Download to read offline


![Online Documentation
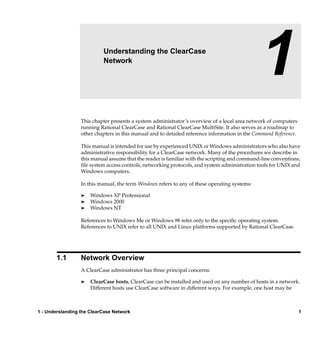
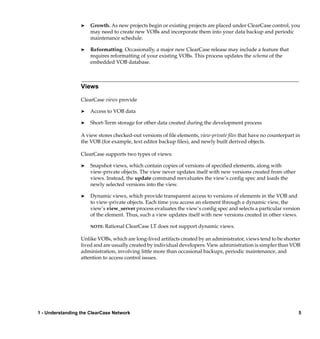
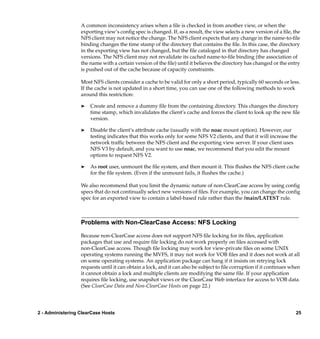
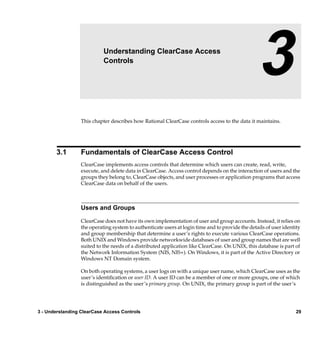
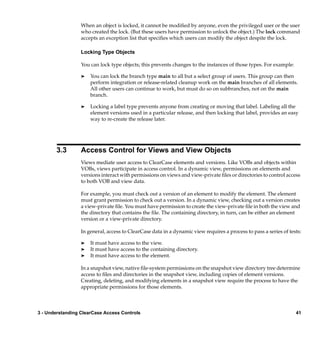
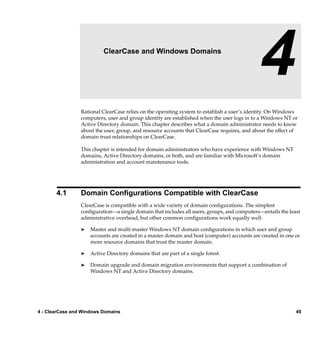
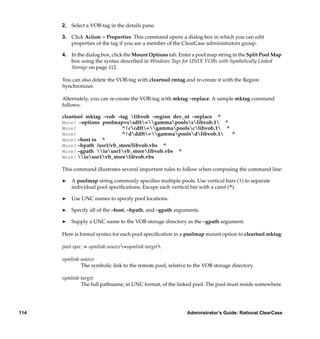
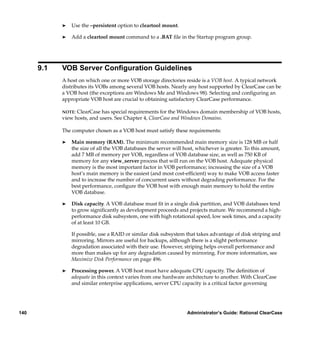
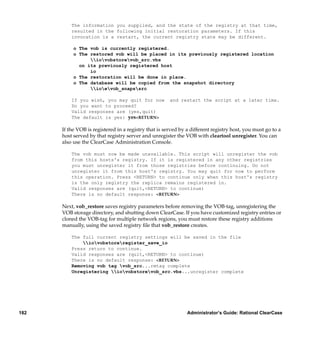
The ClearCase graphical interface includes an online help system.
There are three basic ways to access the online help system: the Help menu, the Help button, or
the F1 key. Help > Contents provides access to the complete set of ClearCase online
documentation. For help on a particular context, press F1. Use the Help button on various dialog
boxes to get information specific to that dialog box.
ClearCase also provides access to full “reference pages” (detailed descriptions of ClearCase
commands, utilities, and data structures) with the cleartool man subcommand. Without any
argument, cleartool man displays the cleartool overview reference page. Specifying a command
name as an argument gives information about using the specified command. For example:
cleartool man (display the cleartool overview page)
cleartool man man (display the cleartool man reference page)
cleartool man checkout (display the cleartool checkout reference page)
ClearCase’s –help command option or help command displays individual subcommand syntax.
Without any argument, cleartool help displays the syntax for all cleartool commands. help
checkout and checkout –help are equivalent.
cleartool uncheckout –help
Usage: uncheckout | unco [-keep | -rm] [-cact | -cwork ] pname ...
Additionally, the online ClearCase Tutorial provides a step-by-step tour through ClearCase’s most
important features. To start the tutorial:
® On Windows, choose Tutorial in the appropriate ClearCase folder off the Start menu.
® On UNIX, type hyperhelp cc_tut.hlp.
Preface xxxvii](https://image.slidesharecdn.com/ccadmin-100721134814-phpapp01/85/Cc-admin-37-320.jpg)


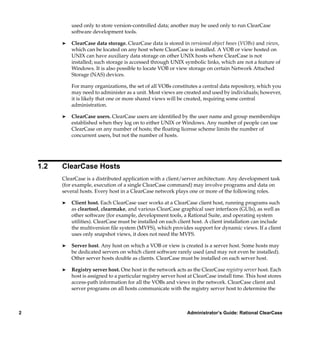
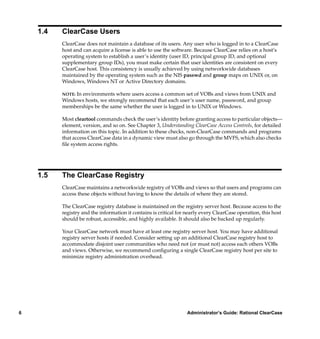
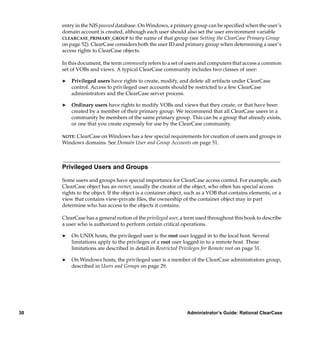
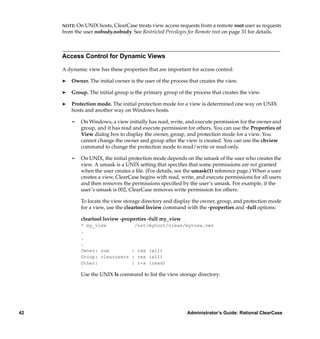
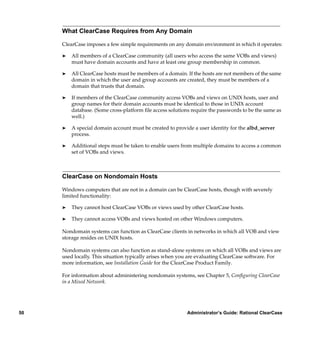


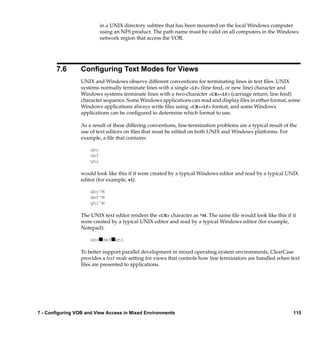

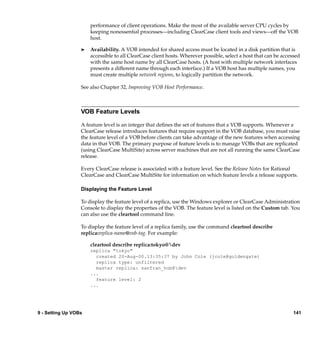
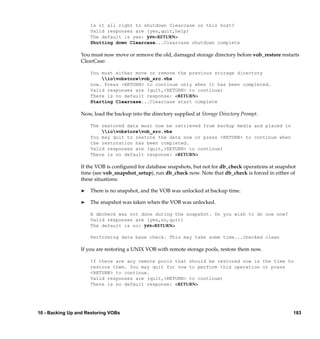
![Enabling Interop Text Mode Support in VOBs
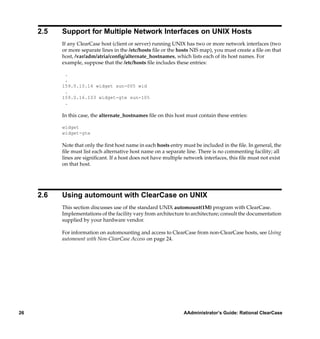
VOBs created with ClearCase version 4.1 or later are compatible with views in any text mode.
VOBs created with earlier versions of ClearCase are compatible only with views in transparent
text mode until you run the msdostext_mode command on the VOB. Previous editions of
ClearCase documentation and interfaces refer to VOBs on which msdostext_mode has been run
as interop-enabled VOBs. Beginning with version 4.1, we further generalize this by saying the
msdostext_mode enables VOBs to support access from views in either transparent or interop text
modes.
If you need to enable interop text mode support in a VOB created by an earlier version of
ClearCase, use the msdostext_mode command. Note that msdostext_mode does not convert or
modify files in any way. It affects only the information recorded for text file versions in the VOB
database.
Only the VOB owner the privileged user can run msdostext_mode. The command syntax is
ccase-home-dir/etc/utils/msdostext_mode [ –d ] vob-storage-pname
With no options, msdostext_mode does the following:
® For all versions of all file elements whose element type is text_file or a subtype of type
text_file, generates and stores in the VOB database the information required to support
access to these versions by views created in strip_cr or insert_cr text modes.
® Turns on interop text mode support, so that this information can be recorded for newly
created versions.
With the –d option, msdostext_mode disables support for interop text modes.
Determining Whether a VOB Supports Interop Text Modes
To determine whether a entire VOB supports interop text modes, use the following command on
either UNIX or Windows:
cleartool dump vob:vob-tag
If the flags line in the output contains the string pc_line_count, the VOB supports interop text
modes.
For example, to determine whether the VOB pc_src supports interop text modes:
118 Administrator’s Guide: Rational ClearCase](https://image.slidesharecdn.com/ccadmin-100721134814-phpapp01/85/Cc-admin-158-320.jpg)


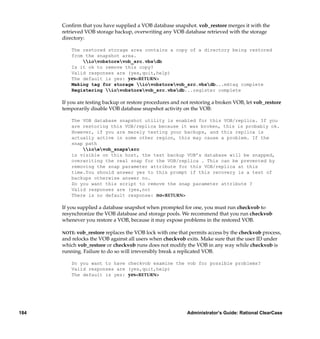
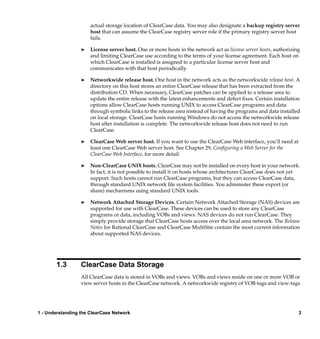
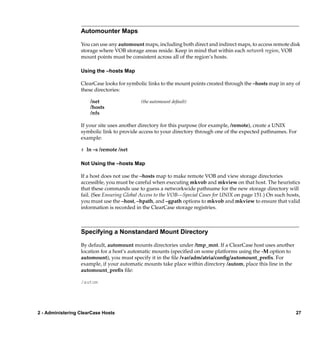
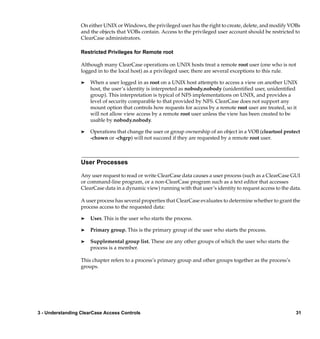
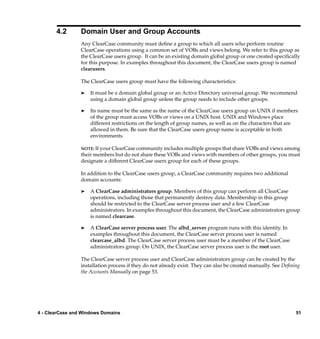
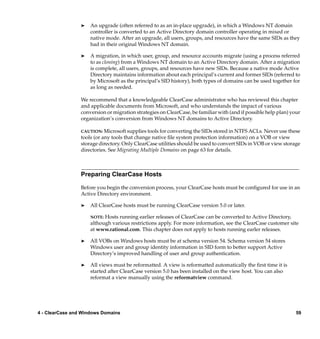
![Do you want to override the default and fix elements with
missing version data? [no] yes<RETURN>
You must specify a time limit for acceptable missing data.
Refer to the reference manual for more information.
Allow missing version data created since: [date-time, <CR>] <RETURN>
Allowing missing version data created since 02-Oct-96.00:00:00.
WARNING: You are allowing fix processing for missing version data.
If the allowable missing version data limit encompasses
more versions than you expected, you will have to restore
this VOB from backup media to undo the effects of this fix
processing.
Do you want to continue with force mode processing? [no] yes<RETURN>
=================================================================
Starting "source pool" processing at 03-Oct-96.14:26:21
... lots of checkvob output ...
The VOB's source pools are healthy.
Poolkind transcript log:
checkvob_fix.03-Oct-96.14.22.02poolkind_sourcetranscript
=================================================================
0 source containers remain either missing or corrupt
0 source containers remain misprotected
0 source elements experienced loss of version data
0 source versions were lost
0 derived object containers remain either missing or corrupt
0 derived object containers remain misprotected
0 rmdo operations were done
0 derived objects were lost
Cleartext containers were not checked.
Check has either detected no problems or has repaired what it did detect.
This is a non replicated vob so no further action should be required.
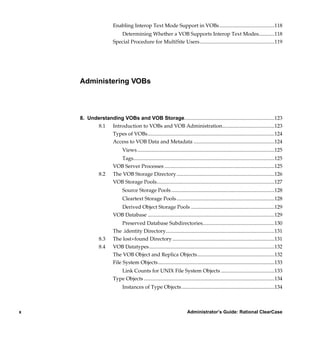
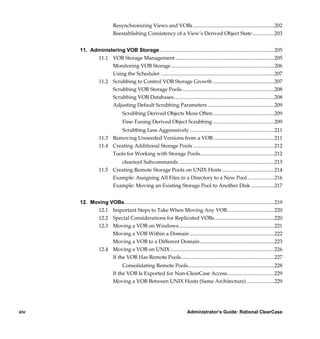
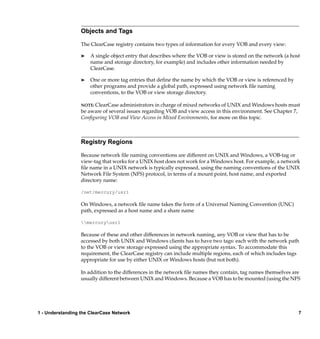
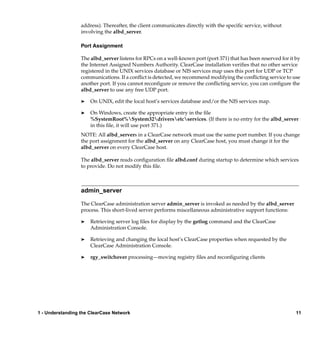
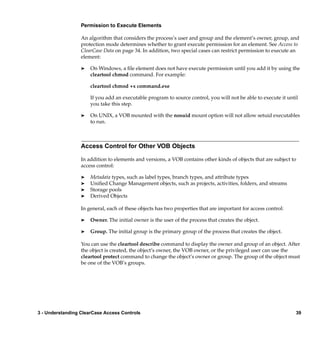
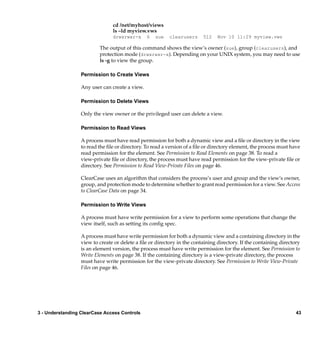
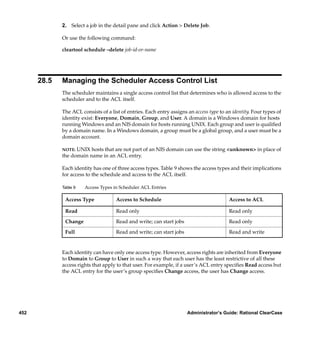
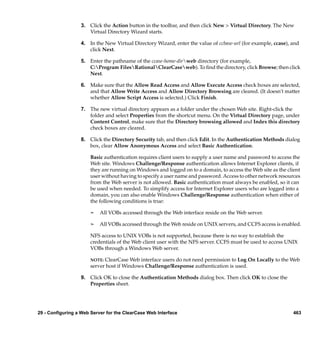
If you restore a VOB replica, vob_restore directs you to run restorereplica immediately. If you
fail to do so, the replica will remain unsynchronized permanently.
VOB restoration is now complete. Go to Step #6 on page 179.
10 - Backing Up and Restoring VOBs 187](https://image.slidesharecdn.com/ccadmin-100721134814-phpapp01/85/Cc-admin-227-320.jpg)
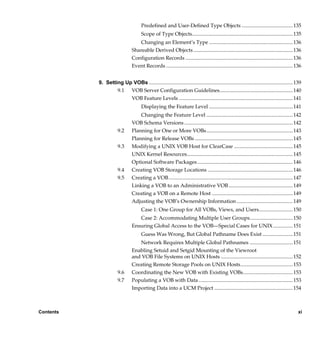
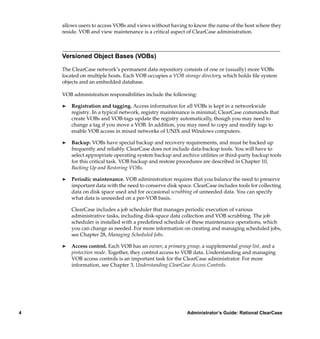
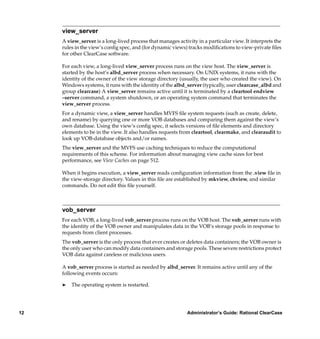
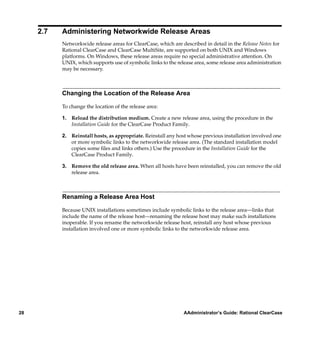
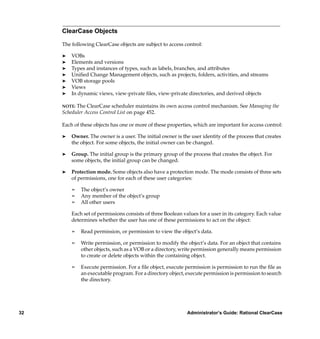
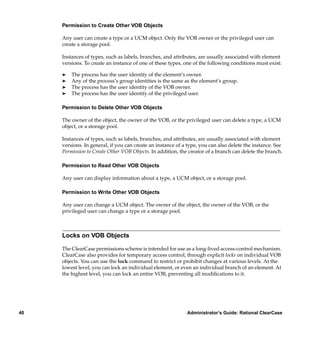
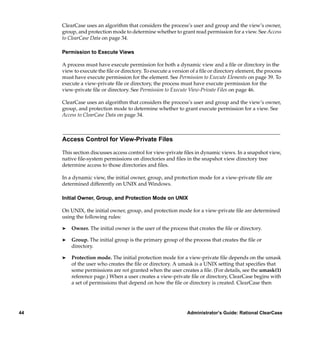
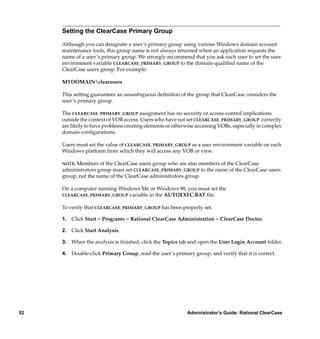
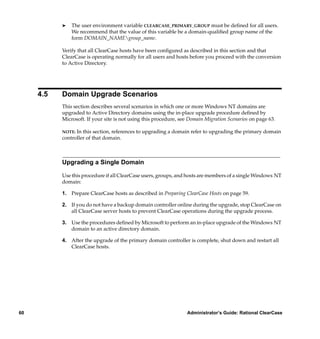
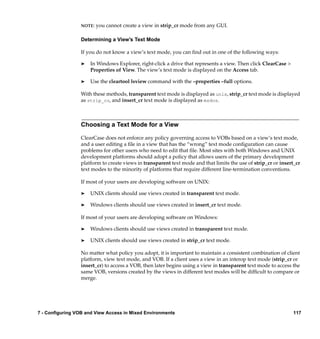
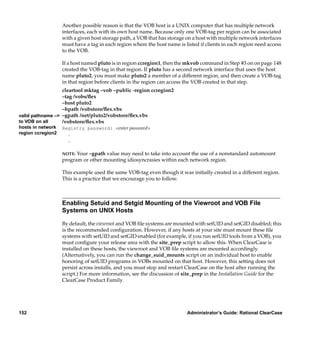
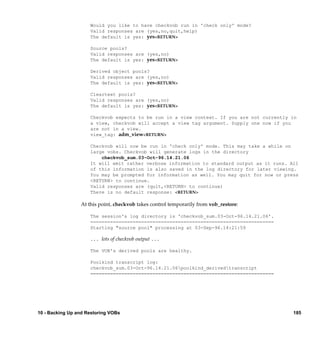
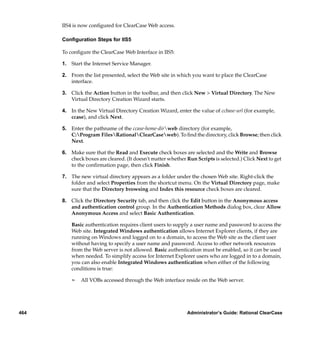
![10. (UNIX server only) Terminate the backup VOB’s server processes. This is similar to Step #3
of this procedure. This time, search the process table for a vob_server and/or vobrpc_server
invoked with /usr/tmp/proj.vbs.
11. Re-register and remount the original VOB. This time, make a public VOB-tag. You can use
these cleartool commands to re-register the VOB.
cleartool register –vob solvobstoreproj.vbs
cleartool mktag –vob –public –tag proj solvobstoreproj.vbs
Vob tag registry password: <enter password>
cleartool mount proj
NOTE: If you are registering a UCM project VOB, you must use the –ucmproject option with
the register command.
12. Relocate the element from the backup VOB to the temporary VOB. Use the cleartool
relocate command program as in Step #8 to relocate the element from the temporary VOB to
the original VOB.
z:> cd tmpvob
z:tmpvob> cleartool relocate util.c projsrc
13. Clean Up. Unregister and unmount the temporary VOB. Remove the temporary VOB and
the backup VOB. Use the VOB storage node for the VOB in the ClearCase Administration
Console or the rmvob command, which removes the VOB’s registry entries and terminates
all of its server processes.
cleartool umount tmpvob
cleartool rmvob c:userstmptmpvob.vbs
Remove versioned object base "c:userstmptmpvob.vbs"[no] yes
Removed versioned object base "c:userstmptmpvob.vbs".
cleartool rmvob c:userstmpoldproj.vbs
Remove versioned object base "c:userstmpoldproj.vbs"[no] yes
Removed versioned object base "c:userstmpoldproj.vbs".
10.7 VOB and View Resynchronization
A VOB database maintains references to one or more view databases, and vice versa. When a
VOB or view is restored from backup, the view and VOB are potentially out of sync; some of the
references are no longer valid. This skew can cause a variety of problems.
200 Administrator’s Guide: Rational ClearCase](https://image.slidesharecdn.com/ccadmin-100721134814-phpapp01/85/Cc-admin-240-320.jpg)
![Sunday 12/19/93 15:55:02. host "scandium", pid 440, user "chase"
Internal Error detected in "../bldr_vob.c"line 114
clearmake/cm/bldr_vob:
Error: VOB "scandium:/vobs/proj"
missing config record for derived object (OID)
"0b5759d0.fb1811cc.a0af.08:00:69:02:2e:aa"
To reestablish the view’s consistency with the VOB:
1. Determine which DOs are causing the inconsistency. The cleartool ls command annotates
them with [no config record]:
cleartool ls
bldr_comm.ugh@@09-Dec.18:26.287028
bldr_cr.msg.o [no config record]
bldr_cr.o [no config record]
bldr_cr.ugh [no config record]
bldr_cr_cache.msg.c@@24-May.20:51.42929
.
.
.
2. Remove the DOs that have no config record. Use the standard rm(1) command on UNIX:
rm bldr_cr.msg.o bldr_cr.o bldr_cr.ugh
Use the del command on Windows.
del bldr_cr.msg.o bldr_cr.o bldr_cr.ugh
204 Administrator’s Guide: Rational ClearCase](https://image.slidesharecdn.com/ccadmin-100721134814-phpapp01/85/Cc-admin-244-320.jpg)


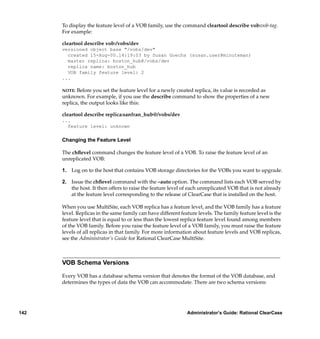
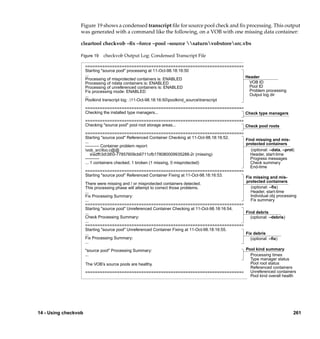
![5. Review the log file, and then run checkvob –global –fix to correct the problems.
cleartool checkvob –global –fix vob:supervob
The session’s log file is "checkvob.03-Aug-99.17:31:06".
Starting analysis of Admin VOB hierarchy.
Analysis of Admin VOB hierarchy complete.
4 VOBs analyzed, no hierarchy errors found.
Starting "global type" processing.
Detection of eclipsing local copies is: ENABLED
Detection of protection mis-matches is: ENABLED
Detection of eclipsing local locks is: ENABLED
Correction of detected errors is: ENABLED
Global element type "global_el" in "admin1" is eclipsed by acquirable
types.
Correct this problem? [no] yes
Attempting to acquire ... acquire completed successfully.
cleartool: Error: Global element type "global_el" in "admin1" has local
copies with inconsistent protections in VOBs:
c2vob
Correct this problem? [no] yes
Attempting to correct this problem ... corrected.
Global branch type "global_br" in "admin1" is eclipsed by acquirable
types.
Correct this problem? [no] yes
Attempting to acquire ... acquire completed successfully.
cleartool: Error: Global branch type "global_br" in "admin1" has local
copies with inconsistent protections in VOBs:
c2vob
Correct this problem? [no] yes
Attempting to correct this problem ... corrected.
Global attribute type "global_at" in "admin1" is eclipsed by acquirable
types.
Correct this problem? [no] yes
Attempting to acquire ... acquire completed successfully.
cleartool: Error: Global attribute type "global_at" in "admin1" has local
copies with inconsistent protections in VOBs:
c2vob
Correct this problem? [no] yes
Attempting to correct this problem ... corrected.
cleartool: Error: Global label type "global_lb" in "admin1" has local
copies with non-matching names:
"nt_global_lb" in "c2vob"
14 - Using checkvob 251](https://image.slidesharecdn.com/ccadmin-100721134814-phpapp01/85/Cc-admin-291-320.jpg)
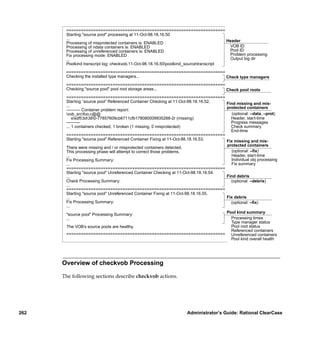
![Correct this problem? [no] yes
Attempting to correct this problem ... corrected.
Global element type "global_el" in "supervob" is eclipsed by acquirable
types.
Correct this problem? [no] yes
Attempting to acquire ... acquire completed successfully.
Global branch type "global_br" in "supervob" is eclipsed by acquirable
types.
Correct this problem? [no] yes
Attempting to acquire ... acquire completed successfully.
cleartool: Error: Global branch type "global_br" in "supervob" has local
copies with non-matching names:
"global_br_mismatch" in "c1vob"
Correct this problem? [no] yes
Attempting to correct this problem ... corrected.
Global attribute type "global_at" in "supervob" is eclipsed by acquirable
types.
Correct this problem? [no] yes
Attempting to acquire ... acquire completed successfully.
Global hyperlink type "global_hl" in "supervob" is eclipsed by acquirable
types.
Correct this problem? [no] yes
Attempting to acquire ... acquire completed successfully.
cleartool: Error: Global hyperlink type "global_hl" in "supervob" has
local copies with non-matching names:
"global_hl_wrong" in "admin1"
Correct this problem? [no] yes
Attempting to correct this problem ... corrected.
cleartool: Error: Global hyperlink type "global_hl" in "supervob" has
local copies with inconsistent protections in VOBs:
c2vob
Correct this problem? [no] yes
Attempting to correct this problem ... corrected.
Global label type "global_lb" in "supervob" is eclipsed by acquirable
types.
Correct this problem? [no] yes
Attempting to acquire ... acquire completed successfully.
Completed "global type" processing.
Processed 9 global types in 4 VOBs.
252 Administrator’s Guide: Rational ClearCase](https://image.slidesharecdn.com/ccadmin-100721134814-phpapp01/85/Cc-admin-292-320.jpg)

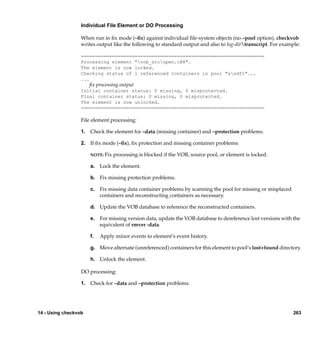
![® Prompts to allow data loss. In force-fix mode, checkvob prints the following prompt:
Do you want to override the default and allow fixing of
elements involving missing version data? [no] n
If you answer yes, checkvob prompts you to specify a time interval for which data loss is
allowable (or expected). For example, if you restored source pools from a backup with
date-time 6-Oct-99.00:02:00, and your VOB database is current, you can reasonably expect to
lose version data created since that time. In this case, you can direct checkvob to allow the
loss of data created and recorded in the VOB database after that time:
cleartool checkvob –force –fix –data –pool –source c:vobstoreproj1.vbs
...
Allow missing data created since: [date-time, <CR>] 6-Oct-99.00:02:00
If checkvob cannot find an expected container with data that was created before
6-Oct-99.00:02:00, it records this fact in the output log but does not update the VOB to
dismiss the missing container; it does not accept the data loss. Run checkvob again without
the –force option to process such elements individually, or adjust the allowed data loss time.
To silently accept (fix) all missing data containers without regard for creation time, use a very old
date-time. The default time interval for allowed data loss is “since yesterday at 00:00:00.” If you
supply a date older than one week, checkvob forces you to confirm it.
checkvob log files do not capture the time-interval dialogue from –force –fix operations.
See the description of the date-time argument in the lshistory reference page for a list of
acceptable values.
Pool Setup Mode
checkvob –setup –fix –pool is run by reformatvob (and by mkreplica –import, for replicated
VOBs) when you upgrade a VOB server host to a new ClearCase release. If this part of the
reformatvob or mkreplica operation fails, you must run checkvob –setup –fix manually. This
command must complete successfully to enable checkvob processing in the VOB’s storage pools
(which is a prerequisite to using the vob_snapshot utility successfully.)
checkvob –setup –fix –pool does the following:
® Checks pool roots—pool names, locations, and pool identity information. (Each pool must
have a pool_id file, which stores the pool’s OID). For any pool, if a missing pool_id file is
the only detected error, checkvob adds the file.
14 - Using checkvob 265](https://image.slidesharecdn.com/ccadmin-100721134814-phpapp01/85/Cc-admin-305-320.jpg)
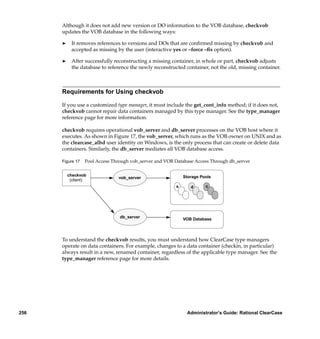
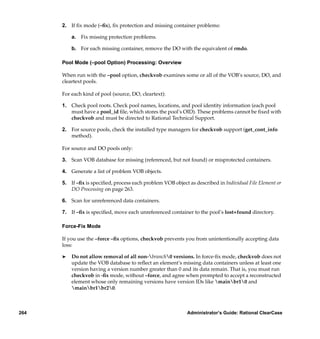
![® (Pool or database reference times differ) A chpool operation on a file element in the interval
between pool and database reference times leaves the database pointing at the wrong pool.
The containers, being at an unexpected location, are unreferenced.
® Restoring a pool from incremental backups.
® Unexpected events.
Fix Processing
checkvob usually moves an unreferenced container to the applicable pool’s lost+found
subdirectory (vob-storage-dirssdftlost+found, by default). It leaves in place unreferenced
containers that fit into these categories:
® May be needed. checkvob found, but did not fix, a missing container problem, and the
pathname of the current unreferenced container suggests that it may be able to contribute to
reconstruction of the missing container on a subsequent checkvob run. If you specify
[–force] –fix –debris, without –data, checkvob performs –data check (not fix) processing to
identify debris that may be needed.
® Underage. The container is less than one hour old. checkvob skips underage containers to
avoid removing a newly created container before the VOB database has been updated to
reference it. Typically, the time between new container creation and database reference
update is less than one second, but checkvob takes a conservative approach because of the
critical nature of source containers.
® Scheduled for deletion. The VOB is configured for deferred source container deletion (see
vob_snapshot_setup and vob_server), and the container is already marked for deletion.
NOTE: When the pool is newer than the database and includes more recent versions not recorded
in the (older) database, checkvob does not salvage versions from the unreferenced containers
and update the database. It uses the unreferenced containers to return the pool to the state
expected by the database, and it moves the unreferenced containers (with the latest version data)
to pool-dirlost+found. These versions should be presumed lost. Contact Rational Technical
Support for more information.
Source Pool: Corrupted Container
Description
File truncated and similar conditions
272 Administrator’s Guide: Rational ClearCase](https://image.slidesharecdn.com/ccadmin-100721134814-phpapp01/85/Cc-admin-312-320.jpg)


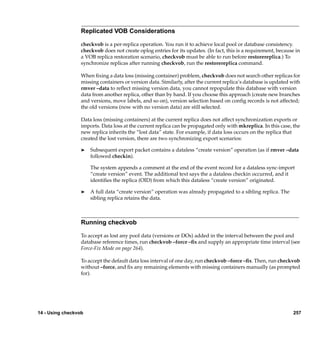
![Inform users that relocated elements will cause rebuilding of DOs that include them as
dependencies.
2. Have users move view-private files out of directories that are to be relocated. If
view-private files are not moved from relocated directories, they become stranded.
These files can be recovered to view-stg-dir.slost+found with recoverview –sync view-tag.
However, it is easier to move them to new locations before running relocate.
Checked-out files are also view-private and must be resolved before running relocate. The
command aborts if any files are checked out from a directory it is trying to relocate.
3. Coordinate with administrators of all other VOB replicas, if any. Affected elements must
be inactive at all replica sites. See the section on replicated VOBs in the relocate reference
page.
4. Check for views with checkouts or DOs in the VOB. Use the VOBs node in ClearCase
Administration Console. This node has DOs and Referenced Views subnodes that list all
views with checkouts and/or DOs in the VOB and allow you to manage these objects from
the console window. You can also use the cleartool lsdo and lscheckout commands to list
DOs and checkouts on a per-view basis.
5. Resolve any checkouts. Resolving checkouts typically involves notifying the appropriate
users about the problem. relocate aborts if it encounters an active checkout in any directory
it is trying to move.
6. Establish a working view. Use a working view whose config spec selects the branch
(typically main) on which the move is to occur.
This step is very important. Your view must be able to see and check out elements in both
the source and destination VOBs. Therefore, a working view configured without a
CHECKEDOUT rule, for example, is inappropriate. Also, run relocate with the same view
or with the same config spec that you will use to adjust makefiles, rebuild libraries, reset
config specs, modify development tools, or complete any other work that may accompany
the relocate task. See also After Relocating Elements on page 295.
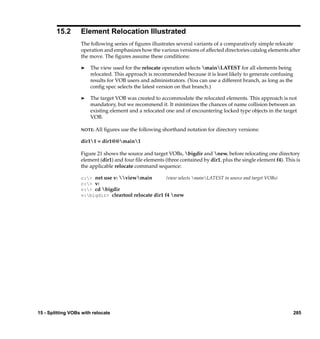
7. Run relocate in test mode. Run the intended relocate command and monitor its output, but
stop short of moving any elements by responding no at this prompt:
Do you want to relocate these objects? [no]
You may want to include the –qall option in your test run, to examine relocate’s potential
handling of borderline elements:
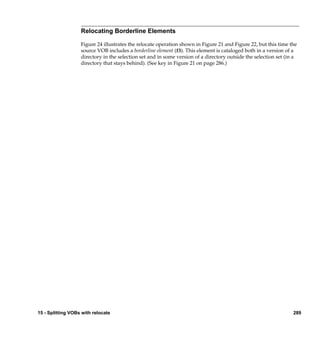
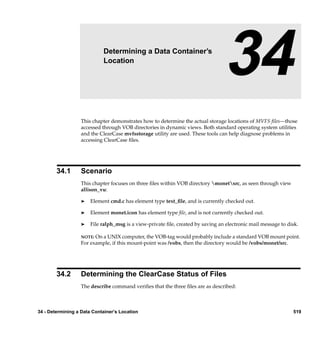
15 - Splitting VOBs with relocate 293](https://image.slidesharecdn.com/ccadmin-100721134814-phpapp01/85/Cc-admin-333-320.jpg)
![cleartool relocate –qall dir1 new
When relocate encounters a borderline element, its output looks like this:
Element "f3" is
located outside the selection tree as "f3" in
directory "bigdirdir2",
located inside the selection tree as "f3" in
directory "bigdirdir1".
Do you want to relocate it? [no]
15.4 Common Errors During a Relocate Operation
The following conditions are the most frequent causes of failed relocate operations:
® Checked-out files in relocated directories
® Locked type objects in the target VOB
® Triggers on rmelem that prevent relocate from removing elements from the source VOB after
they have been created in the target VOB
In general, you can restart relocate. You fix the reported error and restart relocate with the same
command line. Errors that occur during source VOB element removal require manual repair.
Errors Not Related to Source VOB Element Removal
In the event of an error:
1. Stop and fix the problem. For example, if relocate reports a locked type in the target VOB,
unlock it. If it reports a checked-out version in the relocate set, resolve it.
2. Restart relocate. When invoked with an identical command line, relocate resumes
processing from the interrupt point, provided that these conditions are met:
¢ You do not release source VOB element locks that relocate sets automatically.
¢ No user modifies the elements being moved (new checked-in versions, new labels, and
so on).
¢ (–qall only) You answer all relocate this object? queries the same way.
294 Administrator’s Guide: Rational ClearCase](https://image.slidesharecdn.com/ccadmin-100721134814-phpapp01/85/Cc-admin-334-320.jpg)

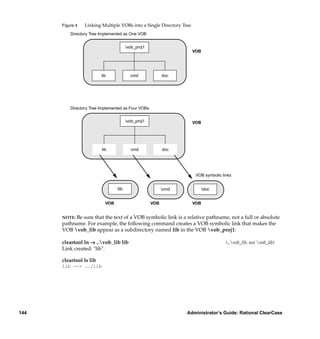
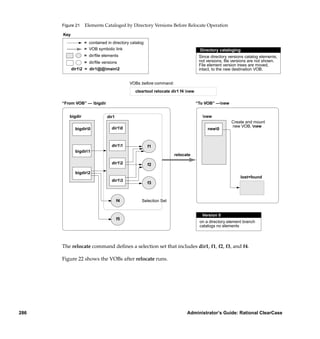
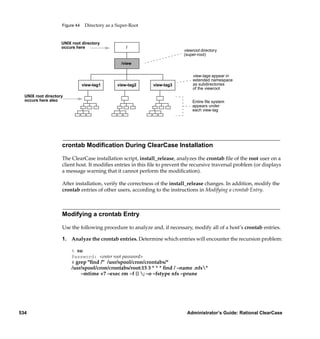
![Updating Directory Versions Manually
You can modify the results of a relocate operation by adding and removing VOB symbolic links
to specific directory versions manually. However, these operations alter the intended results of
relocate, and they are rarely necessary.
WARNING: The techniques described here are powerful and potentially dangerous. Do not use
cleartool ln –nco or its companion command rmname –nco carelessly; they make permanent
VOB changes without leaving behind an event history that you can trace easily. To use these
commands, you must be the VOB owner or the privileged user. Also, you cannot use these
commands in a replicated VOB.
Fixing Symbolic Links Created by relocate
In some cases, the VOB symbolic links that relocate creates automatically may have to be
modified to point to their intended targets. An incorrect symbolic link in a specific directory
version can be removed with cleartool rmname –nco and replaced with cleartool ln –nco.
relocate has to make an educated guess about the relationship between the source and target
VOB roots and about the relationship between the source and target directories. The local host
map, VOB mounting and naming conventions on UNIX, as well as drive assignment, disk
sharing, and naming conventions on Windows can sometimes lead to an incorrect guess.
To help identify the sources and targets for symbolic links, relocate connects a symbolic link
object to the target element object with a hyperlink of type HyperSlink. Use the cleartool
describe command on the symbolic link to display information about this hyperlink, which can
help to repair the symbolic link.
After you relocate elements, if you move any of them again with cleartool mv, symbolic links are
not updated automatically. You can use this technique to update the links manually.
The following commands replace a relative symbolic link created by relocate with an alternative
absolute pathname to the target VOB.
cd bigdir
cleartool rmname –nco bigdir@@main2dir1
Modify non-checkedout directory version "bigdir@@main2"? [no] yes
Link removed: "bigdir@@main2dir1"
cleartool ln –nco newproj2dir1 bigdir@@main2dir1
Modify non-checkedout directory version "bigdir@@main2"? [no] yes
Link created: "bigdir@main2dir1"
15 - Splitting VOBs with relocate 299](https://image.slidesharecdn.com/ccadmin-100721134814-phpapp01/85/Cc-admin-339-320.jpg)
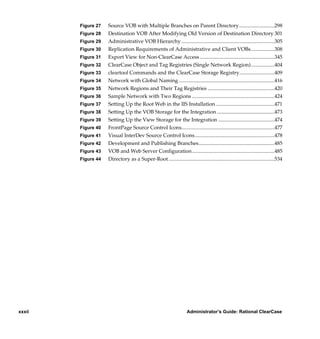
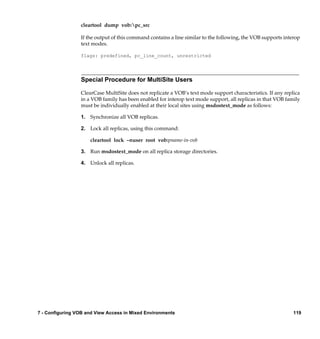
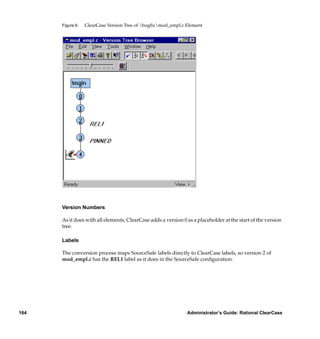
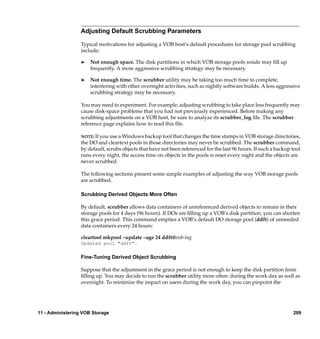
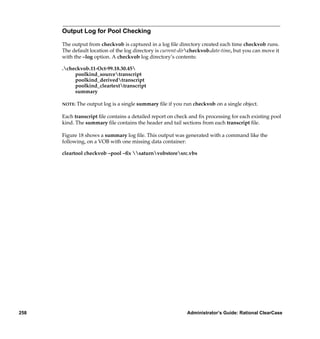
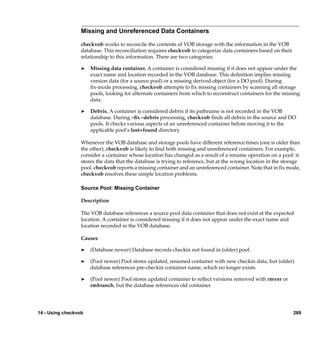
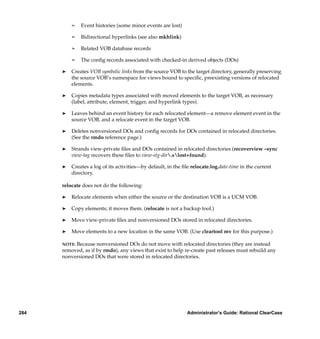
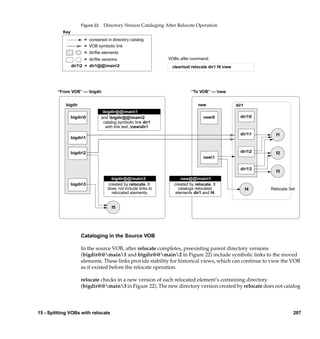
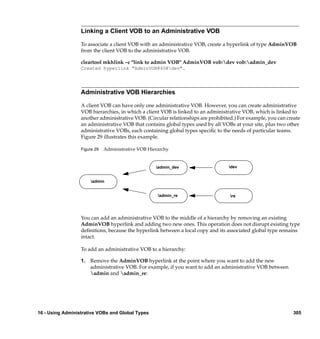
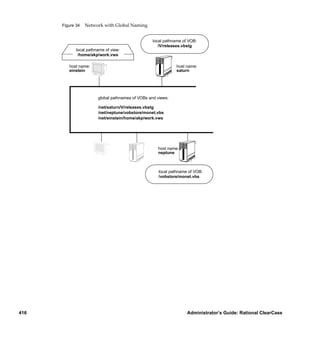
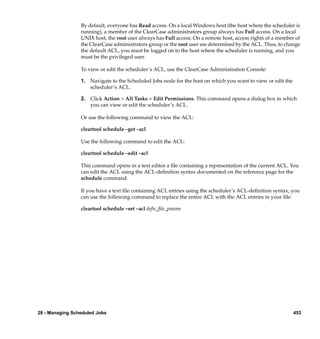
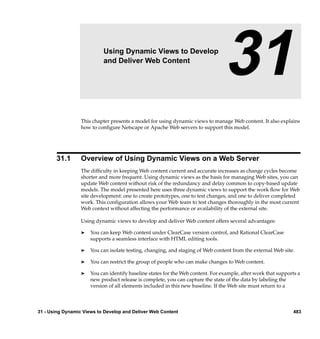
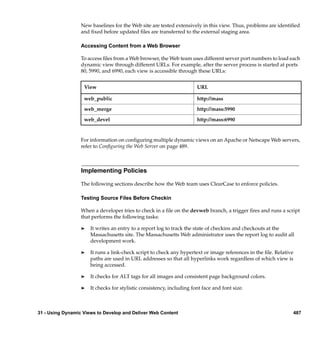
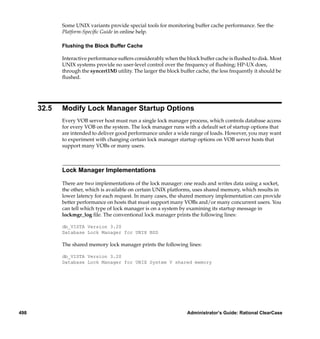
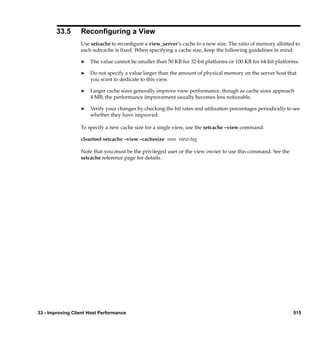
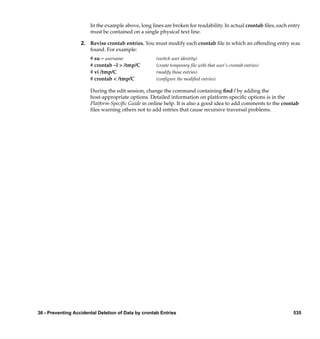
![Modifying Old Target Directory Versions to See Relocated Elements
In Figure 23 on page 288, relocate checks in a new version of the destination directory, and only
that version catalogs the relocated elements. Now, consider this scenario:
® You have a view, alh_port, that selects a previous version of the target directory
(new@@main2, for example).
® You want the alh_port view to be able to see the newly relocated dir1 element at its new
home, newdir1, rather than at its old location, bigdirdir1.
In a case like this, you can manually update previous versions of relocate’s destination directory
to catalog relocated elements. For example, to add dir1 to directory version new@@main2:
1. Log on as the privileged user.
2. Create the VOB symbolic link. The following command requires special privileges because
it modifies a directory version’s contents without checking it out or changing its event
history.
cd new (and your working view must select some version of dir1)
cleartool ln –slink –nco dir1 new@@main2dir1
Modify non-checkedout directory version "new@@main2"? [no] yes
Link created: "new@@main2dir1"
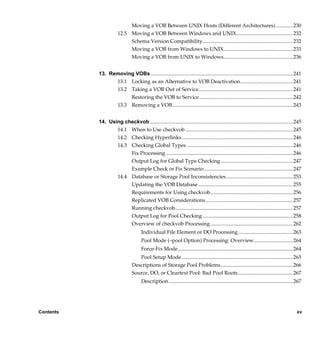
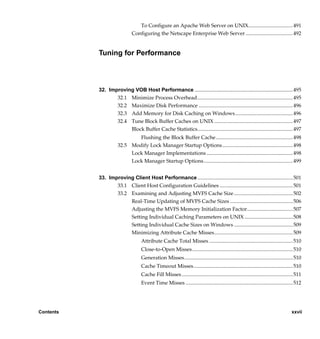
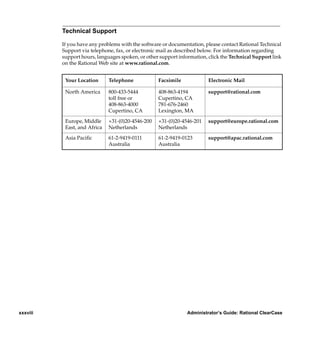
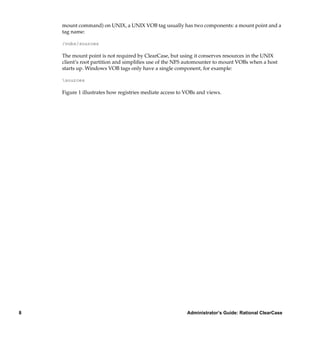
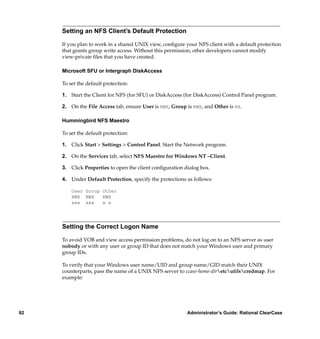
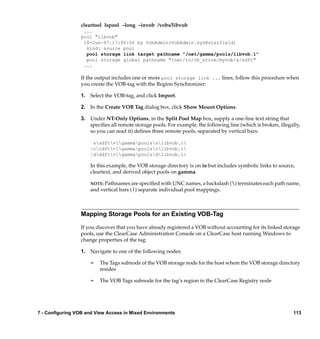
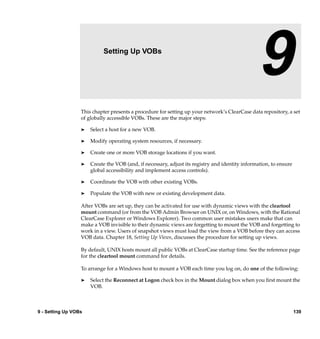
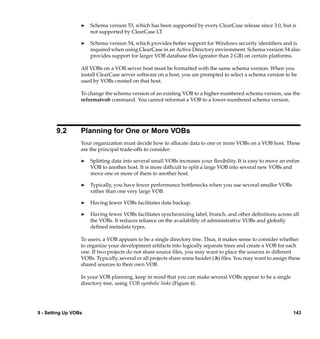
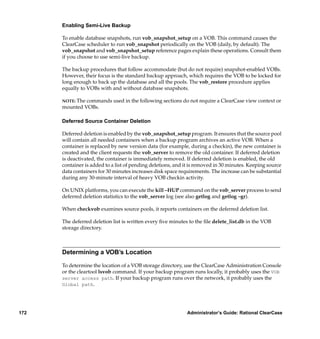
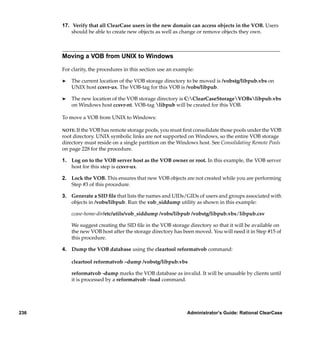
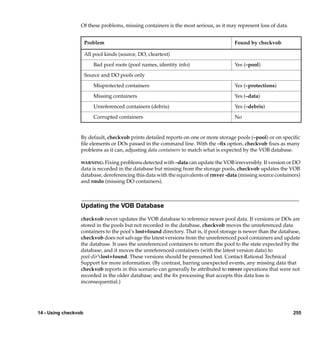
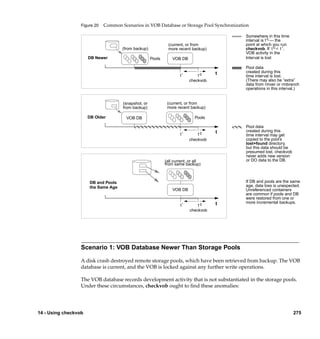
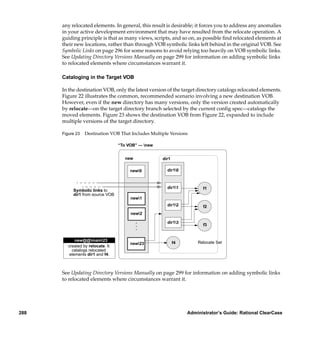
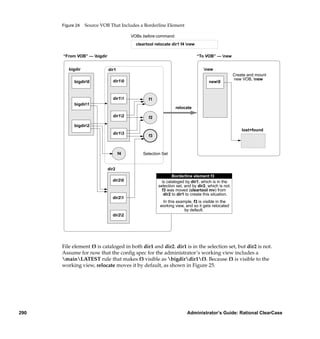
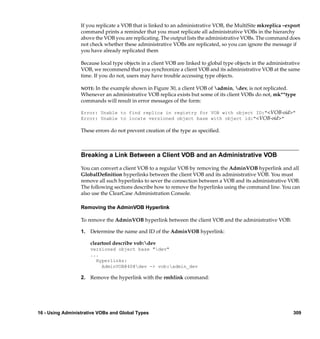
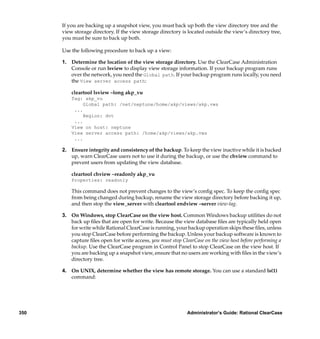
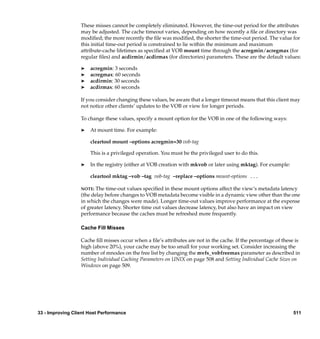
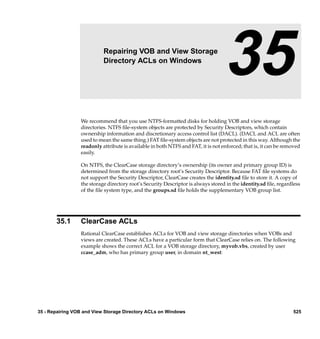
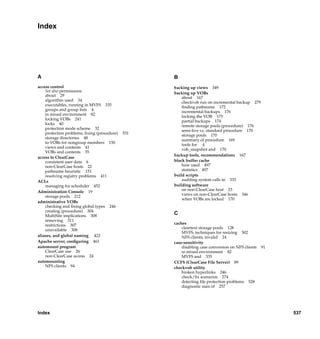
Figure 28 shows the effect of the cleartool ln –nco command. (See the key in Figure 21 on
page 286.)
300 Administrator’s Guide: Rational ClearCase](https://image.slidesharecdn.com/ccadmin-100721134814-phpapp01/85/Cc-admin-340-320.jpg)
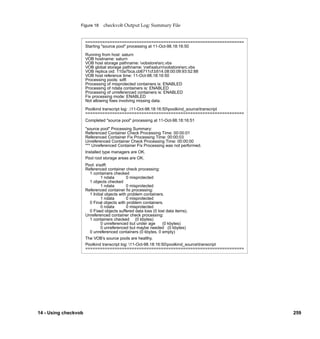
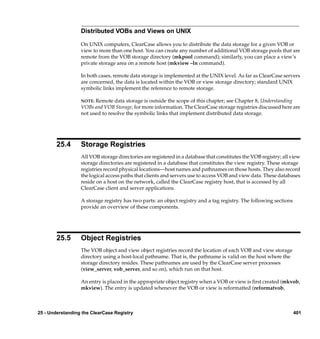
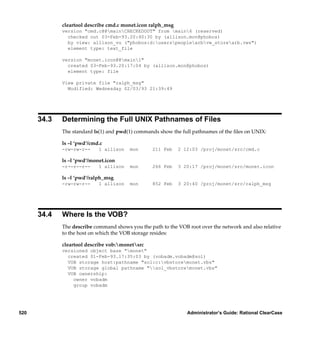
![Figure 28 Destination VOB After Modifying Old Version of Destination Directory
“To VOB” — new
new dir1
new0 dir10
dir11 f1
Symbolic links to
dir1 from source VOB
new1
dir12 f2
new2
. dir13
Two versions of target . f3
directory now catalog .
dir1, main23 and main2
new23 f4 Relocate Set
Modifying Newest Version of Source Directory to See Relocated Elements
In Figure 22 on page 287 and Figure 25 on page 291, the latest version of a relocated element’s
parent directory does not catalog that relocated element. In some circumstances, you may want
to add such cataloging manually, in the form of symbolic links. For example, the following
command sequence updates the from-directory version bigdir@@main3 (Figure 22) to see
relocated directory dir1 at its new location:
cd new
cleartool ln –slink –nco dir1 bigdir@@main3dir1
Modify non-checkedout directory version "bigdir@@main3"? [no] yes
Link created: "bigdir@@main3dir1"
15 - Splitting VOBs with relocate 301](https://image.slidesharecdn.com/ccadmin-100721134814-phpapp01/85/Cc-admin-341-320.jpg)


![cleartool rmhlink AdminVOB@40@dev
Removed hyperlink "AdminVOB@40@dev".
Removing All GlobalDefinition Hyperlinks
To remove all GlobalDefinition hyperlinks that connect local copies in the client VOB to global
types in the administrative VOB:
1. Determine the names of all local copies:
cleartool lstype –local –fmt "%nt%[type_scope]pn" –kind attype –invob dev
Tested local copy
Feature Level ordinary
...
cleartool lstype –local –fmt "%nt%[type_scope]pn" –kind brtype –invob dev
...
cleartool lstype –local –fmt "%nt%[type_scope]pn" –kind eltype –invob dev
...
cleartool lstype –local –fmt "%nt%[type_scope]pn" –kind hltype –invob dev
...
cleartool lstype –local –fmt "%nt%[type_scope]pn" –kind lbtype –invob dev
...
2. For each local copy, determine the name and ID of the hyperlink linking the local copy to its
global type. For example:
cleartool describe –local –long –ahlink GlobalDefinition attype:Tested
Tested
Hyperlinks:
GlobalDefinition@58@dev -> attype:Tested@admin_dev
3. Remove each hyperlink with the rmhlink command:
cleartool rmhlink GlobalDefinition@58@dev
Removed hyperlink "GlobalDefinition@58@dev".
310 Administrator’s Guide: Rational ClearCase](https://image.slidesharecdn.com/ccadmin-100721134814-phpapp01/85/Cc-admin-350-320.jpg)
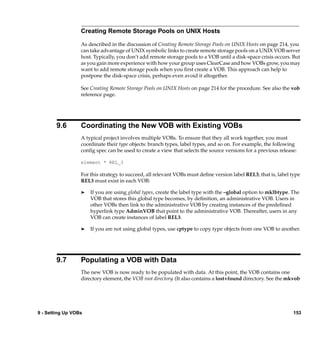
![Creating a Global Type
The cleartool commands mkattype, mkbrtype, mkeltype, mkhltype, and mklbtype include the
–global option, which creates a global type object in the current VOB. Client VOBs linked to this
VOB can use the global types.
Local copies of global types are created in client VOBs only when a user creates an instance of the
type in the client VOB.
The following command creates a global label type in VOB admin:
cleartool mklbtype –c "final label for REL6" –global REL6@admin
Created label type "REL6".
You cannot create a global type if any client VOB contains types with the same name. When you
create a new global type, you can check for types with the same name in client VOBs. If the types
are identical (except for comments and locks, which can be different), the creation operation
converts the existing types to local copies of the global type and changes their comments to
match. Use the –acquire option with the mk**type command to check for and acquire identical
ordinary types.
For example:
cleartool describe –fmt "%nt%[type_scope]pn" lbtype:V3.2@dev
V3.2 ordinary
cleartool mklbtype –c "Release 3.2" –global –acquire V3.2@admin
Created label type "V3.2".
cleartool describe –local –fmt "%nt%[type_scope]pn" lbtype:V3.2@dev
V3.2 local copy
If the types are not identical, the operation prints a warning and fails. If a type is locked, it is
reported as not acquirable, and the operation continues with other types. To correct this problem,
remove the lock and enter a new mk**type command with the –replace –global –acquire
options, or use the checkvob –global command.
Use the –replace –global –acquire options either to acquire and replace eclipsing ordinary types
that were created after the global type was first created or to convert an ordinary type in an
administrative VOB to a global type.
312 Administrator’s Guide: Rational ClearCase](https://image.slidesharecdn.com/ccadmin-100721134814-phpapp01/85/Cc-admin-352-320.jpg)
![you are attaching the instance. This mastership restriction prevents conflicting, simultaneous
creation of a given type with a given name at multiple sites.
If the client VOB at your site does not contain a local copy of the type, you must create a local
copy at the site that masters the type. Then, export an update packet from the client VOB at that
site to the client VOB at your site and import the packet at your site.
For example, a release engineer at your site (London) tries to apply the V2.1 label to a version in
the dev VOB. The command fails because the label type is shared, no local copy of the type
exists, and the type is mastered at a different site.
cleartool mklabel –nc V2.1 devfile.txt
cleartool: Error: Type must be mastered in original replica "london" to use
copy type.
cleartool: Error: Unable to create label "V2.1" on "devfile.txt" version
"/main/3".
To create a local copy of the type in the replica at your site:
1. Determine the VOB-tag of the administrative VOB.
cleartool describe vob:dev
versioned object base "dev"
...
Hyperlinks:
AdminVOB -> vob:admin
2. Determine which replica of the administrative VOB masters the type.
cleartool describe –fmt "%nt%[master]pn" lbtype:V2.1@admin
V2.1 lex@admin
3. At the site where the type is mastered, create a local copy of the type in the client VOB.
cleartool cptype –c "forcing creation of local copy" lbtype:V2.1@admin
lbtype:V2.1@dev
Copied type "V2.1".
4. At the site where the type is mastered, export an update packet to the replica at your site.
multitool syncreplica –export –fship london@dev
...
5. At your site, import the update packet.
314 Administrator’s Guide: Rational ClearCase](https://image.slidesharecdn.com/ccadmin-100721134814-phpapp01/85/Cc-admin-354-320.jpg)
![cleartool describe –local lbtype:NOLOCAL@dev
cleartool: Error: Not a vob object: "lbtype:NOLOCAL@dev".
The following command describes a global type in a replicated VOB. Note that because the
master replica of the type is in a different VOB family than the replica in which you enter the
command, the output includes the VOB-tag of the master replica in addition to the replica name.
cleartool describe –long lbtype:SHARED@tests
label type "SHARED"
created 03-Aug-99.12:29:01 by Pete Sharon (pds.user@argon)
master replica: raleigh@tests_admin
instance mastership: shared
owner: pds
group: user
scope: global
constraint: one version per branch
Hyperlinks:
GlobalDefinition@43@tests <- lbtype:SHARED@tests
Listing Global Types
By default, the lstype command lists global types associated with local copies, even if you specify
the client VOB in the –invob option. The output also includes global types from all
administrative VOBs above this VOB in the administrative VOB hierarchy, even if the client VOB
does not contain local copies of the type. To show client information only, use the –local option.
The following command lists all label types in the client VOB, including all global types from
administrative VOBs in the hierarchy:
cleartool lstype –fmt "%nt%[type_scope]pn" –kind lbtype –invob dev
BACKSTOP ordinary
CHECKEDOUT ordinary
LABEL1 global
LATEST ordinary
REL6 global
The following command lists ordinary types and local copies of global types (if the specified
VOB is an administrative VOB, global types are also listed):
316 Administrator’s Guide: Rational ClearCase](https://image.slidesharecdn.com/ccadmin-100721134814-phpapp01/85/Cc-admin-356-320.jpg)
![cleartool lstype –local –fmt "%nt%[type_scope]pn" –kind lbtype –invob dev
BACKSTOP ordinary
CHECKEDOUT ordinary
LATEST ordinary
REL6 local copy
Listing History of a Global Type
By default, the lshistory command lists the history of the global type for the object selector you
specify, even if there is no local copy of the type in the client VOB. To list the history of a local
copy, use the –local option. Specifying –all or –avobs implicitly specifies –local.
The following command lists the history of a global label type:
cleartool lshistory –minor lbtype:REL6@dev
28-Jul.14:00 smg make hyperlink "GlobalDefinition" on label type
"REL6"
"Attached hyperlink "GlobalDefinition@47@dev".
Automatically created label type from global definition in VOB "admin"."
28-Jul.13:57 smg create label type "REL6"
The following command lists the history of a local copy of a global label type:
cleartool lshistory –local –minor lbtype:REL6@dev
28-Jul.14:00 smg make hyperlink "GlobalDefinition" on label type
"REL6"
"Attached hyperlink "GlobalDefinition@47@dev".
Automatically created label type from global definition in VOB "admin"."
28-Jul.14:00 smg create label type "REL6"
"Automatically created label type from global definition in VOB "admin"."
Changing Protection of a Global Type
Changing the protection of a global type or of a local copy of a global type changes the protection
of the global type and all its local copies. You must have permission to change the protection of
the global type. You can enter the command in the context of a client VOB even if the client VOB
does not contain a local copy of the type.
In this example, the owner of the label type LABEL1 is changed to jtg. The describe command
shows that the protection change is made to all local copies of the global type.
16 - Using Administrative VOBs and Global Types 317](https://image.slidesharecdn.com/ccadmin-100721134814-phpapp01/85/Cc-admin-357-320.jpg)
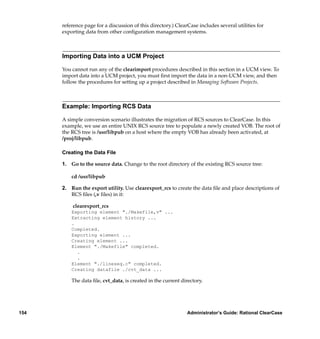
![Changing Mastership of a Global Type
Changing mastership of a global type does not change the mastership of its local copies.
Likewise, changing the mastership of a local copy changes the mastership of the local copy only.
Mastership of the global type and all other local copies is not changed.
For example, the global label type V3.2 is mastered by the london replica in the VOB family
admin, and the local copy in the client VOB client is mastered by the london replica in the
VOB family client:
cleartool describe –fmt "%nn %[master]pn %[type_scope]pn" lbtype:V3.2@admin
V3.2
london@admin
global
cleartool describe –local –fmt "%nn %[master]pn %[type_scope]pn"
lbtype:V3.2@client
V3.2
london@client
local copy
When the mastership of the global type is transferred to the lex replica, the mastership of the
local copy remains the same:
multitool chmaster lex@admin lbtype:V3.2@admin
Changed mastership of label type "V3.2" to "lex@admin"
cleartool describe –fmt "%nn %[master]pn %[type_scope]pn" lbtype:V3.2@admin
V3.2
lex@admin
global
cleartool describe –local –fmt "%nn %[master]pn %[type_scope]pn" ^
lbtype:V3.2@client
V3.2
london@client
local copy
If you enter a chmaster command in a client VOB that does not contain a local copy of the
specified type, the command fails with the message type not found. For example:
multitool chmaster lex@client lbtype:DOC_SOURCE@client
multitool: Error: Label type not found: "DOC_SOURCE".
16 - Using Administrative VOBs and Global Types 319](https://image.slidesharecdn.com/ccadmin-100721134814-phpapp01/85/Cc-admin-359-320.jpg)
![cleartool rmtype –nc –rmall lbtype:LABEL1@dev
There are 1 instance(s) of label type "LABEL1" in re.
There are 1 instance(s) of label type "LABEL1" in dev.
Remove all instances of label type "LABEL1"? [no] yes
Removed label type "LABEL1".
Notes on removing global types:
® If you enter a rmtype command in a client VOB that does not contain a local copy of the
global type, ClearCase tries to find a matching global type in the administrative VOB
hierarchy.
® All local copies are deleted first; then the global type is removed. If any of the local copies
cannot be removed, the command fails and the global type is not removed. You must
correct the problem and enter the rmtype command again.
For more information on removing types, see the rmtype reference page.
Cleaning Up Global Types
Use checkvob –global to check and fix global types that are in an inconsistent state. For more
information, see Chapter 14, Using checkvob.
16 - Using Administrative VOBs and Global Types 323](https://image.slidesharecdn.com/ccadmin-100721134814-phpapp01/85/Cc-admin-363-320.jpg)


![cleartool setview r2integ
On Windows, use the net use command:
net use * viewr2integ
In Windows Explorer, use Tools > Map Network Drive.
2. Take inventory of the view’s private files with lsprivate. The Private Files subnode of the
view storage node in the ClearCase Administration Console or the lsprivate command lists
view-private files using the pathnames at which they appear in VOBs.
cleartool lsprivate >C:tmpr2integ.lsp
type C:tmpr2integ.lsp
projlibpick.o
projlibspar.o
projlibget.c [checkedout]
projlibget.c~
projlibquerytty.c [checkedout]
projlibquerytty.c~
projlibstrut.c [checkedout]
.
.
.
Be sure to place the output in a scratch inventory file, as in this example. Don’t worry if some
not available - deleted perhaps? error messages appear. Such messages are also
captured in the scratch file.
3. Extract the names of unneeded files. Use a text editor or any text filtering tool to extract
from the scratch file the names of files that can safely be deleted. Write this list to another
file—for example, c:tmpr2integ.deleteme. Exclude from the this list any checked-out files.
Such files are annotated with [checkedout] in the lsprivate output, as shown in Step #2.
4. Double-check the list. Make sure it contains only files to be deleted.
5. Delete the view-private files.
NOTE: The following steps are appropriate only if not available - deleted perhaps?
error messages appeared in Step #2.
6. Decide which stranded files to delete. The error messages, and corresponding lines with
VOB– or DIR– in the inventory file, describe stranded view-private files. Such files belong to
VOBs or directories that are not currently accessible—and, in some cases, may never become
accessible again. Consult the lsprivate reference page to learn more about stranded files, and
358 Administrator’s Guide: Rational ClearCase](https://image.slidesharecdn.com/ccadmin-100721134814-phpapp01/85/Cc-admin-398-320.jpg)


![This section discusses how ClearCase distinguishes and initializes tasks and jobs. For
information on creating, editing, and deleting tasks and jobs, see Managing Tasks on page 445 and
Managing Jobs on page 447.
Task and Job Storage
The scheduler relies on two data repositories:
® A database of tasks available for scheduling
® A database of jobs, or scheduled tasks
The database and the jobs, along with various other ClearCase administrative tools, are installed
under the directory represented here as ccase-var-dir. On UNIX, this directory is /var/adm/atria.
On Windows, the file is in ccase-home-dirvar.
A task must be defined in the task database before you can schedule it. The task database is a
single text file ccase-var-dirschedulertaskstask_registry. You can add task definitions to the
task database by editing this file in a text editor. You must not change the definitions of standard
ClearCase tasks, but you may add your own task definitions at the end of the file. For more
information, see Managing Tasks on page 445.
Standard ClearCase tasks reside in the directory ccase-home-dirconfigschedulertasks. You
cannot edit these tasks. Tasks that you define can reside anywhere in the file system, but the
recommended location is the directory ccase-var-dirschedulertasks. This directory initially
contains two task placeholder scripts that run on a regular basis but by default do nothing. To
change this default:
® Edit ccase_local_day.[sh|bat] to add any user-defined operations to be run daily.
® Edit ccase_local_wk.[sh|bat] to add user-defined tasks to be run weekly.
The database of jobs is a binary file (ccase-var-dirschedulerdb) that you can read and edit only
by using the Scheduled Jobs node of the ClearCase Administration Console or the cleartool
schedule command. For more information, see Managing Jobs on page 447.
442 Administrator’s Guide: Rational ClearCase](https://image.slidesharecdn.com/ccadmin-100721134814-phpapp01/85/Cc-admin-482-320.jpg)
![28.2 The Default Schedule
Rational ClearCase has a set of standard jobs, most of which manage disk space in VOB and view
storage directories. Some of these jobs run daily. Others run weekly.
Daily jobs:
® Scrub cleartext and derived object storage pools of all local VOBs, using scrubber.
® Copy the VOB database for all local VOBs that are configured for snapshots, using
vob_snapshot.
® Copy the ClearCase registry from the primary registry server host (when run on a backup
registry server host), using rgy_backup.
® Run user-defined daily operations in ccase_local_day.[sh|bat].
® Generate and cache data on disk space used by all local views, using space.
® Generate and cache data on disk space used by all local VOBs, using space.
Weekly jobs:
® Scrub some ClearCase logs.
® Scrub the databases of all local VOBs, using vob_scrubber.
® Run user-defined weekly operations in ccase_local_wk.[sh|bat].
® Generate and cache data on disk space used by derived objects in all local VOBs, using
dospace.
For information about how these jobs operate, see the reference page for the command or utility
that the job uses. For information on managing VOB storage, see Chapter 11, Administering VOB
Storage. For more information on managing view storage, see Chapter 20, Administering View
Storage.
The default schedule also includes jobs to automate the synchronization of MultiSite replicas.
These jobs are designed to run daily but are disabled by default, whether or not MultiSite is
installed. For more information on these jobs and how to enable them for use with MultiSite, see
the Administrator’s Guide for Rational ClearCase MultiSite
444 Administrator’s Guide: Rational ClearCase](https://image.slidesharecdn.com/ccadmin-100721134814-phpapp01/85/Cc-admin-484-320.jpg)
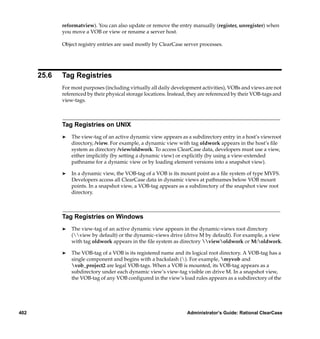
![28.3 Managing Tasks
A task has two components:
® A program (job) to be executed when the task runs
® A definition for the task in the scheduler’s task database
ClearCase has a set of standard executable tasks and standard definitions for these tasks in the
task database. You cannot create, change, or delete any standard ClearCase tasks or task
definitions. You can, however, define new tasks in the task database. You can also customize two
predefined ClearCase tasks, one of which is run daily and the other weekly in the default
schedule. You can add your own procedures to these tasks and can change their schedules.
To view all task definitions in the task registry, use the following command:
cleartool schedule –get –tasks
Creating a Task
To create a new task:
1. Create an executable program suitable to be run in the scheduler’s execution environment
(see Job Execution Environment on page 443). You can place the program anywhere in the file
system, but the recommended location is the directory ccase-var-dirschedulertasks.
2. If you want the program to run daily, you can run it from the existing task
ccase_local_day.[sh|bat]. If you want the program to run weekly, you can run it from the
existing task ccase_local_wk.[sh|bat]. Both tasks are in the directory
ccase-var-dirschedulertasks. If you add your program to one of these customizable tasks,
you need take no further action.
3. If you prefer to run your program as a new task, you must add the task to the scheduler’s
task registry, ccase-var-dir/scheduler/tasks/task_registry. To add a task to this file, use a text
editor.
Tasks are defined using a job-definition syntax documented on the reference page for the
schedule command. The essential components of a task definition are the following:
¢ A unique numeric ID used by a scheduled job to refer to the task
28 - Managing Scheduled Jobs 445](https://image.slidesharecdn.com/ccadmin-100721134814-phpapp01/85/Cc-admin-485-320.jpg)
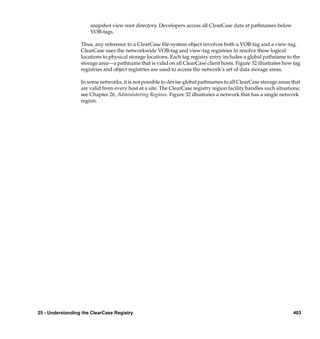
![¢ A unique name for the task
¢ The pathname to the executable program
WARNING: Place new task definitions at the end of the task registry file. Do not alter or delete
any of the standard ClearCase tasks defined in that file.
4. If you have added a task to the scheduler’s task registry, you must create a new job to run
the task. See Creating a Job on page 447. You do not need to create a new job if you have added
your program to an existing scheduled job such as ccase_local_day.[sh|bat].
Editing a Task
You may need to edit an existing task definition in the scheduler’s task registry. For example, if
you move the task’s executable program to another directory, you must change the pathname in
the task definition in the task registry.
WARNING: Edit only tasks that have been added at your site. Do not alter or delete any of the
standard ClearCase tasks defined in the task registry.
To change a task definition, use a text editor to edit the task registry file,
ccase-var-dirschedulertaskstask_registry. When you edit a task, you must use the
task-definition syntax documented on the reference page for the schedule command.
CAUTION: The scheduler uses a task definition’s numeric ID to refer to the task when it runs a
scheduled job that uses that task. If you change a task’s numeric ID, you must change all
references to the task in all scheduled jobs. See Editing Job Properties on page 450.
Deleting a Task
Before you delete a task definition, you must remove all references to the task in all scheduled
jobs. See Editing Job Properties on page 450. To delete a task definition, use a text editor to edit the
task registry file ccase-var-dirschedulertaskstask_registry.
WARNING: Delete only tasks that have been added at your site. Do not alter or delete any of the
standard ClearCase tasks defined in the task registry.
446 Administrator’s Guide: Rational ClearCase](https://image.slidesharecdn.com/ccadmin-100721134814-phpapp01/85/Cc-admin-486-320.jpg)


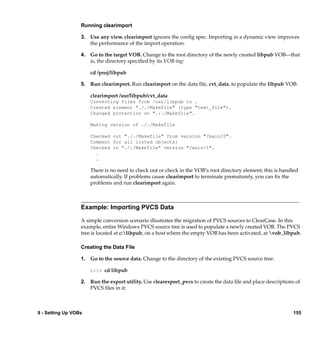
![For information about fixing protection problems caused by editing permissions, see Fixing
Protection Problems on page 531. For more information about the options to the checkvob
command, see the checkvob reference page.
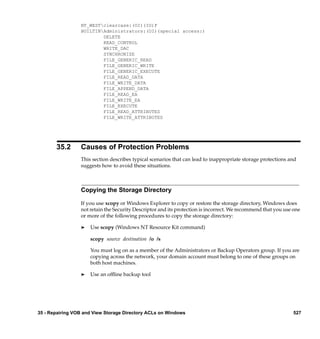
35.3 Utilities for Fixing Protection Problems
ClearCase includes three utility programs for fixing protection problems on Windows:
® ccase-home-diretcutilsvob_sidwalk.exe repairs permissions on VOB storage directories.
It can also be used to change ownership on VOB objects. For details, see Using vob_sidwalk to
Change or Update VOB Users and Groups on page 68.
® ccase-home-diretcutilsfix_prot.exe repairs permissions on VOB or view storage
directories
® ccase-home-diretcutilslsacl.exe displays NTFS DACLs for file-system objects
fix_prot
fix_prot [-f⋅orce] { -root [-r⋅ecurse] [-recover {-chown user | -chgrp group } |
-replace⋅_server_process_group|
[-r⋅ecurse] [-type { d | f }] [-chown user] [-chgrp group] [-chmod permissions] } pname ...
Options
–f⋅orce
Do not prompt for confirmation.
–r⋅ecurse
Recursively fix protections.
–root
Specifies that pname is a VOB or view storage directory root.
–type
Specifies the type of file-system objects to fix. Use d for directories and f for files. If -type
is not specified, fix_prot operates on both directories and files.
35 - Repairing VOB and View Storage Directory ACLs on Windows 529](https://image.slidesharecdn.com/ccadmin-100721134814-phpapp01/85/Cc-admin-569-320.jpg)
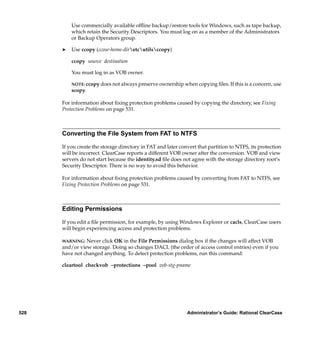
![fix_prot: Error: unknown style protections on foo: The data is invalid.
If it does, you must rerun fix_prot and specify all of the –chown, –chgrp, and –chmod options
with the absolute codes. For example:
ccase-home-diretcutilsfix_prot –chown owner –chgrp group –chmod 0666 pname
lsacl
lsacl [ –s | –l ] [ –n ] [ –f ] path-name
Options:
–s | –l
Specifies short or long format; displays generic rights, by default.
–n
Specifies that the numeric security ID (SID) is not to be translated into the user’s name.
Use this option if the domain controller is down or if the user’s account has been
removed.
–f
Reads a security descriptor from a file; allows you to display the contents of the
identity.sd and groups.sd files.
Note that you can also use %SystemRoot%system32cacls to display a DACL, but cacls cannot
read a security descriptor from a file.
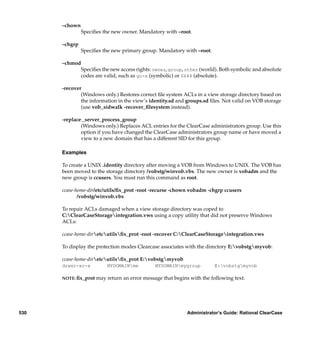
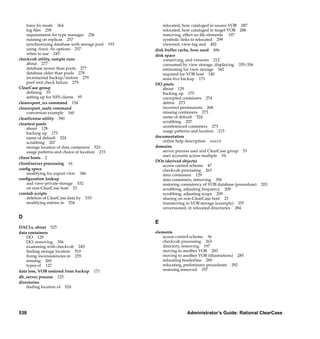
35.4 Fixing Protection Problems
The following sections describe how to fix the protection problems described in Causes of
Protection Problems on page 527.
To fix most protection problems:
1. Log on as a member of the Administrators or Backup Operators group.
2. If the groups.sd file exists in the storage directory root, run this command:
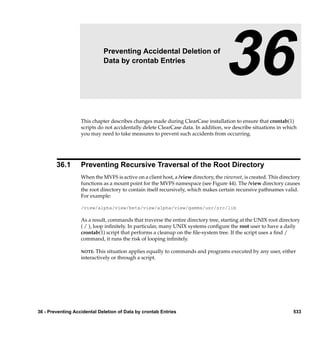
35 - Repairing VOB and View Storage Directory ACLs on Windows 531](https://image.slidesharecdn.com/ccadmin-100721134814-phpapp01/85/Cc-admin-571-320.jpg)
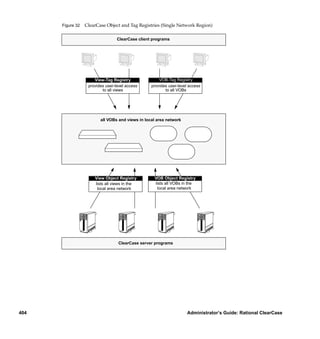
![ccase-home-diretcutilslsacl –f stg-pnamegroups.sd
Note the supplementary group list. The following is sample output:
===== stg-pnamegroups.sd
Owner: FOObob (User) (non-defaulted) (Owner)
Group: FOOusersnt (Group) (non-defaulted) (Primary group)
ACL (revision 2):
0: allowed
SID: FOOuser (Group) (Supplementary group)
rights (00000000)
1: allowed
SID: FOOtester (Group) (Supplementary group)
rights (00000000)
===== stg-pnamegroups.sd
Owner: FOObob (User) (non-defaulted) (Owner)
Group: FOOusersnt (Group) (non-defaulted) (Primary group)
ACL (revision 2):
Empty ACL: all access denied (No supplementary group)
3. Issue the following command:
ccase-home-diretcutilsfix_prot –r –root –chown owner –chgrp group stg-pname
fix_prot –root removes the supplementary group list.
If you are fixing view storage, you are finished. There should be no supplementary groups
for the view storage directory.
4. If you are fixing VOB storage and your VOB had the supplementary group list, run this
command:
ccase-home-dirbincleartool protectvob –add_group group-name[,...] vob-stg-pname
5. Remove the cleartext containers. To do so, log on as the VOB owner and run this command:
ccase-home-dirbinscrubber –e –k cltxt vob-stg-pname
This step is necessary because cleartool checkvob cannot fix the cleartext containers.
6. Fix the storage pool’s protections. Log on as the VOB owner and run this command:
ccase-home-dirbincleartool checkvob –force –fix –protections –pool vob-stg-pname
532 Administrator’s Guide: Rational ClearCase](https://image.slidesharecdn.com/ccadmin-100721134814-phpapp01/85/Cc-admin-572-320.jpg)


This document provides an administrator's guide for Rational ClearCase version 2002.05.00 and later. It contains information about ClearCase network architecture, including ClearCase hosts, data storage in versioned object bases (VOBs) and views, users, the ClearCase registry, and ClearCase server processes. It also covers administering ClearCase hosts, using DHCP and non-ClearCase access on UNIX systems, and using automount with ClearCase on UNIX.