CSEduino - Build your Arduino from scratch
•
5 likes•7,249 views

An how-to build an inexpensive Arduino Board for 5 USD.

Recommended
More Related Content
What's hot
What's hot (20)
Viewers also liked
Viewers also liked (20)
Similar to CSEduino - Build your Arduino from scratch
Similar to CSEduino - Build your Arduino from scratch (20)
Recently uploaded
Recently uploaded (6)
CSEduino - Build your Arduino from scratch
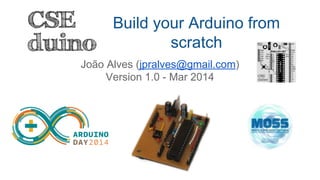
- 1. Build your Arduino from scratch João Alves (jpralves@gmail.com) Version 1.0 - Mar 2014
- 2. Agenda Introduction Problem Solution Requirements Schematics Bill of Materials The Parts Assembling the board Running a Test Sketch Demo
- 3. Introduction Soldered my first Arduino Clone - a Diavolino (http://wiki. evilmadscientist.com/Diavolino) - in 2012 in a workshop presented by Mitch Altman at Codebits.
- 4. Introduction (cont…) After some other workshops in Altlab (http://altlab.org) where I assembled a Freeduino and made some small stripboards with leds, buzzers and buttons I wanted to do more and start learning not only the how but also the why in electronics. This is one of my works, based on several other similar projects found on the Internet. You are free to use it, change it and improve it.
- 5. Problem Arduino is very nice for prototyping but after creating a project with the board it is an overkill to use it in the final product. Although not very expensive, an Arduino clone board costs at least € 20 (25 USD), an official one costs a little bit more.
- 6. Solution Create an inexpensive Arduino-like board that can be used with the project keeping the Arduino Board for future projects. It can replace completely the Arduino board if you don’t require the use of shields (it is not pin head compatible).
- 7. Requirements ● Cheap ● Small ● Easy
- 8. Cheap With a very small budget of up to € 3.5 (5 USD) in parts it was possible to build this board with the required components.
- 9. Small To be small some optimizations were made to the stripboard to accomplish its reduced size. The board is 4.5cm x 5.5cm. The circuit is adaptable to different requirements and it was made modular enough to be able remove the parts not needed and reduce its size even further.
- 10. Easy To be simple and easy to build I’ve used only THT - Through-hole technology. Avoiding SMD - Surface Mount Devices - components - as they are harder to solder and prone to errors. I’ve used the most common microcontroller used in Arduino Boards with THT - the ATMega328P (in PDIP format). The components where soldered to a stripboard to reduce extra wiring.
- 11. Schematics
- 12. Bill of Materials ● 1x Stripboard with at least 19 Rows and 16 Columns (€ 0,73) ● 1x ATmega328P-PU microcontroller with Arduino bootloader (U1) (€ 1,59) ● 1x 28 pin DIP IC Socket (U1) ● 1x 16 MHz crystal oscillator (XTAL1) (€ 0,44) ● 2x 22 pF, 50 V ceramic capacitors (C3, C4) (€ 0,06) ● 1x 40-pin male single header (J1, J2, J3, J4, J5, J6, J7) (€ 0,12) ● 1x 7805 linear voltage regulator (U2) (€ 0,22) ● 2x 100 μF, 25 V electrolytic capacitors (C1, C2) (€ 0,04) ● 1x 1N4001 rectifier diode (D1) (€ 0,02) ● 1x SPST momentary normally-open type switch (S1) € 0,08) ● 1x 10 kΩ resistor (R2) (€ 0,01) ● 1x 100 nF, 50 V ceramic capacitor (C5) (€ 0,06) ● 1x 1 kΩ resistor (R1) (€ 0,01) ● 1x LED (3mm) (LED1) (€ 0,02) ● 1x Jumper (€ 0,01)
- 13. The Parts ● Voltage Regulator ● USB/FTDI Programming Header ● Hello World LED ● Microcontroller
- 14. The Voltage Regulator Components: ● 1x 7805 linear voltage regulator (U2) ● 2x 100 μF 25 V electrolytic capacitors (C1, C2) ● 1x 1N4001 rectifier diode (D1) ● 1x 5-pin male single header (J5 + J6)
- 15. USB/FTDI Prog. Header Components: ● 1x SPST normally-open type switch (S1) ● 1x 10 kΩ resistor (R2) ● 1x 100 nF, 50 V ceramic capacitor (C5) ● 1x 6-pin male single header (J4)
- 16. Hello World LED Components: ● 1x 1 kΩ resistor (R1) ● 1x LED (3mm) (LED1) ● 1x Jumper ● 1x 2-pin male single header (J7)
- 17. Microcontroller Components: ● 1x ATmega328P-PU microcontroller (U1) ● 1x 28 pin DIP IC Socket (U1) ● 1x 16 MHz crystal oscillator (XTAL) ● 2x 22 pF, 50 V ceramic capacitors (C3, C4) ● 1x 14-pin male single header (J1) ● 1x 7-pin male single header (J2) ● 1x 4-pin male single header (J3)
- 18. The ATmega328P Pin Layout
- 19. Assembling the board ● Tools required for assembling ● Preparing for the Assembly ● Cut holes in the stripboard ● Cut 40-Pin Header into smaller parts ● Soldering components
- 20. Tools required for assembling ● Soldering Iron ● Track Cutter ● Wire Snips ● X-Acto Knife ● Solder
- 21. Preparing for the Assembly Common stripboards have one side with the “stripes” and another clean side. The components will be mounted on the clean side and soldered on the strip side.
- 22. Cut holes in the stripboard
- 23. Prepare 40-Pin Male Header Cut the 40-Pin Male to this sizes: ● 1x 14-pin male single header (J1) ● 1x 8-pin male single header (J2) ● 1x 4-pin male single header (J3) ● 1x 6-pin male single header (J4) ● 1x 5-pin male single header (J5 + J6) ● 1x 2-pin male single header (J7)
- 24. Soldering components Solder the components in the following order: ● Wires ● IC Socket (U1) ● Resistors (R1, R2) ● 1N4001 (D1) ● Ceramic Capacitors (C3, C4, C5) ● Crystal (XTAL) ● SPST switch (S1) ● Male Head Pins (J1, J2, J3, J4, J5, J6, J7) ● LED (LED1) ● Electrolytic Capacitors (C1, C2) ● 7805 (U2) ● ATmega328P (U1)
- 25. Components location ● IC Socket and ATmega328P-PU (U1) ● 16 MHz Crystal (XTAL1) ● 22 pF, 50 V (C3, C4) ● 7805 (U2) ● 100 μF, 25 V (C1, C2) ● 1N4001 (D1) ● SPST switch (S1) ● 10 kΩ resistor (R2) ● 100 nF, 50 V (C5) ● 1 kΩ resistor (R1) ● LED (3mm) (LED1) C5 C3 C1 C2 C4 XTAL1 S1 U1 U2 D1 LED1 R1 R2 FTDI POWER
- 26. Soldering components location After each component there are coordinates LyCx where y is the line and x is the column to put the wire. The lines and columns are numbered on the strip side so the x is backwards. x y
- 27. Wires Cut wires with the following lengths: ● Black: ○ 2 x 3 cm (L4C3-L12C3, L4C8-L13C8) ○ 1 x 1 cm (L2C9-L4C9) ● Red: ○ 2 x 3 cm (L5C2-L14C2, L5C6-L12C6) ○ 2 x 1 cm (L3C12-L5C12, L5C14-L6C15) ● Green: ○ 1 x 3,5 cm (L3C5-L15C5) ● Yellow: ○ 1 x 3 cm (L6C13-L11C16) Solder the wires into the stripboard according to the image.
- 28. IC Socket (U1) Place the IC Socket with pin 1 on the top. Its not very easy to solder because the two wires below get in the way. Try to center the wires under the socket. Solder carefully according to the image. Components: ● U1 - 28 pin DIP IC Socket (L6C7 - L19C4)
- 29. Resistors (R1, R2) The Resistors don’t have polarity but R1 is different from R2. Solder carefully according to the image. Components: ● R1 - 1 kΩ resistor (L3C3 - L2C5) ● R2 - 10 kΩ resistor (L6C9 - L12C9)
- 30. 1N4001 (D1) Solder the component in the board with the stripe (-) on the left. Components: ● D1 - 1N4001 rectifier diode (L1C2 - L1C5)
- 31. Ceramic Capacitors (C3, C4, C5) The Ceramic Capacitors don’t have polarity but C5 is different from C3 and C4. Solder carefully according to the image. Components: ● C3 - 22 pF, 50 V ceramic capacitor (L13C11 - L15C11) ● C4 - 22 pF, 50 V ceramic capacitor (L13C9 - L14C9) ● C5 - 100 nF, 50 V ceramic capacitor (L9C15 - L11C15)
- 32. Crystal (XTAL) The Crystal doesn’t have polarity. Solder carefully according to the image. Components: ● XTAL - 16 MHz crystal oscillator (L14C8 - L15C8)
- 33. SPST switch (S1) To solder this component you should straighten the pins so it fits in a 3 x 3 space. Solder carefully according to the image. Components: ● S1 - SPST normally-open type switch (L11C14 - L13C12)
- 34. Male Head Pins (J1, J2, J3, J4, J5, J6, J7) These should be soldered carefully. Solder only one pin at the beginning so its easier to straighten the head, then solder the rest. Solder carefully according to the image. ● J1 - 14-pin male header (L6C1-L19C1) ● J2 - 8-pin male header (L6C10-L13C10) ● J3 - 4-pin male header (L16C10-L19C10) ● J4 - 6-pin male header (L4C16-L9C16) ● J5+J6 - 5-pin male header* (L1C1-L5C1) ● J7 - 2-pin male header (L2C6-L3C6) * - Remove 2 of the pins
- 35. LED (LED1) The LED has a longer leg (+) which should be placed on the upper side, the smaller leg (-) should be on the bottom side. Solder according to the image. Components: ● LED - LED (3mm) (L3C2+ - L4C2-)
- 36. Electrolytic Capacitors (C1, C2) The C1 should have the (-) side up and the (+) side down. The minus is normally identified by a white strip and shorter leg. The C2 should have the (-) side down and the (+) side up. Solder according to the image. Components: ● C1 - 100 μF 25 V electrolytic capacitor (L2C13- - L2C13+) ● C2 - 100 μF 25 V electrolytic capacitor (L1C8+ - L2C8-)
- 37. 7805 (U2) The metal side should be facing right and letters on the chip should be facing left. Solder according to the image. Components: ● U2 - 7805 linear voltage regulator (L1C10-L3C10)
- 38. ATmega328P (U1) Then, after finishing you can put the ATmega328P on the socket according to the image. Components: ● U1 - ATmega328P-PU microcontroller
- 40. Testing and using it Make sure you don’t have shorts between tracks Use a USB/FTDI Breakout board Disconnect the external power to the board when using the USB/FTDI programming breakout card.
- 41. Running a Test Sketch Setup Arduino IDE: ● Choose Arduino Duemilanove w/ ATmega328 ● Load Examples -> 01. Basics -> Blink
- 42. Demo ● Traffic Signals ● MegaDemo ● Ultrasonic Sensors
- 43. Q & A ? Questions ? http://jpralves.net https://plus.google.com/u/0/+JoãoAlvesPlus