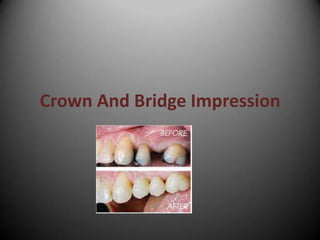
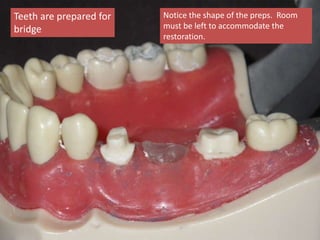
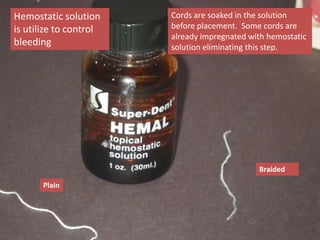
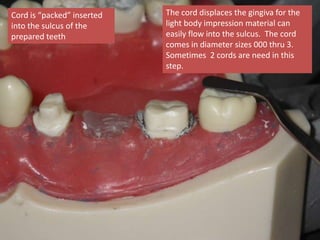
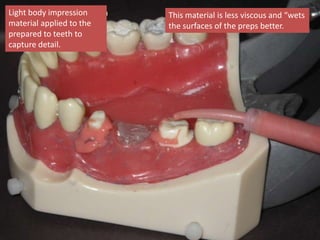
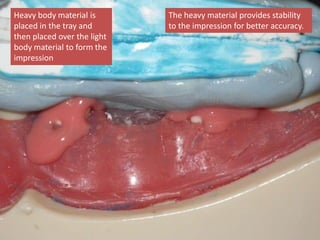
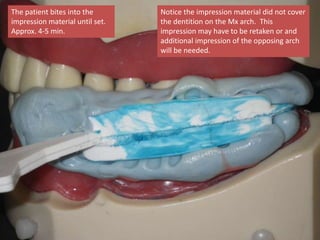
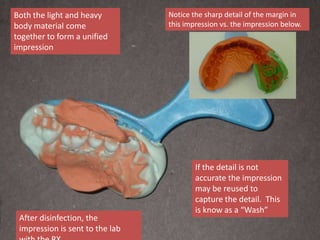
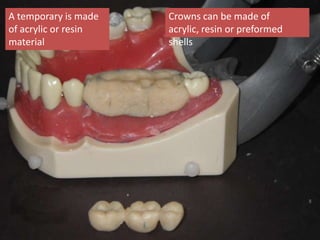
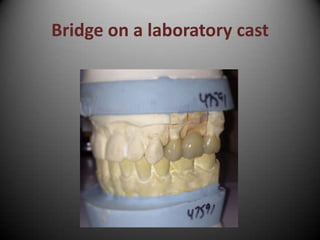
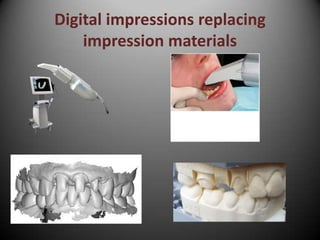
Crown And Bridge Impression
Teeth are prepared for
bridge
Notice the shape of the preps. Room
must be left to accommodate the
restoration.
Hemostatic solution
is utilize to control
bleeding
Cords are soaked in the solution
before placement. Some cords are
already impregnated with hemostatic
solution eliminating this step.
Plain
Braided
Cord is “packed” inserted
into the sulcus of the
prepared teeth
The cord displaces the gingiva for the
light body impression material can
easily flow into the sulcus. The cord
comes in diameter sizes 000 thru 3.
Sometimes 2 cords are need in this
step.
The final impression is taken
by the dentist.
In this example a triple tray is
used
Intraoral and mixing tip
Light body cartridge
and mixing gun
Heavy body Putty
Triple tray with tray
adhesive
If a triple tray is not used, three separate
procedures must be performed:
• Take an impression of the prepared teeth
• Take an impression of the opposing arch
• Take a bite registration
Light body impression
material applied to the
prepared to teeth to
capture detail.
This material is less viscous and “wets
the surfaces of the preps better.
Heavy body material is
placed in the tray and
then placed over the light
body material to form the
impression
The heavy material provides stability
to the impression for better accuracy.
The patient bites into the
impression material until set.
Approx. 4-5 min.
Notice the impression material did not cover
the dentition on the Mx arch. This
impression may have to be retaken or and
additional impression of the opposing arch
will be needed.
Both the light and heavy
body material come
together to form a unified
impression
Notice the sharp detail of the margin in
this impression vs. the impression below.
If the detail is not
accurate the impression
may be reused to
capture the detail. This
is know as a “Wash”
After disinfection, the
impression is sent to the lab
A temporary is made
of acrylic or resin
material
Crowns can be made of
acrylic, resin or preformed
shells
Removing cement
Popular temporary cement
Temporary bridge
cemented into place until
“permanent” bridge is
completed in the lab to
maintain occlusion
Bridge on a laboratory cast
Digital impressions replacing
impression materials

Crown and bridge impression slides

  • 1.
    Crown And BridgeImpression
  • 2.
    Teeth are preparedfor bridge Notice the shape of the preps. Room must be left to accommodate the restoration.
  • 3.
    Hemostatic solution is utilizeto control bleeding Cords are soaked in the solution before placement. Some cords are already impregnated with hemostatic solution eliminating this step. Plain Braided
  • 4.
    Cord is “packed”inserted into the sulcus of the prepared teeth The cord displaces the gingiva for the light body impression material can easily flow into the sulcus. The cord comes in diameter sizes 000 thru 3. Sometimes 2 cords are need in this step.
  • 5.
    The final impressionis taken by the dentist. In this example a triple tray is used Intraoral and mixing tip Light body cartridge and mixing gun Heavy body Putty Triple tray with tray adhesive
  • 6.
    If a tripletray is not used, three separate procedures must be performed: • Take an impression of the prepared teeth • Take an impression of the opposing arch • Take a bite registration
  • 7.
    Light body impression materialapplied to the prepared to teeth to capture detail. This material is less viscous and “wets the surfaces of the preps better.
  • 8.
    Heavy body materialis placed in the tray and then placed over the light body material to form the impression The heavy material provides stability to the impression for better accuracy.
  • 9.
    The patient bitesinto the impression material until set. Approx. 4-5 min. Notice the impression material did not cover the dentition on the Mx arch. This impression may have to be retaken or and additional impression of the opposing arch will be needed.
  • 10.
    Both the lightand heavy body material come together to form a unified impression Notice the sharp detail of the margin in this impression vs. the impression below. If the detail is not accurate the impression may be reused to capture the detail. This is know as a “Wash” After disinfection, the impression is sent to the lab
  • 11.
    A temporary ismade of acrylic or resin material Crowns can be made of acrylic, resin or preformed shells
  • 12.
    Removing cement Popular temporarycement Temporary bridge cemented into place until “permanent” bridge is completed in the lab to maintain occlusion
  • 13.
    Bridge on alaboratory cast
  • 14.