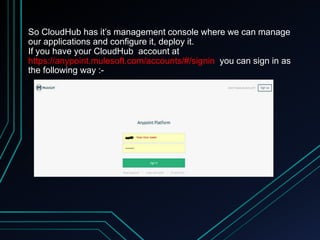
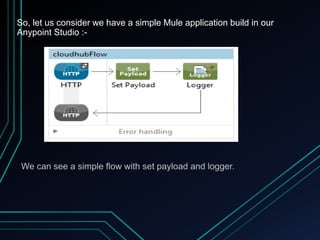
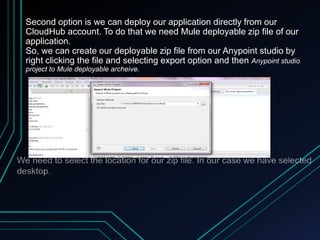
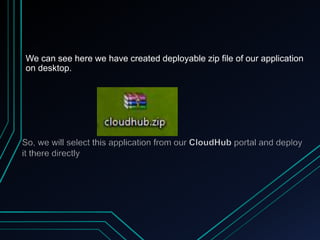
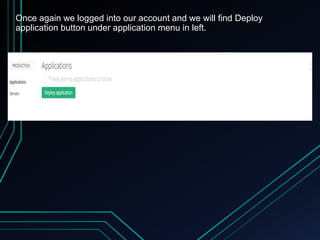
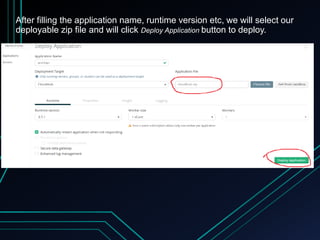
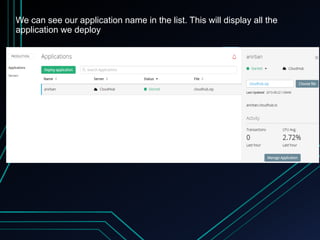
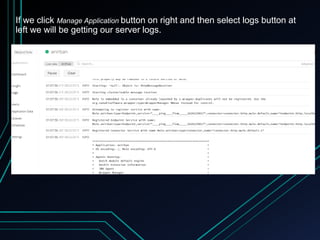
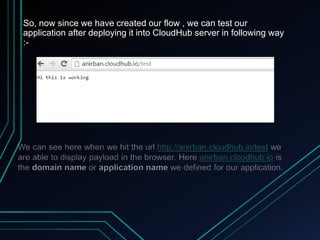
CloudHub with Mule
Before we start, we will actually look into what CloudHub really is.
CloudHub is the platform as a service (PaaS) component of
Anypoint Platform, providing a fully-managed, multi-tenanted,
globally available, secure and highly available cloud platform for
integration and APIs.
The real advantage of CloudHub is it requires no hardware to
maintain and continuous software updates.
It provides Cloud based integration to users.
So CloudHub has it’s management console where we can manage
our applications and configure it, deploy it.
If you have your CloudHub account at
https://anypoint.mulesoft.com/accounts/#/signin you can sign in as
the following way :-
We can build our application in Anypoint Studio and deploy it in
CloudHub by either two ways:
So, let us consider we have a simple Mule application build in our
Anypoint Studio :-
And corresponding Mule flow will be as follow:-
Now after we created our application, we will deploy directly from
Anypoint Studio. Right Click after selecting the project and we will get
deploy to CloudHub under CloudHub menu. From here we can deploy
directly to CloudHub by entering username and password of our
CloudHub account :-
We need to provide necessary details like domain name, environment
etc and then click finish
We can see our application deployed in CloudHub from Anypoint Studio
:-
If we log into our CloudHub account we will see that our application is
successfully deployed from Anypoint Studio and started :-
Second option is we can deploy our application directly from our
CloudHub account. To do that we need Mule deployable zip file of our
application.
So, we can create our deployable zip file from our Anypoint studio by
right clicking the file and selecting export option and then Anypoint studio
project to Mule deployable archeive.
We can see here we have created deployable zip file of our application
on desktop.
Once again we logged into our account and we will find Deploy
application button under application menu in left.
After filling the application name, runtime version etc, we will select our
deployable zip file and will click Deploy Application button to deploy.
We can see our application name in the list. This will display all the
application we deploy
If we click Manage Application button on right and then select logs button at
left we will be getting our server logs.
So, now since we have created our flow , we can test our
application after deploying it into CloudHub server in following way
:-
So we can see it is very very easy to deploy our Mule application
in Cloud server. We can deploy it either from our studio or from our
CloudHub account directly.
So at the end I can only say that, let’s spread our knowledge and
expand our Mule community. 

Cloud hub with mule

  • 1.
  • 2.
    Before we start,we will actually look into what CloudHub really is. CloudHub is the platform as a service (PaaS) component of Anypoint Platform, providing a fully-managed, multi-tenanted, globally available, secure and highly available cloud platform for integration and APIs. The real advantage of CloudHub is it requires no hardware to maintain and continuous software updates. It provides Cloud based integration to users.
  • 3.
    So CloudHub hasit’s management console where we can manage our applications and configure it, deploy it. If you have your CloudHub account at https://anypoint.mulesoft.com/accounts/#/signin you can sign in as the following way :-
  • 4.
    We can buildour application in Anypoint Studio and deploy it in CloudHub by either two ways:
  • 5.
    So, let usconsider we have a simple Mule application build in our Anypoint Studio :-
  • 6.
    And corresponding Muleflow will be as follow:-
  • 7.
    Now after wecreated our application, we will deploy directly from Anypoint Studio. Right Click after selecting the project and we will get deploy to CloudHub under CloudHub menu. From here we can deploy directly to CloudHub by entering username and password of our CloudHub account :-
  • 8.
    We need toprovide necessary details like domain name, environment etc and then click finish
  • 9.
    We can seeour application deployed in CloudHub from Anypoint Studio :-
  • 10.
    If we loginto our CloudHub account we will see that our application is successfully deployed from Anypoint Studio and started :-
  • 12.
    Second option iswe can deploy our application directly from our CloudHub account. To do that we need Mule deployable zip file of our application. So, we can create our deployable zip file from our Anypoint studio by right clicking the file and selecting export option and then Anypoint studio project to Mule deployable archeive.
  • 13.
    We can seehere we have created deployable zip file of our application on desktop.
  • 14.
    Once again welogged into our account and we will find Deploy application button under application menu in left.
  • 15.
    After filling theapplication name, runtime version etc, we will select our deployable zip file and will click Deploy Application button to deploy.
  • 16.
    We can seeour application name in the list. This will display all the application we deploy
  • 17.
    If we clickManage Application button on right and then select logs button at left we will be getting our server logs.
  • 18.
    So, now sincewe have created our flow , we can test our application after deploying it into CloudHub server in following way :-
  • 19.
    So we cansee it is very very easy to deploy our Mule application in Cloud server. We can deploy it either from our studio or from our CloudHub account directly. So at the end I can only say that, let’s spread our knowledge and expand our Mule community. 