This document provides instructions for a lab assignment to create an ASP.NET web application with multiple forms. The application will include a main navigation form with links to other forms, including a data entry form with text boxes and a submit button to send data to a display form. The document outlines the steps to create the forms, add navigation between them, and submit the completed project.
The VB6 IDE (Integrated Development Environment) is a very simple and fully featured IDE. If you start out programming in VB6 you may end up being too spoiled to ever appreciate a more complicated and less functional IDE like most C++ IDEs. One feature which sets VB6 apart from various IDEs is the simplicity of its approach to GUI (Graphical User Interface) design.
As a general rule: Play with it. You're very unlikely to break anything that matters, so just explore and experiment with the IDE, and you'll learn more.
Easy Ways to Develop Education with Android Application Template. Contains mundah way in developing android applications with simple coding. You can certainly develop because only filling material and alter other facilities. Manufacture using Adobe Flash Professional CS 6.
hopTo Work is the New Mobile Workspace.Transport & transform your existing Windows apps into touch friendly mobile apps- with NO coding required.
View the hopTo Work 2.0 product launch webinar recording - https://attendee.gotowebinar.com/recording/6129922825935128066
View our hands-on technical webinar co-hosted by Doug Brown (Microsoft MVP, Citrix CTP and VMware vEXPERT) - https://attendee.gotowebinar.com/recording/702798302548884994
You can find the hopTo Work 2.0 Youtube video demo playlist here - https://www.youtube.com/playlist?list=PLBHiS93vpwfuqllw6sUT0RJ1BHvstuzEj
Most IT departments face an exponential change – the explosion of mobile devices. The real challenge is the fact that most mission critical applications are Windows based, but most new mobile devices are not. While solutions exist to transport your mission critical apps to mobile devices, users often struggle a great deal with using a touch interface for an app designed for a mouse and keyboard.
hopTo offers a mobile workspace that overcomes the many challenges of transporting Windows apps to mobile devices by transforming the user interface to be touch friendly & mobile. hopTo Work uses an organizations existing Windows infrastructure to enable a complete multi-tasking mobility solution for all users while keeping all documents and content secure on the internal network. We enable you to transport your Windows apps to mobile devices, then transform those Windows apps into touch friendly mobile apps – with no coding required.
Empowerment technology is any tool or system that enables individuals and communities to take control of their lives, make informed decisions, and ultimately enhance their well-being. It can be used to improve access to education, healthcare, employment, and other resources.
Software engineering modeling lab lectures
engineering+ education purpose
This series of lectures was prepared for the third class of software engineering / Aliraqia University/ Baghdad/ Iraq.
In prepared these lectures, I depend on the YouTube to make it, the programs of the lectures are designed and executed by vb.net, discussions are also found here
These lectures are not finished yet, i will improve it in the future
Forgive me for anything wrong by mistake, I wish you can profit from these lectures
My regard
Marwa Moutaz/ M.Sc. studies of Communication Engineering / University of Technology/ Bagdad / Iraq.
PowerPointLabs (http://www.comp.nus.edu.sg/~pptlabs/) is an add-in for PowerPoint to help less-experience user to make professional-look presentation slides. This presentation is a brief tutorial about the PowerPointLabs.
The Art of the Pitch: WordPress Relationships and SalesLaura Byrne
Clients don’t know what they don’t know. What web solutions are right for them? How does WordPress come into the picture? How do you make sure you understand scope and timeline? What do you do if sometime changes?
All these questions and more will be explored as we talk about matching clients’ needs with what your agency offers without pulling teeth or pulling your hair out. Practical tips, and strategies for successful relationship building that leads to closing the deal.
Slack (or Teams) Automation for Bonterra Impact Management (fka Social Soluti...Jeffrey Haguewood
Sidekick Solutions uses Bonterra Impact Management (fka Social Solutions Apricot) and automation solutions to integrate data for business workflows.
We believe integration and automation are essential to user experience and the promise of efficient work through technology. Automation is the critical ingredient to realizing that full vision. We develop integration products and services for Bonterra Case Management software to support the deployment of automations for a variety of use cases.
This video focuses on the notifications, alerts, and approval requests using Slack for Bonterra Impact Management. The solutions covered in this webinar can also be deployed for Microsoft Teams.
Interested in deploying notification automations for Bonterra Impact Management? Contact us at sales@sidekicksolutionsllc.com to discuss next steps.
GDG Cloud Southlake #33: Boule & Rebala: Effective AppSec in SDLC using Deplo...James Anderson
Effective Application Security in Software Delivery lifecycle using Deployment Firewall and DBOM
The modern software delivery process (or the CI/CD process) includes many tools, distributed teams, open-source code, and cloud platforms. Constant focus on speed to release software to market, along with the traditional slow and manual security checks has caused gaps in continuous security as an important piece in the software supply chain. Today organizations feel more susceptible to external and internal cyber threats due to the vast attack surface in their applications supply chain and the lack of end-to-end governance and risk management.
The software team must secure its software delivery process to avoid vulnerability and security breaches. This needs to be achieved with existing tool chains and without extensive rework of the delivery processes. This talk will present strategies and techniques for providing visibility into the true risk of the existing vulnerabilities, preventing the introduction of security issues in the software, resolving vulnerabilities in production environments quickly, and capturing the deployment bill of materials (DBOM).
Speakers:
Bob Boule
Robert Boule is a technology enthusiast with PASSION for technology and making things work along with a knack for helping others understand how things work. He comes with around 20 years of solution engineering experience in application security, software continuous delivery, and SaaS platforms. He is known for his dynamic presentations in CI/CD and application security integrated in software delivery lifecycle.
Gopinath Rebala
Gopinath Rebala is the CTO of OpsMx, where he has overall responsibility for the machine learning and data processing architectures for Secure Software Delivery. Gopi also has a strong connection with our customers, leading design and architecture for strategic implementations. Gopi is a frequent speaker and well-known leader in continuous delivery and integrating security into software delivery.
Key Trends Shaping the Future of Infrastructure.pdfCheryl Hung
Keynote at DIGIT West Expo, Glasgow on 29 May 2024.
Cheryl Hung, ochery.com
Sr Director, Infrastructure Ecosystem, Arm.
The key trends across hardware, cloud and open-source; exploring how these areas are likely to mature and develop over the short and long-term, and then considering how organisations can position themselves to adapt and thrive.
Encryption in Microsoft 365 - ExpertsLive Netherlands 2024Albert Hoitingh
In this session I delve into the encryption technology used in Microsoft 365 and Microsoft Purview. Including the concepts of Customer Key and Double Key Encryption.
UiPath Test Automation using UiPath Test Suite series, part 3DianaGray10
Welcome to UiPath Test Automation using UiPath Test Suite series part 3. In this session, we will cover desktop automation along with UI automation.
Topics covered:
UI automation Introduction,
UI automation Sample
Desktop automation flow
Pradeep Chinnala, Senior Consultant Automation Developer @WonderBotz and UiPath MVP
Deepak Rai, Automation Practice Lead, Boundaryless Group and UiPath MVP
Smart TV Buyer Insights Survey 2024 by 91mobiles.pdf91mobiles
91mobiles recently conducted a Smart TV Buyer Insights Survey in which we asked over 3,000 respondents about the TV they own, aspects they look at on a new TV, and their TV buying preferences.
Generating a custom Ruby SDK for your web service or Rails API using Smithyg2nightmarescribd
Have you ever wanted a Ruby client API to communicate with your web service? Smithy is a protocol-agnostic language for defining services and SDKs. Smithy Ruby is an implementation of Smithy that generates a Ruby SDK using a Smithy model. In this talk, we will explore Smithy and Smithy Ruby to learn how to generate custom feature-rich SDKs that can communicate with any web service, such as a Rails JSON API.
State of ICS and IoT Cyber Threat Landscape Report 2024 previewPrayukth K V
The IoT and OT threat landscape report has been prepared by the Threat Research Team at Sectrio using data from Sectrio, cyber threat intelligence farming facilities spread across over 85 cities around the world. In addition, Sectrio also runs AI-based advanced threat and payload engagement facilities that serve as sinks to attract and engage sophisticated threat actors, and newer malware including new variants and latent threats that are at an earlier stage of development.
The latest edition of the OT/ICS and IoT security Threat Landscape Report 2024 also covers:
State of global ICS asset and network exposure
Sectoral targets and attacks as well as the cost of ransom
Global APT activity, AI usage, actor and tactic profiles, and implications
Rise in volumes of AI-powered cyberattacks
Major cyber events in 2024
Malware and malicious payload trends
Cyberattack types and targets
Vulnerability exploit attempts on CVEs
Attacks on counties – USA
Expansion of bot farms – how, where, and why
In-depth analysis of the cyber threat landscape across North America, South America, Europe, APAC, and the Middle East
Why are attacks on smart factories rising?
Cyber risk predictions
Axis of attacks – Europe
Systemic attacks in the Middle East
Download the full report from here:
https://sectrio.com/resources/ot-threat-landscape-reports/sectrio-releases-ot-ics-and-iot-security-threat-landscape-report-2024/
State of ICS and IoT Cyber Threat Landscape Report 2024 preview
Cis 407 i lab 2 of 7
1. HELPIDO.COM
CLICK HERE TO GET THE SOLUTION !!!!!!
CIS 407 A – ILAB 2 OF 7
Scenario/Summary
In this lab, we will demonstrate how to create an ASP.NET web application having a single form with five
text boxes and a Submit button. We will use the form to send information to a second form where data from
the first form will be displayed. We will also add a main navigation page with two different ways of linking to
other pages.
Instructions for Week 2 iLab: User Input Web PagesClick on the link above to view the tutorial.Please
watch this tutorial before beginning the iLab.
The tutorial has audio.
Deliverables
All files are located in the subdirectory of the website. The website should function as follows: When you run
the website, you will be presented with a page (frmMain) that allows you to go to the different parts of the
website you are developing. You will be able to go to the annual salary calculator we added last week and to
the data entry form for personnel this week. When you go to the personnel data entry page you should be
able to enter data in the frmPersonnel form and have it displayed in the frmPersonnelVerified form. Your
salary calculator will also be available from the main page and will calculate properly when you enter data.
Each page should link back to the main page via the CoolBiz logo hyperlink. Once you have verified it works,
save your website, zip up all files, and submit in the Dropbox. Each page (except frmMain) will include the
CoolBiz logo that is hyperlinked back to frmMain.
i L A B S T E P S
STEP 1: frmPersonnel (10 points)
1. Open the payroll system website from Lab 1.
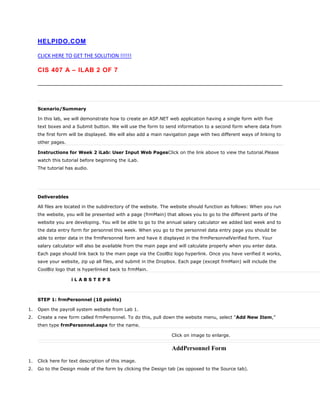
2. Create a new form called frmPersonnel. To do this, pull down the website menu, select “Add New Item,”
then type frmPersonnel.aspx for the name.
Click on image to enlarge.
AddPersonnel Form
1. Click here for text description of this image.
2. Go to the Design mode of the form by clicking the Design tab (as opposed to the Source tab).
2. 3. Copy/paste this text for the CoolBiz Productions, Inc. logo onto the form at the very top. Set the
alignment to center by highlighting the text then clicking Format, Justify, Center. You can switch to Source
view and add the following HTML to create the logo:
<font color=”black” size=”2″><strong><font color=”blue” face=”Comic Sans MS”
size=”4″>Cool</font><font color=”#ff6600″ face=”Comic Sans MS” size=”4″>Biz</font><font
face=”Comic Sans MS” size=”4″> <font color=”#993366″>Productions</font>,
Inc.</font></strong> </font>
1. From the ToolBox, drag-and-drop a Panel control underneath the logo text.
2. Click the A/Z button in the Properties dialog so that all the properties are sorted alphabetically.
1. Change the height property of the Panel to 250px and the width to 300px. To do this, select the Panel, then
go to the Properties pane (usually in the lower right corner of the Visual Studio.NET Design view; if you
don’t see it, click View Properties Window OR press the F4 key). Scroll down the list, then type the value in
for each property.
2. Change the panel’s HorizontalAlign property to left.
3. Save your work!
4. From the ToolBox, drag-and-drop five Labels and five TextBoxes onto the Panel. To make each
Label/TextBox pair appear on a separate line, put the cursor after each TextBox then press the [ENTER] key
(much like you would with a word processing program).
5. From the ToolBox, drag-and-drop two buttons onto the Panel below the last Label and TextBox.
6. Save your work!
Click on image to enlarge.
Unfinished Personnel Form
1. Click here for text description of this image.
2.
3. Test your web page. Press F5, or click the Start Debugging (Citrix users, press “Start Without Debugging”)
button on the toolbar, or pull down the Debug menu and select Start Debugging.
NOTE: To execute the application, you have these options:
1. If you are using Citrix, press CTRL + F5 to Start Without Debugging. You will not be deducted points for this
part.
2. If you are using a standalone version, press F5 to Start with Debugging, or you can press CTRL + F5 to
Start Without Debugging
Rename the Label’s properties as defined below. You can do this by selecting each Label, scrolling to the
property, and then typing in the value.
Property Value
Label1 – Text First Name:
Label2 – Text Last Name:
3. Label3 – Text Pay Rate:
Label4 – Text Start Date:
Label5 – Text End Date:
1. Rename each TextBox’s property as defined below. You can do this by selecting each TextBox, scrolling to
the property, and then typing in the value.
Property Value
TextBox1 – (ID) txtFirstName
TextBox2 – (ID) txtLastName
TextBox3 – (ID) txtPayRate
TextBox4 – (ID) txtStartDate
TextBox5 – (ID) txtEndDate
1.
Click on image to enlarge.
Changing Text Box ID
1. Click here for text description of this image.
2. Change each button’s ID and Text properties as defined below. You can do this by selecting each button,
scrolling to the property, and then typing in the value.
Property Value
Button1 – (ID) btnSubmit
Button1 – Text Submit
Button2 – (ID) btnCancel
Button2 – Text Cancel
1. In order to format the TextBoxes and Labels, we will make them the same size. Bring up the Layout Toolbar
by clicking View, Toolbars, Layout.
2. Highlight each Label by pressing and holding the keyboard Ctrl button and then clicking each Label. Make
sure you click on the longest Label last.
3. Click the icon “Make Same Width” on the Layout Toolbar. (You may also select Format and then Make Same
Size and then select width).
1. Save your work!
2. Test your work by running it (press F5 or click the Start Debugging button, or click Debug, Start
Debugging).
STEP 2: frmPersonalVerified (5 points)
4. 1. Create a new web form called frmPersonalVerified.aspx
2. Click the Design tab for the frmPersonalVerified.aspx and add a Label and a TextBox. Set the properties as
follows:
Property Value
Label – Text Information to submit
Textbox – (ID) txtVerifiedInfo
Textbox – Height 80px
Textbox – Width 400px
Textbox – TextMode Multiline
1. Double-click anywhere on a blank part of the web page to open the code portion. The cursor should be in
the protected void Page_Load (object sender, EventArgs) function. Enter the following information:
//Add your comments here
txtVerifiedInfo.Text = Request["txtFirstName"] +
“n” + Request["txtLastName"] +
“n” + Request["txtPayRate"] +
“n” + Request["txtStartDate"] +
“n” + Request["txtEndDate"];
1. Return to the frmPersonnel web page, click the btnSubmit button, go to the PostBackUrl property, and set it
to frmPersonalVerified.aspx. To do this, you can click the ellipse to the right of this property to open a
Browse dialog and click frmPersonalVerified.aspx there. This will insert the correct path into the PostBackUrl
property.
STEP 3: Adding Navigation (5 points)
1. Create a folder in Solution Explorer called images.
2. Add a new web form called frmMain.
1. Add the CoolBiz Logo to the top of the form (centered).
2. Create links using a link button for each of the following items.Salary Calculator
Add New Employee
3. Create or find appropriate images for the Salary Calculator and New Employee links. Copy the images to the
images folder created above.
4. Add the images to the images folder by right-clicking on the images folder in Solution Explorer and selecting
Add Existing Items. Select both images and Add to the images folder.
5. Next to each link item, add an image button.
6. Set each image button’s image to the appropriate image in the images folder.
7. You may work with the format to make this page look nice by using tables or other HTML/CSS elements.
8. Set the PostbackURL property to the appropriate page for each image and each link.
1. On the frmPersonnel page, make the CoolBiz logo be a link that will take the user to the frmMain page. Use
an ASP.Net Hyperlink control to do this.
5. 2. Update the frmPersonnel, frmPersonnelVerified, and frmSalaryCalculator to include the CoolBiz logo at the
top of each page (centered) with the logo set as a hyperlink that will return to the frmMain page.
3. On the frmPersonnel page, make it so that if the user presses the Cancel button then that user is taken back
to the frmMain.
STEP 4: Verify and Submit (10 points)
1. Save your work. Set the start page to frmMain and run the project. You should be able to go to both areas
of your site and enter the information in the pages. Your calculator should properly calculate without errors,
and then on the frmPersonel web page you can click the Submit button and have it display in the
frmPersonalVerified web page. Once you have verified that it works, save your project, zip up all files, and
submit in the Dropbox.
Here are screen shots (Note: Your frmMain does not have to look exactly like this, as long as it functions.):
frmMain:
frmSalaryCalculator:
frmPersonnel:
frmPersonnelVerified:
All Forms:
NOTE: Make sure you include comments in the C# code where specified (where the “//Your comments
here” is mentioned), or else a 5 point deduction per item (form, class, function) will be made. This includes
code you will be creating in the coming weeks. To comment on the code you basically put two forward
slashes to start the comment; anything after the slashes on that line is disregarded by the compiler. Then
type a brief statement on what is happening in the line under it. Comments show professionalism and are a
must in systems. As a professional developer, comments will set you apart from others and make your life
much easier if maintenance and debugging are needed.
CLICK HERE TO GET THE SOLUTION !!!!!!
![3. Copy/paste this text for the CoolBiz Productions, Inc. logo onto the form at the very top. Set the
alignment to center by highlighting the text then clicking Format, Justify, Center. You can switch to Source
view and add the following HTML to create the logo:
<font color=”black” size=”2″><strong><font color=”blue” face=”Comic Sans MS”
size=”4″>Cool</font><font color=”#ff6600″ face=”Comic Sans MS” size=”4″>Biz</font><font
face=”Comic Sans MS” size=”4″> <font color=”#993366″>Productions</font>,
Inc.</font></strong> </font>
1. From the ToolBox, drag-and-drop a Panel control underneath the logo text.
2. Click the A/Z button in the Properties dialog so that all the properties are sorted alphabetically.
1. Change the height property of the Panel to 250px and the width to 300px. To do this, select the Panel, then
go to the Properties pane (usually in the lower right corner of the Visual Studio.NET Design view; if you
don’t see it, click View Properties Window OR press the F4 key). Scroll down the list, then type the value in
for each property.
2. Change the panel’s HorizontalAlign property to left.
3. Save your work!
4. From the ToolBox, drag-and-drop five Labels and five TextBoxes onto the Panel. To make each
Label/TextBox pair appear on a separate line, put the cursor after each TextBox then press the [ENTER] key
(much like you would with a word processing program).
5. From the ToolBox, drag-and-drop two buttons onto the Panel below the last Label and TextBox.
6. Save your work!
Click on image to enlarge.
Unfinished Personnel Form
1. Click here for text description of this image.
2.
3. Test your web page. Press F5, or click the Start Debugging (Citrix users, press “Start Without Debugging”)
button on the toolbar, or pull down the Debug menu and select Start Debugging.
NOTE: To execute the application, you have these options:
1. If you are using Citrix, press CTRL + F5 to Start Without Debugging. You will not be deducted points for this
part.
2. If you are using a standalone version, press F5 to Start with Debugging, or you can press CTRL + F5 to
Start Without Debugging
Rename the Label’s properties as defined below. You can do this by selecting each Label, scrolling to the
property, and then typing in the value.
Property Value
Label1 – Text First Name:
Label2 – Text Last Name:](data:image/gif;base64,R0lGODlhAQABAIAAAAAAAP///yH5BAEAAAAALAAAAAABAAEAAAIBRAA7)