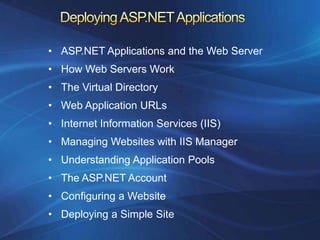
• ASP.NET Applications and the Web Server
• How Web Servers Work
• The Virtual Directory
• Web Application URLs
• Internet Information Services (IIS)
• Managing Websites with IIS Manager
• Understanding Application Pools
• The ASP.NET Account
• Configuring a Website
• Deploying a Simple Site
•   A specialized piece of software that accepts requests
    over Hypertext Transport Protocol (HTTP) and
    serves content.

•   When you’re running your web application in Visual
    Studio, you use the test web server that’s built in.

•   When you deploy your website to a broader
    audience, you need a real web server, such as IIS.

•   Web servers run special software to support mail
    exchange, FTP and HTTP access, and everything
•   else clients need in order to access web content.
•   The easiest job a web server has is to provide
    ordinary HTML pages. When you request such a file,
    the web server simply reads it off the hard drive (or
    retrieves it from an in-memory cache) and sends the
    complete document to the browser.

•   When you request the ASP.NET page, the web
    server sends the request over to the ASP.NET
    engine. The ASP.NET engine loads the requested
    page, runs the code it contains, and then creates the
    final HTML document, which it passes back to IIS.
    IIS then sends the HTML document to the client.
When you deploy your web application to a web server,
it’s exposed through something called a virtual directory.

A virtual directory is simply the public face of your website
directory.

For example, your website might exist in a directory on the
server named c:MySite. To allow remote users to access
this website through their browsers, you could expose it
as a virtual directory say MySite.

When the user requests a page in a virtual directory (say,
http://WebServer/MySite/Checkout.aspx), the web server
looks for the corresponding file in the corresponding
physical directory (c:MySiteCheckout.aspx).
You can use ASP.NET applications in a variety of different
environments, including local area networks (LANs) and
over the Internet.

On an IP network, each computer is given a unique number
called an IP address. IP addresses aren’t easy to
remember web servers on the Internet usually register
unique domain names such as www.microsoft.com.

Within an internal network computers can access your
website using either the IP address of your machine the
network computer name.
http://localhost/MyWebApp

http://MyWebServer/MyWebApp

http://www.MyDomain.com/MyWebApp

http://www.MyDomain.com/MyWebApp

http://localhost:2040/MyWebApp/Default.aspx
Instead of placing web application files on a single web
server, you place a copy on several separate web
servers.

 When a request is received for your website, it’s directed
to one of these web servers (based on which one has the
lightest load).

if you decide to update your application, you need to
make sure you update each web server in the web farm
with the same version to prevent discrepancies.
IIS exists in several different versions. The version of IIS
you use depends on the operating system you’re using:

•   Windows Server 2003 uses IIS 6, which isn’t covered in
    this book.
•   Windows Vista and Windows Server 2008 use IIS 7.
•   Windows 7 and Windows Server 2008 R2 use IIS 7.5

Windows Vista and Windows 7, are fine for development
testing, but they implement a connection limit to 10 users.
When IIS is installed, it automatically creates a directory
named c:inetpubwwwroot. Any files in this directory will
appear as though they’re in the root of your web server.

If you add the file TestFile.html to this directory, you can
request it in a browser through the URL

http://localhost/TestFile.html.

You can even create subdirectories

c:inetpubwwwroot MySiteMyFile.html
can be accessed as :

http://localhost/MySite/MyFile.html.
The easiest and most flexible way to create a virtual
directory is to use the IIS Manager utility

1. To create a new virtual directory for an existing
   physical directory, expand the node for the current
   computer, and expand the Sites node underneath.
2. Right-click the Default Web Site item, and choose
   Add Application.
3. Supply the alias. For example, if your alias is MyApp
   and your computer is MyServer, you can request
   pages using URLs such as
   http://MyServer/MyApp/MyPage.aspx.
4. Next, you need to choose the physical path
5. Next, you need to specify the application pool.
The web application pool sets a small group of low-level
settings that apply only to ASP.NET applications,

Such as the maximum number of requests to put on hold
before sending a “Service Unavailable” response to new
clients (by default, it’s 1000) etc.

Application pools include two settings that are uniquely
important and may require your customization:

•   The version of ASP.NET that IIS runs to process the
    requests in your website
•   The Windows account that IIS uses to run your website
When the web server runs your web application, it performs
all its work under a specific Windows user account that has a
carefully limited set of privileges. The actual account that’s
used depends on the web server you’re using:

• If you’re using the integrated test server in Visual Studio,
  the server runs under your account.
• If you’re using IIS 7, it’s the network service account. This
  is a special account that Windows creates when you first
  install it.
• If you’re using IIS 7.5, it’s an account that’s based on the
  application pool. For example, an application pool named
  ASP.NET v4.0 will use an account named IIS
  AppPoolASP.NET v4.0, which IIS generates automatically.
The website configuration settings are split into three
broad groups, which are arranged alphabetically:
ASP.NET, IIS, and Management.
IIS supports several different protocols that it can use
when authenticating a user with Windows authentication
Before you can use any type of Windows authentication, you need to install the
appropriate support for IIS. To add support, open the Control Panel, choose
Programs and Features, and then click the link “Turn Windows features on or
off.” Head to the Internet Information Services ➤ World Wide Web Services ➤
Security group
Once you have the authentication features you need installed, you simply need
to select your website in IIS manager and double-click the Authentication icon (in
the IIS group). Now you’ll see whatever authentication options you’ve installed.
All you need to do is follow these two simple steps:

1. Create the virtual directory on the web server.
2. Copy the entire site (including subdirectories) to
the virtual directory.

This is often called zero-touch deployment,
because you don’t need to manually configure web
server resources However, some applications are
more difficult to set up on a web server.
Here are some common factors that will require additional
configuration steps:
Databases: If your web application uses a database, you’ll need
to transfer the database to the web server. You can do this by
generating a SQL script that will automatically create the
database and load it with data.
Windows account permissions: Usually, a web server will run web
page code under a restricted account. This account might not be
allowed to perform the tasks you rely on, such as writing to files or
the Windows event log, or connecting to a database. In this case,
an administrator needs to specifically grant the permissions you
need to the account that runs the ASP.NET engine for your
website.
IIS security settings: If your website uses SSL encryption or
Windows authentication the virtual directory settings will need to
be tweaked. This also requires the help of
an administrator.
A command-line tool named aspnet_compiler.exe,
which is stored in the familiar directory.

c:WindowsMicrosoft.NETFramework64[Version]

You use this compiler on your development
machine before you deploy the application.

aspnet_compiler -m metabasePath targetDirectory
Visual Studio includes features that integrate with IIS
and allow you to create virtual directories without
leaving the comfort of your design-time environment.
Visual Studio has several deployment-related features:

• You can use the Copy Web Site feature to transfer
  an existing website to a virtual directory.
• You can use the Publish Web Site feature to compile
  your website and transfer it to another location.
Select Website ➤ Copy Web Site from the menu
Select Build ➤ Publish Web Site from the menu

Chapter 26

  • 1.
    • ASP.NET Applicationsand the Web Server • How Web Servers Work • The Virtual Directory • Web Application URLs • Internet Information Services (IIS) • Managing Websites with IIS Manager • Understanding Application Pools • The ASP.NET Account • Configuring a Website • Deploying a Simple Site
  • 2.
    A specialized piece of software that accepts requests over Hypertext Transport Protocol (HTTP) and serves content. • When you’re running your web application in Visual Studio, you use the test web server that’s built in. • When you deploy your website to a broader audience, you need a real web server, such as IIS. • Web servers run special software to support mail exchange, FTP and HTTP access, and everything • else clients need in order to access web content.
  • 3.
    The easiest job a web server has is to provide ordinary HTML pages. When you request such a file, the web server simply reads it off the hard drive (or retrieves it from an in-memory cache) and sends the complete document to the browser. • When you request the ASP.NET page, the web server sends the request over to the ASP.NET engine. The ASP.NET engine loads the requested page, runs the code it contains, and then creates the final HTML document, which it passes back to IIS. IIS then sends the HTML document to the client.
  • 4.
    When you deployyour web application to a web server, it’s exposed through something called a virtual directory. A virtual directory is simply the public face of your website directory. For example, your website might exist in a directory on the server named c:MySite. To allow remote users to access this website through their browsers, you could expose it as a virtual directory say MySite. When the user requests a page in a virtual directory (say, http://WebServer/MySite/Checkout.aspx), the web server looks for the corresponding file in the corresponding physical directory (c:MySiteCheckout.aspx).
  • 5.
    You can useASP.NET applications in a variety of different environments, including local area networks (LANs) and over the Internet. On an IP network, each computer is given a unique number called an IP address. IP addresses aren’t easy to remember web servers on the Internet usually register unique domain names such as www.microsoft.com. Within an internal network computers can access your website using either the IP address of your machine the network computer name.
  • 6.
  • 7.
    Instead of placingweb application files on a single web server, you place a copy on several separate web servers. When a request is received for your website, it’s directed to one of these web servers (based on which one has the lightest load). if you decide to update your application, you need to make sure you update each web server in the web farm with the same version to prevent discrepancies.
  • 8.
    IIS exists inseveral different versions. The version of IIS you use depends on the operating system you’re using: • Windows Server 2003 uses IIS 6, which isn’t covered in this book. • Windows Vista and Windows Server 2008 use IIS 7. • Windows 7 and Windows Server 2008 R2 use IIS 7.5 Windows Vista and Windows 7, are fine for development testing, but they implement a connection limit to 10 users.
  • 9.
    When IIS isinstalled, it automatically creates a directory named c:inetpubwwwroot. Any files in this directory will appear as though they’re in the root of your web server. If you add the file TestFile.html to this directory, you can request it in a browser through the URL http://localhost/TestFile.html. You can even create subdirectories c:inetpubwwwroot MySiteMyFile.html can be accessed as : http://localhost/MySite/MyFile.html.
  • 10.
    The easiest andmost flexible way to create a virtual directory is to use the IIS Manager utility 1. To create a new virtual directory for an existing physical directory, expand the node for the current computer, and expand the Sites node underneath. 2. Right-click the Default Web Site item, and choose Add Application. 3. Supply the alias. For example, if your alias is MyApp and your computer is MyServer, you can request pages using URLs such as http://MyServer/MyApp/MyPage.aspx. 4. Next, you need to choose the physical path 5. Next, you need to specify the application pool.
  • 11.
    The web applicationpool sets a small group of low-level settings that apply only to ASP.NET applications, Such as the maximum number of requests to put on hold before sending a “Service Unavailable” response to new clients (by default, it’s 1000) etc. Application pools include two settings that are uniquely important and may require your customization: • The version of ASP.NET that IIS runs to process the requests in your website • The Windows account that IIS uses to run your website
  • 12.
    When the webserver runs your web application, it performs all its work under a specific Windows user account that has a carefully limited set of privileges. The actual account that’s used depends on the web server you’re using: • If you’re using the integrated test server in Visual Studio, the server runs under your account. • If you’re using IIS 7, it’s the network service account. This is a special account that Windows creates when you first install it. • If you’re using IIS 7.5, it’s an account that’s based on the application pool. For example, an application pool named ASP.NET v4.0 will use an account named IIS AppPoolASP.NET v4.0, which IIS generates automatically.
  • 13.
    The website configurationsettings are split into three broad groups, which are arranged alphabetically: ASP.NET, IIS, and Management.
  • 14.
    IIS supports severaldifferent protocols that it can use when authenticating a user with Windows authentication
  • 15.
    Before you canuse any type of Windows authentication, you need to install the appropriate support for IIS. To add support, open the Control Panel, choose Programs and Features, and then click the link “Turn Windows features on or off.” Head to the Internet Information Services ➤ World Wide Web Services ➤ Security group
  • 16.
    Once you havethe authentication features you need installed, you simply need to select your website in IIS manager and double-click the Authentication icon (in the IIS group). Now you’ll see whatever authentication options you’ve installed.
  • 17.
    All you needto do is follow these two simple steps: 1. Create the virtual directory on the web server. 2. Copy the entire site (including subdirectories) to the virtual directory. This is often called zero-touch deployment, because you don’t need to manually configure web server resources However, some applications are more difficult to set up on a web server.
  • 18.
    Here are somecommon factors that will require additional configuration steps: Databases: If your web application uses a database, you’ll need to transfer the database to the web server. You can do this by generating a SQL script that will automatically create the database and load it with data. Windows account permissions: Usually, a web server will run web page code under a restricted account. This account might not be allowed to perform the tasks you rely on, such as writing to files or the Windows event log, or connecting to a database. In this case, an administrator needs to specifically grant the permissions you need to the account that runs the ASP.NET engine for your website. IIS security settings: If your website uses SSL encryption or Windows authentication the virtual directory settings will need to be tweaked. This also requires the help of an administrator.
  • 19.
    A command-line toolnamed aspnet_compiler.exe, which is stored in the familiar directory. c:WindowsMicrosoft.NETFramework64[Version] You use this compiler on your development machine before you deploy the application. aspnet_compiler -m metabasePath targetDirectory
  • 20.
    Visual Studio includesfeatures that integrate with IIS and allow you to create virtual directories without leaving the comfort of your design-time environment. Visual Studio has several deployment-related features: • You can use the Copy Web Site feature to transfer an existing website to a virtual directory. • You can use the Publish Web Site feature to compile your website and transfer it to another location.
  • 21.
    Select Website ➤Copy Web Site from the menu
  • 22.
    Select Build ➤Publish Web Site from the menu