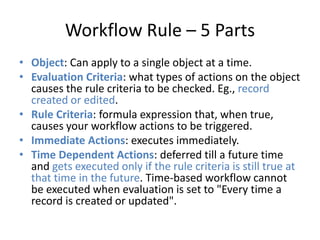
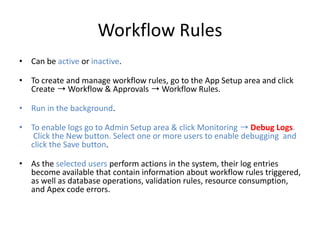
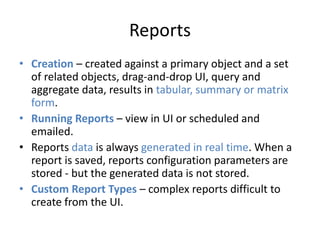
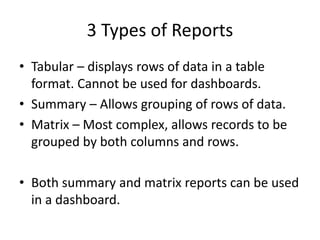
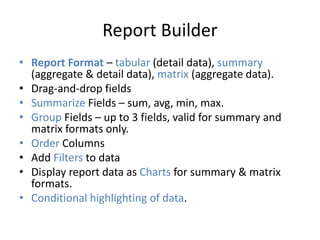
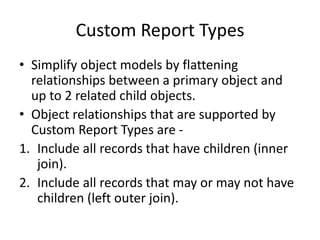
Force.com Other Platform 
Features 
Sujit Kumar 
Zenolocity LLC © 2012 - 2024
Overview 
• Workflow and Approvals 
• Analytics 
• Internationalization and Localization 
• Single Sign-On
Workflow Rule – 5 Parts 
• Object: Can apply to a single object at a time. 
• Evaluation Criteria: what types of actions on the object 
causes the rule criteria to be checked. Eg., record 
created or edited. 
• Rule Criteria: formula expression that, when true, 
causes your workflow actions to be triggered. 
• Immediate Actions: executes immediately. 
• Time Dependent Actions: deferred till a future time 
and gets executed only if the rule criteria is still true at 
that time in the future. Time-based workflow cannot 
be executed when evaluation is set to "Every time a 
record is created or updated".
Possible Actions for Workflows and 
Approvals 
• Create a new task. 
• Update a field. 
• Send an email notification. 
• Send a new outbound message. 
• Use an existing action. 
• Locking a record.
Workflow Rules 
• Can be active or inactive. 
• To create and manage workflow rules, go to the App Setup area and click 
Create ➝Workflow & Approvals ➝ Workflow Rules. 
• Run in the background. 
• To enable logs go to Admin Setup area & click Monitoring ➝ Debug Logs. 
Click the New button. Select one or more users to enable debugging and 
click the Save button. 
• As the selected users perform actions in the system, their log entries 
become available that contain information about workflow rules triggered, 
as well as database operations, validation rules, resource consumption, 
and Apex code errors.
Approval Processes 
• Special workflow template, defined on a specific 
object. 
• Define 4 states that a record can exist in - Submitted, 
Approved, Rejected, Recalled. 
• Workflow actions execute when a record transitions to 
a new state. 
• Rules are used to route the record to users relevant to 
each state. 
• Approved state has a more specific state called final 
when all relevant parties have approved it. 
• Available in Enterprise, Unlimited and Developer 
Editions.
Approval Process 
• Specifies the steps necessary for a record to be 
approved and who must approve it at each step. 
• A step can apply to all records included in the process, 
or just records that have certain attributes. 
• An approval process also specifies the actions to take 
when a record is approved, rejected, recalled, or first 
submitted for approval. 
• The 2 wizards for building an approval process are the 
Standard Setup Wizard and the Jump Start Wizard. 
• Can be either single or multi-select process.
Approval Process Configuration 
• Active: Like workflow rules, approval processes must 
be in an active state before records can be submitted 
to them. 
• Entry Criteria: The entry criteria define what records 
can be submitted to this approval process. When a user 
attempts to submit a record that does not meet the 
entry criteria, an error message is displayed. 
• Initial Submitters: This field indicates who is allowed to 
submit a record for approval. Submitters can be 
dynamic based on the record itself; for example, the 
creator or owner. They can also be static lists of groups, 
roles, and users.
Parallel Approval Process 
• Allows specifying (up to 25) multiple 
approvers simultaneously. 
• Two options to approve: 
• Approve or reject based on the first response. 
• Require unanimous approval from all selected 
approvers. The approval request is rejected if 
any of the approvers reject the request.
Retrieve Approval Process Information 
• ProcessInstances: information about approval 
processes active on records. 
• ProcessSteps: audit trail of approval activities 
on records. 
SELECT Week_Ending__c, Total_Hours__c, 
(SELECT Status FROM ProcessInstances), 
(SELECT IsPending, StepStatus FROM 
ProcessSteps) 
FROM Timecard__c
Multi-Step Approval Process 
• Each step can approve, reject or skip to the 
next step depending on filter criteria or 
formula. 
• Perform all rejection actions (rejection action 
for this step and final rejection actions) or 
perform the rejection actions only for a 
particular step. 
• When the final step approves, all final 
approval actions are performed.
Dynamic Approvals 
• Used to route approval requests to users 
based on values in lookup fields of the record 
requiring approval. 
• Approver names are defined dynamically in 
the record that needs to be routed for 
approval. 
• Use Apex code to dynamically route approval 
requests to different users within your org.
Approval Processes using Apex Code 
• Records can be submitted for approval processing 
and accept, reject, and recall records from Apex 
code and the Web Services API. 
• Example of submitting a record from Apex: 
Approval.ProcessSubmitRequest req = 
new Approval.ProcessSubmitRequest(); 
req.setObjectId('a048000000BO4W3'); 
Approval.ProcessResult result = Approval.process(req); 
System.debug(result.success);
Analytics 
• Determine early in the development process which 
reports are needed so that the right object model can 
be designed to support both the transactional and the 
analytical requirements of the application. 
• Reports – detail or aggregate-level views 
• Dashboards - Pages consisting of components that 
consume data from reports and display it graphically in 
a uniformly small visual footprint. Provide a window 
into various types of data across a business. 
• Snapshots - copy the output of a source report into a 
custom object on a fixed time schedule. Show trends.
Reports 
• Creation – created against a primary object and a set 
of related objects, drag-and-drop UI, query and 
aggregate data, results in tabular, summary or matrix 
form. 
• Running Reports – view in UI or scheduled and 
emailed. 
• Reports data is always generated in real time. When a 
report is saved, reports configuration parameters are 
stored - but the generated data is not stored. 
• Custom Report Types – complex reports difficult to 
create from the UI.
3 Types of Reports 
• Tabular – displays rows of data in a table 
format. Cannot be used for dashboards. 
• Summary – Allows grouping of rows of data. 
• Matrix – Most complex, allows records to be 
grouped by both columns and rows. 
• Both summary and matrix reports can be used 
in a dashboard.
Report Builder 
• Report Format – tabular (detail data), summary 
(aggregate & detail data), matrix (aggregate data). 
• Drag-and-drop fields 
• Summarize Fields – sum, avg, min, max. 
• Group Fields – up to 3 fields, valid for summary and 
matrix formats only. 
• Order Columns 
• Add Filters to data 
• Display report data as Charts for summary & matrix 
formats. 
• Conditional highlighting of data.
Custom Report Types 
• Simplify object models by flattening 
relationships between a primary object and 
up to 2 related child objects. 
• Object relationships that are supported by 
Custom Report Types are - 
1. Include all records that have children (inner 
join). 
2. Include all records that may or may not have 
children (left outer join).
Custom Report Type 
• Let the developers define which all fields should 
be available in a report. 
• Allow user to change field names. 
• Allow developers to select related fields (up to 
four levels). 
• Allow developers to add sections to group fields. 
• Once a custom report is created it is available in 
reports tab and user may create reports from it.
Dashboards 
• Are graphical representation of reports. 
• Can be generated for summary or matrix 
reports (and not for tabular reports). 
• Display data as per last time report was run. 
• A dashboard can have up to 20 components. 
• Support automatic refresh and email. The 
refresh and email can also be scheduled at 
intervals - daily, weekly, monthly.
4 Types of Dashboards 
• Chart - used for comparisons. 
• Table - good for showing top five or bottom 
five lists. 
• Gauge - used to show progress towards a goal. 
• Metric - shows a single number. 
• Visualforce page - used to pull data from other 
sources.
6 Types of Charts 
• Vertical column 
• Horizontal bar 
• Line 
• Donut – show proportion of single value against 
total and also show the total value. 
• Funnel - proportion of values against each other. 
• Pie - demonstrate proportion of single value 
against total.
Access to Reports & Dashboards 
• Reports and Dashboards are stored in folders. 
• Folders – determine who can access the reports and 
dashboards. 
• Running User – determines what data is displayed by 
the report or dashboard. 
• Running User can be a specific user (static dashboard) 
or the logged-in user (dynamic dashboard). 
• Reports present in public folders can be emailed to 
Salesforce users. 
• Reports display up to 2000 rows of data. Larger reports 
can be emailed to Excel.
Internationalization 
• Multilingual – can be translated into 16 
languages in 2 ways: Translation Workbench (not 
enabled by default) and Custom Labels 
(externalize strings). 
• Multiple Currencies – default is single global 
currency per organization. Supports multiple 
currencies at the record level. 
• Advanced Currency Management (ACM) – 
optional feature that needs to be enabled. 
Supports currency exchange rates that vary with 
time.
ACM 
• With ACM disabled, currency conversion rates 
are not sensitive to time. 
• Can be used only for standard fields on the 
Opportunity object. 
• To use dated currency rates on custom 
objects, run SOQL on the 
DatedConversionRate standard object
Single Sign-On 
• Federated Single Sign-On: a digitally signed 
assertion message is posted from a Web page 
into Force.com’s login servers. If the assertion is 
valid, the user is logged in to Force.com. 
• Delegated Single Sign-On: Delegated SSO uses a 
custom Web service you implement to decide 
whether a user should be permitted access to 
Force.com allowing you to integrate Force.com 
with any back-end identity provider.
Federated Single Sign-On 
• Assertions are messages encoded in XML, digitally 
signed, and posted to Force.com from the Web 
browser. These messages, when verified, instruct 
Force.com to create an authenticated session for a user 
on behalf of your corporate systems. 
• Force.com supports Security Assertion Markup 
Language (SAML) 1.1 and 2.0. 
• A sys admin configures Force.com to receive SAML 
assertions by specifying a digital certificate to verify the 
signed messages and the location and format of the 
user’s identity in the assertions. 
• Not supported for the web services API.
Configure Federate Single Sign-On 
• Issuer: The issuer value must map to the issuer element in the SAML assertion. 
• SAML User ID Type: This value specifies how Force.com is to interpret the user 
value provided in the assertion. It is either a Force.com username or a federation 
identifier, which is an optional field on the user object. 
• SAML User ID Location: This setting instructs Force.com on where to find the user 
in the assertion. It is in either a Name Identifier element or an Attribute element. 
• Salesforce Login URL: This is a value generated by Force.com. Post your SAML 
assertions to this URL. 
• Identity Provider Certificate: Your system, the one generating the assertion, is the 
identity provider. The assertion must be digitally signed. This certificate is the 
public half of the credential’s key pair, used by Force.com to verify that your 
system indeed signed the assertion. This field displays information about the 
certificate you’ve uploaded.
Testing Federated Single Sign-On 
• After federated SSO is configured, generate SAML 
assertions and test them using the SAML Assertion 
Validator. 
• On the Single Sign-On Settings page, click the SAML 
Assertion Validator button. Paste a plain XML or 
Base64-encoded assertion into the text area labeled 
SAML Response and click the Validate button. 
• When the assertion is validated with no errors, you 
know it can be used to actually log a user in to 
Force.com when Base64-encoded and posted to the 
Salesforce Login URL.
Delegated Single Sign-On 
• Force.com provides the username, password, 
and source IP address of the user attempting 
to log in. An authenticating web service 
returns true or false, indicating whether the 
user should be allowed to enter Force.com. 
• By default, delegated SSO is not enabled in 
your Force.com organization. To enable it, 
contact Salesforce support by logging a case.

SFDC Other Platform Features

  • 1.
    Force.com Other Platform Features Sujit Kumar Zenolocity LLC © 2012 - 2024
  • 2.
    Overview • Workflowand Approvals • Analytics • Internationalization and Localization • Single Sign-On
  • 3.
    Workflow Rule –5 Parts • Object: Can apply to a single object at a time. • Evaluation Criteria: what types of actions on the object causes the rule criteria to be checked. Eg., record created or edited. • Rule Criteria: formula expression that, when true, causes your workflow actions to be triggered. • Immediate Actions: executes immediately. • Time Dependent Actions: deferred till a future time and gets executed only if the rule criteria is still true at that time in the future. Time-based workflow cannot be executed when evaluation is set to "Every time a record is created or updated".
  • 4.
    Possible Actions forWorkflows and Approvals • Create a new task. • Update a field. • Send an email notification. • Send a new outbound message. • Use an existing action. • Locking a record.
  • 5.
    Workflow Rules •Can be active or inactive. • To create and manage workflow rules, go to the App Setup area and click Create ➝Workflow & Approvals ➝ Workflow Rules. • Run in the background. • To enable logs go to Admin Setup area & click Monitoring ➝ Debug Logs. Click the New button. Select one or more users to enable debugging and click the Save button. • As the selected users perform actions in the system, their log entries become available that contain information about workflow rules triggered, as well as database operations, validation rules, resource consumption, and Apex code errors.
  • 6.
    Approval Processes •Special workflow template, defined on a specific object. • Define 4 states that a record can exist in - Submitted, Approved, Rejected, Recalled. • Workflow actions execute when a record transitions to a new state. • Rules are used to route the record to users relevant to each state. • Approved state has a more specific state called final when all relevant parties have approved it. • Available in Enterprise, Unlimited and Developer Editions.
  • 7.
    Approval Process •Specifies the steps necessary for a record to be approved and who must approve it at each step. • A step can apply to all records included in the process, or just records that have certain attributes. • An approval process also specifies the actions to take when a record is approved, rejected, recalled, or first submitted for approval. • The 2 wizards for building an approval process are the Standard Setup Wizard and the Jump Start Wizard. • Can be either single or multi-select process.
  • 8.
    Approval Process Configuration • Active: Like workflow rules, approval processes must be in an active state before records can be submitted to them. • Entry Criteria: The entry criteria define what records can be submitted to this approval process. When a user attempts to submit a record that does not meet the entry criteria, an error message is displayed. • Initial Submitters: This field indicates who is allowed to submit a record for approval. Submitters can be dynamic based on the record itself; for example, the creator or owner. They can also be static lists of groups, roles, and users.
  • 9.
    Parallel Approval Process • Allows specifying (up to 25) multiple approvers simultaneously. • Two options to approve: • Approve or reject based on the first response. • Require unanimous approval from all selected approvers. The approval request is rejected if any of the approvers reject the request.
  • 10.
    Retrieve Approval ProcessInformation • ProcessInstances: information about approval processes active on records. • ProcessSteps: audit trail of approval activities on records. SELECT Week_Ending__c, Total_Hours__c, (SELECT Status FROM ProcessInstances), (SELECT IsPending, StepStatus FROM ProcessSteps) FROM Timecard__c
  • 11.
    Multi-Step Approval Process • Each step can approve, reject or skip to the next step depending on filter criteria or formula. • Perform all rejection actions (rejection action for this step and final rejection actions) or perform the rejection actions only for a particular step. • When the final step approves, all final approval actions are performed.
  • 12.
    Dynamic Approvals •Used to route approval requests to users based on values in lookup fields of the record requiring approval. • Approver names are defined dynamically in the record that needs to be routed for approval. • Use Apex code to dynamically route approval requests to different users within your org.
  • 13.
    Approval Processes usingApex Code • Records can be submitted for approval processing and accept, reject, and recall records from Apex code and the Web Services API. • Example of submitting a record from Apex: Approval.ProcessSubmitRequest req = new Approval.ProcessSubmitRequest(); req.setObjectId('a048000000BO4W3'); Approval.ProcessResult result = Approval.process(req); System.debug(result.success);
  • 14.
    Analytics • Determineearly in the development process which reports are needed so that the right object model can be designed to support both the transactional and the analytical requirements of the application. • Reports – detail or aggregate-level views • Dashboards - Pages consisting of components that consume data from reports and display it graphically in a uniformly small visual footprint. Provide a window into various types of data across a business. • Snapshots - copy the output of a source report into a custom object on a fixed time schedule. Show trends.
  • 15.
    Reports • Creation– created against a primary object and a set of related objects, drag-and-drop UI, query and aggregate data, results in tabular, summary or matrix form. • Running Reports – view in UI or scheduled and emailed. • Reports data is always generated in real time. When a report is saved, reports configuration parameters are stored - but the generated data is not stored. • Custom Report Types – complex reports difficult to create from the UI.
  • 16.
    3 Types ofReports • Tabular – displays rows of data in a table format. Cannot be used for dashboards. • Summary – Allows grouping of rows of data. • Matrix – Most complex, allows records to be grouped by both columns and rows. • Both summary and matrix reports can be used in a dashboard.
  • 17.
    Report Builder •Report Format – tabular (detail data), summary (aggregate & detail data), matrix (aggregate data). • Drag-and-drop fields • Summarize Fields – sum, avg, min, max. • Group Fields – up to 3 fields, valid for summary and matrix formats only. • Order Columns • Add Filters to data • Display report data as Charts for summary & matrix formats. • Conditional highlighting of data.
  • 18.
    Custom Report Types • Simplify object models by flattening relationships between a primary object and up to 2 related child objects. • Object relationships that are supported by Custom Report Types are - 1. Include all records that have children (inner join). 2. Include all records that may or may not have children (left outer join).
  • 19.
    Custom Report Type • Let the developers define which all fields should be available in a report. • Allow user to change field names. • Allow developers to select related fields (up to four levels). • Allow developers to add sections to group fields. • Once a custom report is created it is available in reports tab and user may create reports from it.
  • 20.
    Dashboards • Aregraphical representation of reports. • Can be generated for summary or matrix reports (and not for tabular reports). • Display data as per last time report was run. • A dashboard can have up to 20 components. • Support automatic refresh and email. The refresh and email can also be scheduled at intervals - daily, weekly, monthly.
  • 21.
    4 Types ofDashboards • Chart - used for comparisons. • Table - good for showing top five or bottom five lists. • Gauge - used to show progress towards a goal. • Metric - shows a single number. • Visualforce page - used to pull data from other sources.
  • 22.
    6 Types ofCharts • Vertical column • Horizontal bar • Line • Donut – show proportion of single value against total and also show the total value. • Funnel - proportion of values against each other. • Pie - demonstrate proportion of single value against total.
  • 23.
    Access to Reports& Dashboards • Reports and Dashboards are stored in folders. • Folders – determine who can access the reports and dashboards. • Running User – determines what data is displayed by the report or dashboard. • Running User can be a specific user (static dashboard) or the logged-in user (dynamic dashboard). • Reports present in public folders can be emailed to Salesforce users. • Reports display up to 2000 rows of data. Larger reports can be emailed to Excel.
  • 24.
    Internationalization • Multilingual– can be translated into 16 languages in 2 ways: Translation Workbench (not enabled by default) and Custom Labels (externalize strings). • Multiple Currencies – default is single global currency per organization. Supports multiple currencies at the record level. • Advanced Currency Management (ACM) – optional feature that needs to be enabled. Supports currency exchange rates that vary with time.
  • 25.
    ACM • WithACM disabled, currency conversion rates are not sensitive to time. • Can be used only for standard fields on the Opportunity object. • To use dated currency rates on custom objects, run SOQL on the DatedConversionRate standard object
  • 26.
    Single Sign-On •Federated Single Sign-On: a digitally signed assertion message is posted from a Web page into Force.com’s login servers. If the assertion is valid, the user is logged in to Force.com. • Delegated Single Sign-On: Delegated SSO uses a custom Web service you implement to decide whether a user should be permitted access to Force.com allowing you to integrate Force.com with any back-end identity provider.
  • 27.
    Federated Single Sign-On • Assertions are messages encoded in XML, digitally signed, and posted to Force.com from the Web browser. These messages, when verified, instruct Force.com to create an authenticated session for a user on behalf of your corporate systems. • Force.com supports Security Assertion Markup Language (SAML) 1.1 and 2.0. • A sys admin configures Force.com to receive SAML assertions by specifying a digital certificate to verify the signed messages and the location and format of the user’s identity in the assertions. • Not supported for the web services API.
  • 28.
    Configure Federate SingleSign-On • Issuer: The issuer value must map to the issuer element in the SAML assertion. • SAML User ID Type: This value specifies how Force.com is to interpret the user value provided in the assertion. It is either a Force.com username or a federation identifier, which is an optional field on the user object. • SAML User ID Location: This setting instructs Force.com on where to find the user in the assertion. It is in either a Name Identifier element or an Attribute element. • Salesforce Login URL: This is a value generated by Force.com. Post your SAML assertions to this URL. • Identity Provider Certificate: Your system, the one generating the assertion, is the identity provider. The assertion must be digitally signed. This certificate is the public half of the credential’s key pair, used by Force.com to verify that your system indeed signed the assertion. This field displays information about the certificate you’ve uploaded.
  • 29.
    Testing Federated SingleSign-On • After federated SSO is configured, generate SAML assertions and test them using the SAML Assertion Validator. • On the Single Sign-On Settings page, click the SAML Assertion Validator button. Paste a plain XML or Base64-encoded assertion into the text area labeled SAML Response and click the Validate button. • When the assertion is validated with no errors, you know it can be used to actually log a user in to Force.com when Base64-encoded and posted to the Salesforce Login URL.
  • 30.
    Delegated Single Sign-On • Force.com provides the username, password, and source IP address of the user attempting to log in. An authenticating web service returns true or false, indicating whether the user should be allowed to enter Force.com. • By default, delegated SSO is not enabled in your Force.com organization. To enable it, contact Salesforce support by logging a case.