
Recommended
More Related Content
What's hot
What's hot (20)
Similar to Bolderstone brochure
Similar to Bolderstone brochure (20)
More from kristenjames
More from kristenjames (20)
Recently uploaded
Recently uploaded (20)
Bolderstone brochure
- 2. Details & Dimensions: Split face 225 unit Bolstered 225 unit Blocks Cornerstones Capping Units 440mm capping unit 200mm capping unit No/ M2: Weight/ unit:Code: Units/ pallet:Product: Description: 26.5 26 16.0 5.3 3500 3600 5440 5103 11.35 11.35 2.3/lin m 5/lin m 60 60 84 270 Nominal Dimensions 200 x 440 x 225 200 x 440 x 225 Left hand split cornerstone Right hand split cornerstone Universal Bolstered cornerstone 21.5 21.5 19.5 3381 3382 3360 32 32 64 200 x 380 x 160 200 x 380 x 160 200 x 380 x 140 65 x 440 x 320 65 x 200 x 230
- 3. Drawing not to Scale Drainage layer 300mm in depth constructed of 20mm angular clear stone (not scoria) Geotextile Cloth encapsulating the drainage layer Footing of c (FCR Class 2) at a depth of 600mm ompacted crushed rock Footing height of 150mm compacted Footing toe depth 200mm 90-100mm A.G. Pipe at a 1:100 grade to a legal discharge point Backslope of retained soil must be 15 degrees or less Height of Retaining Wall Installation information Construction guidelines.... Typical walls up to 1.0m in height Wall Setback: Offset per course: Maximum wall height: 1:40 1:8 5mm 25mm Maximum wall heights.... Gravity wall 800mm 1000mm Note: This table is a guide, all retaining walls over one metre in height need to be designed by a qualified engineer. Check with your local council to see if there are any regulations relating to your proposed building works. Ensure that all relevant building codes are adhered to. Constructing the footing: Excavate a trench 200mm deep and 600mm in width. Fill with a well-graded crushed rock and compact with a mechanical vibrating plate to achieve footing at least 150mm thick. Ensure the footing is well compacted and level. Laying the base course: Use a string line when constructing a straight segment of wall. When building a curved segment of wall, use a piece of bent conduit to create the shape you desire, then mark the shape on the ground using spray paint. Placing a 10-20mm bedding layer of mortar on the crushed rock footing will make it easier to level the first course. Beginning at the lowest point, place units and tap into position using a rubber mallet. Make sure that every block is level from front to back and side to side using a spirit level. This will give the wall a professional look. Placing drainage material: Place a 90-100mm drainage pipe adjacent to the back of the first course and ensure it has the required fall to carry the water away to the desired drainage point. Fill the block cavities with crushed rock (FCR Class 2), wet the block in-fill and compact after completion of each course. Lay geotextile filter cloth to encapsulate the drainage zone. This prevents migration of retained earth into the drainage layer. Using 20mm angular clear stone, create a 300mm drainage layer behind the wall (not scoria). Installing remaining courses: Sweep excess crushed rock from the top of the first course of blocks. Insert the plastic keys into the square recesses on the top face of the blocks, orienting the keys as per figure 1 to achieve the desired setback. Place the next course of blocks, ensuring vertical joints are appropriately offset to the course below. Fill the block cavities in the same way as for the base course and continue creating the drainage layer behind the wall in 200mm lifts. Continue this process for all remaining courses. Finishing off the wall: When the last course has been installed, place capping units on the top course of blocks, affixing them in place with either masonry adhesive or mortar. The maximum wall heights listed below are for gravity walls with no reinforcement. Walls can be built up to several metres if fully engineered as a geo-grid reinforced wall or a canterlievered wall incorporating steel reinforcing and concrete core infill. An engineers design is usually required for walls over 1m in height, walls on a boundary or walls with a surcharge. General Notes: 1. Designed in accordance with AS4678-2002 & AS4678-2002 Amdt No 1 July 2003, for a Class A retaining walls. 2. Retaining wall height is measured vertically from the base of the bottom course to the level of retained infill soil. 3. Crushed rock footing must be embedded in undisturbed natural soil of 100kPa bearing capacity, and if clay, of cohesion >15kPa. 4. No excavation is to be made within a lateral distance in-front of the wall equal to its height. 5. Bottom course is to be embedded 100mm below final ground level Wall Setback: Depth of no-fines concrete: Maximum wall height: 1:8 1:8 1:8 300mm 350mm 500mm No-fines concrete backed wall 1200mm 1400mm 1600mm Walls 1000mm & under Walls over 1000mm (indicative) Geo-grid reinforced walls Contact us for further information on design and construction.
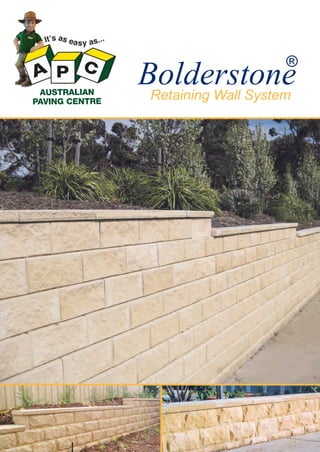
- 4. Due to the changes in raw material, variations in colour do occur. When ordering your product, order all elements of your project together to reduce the possibility of colour variation. We do not guarantee different batches will be an exact colour match. Efflorescence (a crystalline salt deposit) is a natural occurrence in masonry products. Efflorescence does not effect the structural integrity or strength of the product. Efflorescence will usually diminish and disappear in the course of time as the product is exposed to the elements. No responsibility will be accepted for the occurrence of efflorescence. When placing your order please confirm delivery zone pricing and minimum free delivery quantities applicable to your area. Maximum unloading time for deliveries is half an hour. Delivery of bolstered product may take up to two weeks, depending on the availability and quantity ordered. Claims must be reported within 48 hours of delivery. No claims will be accepted once product has been installed. Please contact the store where goods were purchased to report any concerns regarding product colour or quality. notes Colour Variation Efflorescence Delivery Claims Bolderstone® Convex curves The specially designed back “wings” are easily knocked-off (on site) to achieve a minimum radius of 1.5 metres. 1:4.5 Setback Course B (and D,F,H...) Course B (and D,F,H...) Steps are easily created using the standard units for step risers and the 440mm capping unit for step treads. Stair wells are often designed to be two capping units wide giving a 880mm width stair structure. Figure 1. -Offset Interlocking Keys: Curves: Concave curves are easily achieved by abutting the front faces of adjacent blocks and gapping the back face. 1:8 Setback1:40 Setback Corners: Course A (and C,E,G...) (Minimum radius 1.5m) Course A (and C,E,G...) Steps: ® Bolderstonetiered walls D H1 H2 £ D ³ 2H1 H1 H2 Bolderstone 440 Cap Bolderstone Unit Compacted Granular Fill Original Ground range Colour Ivory Autumn Gold Charlestone Bluestone NOTE: These colours are an indication only, please contact your nearest distributor to view sample colours. Desert Sand The orientation of the plastic key determines the setback of the wall. After reading the Bolderstone wall heights table and determining what set back is required, place the keys in the appropriate position as outlined above. To build an external corner follow these diagrams. Use cornerstones alternatively as you build your wall. Depending on the setback, one block per course may need to be cut to maintain bond. (Minimum radius 1.5m) External Corners: 1800 191 131