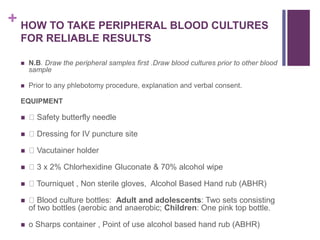
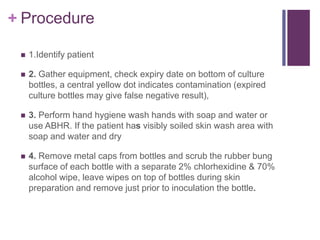
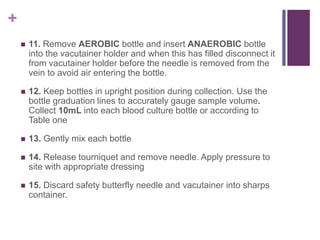
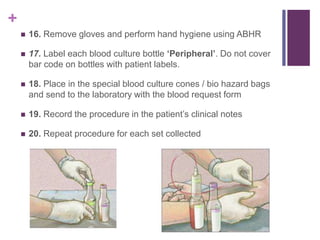
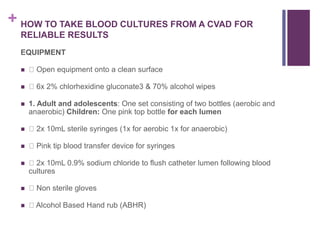
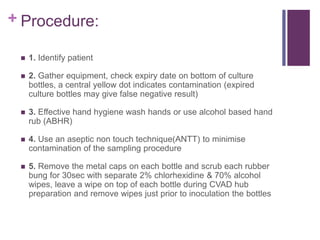
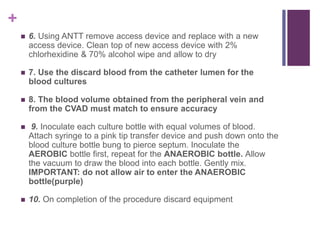
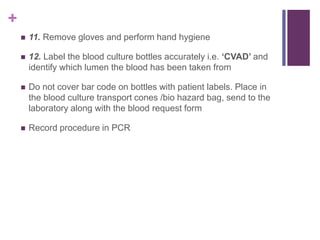
+
INDICATION AND
COLLECTION OF
BLOOD CULTURE
EFFIOM, VICTOR
House Officer.
+
INTRODUCTION
 Taking blood for culture is an important procedure as blood
cultures are used to detect the cause of an infection leading to
Septicemia bloodstream infection
 The results are important because they help guide appropriate
treatment. However microorganisms are present on the skin
surface of patients, staff and the immediate patient environment
which can result in contamination of blood cultures.
 Contamination can cause confusion and potentially,
inappropriate treatment because it is sometimes difficult to
determine if a positive blood culture is due to genuine
bacteraemia or if it is a false positive result caused by
contamination.
+  A false positive is defined as a growth of bacteria in the blood
culture bottle that were not present in the patient’s bloodstream
and were introduced during sample collection.
 Contamination can come from a number of sources: the
patient’s skin, the equipment used to take the sample and
transfer it to the culture bottle, the hands of the person taking
the blood sample or the general environment.
The aim is that blood cultures should be taken:
 1. Only when there is an appropriate indication.
 2. At the correct time.
 3. Using the correct technique in order to prevent
contamination of the sample and minimise risk to patients and
staff.
+
INDICATIONS:
 Blood cultures should only be taken when there is a clinical
reason to suspect a septicaemia. Blood cultures should not be
taken for routine assessment or for the investigation of a
localised infection.
+ CLINICAL SYMPTOMS
INDICATING SEPSIS ARE:
 Temperature of >38° or < 36° (normal range 36.5° – 37.5°)
 Tachycardia, sustained hypotension, tachypnoea
 Chills or rigors
 Raised or very low white blood cell count
 New signs of confusion or worsening signs of existing confusion
 Unexplained raised CRP in an immunosuppressed patient can
be associated with a septicemia even without a fever.
 ?Please note that the signs of sepsis may be minimal or absent
in the very young or elderly.
 Not all the symptoms listed above are indicative of sepsis for
example low grade fever within 24 hours of surgery is not specific
for septicaemia
+
 Conversely this list is not exclusive and blood cultures will be
required in some patients who do not have any of the above
symptoms.
 In the very young and in the elderly signs of infection may be
absent or minimal.
 Clinical judgement is required to decide when there is a
reasonable possibility that a patient has an infection where
blood cultures may be useful.
 The decision to take blood cultures should always be made by a
qualified doctor.
 Confirm MRSA status.
+
 Where signs of sepsis are present ‘PAIRED SAMPLES’ i.e.
two sets of cultures (4 bottles) from two different sites are
required for adults. Blood cultures should be taken before
administration of antibiotics.
 Blood cultures should be taken as soon as bacteraemia is
suspected and before the administration of antibiotic therapy. If a
patient is already receiving antibiotics then blood cultures should
usually be taken before the next dose is given.
 The taking of blood cultures should be documented in the
patient’s notes including the date, time, site taken from and the
specific indication(s).
 The person collecting blood cultures should give relevant clinical
information and state clearly on the request form accompanying
the specimen their name, position and time of specimen collection.
 Blood cultures should not be left for phlebotomists or health care
assistants to take
+
PATIENTS ON ANTIBIOTICS:
 Blood cultures should be taken when clinically indicated by
the patient's symptoms of a spike in temperature of
 >38° rigors, new onset confusion.
 Do not draw from a lumen that has had an
antibiotic/antimicrobial agent administered through it during the
previous hour.
 Advice should be sought from the Microbiologist who will
make the decision to stop antibiotics to allow for repeat blood
culturing.
 Current antimicrobial information should be indicated on the
lab request form
+
TIMING OF COLLECTING
SAMPLES:
 The peripheral vein sample should be collected first.
Sets taken from either CVAD, peripheral or both sites
should be obtained sequentially or within 12 hours of each
other
 The volumes of blood obtained from both sites must match to
ensure accuracy e.g. if only 10mL is obtained from the
peripheral vein, obtain 10mL from the CVAD
 When taking blood from both the CVAD and from a
peripheral vein, ensure that the site of each sample is clearly
labeled on the culture bottles and the request form.
+
Collecting peripheral blood
cultures:
 Blood cultures should be taken from a suitable, previously
unused venepuncture site.
 Blood cultures should not routinely be taken from existing
central catheters or peripheral venous cannulae where there is
no indication of sepsis
+
Collecting Central Venous Access
Device (CVAD) blood cultures:
 If the CVAD is the suspected source of sepsis then taking
blood cultures from the CVAD is appropriate.
 Blood cultures should be taken from a CVAD in combination
with a separate peripheral IV sample when investigating
potential central venous catheter-related septicemia. Samples
should be taken from one lumen and clearly labeled as to
which lumen the sample have been obtained from.
+
+
EXCEPTIONS:
Obtaining CVAD blood cultures as the single source
 When peripheral IV access is clinically impossible and the only
available source is the CVAD, a blood culture specimen may be
taken from the CVAD.
 The source of the blood culture and the reasons for using a
CVAD must be clearly documented on the blood request form
and in the patient's clinical notes
Obtaining Blood culture from Patients in ED
 Blood cultures are not routinely taken fro patients in ED who do
not require admission
 Where a patient is unwell enough to require admission
obtaining blood cultures may be indicated
+
Blood Cultures should NOT be taken
from the following sites
 From a peripheral IV cannula
 Veins which are immediately proximal to an existing
peripheral IV cannula.
 A femoral vein due to difficulty in skin disinfection of the site.
This area poses a high risk of contamination. If a femoral stab
is the only option this information must be clearly documented
on the 'site' section of the blood culture request form and
documented in the patient's clinical notes
+
+ HOW TO TAKE PERIPHERAL BLOOD CULTURES
FOR RELIABLE RESULTS
 N.B. Draw the peripheral samples first .Draw blood cultures prior to other blood
sample
 Prior to any phlebotomy procedure, explanation and verbal consent.
EQUIPMENT
 Safety butterfly needle
 Dressing for IV puncture site
 Vacutainer holder
 3 x 2% Chlorhexidine Gluconate & 70% alcohol wipe
 Tourniquet , Non sterile gloves, Alcohol Based Hand rub (ABHR)
 Blood culture bottles: Adult and adolescents: Two sets consisting
of two bottles (aerobic and anaerobic; Children: One pink top bottle.
 o Sharps container , Point of use alcohol based hand rub (ABHR)
+ Procedure
 1.Identify patient
 2. Gather equipment, check expiry date on bottom of culture
bottles, a central yellow dot indicates contamination (expired
culture bottles may give false negative result),
 3. Perform hand hygiene wash hands with soap and water or
use ABHR. If the patient has visibly soiled skin wash area with
soap and water and dry
 4. Remove metal caps from bottles and scrub the rubber bung
surface of each bottle with a separate 2% chlorhexidine & 70%
alcohol wipe, leave wipes on top of bottles during skin
preparation and remove just prior to inoculation the bottle.
+
 5. Apply tourniquet and palpate vein. Identify a suitable
venepuncture site first before disinfecting the skin. Release
tourniquet.
 6. Use a 2% chlorhexidine & 70% alcohol wipe, clean for 30
seconds and allow to air dry. IMPORTANT: skin drying is
essential to achieve adequate skin disinfection. Do not
palpate vein again after cleaning patient's skin.
 7. Prepare safety butterfly needle and vacutainer holder. Re-apply
tourniquet
 8. Perform hand hygiene before applying clean non sterile gloves.
 9. Insert butterfly needle into selected vein
 10. Place vacutainer over blood culture bottle and pierce septum.
IMPORTANT: Fill AEROBIC bottle first (blue top) to ensure all
air is removed from the butterfly and tubing.
+
 11. Remove AEROBIC bottle and insert ANAEROBIC bottle
into the vacutainer holder and when this has filled disconnect it
from vacutainer holder before the needle is removed from the
vein to avoid air entering the bottle.
 12. Keep bottles in upright position during collection. Use the
bottle graduation lines to accurately gauge sample volume.
Collect 10mL into each blood culture bottle or according to
Table one
 13. Gently mix each bottle
 14. Release tourniquet and remove needle. Apply pressure to
site with appropriate dressing
 15. Discard safety butterfly needle and vacutainer into sharps
container.
+
 16. Remove gloves and perform hand hygiene using ABHR
 17. Label each blood culture bottle ‘Peripheral’. Do not cover
bar code on bottles with patient labels.
 18. Place in the special blood culture cones / bio hazard bags
and send to the laboratory with the blood request form
 19. Record the procedure in the patient’s clinical notes
 20. Repeat procedure for each set collected
+
+ HOW TO TAKE BLOOD CULTURES FROM A CVAD FOR
RELIABLE RESULTS
EQUIPMENT
 Open equipment onto a clean surface
 6x 2% chlorhexidine gluconate3 & 70% alcohol wipes
 1. Adult and adolescents: One set consisting of two bottles (aerobic and
anaerobic) Children: One pink top bottle for each lumen
 2x 10mL sterile syringes (1x for aerobic 1x for anaerobic)
 Pink tip blood transfer device for syringes
 2x 10mL 0.9% sodium chloride to flush catheter lumen following blood
cultures
 Non sterile gloves
 Alcohol Based Hand rub (ABHR)
+
Equipment for taking blood Culture
from CVAD
+ Procedure:
 1. Identify patient
 2. Gather equipment, check expiry date on bottom of culture
bottles, a central yellow dot indicates contamination (expired
culture bottles may give false negative result)
 3. Effective hand hygiene wash hands or use alcohol based hand
rub (ABHR)
 4. Use an aseptic non touch technique(ANTT) to minimise
contamination of the sampling procedure
 5. Remove the metal caps on each bottle and scrub each rubber
bung for 30sec with separate 2% chlorhexidine & 70% alcohol
wipes, leave a wipe on top of each bottle during CVAD hub
preparation and remove wipes just prior to inoculation the bottles
+
 6. Using ANTT remove access device and replace with a new
access device. Clean top of new access device with 2%
chlorhexidine & 70% alcohol wipe and allow to dry
 7. Use the discard blood from the catheter lumen for the
blood cultures
 8. The blood volume obtained from the peripheral vein and
from the CVAD must match to ensure accuracy
 9. Inoculate each culture bottle with equal volumes of blood.
Attach syringe to a pink tip transfer device and push down onto the
blood culture bottle bung to pierce septum. Inoculate the
AEROBIC bottle first, repeat for the ANAEROBIC bottle. Allow
the vacuum to draw the blood into each bottle. Gently mix.
IMPORTANT: do not allow air to enter the ANAEROBIC
bottle(purple)
 10. On completion of the procedure discard equipment
+
 11. Remove gloves and perform hand hygiene
 12. Label the blood culture bottles accurately i.e. ‘CVAD’ and
identify which lumen the blood has been taken from
 Do not cover bar code on bottles with patient labels. Place in
the blood culture transport cones /bio hazard bag, send to the
laboratory along with the blood request form
 Record procedure in PCR

Blood culture

  • 1.
    + INDICATION AND COLLECTION OF BLOODCULTURE EFFIOM, VICTOR House Officer.
  • 2.
    + INTRODUCTION  Taking bloodfor culture is an important procedure as blood cultures are used to detect the cause of an infection leading to Septicemia bloodstream infection  The results are important because they help guide appropriate treatment. However microorganisms are present on the skin surface of patients, staff and the immediate patient environment which can result in contamination of blood cultures.  Contamination can cause confusion and potentially, inappropriate treatment because it is sometimes difficult to determine if a positive blood culture is due to genuine bacteraemia or if it is a false positive result caused by contamination.
  • 3.
    +  Afalse positive is defined as a growth of bacteria in the blood culture bottle that were not present in the patient’s bloodstream and were introduced during sample collection.  Contamination can come from a number of sources: the patient’s skin, the equipment used to take the sample and transfer it to the culture bottle, the hands of the person taking the blood sample or the general environment. The aim is that blood cultures should be taken:  1. Only when there is an appropriate indication.  2. At the correct time.  3. Using the correct technique in order to prevent contamination of the sample and minimise risk to patients and staff.
  • 4.
    + INDICATIONS:  Blood culturesshould only be taken when there is a clinical reason to suspect a septicaemia. Blood cultures should not be taken for routine assessment or for the investigation of a localised infection.
  • 5.
    + CLINICAL SYMPTOMS INDICATINGSEPSIS ARE:  Temperature of >38° or < 36° (normal range 36.5° – 37.5°)  Tachycardia, sustained hypotension, tachypnoea  Chills or rigors  Raised or very low white blood cell count  New signs of confusion or worsening signs of existing confusion  Unexplained raised CRP in an immunosuppressed patient can be associated with a septicemia even without a fever.  ?Please note that the signs of sepsis may be minimal or absent in the very young or elderly.  Not all the symptoms listed above are indicative of sepsis for example low grade fever within 24 hours of surgery is not specific for septicaemia
  • 6.
    +  Conversely thislist is not exclusive and blood cultures will be required in some patients who do not have any of the above symptoms.  In the very young and in the elderly signs of infection may be absent or minimal.  Clinical judgement is required to decide when there is a reasonable possibility that a patient has an infection where blood cultures may be useful.  The decision to take blood cultures should always be made by a qualified doctor.  Confirm MRSA status.
  • 7.
    +  Where signsof sepsis are present ‘PAIRED SAMPLES’ i.e. two sets of cultures (4 bottles) from two different sites are required for adults. Blood cultures should be taken before administration of antibiotics.  Blood cultures should be taken as soon as bacteraemia is suspected and before the administration of antibiotic therapy. If a patient is already receiving antibiotics then blood cultures should usually be taken before the next dose is given.  The taking of blood cultures should be documented in the patient’s notes including the date, time, site taken from and the specific indication(s).  The person collecting blood cultures should give relevant clinical information and state clearly on the request form accompanying the specimen their name, position and time of specimen collection.  Blood cultures should not be left for phlebotomists or health care assistants to take
  • 8.
    + PATIENTS ON ANTIBIOTICS: Blood cultures should be taken when clinically indicated by the patient's symptoms of a spike in temperature of  >38° rigors, new onset confusion.  Do not draw from a lumen that has had an antibiotic/antimicrobial agent administered through it during the previous hour.  Advice should be sought from the Microbiologist who will make the decision to stop antibiotics to allow for repeat blood culturing.  Current antimicrobial information should be indicated on the lab request form
  • 9.
    + TIMING OF COLLECTING SAMPLES: The peripheral vein sample should be collected first. Sets taken from either CVAD, peripheral or both sites should be obtained sequentially or within 12 hours of each other  The volumes of blood obtained from both sites must match to ensure accuracy e.g. if only 10mL is obtained from the peripheral vein, obtain 10mL from the CVAD  When taking blood from both the CVAD and from a peripheral vein, ensure that the site of each sample is clearly labeled on the culture bottles and the request form.
  • 10.
    + Collecting peripheral blood cultures: Blood cultures should be taken from a suitable, previously unused venepuncture site.  Blood cultures should not routinely be taken from existing central catheters or peripheral venous cannulae where there is no indication of sepsis
  • 11.
    + Collecting Central VenousAccess Device (CVAD) blood cultures:  If the CVAD is the suspected source of sepsis then taking blood cultures from the CVAD is appropriate.  Blood cultures should be taken from a CVAD in combination with a separate peripheral IV sample when investigating potential central venous catheter-related septicemia. Samples should be taken from one lumen and clearly labeled as to which lumen the sample have been obtained from.
  • 12.
  • 13.
    + EXCEPTIONS: Obtaining CVAD bloodcultures as the single source  When peripheral IV access is clinically impossible and the only available source is the CVAD, a blood culture specimen may be taken from the CVAD.  The source of the blood culture and the reasons for using a CVAD must be clearly documented on the blood request form and in the patient's clinical notes Obtaining Blood culture from Patients in ED  Blood cultures are not routinely taken fro patients in ED who do not require admission  Where a patient is unwell enough to require admission obtaining blood cultures may be indicated
  • 14.
    + Blood Cultures shouldNOT be taken from the following sites  From a peripheral IV cannula  Veins which are immediately proximal to an existing peripheral IV cannula.  A femoral vein due to difficulty in skin disinfection of the site. This area poses a high risk of contamination. If a femoral stab is the only option this information must be clearly documented on the 'site' section of the blood culture request form and documented in the patient's clinical notes
  • 15.
  • 16.
    + HOW TOTAKE PERIPHERAL BLOOD CULTURES FOR RELIABLE RESULTS  N.B. Draw the peripheral samples first .Draw blood cultures prior to other blood sample  Prior to any phlebotomy procedure, explanation and verbal consent. EQUIPMENT  Safety butterfly needle  Dressing for IV puncture site  Vacutainer holder  3 x 2% Chlorhexidine Gluconate & 70% alcohol wipe  Tourniquet , Non sterile gloves, Alcohol Based Hand rub (ABHR)  Blood culture bottles: Adult and adolescents: Two sets consisting of two bottles (aerobic and anaerobic; Children: One pink top bottle.  o Sharps container , Point of use alcohol based hand rub (ABHR)
  • 17.
    + Procedure  1.Identifypatient  2. Gather equipment, check expiry date on bottom of culture bottles, a central yellow dot indicates contamination (expired culture bottles may give false negative result),  3. Perform hand hygiene wash hands with soap and water or use ABHR. If the patient has visibly soiled skin wash area with soap and water and dry  4. Remove metal caps from bottles and scrub the rubber bung surface of each bottle with a separate 2% chlorhexidine & 70% alcohol wipe, leave wipes on top of bottles during skin preparation and remove just prior to inoculation the bottle.
  • 18.
    +  5. Applytourniquet and palpate vein. Identify a suitable venepuncture site first before disinfecting the skin. Release tourniquet.  6. Use a 2% chlorhexidine & 70% alcohol wipe, clean for 30 seconds and allow to air dry. IMPORTANT: skin drying is essential to achieve adequate skin disinfection. Do not palpate vein again after cleaning patient's skin.  7. Prepare safety butterfly needle and vacutainer holder. Re-apply tourniquet  8. Perform hand hygiene before applying clean non sterile gloves.  9. Insert butterfly needle into selected vein  10. Place vacutainer over blood culture bottle and pierce septum. IMPORTANT: Fill AEROBIC bottle first (blue top) to ensure all air is removed from the butterfly and tubing.
  • 19.
    +  11. RemoveAEROBIC bottle and insert ANAEROBIC bottle into the vacutainer holder and when this has filled disconnect it from vacutainer holder before the needle is removed from the vein to avoid air entering the bottle.  12. Keep bottles in upright position during collection. Use the bottle graduation lines to accurately gauge sample volume. Collect 10mL into each blood culture bottle or according to Table one  13. Gently mix each bottle  14. Release tourniquet and remove needle. Apply pressure to site with appropriate dressing  15. Discard safety butterfly needle and vacutainer into sharps container.
  • 20.
    +  16. Removegloves and perform hand hygiene using ABHR  17. Label each blood culture bottle ‘Peripheral’. Do not cover bar code on bottles with patient labels.  18. Place in the special blood culture cones / bio hazard bags and send to the laboratory with the blood request form  19. Record the procedure in the patient’s clinical notes  20. Repeat procedure for each set collected
  • 21.
  • 22.
    + HOW TOTAKE BLOOD CULTURES FROM A CVAD FOR RELIABLE RESULTS EQUIPMENT  Open equipment onto a clean surface  6x 2% chlorhexidine gluconate3 & 70% alcohol wipes  1. Adult and adolescents: One set consisting of two bottles (aerobic and anaerobic) Children: One pink top bottle for each lumen  2x 10mL sterile syringes (1x for aerobic 1x for anaerobic)  Pink tip blood transfer device for syringes  2x 10mL 0.9% sodium chloride to flush catheter lumen following blood cultures  Non sterile gloves  Alcohol Based Hand rub (ABHR)
  • 23.
    + Equipment for takingblood Culture from CVAD
  • 24.
    + Procedure:  1.Identify patient  2. Gather equipment, check expiry date on bottom of culture bottles, a central yellow dot indicates contamination (expired culture bottles may give false negative result)  3. Effective hand hygiene wash hands or use alcohol based hand rub (ABHR)  4. Use an aseptic non touch technique(ANTT) to minimise contamination of the sampling procedure  5. Remove the metal caps on each bottle and scrub each rubber bung for 30sec with separate 2% chlorhexidine & 70% alcohol wipes, leave a wipe on top of each bottle during CVAD hub preparation and remove wipes just prior to inoculation the bottles
  • 25.
    +  6. UsingANTT remove access device and replace with a new access device. Clean top of new access device with 2% chlorhexidine & 70% alcohol wipe and allow to dry  7. Use the discard blood from the catheter lumen for the blood cultures  8. The blood volume obtained from the peripheral vein and from the CVAD must match to ensure accuracy  9. Inoculate each culture bottle with equal volumes of blood. Attach syringe to a pink tip transfer device and push down onto the blood culture bottle bung to pierce septum. Inoculate the AEROBIC bottle first, repeat for the ANAEROBIC bottle. Allow the vacuum to draw the blood into each bottle. Gently mix. IMPORTANT: do not allow air to enter the ANAEROBIC bottle(purple)  10. On completion of the procedure discard equipment
  • 26.
    +  11. Removegloves and perform hand hygiene  12. Label the blood culture bottles accurately i.e. ‘CVAD’ and identify which lumen the blood has been taken from  Do not cover bar code on bottles with patient labels. Place in the blood culture transport cones /bio hazard bag, send to the laboratory along with the blood request form  Record procedure in PCR