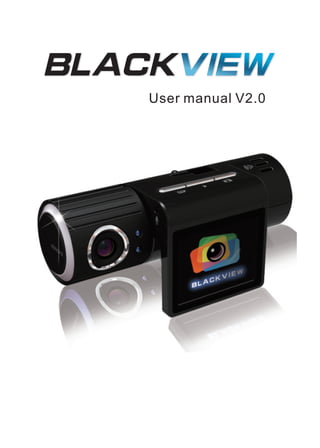
User Manual for Qditor V3, an all-in-one video editor which can help you easily make cool videos with the most powerful editing functions and hundreds of built-in effects.
How to stream live in 3D 360 to youtube or facebook with Vuze Camera Raz Kaplan
1. Vuze LIVE – A Quick Introduction
2. Before you start make sure your Vuze or Vuze+ camera is set to ‘LIVE’ mode through the mobile app and connect your camera to the computer. If you are using a Vuze camera you will need to activate your LIVE license before the first use. This isn’t necessary for a Vuze+ camera. Ready?
3. Turn on Broadcasting Media if you wish to broadcast live. Select your platform and fill in the required details. If your broadcasting platform requires it, remember to set up a streaming event locally before starting. Broadcasting won’t begin until you press start. Selecting a preset platform here will set the recommended values in the ‘Video Settings’ section below.
4. Turn on ‘Save Local Copy’ if you wish to save the media you are previewing. If you choose to save stitched media the media will be stitched with the settings in the ‘Video Settings’ section below. If you save unstitched media the full quality unstitched file will be saved to your PC and can be stitched and edited in Vuze VR Studio later. Recording won’t begin until you press start.
5. Choose the settings with which to stich your video here. These depend on your hardware, internet connection and the platform you are broadcasting to. For example to stream on a weaker internet connection choose a lower resolution or bitrate. If you have selected to broadcast to a preset platform these settings have already been set to the recommended values.
6. Once you have selected your desired set up, begin recording and broadcasting using the ‘Start’ button.
7. While recording you can ensure stitching is keeping up to 30FPS. If not your hardware may be overloaded, try closing other processes or rendering at a lower resolution.
8. Stop recording when finished.
9. To save battery while not recording you can select ‘Turn LIVE preview off’ under the File menu.
10. Turn the preview on again when ready to continue.
11. See you LIVE
Using FREECAM for creating video content, Screen recording and editingRamesh C. Sharma
Freecam is a simple and effective tool for screen recording, fine tuning the recording by editing the video and audio. Recently Google Meet has withdrawn the facility of recording the session from some specific subscriptions. Freecam is a good tool for recording your Google Meet session. You can save your recording on local disk or upload on YouTube.
Hướng dẫn sử dụng máy nội soi công nghiệp tích hợp wireless BR - 250Tenmars Việt Nam
Hướng dẫn sử dụng máy nội soi công nghiệp tích hợp wireless BR - 250
http://extech.vn/vi/products/category/view/40
http://extech.vn/vi/products/product/view/40/58
bathroom hidden camera Lynx hd camera user guide how to use a bathroom spy ca...george david
Best customized spy cameras
Professional hidden camera for house surveillance
www.spycamerasmall.com
www.bathspycamera.com
www.wifibathroomhiddencamera.com
www.spycameraforsale.com
www.bathroomspycameras.com
www.spycameraforbathroom.com
email:sales@wholesalespycams.com
email:eyespychina@yahoo.com
Copyright 2018 Eagle Eye Technology LTD,.
All rights reserved.
shampoo Bathroom Shower gel hd camera user guidegeorge david
Best customized spy cameras
Professional hidden camera for house surveillance
www.spycamerasmall.com
www.wifibathroomhiddencamera.com
www.spycameraforsale.com
www.bathroomspycameras.com
www.spycameraforbathroom.com
Copyright 2018 Eagle Eye Technology LTD,.
All rights reserved.
face wash face care spy camera Aqua boss camera user guide(nrc)george david
Best customized spy cameras
Professional hidden camera for house surveillance
www.spycamerasmall.com
www.wifibathroomhiddencamera.com
www.bathspycamera.com
www.spycameraforsale.com
www.bathroomspycameras.com
www.spycameraforbathroom.com
Copyright 2018 Eagle Eye Technology LTD,.
All rights reserved.
hidden camera hair gel hidden camera bathroom Syoss hd camera user guide(nrg)george david
Best customized spy cameras
Professional hidden camera for house surveillance
www.spycamerasmall.com
www.wifibathroomhiddencamera.com
www.bathspycamera.com
www.spycameraforsale.com
www.bathroomspycameras.com
www.spycameraforbathroom.com
Copyright 2018 Eagle Eye Technology LTD,.
All rights reserved.
Best customized spy cameras
Professional hidden camera for house surveillance
www.spycamerasmall.com
www.wifibathroomhiddencamera.com
www.bathspycamera.com
www.spycameraforsale.com
www.bathroomspycameras.com
www.spycameraforbathroom.com
Copyright 2018 Eagle Eye Technology LTD,.
All rights reserved.
Best customized spy cameras
Professional hidden camera for house surveillance
www.spycamerasmall.com
www.wifibathroomhiddencamera.com
www.bathspycamera.com
www.spycameraforsale.com
www.bathroomspycameras.com
www.spycameraforbathroom.com
Copyright 2018 Eagle Eye Technology LTD,.
All rights reserved.
Best customized spy cameras
Professional hidden camera for house surveillance
www.spycamerasmall.com
www.wifibathroomhiddencamera.com
www.bathspycamera.com
www.spycameraforsale.com
www.bathroomspycameras.com
www.spycameraforbathroom.com
Copyright 2018 Eagle Eye Technology LTD,.
All rights reserved.
Conpu air purifier hd camera user guidegeorge david
Best customized spy cameras
Professional hidden camera for house surveillance
www.spycamerasmall.com
www.wifibathroomhiddencamera.com
www.bathspycamera.com
www.spycameraforsale.com
www.bathroomspycameras.com
www.spycameraforbathroom.com
Copyright 2018 Eagle Eye Technology LTD,.
All rights reserved.
shower radio camera I form radio user guidegeorge david
Best customized spy cameras
Professional hidden camera for house surveillance
www.spycamerasmall.com
www.wifibathroomhiddencamera.com
www.bathspycamera.com
www.spycameraforsale.com
www.bathroomspycameras.com
www.spycameraforbathroom.com
Copyright 2018 Eagle Eye Technology LTD,.
All rights reserved.
Best customized spy cameras
Professional hidden camera for house surveillance
www.spycamerasmall.com
www.wifibathroomhiddencamera.com
www.bathspycamera.com
www.spycameraforsale.com
www.bathroomspycameras.com
www.spycameraforbathroom.com
Copyright 2018 Eagle Eye Technology LTD,.
All rights reserved.
Best customized spy cameras
Professional hidden camera for house surveillance
www.spycamerasmall.com
www.wifibathroomhiddencamera.com
www.bathspycamera.com
www.spycameraforsale.com
www.bathroomspycameras.com
www.spycameraforbathroom.com
Copyright 2018 Eagle Eye Technology LTD,.
All rights reserved.
Men tholatum shower gel hd camera user guidegeorge david
Best customized spy cameras
Professional hidden camera for house surveillance
www.spycamerasmall.com
www.wifibathroomhiddencamera.com
www.bathspycamera.com
www.spycameraforsale.com
www.bathroomspycameras.com
www.spycameraforbathroom.com
Copyright 2018 Eagle Eye Technology LTD,.
All rights reserved.
shower spy camera toilet spy camera Adidas pulse hd camera user guide (rc)george david
Best customized spy cameras
Professional hidden camera for house surveillance
www.spycamerasmall.com
www.wifibathroomhiddencamera.com
www.bathspycamera.com
www.spycameraforsale.com
www.bathroomspycameras.com
www.spycameraforbathroom.com
Copyright 2018 Eagle Eye Technology LTD,.
All rights reserved.
HD bathroom hidden camera Adidas pulse body spray hd camera user guidegeorge david
Best customized spy cameras
Professional hidden camera for house surveillance
www.spycamerasmall.com
www.wifibathroomhiddencamera.com
www.bathspycamera.com
www.spycameraforsale.com
www.bathroomspycameras.com
www.spycameraforbathroom.com
Copyright 2018 Eagle Eye Technology LTD,.
All rights reserved.
HD spy camera bathroom 409 hd spy camera user guidegeorge david
Best customized spy cameras
Professional hidden camera for house surveillance
www.spycamerasmall.com
www.wifibathroomhiddencamera.com
www.bathspycamera.com
www.spycameraforsale.com
www.bathroomspycameras.com
www.spycameraforbathroom.com
Copyright 2018 Eagle Eye Technology LTD,.
All rights reserved.
toilet cleaner bathroom spy camera 409 hd camera user guidegeorge david
Best customized spy cameras
Professional hidden camera for house surveillance
www.spycamerasmall.com
www.wifibathroomhiddencamera.com
www.bathspycamera.com
www.spycameraforsale.com
www.bathroomspycameras.com
www.spycameraforbathroom.com
Copyright 2018 Eagle Eye Technology LTD,.
All rights reserved.
Smart TV Buyer Insights Survey 2024 by 91mobiles.pdf91mobiles
91mobiles recently conducted a Smart TV Buyer Insights Survey in which we asked over 3,000 respondents about the TV they own, aspects they look at on a new TV, and their TV buying preferences.
Slack (or Teams) Automation for Bonterra Impact Management (fka Social Soluti...Jeffrey Haguewood
Sidekick Solutions uses Bonterra Impact Management (fka Social Solutions Apricot) and automation solutions to integrate data for business workflows.
We believe integration and automation are essential to user experience and the promise of efficient work through technology. Automation is the critical ingredient to realizing that full vision. We develop integration products and services for Bonterra Case Management software to support the deployment of automations for a variety of use cases.
This video focuses on the notifications, alerts, and approval requests using Slack for Bonterra Impact Management. The solutions covered in this webinar can also be deployed for Microsoft Teams.
Interested in deploying notification automations for Bonterra Impact Management? Contact us at sales@sidekicksolutionsllc.com to discuss next steps.
Software Delivery At the Speed of AI: Inflectra Invests In AI-Powered QualityInflectra
In this insightful webinar, Inflectra explores how artificial intelligence (AI) is transforming software development and testing. Discover how AI-powered tools are revolutionizing every stage of the software development lifecycle (SDLC), from design and prototyping to testing, deployment, and monitoring.
Learn about:
• The Future of Testing: How AI is shifting testing towards verification, analysis, and higher-level skills, while reducing repetitive tasks.
• Test Automation: How AI-powered test case generation, optimization, and self-healing tests are making testing more efficient and effective.
• Visual Testing: Explore the emerging capabilities of AI in visual testing and how it's set to revolutionize UI verification.
• Inflectra's AI Solutions: See demonstrations of Inflectra's cutting-edge AI tools like the ChatGPT plugin and Azure Open AI platform, designed to streamline your testing process.
Whether you're a developer, tester, or QA professional, this webinar will give you valuable insights into how AI is shaping the future of software delivery.
Dev Dives: Train smarter, not harder – active learning and UiPath LLMs for do...UiPathCommunity
💥 Speed, accuracy, and scaling – discover the superpowers of GenAI in action with UiPath Document Understanding and Communications Mining™:
See how to accelerate model training and optimize model performance with active learning
Learn about the latest enhancements to out-of-the-box document processing – with little to no training required
Get an exclusive demo of the new family of UiPath LLMs – GenAI models specialized for processing different types of documents and messages
This is a hands-on session specifically designed for automation developers and AI enthusiasts seeking to enhance their knowledge in leveraging the latest intelligent document processing capabilities offered by UiPath.
Speakers:
👨🏫 Andras Palfi, Senior Product Manager, UiPath
👩🏫 Lenka Dulovicova, Product Program Manager, UiPath
Generating a custom Ruby SDK for your web service or Rails API using Smithyg2nightmarescribd
Have you ever wanted a Ruby client API to communicate with your web service? Smithy is a protocol-agnostic language for defining services and SDKs. Smithy Ruby is an implementation of Smithy that generates a Ruby SDK using a Smithy model. In this talk, we will explore Smithy and Smithy Ruby to learn how to generate custom feature-rich SDKs that can communicate with any web service, such as a Rails JSON API.
Kubernetes & AI - Beauty and the Beast !?! @KCD Istanbul 2024Tobias Schneck
As AI technology is pushing into IT I was wondering myself, as an “infrastructure container kubernetes guy”, how get this fancy AI technology get managed from an infrastructure operational view? Is it possible to apply our lovely cloud native principals as well? What benefit’s both technologies could bring to each other?
Let me take this questions and provide you a short journey through existing deployment models and use cases for AI software. On practical examples, we discuss what cloud/on-premise strategy we may need for applying it to our own infrastructure to get it to work from an enterprise perspective. I want to give an overview about infrastructure requirements and technologies, what could be beneficial or limiting your AI use cases in an enterprise environment. An interactive Demo will give you some insides, what approaches I got already working for real.
Accelerate your Kubernetes clusters with Varnish CachingThijs Feryn
A presentation about the usage and availability of Varnish on Kubernetes. This talk explores the capabilities of Varnish caching and shows how to use the Varnish Helm chart to deploy it to Kubernetes.
This presentation was delivered at K8SUG Singapore. See https://feryn.eu/presentations/accelerate-your-kubernetes-clusters-with-varnish-caching-k8sug-singapore-28-2024 for more details.
The Art of the Pitch: WordPress Relationships and SalesLaura Byrne
Clients don’t know what they don’t know. What web solutions are right for them? How does WordPress come into the picture? How do you make sure you understand scope and timeline? What do you do if sometime changes?
All these questions and more will be explored as we talk about matching clients’ needs with what your agency offers without pulling teeth or pulling your hair out. Practical tips, and strategies for successful relationship building that leads to closing the deal.
Securing your Kubernetes cluster_ a step-by-step guide to success !KatiaHIMEUR1
Today, after several years of existence, an extremely active community and an ultra-dynamic ecosystem, Kubernetes has established itself as the de facto standard in container orchestration. Thanks to a wide range of managed services, it has never been so easy to set up a ready-to-use Kubernetes cluster.
However, this ease of use means that the subject of security in Kubernetes is often left for later, or even neglected. This exposes companies to significant risks.
In this talk, I'll show you step-by-step how to secure your Kubernetes cluster for greater peace of mind and reliability.
GDG Cloud Southlake #33: Boule & Rebala: Effective AppSec in SDLC using Deplo...James Anderson
Effective Application Security in Software Delivery lifecycle using Deployment Firewall and DBOM
The modern software delivery process (or the CI/CD process) includes many tools, distributed teams, open-source code, and cloud platforms. Constant focus on speed to release software to market, along with the traditional slow and manual security checks has caused gaps in continuous security as an important piece in the software supply chain. Today organizations feel more susceptible to external and internal cyber threats due to the vast attack surface in their applications supply chain and the lack of end-to-end governance and risk management.
The software team must secure its software delivery process to avoid vulnerability and security breaches. This needs to be achieved with existing tool chains and without extensive rework of the delivery processes. This talk will present strategies and techniques for providing visibility into the true risk of the existing vulnerabilities, preventing the introduction of security issues in the software, resolving vulnerabilities in production environments quickly, and capturing the deployment bill of materials (DBOM).
Speakers:
Bob Boule
Robert Boule is a technology enthusiast with PASSION for technology and making things work along with a knack for helping others understand how things work. He comes with around 20 years of solution engineering experience in application security, software continuous delivery, and SaaS platforms. He is known for his dynamic presentations in CI/CD and application security integrated in software delivery lifecycle.
Gopinath Rebala
Gopinath Rebala is the CTO of OpsMx, where he has overall responsibility for the machine learning and data processing architectures for Secure Software Delivery. Gopi also has a strong connection with our customers, leading design and architecture for strategic implementations. Gopi is a frequent speaker and well-known leader in continuous delivery and integrating security into software delivery.
Key Trends Shaping the Future of Infrastructure.pdfCheryl Hung
Keynote at DIGIT West Expo, Glasgow on 29 May 2024.
Cheryl Hung, ochery.com
Sr Director, Infrastructure Ecosystem, Arm.
The key trends across hardware, cloud and open-source; exploring how these areas are likely to mature and develop over the short and long-term, and then considering how organisations can position themselves to adapt and thrive.
Builder.ai Founder Sachin Dev Duggal's Strategic Approach to Create an Innova...Ramesh Iyer
In today's fast-changing business world, Companies that adapt and embrace new ideas often need help to keep up with the competition. However, fostering a culture of innovation takes much work. It takes vision, leadership and willingness to take risks in the right proportion. Sachin Dev Duggal, co-founder of Builder.ai, has perfected the art of this balance, creating a company culture where creativity and growth are nurtured at each stage.
JMeter webinar - integration with InfluxDB and GrafanaRTTS
Watch this recorded webinar about real-time monitoring of application performance. See how to integrate Apache JMeter, the open-source leader in performance testing, with InfluxDB, the open-source time-series database, and Grafana, the open-source analytics and visualization application.
In this webinar, we will review the benefits of leveraging InfluxDB and Grafana when executing load tests and demonstrate how these tools are used to visualize performance metrics.
Length: 30 minutes
Session Overview
-------------------------------------------
During this webinar, we will cover the following topics while demonstrating the integrations of JMeter, InfluxDB and Grafana:
- What out-of-the-box solutions are available for real-time monitoring JMeter tests?
- What are the benefits of integrating InfluxDB and Grafana into the load testing stack?
- Which features are provided by Grafana?
- Demonstration of InfluxDB and Grafana using a practice web application
To view the webinar recording, go to:
https://www.rttsweb.com/jmeter-integration-webinar
2. Thank you for purchasing BlackView.BlackView is a
portable, Stylish, high-performance vehicle drive
recorder. It has 5.0M effective pixel high-definition CMOS
image sensor, intelligent voice reminder, enhanced
night shooting,140°wide-angle lens.
Specific performance parameters are as follows:
CMOS sensor 5,000,000 pixels
Viewing angle o f lens Wide-angle 140°
Turning angle of lens 200° back and fo rth
Screen 2.0TFT high resolution
Quality vedio HD(1280×720)@30 fps
Night vision Enhanced night vision
Format of picture JPEG
Pixel of picture 2560x1920
Voice guidance intelligent voice guidance
Type of memory card TF card
Capacity of memory Card Supports up to 32G
Battery 800MA Polymer lithium battery
Power consumption 150MA
3. Checking the packing content
Check the product and the accompanied accessories
!
If there is any problem of the accessories, contact your local product
distributor.
BlackView Support Slot
User m n aual Cable holders
Power cable Driver disk
4. Checking the main body of the BlackView
Enhanced night vision light
Speaker
TFT LCD
Lens
Support slot Reset
Vedio Play Camera
TF Card Slot Microphone
USB Interface Switching&Menu
5. Installing the BlackView
1.Stop the engine and remove the key from the ignition.
Install the BlackView in a well-lit and safe location.
2.Insert the Micro SD card into the BlackView.
3.Attach the BlackView into the windshield of your car
using double-sided tape.
Use a soft and dry cloth to wipe the foreign material and moisture
attached in the surface of the support slot.
4.Connect the [USB] terminal of the BlackView and the
cigarette jack of your car using the power cable.
5.Tie the power cable
Use the provided cable holder, when necessary.
6.Adjust the position of the camera lens of the BlackView.
Ensure that it is level with the ground.
7.Start the engine. Check whether the BlackView is installed
When the BlackVue is installed correctly, its Intelligent voice systems
will play“The BlackView has been starting normal recording”.
6. Using the BlackView
Using the Normal Recording Function
Start the engine.
BlackView turns on and starts the Normal Recording function. After
it is turned on, it will records and saves scenes at each specified
period.
Stop the engine.
BlackView will turn off after about 5 seconds.
Using the Manual Reconrding Function
Press the <Switching> button on the BlackView.
After BlackView turns on.Press the <Camera> button to starts the
Manual Recording function. It will record and saves scenes at each
specified period.
Press the <Camera> button again.BlackView will exit Manual
Recording function.
Using the Camera Function
When BlackView turns on.
To enter the Camera Function Press the <Camera> button.
Press the <Camera> button again.BlackView will take photograph.
Using the Playback Function
When BlackView turns on.
Press and hold <Play> button for 2 seconds to enter the Playback
Function.
Press <Camera> or <Vedio>button to select the video or photo
which you want,Then Press <Play> button to play.
Press and hold <Play> button for 2 seconds again. The BlackView
will exit the Playback Function.
7. Setting the BlackView
Setting video output
Video output including【Size】【EV】【White Balance】 deo Time】 ght Mode】
【Vi 【Ni
1.Setting 【Size】
When System is turned on.Press <Switching> button to display video
output page.
Press <Camera> or <Vedio> button to select【Size】,Then Press
<Play> button to display Sub-page.
Sub-page including【VGA】【QVGA】【D1】【HD】,Press
<Camera> or <Vedio>button to select the setting which you want,Then
Press <Play> button to confirm.
Video output Setup
Size HD VGA
EV +0.0 Q VGA
White Balance Auto D1
Ve dio Time 1 Min
Night Mode O ff
Exit O K Set
2.Setting 【EV】
When System is turned on.Press < Switching > button to display video
output page.
Press <Camera> or <Vedio> button to select【EV】,Then Press <Play>
button to display Sub-page.
Sub-page including【+2.0】【+5/3】【+4/3】【+1.0】【+2/3】【+1/3】
【+0.0】【-1/3】【-2/3】【-1.0】【-4/3】【-5/3】【-2.0】,Press
<Camera> or <Vedio> button to select the setting which you want,Then
Press <Play> button to confirm.
8. Setting the BlackView
Video output Setup
Size HD +1/3
EV +0.0 +0.0
White Balance Auto -1/3
Ve dio Time 1 Min -2/3
-1.0
Night Mode O ff
Exit O K Set
3.Setting 【White Blance】
When System is turned on.Press < Switching > button to display video output
page.
Press <Camera> or <Vedio> button to select【White Blance】,Then
Press <Play> button to display Sub-page.
Sub-page including【Auto】【Daylight】【Cloudy】【Tungsten】【
Fluorescent】,Press <Camera> or <Vedio> button to select the setting
which you want,Then Press <Play> button to confirm.
Video output Setup
Size HD Auto
EV +0.0 Daylight
White Balance Auto Cloudy
Ve dio Time 1 Min Tungsten
Fluoresce nt
Night Mode O ff
Exit O K Set
9. Setting the BlackView
4.Setting 【Vedio Time】
When System is turned on.Press < Switching > button to display video
output page.
Press <Camera> or <Vedio> button to select【Night Mode】,Then
Press <Play> button to display Sub-page.
Sub-page including【Off】【On】,Press <Camera> or <Vedio> button
to select the setting which you want,Then Press <Play> button to
confirm.
Video output Setup
Size HD O ff
EV +0.0 1 Min
White Balance Auto 2 Min
Vide o Time 1 Min
Night Mode O ff
Exit O K Set
5.Setting 【Night Mode】
When System is turned on.Press < Switching > button to display video
output page.
Press <Camera> or <Vedio> button to select【Night Mode】,Then
Press <Play> button to display Sub-page.
Sub-page including【Off】【On】,Press <Camera> or <Vedio> button
to select the setting which you want,Then Press <Play> button to
confirm.
10. Setting the BlackView
Video output Setup
Size HD
EV +0.0 O ff
On
White Balance Auto
Ve dio Time 1 Min
Night Mode O ff
Exit O K Set
Setting Setup
Setup including【Format】【beep】【language】【auto off】【sys.reset】
【Light Freq.】【USB】【Screen Set】
1.Setting 【Format】
When System is turned on.Double click<Switching> button to display
Setup page.
Press <Camera> or <Vedio> button to select【Format】,Then Press
<Play> button to display subpage.
Subpage including【Cancel】【Execute】,Press <Camera> or <Vedio>
button to select the setting which you want,Then Press <Play> button to
confirm.
Video output Setup
Format Ne xt Me nu
Bee p On Cancel
Language English Exe cute
Auto Off O ff
Sys.Re se t Ne xt Me nu
Exit O K Set
11. Setting the BlackView
2.Setting 【Beep】
When System is turned on.Double click<Switching> button to display
Setup page.
Press <Camera> or <Vedio> button to select【Beep】,Then Press
<Play> button to display subpage.
Subpage including【On】【Off】,Press <Camera> or <Vedio> button to
select the setting which you want,Then Press <Play> button to confirm.
Video output Setup
Format Ne xt Me nu
Bee p On On
Language English O ff
Auto Off O ff
Sys.Re se t Ne xt Me nu
Exit O K Set
3.Setting 【Language】
When System is turned on.Double click<Switching> button to display
Setup page.
Press <Camera> or <Vedio> button to select【Language】,Then
Press <Play> button to display subpage.
Subpage including【English】【繁體中文】【简体中文】【日本語】【
Русский】,Press <Camera> or <Vedio> button to select setting
which you want,Then Press <Play> button to confirm.
12. Setting the BlackView
Video output Setup
Format Ne xt Me nu
Bee p On English
Language English 简体中文
日本語
Auto Off O ff
Русский
Sys.Re se t Ne xt Me nu 文
Exit O K Set
4.Setting 【Auto Off】
When System is turned on.Double click<Switching> button to display
Setup page.
Press <Camera> or <Vedio> button to select【Auto Off】,Then Press
<Play> button to display subpage.
Subpage including【1 Min】【3 Min】【5 Min】【Off】,Press
<Camera> or <Vedio> button to select the setting which you want,Then
Press <Play> button to confirm.
Video output Setup
Format Ne xt Me nu
Bee p On 1 Min
Language English 3 Min
Auto Off O ff 5 Min
Off
Sys.Re se t Ne xt Me nu
Exit O K Set
13. Setting the BlackView
5.Setting 【Sys.Reset】
When System is turned on.Double click<Switching> button to display
Setup page.
Press <Camera> or <Vedio> button to select【Sys.Reset】,Then
Press <Play> button to display subpage.
Subpage including【Cancel】【Execute】,Press <Camera> or
<Vedio> button to select the setting which you want,Then Press <Play>
button to confirm.
Video output Setup
Format Ne xt Me nu Cancel
Bee p Language Exe cute
Language Date Input
Auto off Light Fre q.
Sys.Re se t Ne xt Me nu
Exit O K Set
6.Setting 【Light Fre.】
When System is turned on.Double click<Switching> button to display
Setup page.
Press <Camera> or <Vedio> button to select【Light Fre.】,Then Press
<Play> button to display subpage.
Subpage including【60Hz】【50Hz】,Press <Camera> or <Vedio>
button to select the setting which you want,Then Press <Play> button to
confirm.
14. Setting the BlackView
Video output Setup
Light Fre q. 60Hz 60Hz
USB PC Cam 50Hz
Scree n Set Aways On
Exit O K Set
7.Setting 【USB】
When System is turned on.Double click<Switching> button to display
Setup page.
Press <Camera> or <Vedio> button to select【Light Fre.】,Then Press
<Play> button to display subpage.
Subpage including【60Hz】【50Hz】,Press <Camera> or <Vedio>
button to select the setting which you want,Then Press <Play> button to
confirm.
Video output Setup
Light Fre q. 60Hz PC Cam
USB PC Cam Disk Drive
Scree n Set Aways On
Exit O K Set
15. Setting the BlackView
8.Setting 【Screen Set】
When System is turned on.Double click<Switching> button to display
Setup page.
Press <Camera> or <Vedio> button to select【Screen Set】,Then
Press <Play> button to display subpage.
Subpage including【Always On】【1 Min】【3 Min】,Press
<Camera> or <Vedio> button to select the setting which you want,Then
Press <Play> button to confirm.
Video output Setup
Light Fre q. 60Hz Away On
USB PC Cam 1 Min
Scree n Set Aways On
Exit O K Set