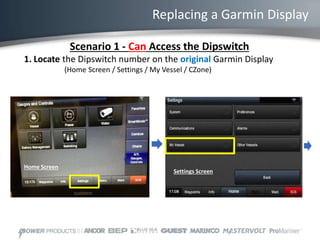
When replacing a Garmin display that can access the original display's dipswitch settings:
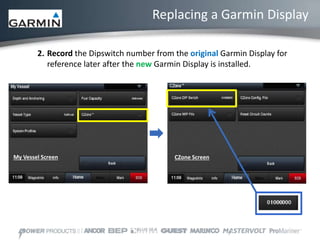
1. Record the dipswitch number from the original display.
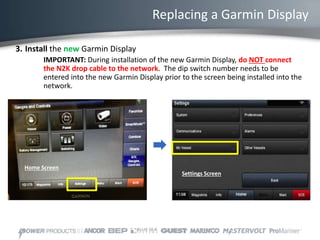
2. Enter the dipswitch number into the new display before connecting it to the network.
3. Connect the new display to the network to load the boat's digital configuration.


![Getting Started with Apache Spark: Big Data Made Simple [Free Meetup]](https://cdn.slidesharecdn.com/ss_thumbnails/apachesparkgettingstarted-260203175547-8361bcc3-thumbnail.jpg?width=640&height=640&fit=bounds)


