Download to read offline


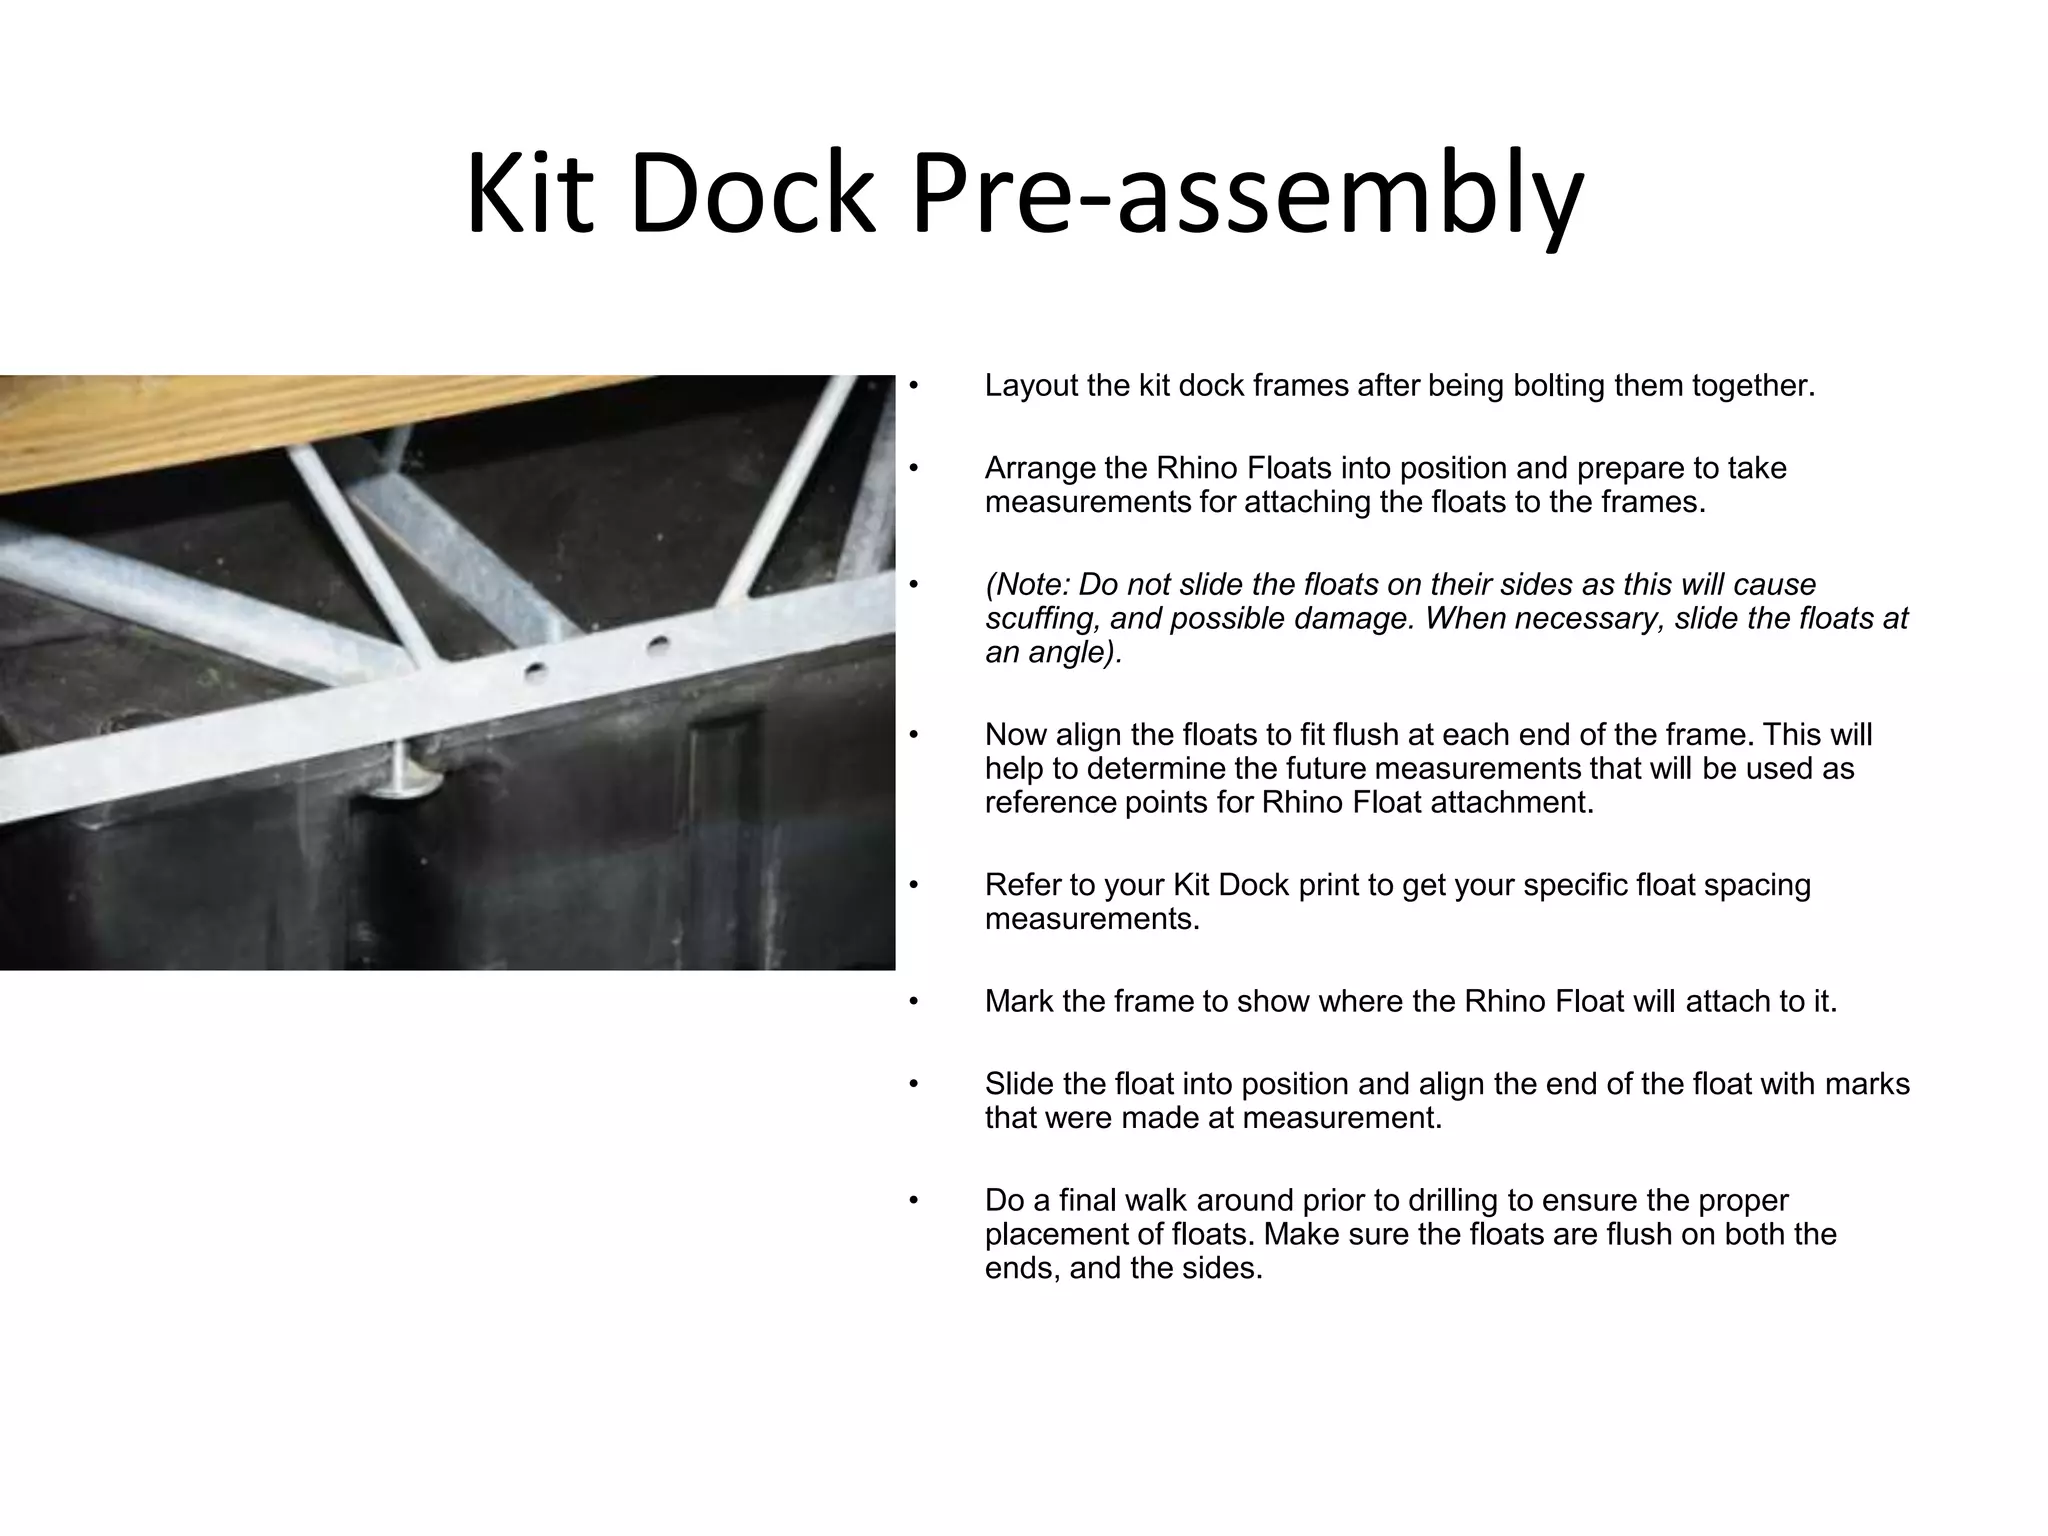
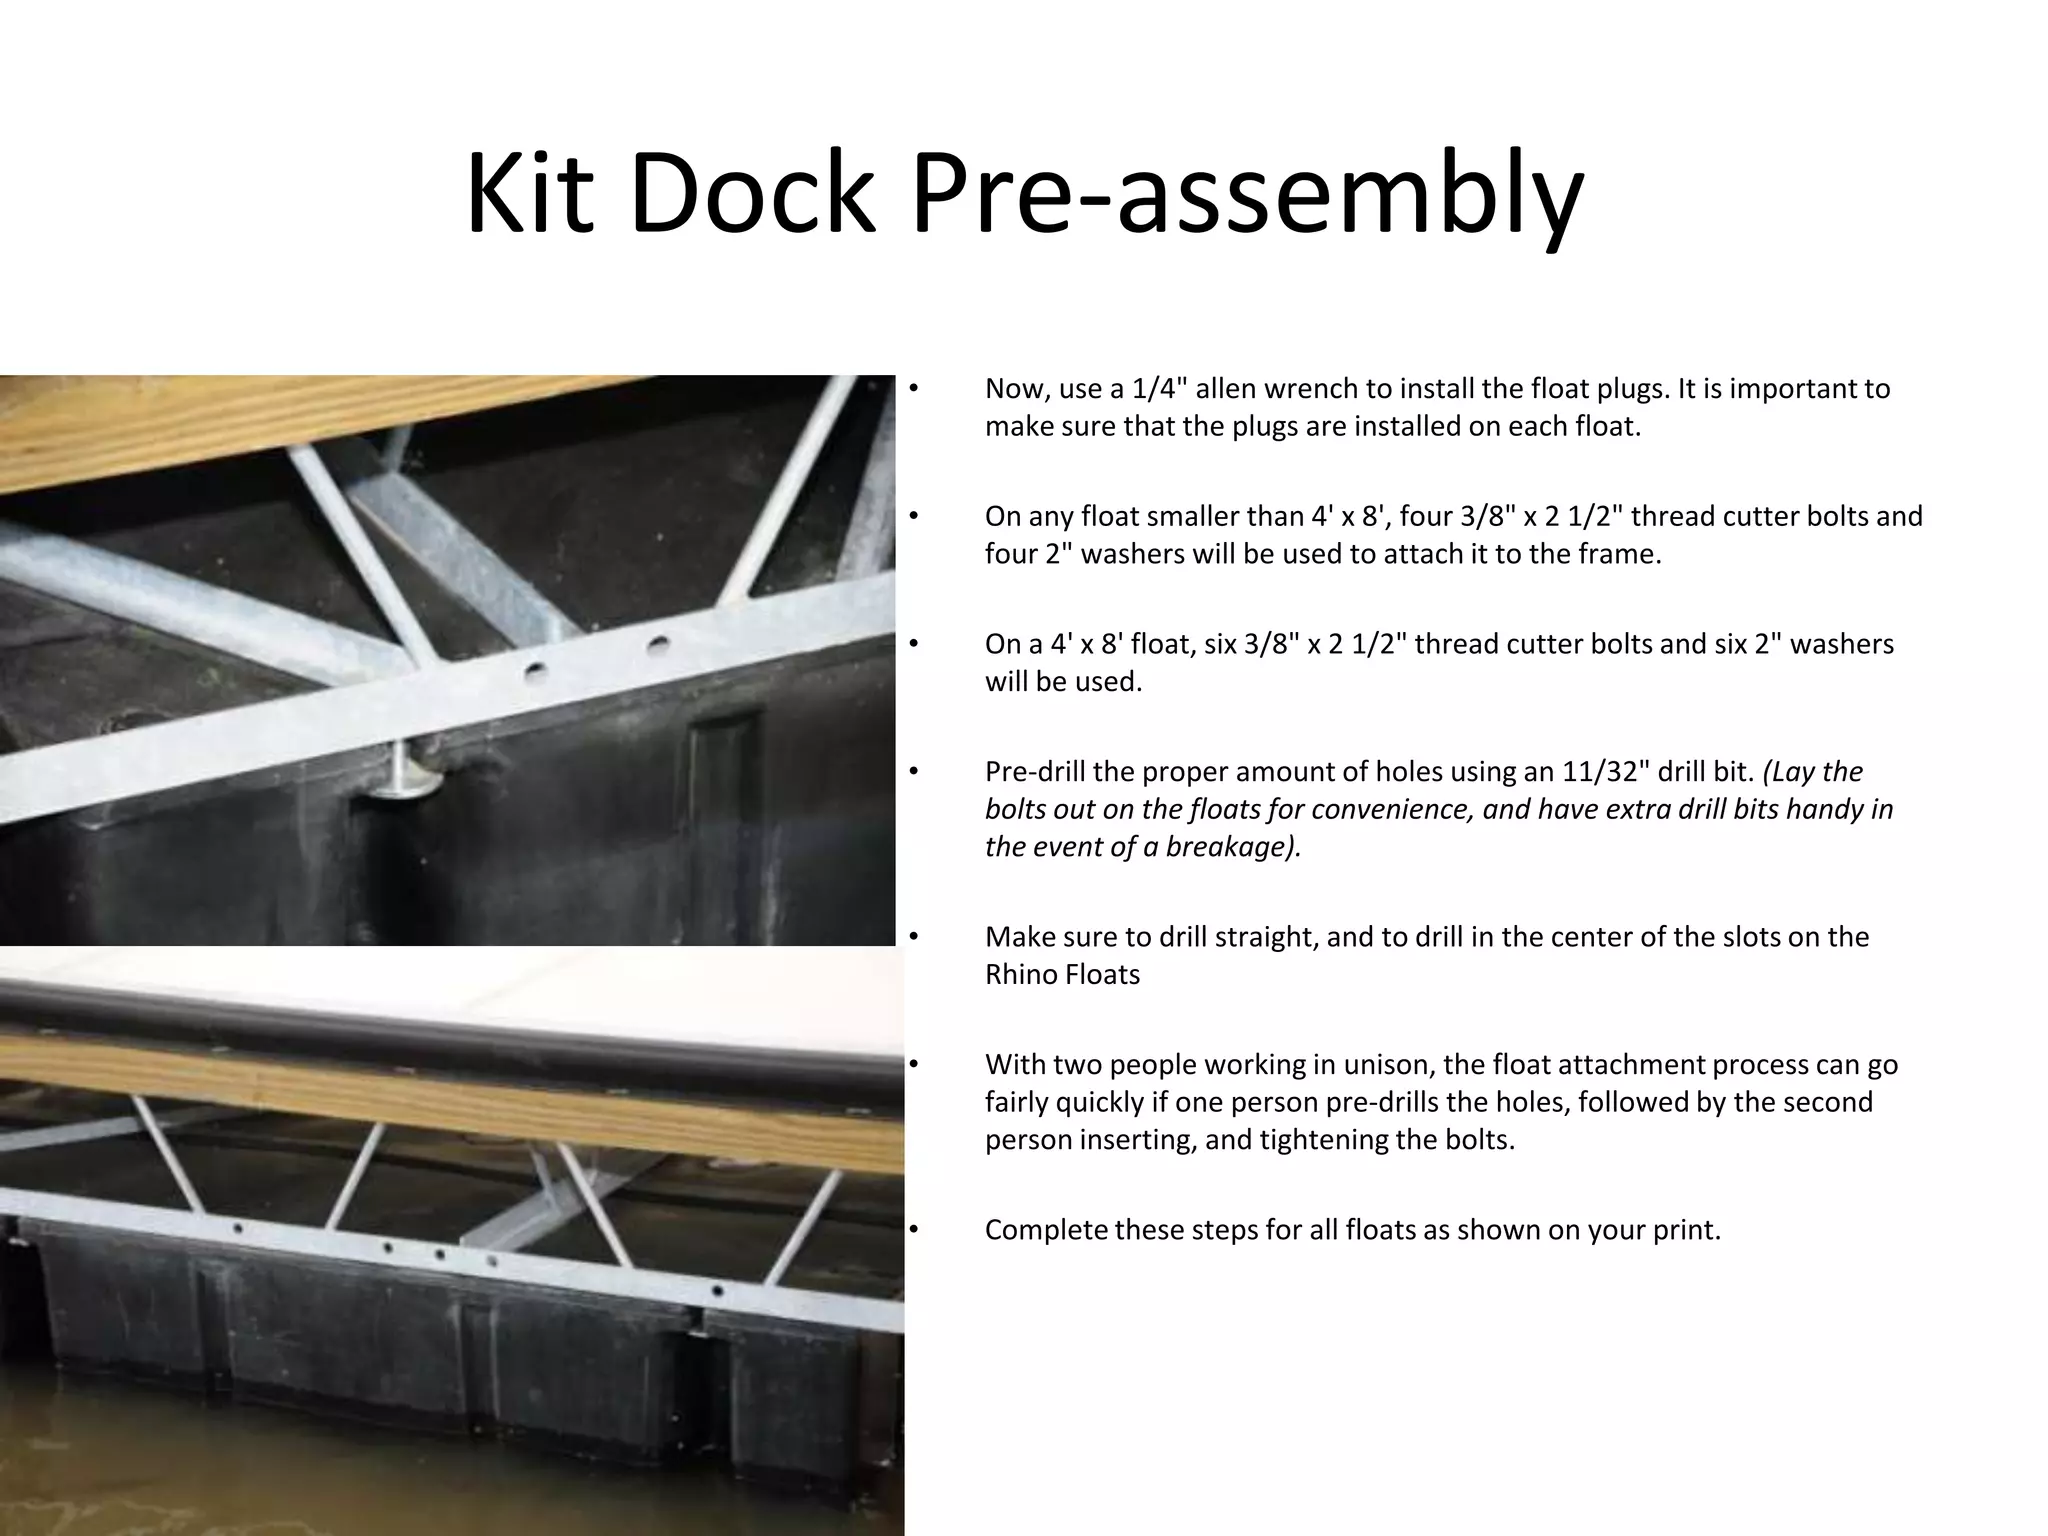

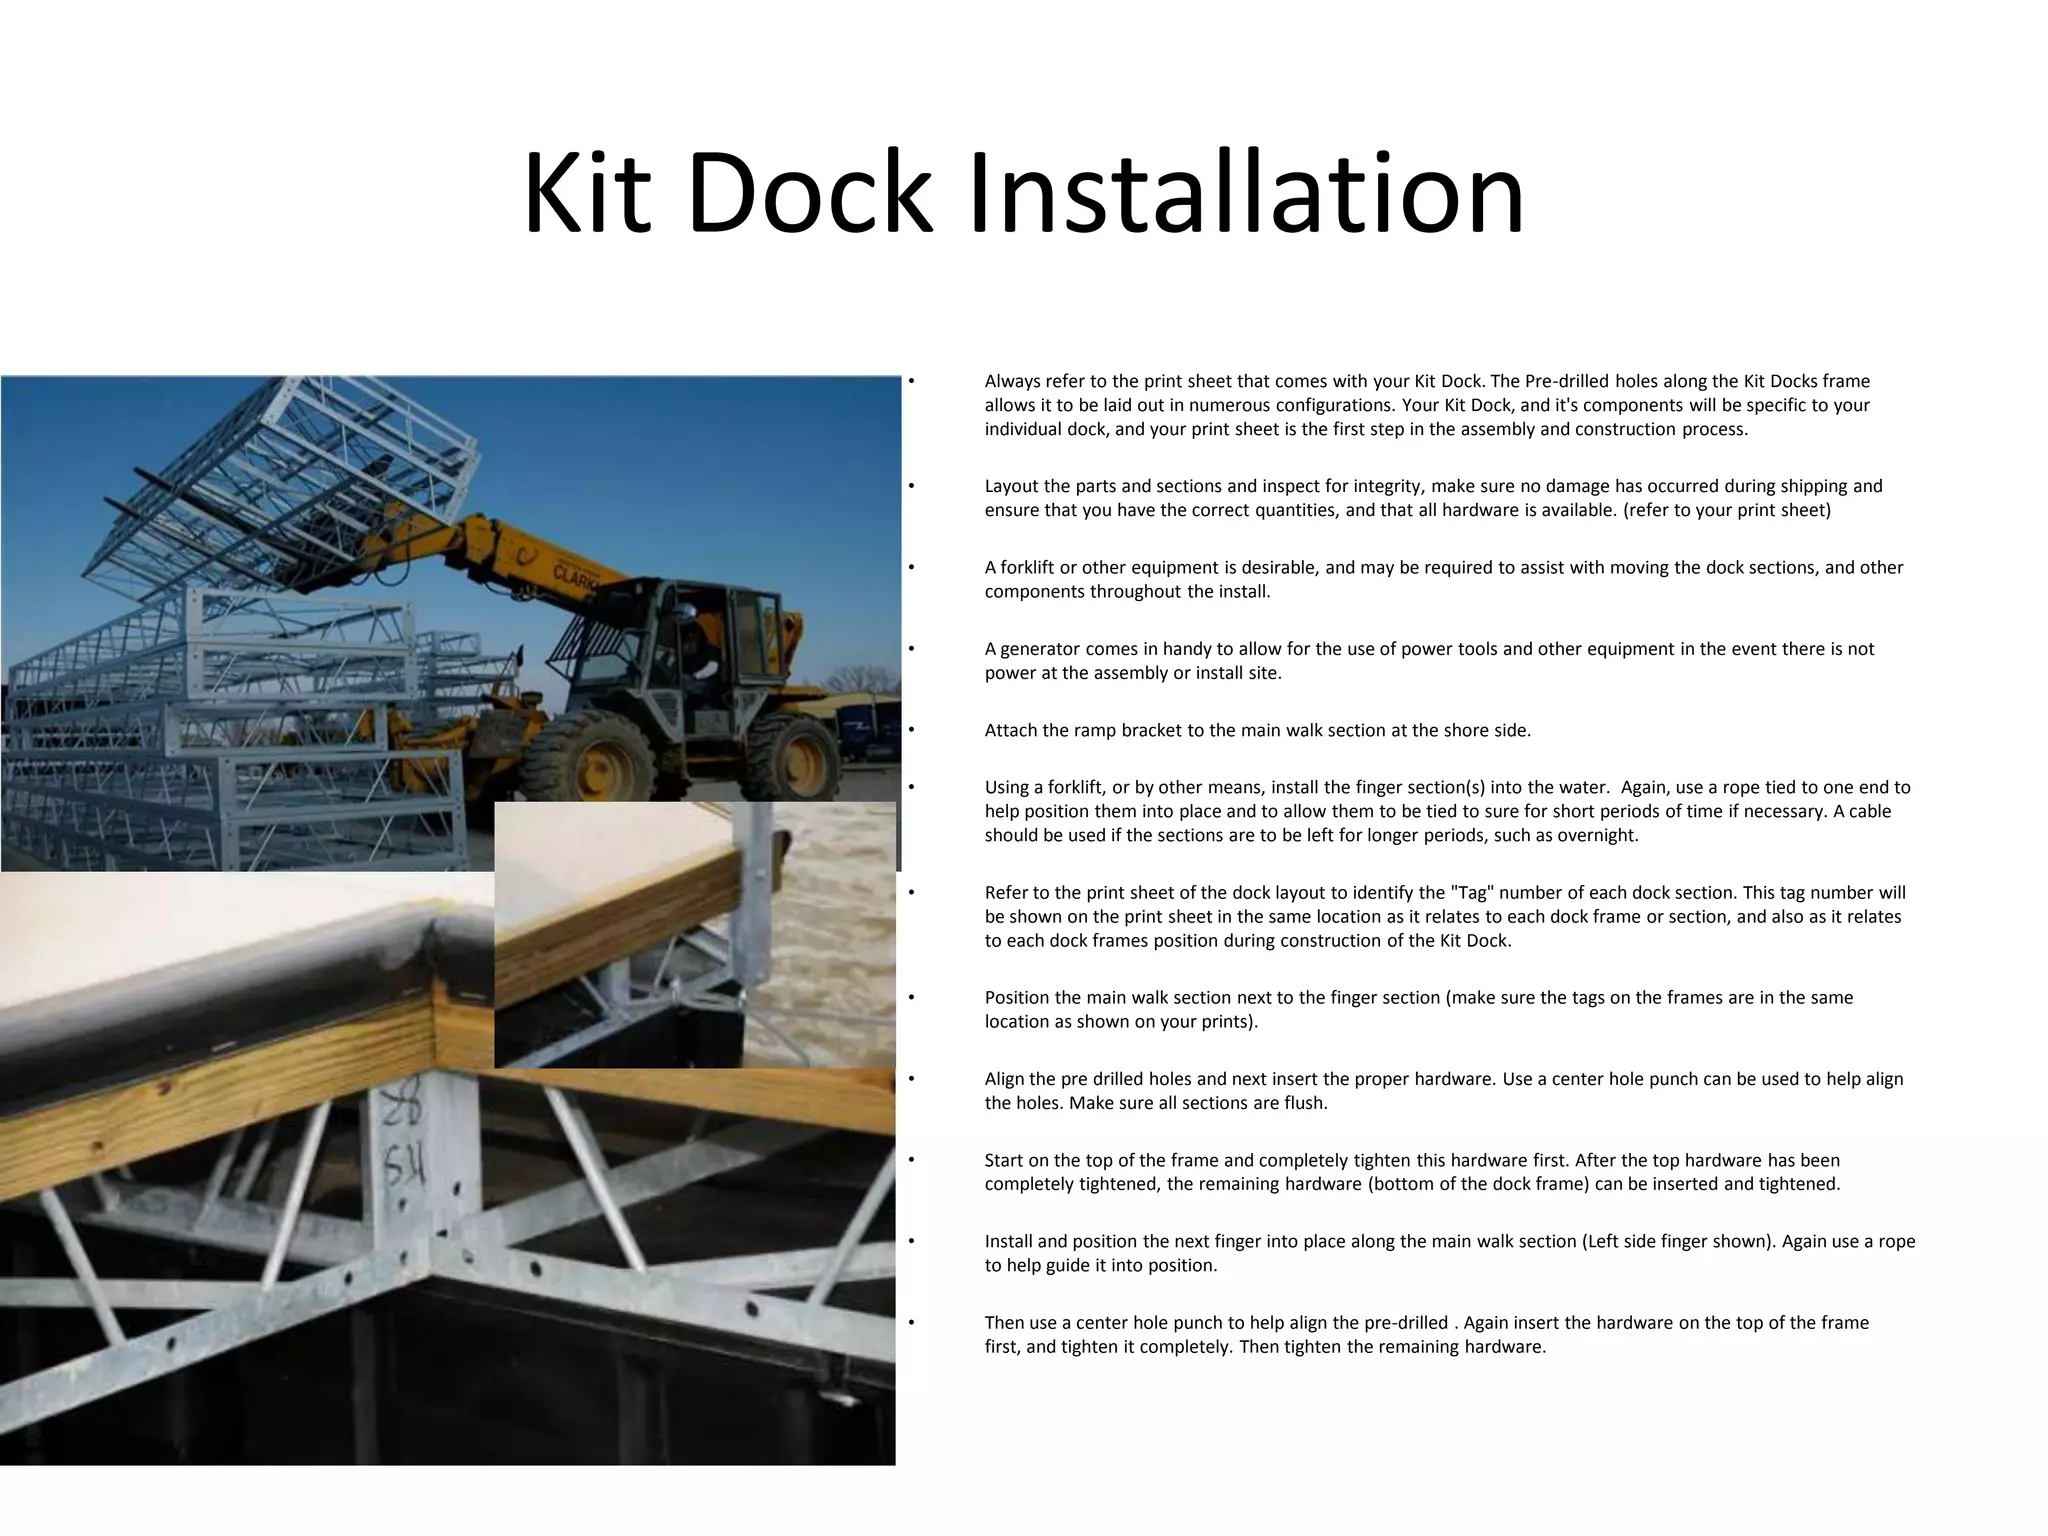


The document provides detailed assembly instructions for a ShoreMaster kit dock, emphasizing the importance of the print sheet for specific configurations and component verification. It outlines the preparation steps, including inspection of parts, floating alignment, and hardware installation for both the dock assembly and ramp attachment. Additionally, the document details procedures for installing roofing panels and anchor cables to ensure stability and durability of the dock structure.


![Materi Teks Pantun Bahasa Indonesia Kelas XI [K13]](https://cdn.slidesharecdn.com/ss_thumbnails/materitekspantunbahasaindonesiakelasxi-141115212253-conversion-gate02-thumbnail.jpg?width=640&height=640&fit=bounds)


![Materi Teks Cerpen Bahasa Indonesia Kelas XI [K13]](https://cdn.slidesharecdn.com/ss_thumbnails/materitekscerpenbahasaindonesiakelasxi-141115152643-conversion-gate01-thumbnail.jpg?width=640&height=640&fit=bounds)


