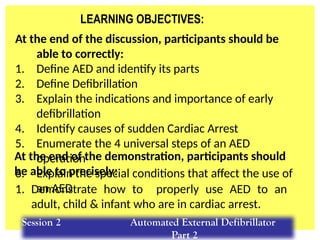
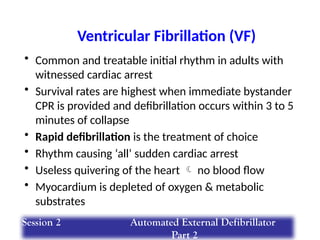
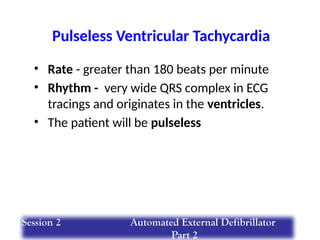
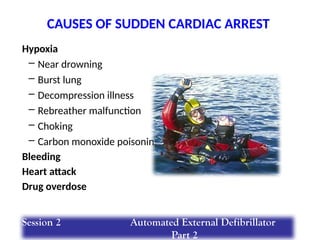
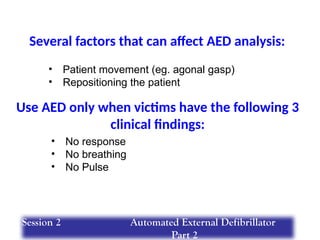
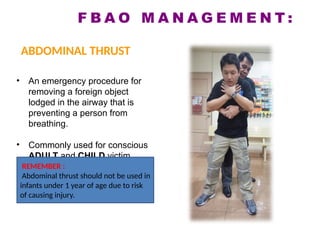
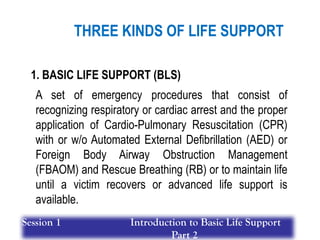
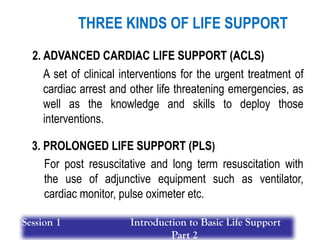
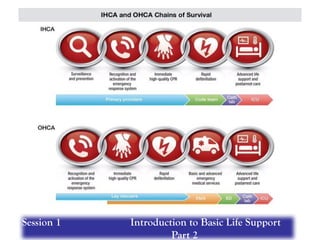
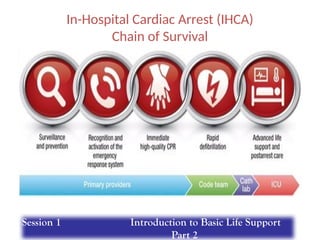
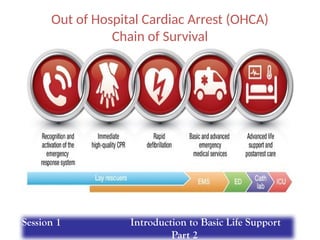
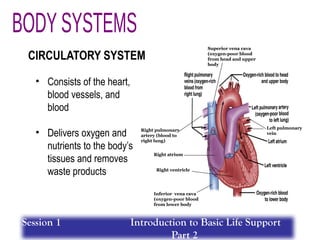
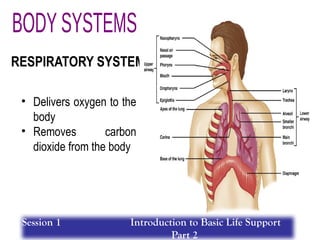
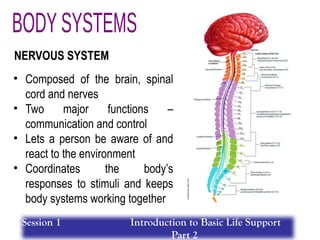
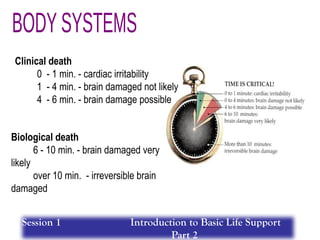
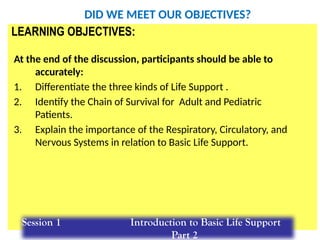
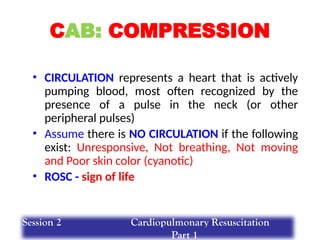
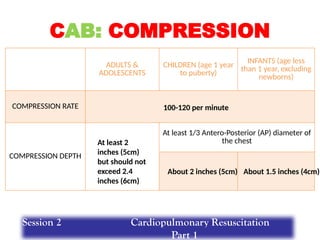
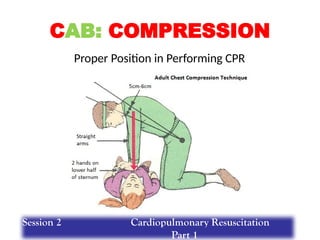
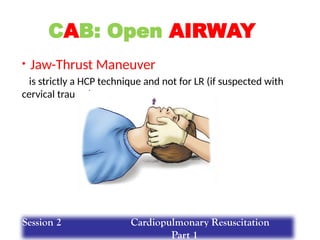
The document outlines basic life support (BLS) training house rules, including punctuality, attendance checks, and appropriate attire. It details emergency care principles such as scene safety, activating medical assistance, and performing assessments, alongside learning objectives focused on understanding BLS concepts and techniques. Additionally, it provides guidelines for administering CPR and using an Automated External Defibrillator (AED), emphasizing the importance of high-quality CPR performance.


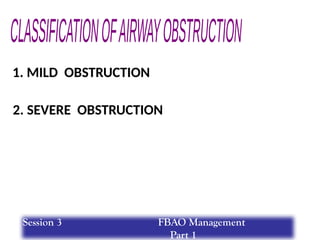
![HIGH-QUALITY CPR:
1. Adequate Compression Rate (100-120/minute)
2. Adequate Compression Depth (at least 2 inches
[5cm]
but should not exceed 2.4 inches [6cm]) (for adult
only)
3 . Allow Complete Chest Recoil after each
compression
4 . Minimize Interruptions in Compression
Session 2 Cardiopulmonary Resuscitation
Part 1](https://image.slidesharecdn.com/basic-life-support-training-240824063433-dba316c6/85/Basic-Life-Support-Training-special-pptx-61-320.jpg)
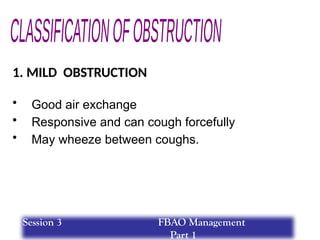
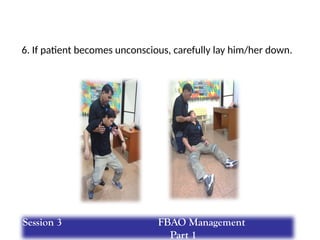
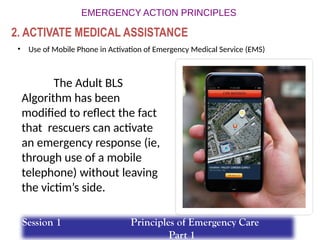
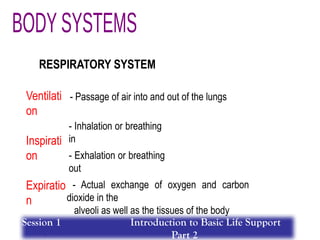
![Introduce yourself.
Check for Responsiveness:
· Unconscious/unresponsive
HIGH-QUALITY CPR:
1. Adequate Compression Rate (100-120/minute)
2. Adequate Compression Depth (at least 2 inches [5cm]
but should not exceed 2.4 inches [6cm])
3 . Allow Complete Chest Recoil after each compression
4 . Minimize Interruptions in Compression
5. Avoid Excessive Ventilation
Use AED if already available
Resume CPR after Shock delivery
If AED tells “No Shock Advised” for the
second time:
· Check for Pulse
Simultaneously Check for:
· Breathing
· Pulse (for not more than 10 seconds [for HCP only])
Activate Emergency Response System:
· Shout for nearby help
· Mobile phone or phone patch(if available)
· Get AED/emergency equipment (or send someone to do so)
· No breathing or only gasping
· No definite pulse
If AED initially tells “No Shock Advised”:
· Continue CPR
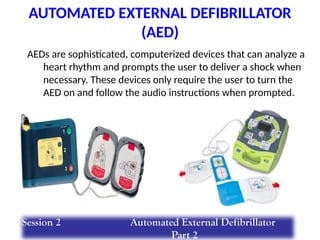
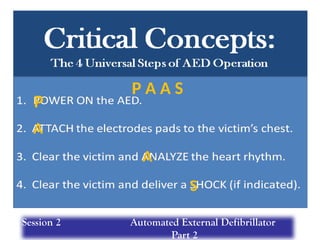
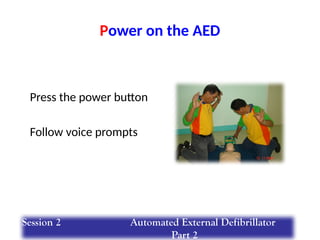
Universal Steps in AED Operation:
Power on
Attach pads
Analyze Heart Rhythm
Shock
START GIVING 5 CYCLES OF HIGH-QUALITY CPR:
· Give 30:2 (Compression to Ventilation Ratio)
· Compression: 30 compressions within 15-18 sec (100-120/min)
· Ventilation: 2 ventilations delivered 1 sec each breath
· 5 cycles equivalent to 2 minutes
BLS HEALTHCARE PROVIDER CARDIAC ARREST
ALGORITHM
BLS HEALTHCARE PROVIDER CARDIAC
ARREST ALGORITHM
Verify Scene Safety](https://image.slidesharecdn.com/basic-life-support-training-240824063433-dba316c6/85/Basic-Life-Support-Training-special-pptx-62-320.jpg)
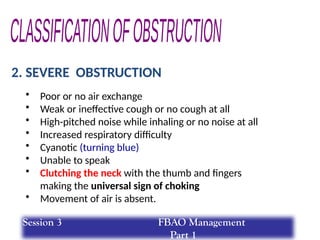
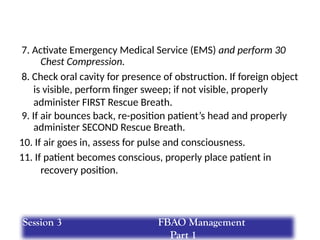
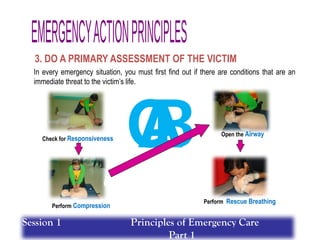
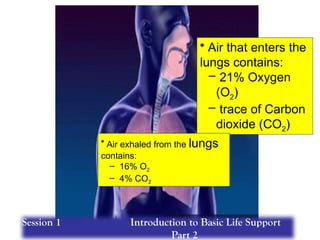
![Introduce yourself.
Check for Responsiveness and for No
breathing or
no normal breathing (only gasping)
for not more than 10 seconds
· Unconscious/unresponsive/not breathing
HIGH-QUALITY CPR:
1. Adequate Compression Rate (100-120/minute)
2. Adequate Compression Depth (at least 2 inches [5cm]
but should not exceed 2.4 inches [6cm])
3 . Allow Complete Chest Recoil after each compression
4 . Minimize Interruptions in Compression
5. Avoid Excessive Ventilation
Use AED if already available
Resume CPR after Shock delivery
If AED tells “No Shock Advised” for the
second time:
· Check for Responsiveness
Activate Emergency Response System:
· Shout for nearby help
· Mobile phone or phone patch(if available)
· Get AED/emergency equipment (or send someone to do so)
If AED initially tells “No Shock Advised”:
· Continue CPR
Universal Steps in AED Operation:
Power on
Attach pads
Analyze Heart Rhythm
Shock
START GIVING 5 CYCLES OF HIGH-QUALITY CPR:
· Give 30:2 (Compression to Ventilation Ratio)
· Compression: 30 compressions within 15-18 sec (100-120/min)
· Ventilation: 2 ventilations delivered 1 sec each breath
· 5 cycles equivalent to 2 minutes
BLS LAY RESCUER CARDIAC ARREST
ALGORITHM
BLS LAY RESCUER CARDIAC ARREST
ALGORITHM
Verify Scene Safety](https://image.slidesharecdn.com/basic-life-support-training-240824063433-dba316c6/85/Basic-Life-Support-Training-special-pptx-63-320.jpg)
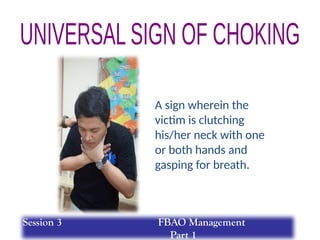
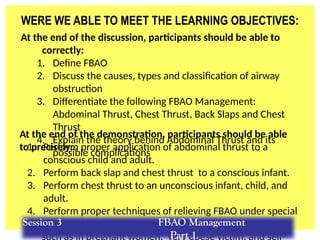
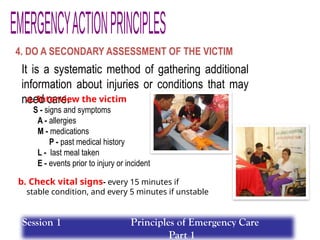
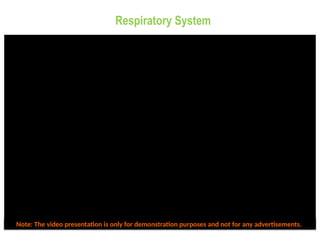
![START GIVING 5 CYCLES OF HIGH-QUALITY CPR:
Introduce yourself.
· No breathing or only gasping
· No definite pulse
Simultaneously Check for:
· Breathing
· Pulse (for not more than 10 seconds [for HCP only])
Check for Responsiveness:
· Unconscious/unresponsive
Use AED if already available
For lone rescuer (unwitnessed sudden collapse of a child/infant)
do 5 cycles of CPR before calling for help
Universal Steps in AED Operation:
Power on
Attach pads
Analyze Rhythm
Shock
Resume CPR after Shock delivery
If AED initially tells “No Shock Advised”:
· Continue CPR
If AED tells “No Shock Advised” for the
second time:
· Check for Pulse
HIGH-QUALITY CPR:
· Adequate Compression Rate (100-120/minute)
· Adequate Compression Depth: CHILDREN: about 2 inches [5cm]
INFANTS: about 1.5 inches [4cm]
• Allow Complete Chest Recoil after each compression
· Minimize Interruptions in Compression
· Avoid Excessive Ventilation
1 Rescuer 2 Rescuers
30:2
(Compression to Ventilation Ratio)
15:2
(Compression to Ventilation Ratio)
30 compressions in 15 to18 sec
(100-120/min) 15 compressions in 7 to 9 sec (100-120/min)
Child: Heel of one hand with the other hand
on top or One hand technique
Infant: Two-finger technique
Child: Heel of one hand with the other hand on
top or One hand technique
Infant: Two-thumbs hand encircling technique
2 ventilations delivered 1 sec each breath
5 cycles equivalent to 2 minutes 10 cycles equivalent to 2 minutes
Activate Emergency Response System:
· Shout for nearby help
· Mobile phone or phone patch (if available)
· Get AED/emergency equipment (or send someone to do so)
BLS PEDIATRIC CARDIAC ARREST ALGORITHM
(HEALTHCARE PROVIDER)
Verify Scene Safety
BLS PEDIATRIC CARDIAC ARREST ALGORITHM
(HEALTHCARE PROVIDER)](https://image.slidesharecdn.com/basic-life-support-training-240824063433-dba316c6/85/Basic-Life-Support-Training-special-pptx-64-320.jpg)