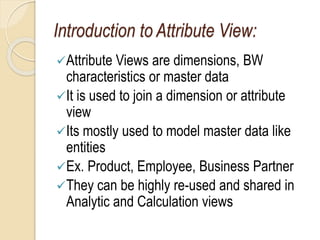
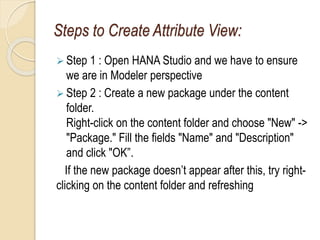
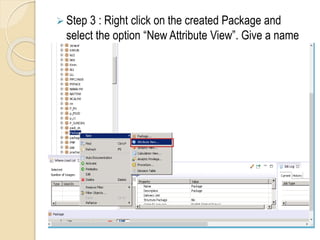
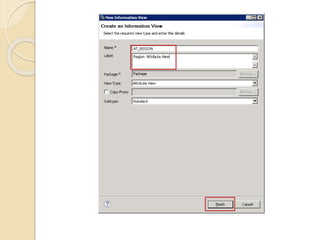
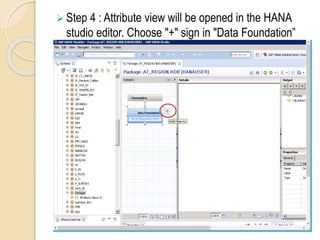
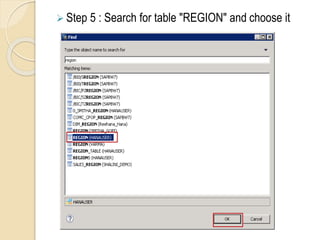
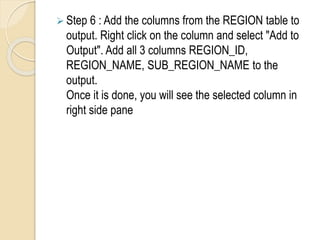
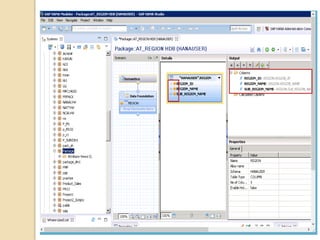
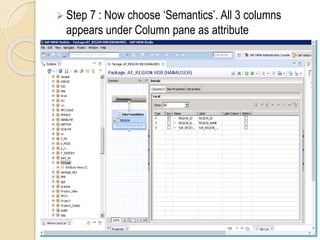
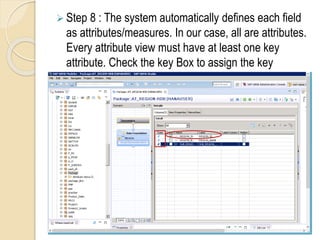
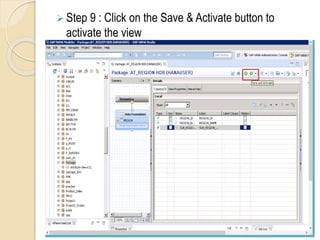
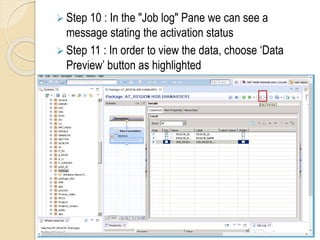
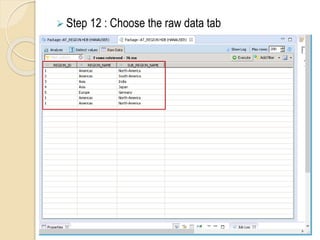
ATTRIBUTE VIEWS
- Yasmin Banu A
Introduction to Attribute View:
Attribute Views are dimensions, BW
characteristics or master data
It is used to join a dimension or attribute
view
Its mostly used to model master data like
entities
Ex. Product, Employee, Business Partner
They can be highly re-used and shared in
Analytic and Calculation views
Steps to Create Attribute View:
 Step 1 : Open HANA Studio and we have to ensure
we are in Modeler perspective
 Step 2 : Create a new package under the content
folder.
Right-click on the content folder and choose "New" ->
"Package." Fill the fields "Name" and "Description"
and click "OK”.
If the new package doesn’t appear after this, try right-
clicking on the content folder and refreshing
 Step 3 : Right click on the created Package and
select the option “New Attribute View”. Give a name
and a description and Choose ‘Finish’
 Step 4 : Attribute view will be opened in the HANA
studio editor. Choose "+" sign in "Data Foundation”
 Step 5 : Search for table "REGION" and choose it
 Step 6 : Add the columns from the REGION table to
output. Right click on the column and select "Add to
Output". Add all 3 columns REGION_ID,
REGION_NAME, SUB_REGION_NAME to the
output.
Once it is done, you will see the selected column in
right side pane
 Step 7 : Now choose ‘Semantics’. All 3 columns
appears under Column pane as attribute
 Step 8 : The system automatically defines each field
as attributes/measures. In our case, all are attributes.
Every attribute view must have at least one key
attribute. Check the key Box to assign the key
 Step 9 : Click on the Save & Activate button to
activate the view
 Step 10 : In the "Job log" Pane we can see a
message stating the activation status
 Step 11 : In order to view the data, choose ‘Data
Preview’ button as highlighted
 Step 12 : Choose the raw data tab
THANK YOU

SAP HANA - Attribute views

  • 1.
  • 2.
    Introduction to AttributeView: Attribute Views are dimensions, BW characteristics or master data It is used to join a dimension or attribute view Its mostly used to model master data like entities Ex. Product, Employee, Business Partner They can be highly re-used and shared in Analytic and Calculation views
  • 3.
    Steps to CreateAttribute View:  Step 1 : Open HANA Studio and we have to ensure we are in Modeler perspective  Step 2 : Create a new package under the content folder. Right-click on the content folder and choose "New" -> "Package." Fill the fields "Name" and "Description" and click "OK”. If the new package doesn’t appear after this, try right- clicking on the content folder and refreshing
  • 4.
     Step 3: Right click on the created Package and select the option “New Attribute View”. Give a name and a description and Choose ‘Finish’
  • 6.
     Step 4: Attribute view will be opened in the HANA studio editor. Choose "+" sign in "Data Foundation”
  • 7.
     Step 5: Search for table "REGION" and choose it
  • 8.
     Step 6: Add the columns from the REGION table to output. Right click on the column and select "Add to Output". Add all 3 columns REGION_ID, REGION_NAME, SUB_REGION_NAME to the output. Once it is done, you will see the selected column in right side pane
  • 10.
     Step 7: Now choose ‘Semantics’. All 3 columns appears under Column pane as attribute
  • 11.
     Step 8: The system automatically defines each field as attributes/measures. In our case, all are attributes. Every attribute view must have at least one key attribute. Check the key Box to assign the key
  • 12.
     Step 9: Click on the Save & Activate button to activate the view
  • 13.
     Step 10: In the "Job log" Pane we can see a message stating the activation status  Step 11 : In order to view the data, choose ‘Data Preview’ button as highlighted
  • 14.
     Step 12: Choose the raw data tab
  • 15.