Advanced MultiMedia v2 (20 slides)
•Download as PPTX, PDF•
0 likes•153 views

This is the updated production log for Advanced Multimedia. I had to include evidence of creating each concept that I added onto my photography portfolio

Recommended
More Related Content
What's hot
What's hot (18)
Similar to Advanced MultiMedia v2 (20 slides)
Similar to Advanced MultiMedia v2 (20 slides) (20)
More from Brandon Boyd
More from Brandon Boyd (20)
Recently uploaded
Recently uploaded (20)
Advanced MultiMedia v2 (20 slides)
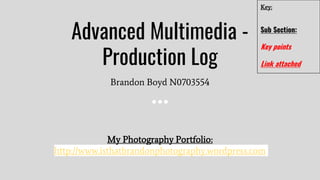
- 1. Advanced Multimedia - Production Log Brandon Boyd N0703554 My Photography Portfolio: http://www.isthatbrandonphotography.wordpress.com Key: Sub Section: Key points Link attached
- 2. Contents Page (1) Target Audience (2) Brand Identity vs Image (3) Colour Scheme/Palette (4) Logo (5) ‘Landing’ Page (6) ‘About Me’ Page (7) Short Biography (8) Tone of Voice (9) Portraits Research (10) Portraits - Finalising (11) Gallery (12) Showreel Research (13) Showreel - Finalising (14) Achievements/Publications (15) ‘Contact Me’ Page (16) Social Media Links (17) Blog & ‘Active Professional Development’
- 3. Target Audience This website will showcase my specific skill set in photography. Although I have other skills in the creative sector including videography, modelling and editing, I wanted to pick a media type that I have a wide range of content for. My aim: This website will focus on my photography niche and my aim is to utilise my creativity, along with the unique methods that I have developed over the years, to plan, edit and showcase my photography in its strongest form. Who is my target audience? During the developmental process, I aim to target my photography portfolio to other media creatives in the industry primarily, but also future employers. My portfolio could also be beneficial for current students with an interest in photography or art, and would allow them to progress their studies further as they would have seen an exemplar portfolio which will be at its highest standard. How have I identified this audience? I created a survey on Surveymonkey asking people the best way to work out a target audience, and if creating a photography portfolio, who will benefit most from accessing my website. Although I didn’t get many physical responses, I spoke to these two respondents on the phone, and they both explained their answers in more details. I already had an idea of my target audience, but this helped me identify a specific market. Target Audience aims: For me to ensure that my target audience is met, I will use photos of people that have a variety of different features. This will include, different genders, types of portrait photography and thinking about the cultures of being included across the site.
- 4. ‘Brand Identity’ looks at how an actual brand works, whereas ‘Brand Image’ is what the customers or the general public see. E.g what’s broadcasted on social media. To read more, click here. Brand Identity vs Brand Image Having a brand logo is also very important when trying to stand out from the crowd, and here’s a few examples of photography logos that I will not be using as inspirations. What I want to do: I want to ensure that I am showcasing myself as a professional photographer, rather than just somebody who takes pictures as a hobby. I want to showcase my best photography, and that I am an individual who takes pride in my work. In addition to this, I want to convey that I am a confident and bubbly person, willing to collaborate with anyone and everyone; whether professionally or to offer a good deed to help improve someone else’s portfolio. I would label my photography type as a ‘creative professional’ What I have done: To improve my branding, I have researched a variety of well known brands and thought about why they have recognisable logos and why some are likely to get more attraction to their websites/portfolios than others. (See Figure 1). I have also been to a variety of events and meetups where I have built connections with people that have their own brands; so researching into what a brand image is, has helped me think creatively about the potential design, tone of voice and colour that I want to present myself as; because creating a brand image can only be done through being your true self. The result: I have thought about different concepts that are important in the process of improving my brand image, and those include things such as having a personal logo, online persona (which I have done through YouTube, Instagram and Twitter mainly); and being an active user in a variety of media & creative groups. Figure 1:
- 5. Colour Scheme/Palette for the Logo Exploring colours: The next thing I had to decide was a colour scheme for my logo. Initially, these were some of the initial colours that I was drawn to, after using a colour generator called ‘coolors.co’. Exploring neutrals: This was a more simplistic colour palette with white, various greys and silvers. After reviewing both colour and neutrals, I realised that I could implement this basic colour scheme as the theme for my overall portfolio but I wanted my logo to have colour. Choosing a final colour: I decided that I was going to use the colour blue as the main focus for my logo, and experiment with different shades of blue. I also wanted to experiment with using my initials of my first and surname, and then just by the online persona I have been creating work under for the past few years ‘IsThatBrandon’. On Adobe Photoshop, I will also plan on experimenting with different shapes and fonts to make my logo stand out. Why have I chosen this colour? I have chosen blue, as this is my favourite colour. It is also the colour of ‘trust’ and ‘loyalty’. The colour blue reminds me of the phrase ‘out of the blue’ - which means for something to appear unexpectedly, and for me, this is something I can include on my portfolio. This colour is also said to protect, be calm, relax and support others, as well as having positive traits including confidence, peace, honesty and reliability. How this colour relates to my brand: This colour relates to my brand, as I want people to have full confidence in the photography I am creating and that I will be able to think of unique ideas on the go, based on the environments I host photoshoots in and who I work with.
- 6. Logo Photoshop Experiment 1: I wanted to have my name in the middle of the page with a variety of blue backgrounds. I also decided to add some shapes (decided to try circles but it didn’t look that great, so went with circles instead). Photoshop Experiment 2: For this design I started on a white background. I opened shapes and experimented with the ‘Tree’ and ‘Grass’ shapes. I used a watercolour paint brush to paint the shape onto the background of my logo. After this, I cropped the logo to turn it into a circle rather than having it as a square, and this is the final design. Logo Inspiration - Design Hill Here were some quick logo designs that I came up with. Out of all three, I prefer the third one the most, but wanted to use Adobe Photoshop to see what else I could create. For my experiments, I decided that I wanted to try using circles & squares to see what worked more effectively.
- 7. ‘Landing’ Page Each image has been blurred and used as a background What have I researched? I decided to look at some photography portfolios that had already been created. Pantelia’s doesn’t include a lot of information and lets the images speak for themselves. She also showcases different types of her photography on the main page (which is what I planned to do, according to my design). One aspect I don’t like from her page is having everything centred into the middle of the page, so working out where different concepts would go was a very important part of this process. In terms of Schoeller, I decided to use him as inspiration as most of his work falls into the category of ‘Portraits’. He also has a bold title for his page along with a black & white portrait image, and along with the rest of my research, this helped me when starting to create my own individual concepts. How did I create this design & the final page? I used Wordpress to create my portfolio. The template that I used was called ‘Maryland’ and it was the closest in appearance to my Photoshop design. I wanted to include both Pantelia and Scholler’s feature of having a variety of photography work as the homepage. I created each of the individual concepts individually and then added them to my website (such as the showreel, portrait and logo). Photoshop Design Final Page Page Inspirations - Anna Pantelia & Martin Schoeller
- 8. ‘About Me’ PagePhotoshop Design Final Page Page Inspirations - Anna Pantelia & Martin Schoeller What have I researched? When designing the ‘About Me’ page, I wanted to keep it simple rather than overpowering visitors with lots of information. I decided to add my social media links so that people could contact me straight from the website. I also decided to have a short FAQ section with an introductory motto which I have used to promote my brand for the last several years. After looking at both Pantelia and Schoeller’s personal profiles, the style I was intending my website to be similar to, was Schoeller’s. He has a black and white portrait image, with a few simple blocks of text to explain who he is. At first, I was unsure on whether to have a black and white or coloured image, and whether to have more/less information, but after reviewing my initial design and looking at the finished page, I am happy with how it turned out. How did I create this design & the final page? Creating this page was very simple, as I just wanted to include a portrait image with my name and brand name and reveal some personal information and facts about myself. I decided to note down some questions that would be important for when introducing myself to potential customers/clients/collaborators and decided to think of a ‘5 question FAQ’ - inspired by ‘Mr Bingo’ (who has a quirky personality and is able to showcase that with the wording of his posts). In terms of the typography on this page, I decided to Italic my answers and bold the questions so that there was a clear separation between each section of information.
- 9. Short Biography Draft 1 Biography Inspiration - ‘Mr Bingo’ Why the FAQ section works better: After completing the research about different tones of voice, I feel that my ‘About Me’ page has improved drastically. The main change was having my ‘Skills, Interests and Hobbies’ originally in a list, with not much purpose, but adjusting the page to have questions and answers, allows me to showcase my personality through the words. My tone of voice shows that I am confident in my work and that I have a comedic personality (as shown by JaackMaate and ‘Mr Bingo’ previously); but just not as dramatic. Asking for feedback: -I wasn’t able to sell my personality through lists of my skills, interests and hobbies -No need for the ‘Who Am I?’ title, as it was clear this was an ‘About Me’ page -Think about ‘Tone of Voice’ as wording sounds very complicated to understand -Update the profile picture with a more recent shot -Experiment with different text features (such as Bold, Underline and Italic) Final
- 10. Tone of Voice Who have I looked at? Social media is a great place to find a variety of people with interesting personalities/personas. Three of the main creators I looked at were ‘Mr Bingo’, Jack Ben Edwards and Jack Dean; (known as ‘JaackMaate’ on YouTube). Mr Bingo is known for his big, bold and very honest personality. His website includes a variety of curse words and funny jokes to link with his very outgoing and colourful visuals. He also has a shop where he sells items such as a print called ‘Who cares’ and a ‘Valentines Day print for single people’. His tone of voice throughout his website (and via his shop) show that he is a very confident man. I took inspiration from his ‘About Me’ section, by creating 5 questions that I would answer on my FAQ section of my ‘About Page’. JaackMaate is similar in style, but doesn’t currently own a portfolio. Like Mr Bingo, he is very open and honest with his opinions which has got him in YouTube debates with other creators, or even Twitter arguments with singer/songwriters, like Ellie Goulding. The third and final inspiration was Jack Ben Edwards who currently lives and works a multifaceted lifestyle. He owns a YouTube channel, a blog, has been featured in various magazines, articles and publications, and his tone of voice is more comedic than just using dark humour and bad language. He is also currently about to finish his English Literature degree at Durham University and he plays on the fact that he’s a ‘posh boy’ by exaggerating his vocabulary. Why tone of voice is important? Tone of Voice is usually the first thing that an individual will notice about a website/portfolio. It’s important to be true to yourself and write in a way that not only engages, but is the same approach for how you would speak in real life. Knowing the age and target market for your audience will help in this decision process, and that’s why I have personally decided not to use too much complicated vocabulary. Firstly, that’s not how I speak in real life, and secondly, a more fun/comedic style of writing is more likely to attract visitors / recommendations from others. ‘We write the way we speak, and we speak to everyone the same way we speak to our friends’. I speak to my friends in a professionally casual way, and that’s the style of writing I went for on my site.
- 11. Portraits - Secondary Research Neon Inspirations - Slava Thisset & Tom Dewh Portrait Inspirations - Annie Leibovitz & David Bailey Similar to my photography: I managed to find a few photographers who create photography work with the use of neon lights. Some of my photography work uses this similar style and I would definitely think about adding some of my neon work to my photography portfolio and my showreel. Portrait Tips: Things to consider when taking a portrait image Similar to my portrait inspiration: The above photos are inspirations for the type of portrait I would like to try and capture and I am always finding inspirations for different poses, locations and styles of photography. I haven’t experimented that much with black & white photography so that was my aim.
- 12. Portraits - Finalising Updating my portrait: In terms of portraits, I have a few ‘go to images’ which are featured above. The only problem is that none of them are images that were taken recently, so I decided to have another photo-shoot to search for a new portrait shot that would work best to promote my photography. Aim for the photoshoot: My aim was to get a variety of close up, long shots and varied emotions (including no smiles and smiles). Here’s a variety of images that were taken with the best few highlighted on this slide. All of these images are unedited. Colour: Straightaway you can see that I was able to capture coloured images from the shoot. There were over 200+ images to choose from but these are the ones where the pose showed confidence rather than awkwardness. I was going to ask my photographer to edit the photos in black and white, so didn’t worry about the colours Editing: It doesn’t seem like there was much editing done to the images, other than a black and white filter, and potentially some additional changes of brightness, contrast and shadows. Tone: In terms of the tone of the image, the image is split into a mixture of light and dark tones. The images were professionally edited and look similar to the inspired portraits that I was looking to replicate, but also with my own style.
- 13. Gallery Image in Gallery: When you click on each image in any of the galleries, the background is black. Finished Showreel: have added my completed showreel to the top of the tab, with a drop down menu leading to each of the suitably named galleries. Finished Gallery: This is an example of what one of the galleries looks like. Why I’ve chosen this gallery layout: After completing research into the various ways a gallery can be showcased, I felt that I wasn’t able to find one that suited my style. I was able to include a template gallery page on the website builder Wordpress and decided to have three columns of images with a scrolling option. According to my research, things in threes look a lot more attractive that groups of two, four or more than that, and that’s how I came up with the simple layout for these pages. Example 1: ‘Destiny Road Photography’ Example 2: ‘Autumn Mooney’
- 14. Showreel Developments/Research Showreel Inspiration - Richard Oakes Showreel Inspirations: In terms of research completed for my showreel, I firstly looked at a variety of creative showreels. Richard Oakes’s 2020 Cinematographer Showreel: After watching this showreel, I really like the variety of work that he showcases, but if I was an employer in the creative industry looking for a skilled photographer for a certain project, I wouldn’t know if I could have 100% faith in him due to such a wide range of projects he has already worked on. David Tabagari’s Photography Showreel: This showreel was really interesting to watch, as he showcases the best images he has taken, accompanying them to the music. Between 00;36 and 00;38 there is a flash like effect that makes the images disappear and appear once again - which is a concept I wanted to try and include for my own showreel as it looks really professionally done, and would help my showreel to stand out. Mark Duffy’s Photography Showreel: Out of all three of the showreels that I watched, this is the one with the most variation. Duffy has also included some of his own self portraits which it seems he’s edited himself. My initial showreel approach would have been similar to him, but I wanted to showcase photography I had taken of other people, rather than myself. Showreel Inspiration - David Tabagari Showreel Inspiration - Mark Duffy
- 15. Showreel - Finalising Creating the showreel: When creating my showreel, I decided that I wanted to split it into main sections based on the images I wanted to use. Most of my images fall under the portrait sub section of ‘club/neon’ photography or the sub section of portraits around architecture/buildings. I decided to begin experimenting with the layout of my photography work. When first creating the showreel I wanted to just have ‘IsThatBrandon’ as the introduction. Then, I selected a few collections of images that I wanted to transition together. I also decided to include a few individual images that stood out from the rest of the set. Choosing photos: When looking through my collections of images, I wanted to ensure that I chose some pictures that I hadn’t already added to my portfolio, but also to include some of my favourite neon images to show them off. I did this by using editing skills to make some of the images pan in and last longer on the screen. I also included individual images from certain shoots as they were the ‘best photos’ from each of those shoots and didn’t necessarily fit the theme of a neon portrait. Choosing music: I didn’t have any inspirations behind the background music selection. I just wanted to ensure that the track I picked wasn’t too upbeat or too slow that would make people fall asleep. I searched for ‘Pop/Inspirational’ theme songs, and chose ‘Ruination 2’ which is available to download for free, from the YouTube Audio Library. The Finished Showreel: Photography Showreel 2020
- 16. Achievements/Publications For the ‘Achievements and Publications’ page, I decided to post some video evidence from when I had previously analysed some of my photography work. I had completed 4 sketchbooks during my A Levels and had to research a variety of different photographers and artists. Updated Achievements/Publications After this, we used these inspirations to create our own photography work and experiment with a variety of different editing tools, colours and techniques that we had learnt during the course. I decided to add these YouTube videos as it’s nice to sometimes showcase the early stages of photography work and then how far you have progressed over the years. YouTube Videos: Photography Book 1, Photography Books 2,3 & 4
- 17. ‘Contact Me’ Page This is the contact page. I decided to add a ‘wave’ emoji in the bio to show that I have some personality and open to communicating with new people. I thought I would keep the theme simplistic and therefore used my colour palette colours (See Slide X); and a scrolling option to view the form. For the short bio at the beginning. I added a simple sentence saying; ‘Let’s talk. Don’t hesitate to directly contact me through this website or social media! That’s all’... Contact Form: Two of the fields required answers so I know exactly who is contacting me (Name and Email Address). The above fields make it easy to identify an individual rather than having to ask those questions later. Creative Collaboration Option: I included an optional field called ‘website’ so that if other photographers or models wanted to collaborate, I could easily identify which media type they were. (See Slide 3 for my ‘Target Audience’) At the bottom of the form is a black button with the word ‘Submit’ so that people can easily identify where they can send the form off to.
- 18. Social Media ‘About Me’ Page ‘Contact Me’ PageTo create the social media links and make them active, I used the template that was given to me and made sure that I put the platforms in the right order. From there, I had to click on the image, ‘link to’, and type in the full HTML address including the ‘:’ and ‘/’ otherwise the page wouldn’t link. ‘About Me’ Page: It benefits my audience by having social media on my about me page because then all of my accounts are accessible in the same place. I have included my Facebook Page, Twitter, Instagram, LinkedIn, YouTube and a link to my main website if people wanted to see what other skills/interests I have, other than photography. ‘Contact Me’ Page: On this page, I have also added the links, so it’s easy for people to contact me rather than visitors having to check every page for my links. Why would social media be beneficial? Social Media is a very helpful tool to connect you with customers/clients. Being active on social media would allow me to engage with new audiences, especially when posting new content where I would be able to choose a location, add relevant hashtags to help my page get noticed or pay for sponsors to get extra exposure of my work. How would I use social media? I already use social media as if it’s my real life job, but I would ensure that I am professional and only sharing content on both my personal profile and photography profile that I am proud of or that shows me in a positive light. This will give confidence to the models, photographers or other collaborators that I am What do I want the end result to be? From creating my photography portfolio, I would love for people to reach out and connect with me n social media. I am hoping to go into a social media job full time, but to continue pursuing my hobby of photography would be very important, as it may end up transitioning into my full time job. I will regularly check my website and ensure that all of the social media handles are upto date (especially if I decided to rebrand in the near future).
- 19. Blog/APD (Active Professional Development) ‘Active Professional Development’ is a continuous learning process, where you can develop your knowledge and skills through participation based, independant or interactive learning. It allows people in the professional workplace to improve their skill sets after going through the important training. I really like the simplicity of the page, but think that it could have been made a lot better if you were able to see all of the posts at once, rather than having to click on ‘previous’ and ‘next’ post. Why am I including a blog to my portfolio? Writing blog posts is a very important aspect of a website or portfolio as it shows that you’re active outside of your media type. A blog allows you to engage or interact with any source and give opinions on it; whilst still being able to showcase your personality, tone of voice and creativity. Individuals are able to improve their professional development skills by staying ‘up-to date’ with the latest news stories or changes in a particular industry. My aims for the including the blog? Including the blog to my portfolio will showcase a new dimension to my creative outlets, and I will be able to share my views and opinions on relatable topics to help more traffic flow to my website, or for me to update visitors on certain projects I have been working on recently. What will my blog posts include? Anyone with a blog will know that you can write about almost anything, and I will take advantage of that. I will also make sure that I am writing about things that will be of interest to my visitors. For example the COVID-19 pandemic will be something I can create a blog post about, as it may be something an employer asks me about in the future. They could ask me a question like; ‘How did you manage to stay active/creative during this difficult time’ - and although I couldn’t be as creative as I wanted to, I would still be able to explain that I planned and executed my own photo-shoots which I could title ‘Coronavirus Creativity’. Planned blog posts: -Photography inspirations for my future shoots -Self Shooting -Models/Photographers I would love to work with… What can potential employers take away from reading my posts? They will be able to identify almost instantly that I am an open minded individual with an option or viewpoint on almost every topic. I will also have showcased a varied skill set in both my photography skills, editing skills and now my written skills. Finally, they should hopefully understand my addiction to social media and potentially point me in the direction of any social media related jobs.
Editor's Notes
- Finalising my own portrait: Colour, editing, tone
- -Who I have looked at (one sentence of what I liked/how I developed my idea) -Link ‘Ruination 2’ music to youtube audio library (NO SCREENSHOT!)
- -Editing process, software, music (where from?)