Download to read offline
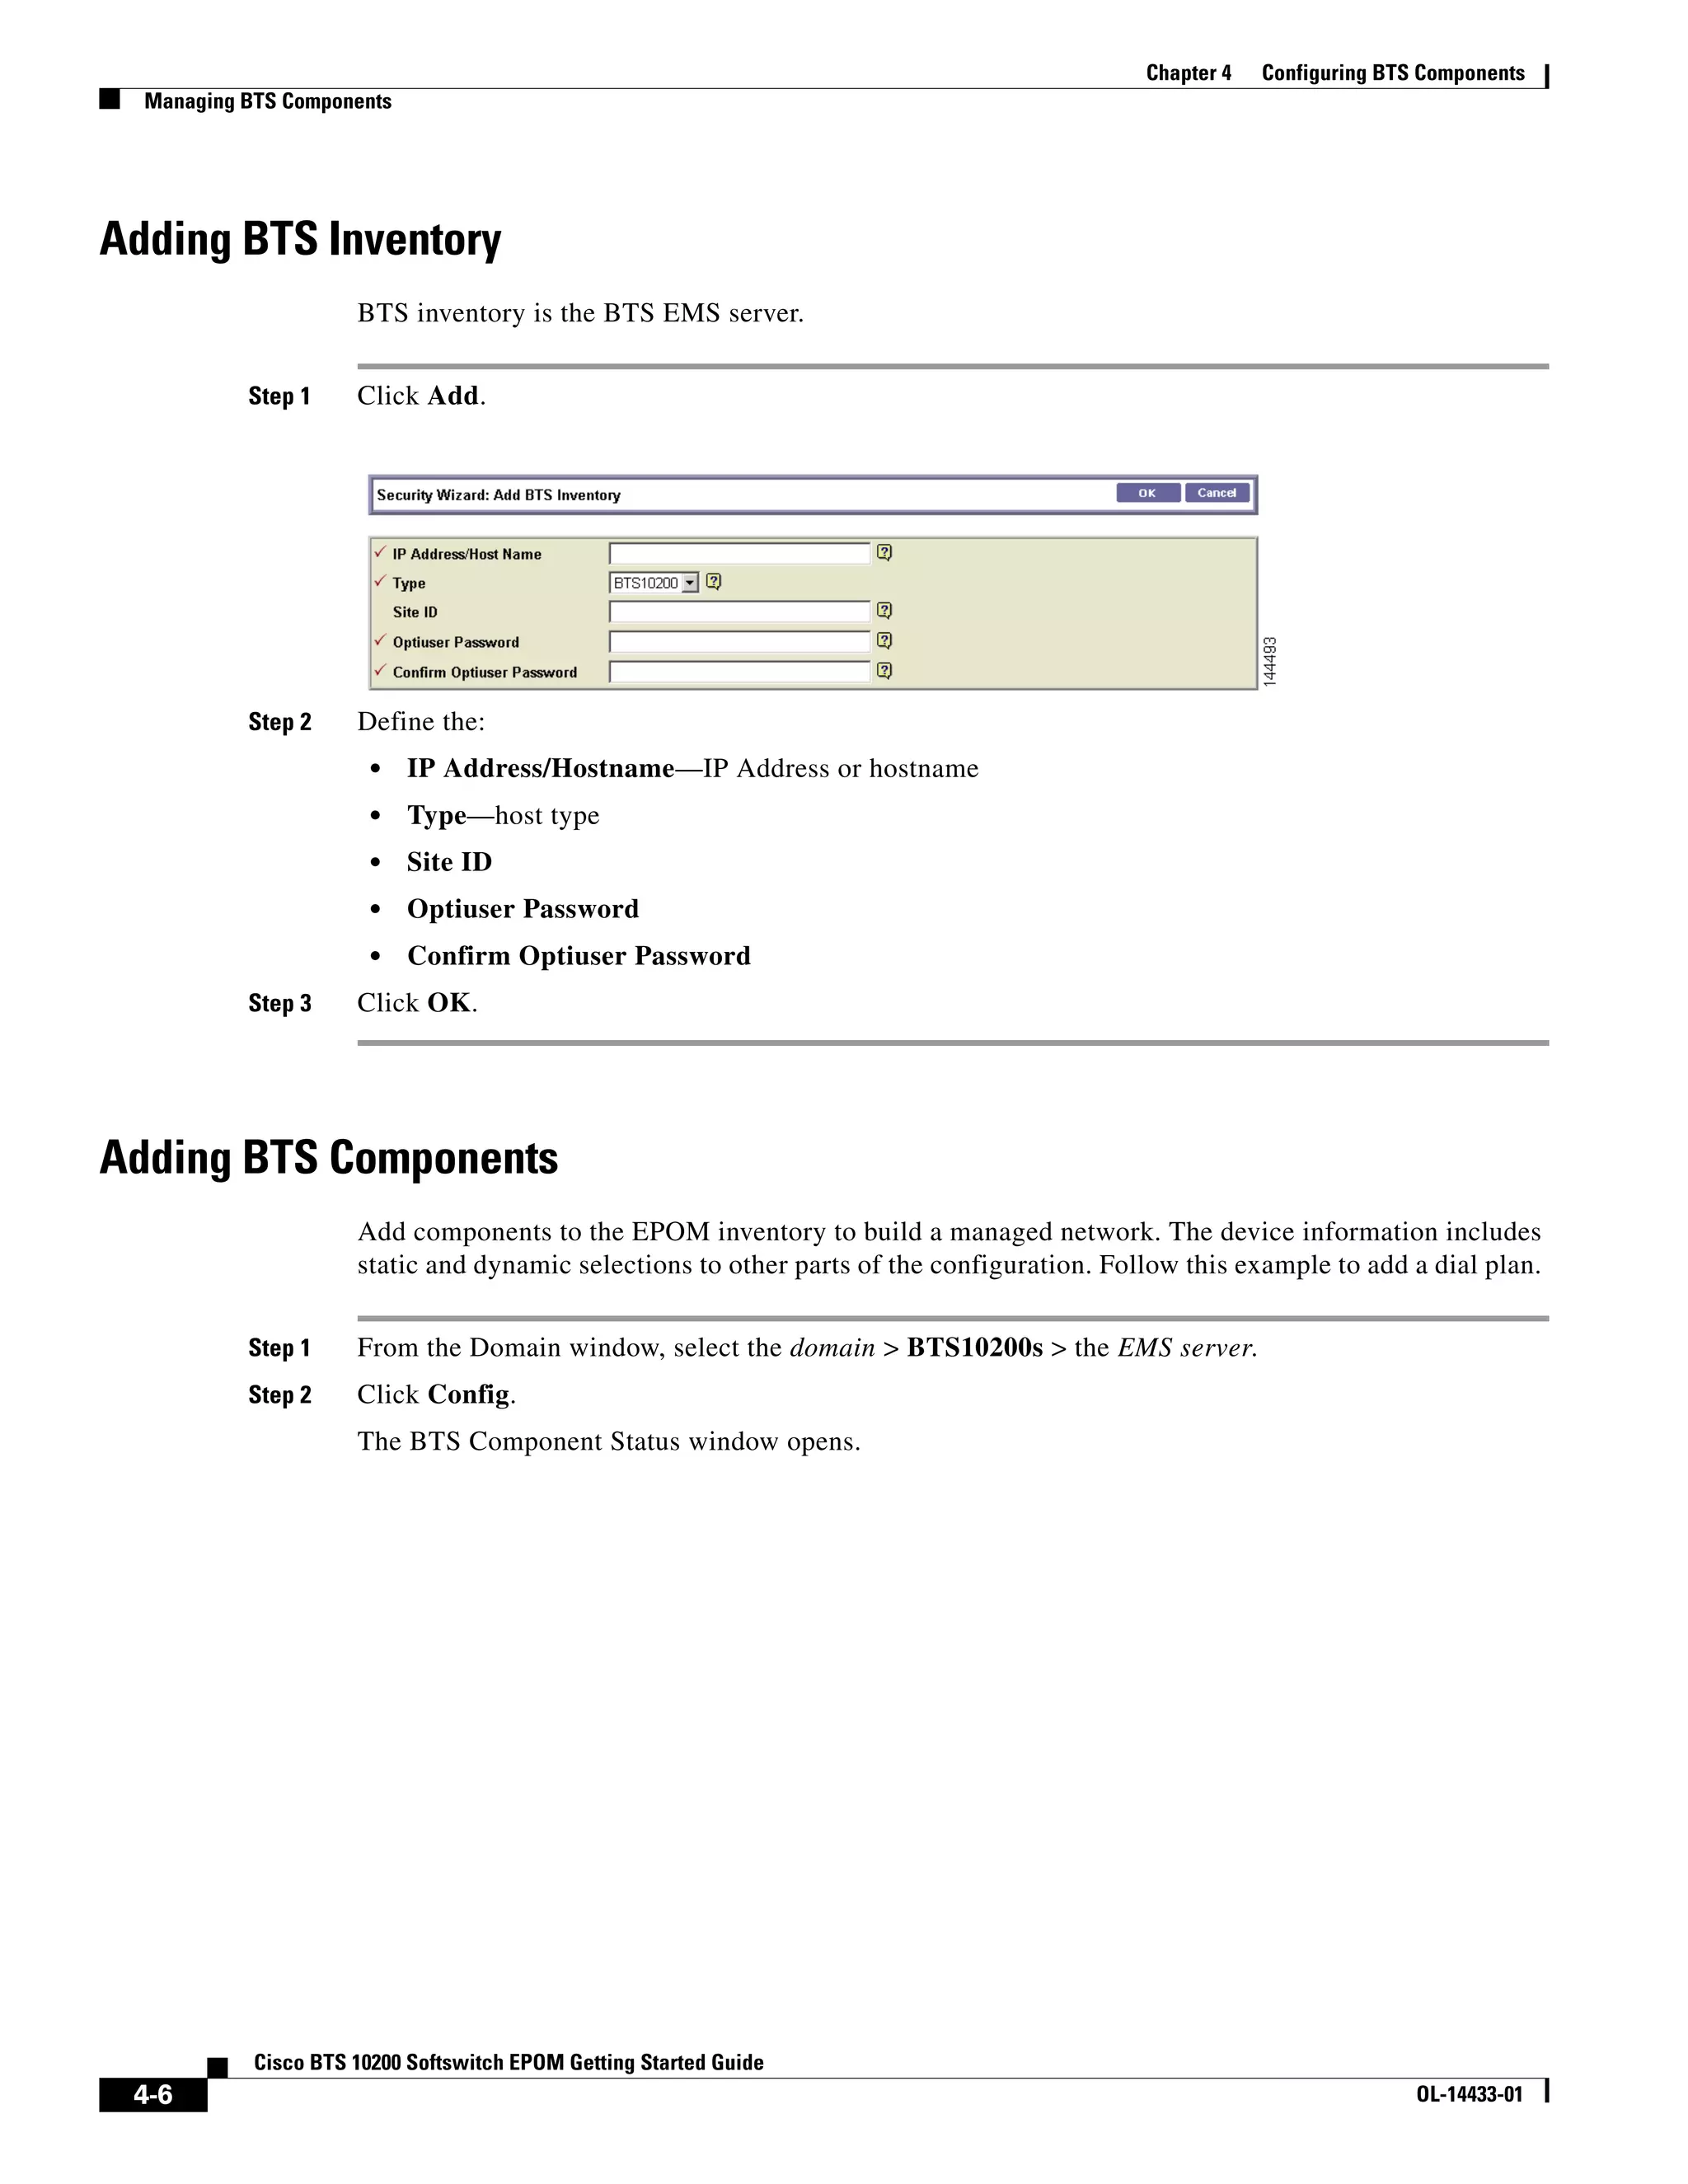
![CH A P T E R 4
Configuring BTS Components
Bulk Provisioning
To use information on one BTS server to configure another BTS server:
1. use the bulk_export command to generate a CLI file from the first BTS server
2. use the bulk_import command to load that generated CLI file on the other BTS server; it uses SSL
to transfer the file from the EPOM server to the BTS server
bts_export looks like the following:
root@cyber229:opt 21> /opt/CSCOepom/bin/bts_export
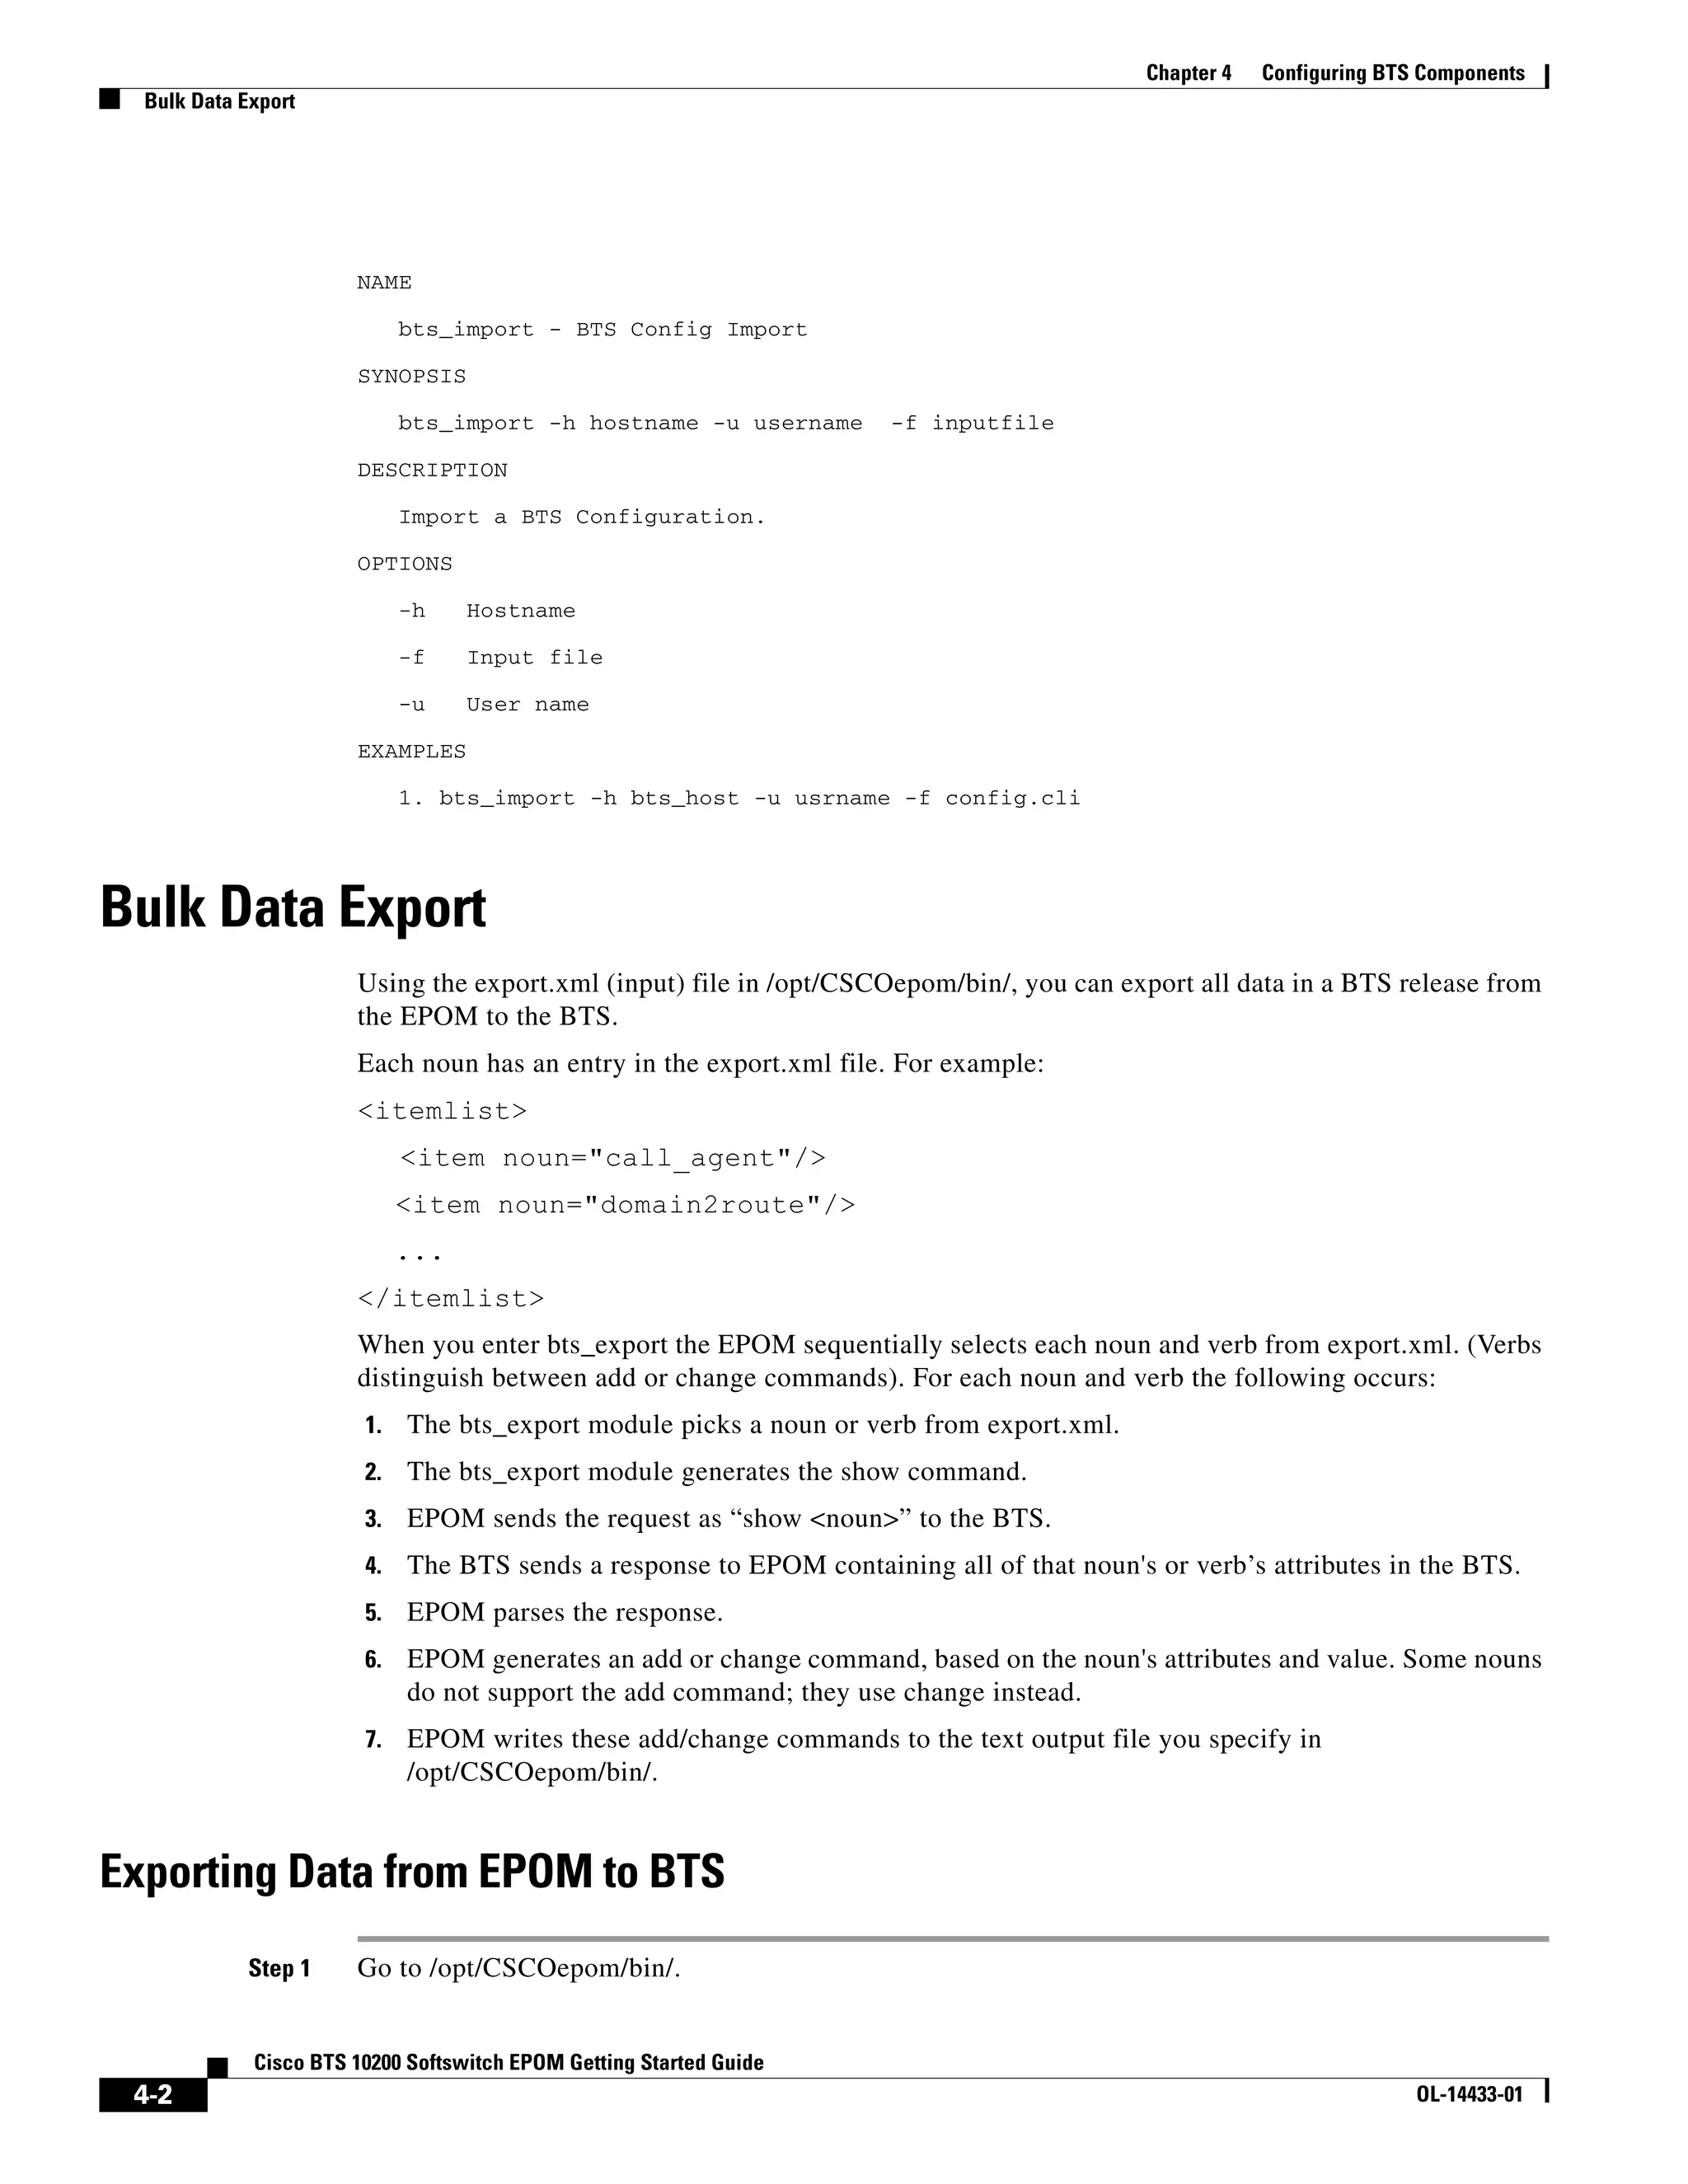
NAME
bts_export - BTS Config Export
SYNOPSIS
bts_export -h hostname -v BTSver of hostname -o outfile [-l login -p password
]
DESCRIPTION
Export a BTS Configuration.
OPTIONS
-h Hostname
-v BTSversion of hostname (3.5,4.1,4.2,4.4.0,4.4.1. 4.5.0)
-o Output file
-l Login
-p Password
-s Site ID
EXAMPLES
1. bts_export -h bts_host -v host_bts_ver -o config.cli
2. bts_export -h bts_host -v host_bts_ver -l login -p passwd -s siteid -o con
fig.cli
bts_import looks like the following:
root@cyber229:opt 22> /opt/CSCOepom/bin/bts_import
Cisco BTS 10200 Softswitch EPOM Getting Started Guide
OL-14433-01 4-1](https://image.slidesharecdn.com/4cfgbts-120810081524-phpapp01/75/4-cfg-bts-1-2048.jpg)

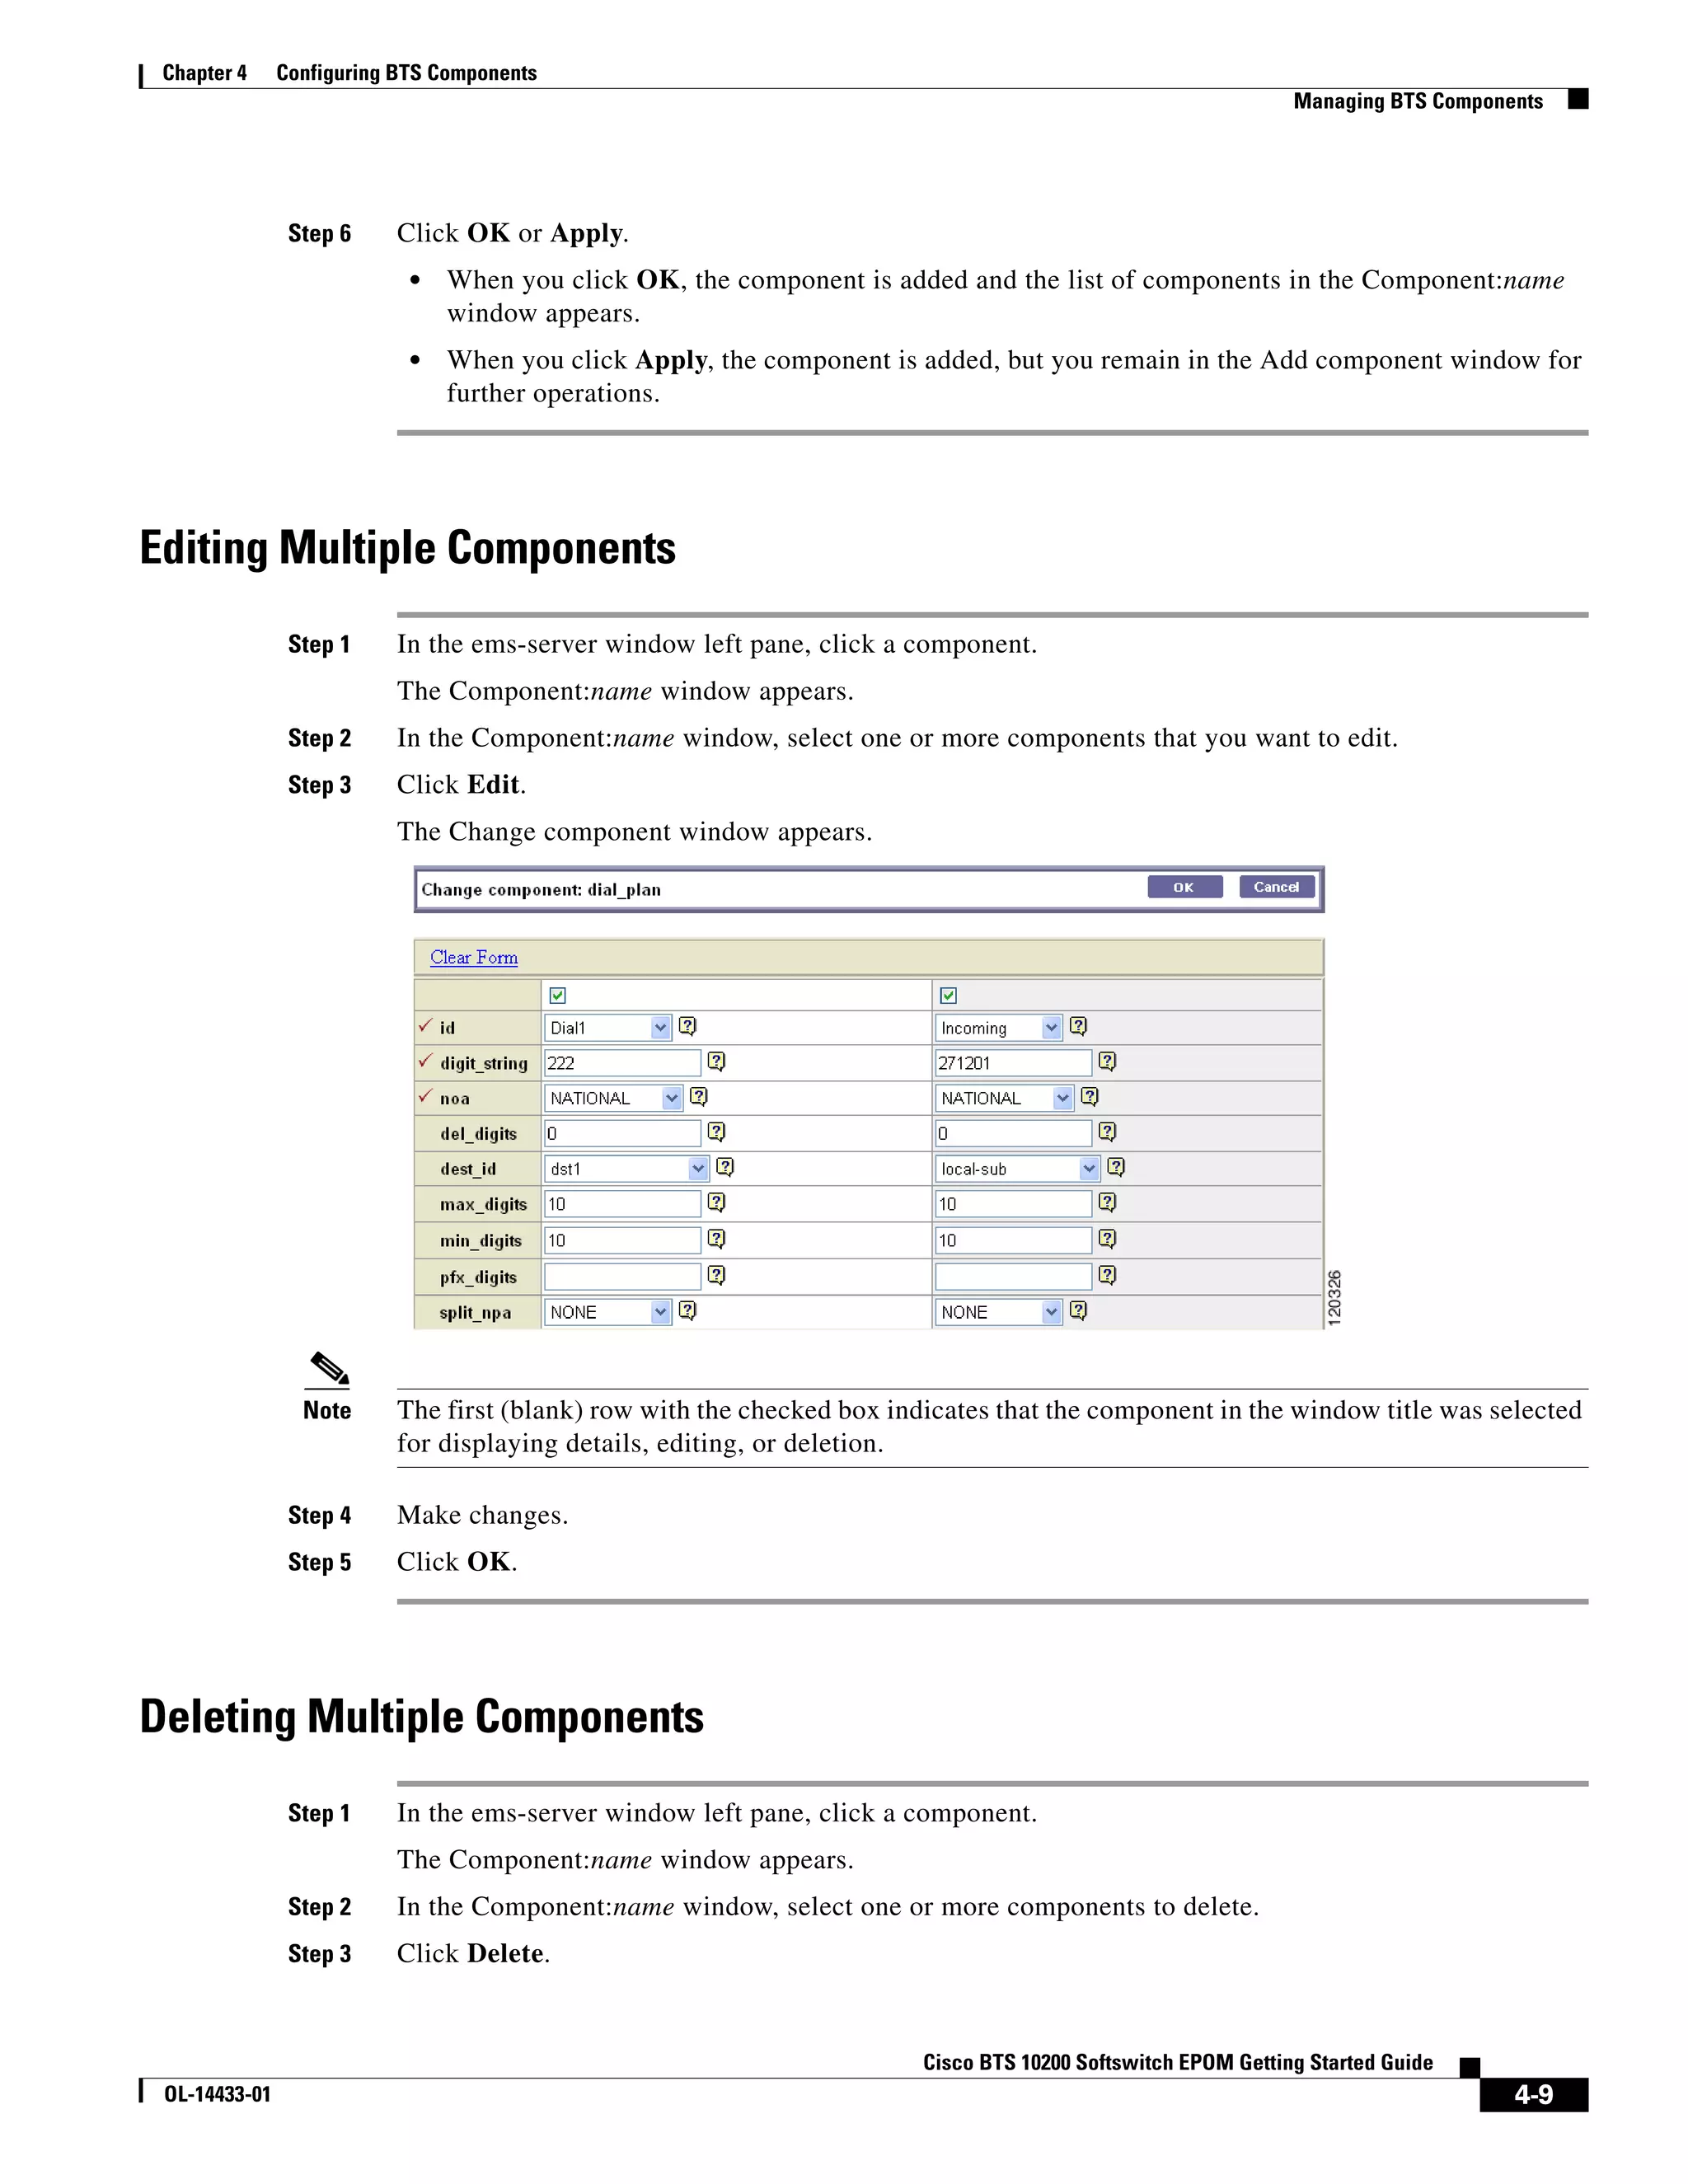
![Chapter 4 Configuring BTS Components
Managing BTS Components
Checking Status and Controlling Components
Step 1 From the Domain window, navigate to EMS server.
Step 2 Click Config.
The BTS Component Status window opens. The Configuration tree appears in the left navigation pane.
Step 3 Navigate to device and click to select it.
Step 4 In the Status window, click Control.
Step 5 From the Component Control window, verify that you have selected the correct component, then select
a target_state.
Step 6 Select state.
Options depend on the type of component that you selected.
Step 7 Click OK.
Adding Multiple Components
You can only perform bulk provisioning commands on the same type of devices. For instance, if a group
of subscribers use the same media gateway and subscriber profile, you can add or edit these subscribers
by using a single command.
Step 1 In the EMS-Server window left pane, click a component.
The Component:name window appears.
Step 2 Click Add.
The Add component window appears.
Step 3 Select the Expand range expression check box.
Step 4 In the ID field, enter a range expression in square brackets [ ].
For example, to add a group of 10 dial plans with the id prefix dp001_new, enter dp001_new[01-10].
Doing so adds dial plans dp001_new01, dp001_new02, through dp001_new10.
Step 5 Enter information in the remaining attribute fields.
Cisco BTS 10200 Softswitch EPOM Getting Started Guide
4-8 OL-14433-01](https://image.slidesharecdn.com/4cfgbts-120810081524-phpapp01/75/4-cfg-bts-8-2048.jpg)

Bulk provisioning allows exporting configuration data from one BTS server and importing it to configure another BTS server. Components like Call Agents, Feature Servers, and EMS can be added to the inventory and configured. BTS components can be managed by checking their status, controlling their state, and adding, editing, or deleting multiple components simultaneously.


![Vibe Coding vs. Spec-Driven Development [Free Meetup]](https://cdn.slidesharecdn.com/ss_thumbnails/vibecodingvsspecdrivendevelopment-251209105622-43f455e7-thumbnail.jpg?width=640&height=640&fit=bounds)


