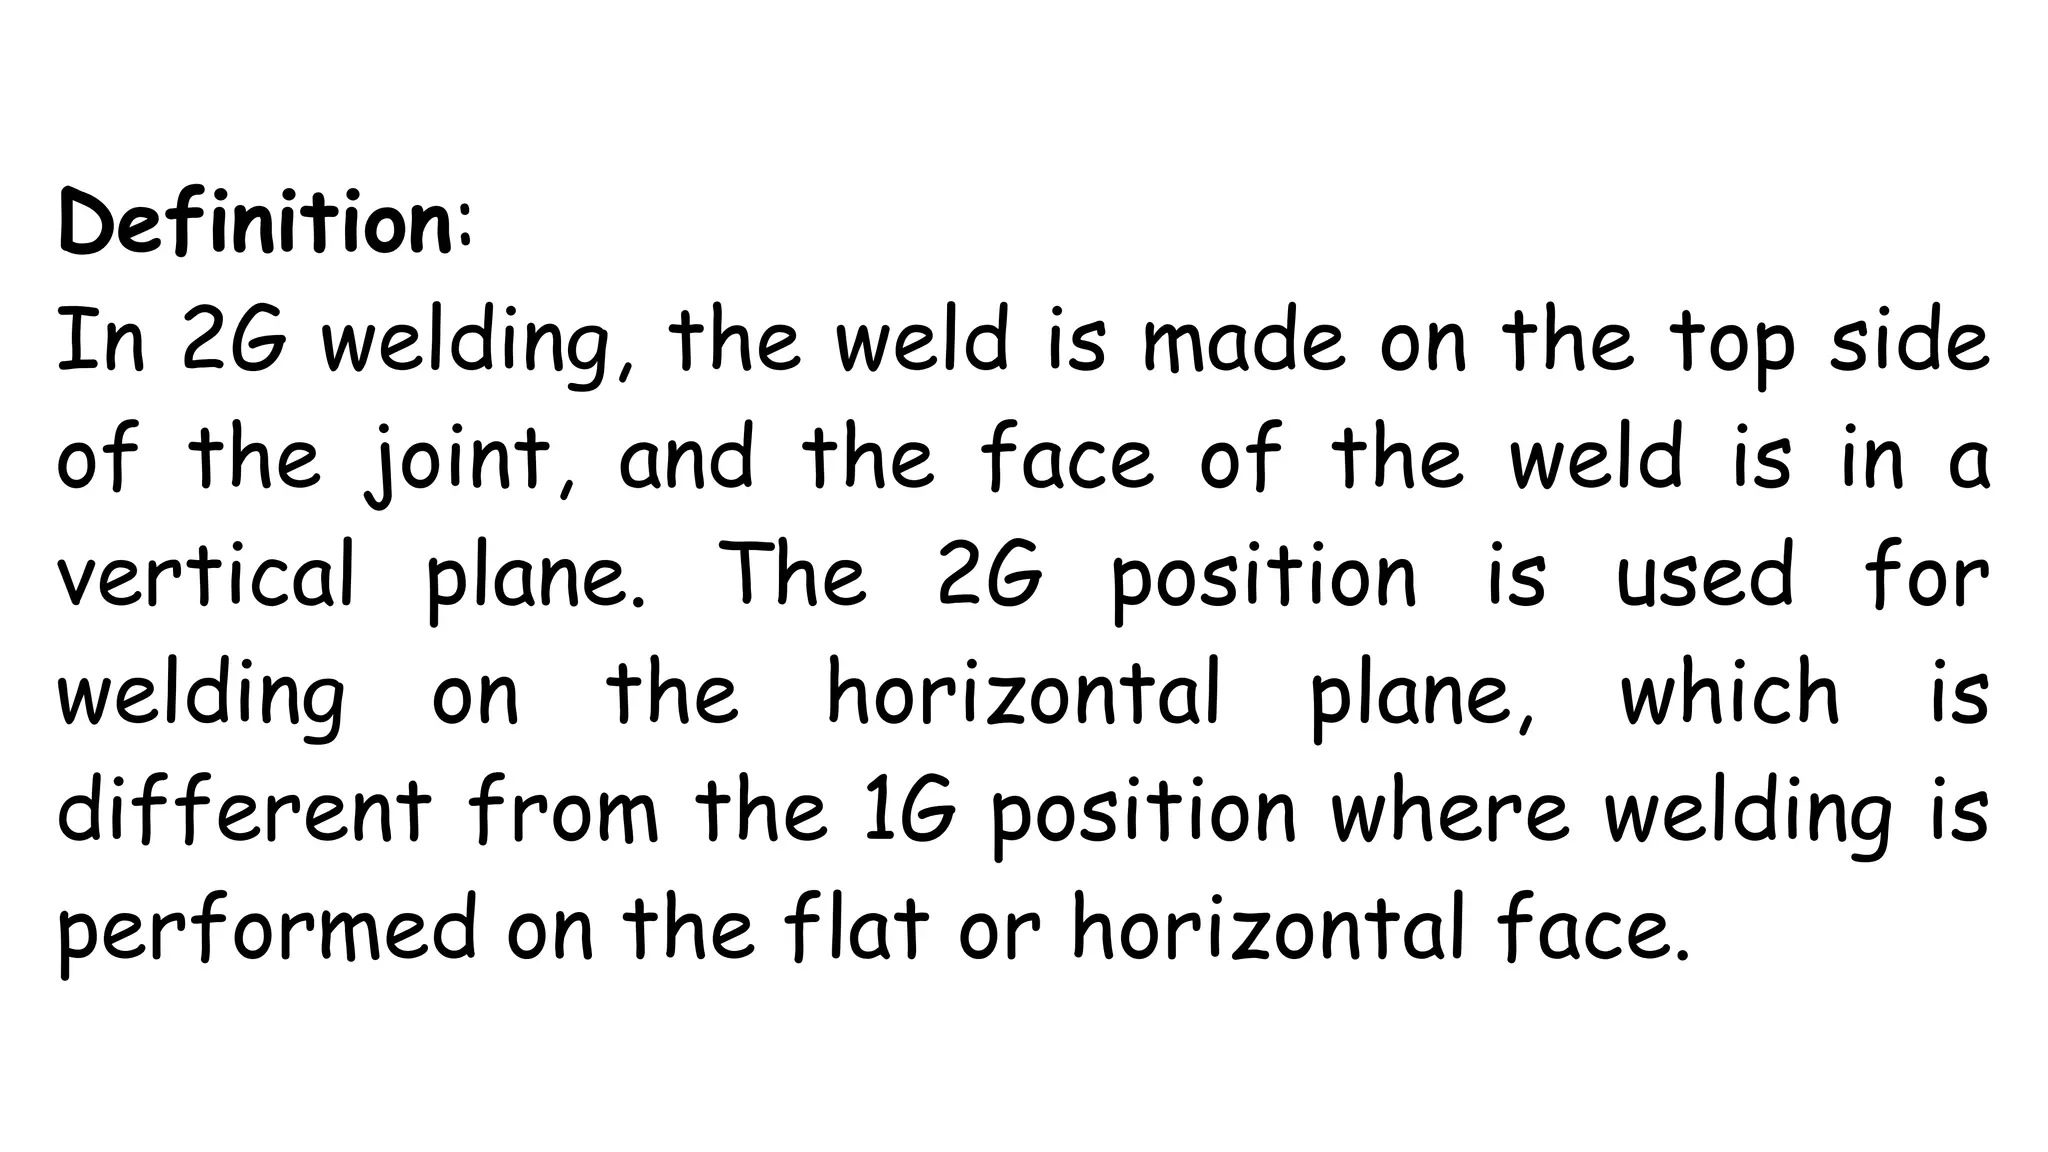
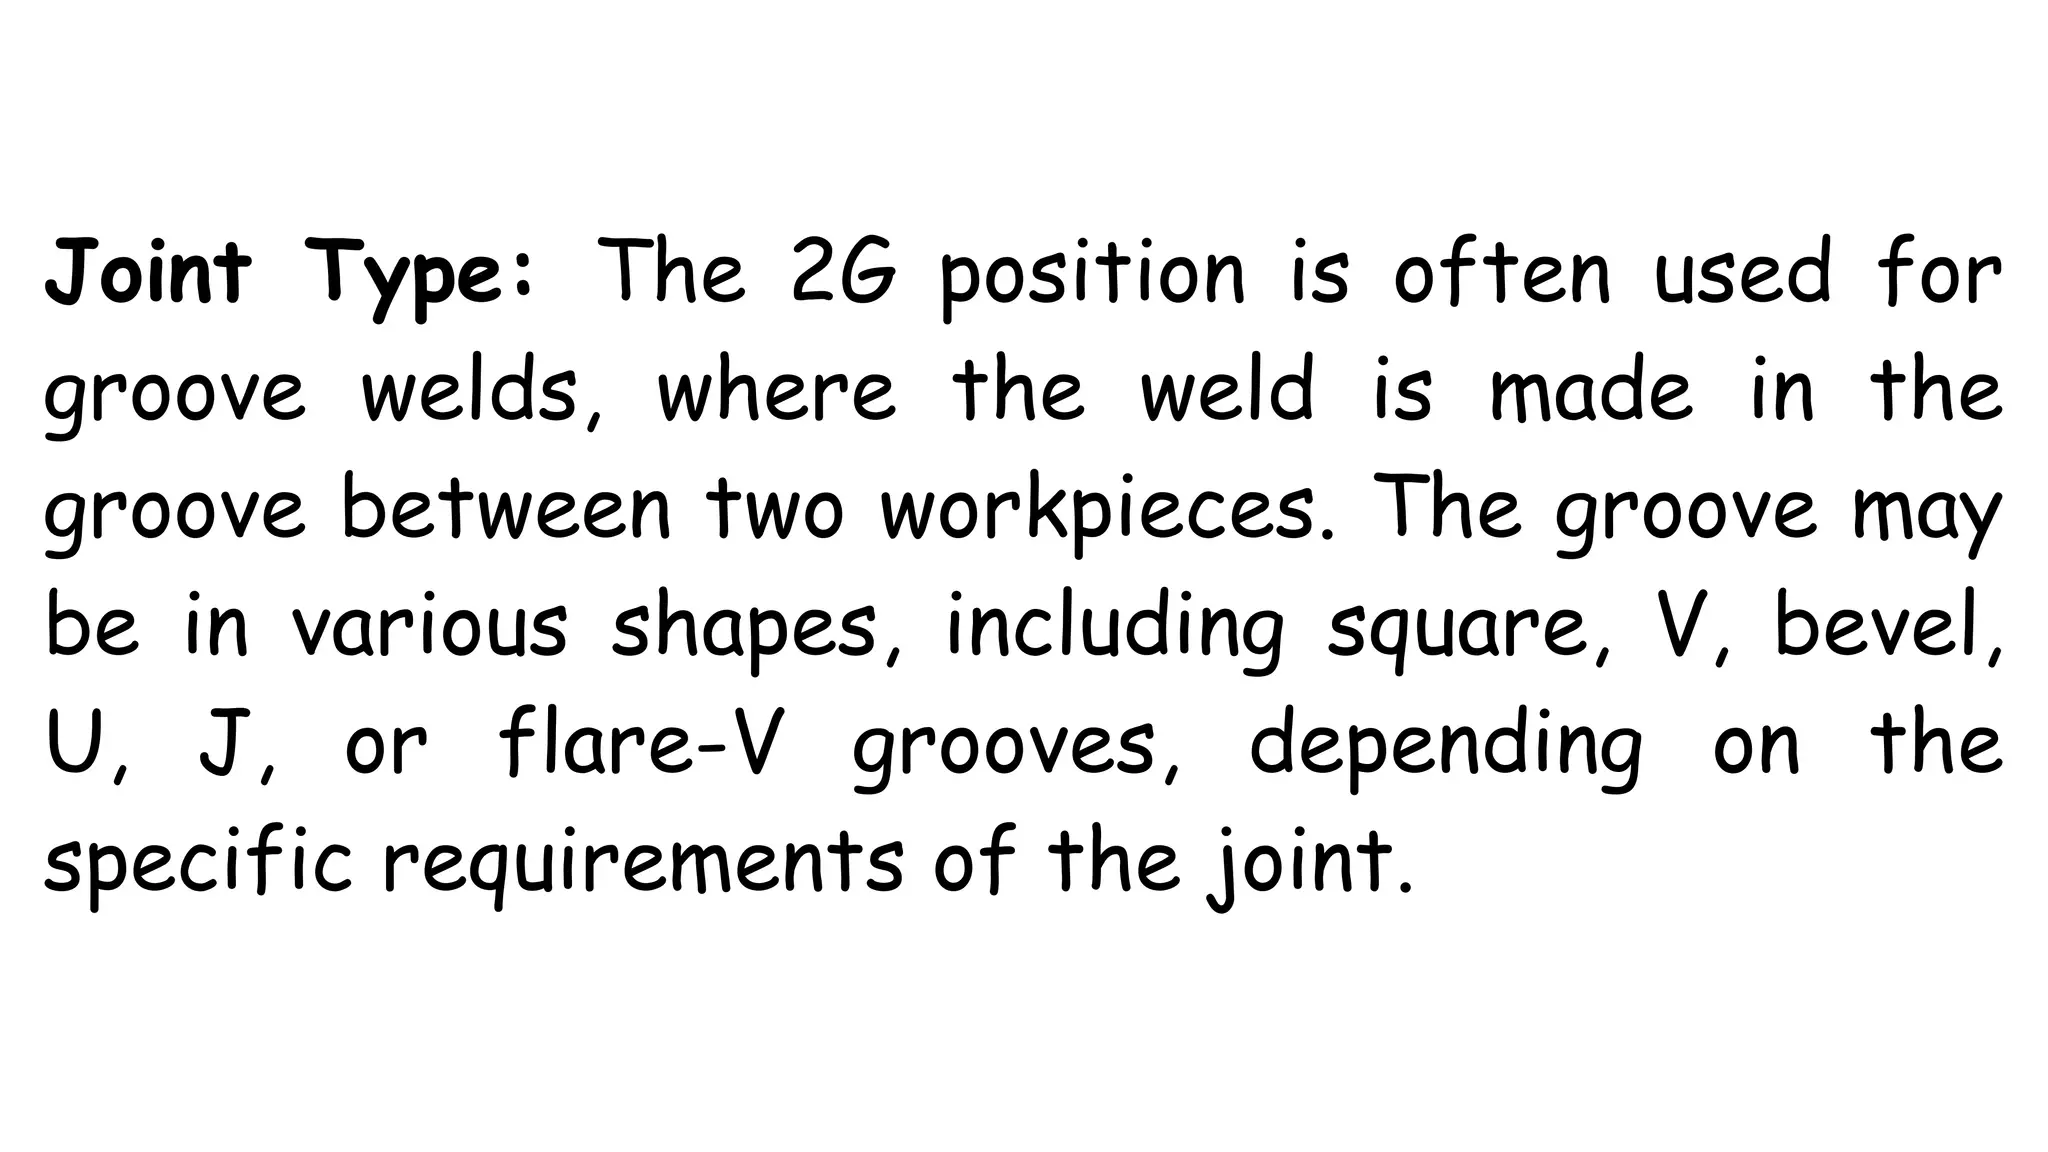
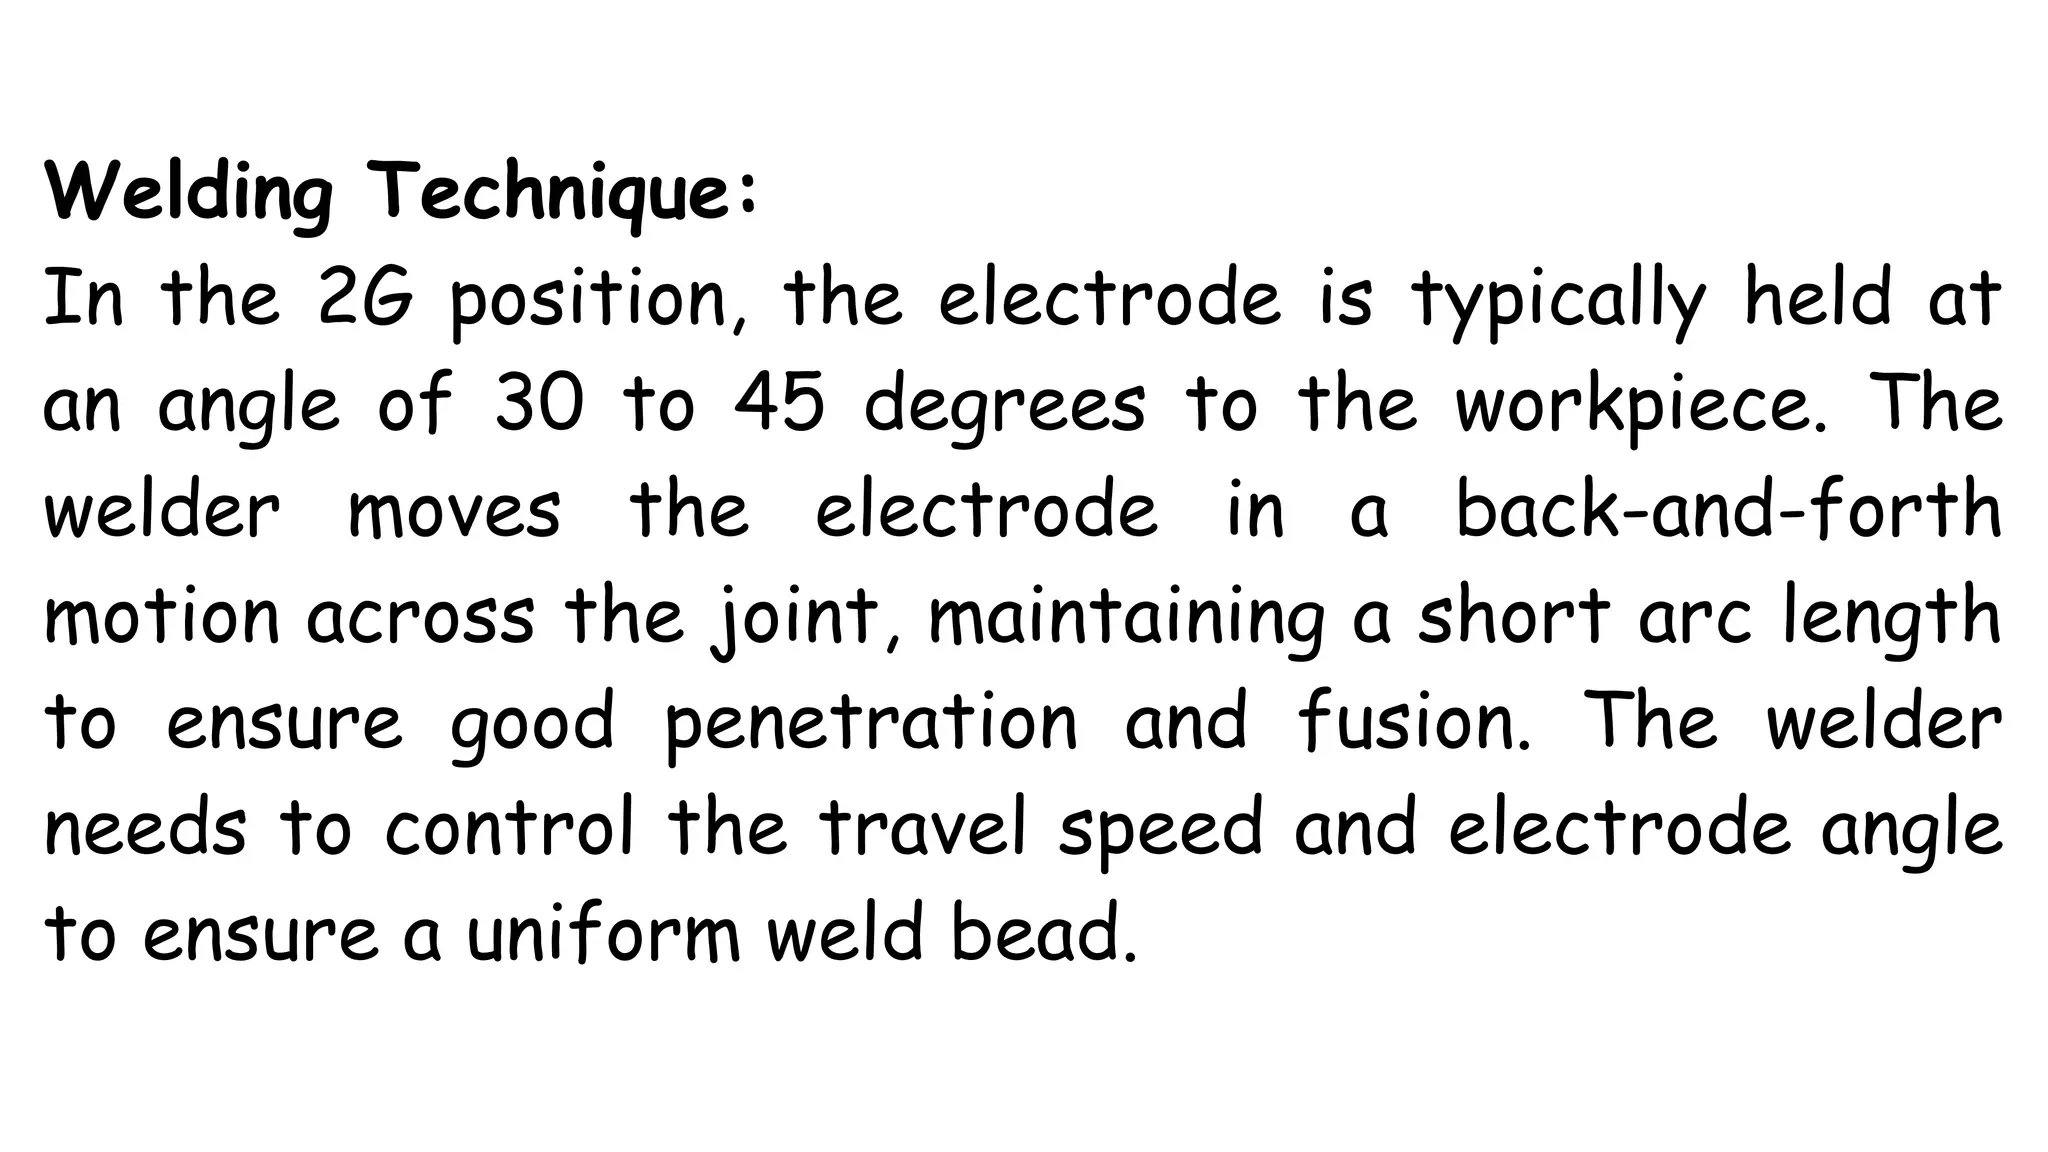
The 2G position in Shielded Metal Arc
Welding (SMAW), also known as Stick
Welding, is a horizontal welding position. This
position is commonly referred to as the horizontal
position because the weld axis is in a horizontal
plane.
Definition:
In 2G welding, the weld is made on the top side
of the joint, and the face of the weld is in a
vertical plane. The 2G position is used for
welding on the horizontal plane, which is
different from the 1G position where welding is
performed on the flat or horizontal face.
Joint Type: The 2G position is often used for
groove welds, where the weld is made in the
groove between two workpieces. The groove may
be in various shapes, including square, V, bevel,
U, J, or flare-V grooves, depending on the
specific requirements of the joint.
Welding Technique:
In the 2G position, the electrode is typically held at
an angle of 30 to 45 degrees to the workpiece. The
welder moves the electrode in a back-and-forth
motion across the joint, maintaining a short arc length
to ensure good penetration and fusion. The welder
needs to control the travel speed and electrode angle
to ensure a uniform weld bead.
Applications:
The 2G position is commonly used in various
industries, including construction,
manufacturing, and automotive repair. It's
frequently used for welding structural steel in
buildings, bridges, and other structures due to
its versatility and ease of access to the weld
joint.
Advantages and Disadvantages: The 2G
position allows for faster welding speeds and
better visibility of the weld pool compared to other
positions. However, it may require more skill to
control the weld pool due to the effects of gravity.
The quality of the weld can also be influenced by
factors such as electrode type, welding technique,
and workpiece material.
Safety:
As with any welding process, safety is
paramount. This includes wearing the
appropriate protective gear, such as a
welding helmet and gloves, and ensuring that
the work area is well-ventilated.
Step 1: Preparation
- Begin by gathering all the necessary equipment,
including the welding machine, electrodes, safety gear
(welding helmet, gloves, protective clothing), and
tools.
- Ensure the work area is clean, well-ventilated, and
free from any flammable materials.
- Inspect the base metal and remove any
contaminants, such as rust, oil, or paint, from the
joint area to ensure proper weld penetration.
Step 2: Joint Preparation
- Determine the joint configuration required for
the 2G position. The 2G position involves welding
in the horizontal position on a vertical plate or
pipe.
- Prepare the joint by ensuring proper fit-up and
alignment. Use clamps or fixtures if necessary
to hold the pieces in place.
Step 3: Electrode Selection
- Select the appropriate electrode for the specific
application and base metal being welded. Consider
factors such as electrode diameter, type, and
classification.
- Common electrodes used in 2G SMAW welding
include E-6010, E-6013, and E-7018.
Step 4: Setting Up the Welding Machine
- Set up the welding machine according to the
specifications provided by the electrode
manufacturer. Adjust the amperage, polarity, and
other settings as required.
- Ensure proper grounding of the welding machine to
maintain electrical safety.
Step 5: Welding Technique
- Position yourself comfortably and securely to maintain control
during the welding process.
- Start the arc by striking it against the base metal near the joint
area.
- Hold the electrode at the correct angle, typically around 5 to 15
degrees from the vertical.
- Move the electrode in a controlled motion along the joint,
maintaining a consistent travel speed and maintaining the correct
arc length.
- Ensure proper electrode manipulation, such as maintaining a
consistent drag angle or using a weaving technique if necessary.
Step 6: Welding Progression
- Begin welding from one end of the joint and progress towards
the other end.
- Ensure proper fusion and penetration by observing the weld
pool and the appearance of the bead.
- Make multiple passes if required, following the same
technique and overlapping the previous weld bead by around
1/2 to 2/3 of its width.
- Clean the slag between passes to ensure good fusion and
proper weld quality.
Step 7: Inspection and Quality Control
- After completing the weld, inspect it visually for
any defects such as cracks, porosity, or incomplete
fusion.
- Perform non-destructive testing (if required) to
ensure the integrity of the weld.
- If necessary, perform post-welding processes such
as grinding or cleaning to achieve the desired finish.
Step 8: Safety Measures
- Throughout the welding process, prioritize safety
by wearing appropriate personal protective
equipment (PPE) such as a welding helmet, gloves,
and protective clothing.
- Ensure proper ventilation in the work area to
minimize exposure to welding fumes and gases.
Remember, practice and experience are
essential for mastering the 2G position in
SMAW. It's important to follow proper welding
procedures and safety guidelines to achieve
high-quality welds.
Multiple-Choice questions about the 2G
position in SMAW:
1. In the 2G position in SMAW, the weld is performed on the:
a. Vertical face
b. Horizontal face
c. Overhead face
d. Inclined face
2. What is the recommended electrode angle for
welding in the 2G position?
a. 0-15 degrees
b. 30-45 degrees
c. 60-75 degrees
d. 90 degrees
3. How does a steep electrode angle in the 2G
position affect the weld?
a. Increases penetration
b. Decreases penetration
c. Increases weld width
d. Decreases weld width
4. What happens if the travel speed is too fast
in the 2G position?
a. Narrow, underfilled weld
b. Wide, overfilled weld
c. Poor fusion
d. Excessive penetration
5. What is the consequence of a slow travel speed in
the 2G position?
a. Narrow, underfilled weld
b. Wide, overfilled weld
c. Poor fusion
d. Excessive penetration
6. What should be the goal when controlling the
travel speed in the 2G position?
a. Maintain a consistent speed
b. Increase the speed gradually
c. Vary the speed for better fusion
d. Slow down for better penetration
7. Which joint type is commonly used in the 2G
position?
a. Butt joint
b. Lap joint
c. T-joint
d. Fillet joint
8. What is the purpose of holding the electrode
at the correct angle in the 2G position?
a. Control weld bead shape
b. Increase travel speed
c. Reduce electrode consumption
d. Improve electrode efficiency
9. What is the primary concern when setting
the electrode angle in the 2G position?
a. Weld penetration
b. Weld width
c. Weld reinforcement
d. Weld distortion
10. Which factor determines the quality of the
weld in the 2G position?
a. Electrode diameter
b. Electrode material
c. Electrode angle
d. Electrode manufacturer
2G PRESENTATION IN SMAW AND THE ROOT PASS

2G PRESENTATION IN SMAW AND THE ROOT PASS

  • 2.
    The 2G positionin Shielded Metal Arc Welding (SMAW), also known as Stick Welding, is a horizontal welding position. This position is commonly referred to as the horizontal position because the weld axis is in a horizontal plane.
  • 3.
    Definition: In 2G welding,the weld is made on the top side of the joint, and the face of the weld is in a vertical plane. The 2G position is used for welding on the horizontal plane, which is different from the 1G position where welding is performed on the flat or horizontal face.
  • 4.
    Joint Type: The2G position is often used for groove welds, where the weld is made in the groove between two workpieces. The groove may be in various shapes, including square, V, bevel, U, J, or flare-V grooves, depending on the specific requirements of the joint.
  • 5.
    Welding Technique: In the2G position, the electrode is typically held at an angle of 30 to 45 degrees to the workpiece. The welder moves the electrode in a back-and-forth motion across the joint, maintaining a short arc length to ensure good penetration and fusion. The welder needs to control the travel speed and electrode angle to ensure a uniform weld bead.
  • 6.
    Applications: The 2G positionis commonly used in various industries, including construction, manufacturing, and automotive repair. It's frequently used for welding structural steel in buildings, bridges, and other structures due to its versatility and ease of access to the weld joint.
  • 7.
    Advantages and Disadvantages:The 2G position allows for faster welding speeds and better visibility of the weld pool compared to other positions. However, it may require more skill to control the weld pool due to the effects of gravity. The quality of the weld can also be influenced by factors such as electrode type, welding technique, and workpiece material.
  • 8.
    Safety: As with anywelding process, safety is paramount. This includes wearing the appropriate protective gear, such as a welding helmet and gloves, and ensuring that the work area is well-ventilated.
  • 9.
    Step 1: Preparation -Begin by gathering all the necessary equipment, including the welding machine, electrodes, safety gear (welding helmet, gloves, protective clothing), and tools. - Ensure the work area is clean, well-ventilated, and free from any flammable materials. - Inspect the base metal and remove any contaminants, such as rust, oil, or paint, from the joint area to ensure proper weld penetration.
  • 10.
    Step 2: JointPreparation - Determine the joint configuration required for the 2G position. The 2G position involves welding in the horizontal position on a vertical plate or pipe. - Prepare the joint by ensuring proper fit-up and alignment. Use clamps or fixtures if necessary to hold the pieces in place.
  • 11.
    Step 3: ElectrodeSelection - Select the appropriate electrode for the specific application and base metal being welded. Consider factors such as electrode diameter, type, and classification. - Common electrodes used in 2G SMAW welding include E-6010, E-6013, and E-7018.
  • 12.
    Step 4: SettingUp the Welding Machine - Set up the welding machine according to the specifications provided by the electrode manufacturer. Adjust the amperage, polarity, and other settings as required. - Ensure proper grounding of the welding machine to maintain electrical safety.
  • 13.
    Step 5: WeldingTechnique - Position yourself comfortably and securely to maintain control during the welding process. - Start the arc by striking it against the base metal near the joint area. - Hold the electrode at the correct angle, typically around 5 to 15 degrees from the vertical. - Move the electrode in a controlled motion along the joint, maintaining a consistent travel speed and maintaining the correct arc length. - Ensure proper electrode manipulation, such as maintaining a consistent drag angle or using a weaving technique if necessary.
  • 14.
    Step 6: WeldingProgression - Begin welding from one end of the joint and progress towards the other end. - Ensure proper fusion and penetration by observing the weld pool and the appearance of the bead. - Make multiple passes if required, following the same technique and overlapping the previous weld bead by around 1/2 to 2/3 of its width. - Clean the slag between passes to ensure good fusion and proper weld quality.
  • 15.
    Step 7: Inspectionand Quality Control - After completing the weld, inspect it visually for any defects such as cracks, porosity, or incomplete fusion. - Perform non-destructive testing (if required) to ensure the integrity of the weld. - If necessary, perform post-welding processes such as grinding or cleaning to achieve the desired finish.
  • 16.
    Step 8: SafetyMeasures - Throughout the welding process, prioritize safety by wearing appropriate personal protective equipment (PPE) such as a welding helmet, gloves, and protective clothing. - Ensure proper ventilation in the work area to minimize exposure to welding fumes and gases.
  • 17.
    Remember, practice andexperience are essential for mastering the 2G position in SMAW. It's important to follow proper welding procedures and safety guidelines to achieve high-quality welds.
  • 19.
    Multiple-Choice questions aboutthe 2G position in SMAW: 1. In the 2G position in SMAW, the weld is performed on the: a. Vertical face b. Horizontal face c. Overhead face d. Inclined face
  • 20.
    2. What isthe recommended electrode angle for welding in the 2G position? a. 0-15 degrees b. 30-45 degrees c. 60-75 degrees d. 90 degrees
  • 21.
    3. How doesa steep electrode angle in the 2G position affect the weld? a. Increases penetration b. Decreases penetration c. Increases weld width d. Decreases weld width
  • 22.
    4. What happensif the travel speed is too fast in the 2G position? a. Narrow, underfilled weld b. Wide, overfilled weld c. Poor fusion d. Excessive penetration
  • 23.
    5. What isthe consequence of a slow travel speed in the 2G position? a. Narrow, underfilled weld b. Wide, overfilled weld c. Poor fusion d. Excessive penetration
  • 24.
    6. What shouldbe the goal when controlling the travel speed in the 2G position? a. Maintain a consistent speed b. Increase the speed gradually c. Vary the speed for better fusion d. Slow down for better penetration
  • 25.
    7. Which jointtype is commonly used in the 2G position? a. Butt joint b. Lap joint c. T-joint d. Fillet joint
  • 26.
    8. What isthe purpose of holding the electrode at the correct angle in the 2G position? a. Control weld bead shape b. Increase travel speed c. Reduce electrode consumption d. Improve electrode efficiency
  • 27.
    9. What isthe primary concern when setting the electrode angle in the 2G position? a. Weld penetration b. Weld width c. Weld reinforcement d. Weld distortion
  • 28.
    10. Which factordetermines the quality of the weld in the 2G position? a. Electrode diameter b. Electrode material c. Electrode angle d. Electrode manufacturer