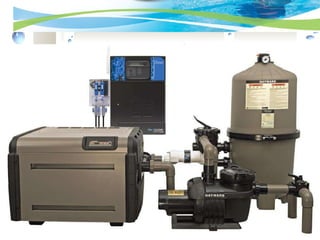
51. Installation Install cell and flow switch down stream of all existing pool equipment. (prior to any valves to prevent partial chlorination on multiple bodies of water with one filter system)
52. Installation Flow switch requires 12” of straight pipe before the mounting “T” . Flow rate must be greater than 11 gpm to close switch in 2”pipe. 12”
56. Installation (bottom view) Connect the cell cable into the front of the control box. Closing the door locks the cable into place Connect the flow switch cable into the "phone" connector located on the bottom of the control box Attach the bonding wire to the ground lug located on the bottom of the control box
57.
58.
59. Note: Wire the pump to the time clock: DO NOT USE THE AQUA RITE AS A JUNCTION BOX Installation w/Timeclock
92. Turbo Cell Maintenance TURN POWER OFF Turn off the filter pump and input power to control. DISCONNECT CELL CABLE Open cover and unplug the cell cable from the control REMOVE CELL FROM POOL PLUMBING Remove the cell from the pool plumbing by loosening both unions with your hands. Never tighten or loosen unions with tools. INSPECT CELL FOR CALCIUM DEPOSITS Inspect for white deposits on the plates inside of the cell and around studs. If no deposits are found (Fig. 4A), the cell does not require cleaning and can be re-installed. Reverse steps 1-3. 2
93. Turbo Cell Maintenance SPRAY CELL WITH HIGH PRESSURE Spray high pressure water from a garden hose into one end of the cell and then the other end. The cell deposits should now be removed, re-install by reversing steps 1-3. If the deposits cannot be removed by spraying, go to step 6.
94.
95.
96.
97.
98. ProLogic ™ Training 2009 Electronic Chlorine Generator and Multifunction Pool/Spa Control True Cost Effective User Friendly Automation
136. Aqua Pod ™ Waterproof, Programmable Remote Taking pool control as far as it can go, right into the water
137.
138.
139. Product Overview Signal Strength Bars Battery Level Indicator Day & Time Pool or Spa Temperature Air Temperature Menu Output Status Soft Keys Navigation Buttons System Off Button
223. Chemistry Configuration Wizard (example) “ +” to access Wizard “ +“ or “-” to toggle between Disabled (default ) & Enabled Adjustable from 7.1 (low) to 7.9 (high) Adjustable from 550mV to 850mV “ +“ or “-” to toggle between AUTO & OFF “ +“ or “-” to toggle between AUTO, Timed Feed, & OFF Chemistry Configuration + to enter Sensing System: Disabled (+/-) pH reduction Control AUTO sensing (+/-) Chlorine Feed ORP AUTO sensing (+/-) pH Alarm: 7.2 ppm (+/-) ORP Alarm: 700mV (+/-)
On time is determined by how far out from the set-point the actual reading is. Everything is set to operate within a 1 minute time span. Pool .1 10 seconds on, 50 seconds off .2 20 seconds on, 40 seconds off .3 30 seconds on, 30 seconds off .4 40 seconds on, 20 seconds off .5 50 seconds on, 10 seconds off SPA .1 2 seconds on, 58 seconds off .2 4 seconds on, 56 seconds off .3 6 seconds on, 54 seconds off .4 8 seconds on, 52 seconds off .5 10 seconds on, 50 seconds off Please remember that when starting out a pool or spa must have all chemical balanced before using this product. An independent pH measurement of pH should be measured, then calibrate the pH probe accordingly. How much water is in the pool? If it's a small body of water may want to select SPA over Pool.