IMPRESSION MATERIALS &
TECHNIQUESIN
FIXED PARTIAL DENTURES
GUIDED BY
DR. M.BHARATHI
Professor and HOD
Presentation By
DR. V.SUSRUTHA
II MDS
2.
CONTENTS
• Introduction
• Definition
•Ideal impression material
• History
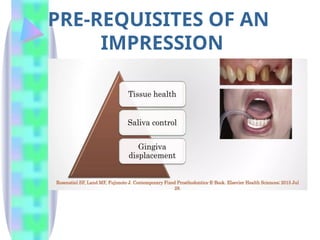
• Pre-requisites of an impression
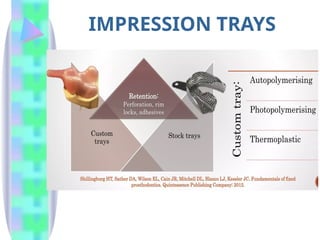
• Impression trays
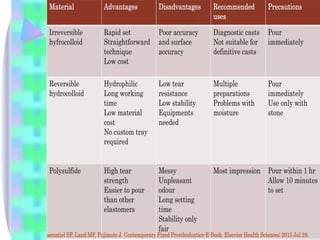
• Elastic impression materials
- Reversible hydrocolloids
- Polysulfide polymers
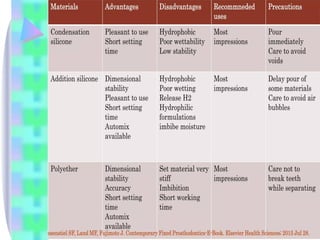
- Condensation silicones
- Polyether
- Addition silicones
• Impression techniques
• Disinfection
• Recent Advances
• Conclusion and References
3.
INTRODUCTION
• An impressionis a negative likeness of the teeth
and the surrounding structures.
• A fixed prosthesis cannot be fabricated without a
proper impression.
• A positive likeness of the impression has to be
obtained
4.
DEFINITION
According to GPT-9,an impression is a
negative likeness or copy in reverse of the
surface of an object; an imprint of the
teeth and adjacent structures for use in
dentistry.
5.
IDEAL IMPRESSION
MATERIAL
The fabricationof casting requires an
impression material that produces an
accurate negative likeness of the oral
tissues.
The properties of an ideal impression are:
1. Complete plasticity before cure
2. Sufficient fluidity to record fine detail
3. The ability to wet the oral tissues
4. Dimensional accuracy
5. Dimensional Stability
6. Complete Elasticity after cure
7. Optimal Stiffness
6.
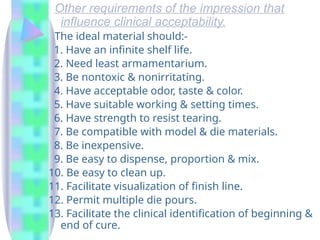
Other requirements ofthe impression that
influence clinical acceptability.
The ideal material should:-
1. Have an infinite shelf life.
2. Need least armamentarium.
3. Be nontoxic & nonirritating.
4. Have acceptable odor, taste & color.
5. Have suitable working & setting times.
6. Have strength to resist tearing.
7. Be compatible with model & die materials.
8. Be inexpensive.
9. Be easy to dispense, proportion & mix.
10. Be easy to clean up.
11. Facilitate visualization of finish line.
12. Permit multiple die pours.
13. Facilitate the clinical identification of beginning &
end of cure.
7.
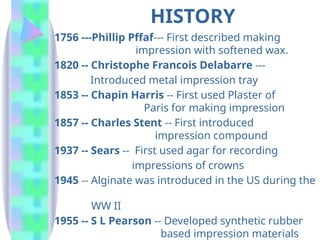
1756 ---Phillip Pffaf---First described making
impression with softened wax.
1820 -- Christophe Francois Delabarre ---
Introduced metal impression tray
1853 -- Chapin Harris -- First used Plaster of
Paris for making impression
1857 -- Charles Stent -- First introduced
impression compound
1937 -- Sears -- First used agar for recording
impressions of crowns
1945 -- Alginate was introduced in the US during the
WW II
1955 -- S L Pearson -- Developed synthetic rubber
based impression materials
HISTORY
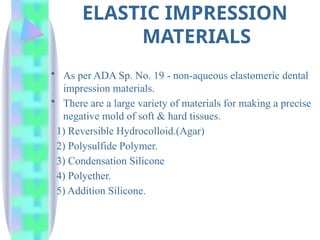
ELASTIC IMPRESSION
MATERIALS
• Asper ADA Sp. No. 19 - non-aqueous elastomeric dental
impression materials.
• There are a large variety of materials for making a precise
negative mold of soft & hard tissues.
1) Reversible Hydrocolloid.(Agar)
2) Polysulfide Polymer.
3) Condensation Silicone
4) Polyether.
5) Addition Silicone.
13.
• These materialsare available in various
viscosities:-
1. Light body or syringe consistency
2. Medium or regular body
3. Heavy body or tray consistency
4. Very heavy body or putty consistency
16.
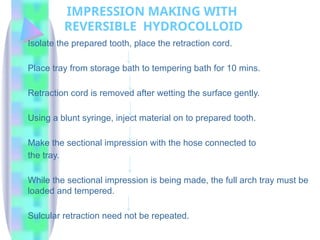
IMPRESSION MAKING WITH
REVERSIBLEHYDROCOLLOID
Isolate the prepared tooth, place the retraction cord.
Place tray from storage bath to tempering bath for 10 mins.
Retraction cord is removed after wetting the surface gently.
Using a blunt syringe, inject material on to prepared tooth.
Make the sectional impression with the hose connected to
the tray.
While the sectional impression is being made, the full arch tray must be
loaded and tempered.
Sulcular retraction need not be repeated.
18.
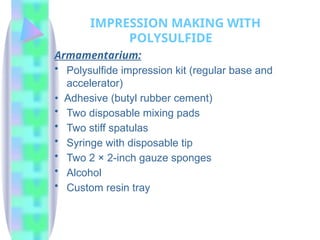
Armamentarium:
• Polysulfide impressionkit (regular base and
accelerator)
• Adhesive (butyl rubber cement)
• Two disposable mixing pads
• Two stiff spatulas
• Syringe with disposable tip
• Two 2 × 2-inch gauze sponges
• Alcohol
• Custom resin tray
IMPRESSION MAKING WITH
POLYSULFIDE
19.
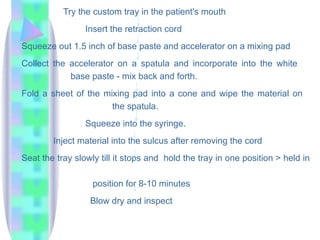
Try the customtray in the patient's mouth
Insert the retraction cord
Squeeze out 1.5 inch of base paste and accelerator on a mixing pad
Collect the accelerator on a spatula and incorporate into the white
base paste - mix back and forth.
Fold a sheet of the mixing pad into a cone and wipe the material on
the spatula.
Squeeze into the syringe.
Inject material into the sulcus after removing the cord
Seat the tray slowly till it stops and hold the tray in one position > held in
position for 8-10 minutes
Blow dry and inspect
21.
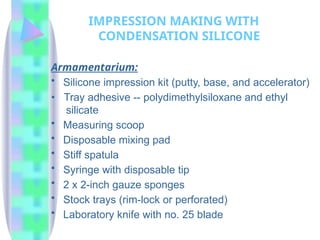
Armamentarium:
• Silicone impressionkit (putty, base, and accelerator)
• Tray adhesive -- polydimethylsiloxane and ethyl
silicate
• Measuring scoop
• Disposable mixing pad
• Stiff spatula
• Syringe with disposable tip
• 2 x 2-inch gauze sponges
• Stock trays (rim-lock or perforated)
• Laboratory knife with no. 25 blade
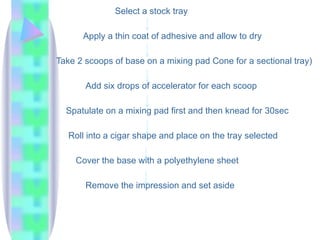
IMPRESSION MAKING WITH
CONDENSATION SILICONE
22.
Select a stocktray
Apply a thin coat of adhesive and allow to dry
Take 2 scoops of base on a mixing pad Cone for a sectional tray)
Add six drops of accelerator for each scoop
Spatulate on a mixing pad first and then knead for 30sec
Roll into a cigar shape and place on the tray selected
Cover the base with a polyethylene sheet
Remove the impression and set aside
24.
Armamentarium:
•Dispenser
• Cartridge (baseand accelerator)
• Mixing tip
• Disposable mixing pad
• Syringe with disposable tip
• 2 × 2-inch gauze sponges
• Custom impression tray
• Tray adhesive
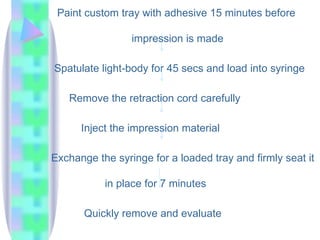
IMPRESSION MAKING WITH
POLYVINYLSILOXANE
25.
Paint custom traywith adhesive 15 minutes before
impression is made
Spatulate light-body for 45 secs and load into syringe
Remove the retraction cord carefully
Inject the impression material
Exchange the syringe for a loaded tray and firmly seat it
in place for 7 minutes
Quickly remove and evaluate
27.
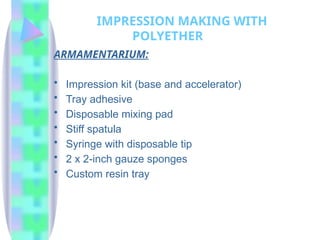
ARMAMENTARIUM:
• Impression kit(base and accelerator)
• Tray adhesive
• Disposable mixing pad
• Stiff spatula
• Syringe with disposable tip
• 2 x 2-inch gauze sponges
• Custom resin tray
IMPRESSION MAKING WITH
POLYETHER
28.
Coat the customtray with adhesive and allow to dry
Express 7.5 inches of base and accelerator onto a mixing pad
Mix for 1 min till streaks are removed
Load the syringe
Remove the retraction cord carefully
Seat the loaded tray in place for about 4 mins
Rinse it, blow dry and evaluate
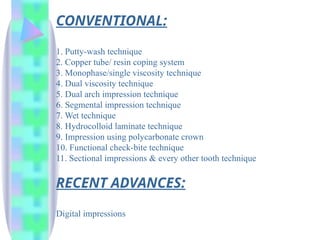
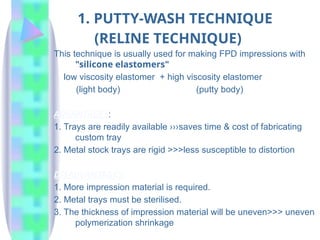
1. PUTTY-WASH TECHNIQUE
(RELINETECHNIQUE)
This technique is usually used for making FPD impressions with
"silicone elastomers"
low viscosity elastomer + high viscosity elastomer
(light body) (putty body)
ADVANTAGES:
1. Trays are readily available ›››saves time & cost of fabricating
custom tray
2. Metal stock trays are rigid >>>less susceptible to distortion
DISADVANTAGES:
1. More impression material is required.
2. Metal trays must be sterilised.
3. The thickness of impression material will be uneven>>> uneven
polymerization shrinkage
32.
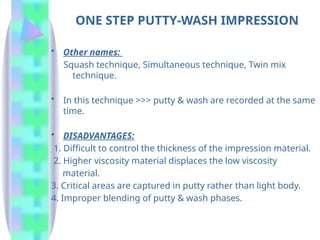
ONE STEP PUTTY-WASHIMPRESSION
• Other names:
Squash technique, Simultaneous technique, Twin mix
technique.
• In this technique >>> putty & wash are recorded at the same
time.
• DISADVANTAGES:
1. Difficult to control the thickness of the impression material.
2. Higher viscosity material displaces the low viscosity
material.
3. Critical areas are captured in putty rather than light body.
4. Improper blending of putty & wash phases.
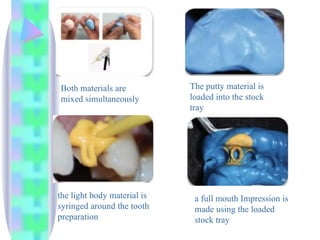
33.
Both materials are
mixedsimultaneously
The putty material is
loaded into the stock
tray
the light body material is
syringed around the tooth
preparation
a full mouth Impression is
made using the loaded
stock tray
34.
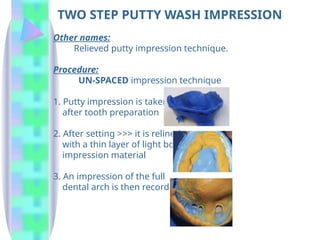
TWO STEP PUTTYWASH IMPRESSION
Other names:
Relieved putty impression technique.
Procedure:
UN-SPACED impression technique
1. Putty impression is taken
after tooth preparation
2. After setting >>> it is relined
with a thin layer of light body
impression material
3. An impression of the full
dental arch is then recorded
35.
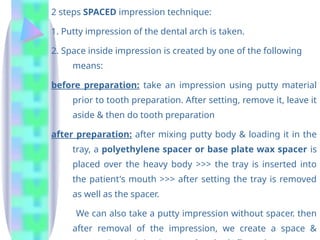
2 steps SPACEDimpression technique:
1. Putty impression of the dental arch is taken.
2. Space inside impression is created by one of the following
means:
before preparation: take an impression using putty material
prior to tooth preparation. After setting, remove it, leave it
aside & then do tooth preparation
after preparation: after mixing putty body & loading it in the
tray, a polyethylene spacer or base plate wax spacer is
placed over the heavy body >>> the tray is inserted into
the patient's mouth >>> after setting the tray is removed
as well as the spacer.
We can also take a putty impression without spacer. then
after removal of the impression, we create a space &
36.
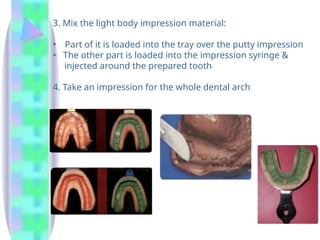
3. Mix thelight body impression material:
• Part of it is loaded into the tray over the putty impression
• The other part is loaded into the impression syringe &
injected around the prepared tooth
4. Take an impression for the whole dental arch
37.
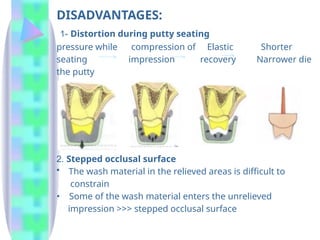
DISADVANTAGES:
1- Distortion duringputty seating
pressure while compression of Elastic Shorter
seating impression recovery Narrower die
the putty
2. Stepped occlusal surface
• The wash material in the relieved areas is difficult to
constrain
• Some of the wash material enters the unrelieved
impression >>> stepped occlusal surface
38.
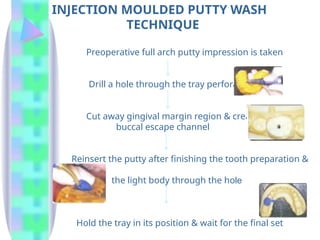
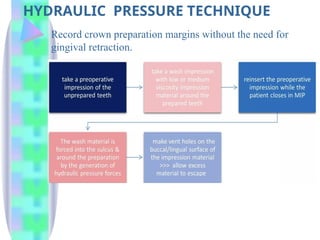
INJECTION MOULDED PUTTYWASH
TECHNIQUE
Preoperative full arch putty impression is taken
Drill a hole through the tray perforation
Cut away gingival margin region & create a
buccal escape channel
Reinsert the putty after finishing the tooth preparation &
inject
the light body through the hole
Hold the tray in its position & wait for the final set
39.
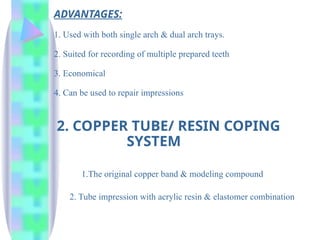
ADVANTAGES:
1. Used withboth single arch & dual arch trays.
2. Suited for recording of multiple prepared teeth
3. Economical
4. Can be used to repair impressions
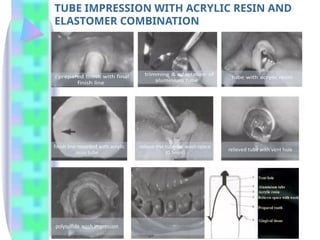
2. COPPER TUBE/ RESIN COPING
SYSTEM
1.The original copper band & modeling compound
2. Tube impression with acrylic resin & elastomer combination
40.
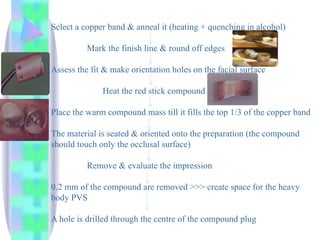
Select a copperband & anneal it (heating + quenching in alcohol)
Mark the finish line & round off edges
Assess the fit & make orientation holes on the facial surface
Heat the red stick compound
Place the warm compound mass till it fills the top 1/3 of the copper band
The material is seated & oriented onto the preparation (the compound
should touch only the occlusal surface)
Remove & evaluate the impression
0.2 mm of the compound are removed >>> create space for the heavy
body PVS
A hole is drilled through the centre of the compound plug
41.
4-5 holes aremade for the retention of the impression material
Internal surface is coated with adhesive
The heavy viscosity material is mixed
It is injected into the band & positioned over the tooth
Wait till setting
The band is removed & the impression is inspected
This system eliminatesthe use of retraction cord:
The carrier extends slightly apical to the finish line
Displacement of the gingiva
No need for retraction cord
ADVANTAGES:
1. Mechanical displacement of the gingiva >>> clean &
complete impression
DISADVANTAGES:
1.Time consuming
2. May cause trauma & hemorrhage
3. Distortion of the compound (rigid) >>> fracture of the die
44.
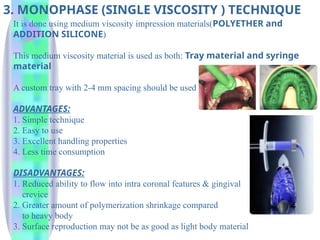
3. MONOPHASE (SINGLEVISCOSITY ) TECHNIQUE
It is done using medium viscosity impression materials(POLYETHER and
ADDITION SILICONE)
This medium viscosity material is used as both: Tray material and syringe
material
A custom tray with 2-4 mm spacing should be used
ADVANTAGES:
1. Simple technique
2. Easy to use
3. Excellent handling properties
4. Less time consumption
DISADVANTAGES:
1. Reduced ability to flow into intra coronal features & gingival
crevice
2. Greater amount of polymerization shrinkage compared
to heavy body
3. Surface reproduction may not be as good as light body material
45.
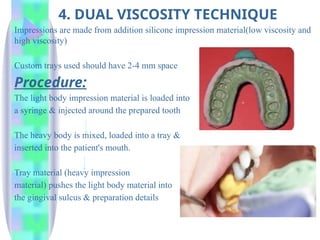
4. DUAL VISCOSITYTECHNIQUE
Impressions are made from addition silicone impression material(low viscosity and
high viscosity)
Custom trays used should have 2-4 mm space
Procedure:
The light body impression material is loaded into
a syringe & injected around the prepared tooth
The heavy body is mixed, loaded into a tray &
inserted into the patient's mouth.
Tray material (heavy impression
material) pushes the light body material into
the gingival sulcus & preparation details
46.
ADVANTAGES:
1.Overcome the polymerizationshrinkage of the light body material
2. Good marginal definition
3. Uniform thickness of the impression material
DISADVANTAGES:
1. Margins duplicated in heavy body in case of excess pressure
2. An assistant is needed for mixing the heavy material while the dentist
is injecting the light material at the same time
3. Construction of custom tray
47.
5. DUAL ARCHIMPRESSION TECHNIQUE
Other names:
Dual quad tray, Closed mouth impression, Triple arch, Accu-bite, Closed bite double
arch method.
This technique records the following at the same time:
the prepared teeth, the opposing arch and the occlusal articulation.
INDICATIONS:
1. Maximum 2 prepared teeth bounded by intact & opposed dentition
2. Patient with anterior guidance
3. Good patient cooperation (able to see Maximum intercuspation)
4. Stable reproducible MIP
5. Space for connector bar behind the last molars (quadrant trays)
CONTRAINDICATIONS:
Rapidly ascending ramus and excess soft tissue distal to molars
48.
ADVANTAGES:
1. Less impressionmaterial
2. More comfortable to the patient (less gagging)
3. Minimal physical deformation of the mandible
4. Saves time
5. Less effort (less number of steps)
DISADVANTAGES:
1. Flexible plastic tray (not rigid)
2. Limited to one casting per quadrant
3. Non uniform distribution of impression material
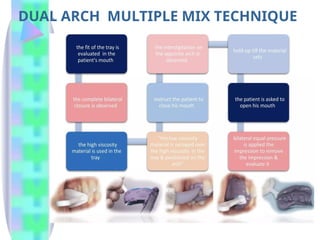
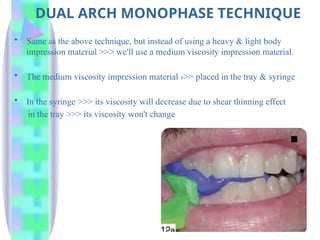
DUAL ARCH MONOPHASETECHNIQUE
• Same as the above technique, but instead of using a heavy & light body
impression material >>> we'll use a medium viscosity impression material.
• The medium viscosity impression material ›>> placed in the tray & syringe
• In the syringe >>> its viscosity will decrease due to shear thinning effect
in the tray >>> its viscosity won't change
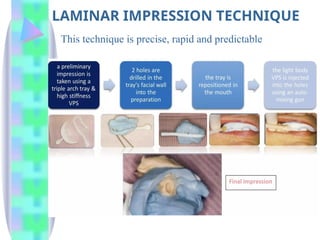
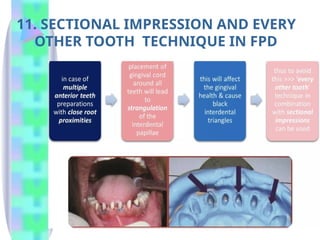
6. SEGMENTAL IMPRESSIONTECHNIQUE
• This technique is useful for taking an impression for multi-prepared teeth
• The dental arch is divided into several segments that could be recorded easily
• This technique could be used with any impression technique but optimally with
auto-mix PVS material
54.
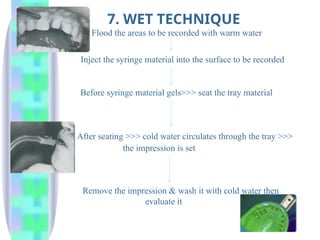
7. WET TECHNIQUE
Floodthe areas to be recorded with warm water
Inject the syringe material into the surface to be recorded
Before syringe material gels>>> seat the tray material
After seating >>> cold water circulates through the tray >>>
the impression is set
Remove the impression & wash it with cold water then
evaluate it
55.
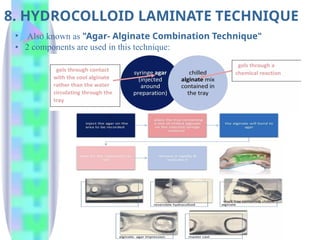
8. HYDROCOLLOID LAMINATETECHNIQUE
• Also known as "Agar- Alginate Combination Technique"
• 2 components are used in this technique:
56.
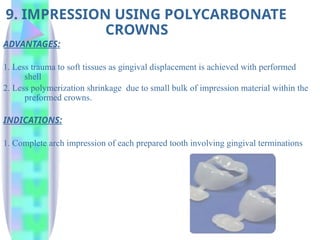
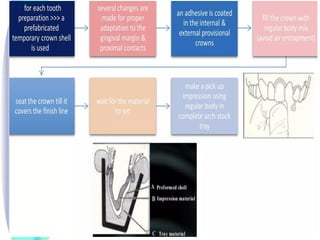
9. IMPRESSION USINGPOLYCARBONATE
CROWNS
ADVANTAGES:
1. Less trauma to soft tissues as gingival displacement is achieved with performed
shell
2. Less polymerization shrinkage due to small bulk of impression material within the
preformed crowns.
INDICATIONS:
1. Complete arch impression of each prepared tooth involving gingival terminations
58.
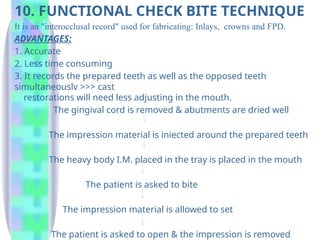
10. FUNCTIONAL CHECKBITE TECHNIQUE
It is an "interocclusal record" used for fabricating: Inlays, crowns and FPD.
ADVANTAGES:
1. Accurate
2. Less time consuming
3. It records the prepared teeth as well as the opposed teeth
simultaneouslv >>> cast
restorations will need less adjusting in the mouth.
The gingival cord is removed & abutments are dried well
The impression material is iniected around the prepared teeth
The heavy body I.M. placed in the tray is placed in the mouth
The patient is asked to bite
The impression material is allowed to set
The patient is asked to open & the impression is removed
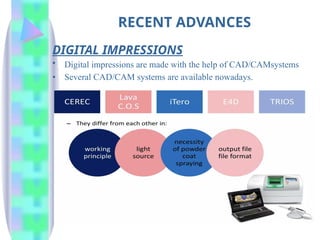
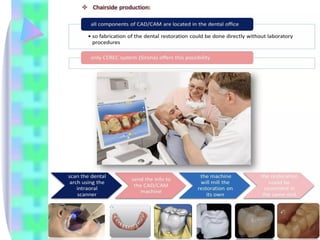
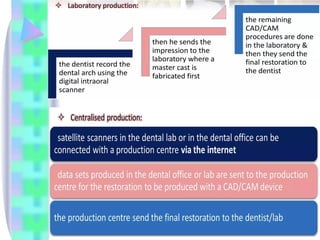
DIGITAL IMPRESSIONS
• Digitalimpressions are made with the help of CAD/CAMsystems
• Several CAD/CAM systems are available nowadays.
RECENT ADVANCES
63.
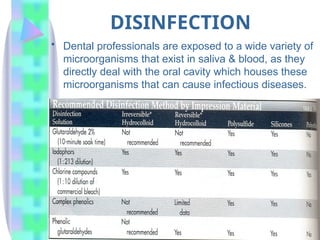
DISINFECTION
• Dental professionalsare exposed to a wide variety of
microorganisms that exist in saliva & blood, as they
directly deal with the oral cavity which houses these
microorganisms that can cause infectious diseases.
64.
CONCLUSION
Making impressions fromprepared hard tooth
substances requires a selective approach. A suitable
procedure should be selected for each impression
task according to the clinical situation. Impression
materials & methods available today offer excellent
results in terms of material characteristics. It is only
the general clinical circumstances which limit the
realisation of what is technically possible on the
patient.
65.
REFERENCES
1. Johnston J.F,PhillipsR.W.- “Modern practice in fixed
prosthodontics.4th
edi.
2. Malone W.F.P,Koth D.L. – “ Tylman’s theory & practice
of fixed prosthodontics.” 8th
edi. 1997.
3. Rosenstiel S.F., Land M.F. – “ Contemporary fixed
prosthodontics” 6rd
edi.
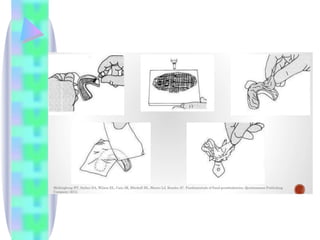
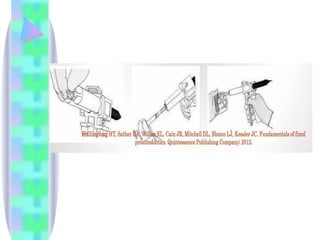
4. Shillingburg H.T. – “Fundamentals of fixed
Prosthodontics.” 4th edi.
5. Glossary of Prosthodontic Terms, 9th Ed


![10. impressions and technicques 2[1].pptx](https://cdn.slidesharecdn.com/ss_thumbnails/10-251125031651-ef9ee1c5-thumbnail.jpg?width=640&height=640&fit=bounds)


