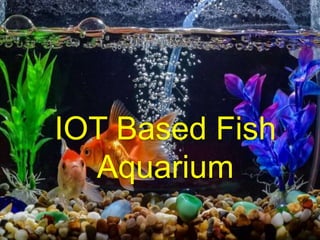
This document describes an IOT based fish aquarium project. A group of students designed a system to automatically monitor and control the water temperature, level, pH, and feeding using sensors connected to an Arduino and ESP8266. The sensor data is sent to the cloud and displayed on a website for remote monitoring and control. Buttons on the site allow functions like automatic feeding and water refilling to be triggered remotely. The goal is to reduce fish care needs and create convenience through internet-connected automation.
2. Group Members
Junaid Khan 15-EE-170
Onib-ur-Rehman 15-EE-038
Zafran Jalil 15-EE-174
Sikandar Ali 15-EE-181
Supervisor
Dr Ashiq Hussain
3. Table of Content
Problem Statement
Introduction
Objectives
Components
Block Diagram
Methodology
Calculations
Results
Problems Faced
Future Work
Conclusion
4. Problem Statement
• As the trend of keeping pets increases people
are keeping more animals at home.
• All of these animals require special care and
sometimes human cannot attend to their needs.
• Out of these animals, fish require the most care
because their environment is completely
different and maintaining these conditions is
very hard manually, so automating this process
will greatly reduce the fish death rate and will
create great convenience for the owners.
• This will also decrease the time for taking care
and can be controlled from anywhere, such as a
mobile phone or PC etc.
5. Introduction
The Internet of Things (IOT)
The Internet of Things (IOT), also called the
Internet of Everything or the Industrial
Internet.
It is a technology envisioned as a global
network of machines and devices capable of
interacting with each other.
IoT evolved from machine-to-machine (M2M)
communication without human interaction.
It refers to connecting a device to the cloud,
managing it and collecting data.
7. Objectives
Our project has following objectives to be
accomplished:
To sense and control the water temperature.
To monitor the water level of the aquarium.
To automate the refilling and drainage systems of
aquarium
To automatically feed the fishes at specific interval of
times.
To check the purity of water by checking its pH.
To transfer all the data to the internet.
To make system capable of displaying and
monitoring sensor’s data online in real time.
To display the useful data of aquarium on the
8. Components
Arduino Mega 2560
Esp 8266
4 Relay module
HC-SR04 Sensor
pH Sensor
Temperature Sensor
DC Servo Motor
Water Pumps
Water Heater
Water Filter
Fan
Connecting Wires
9. Arduino Mega 2560
Arduino mega 2560 is a microcontroller it consists of
16 analog , 54 digital and 15 PWM pins
It has a crystal oscillator of 16MHz frequency
It has a USB port
An external DC power jack
It will extract the data from sensor and perform necessary
actions .
It will also send and receive the data from Esp 8266.
10. Esp 8266
It plays an important role in IOT.
It is a low cost wifi microchip which programmed
with Arduino .
It gets the data from Arduino and sends it to Internet
using wifi.
It has USB slot for uploading code.
It hosts a web server to connect to internet to fetch
or upload data.
It will receive the commands from Cayenne and
send signal to arduino to do respective
tasks.(Automatic feeding, water refilling & Draining)
11. HC-SR04
It provides distance non-contact measurement function.
It range is usually up to 50cm.
It works on the principle of echo.
Ultrasonic sensor needs 5V to operate.
The transmitter transmits the wave and receiver gets it by
reflection from object or surface by measuring the
distance from emission to reflection.
In our Project it will measure water level and feed level.
12. pH Sensor
It is used to measure hydrogen ion activity in a
solution.
Glass pH electrode is widely used in pH sensors
The electrode we used is main reason of measuring
the acidity in a solution.
It works on the principle of voltmeter and use
potential difference to check solution voltages and
compare them with existing ones.
The ideal value for a solution should be pH=7 and if
it increases than it will a basic solution and if pH is
less than 7 then solution will be acidic.
13. Temperature Sensor
Temperature sensors are usually thermocouple or
RTD.
It is capable of monitoring water temperature.
The resistance of thermistor decrease within
increase in temperature which gives the signals of
rise in temperature.
It has 3 pins.
It sense the temperature and sends the data to
arduino according to the sensed temprature
arduino takes action.
14. DC Servo Motor
Its working principle is based on the applied
signal to the control pin.
The principle behind it is Pulse Width
Modulation.
The construction of servo motor is consisting
of DC motor and variable resistors with gear
mechanism.
We have adjusted its rotating angle to be 90 so
that it pulls the feeding tray outwards.
We have assigned a button on Cayenne web
page ,when we press the button servo motor
rotates and pulls the feeding try so that fish are
fed up.
15. 4-Relay Module
It is an Electro-mechanical relay
It is used to derive load based on setting.
It is connected with arduino board.
Its Switches inside relay make it useful for
quick switching of load.
According to the given signal it will turn
ON/OFF Motor M1,M2 ,Heater and Fan.
16. Water Heater
It consists of rod with spiral type
resistive material.
Heater is usually used to stable the
temperature inside the fish tank.
It is connected to 4-Relay module
when temperature of water falls
below 20 degree Celsius then relay
will turn on heater so it will bring the
temperature back to the optimum
limit.
17. FAN
It cools down temperature to certain
extend.
It is Connected to 4-Relay module
whenever water temperature exceeds
28 degree Celsius the relay will turn on
the Fan and it will try to balance the
optimum temperature inside the
aquarium.
18. DC Water Pumps
DC water pump consists of an inlet and an outlet
for extraction and refilling of water respectively.
It is operated on voltage between 6 to 12 v DC
supply.
Its flow rate is 10 liters per minute.
We have used 2 pumps which are connected with
4-Relay module .
One pump extracts impure water from the
aquarium and second refills the aquarium with
fresh water after sensing the pH.
We have also used the buttons for
Auto Refilling and drainage system.
19. LCD Display
This LCD consists of 20 characters wide 4 rows
with white text and blue background.
It is used to display the results in digital form.
It is connected with arduino and display output.
It is powered by 5 v directly from arduino.
It is connected with I2C module to minimize the
pins.
20. I2C Module
•I2C is inter integrated Circuit Module
•It Minimizes the pins
connected with LCD
•It has 4 input pins
(VCC ,GND ,SCL and SDA)
22. Methodology
We have interfaced the sensors with Arduino.
Arduino senses the data from sensors and takes
necessary actions according to that.
Arduino sends the data to module Esp 8266.
Esp 8266 is a Wifi module which sends the data to
Cayenne.
We have created remote controlled feeding system which
feeds the fish when button on Cayenne is pressed.
We have created automatic remotely controlled refilling
and drainage system of water which can be controlled by
pressing buttons on the cayenne web page.
The web application Cayenne my Devices makes graphs
and show real time feed as well.
Data will also be displayed on an LCD on the aquarium
24. Water Level/Feed Calculation:
The distance to the liquid surface is based on
the speed of sound in air.
This distance, D, is subtracted from the height
of the tank, H, to give the depth, L, of liquid. The
transmitter unit relays the level back to the LCD
display to give you the current depth of your
tank.
S = v * T/2
At sea level Speed of sound= v = 34300 cm/s
S = 17150 * Time (unit cm)
25. Feed Level Calculation
We initially measured the total distance with a scale
11 cms.
We wanted to take 4cm height as max so we
subtracted our empty container height from 4cm ,
which made it the 0% or 0cm level.
Speed of sound in air v= 340 m/s
Distance= v*(time/2)
h_f = (t_f*340)/20000
h_f = (h_f- 7) //Distance of ultrasonic sensor from bottom 100%
feed
h_f = 4 - h_f //Actual Height of feed
26. pH Sensor Calculation
To calculate pH value we will take the
average of almost 6 samples and then
multiplied it with transfer function then
we add some correction factors to get
accurate value of pH.
pH=avgValue*5.0/1024/6
phValue = 3.5* pHValue + 3.10
27. Design of Fish Feeder:
We have constructed special mechanical design of
fish feeder which we mounted on the roof of
aquarium.
The Feeder is made up of aluminum and has 3
layers.
It has a capacity for storing feed in its box.
Each layer has hole in it. With the help of flexible
wire the tray is connected with DC servo motor
which rotates 180 degree .
Whenever we press button on Cayenne fish are fed
up.
The tray is also connected with rubber band to
restore its original position.
29. Cayenne Website Setup
Make an Cayenne Account by using
email.
Add a controller or
device(Arduino,ESp8266)
A user name password and MQTT pass
phrase will be provided to you.
Add Buttons gadgets and other controls
by clicking the button ‘’Add widgets’’.
Now We configured the button to be used
on arduino by assigning it a channel and
some other properties
Now we adjusted the widgets according to
our preferences(size , and positions)
30. Cayenne Website Setup
If you want to view the graphs you can
click the icons .
You can also set a trigger which will
send you a message or email
notification.
31. STEPS TO CONNECT board with
Cayenne
Install the Arduino IDE and add Cayenne
MQTT Library to Arduino IDE.
Install the ESP8266 board package to
Arduino IDE.
Install required USB driver on your
computer so you can program the
ESP8266.
Connect the ESP8266 to your PC/Mac
via data-capable USB cable.
In the Arduino IDE, go to
the tools menu, select your board, and
the port your ESP8266 is connected to.
39. Problems Faced
Feed Design
At start we had designed wooden
feeder which was slightly heavy to pull of
so we redesigned feeder with aluminium,
now its free to move.
pH Sensor Calibration
pH sensor’s values were not stable
they were continuously varying so we
recoded it to solve that issue.
40. Future Work
A camera can be added which can
stream live video of the aquarium,
providing detailed knowledge of fish
growth and health
41. Conclusion:
The project was inspired by the idea , to
create a system that could automatically take
care of the fish and the ability to be able to
control these devices remotely over the Iot .
Now most of the operations happen by
themselves, maintaining steady pH, water
level, temperature.
Our project achieves ,simplicity ,efficiency
,time and cost saving .It serves as a way to
practically implement our skills to solve a real
world problem and to make a product.