2. Introduction:
The goal of this final project is to utilize a sensor to create a prototype for a sellable
product. This project aims to apply various embedded system design aspects to build a simple
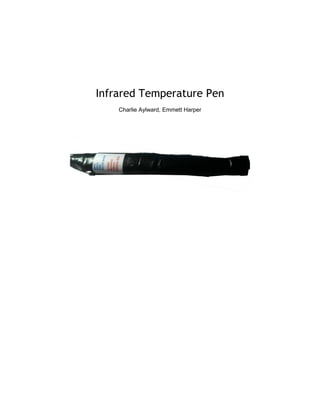
system to monitor a sensor and display the sensor output. In this project, an infrared
thermometer interfaced with an MSP430 is utilized to ensure beverages are at an ideal serving
temperature. A portable pen-style design will enable this device to be used on the go and in
various environments.
System Requirements:
This device shall provide temperature readings of specific beverages and compare them
to ideal serving temperatures. There shall be two buttons on the device to control beverage
modes and device power. When the device is pointed toward a beverage with the power button
held pressed, the system shall determine the beverage temperature and display its relation to
the ideal temperature via an LED array. The LEDs are centered around a green LED
representing the correct temperature. Four red and blue LEDs on either side of the green LED
shall signify whether the drink is too hot or cold. With the power button held down, a second
button may be pressed to toggle between beverage modes and display that mode by lighting up
3. an LED adjacent to the indicating label for the mode. The device shall operate on two
replaceable AAA batteries.
System Specifications:
Table 1. System Specifications
Specifications Value Units
MLX VCC 3.0 Volts
MLX VSS (GND) 0 Volts
Measurement Resolution 0.02 o
Celcius
Accuracy 0.5 o
Celcius
Resistors 10K Ohms
Temperature Range -40 to 125 o
Celcius
MLX Clock 20 kHz
MSP430 Clock 1 MHz
Weight 54.86 grams
Diameter 2.3 cm
Length 16.5 cm
Field of View -20 to 20 Degrees
Sensor Communication I2C N/A
GPIO Pins 4 N/A
System Architecture:
The system is composed of 5 main components: mode button, power button, MSP430,
MLX90614 (sensor), and a LED array. The power button supplies a 3V battery source to the
system when pressed. This enables the MSP430 to communicate with the sensor and control
the LED array. Regular operation involves I2C communication between the sensor and the
4. MSP430. The mode button interrupts regular operation and changes the preset temperature
value being compared to. All of the system components are arranged within an ergonomic, pen-
style design to allow for easy portability.
Figure 1. Block Level Diagram of Infrared Beverage Thermometer
Component Design:
The MSP430 microcontroller software begins I2C communication with the MLX by
sending a start signal followed by the MLX90614 slave address. If the MLX90614 lowers the
specified acknowledge bit, then the two devices have successfully initiated communication.
Following acknowledgement, the MLX90614 receives a transmitted sequence representing a
command and the slave address byte once more.Upon another acknowledgement, the
MLX90614 sends two bytes (each requiring acknowledgement from the MSP430) representing
the sensor temperature value. The MSP430 lights up the appropriate LEDs based on how far
the temperature is with the ideal temperature. Pressing the mode button while the power button
is held initiates an interrupt to change the ideal temperature value being compared against. This
loop repeats until the MSP430 loses power via the main button being unpressed. An overview of
the software flow is depicted in Figure 2.
5. Figure 2. Block Level Diagram of Software Flow for Infrared Beverage Thermometer
Figure 3. Schematic for the Infrared Beverage Thermometer
The MLX90614 SDA and SCL pins are tied to ports 1.7 and 1.6 respectively on the
MSP430 with pull-up resistors to Vcc. 9 LEDs soldered to a separate PCB and are connected to
6. MSP430 pins 1.1-1.5 and 2.0-2.3 with a resistor between ground and the LED cathodes to
reduce the voltage drop across the LEDs.
The MLX90614 sensor ships factory calibrated and features a SMBus output with a
resolution of ±0.02 o
Celcius (courtesy of a built-in 17-bit ADC). The temperature range of the
sensor is from -70.01 o
C to +382.19 o
C. The sensor stores the temperature as a hex value when
provided power.The MSP430 reads the appropriate registers to pull the stored temperature
value ranging from 0x27AD (-70.01 o
C) to 0x7FFF (382.19 o
C). The relation between the values
stored in memory to the temperature reading is shown in Figure 4 with the hex values converted
to decimal.
Figure 4. Relation between temperature readings and value stored in sensor registers
Amp Hours of storage = 1150 mA/h
Average Device Current = 2.9mA
Battery Autonomy = 396.5 hours
Bill of Materials:
Table 2. Bill of Materials
7. Item Name Part # Supplier Name Quantity Price Each Extended Price Total
MSP430G2553 1308126433 TI 1 $10.00 $10.00
MLX90164 MLX90614xAA Melexis 1 $19.95 $19.95
4.7kOhm Resistor 271-1121 Radio Shack 3 $0.10 $0.30
1kOhm Resistor 271-1149 Radio Shack 2 $0.10 $0.20
Large Tactile Push
Button
bi00107 Generic 1 $0.10 $0.10
Small Tactile Push
Button
bi00106 Generic 1 $0.10 $0.10
Breadboard Wires 276-173 Radio Shack 30 $0.05 $1.50
Blue LED Strip 12620 SparkFun 1 $2.95 $2.95
Red LED Strip 12619 SparkFun 1 $2.95 $2.95
Green LED Strip 12622 SparkFun 1 $4.95 $4.95
$43.00
System Integration:
The two AAA 1.5V batteries connected to the power button supply 3.0V to the system.
Using an inline battery holder, the diameter of the final design is minimized. The array of LEDs
are manipulated with conditional logic based on how far the actual temperature is from the ideal
temperature. Larger differences between the ideal temperature and the temperature detected is
signified by more than one LED lighting up. Each LED in either direction (hot or cold) signified
steps of ±2 o
F from the ideal temperature. The second button is hooked up to a resistor and
then connected to pin 2.3. This “mode” button is used to cycle through preset #DEFINEs
representing specific beverages’ ideal serving temperature. Each LED corresponds to a
beverage specified on an adjacent label adjacent. Each press of the “mode” button sequentially
steps through the 8 specified beverage modes.
Conclusion:
This project really pushed us to take an idea and go through the struggles it takes to
have a working prototype. We both learned that with I2C communication between the two
devices takes a really long time to get everything just right. Our biggest problem was
8. frequencies and baud rates that should’ve been the same were producing different results and
in the end we have to brute force find the one that supplied correct communication. Another
huge time sink was debugging what we already had packaged. Sometimes you run across bugs
or quirks when you put the whole system into your package, resulting in taking it out of the
package to test it only to put it back in the package. We found that testing in slow steps reduces
the overall time it takes to fine tune and debug our product. The concepts that are involved in
getting a device like this to work are not hard but you never think about all the time and effort
you have to put in for research and debugging. We both have a much realer sense of what to
expect when taking on a project like this.
Appendices:
#include <msp430g2553.h>
//#define ROOM 14905 //76 deg
#define MILK 13712 //34 deg
#define SODA 13823 //38 deg (coke)
#define BEER 14073 //47 deg (pale ales)
#define WHITEWINE 14212 //52 deg
#define WATER 14295 //55 deg
#define REDWINE 14434 //60 deg
#define COFFEE 17207 //159 deg
#define GREENTEA 17629 //175 deg
#define OPTIONS 8
#define TIMEOUT 30000
int sleeping = 0;
int mode;
char modeCount;
int TXByteCtr, RXByteCtr;
int Rx = 0;
char command = 0x07;
unsigned char data_received[3];
unsigned char *PRxData;
char itgAddress = 0x5A;
int temperature;
void init_I2C(void);
void Transmit(void);
void Receive(void);
char temp_lower, temp_upper;
void get_mode();
void write_SegC (char value);
char read_SegC ();
int delay;
int main(void)
{
WDTCTL = WDTPW + WDTHOLD; // Stop WDT
P1OUT &= ~(BIT0 | BIT1 | BIT2 | BIT3 | BIT4 | BIT5);
P1DIR |= BIT0 | BIT1 | BIT2 | BIT3 | BIT4 | BIT5;
P2DIR |= BIT0 | BIT1 | BIT2;
P2OUT &= ~(BIT0 | BIT1 | BIT2);
//BUTTON CONFIGURE
P2REN |= BIT3 | BIT4;
P2IES |= BIT3 | BIT4;
P2IFG &= ~(BIT3 | BIT4);
9. P2DIR &= ~(BIT3 | BIT4);
P2SEL &= ~(BIT3 | BIT4);
P2SEL2 &= ~(BIT3 | BIT4);
P2IE |= BIT3;
//1MHz Clock
DCOCTL = 0; // Select lowest DCOx and MODx settings
BCSCTL1 = CALBC1_1MHZ; // Set range
DCOCTL = CALDCO_1MHZ; // Set DCO step + modulation
P1SEL |= BIT6 + BIT7; // Assign I2C pins to USCI_B0
P1SEL2|= BIT6 + BIT7; // Assign I2C pins to USCI_B0
modeCount = read_SegC();
switch (modeCount) {
case 0:
mode = MILK;
break;
case 1:
mode = SODA;
break;
case 2:
mode = BEER;
break;
case 3:
mode = WHITEWINE;
break;
case 4:
mode = WATER;
break;
case 5:
mode = REDWINE;
break;
case 6:
mode = COFFEE;
break;
case 7:
mode = GREENTEA;
break;
default:
break;
}
get_mode();
__bis_SR_register(CPUOFF + GIE); // Enter LPM0 w/ interrupts
}
//-------------------------------------------------------------------------------
// The USCI_B0 data ISR is used to move received data from the I2C slave
// to the MSP430 memory. It is structured such that it can be used to receive
//-------------------------------------------------------------------------------
#pragma vector = USCIAB0TX_VECTOR
__interrupt void USCIAB0TX_ISR(void)
{
if(Rx == 1){ // Master Recieve?
if (RXByteCtr) {
*PRxData++ = UCB0RXBUF; // Get RX data
RXByteCtr--;
}
else{
IFG2 &= ~UCB0RXIFG; // Clear USCI_B0 TX int flag
Rx = 0;
__bic_SR_register_on_exit(CPUOFF); // Exit LPM0
}
if (RXByteCtr == 1) {
UCB0CTL1 |= UCTXSTP; // I2C stop condition
IFG2 &= ~UCB0RXIFG; // Clear USCI_B0 TX int flag
__bic_SR_register_on_exit(CPUOFF); // Exit LPM0
}
}
else{ // Master Transmit
if (TXByteCtr) // Check TX byte counter