A practical guide to rendering and plastering with lime
•Download as PPTX, PDF•
1 like•274 views

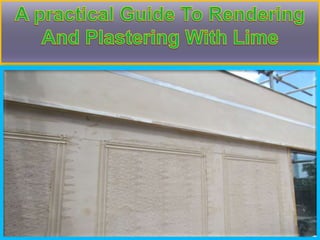
Lime renders were traditionally applied to give protection to walls built of poor quality rubble stone or porous brick or to walls in exposed locations facing driving winds. They help by acting like a sponge, absorbing rainfall then allowing it to evaporate rather than soak into the wall

Recommended
More Related Content
What's hot
What's hot (20)
Similar to A practical guide to rendering and plastering with lime
Similar to A practical guide to rendering and plastering with lime (20)
More from limetecuk
Recently uploaded
Recently uploaded (20)
A practical guide to rendering and plastering with lime
- 2. Lime renders were traditionally applied to give protection to walls built of poor quality rubble stone or porous brick or to walls in exposed locations facing driving winds. They help by acting like a sponge, absorbing rainfall then allowing it to evaporate rather than soak into the wall. Most cottages and houses built of rubble stone would have been rendered originally and they tend to suffer from penetrating damp if the lime render is removed or replaced with a cement rich render.
- 5. There is a very wide range of types of lime rendering. Rubble walls of many vernacular buildings were often treated with just a single coat of render, amounting to not much more than a very full, flush pointing. Such a render is thicker in the hollows and very thin over the stone faces. There was no attempt to create a flat surface so the undulations of the wall and even some of the stones themselves were not concealed. For a smarter finish or on more prestigious buildings the aim would be for a more uniform render achieved by applying a scratch coat to fill the hollows and take up some of the unevenness followed by one or two more coats which were worked to a flatter surface.
- 8. Sometimes joint lines were ruled into the damp top coat to create the illusion of ashlar stone, but a common finish for many houses and cottages was a rough-cast where the final coat consisted of a mortar slurry containing coarse grit applied by throwing from a special trowel. For interiors a fairly smooth surface could be obtained using a coarse render mix, but for top quality internal plastering the final coat would be richer in lime and polished up to a smooth, close finish.
- 10. Renders and plasters can be applied to a variety of backgrounds including earth (which should nearly always be rendered), stone and brick. Plaster is also applied to wooden laths for ceilings and internal partitions.
- 11. By carefully selecting appropriate aggregates it is possible to match existing renders and successfully repair failed patches without the need for complete re-rendering. Hollow or detached plaster can sometimes be consolidated and saved and further advice should be sought before replacing it, especially if it is very old.
- 14. For stone and brick any hollow or decayed render should be hacked off and any loose pointing should be raked out and replaced prior to rendering. Brush the wall to remove loose material. Do not rake out pointing to provide a key. Do not use plastering bead on corners as this will give a modern appearance. Do not use chicken wire or metal lath to form a key as it can cause stress in the render due to differential thermal movements and can lead to large-scale failure, especially when it rusts.