Elem of design unit 7 module 2 investigation of fonts
1. WD132: Elements of Design
Unit 7: Typography
Module 2: Investigation of Fonts and Differences
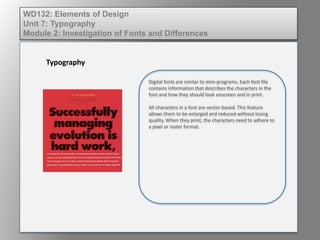
Digital fonts are similar to mini-programs. Each font file
contains information that describes the characters in the
font and how they should look onscreen and in print.
All characters in a font are vector-based. This feature
allows them to be enlarged and reduced without losing
quality. When they print, the characters need to adhere to
a pixel or raster format.
Typography
2. WD132: Fundamentals of Design
Unit 7: Typography
Module 2: Investigation of Fonts and Differences
These fonts were developed by Adobe. Each Windows
Type 1 font has two files that work together—a .pfm file,
which stands for Printer Font Metrics and has information
for your screen font, and a .pfb file, which stands for
Printer Font Binary and is your printer font file.
Typography
PostScript Type 1 fonts
Sponsored Links
OpenType fonts
3. WD132: Fundamentals of Design
Unit 7: Typography
Module 2: Investigation of Fonts and Differences
A dog-eared page icon with a lower case script a—for
Adobe—represents both files: the one with the .pfm
extension and the one with the .pfb extension. To display
and print properly, both the font files should be installed
for each Type 1 font.
Typography
PostScript Type 1 fonts
Sponsored Links
OpenType fonts
4. WD132: Fundamentals of Design
Unit 7: Typography
Module 2: Investigation of Fonts and Differences
These fonts were developed jointly by Adobe and
Microsoft. The OpenType font format is an extension or
new version of TrueType that can also contain PostScript
data. OpenType fonts can contain many more glyphs
characters than other font formats.
In Windows, OpenType fonts can have an .otf or a .ttf
suffix. The .otf fonts contain PostScript data. TrueType
fonts converted to OpenType to take advantage of the
cross-platform capabilities retain the .ttf extension.
The icon for an OpenType font is a dog-eared page icon
with an O—for OpenType. Adobe names the fonts it
creates with an “STD” for a standard number of characters
and “PRO” for fonts that include extra characters.
Typography
PostScript Type 1 fonts
Sponsored Links
OpenType fonts
5. WD132: Fundamentals of Design
Unit 7: Typography
Module 2: Investigation of Fonts and Differences
Why do you need to manage your fonts?
In addition to the fonts you can see in the
font list in InDesign, or any other
application, you can also use other fonts
installed in the following folders:
•Windows> Program
Files/Utilities> Fonts folder
•Mac OS> Library> Fonts folder
You can manage fonts using a program
such as Linotype FontExplorerX, Suitcase,
or the free management system that
comes with a Mac—FontBook.
Typography
Tip #
1 Create font sets. They are a good
method to organize and improve
productivity.
2 Auto activate fonts that are not active
on your system but are located in your
system font folder when possible.
3 Clean duplicates.
4 Offer font security such as font Vault in
Suitcase.
6. WD132: Fundamentals of Design
Unit 7: Typography
Module 2: Investigation of Fonts and Differences
It is best to use only one or two
fonts in a document. This keeps the
design clean and easy to read.
When sending a design job to print,
make sure to include all fonts or the
job will not print as you intended.
This includes all weights of any font
you used in the project.
Typography
7. WD132: Fundamentals of Design
Unit 7: Typography
Module 2: Investigation of Fonts and Differences
There are legal issues concerning
font usage. Most fonts require the
printing company and you to own
the font unless you have multiple
licenses. The original type designer
owns the font. The buyers just own
the license to use the font. The font
manufacturer still owns the font.
This concept is like downloading a
song from iTunes.
Typography
8. WD132: Fundamentals of Design
Unit 7: Typography
Module 2: Investigation of Fonts and Differences
TrueType and PostScript Type 1
fonts come in both Macintosh and
Windows formats. You cannot use
TrueType or Type 1 fonts created for
Macintosh on a computer running
Windows. The new OpenType font
format is cross-platform. With this
format, you can use the same
OpenType fonts on both Macintosh
and Windows computers.
Typography
9. WD132: Fundamentals of Design
Unit 7: Typography
Module 2: Investigation of Fonts and Differences
It is a good idea to back up your
fonts. Keep them on a master fonts
disk. If your hard disk crashes, you
will need to reload them. Since most
fonts are now purchased by
downloading, you must back them
up.
Typography
10. WD132: Fundamentals of Design
Unit 7: Typography
Module 2: Investigation of Fonts and Differences
It is a good idea to manage fonts using a font
management system, such as Suitcase, Font
ExplorerX, or the free management system that
comes with a Mac. FontBook provides a demo of
the software, covering the following:
• How to view fonts.
• How to install fonts.
• How to create a collection of fonts.
• How to categorize fonts including font format,
historical style, text, display, decorative, per
job, per application, and per client.
• How to enable or disable a font.
• How to identify a font character on the
keyboard.
• How to show dingbats or a symbol font by
holding down Shift and then pressing the
Option key.
Typography
11. WD132: Fundamentals of Design
Unit 7: Typography
Module 2: Investigation of Fonts and Differences
Tips on how to manage fonts using a font
manager :
• You should create font sets. They are a
good method to organize and improve
productivity.
• You can auto activate, with some
programs, fonts that are not active on
your system but are located in your
system font folder.
• You can clean duplicates.
• You can offer font security such as font
Vault in Suitcase.
Typography
12. WD132: Fundamentals of Design
Unit 7: Typography
Module 2: Investigation of Fonts and Differences
Special characters are known as
glyphs. If you need to find a specific
character, look at the glyph palette
to view the characters.
A triangle on a character means
there are alternate characters
available.
Double-click the glyph to insert it at
the blinking cursor point.
Typography