
Recommended
More Related Content
Similar to Art With A Heart.pptx
Similar to Art With A Heart.pptx (20)
More from caitlin devendorf
More from caitlin devendorf (20)
Recently uploaded
Recently uploaded (20)
Art With A Heart.pptx
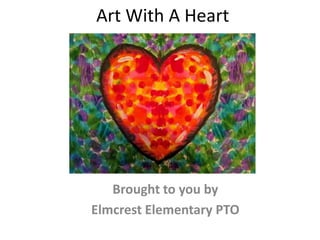
- 1. Art With A Heart Brought to you by Elmcrest Elementary PTO
- 2. Jim Dine Hearts • Inspired by the American artist Jim Dine • Uses hearts in much of his artwork. This is called a ‘motif’ • Pop Art Artist – colorful, fun, meant to grab your attention Confetti Heart, 1985, color lithograph
- 3. Jim Dine Hearts - Materials • Tempera paint in warm and cool colors and white • Black oil pastel • Construction paper • A cup of water • A paintbrush
- 4. Jim Dine Hearts • On the back of your paper, write your: – First and last name – Grade – Teacher
- 5. Jim Dine Hearts Step 1 • Fold your paper in half horizontally (match the left to the right side) • Give it a good crease down the middle • Flip it open so your name is on the back and your crease is in the center
- 6. Jim Dine Hearts Step 2 • Paint in the start of your heart shape using a warm color (reds, oranges, yellows, pinks) • Go a small amount at a time • Refold your paper every few brushstrokes and use the palms of your hands to smooth the area you painted to spread it to the other side – this is called burnishing • Open your paper to see how the image transferred to the other side
- 7. Jim Dine Hearts Step 3 • Continue to paint in the outline of your heart • Fold it over and burnish every few strokes • After the outline, gently flatten your brush on the inside of one half of your heart to leave brush strokes • Fold the paper and burnish to transfer
- 8. Jim Dine Hearts Step 4 • Wash your brush in the water cup before going to the next color • Continue paint brush strokes on one side and folding/burnishing to transfer • Use warm colors for the inside of the heart • Try to get rid of any white paper showing!
- 9. Jim Dine Hearts Step 5 • Wash your brush before using cool colors (water and ice colors) on the outside of your heart • Paint a few brushstrokes, fold and burnish • Continue with other cool colors to make sure no white paper shows through!
- 10. Jim Dine Hearts Step 6 • Let your heart dry for a bit • When it is dry, use a black oil pastel to make a sketchy outline around the heart • Use your finger to rub and smear the black pastel • You can even draw a few little lines inside the outline to make the heart look more 3-dimensional
- 11. Jim Dine Hearts Step 7 • Use some white paint to create a few lines near the edges of the heart • This helps make the heart look 3- dimensional (with depth, like a sculpture) instead of 2-dimensional (flat, like paper)
- 12. Tissue Paper Heart Maps • Create a heart that emphasizes positive and negative space
- 13. Tissue Paper Heart Maps - Materials • Bleeding tissue paper (note this is different from regular tissue paper. It is available through Amazon and art supply companies • Construction or heavier weight paper • Scissors • Black markers • A paintbrush • A cup of water
- 14. Tissue Paper Heart Maps Step 1 • On the back of the paper, write your: – First and last name – Grade – Teacher • Trace around the heart template (some hearts may already be pre-cut for you!)
- 15. Tissue Paper Heart Maps Step 2 • Decide where to place your tissue paper squares • Leave some paper showing around each square -too many squares can cause the artwork to get brown and muddied when water is added • When you have your placement, use a damp paintbrush to paint overtop of the squares.
- 16. Tissue Paper Heart Maps Step 3 • When your paper is dry, gently peel and discard the squares • You should have some white paper that shows through and around the squares
- 17. Tissue Paper Heart Maps Step 4 • Your squares become the positive space – the shapes on the paper • Use a marker to outline the negative space – the areas that surround the squares
- 18. Watercolor Lovebirds • A pair of birds that contrast one another with their geometric and organic lines
- 19. Watercolor Lovebirds - Materials • Watercolors (traditional cakes or liquid watercolors are more vibrant but do stain clothing) • Paintbrush • Water • Markers • Construction or heavier weight paper
- 20. Watercolor Lovebirds – Step 1 • On the back of the paper write your: – Name: First and Last – Grade – Teacher • Trace two of the bird templates onto your paper (note that some birds may be pre-cut for you!) Have them face one another
- 21. Watercolor Lovebirds – Step 2 • One one bird, use a marker to draw geometric lines (straight, zig zag, dashed, etc.). These are lines that have clear rules about how they should look and don’t occur in nature. Leave yourself some room to paint in the shapes in the next step! • One the second bird, use a marker to draw organic lines (wavy, curly, free-form). These are lines that have no rules and occur in nature. Leave yourself room to paint in the shapes in the next step! • Note: If you have a very young artist, you can always do this step last and have them just paint the bird with watercolor!
- 22. Watercolor Lovebirds – Step 3 • Use the watercolor to paint in one bird with warm colors. Try not to put the same color next to each other • Use the watercolors to paint in the second bird with cool colors. Try not to put the same color next to each other.
- 23. Watercolor Lovebirds – Step 4 • Let your birds dry • Use a marker to embellish your birds by creating more geometric and organic lines within your shapes • You can add details like wings, eyes, feathers, etc. • Cut out your birds when you are finished