
Recommended
More Related Content
What's hot
What's hot (18)
Similar to Monica's Paint Night
Similar to Monica's Paint Night (20)
More from caitlin devendorf
More from caitlin devendorf (20)
Recently uploaded
Recently uploaded (20)
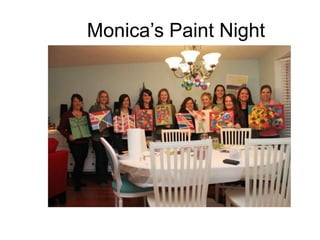
Monica's Paint Night
- 2. The Night • Please feel free to use the following as inspiration or create your own original piece • Included is: – Directions for a colorful abstract painting – Directions for a nameplate painting – References for getting started – Tips and tricks if you decide to continue working with acrylics • The night is about having fun so don’t judge yourself! • Everyone has artistic talent – it’s just finding the right medium to express it with
- 3. About Caitlin • Former High-School Art Teacher • Now Owner/Artist of Inklings Artwork and Lead Sandwich Maker at the Devendorf House • Mother to Violette (3) and Charlotte (1) • Interests include Acrylic Painting; Paper Assemblage; Pen and Ink Drawing; Repurposing Furniture and Objects
- 4. My Work
- 5. Materials We’re Using Tonight • Brushes – there are a few different sizes and types. Experiment around with different ones to find what you like • Canvas – Your choice of size and orientation • Water jars for cleaning your brush between colors • Palette for your paints • Plastic knife for mixing • Paper towel for wiping your brushes • References – color mixing charts and step by step instructions
- 6. Extras • Tape - for sectioning off areas of your painting you want to remain as white canvas • Misting Bottles – to make your paint more workable (dry more slowly) • Pencils and Paper for sketching
- 7. Extras You May Want to Bring • Reference pictures, ideas or notes • Rubber stamps or small objects to print on your canvas (spools, combs, toy cars, buttons, etc) • Templates or tracers (print then cut out and then trace on to your canvas to fill in) • Collage items – scrapbook papers, newsprint, magazine cutouts, small objects to affix to the canvas (I have adhesives you may use) • Permanent black markers
- 8. The Basics• Acrylic paint dries to a plastic. You can layer it when it is wet or dry. Each achieves a different effect. • Protect brushes from drying with paint in them by placing them in water (if you’re taking a break) or cleaning them by washing them in water (or soap and water when you’re done) • Wash your brush when moving from one color to another unless you wish to be very free and expressive – then go nuts and mix with reckless abandon! • Mixing colors – Use the plastic knife to dole out small bits of your paint to a blank section of your palette. Mix completely to make a new color – Start with your lighter color first then add small amounts of the darker color to it. You can always make something darker. Example: Add red to white or add black to green – Quick Color Theory • Shade – adding black to a color to make it darker than the original • Tint – adding white to a color to make it lighter than the original • Primary Colors- can’t be made with any other colors – Red, Yellow, Blue • Secondary Colors – made by mixing two primary colors – Orange, Green, Violet • Tertiary Colors – Made by mixing a primary with a secondary – Red-Orange, Yellow-Orange, Yellow-Green, Green-Blue, Blue-Violet, Red-Violet • If you find the paint on your palette stiffening, lightly mist it to keep the paint flexible • If you find your paint is too thick, you can thin it with water. Also use water to get a more even stroke from the brush
- 13. Infini 2006
- 15. Atomic Jitters in Yellow 2013
- 17. Madame Koto 2006
- 18. Envisage 2006
- 19. Be as simple or as intricate as you wish
- 20. Image courtesy of colorfulartgirl.blogspot.com Take It Further: Add some black outlines around areas you wish to highlight
- 21. Image courtesy of Etsy.com Take It Further: Add a silhouette overtop your painting
- 22. Image courtesy Trulia.com Take It Further: Mask areas of your canvas with tape prior to painting
- 23. Swirl Tree, Two Birds and Houses Karla Gerard Take It Further: Be more representativ e with your patterning to create objects and/or figures or use text. Print out letters to use as templates from the computer. Dafont.com is a great free font resource
- 24. Restless Claire DesJardins Take It Further: Don’t be afraid to use the blank canvas as part of your art
- 25. Take It Further: Use black paint on a wet paintbrush or Sharpie marker to ‘draw’ overtop your painting Images courtesy of madebynicole.com
- 26. Images courtesy of dans-le-townhouse.blogspot.ca/ Further: Be more expressive with your brush stroke. Use more water in your paints to thin and blend them together on the canvas.
- 27. On The Rocks Nancy Stadlee Take It Further: Use scrapbook paper, newsprint, magazine cutouts or small objects to collage onto your painting
- 28. Getting Started • Creating an organically inspired painting • Requires no pre- planning. Completely intuitive • Can be as intricate or as simple as you desire
- 29. Step One (Optional): Border Create a border around the edge of your canvas. If you wish to paint the edges, go ahead and do so
- 30. Step Two: Large Shapes Paint in your larger shapes first, working one color at a time. Remember, acrylics dry fast so if you don’t like what you do just let it dry and paint over it! Think about how your viewer’s eye will bounce from one shape to the next. Spread your shapes and colors all over the canvas to create balance
- 31. Step Three: Layering Add in smaller shapes overtop your larger ones. Keep your composition (how the art is laid out) in mind. Step back every so often to get a fresh take on it
- 32. Step Four: Adding Patterns Add in patterns like dots, lines or shapes atop your bottom 2 layers. Work one color at a time over the canvas.
- 33. Step Five: Finding Balance Continue adding patterns and shapes until you feel the work (or you) is finished. Turn the canvas upside down or on its’ side to get a fresh
- 34. Name Painting
- 35. Name Painting • Use your name; your child’s; your last name or a word with special meaning • Think about the theme of your work and where you want it to hang to help determine colors and patterns • Look up fun patterns and inspiration through Pinterest • Find neat fonts using dafont.com
- 36. Step One: Choose Your Parts Decide what you wish to have as: • A background ( a pattern, shapes, a silhouette, etc.) • Your colors (stick with a max of 5 to keep everything unified) • Your lettering style • “Extras” to incorporate (ex: dinosaurs and rocks)
- 37. Step Two: Sketch It Out Draw your parts on your paper first with small thumbnail drawings, putting each element in different arrangements and proportions to determine
- 38. Step Three: Transfer to Canvas Draw out your best drawing on your canvas LIGHTLY with a pencil
- 39. Border (optional) Paint in the border of your painting first, should you choose to use one. Paint the edges of the canvas at this time
- 40. Step Four: Paint Back to Front Begin painting the background first, then working your way forward. Think about building in layers, with the detail coming at the end
- 41. Step Five: Finding Balance Continue adding until you feel the work (or you) is finished. Step away and look at the canvas from across the room to get a fresh take on it
- 42. Materials For At Home Use • Brushes: You ‘ll want a couple of sizes (small and larger) of each of the following: – Pointed round brush (#4, #8) – Flat (quarter inch and half inch) – Liner (#0000, #1) • Palette Knife: A plastic knife works well too! • Paints: The traditional colors for acrylic painting are listed below. These are universal names across brands – White: Titanium White – Black: Mars Black – Red: Primary Magenta, Quinacridone Red or Alizarin Crimson, Cadmium Red Light – Yellow: Primary Yellow, Diarylide Yellow, Yellow Ochre – Blue: Primary Cyan, Ultramarine Blue, Phthalocyanine Blue – Orange: Pyrrole Orange or Cadmium Orange (you can makethis with yellow and red) – Green: Permanent Green (you can make this with yellow and blue) – Violet: Dioxazine Purple (you can make this with red and blue) • Palette – a piece of plexi-glass, a plastic plate or waxed paper works well • Surface to paint – canvas, paper, wood, cardboard, brick, stone,….the list goes on and on….. • Water container and water – designate an old mason jar or large tin can for your water container. Make sure it is big enough to avoid toppling over • Paper towels or an old towel for wiping your brushes after cleanup • A tote bag or toolbox to carry all your supplies – an old tackling box or plastic container is a great alternative to the expensive equipment the art store sells
- 43. Gathering Ideas • Collect – gather notecards, calendars, newspapers and magazines, business cards, advertisements, leaves and flowers, fabrics, etc. Keep them in a folder for easy reference • Read – Check out websites or books on artist’s whose work you admire. Even local artist’s often have great websites of their work to help inspire • Draw – use a small sketchbook to draw something that comes to mind. Even a simple doodle can become a gorgeous painting with some cool colors and patterns • Search the internet – Google image search or search etsy.com with an object you’d like to paint and be inspired by tons of different images • Pinterest – A Pinterest search of anything you can think of will turn up some fantastic inspiration • Think of others – stuck on what to do? Think of creating for someone else
- 44. Photographs I’d like to take a few photographs of works in progress and finished pieces and may post a few of the night to my blog (http://inklingsartowork.blogspot.com) . If you are Camp Style 2006
- 45. Questions, Comments and More Art Please let me know if you have questions tonight or afterwards. I welcome comments to improve upon and ideas for any other ‘art nights’ you want to see happen! Picadilly 2006
- 46. More Art Nights? Would you like another night of art? Let me know if you’re interested in learning how to zentangle – creating repetitive patterns using artist pens and paper. It’s a great stress reliever and can be tied in with the adult coloring fad! Excerpt from Sketchbook 2013