Creating Network Drive for DICOM File Output - A Step-by-Step Guide

👨⚕️ Are you a Radiologic Technologist or Radiology & Imaging enthusiast? Learn how to effortlessly create a network drive for DICOM file output with our comprehensive step-by-step guide on Fuji Console Advance. In this presentation, we walk you through the process of setting up a network drive on the Fuji Console Advance. By following these easy steps, you'll be able to efficiently manage and share DICOM files. 📝 Topics Covered: Finding Your IP Address Mapping a Network Drive Organizing DICOM Files Sharing Medical Imaging Data 🔗 Presenter Info: Md. Mostak Ahmed Medical Technologist (Radiology & Imaging) Pursuing B.Sc. in Radiology & Imaging Technology (4th Year) LinkedIn: Connect with Mostak Ahmed: https://www.linkedin.com/in/mostakahmedrafi/ View the presentation now and don't forget to connect with Md. Mostak Ahmed for more insights into the world of Radiology & Imaging Technology.

Recommended
More Related Content
Similar to Creating Network Drive for DICOM File Output - A Step-by-Step Guide
Similar to Creating Network Drive for DICOM File Output - A Step-by-Step Guide (20)
Recently uploaded
Recently uploaded (20)
Creating Network Drive for DICOM File Output - A Step-by-Step Guide
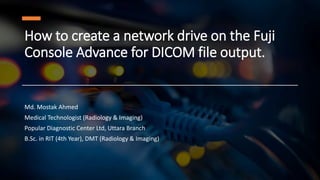
- 1. How to create a network drive on the Fuji Console Advance for DICOM file output. Md. Mostak Ahmed Medical Technologist (Radiology & Imaging) Popular Diagnostic Center Ltd, Uttara Branch B.Sc. in RIT (4th Year), DMT (Radiology & Imaging)
- 2. HOW TO create a network drive on the Fuji Console Advance for DICOM file output. • Press Windows + R to open the Run dialog. • Type "cmd" and press Enter to open the Command Prompt. • In the Command Prompt window, type "ipconfig" and press Enter. • Locate the IP address in the output, for example, "192.168.1.95." • Press Windows + R again to open the Run dialog. • Type "ip" followed by the previously obtained IP address, like this: "192.168.1.95," and click OK. • A window will open showing the network folder. If needed, create a new folder there. • Right-click on the address bar to copy the address. • Now, right-click on the network drive and select "Map Network Drive." • A "Map Network Drive" dialog box will appear: • For "What network folder would you like to map?" • For "Drive," choose a drive letter (e.g., X). • For "Folder," paste the copied address from the clipboard. • Click "Finish" to complete the process.
- 3. Press Windows + R to open the Run dialog. Type "cmd" and press Enter to open the Command Prompt.
- 4. In the Command Prompt window, type "ipconfig" and press Enter. Locate the IP address in the output, for example, "192.168.1.95
- 5. Press Windows + R again to open the Run dialog. Type “ip" followed by the previously obtained IP address, like this: "192.168.1.95," and click OK.
- 6. A window will open showing the network folder. If needed, create a new folder there.
- 7. Right-click on the address bar to copy the address.
- 8. • Now, right-click on the network (DOWN LEFT) drive and select "Map Network Drive."
- 10. A "Map Network Drive" dialog box will appear: For "What network folder would you like to map?" For "Drive," choose a drive letter (e.g., X). For "Folder," paste the copied address from the clipboard. Click "Finish" to complete the process.
- 11. So, your network drive is created, and you can now output file from your workstation as DICOM format
- 12. Dicom Output • Select the patient's name. • Then, choose the file output option. • Save the data on the network drive you created, which is designated as 'M' (or the drive letter you selected).
- 13. Click "+ Add new folder," give it a name, and then click OK.. You will find the outputted file saved as a DICOM file on your PC.
- 14. Thank you for using this guide. Best regards, Md. Mostak Ahmed Medical Technologist (Radiology & Imaging) Popular Diagnostic Center Ltd, Uttara Branch B.Sc. in RIT (4th Year), DMT (Radiology & Imaging) LinkedIn: Md. Mostak Ahmed | LinkedIn https://www.linkedin.com/in/mostakahmedrafi/
Editor's Notes
- Microsoft Windows [Version 10.0.17763.107] (c) 2018 Microsoft Corporation. All rights reserved. C:\Users\Administrator>ipconfig Windows IP Configuration Ethernet adapter PRINTER: Connection-specific DNS Suffix . : Link-local IPv6 Address . . . . . : fe80::43c:9a1e:2ce4:5aea%4 IPv4 Address. . . . . . . . . . . : 192.168.1.95 Subnet Mask . . . . . . . . . . . : 255.255.255.0 Default Gateway . . . . . . . . . : Ethernet adapter Ethernet: Connection-specific DNS Suffix . : Link-local IPv6 Address . . . . . : fe80::9141:e400:309:56dc%8 IPv4 Address. . . . . . . . . . . : 192.168.42.181 Subnet Mask . . . . . . . . . . . : 255.255.255.0 Default Gateway . . . . . . . . . : 192.168.42.129 Ethernet adapter Eth1: Connection-specific DNS Suffix . : Link-local IPv6 Address . . . . . : fe80::e13a:27fb:af03:be22%15 IPv4 Address. . . . . . . . . . . : 192.168.0.10 Subnet Mask . . . . . . . . . . . : 255.255.255.0 Default Gateway . . . . . . . . . : C:\Users\Administrator>