
Recommended
More Related Content
Similar to LAB3_CADCAM_using_MasterCam.pptx
Similar to LAB3_CADCAM_using_MasterCam.pptx (20)
More from MohammedAlobaidy16
More from MohammedAlobaidy16 (19)
Recently uploaded
Recently uploaded (20)
LAB3_CADCAM_using_MasterCam.pptx
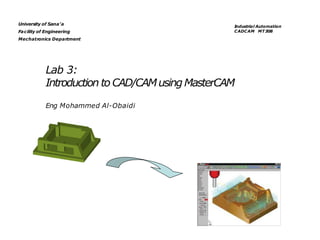
- 1. Lab 3: Introduction to CAD/CAMusingMasterCAM Eng Mohammed Al-Obaidi University of Sana’a Facility of Engineering Mechatronics Department Industrial Automation CADCAM MT308
- 2. Quiz: write CNC code to perform the following Tool size = 0.25 inch, Feed rate = 6 inch per minute, Cutting speed = 300 rpm, Tool start position: 2.0, 2.0 Programming in inches Motion of tool: p0 p1 p2 p3 p4 p5 p1 p0
- 3. Objectives • To understand the need for CAD/CAM in Lean Manufacturing. • To be able to create 2D Geometries in MASTERCAM • To be able to create 2D toolpaths in MASTERCAM • To use MASTERCAM for identifying optimum toolpaths • To generate NC codes using MASTERCAM
- 4. CAD/CAM • Computer-aided design (CAD) is the use of computer systems to assist in the creation, modification, analysis, or optimization of a design. • Computer-aided manufacturing (CAM) is the use of computer systems to plan, manage, and control the operations of a manufacturing plant through direct or indirect computer interface with plant’s resources.
- 5. Need for CAD/CAM • To increase productivity of the designer •To improve quality of the design •To improve communications •To create a manufacturing database •To create and test toolpaths and optimize them •To help in production scheduling and MRP models •To have effective shop floor control
- 6. How do CAD/CAM systems work? • Developing NC code requires an understanding of: 1. Part geometry 2. Tooling 3. Process plans 4. Tolerances 5. Fixturing • Most CAD/CAM systems provide access to: 1. Part geometry 2. Tooling
- 7. Instructions can be generated for a generic NC machine •A set of tool paths and positions can be automatically generated •These paths can be edited and modified •These paths and instructions can then be “posted” to a specific machine
- 8. The Design Process : Then and Now Before CAD After CAD
- 9. CAD/CAM Support • AutoCAD 200i • Pro Engineer 2001 • MasterCAM
- 10. What do I need to begin MasterCAM? • Part geometry – Draw or import • Tooling – Library or create • Process plans • Fixtures – Define orientation and location
- 11. MasterCAM • Mastercam is a three-dimensional geometry creation engine along with features to aid in tool path generation and verification. MasterCAM allows tool path planning and NC code generation for a given part. This part can either be drawn in MasterCAM or imported from other CAD packages
- 12. MasterCAM Drawing • Geometrical part drawing – In-built CAD package • Two-dimensional parts • Three-dimensional parts – Translators (include) • IGES (international Graphics Exchange Standard) • DXF (AutoCad) • CADL (CADKey)
- 13. Tool Path Generation using MasterCAM • Tool path generation – Extensive Tool library – Machining parameter selection – NC program generator – Animation to visualize machining operations
- 14. Getting Started with MasterCam Interface
- 15. Getting Started with MasterCam Interface 1. Quick Access Toolbar (QAT) A customizable set of commonly used functions that are always available in the interface. The QAT can be located above or below the ribbon. 2. Tab Groupings of related controls. Tabs are organized in a simple-to- complex workflow from left to right. 3. Tab Group A region of the tab that contains a set of related controls. 4. Contextual Tab A tab that displays when you make a specific selection in Mastercam. A contextual tab presents relevant controls and commands to your current activity. 5. Tooltip A small window with descriptive text that automatically displays when you hover over a command or control
- 16. Getting Started with MasterCam Interface 6. Selection Bar A toolbar which combines AutoCursor controls and general selection tools used to select entities in the graphics window. There are two selection modes, Standard Selection and Solid Selection, which are activated based on the function you are using. AutoCursor controls allow you to detect and snap to points as you move the cursor over geometry in the graphics window. AutoCursor becomes active whenever Mastercam prompts you to select a position in the graphics window.
- 17. Getting Started with MasterCam Interface 7. Quick Masks A group of controls that helps you to select all entities of a certain type, or to select only entities of certain type. Most controls are divided in half. Clicking the left or right side of the control toggles between selection modes. When a Quick Mask control is selected it lights to indicate the selection mask is on. You can toggle multiple Quick Masks at a time. 8. Status Bar A bar across the bottom of the workspace that shows the coordinate position of the cursor and provides quick access to modify the Cplane, Tplane, WCS, and Z Depth of geometry and toolpaths in the graphics window. The right side of the Status bar has Wireframe, Shaded, and Translucency controls that change the appearance of your part.
- 18. Getting Started with MasterCam Interface 9. Dynamic Gnomon The on-screen gnomon allows you to manipulate geometry and planes interactively. The gnomon comprises three axes connected at the origin, with selection points that let you choose different types of transformations. 10. Managers Managers include controls for toolpaths, solids, planes, levels, recent functions, and Art. Managers can be rearranged to suit your workflow. • Toolpaths Manager: Lists the toolpath groups and machine types for the current file. Use the Toolpaths Manager to control your operations.
- 19. Getting Started with MasterCam Interface 10. Managers • Solids Manager: Lists each solid in the current file along with its operation history and associated toolpaths. Use the Solids Manager to edit solids and their operations. • Planes Manager: Shows the planes in the current file. Use the Planes Manager to adjust planes and work offsets. • Levels Manager: Shows the levels in the current file. Use the Levels Manager to control your levels.
- 20. Getting Started with MasterCam Interface 11. Graphics window • The space in which you view, create, and modify your parts. The graphics window also displays information about the current units (inches or millimeters), and the coordinate axes for the current view or plane..