SlideShare a Scribd company logo
1 of 34
Download to read offline
˝˝
ITdesk.info –
project of computer e-education
with open access -
handbook for digital literacy
digital
literacy
movement
building
modern
society
e - learning
e - inclusion
open
access
human
rights to
education
and
information
Using Computer and Managing Files
Handbook
Author: Gorana Čelebić
Author:
Gorana Čelebić
Translation:
Dario Ilija Rendulic, Sanja Kolaric
Proofreading:
Kristina Vlaovic, Maja Vidan
Main title:
ITdesk.info – project of computer e-education with open access, handbook for digital literacy
Subtitle:
Using Computer and Managing Files, handbook
Expert review:
Surojit Chakraborty
Cover:
Silvija Bunic
Publisher:
Open Society for Idea Exchange (ODRAZI), Zagreb
Expert review of Croatian version:
Infokatedra, center for adult education, Zagreb
ISBN:
978-953-56758-8-4
Place and year of publication:
Zagreb, 2011
Education and Teacher Training Agency in Croatia has approved the use of this publication as
official additional teaching resource in all the primary schools in Croatia
Class: 602-09/14-01/0418
Reg: 561-03-03/10-15-4
Zagreb, April 2015.
Copyright:
Feel free to copy, print and further distribute the whole publication or parts of it, including for
the purpose of organized education, whether in public or private educational organizations,
but only for noncommercial purposes (meaning that it is free of charge for the end users of
this publication) and with attribution (source: www.ITdesk.info - project of computer e-
education with open access). Derivative works without prior approval of the copyright holder
(NGO Open Society for Idea Exchange) are not permitted.
For permission for derivative works please contact us at this e-mail address: info@ITdesk.info.
ITdesk.info – project of computer e-education with open access
ITdesk.info is licensed under a Creative Commons Attribution-
Non-commercial-No Derivative Works 3.0 Croatia License
PREFACE
Today’s society is shaped by sudden growth and development of the
information technology (IT) resulting with its great dependency on the
knowledge and competence of individuals from the IT area. Although this
dependency is growing day by day, the human right to education and
information is not extended to the IT area. Problems that are affecting
society as a whole are emerging, creating gaps and distancing people from
the main reason and motivation for advancement-opportunity. Being a
computer illiterate person today means being a person who is unable to
participate in modern society, and a person without opportunity; and
despite the acknowledged necessity and benefits of inclusive computer
literacy from institutions like the European Commission, UNESCO, OECD,
there are still groups of people having difficulties accessing basic computer
education viz. persons with disabilities, persons with learning difficulties,
migrant workers, unemployed persons, persons that live in remote (rural)
areas where IT education is not accessible.
This handbook, combined with other materials published on ITdesk.info,
represent our effort and contribution to the realization and promotion of
human rights to education and information considering the IT area. We hope
that this education will help you in mastering basic computer skills and with
that hope we wish you to learn as much as you can, and therefore become
an active member of modern ICT society.
Sincerely yours,
ITdesk.info team Expert review of Croatian version:
ITdesk.info – project of computer e-education with open access
ITdesk.info is licensed under a Creative Commons Attribution-
Non-commercial-No Derivative Works 3.0 Croatia License
CONTENT:
Operating system - OS.................................................................................... 1
Main actions.......................................................................................................................1
General information and adjusting computer settings..........................................................3
Icons...................................................................................................................................8
Basic actions with windows..............................................................................................11
Working with files.......................................................................................... 13
Basic concepts..................................................................................................................13
Files and folders ...............................................................................................................16
Working with files............................................................................................................18
Actions with files and folders............................................................................................21
Searching data storage devices..........................................................................................23
Utilities............................................................................................................ 25
Working with compressed files.........................................................................................25
Managing printing.......................................................................................... 27
ITdesk.info – project of computer e-education with open access
ITdesk.info is licensed under a Creative Commons Attribution-
Noncommercial-No Derivative Works 3.0 Croatia License. 1/29
OPERATING SYSTEM - OS
MAIN ACTIONS
Turn on your computer
 The computer turns on by pressing the power button which is located on the
computer case.
 If necessary, enter the username and password.
The proper procedure for restarting the computer:
Fig. 1. Start Menu
The Start menu is the starting point of the system. Through this menu you can access programs,
open frequently used folders, configure settings on the computer, access the Help function, shut
down the computer, log off from Windows, and so on.
The system can be restarted via Start menu: click
the arrow next to the Shut Down button and then
select the Restart command.
Fig. 2. Computer Restart
Start Button Search pane
ITdesk.info – project of computer e-education with open access
ITdesk.info is licensed under a Creative Commons Attribution-
Noncommercial-No Derivative Works 3.0 Croatia License. 2/29
Shutting down a non- responding application (End
Task)
If the application "freezes" and stops responding, the
situation, in most cases, can be solved by pressing the
key combination Ctrl + Alt + Del. Pressing these keys
will open the Windows Task Manager. To close an
application that does not respond, select it and press
the End Task button.
Fig. 3. Windows Task Manager
The Reset button is used when the computer does not respond to our instructions ("freezes” or
“locks up"). The Reset button is usually the button below the Start button on the computer case.
After you have pressed it, the computer shuts down and immediately starts again.
Correct procedure for turning off the computer:
The computer shuts down via Start menu, by
clicking the Shut Down button.
Fig. 4. Shutting down
Using the Help function
The Help function can be accessed from the computer desktop, by pressing the F1 key on the
keyboard. Windows Help and Support opens with a search box in which you can enter terms that
are of interest to you or terms you need help on. If you press F1 while in an active window or
program (e.g. Microsoft Word), the Help function will relate to that program specifically.
Another way to access the Help function is through the Start menu  Help and Support
ITdesk.info – project of computer e-education with open access
ITdesk.info is licensed under a Creative Commons Attribution-
Noncommercial-No Derivative Works 3.0 Croatia License. 3/29
Fig. 5 Help function
GENERAL INFORMATION AND ADJUSTING COMPUTER SETTINGS
System Information
 In the Start menu → right click on Computer, then choose the Properties command from
the pop-up menu, or
 Right-click on icon found on your desktop → choose the Properties command
from the pop-up menu, or
 Start  Control panel  System , or
 The key combination Windows + Pause
It will open a window that shows information about the operating system installed on your
computer and some basic information about the computer (processor, installed memory etc.).
Date and Time
To change the time and date you need to click on the Date and
Time button found on the right corner of the taskbar at
the bottom of the screen. Click on Change date and time settings
in the window opened (Figure 6).
Fig. 6. Date and time
ITdesk.info – project of computer e-education with open access
ITdesk.info is licensed under a Creative Commons Attribution-
Noncommercial-No Derivative Works 3.0 Croatia License. 4/29
Speaker Volume
In order to change the speaker volume, you need to click on the icon in the
notification area on the right corner of the taskbar. By moving the vertical scroll bar you
can change the volume. Pressing the Mute Speakers and Headphones button turns
off the sound.
Fig. 7. Adjusting the speaker volume
Desktop Background
The appearance of your desktop background can be changed in the following manner: position
your cursor over the desktop, press the right mouse button and select the command Personalize
from the pop-up menu. In the opened window, click on Desktop Background and choose from
any of the listed files, or click the Browse button and choose another image stored on the
computer.
It is also possible to select multiple background images that, in a given period of time, change on
the screen, similar to screen saver. Just mark the images you want to display and then in the
drop-down menu Change picture every, select the change interval.
Fig. 8. Changing the
background
Screen Saver
To set the Screen Saver, position the cursor over the desktop and press the right mouse button
(the desktop context menu or pop-up menu will open), and choose the option Personalize. In the
opened window select the Screen Saver icon.
ITdesk.info – project of computer e-education with open access
ITdesk.info is licensed under a Creative Commons Attribution-
Noncommercial-No Derivative Works 3.0 Croatia License. 5/29
Fig. 9. Dialog box
Screen Saver
Resolution
To change the screen
resolution, right-click on the
desktop and select the Screen
resolution command from the
pop-up menu.
Fig. 10. Setting the screen
resolution
Control Panel
The Control Panel is a special folder in which you can adjust the system settings through various
system setting options (install and uninstall programs, adjust the keyboard, mouse, sound and so
on) which can be viewed by category or in the form of small/large icons.
ITdesk.info – project of computer e-education with open access
ITdesk.info is licensed under a Creative Commons Attribution-
Noncommercial-No Derivative Works 3.0 Croatia License. 6/29
The Control
Panel is
accessed via
Start menu 
Control Panel.
Fig. 11. Control
Panel –Small
icons view
Selecting and adding the keyboard language
In the Control Panel, open the Region and Language icon and select the Keyboards and
Languages tab, and then select the Change Keyboards button. In the group Installed services
click on the Add button. Select the language you want to add and double-click on the Keyboard.
Confirm by pressing the OK button.
Fig. 12 Keyboards and Languages Fig. 13 Installed services group
ITdesk.info – project of computer e-education with open access
ITdesk.info is licensed under a Creative Commons Attribution-
Noncommercial-No Derivative Works 3.0 Croatia License. 7/29
Fig. 14 Add input language
Change the input language of the keyboard
On the Language Bar, click the input language button (in this case
Croatian is chosen) and then select the input language you want to use.
Fig. 15 Change input language keyboard
Program management
Installing new programs:
 From CD, DVD, Internet, network
 When installing from a CD or a DVD, in most cases a dialog box will automatically open up
from which the Run AutoRun.exe option can be selected to start the Setup Wizard.
 If the installation of the program does not start automatically, you can start the
installation manually by double-clicking on the file typically called Setup.exe or Install.exe.
 After the Wizard installation has started, follow instructions and go to next steps by
pressing the Next, Yes, and other such buttons. You will usually have to accept license
terms, choose a location where the program will be installed, possibly choose components
of the program you want to install etc. At the end press the Finish or Close button.
Uninstalling the programs
In the Control Panel, click on the Programs and Features icon, choose the software you want to
uninstall and click the Uninstall button.
ITdesk.info – project of computer e-education with open access
ITdesk.info is licensed under a Creative Commons Attribution-
Noncommercial-No Derivative Works 3.0 Croatia License. 8/29
Fig. 16 Uninstalling
programs
Using the «print screen» key on the keyboard
By pressing the Print Screen key, the image currently on the screen is temporarily stored in the
buffer (clipboard). To see the image and edit it, open any software for image editing like the
Paint program and simultaneously press the Ctrl and V keys on the keyboard in order to paste the
image in the imaging software. If you want to capture only active windows, use the keyboard key
combination Alt + Print Screen and the rest of the process is the same.
The Paint program comes with windows and can be accessed via Start  All Programs 
Accessories  Paint.
ICONS
Icons are small pictures (pictograms) on a computer screen and they all represent programs,
folders, files and shortcuts.
A double-click on a program icon will start the appropriate program.
A double-click on the folder icon will open a window that shows files and folders contained in that
folder.
A double-click on the file icon will start the appropriate program and open that file in the
appropriate program.
Shortcuts are files that point to other programs, program files or folders found somewhere on the
computer. A double-click on the shortcut icon will start either the appropriate program, or the
appropriate file and corresponding program, or appropriate folder.
ITdesk.info – project of computer e-education with open access
ITdesk.info is licensed under a Creative Commons Attribution-
Noncommercial-No Derivative Works 3.0 Croatia License. 9/29
Microsoft Excel 2010 shortcut icon
Microsoft Word 2010 shortcut icon
Microsoft Access 2010 shortcut icon
Microsoft PowerPoint 2010 shortcut icon
Folder icon
Computer icon
Recycle Bin icon
Select and move (one or more) icons.
An icon can be selected clicking on it with the left mouse button. To select multiple icons at once:
 press and hold down the left mouse button, then drag the mouse across the icons and
release the mouse button, or
Fig. 17. Select several icons using the above mentioned method
 select an icon, press and hold down the Shift key, press the last icon in a row and release
the Shift key (selecting consecutive icons), or
 press and hold down the Ctrl key and select the non-consecutive icons using the left
mouse button.
ITdesk.info – project of computer e-education with open access
ITdesk.info is licensed under a Creative Commons Attribution-
Noncommercial-No Derivative Works 3.0 Croatia License. 10/29
Icons are moved via the drag-and-drop method – press and hold down the left mouse button
over the icon, drag the mouse (with the icon) to a new location, and release the mouse button
(which places the icon in the new location).
Desktop shortcuts
To create a shortcut:
 right-click on the desktop
 from the pop-up menu choose New
 Shortcut
 click on the Browse button and
search for a folder, program or file
the shortcut is being made for
 press the button Next to confirm
 enter the name of the shortcut (or
leave the existing one) and end this
action with the Finish button
Fig. 18. Create a shortcut
e.g. if you want to create a desktop shortcut for the folder Music:
 open the Start menu
 press the right mouse button
over the folder Music
 on the quick menu choose the
Send to option
 choose the Desktop (create
shortcut) option
Fig. 19. Create a shortcut
Using icons
In order to open an icon:
 double-click on it with the left mouse button, or
 select it and press the Enter key on the keyboard
Shortcut is an icon with a recognizable arrow in the lower left corner. The shortcut links you
with the file or program. It opens like any other icon; double-click on it with the left mouse
button.
ITdesk.info – project of computer e-education with open access
ITdesk.info is licensed under a Creative Commons Attribution-
Noncommercial-No Derivative Works 3.0 Croatia License. 11/29
BASIC ACTIONS WITH WINDOWS
You can have several windows opened at the same time, but only one will be active:
 The active window has a highlighted border and the inactive window is grayed out
 The opened window becomes active if you left-click on it, or
 The opened window becomes active if you left-click on its section on the taskbar
We can move windows using the drag-and-drop method: press and hold down the left mouse
button on the title bar, drag the window to where you want to move it and release the mouse
button.
Recognizing different elements of a window: title bar, menu bar, toolbars, status bar,
scroll bar.
Fig. 20. Window elements
Dialog box
The dialog box is a specific type of window that offers
choices related to a certain task. Confirm an action by
clicking the OK button, or cancel it by clicking the Cancel
button. Unlike regular windows, their size is fixed.
Fig. 21. Dialog box
Title bar
buttons
Title bar
Menu bar
Border
Slider
ITdesk.info – project of computer e-education with open access
ITdesk.info is licensed under a Creative Commons Attribution-
Noncommercial-No Derivative Works 3.0 Croatia License. 12/29
Title bar buttons for manipulating the window are located on the upper right corner of the
window’s title bar.
 The Minimize button – minimizes the window to the taskbar
 The Restore Down button - restores the window to the size before maximization
 The Maximize button - spreads the window over the entire desktop
 The Close button - closes the window
Resizing the window:
Place the cursor over the window’s border and when the mouse pointer changes its shape into
, press and hold down the left mouse button and drag the mouse. Using this method you can
resize the window according to your needs.
Switching between a number of open windows:
 Use the left mouse button to select and activate the desired window - this is possible only
if the desired window is at least partially visible.
 Use the left mouse button to select and activate the desired window from the taskbar –
the selected window appears above all others and becomes active.
 Use the key combination Alt + Tab to open a pane showing all opened windows (Fig.22).
Hold down the Alt key and press Tab consecutively to move between opened windows.
When the desired window is selected, release the Alt key.
Fig. 22. Switching between multiple open
windows- Alt + Tab
ITdesk.info – project of computer e-education with open access
ITdesk.info is licensed under a Creative Commons Attribution-
Noncommercial-No Derivative Works 3.0 Croatia License. 13/29
WORKING WITH FILES
BASIC CONCEPTS
A File is a set of digital data. Each file has a name, an icon (assigned by the operating system) and
an extension. Files are placed within folders (for easier reference). To browse computers for files
and folders we use Windows Explorer. It displays a hierarchical view of folders and files.
Run Windows Explorer:
 position the cursor over the Start button, press the right mouse button and select the
command Open Windows Explorer, or
 from the Start menu select All programs, in the folder Accessories find and click Windows
Explorer, or
 in the search box (within the Start menu) type "Windows Explorer" and click on it when it
appears in the results, or
 click on in the Taskbar, or
 click on the Windows Explorer shortcut on the desktop
Fig. 23. Windows
Explorer – Libraries
There are four types of libraries:
 The Documents library – this library is used for organizing and saving documents (text
files, workbooks, presentations etc.)
 The Pictures library – it is used for organizing and saving pictures
 The Music library – it is used for organizing and saving music
 The Videos library – it is used for organizing and saving video materials
Each file and folder has its path – an address of its location.
Fig. 24. Address bar - path to the
folder Sample Music
ITdesk.info – project of computer e-education with open access
ITdesk.info is licensed under a Creative Commons Attribution-
Noncommercial-No Derivative Works 3.0 Croatia License. 14/29
Create a new folder in the Music library:
 open Windows Explorer
 open the Music library
 press the New Folder button on the toolbar
 enter a name for this folder
Fig. 25. Create a new
folder
Storage devices and hierarchical display of files and folders.
Each device has an icon, name and letter in the parentheses (A, B, C, D, E,...)
There can be one or more Hard Disk Drives on the computer, or there can be one HDD divided
into partitions.
A Floppy Disk
When the hard disk is not
divided into partitions
and the DVD-ROM is
connected
When the hard disk is not
divided into partitions and
the DVD-ROM and CD-RW
are connected
When the hard disk is divided
into two partitions and the DVD-
ROM and CD-RW are connected
C Hard Disk Drive C Hard Disk Drive C
Hard Disk Drive (first
partition)
D DVD-ROM D DVD-ROM D
Hard Disk Drive (second
partition)
E CD-RW E DVD-ROM
F CD-RW
Devices used by the operating system for data storage are marked with capital letters (e.g.
Floppy (A:) ; Local Disk(C:); Removable Disk(E:) etc.) and are available in My Computer.
ITdesk.info – project of computer e-education with open access
ITdesk.info is licensed under a Creative Commons Attribution-
Noncommercial-No Derivative Works 3.0 Croatia License. 15/29
Data storage devices are:
 Floppy Disk
 Hard Disk – the device for permanent storage
 Network Drive – the hard drive that can be accessed through the network
o to access it open the folder My Network Places
 USB stick
 CD-RW (Compact Disc Re-Writable)
 DVD-RW (Digital Versatile Disc Re-Writable)
Measurement unit, size of files and folders: KB, MB, GB
1 KB (kilobyte) - 1024 bytes
1 MB (megabyte) - 1024 kilobytes
1 GB (gigabyte) - 1024 megabytes
Why is it necessary to make additional copies of important files on removable storage
devices?
It is recommended to create back-up copies of important files in case the original files become
inaccessible, either due to drive failure, accidental deletion or other reasons. If you have a back-
up, you can restore original files. Backup is done mainly on removable storage devices.
The advantages of storing data on network devices
If the computer is connected to a network, you can access shared data (shared with other users
on the network). To access network disks, open the My Network Places folder usually found on
the desktop or within the Start menu.
ITdesk.info – project of computer e-education with open access
ITdesk.info is licensed under a Creative Commons Attribution-
Noncommercial-No Derivative Works 3.0 Croatia License. 16/29
FILES AND FOLDERS
Folder properties dialog box
Click the right mouse button over the folder and
choose the Properties command from the quick
menu. In the opened dialog box under the tab
General you can find information about the name,
size and location of the folder.
Fig. 26.Dialog box - folder properties
Manipulating window size
Sometimes when the window is not maximized you can’t see all the information about the
devices, folders or files. You can use vertical and / or horizontal sliders to slide through and see
complete contents of the window. You can also customize the window size (height and / or
length) so that the entire content is visible. To adjust the window size place the cursor (mouse
pointer) over the edge of a window and when the mouse pointer changes shape, press and hold
the left mouse button, drag the edge of the window, and release the left mouse button.
Changing height and width of the window simultaneously can be done by positioning the mouse
pointer over any corner of the window and using the method “drag-and-drop” to achieve the
desired window size.
ITdesk.info – project of computer e-education with open access
ITdesk.info is licensed under a Creative Commons Attribution-
Noncommercial-No Derivative Works 3.0 Croatia License. 17/29
Using Windows Explorer
Fig. 27. Windows
Explorer
Navigation pane (left side of the window) - displays the entire folder structure. To expand maps
press ; folders with are already expanded. If you wish to see the contents of a certain folder,
select it in the left pane, and in the right part of the window the folder content will be displayed.
You can also navigate through folders displayed in the right part of the window using the left
mouse button, double click and address bar.
Creating a folder and subfolder
To create folders on the desktop: press the right mouse button on the desktop and from the pop-
up menu choose the commands New → Folder → enter name →press Enter key.
Fig. 28. Empty folder icon Fig. 29. Folder icon with content
To create a subfolder using Windows Explorer: in the navigation pane, select the folder you want
to create a subfolder in; and on the toolbar, choose: New Folder → enter name → press Enter
key, or press the right mouse button in the right part of the window and choose: New → Folder
→ enter name →press Enter key
ITdesk.info – project of computer e-education with open access
ITdesk.info is licensed under a Creative Commons Attribution-
Noncommercial-No Derivative Works 3.0 Croatia License. 18/29
WORKING WITH FILES
A file is defined by a name and an extension. The extension indicates the file type (text,
multimedia etc.) and tells the computer which application is appropriate for that file type.
File extensions of some frequently used files are:
.exe – executable files
.sys, .dll - system files
.tmp, .temp – temporary files
.rar, .zip, .7z – compressed files
.jpg, .jpeg, .gif, .png– image files
.mp3, .wav, .wma– audio files
.avi, .wmv, .mpg, .mp4 – multimedia files
.txt, .odt, .doc, .docx – text files
.ods, .xls, .xlsx – spreadsheet files
.odp, .ppt, .pptx – presentation files
.dbf, .mdb, .accdb – database files
.pdf – (Portable Document Format)
.htm, .html, .asp, .aspx, .php – web pages
Notepad
The Notepad is a simple text editor with limited
options for text formatting.
The Notepad can be accessed via Start menu and
then clicking on All Programs → Accessories →
Notepad.
Fig. 30. Notepad
ITdesk.info – project of computer e-education with open access
ITdesk.info is licensed under a Creative Commons Attribution-
Noncommercial-No Derivative Works 3.0 Croatia License. 19/29
To save a file for the first time, select Save As from the File menu. In the dialog box that appears
specify the location you want to save the file in (Save in field) and the file name (File Name field),
or just click the Save command. Saving can be done using the keyboard key combination Ctrl + S
or the icon located on the Toolbar.
File attributes
To change a file / folder status, you need to access the file / folder attributes. Right-click over the
file and select Properties from the pop-up menu. In the lower part of the dialog box there are
options for Read Only and Hidden. If you select the Read only attribute option, the file can be
opened and changes can be made, but when you try to save the file you will only get the Save As
dialog box. Saving the file is possible only under a different name and the original file will not be
changed due to the Read Only attribute.
If you select the Hidden attribute, the file or folder will become
invisible in Windows Explorer, provided that the OS is set not to
display hidden files or folders (this option is found in Windows
Explorer toolbar: Organize -> Folder and search options -> tab
“view” -> “show hidden files, folders and drives”).
If marked, hidden files and folders will be visible in Windows
Explorer, but they will also be transparent. If this option is not
marked, files or folders will be invisible, and therefore hidden.
When you have selected the desired attributes, you confirm them
by clicking the OK button.
Fig. 31.Dialog box Properties – option Hidden is marked
Option view
You can choose among available views using the button found on the window toolbar:
 Extra Large Icons
 Large Icons
 Medium Icons
 Small Icons
 List
 Details
 Tiles
 Content Fig. 32. View files
ITdesk.info – project of computer e-education with open access
ITdesk.info is licensed under a Creative Commons Attribution-
Noncommercial-No Derivative Works 3.0 Croatia License. 20/29
Fig. 33. Windows Explorer window – view: Details
Files can be sorted (Arrange by) according to name, length, type and creation date.
Fig. 34. Sorting files
When naming files or folders you should choose meaningful names: names that indicate their
content.
Address
bar
Navigation
buttons
Title bar
buttons
Search pane
Toolbar
Navigation
pane
View button
ITdesk.info – project of computer e-education with open access
ITdesk.info is licensed under a Creative Commons Attribution-
Noncommercial-No Derivative Works 3.0 Croatia License. 21/29
Renaming files and folders
Renaming a file/folder:
 right-click on the file/folder and from the pop-up menu, select the Rename command.
Type in the new name and press the left mouse button next to the icon or just press
Enter.
 select the file/folder and press F2
 select the file/folder and after a few moments press the left mouse button
ACTIONS WITH FILES AND FOLDERS
Select files or folders
Select files/folders with a left-click of your mouse.
 If you want to select consecutive files/folders:
o press and hold down the left mouse button, drag the mouse over the files or folders
until the group of files/folders is highlighted, or
o for selecting consecutive files/folders, select the first file with a left-click, hold down the
Shift key and select the last consecutive file or folder with the left mouse button. All
files or folders in between will be selected, or
o for selecting non-consecutive files or folders, select the first file with a left-click, hold
down the Ctrl key and then select other files one by one. After you have selected all of
the desired files, release the Ctrl key.
To select all files in a specific folder: Click Edit on toolbar and then click on Select All, or use the
keyboard shortcut Ctrl + A.
To copy files / folders, open Windows Explorer and:
 in the navigation pane find and select the file/folder you want to copy
 right-click on the file/folder and from the pop-up menu, choose Copy (Ctrl + C)
 via navigation pane find and select the folder you want to copy the file or folder into
 right-click on that particular folder and from the pop-up menu, choose Paste (Ctrl + V)
Copying using the drag-and-drop method:
 select the file/folder you want to copy
 over the selected file/folder, press and hold down the left mouse button, and then press
and hold down the Ctrl button
 drag the mouse pointer (with file or folder) to a new location
ITdesk.info – project of computer e-education with open access
ITdesk.info is licensed under a Creative Commons Attribution-
Noncommercial-No Derivative Works 3.0 Croatia License. 22/29
 release the mouse button prior to releasing the Ctrl key. The file or folder will be pasted to
the new location.
To move files or folders open Windows Explorer and:
 in the navigation pane find and select the file/folder you want to move
 right-click on the file/folder and from the pop-up menu, choose Cut (Ctrl +X)
 via navigation pane find and select the folder you want to copy the file or folder into
 right-click on that particular folder and from the pop-up menu, choose Paste (Ctrl + V)
To move files/folders via the drag-and-drop method use the same steps as for copying, except
without using the Ctrl key.
Delete files and folders by moving them into the Recycle Bin:
via Windows Explorer:
 in the navigation pane select the location the files/folders you want to delete are in, then
in the right window select the files/folders you want to delete and from the Organize
menu on the toolbar, choose Delete , or
 press the right mouse button over the file/folder and from the pop-up menu, choose
Delete
 select the file/folder you want to delete and press the Delete key
via the drag-and-drop method (on the Desktop):
 press and hold down the left mouse button over the file/folder/shortcut you want to
delete, then drag the mouse cursor to the Recycle Bin and release the mouse button
To Restore deleted items from the Recycle Bin:
Deleted items (files/folders/shortcuts) can be restored from the Recycle Bin to their original
location on the computer prior to deletion. After opening the Recycle Bin (by double-clicking on
the Recycle Bin icon) use the following commands on the toolbar:
Restore all items – restores all items from the Recycle Bin to their original location on the
computer
Restore this item – to make this command available, first select the file/folder you want
to restore
ITdesk.info – project of computer e-education with open access
ITdesk.info is licensed under a Creative Commons Attribution-
Noncommercial-No Derivative Works 3.0 Croatia License. 23/29
Fig. 35. Recycle Bin
Empty the Recycle Bin
 via Recycle Bin window toolbar – the Empty the Recycle Bin command permanently
deletes files/folders from the computer, or
 right-click on the Recycle Bin icon found on the desktop and from the pop-up menu,
choose the Empty Recycle Bin command
SEARCHING DATA STORAGE DEVICES
Use Windows Search function to find files, folders and programs. In the search parameters, you
need to enter data you know about the item (name, part of the name, file type (extension),
creation date etc.).
You can search for a file via:
• Start menu by entering part of the text in the search box. While entering the text
in the Start menu, items that match the input text appear
• search box found in the upper right-hand corner of any opened window
Search data storage devices using the date of modification or creation, or using the size criteria:
In the upper right corner of the opened window, click on the search box and add a search filter.
Date modified – searches for files according to the date they were modified
Size – searches for files according to their size
Fig. 36 Add search filter
ITdesk.info – project of computer e-education with open access
ITdesk.info is licensed under a Creative Commons Attribution-
Noncommercial-No Derivative Works 3.0 Croatia License. 24/29
Search data storage devices using wildcards (file types, or the first letter of the file name):
If you cannot remember the name of the requested files, use wildcard characters: asterisk (*) and
a question mark (?) instead of letters. While question mark (?) can be used as a wildcard for a
single character, an asterisk (*) can be used as a wildcard for any number of characters. In the All
or part of the file name field enter the extension of the document you want to find:
*.txt lists all files with the extension .txt,
*.bmp lists all files with the extension .bmp, etc.
You can also search by using some of the file names letters:
b*.* lists all files whose name begins with the letter b
*t.* lists all files whose name ends with the letter t
List of recently used files
The required documents can often be found on the list of recently used files. It is necessary to
access the Start menu and click on the arrow next to the application you have used, and the list of
recently used files will be shown.
ITdesk.info – project of computer e-education with open access
ITdesk.info is licensed under a Creative Commons Attribution-
Noncommercial-No Derivative Works 3.0 Croatia License. 25/29
UTILITIES
WORKING WITH COMPRESSED FILES
By zipping (compressing) files, space occupied by data on the disk is reduced. Programs for
compressing files are also used for compressing a large number of files and folders into a single
compressed file. Some of the popular programs for compressing files are WinZip, WinRar and 7-
zip.
Adding files to a compressed folder
Fig. 37 Send to - Compressed (zipped) Folder
command
Right-click on a file or folder and from the pop-up menu, choose the command Send to →
Compressed (zipped) Folder. At the location you are currently at, a zipped file will be created
with the same name and .zip extension. If you want to add a file or a folder to the compressed
file, just drag it over the compressed file using the drag-and-drop method.
Fig. 38 Compressed file icon
Decompressing / extracting a compressed folder
Fig. 39. Extract files command
Click the right mouse button over the compressed folder, select the Extract files command and
specify the location you want to extract and store them in.
VIRUSES AND ANTI-VIRUS SOFTWARE
A virus is a malicious program with the possibility of auto-replication. It searches for files within
the computer trying to infect them, and its ultimate goal is to spread to other computers.
Depending on what malicious code it contains, it can cause more or less damage to your
computer. Viruses are usually spread by e-mail attachments, infected files on removable media
etc.
ITdesk.info – project of computer e-education with open access
ITdesk.info is licensed under a Creative Commons Attribution-
Noncommercial-No Derivative Works 3.0 Croatia License. 26/29
For example, if you want to examine (scan) a device, a folder or a file by using the Avira AntiVir
Personal antivirus software, you can do so by selecting it, pressing the right mouse button over it,
and selecting the command Scan selected files with AntiVir from the pop-up menu.
Fig. 40. Scan selected files with antivirus software
Antivirus software (Norton, McAfee, Sophos etc.) is used to find and remove malicious software.
Antivirus software needs to be updated regularly (it is best to set it to update automatically when
connected). If you do not do so, your antivirus program becomes useless because it cannot detect
new types of malware.
There is generally an icon of the installed antivirus program on the taskbar and also in the
notification area: right-click on this icon and you will see the option for Update.
ITdesk.info – project of computer e-education with open access
ITdesk.info is licensed under a Creative Commons Attribution-
Noncommercial-No Derivative Works 3.0 Croatia License. 27/29
MANAGING PRINTING
Select a printer from the list of installed printers found in the Start menu → Devices and Printers
If there are multiple printers, only one is set to default which is automatically used for printing
unless specified otherwise. You can change the default printer via Start menu → Devices and
Printers. Select the printer you want to set as default printer and right-click on it, and from the
pop-up menu, select the Set as default printer command.
Install/add a new printer to the computer:
 via Start menu → Devices and Printers - on the command bar, choose Add a printer
 use the installation CD provided with the printer when it was purchased
Print a text document from a word processing software:
From the File menu, select the Print command. Once you've set the print options (number of
copies, print certain pages, and so on), press the OK button.
Controlling the printing process:
If you want to check what is currently in print, from the Start menu select Devices and Printers
and right-click on the printer icon, and from the pop-up menu, select the See what's printing
command.
To stop the current document from printing, right-click over the document name in queue, and
from the pop-up menu, select the Pause command. To continue printing the document, choose
the Resume command. If you want to stop printing the document – in the pop-up menu, click on
the Cancel command and confirm the action by clicking the Yes button.
ITdesk.info – project of computer e-education with open access
ITdesk.info is licensed under a Creative Commons Attribution-
Noncommercial-No Derivative Works 3.0 Croatia License. 28/29
This handbook is intended for learning in conjunction with materials
published on the following links:
*Notes:
http://www.itdesk.info/Basic computer use notes.pdf
* Video presentations showing basic computer use and managing files:
 Using Windows XP - presentation 1
 Using Windows XP - presentation 2
 Using Windows XP - presentation 3
* Sample exam:
http://www.itdesk.info/sample exam/sample exam module 2.pdf
* Solution for this sample exam:
http://www.itdesk.info/en/exam-solution-module-2/
*Quiz for self-evaluation:
 using the computer and managing files - quiz
(to open the link contained within the .PDF document, just press the left mouse button on one of links
above. The web page the link points to will open in a browser that you have installed on your
computer.)
ITdesk.info – project of computer e-education with open access
ITdesk.info is licensed under a Creative Commons Attribution-
Noncommercial-No Derivative Works 3.0 Croatia License. 29/29
Terms of use:
All freeware programs and services listed on the ITdesk Home Website at ITdesk.info are the sole
property of their respective authors. Microsoft, Windows and Windowsxx are registered
trademarks of the Microsoft Corporation. Other registered trademarks used on the ITdesk Home
Website are the sole property of their respective owners. If you have questions about using or
redistributing any program, please refer to the program license agreement (if any) or contact:
info@itdesk.info.
These sites contain links to other websites or resources. The ITdesk.info team is not responsible
for the text and / or advertising content or products that are on these sites / resources provided,
as it is not responsible for any content that is available through them, nor the possibility of the
inaccuracy of the content. Use links at your own risk. Also, the ITdesk.info team does not
guarantee:
- that the content on this website is free from error or suitable for any purpose,
- that these websites or web services will function without error or interruption,
- will be appropriate for your needs
- that implementing such content will not violate patents, copyrights, trademark or other
rights of a third party.
If you disagree with the general terms of use or if you are not satisfied with the sites we have
provided, stop using this website and web services. ITdesk.info team is not responsible to you or
any third party for any resulting damages, whether direct, indirect, incidental or consequential,
associated with or resulting from your use or misuse of this website or web services. Although
your claim may be based on warranty, contract violation or any other legal footing, regardless
whether we are informed about the possibility of such damages, we shall be released from all
liability. Accepting the limitations of our responsibilities is a necessary prerequisite of using
these documents, web pages and web services.
Please note that all mentioned software, in this or other documents published on ITdesk.info, is
stated only for educational or exemplary purposes and that we, in any case or manner, do not
prefer these software over other similar software mentioned or not mentioned in the materials.
Any statement that would suggest that we prefer some software over others mentioned or not
mentioned in the materials, will be considered as false statement. Our direct and unconditional
support is only to open source software that allows users to become digitally literate, use a
computer and participate in the modern information society without barriers.
The website http://www.ITdesk.info was launched by a non-governmental
organization "Open Society for the Idea Exchange“ in order to actively promote the
human right to free access to information and the human right to education.
Feel free to copy and distribute this document, provided that you do not change
anything in it!
ITdesk.info – project of computer e-education with open access
ITdesk.info is licensed under a Creative Commons Attribution-
Noncommercial-No Derivative Works 3.0 Croatia License. 30/29
project of computer e-education
with open access
Publisher:
Open Society for Idea Exchange
(ODRAZI), Zagreb
ISBN: 978-953-56758-8-4

More Related Content

What's hot

Windows 8
Windows 8Windows 8
Windows 8liguad1
 
Computer Education Class 6 (PTB) Chapter2, 3 and 4 question answer
Computer Education Class 6 (PTB) Chapter2, 3 and 4 question answerComputer Education Class 6 (PTB) Chapter2, 3 and 4 question answer
Computer Education Class 6 (PTB) Chapter2, 3 and 4 question answerFaB6 Design
 
Windows and its components
Windows and its componentsWindows and its components
Windows and its componentsAAi Irene
 
Windows Basic Computer Skills
Windows Basic Computer SkillsWindows Basic Computer Skills
Windows Basic Computer SkillsMarvin Nurse
 
Green hectares rural tech factsheet computer basics
Green hectares rural tech factsheet   computer basicsGreen hectares rural tech factsheet   computer basics
Green hectares rural tech factsheet computer basicsGreen Hectares
 
Computing for Engineering - Lecture 03
Computing for Engineering - Lecture 03Computing for Engineering - Lecture 03
Computing for Engineering - Lecture 03Sarchia Khursheed
 
Windows 7- Introduction and Features
Windows 7- Introduction and FeaturesWindows 7- Introduction and Features
Windows 7- Introduction and FeaturesRajashri Bhairamadgi
 
Introtocomputershibbspowerpoint 120405033637-phpapp01
Introtocomputershibbspowerpoint 120405033637-phpapp01Introtocomputershibbspowerpoint 120405033637-phpapp01
Introtocomputershibbspowerpoint 120405033637-phpapp01ABDUL MUHAIMAN
 
Day 1 basic computer
Day 1 basic computerDay 1 basic computer
Day 1 basic computerSaket Rai
 
PPT on MS-CIT Unit 3 (slide share)
PPT on MS-CIT Unit 3 (slide share)PPT on MS-CIT Unit 3 (slide share)
PPT on MS-CIT Unit 3 (slide share)SHRIBALAJIINFOTECH
 
CE Diagnostic answers
CE Diagnostic answersCE Diagnostic answers
CE Diagnostic answersMichael Lew
 
Computing for Engineering - Lecture 02
Computing for Engineering - Lecture 02Computing for Engineering - Lecture 02
Computing for Engineering - Lecture 02Sarchia Khursheed
 
Lecture windows xp 3
Lecture windows xp 3Lecture windows xp 3
Lecture windows xp 3Shafaq Saleem
 

What's hot (20)

Windows 8
Windows 8Windows 8
Windows 8
 
Windows basic
Windows basicWindows basic
Windows basic
 
Computer Education Class 6 (PTB) Chapter2, 3 and 4 question answer
Computer Education Class 6 (PTB) Chapter2, 3 and 4 question answerComputer Education Class 6 (PTB) Chapter2, 3 and 4 question answer
Computer Education Class 6 (PTB) Chapter2, 3 and 4 question answer
 
Windows and its components
Windows and its componentsWindows and its components
Windows and its components
 
Computer basics02
Computer basics02Computer basics02
Computer basics02
 
Part 3 elements of windows
Part 3  elements of windowsPart 3  elements of windows
Part 3 elements of windows
 
Windows Basic Computer Skills
Windows Basic Computer SkillsWindows Basic Computer Skills
Windows Basic Computer Skills
 
Green hectares rural tech factsheet computer basics
Green hectares rural tech factsheet   computer basicsGreen hectares rural tech factsheet   computer basics
Green hectares rural tech factsheet computer basics
 
Computing for Engineering - Lecture 03
Computing for Engineering - Lecture 03Computing for Engineering - Lecture 03
Computing for Engineering - Lecture 03
 
10 WIndows Basics
10 WIndows Basics 10 WIndows Basics
10 WIndows Basics
 
Windows 7- Introduction and Features
Windows 7- Introduction and FeaturesWindows 7- Introduction and Features
Windows 7- Introduction and Features
 
Introtocomputershibbspowerpoint 120405033637-phpapp01
Introtocomputershibbspowerpoint 120405033637-phpapp01Introtocomputershibbspowerpoint 120405033637-phpapp01
Introtocomputershibbspowerpoint 120405033637-phpapp01
 
Day 1 basic computer
Day 1 basic computerDay 1 basic computer
Day 1 basic computer
 
Lesson1 windows xp
Lesson1 windows xpLesson1 windows xp
Lesson1 windows xp
 
PPT on MS-CIT Unit 3 (slide share)
PPT on MS-CIT Unit 3 (slide share)PPT on MS-CIT Unit 3 (slide share)
PPT on MS-CIT Unit 3 (slide share)
 
CE Diagnostic answers
CE Diagnostic answersCE Diagnostic answers
CE Diagnostic answers
 
Workspace new users
Workspace new usersWorkspace new users
Workspace new users
 
Computing for Engineering - Lecture 02
Computing for Engineering - Lecture 02Computing for Engineering - Lecture 02
Computing for Engineering - Lecture 02
 
MS-CIT Unit 4 (slide share)
MS-CIT Unit 4 (slide share)MS-CIT Unit 4 (slide share)
MS-CIT Unit 4 (slide share)
 
Lecture windows xp 3
Lecture windows xp 3Lecture windows xp 3
Lecture windows xp 3
 

Similar to Handbook using computer_managing_files (1)

Handbook presentations microsoft_powerpoint_2010
Handbook presentations microsoft_powerpoint_2010Handbook presentations microsoft_powerpoint_2010
Handbook presentations microsoft_powerpoint_2010Michael Ramoga
 
Handbook word processing_microsoft_word_2010
Handbook word processing_microsoft_word_2010Handbook word processing_microsoft_word_2010
Handbook word processing_microsoft_word_2010MichaelRamoga1
 
Handbook text editing-libre-office_writer (1)
Handbook text editing-libre-office_writer (1)Handbook text editing-libre-office_writer (1)
Handbook text editing-libre-office_writer (1)Margaret Nicole De Guia
 
Fundamentals of computers (2).pptx
Fundamentals of computers (2).pptxFundamentals of computers (2).pptx
Fundamentals of computers (2).pptxanshparashar5
 
ch 01 ----class three----now your computer
ch 01 ----class three----now your computerch 01 ----class three----now your computer
ch 01 ----class three----now your computerInternational advisers
 
Computer Internet Basics I
Computer Internet Basics IComputer Internet Basics I
Computer Internet Basics Idebbie43
 
Norton and LifeLock are now part of one company giving you all-in-one protect...
Norton and LifeLock are now part of one company giving you all-in-one protect...Norton and LifeLock are now part of one company giving you all-in-one protect...
Norton and LifeLock are now part of one company giving you all-in-one protect...indra Kumara
 
Seunsmith networks innovation computer training guide
Seunsmith networks innovation computer training guideSeunsmith networks innovation computer training guide
Seunsmith networks innovation computer training guideSeunsmith Elijah
 
Wiki Web Way (Practical Manual to Earn Money on Internet)
Wiki Web Way (Practical Manual to Earn Money on Internet)Wiki Web Way (Practical Manual to Earn Money on Internet)
Wiki Web Way (Practical Manual to Earn Money on Internet)AbundioTeca
 
Importance of computer literacy
Importance of computer literacyImportance of computer literacy
Importance of computer literacyJoannemarie Urbano
 
Informatin Technology Exercises.pdf
Informatin Technology Exercises.pdfInformatin Technology Exercises.pdf
Informatin Technology Exercises.pdfAhmed JADIR
 

Similar to Handbook using computer_managing_files (1) (19)

Handbook presentations microsoft_powerpoint_2010
Handbook presentations microsoft_powerpoint_2010Handbook presentations microsoft_powerpoint_2010
Handbook presentations microsoft_powerpoint_2010
 
Handbook word processing_microsoft_word_2010
Handbook word processing_microsoft_word_2010Handbook word processing_microsoft_word_2010
Handbook word processing_microsoft_word_2010
 
Handbook text editing-libre-office_writer (1)
Handbook text editing-libre-office_writer (1)Handbook text editing-libre-office_writer (1)
Handbook text editing-libre-office_writer (1)
 
Fundamentals of computers (2).pptx
Fundamentals of computers (2).pptxFundamentals of computers (2).pptx
Fundamentals of computers (2).pptx
 
ch 01 ----class three----now your computer
ch 01 ----class three----now your computerch 01 ----class three----now your computer
ch 01 ----class three----now your computer
 
Computer Internet Basics I
Computer Internet Basics IComputer Internet Basics I
Computer Internet Basics I
 
Live & learn windows tablets, ed 1
Live & learn windows tablets, ed 1Live & learn windows tablets, ed 1
Live & learn windows tablets, ed 1
 
Norton and LifeLock are now part of one company giving you all-in-one protect...
Norton and LifeLock are now part of one company giving you all-in-one protect...Norton and LifeLock are now part of one company giving you all-in-one protect...
Norton and LifeLock are now part of one company giving you all-in-one protect...
 
Seunsmith networks innovation computer training guide
Seunsmith networks innovation computer training guideSeunsmith networks innovation computer training guide
Seunsmith networks innovation computer training guide
 
IT
ITIT
IT
 
Module 2: Problem solving
Module 2: Problem solvingModule 2: Problem solving
Module 2: Problem solving
 
Computer Technology
Computer TechnologyComputer Technology
Computer Technology
 
An Essay On Computer
An Essay On ComputerAn Essay On Computer
An Essay On Computer
 
NEWHIREEEE
NEWHIREEEENEWHIREEEE
NEWHIREEEE
 
Wiki Web Way (Practical Manual to Earn Money on Internet)
Wiki Web Way (Practical Manual to Earn Money on Internet)Wiki Web Way (Practical Manual to Earn Money on Internet)
Wiki Web Way (Practical Manual to Earn Money on Internet)
 
Ict u2
Ict u2Ict u2
Ict u2
 
Importance of computer literacy
Importance of computer literacyImportance of computer literacy
Importance of computer literacy
 
Introduction to computer
Introduction to computerIntroduction to computer
Introduction to computer
 
Informatin Technology Exercises.pdf
Informatin Technology Exercises.pdfInformatin Technology Exercises.pdf
Informatin Technology Exercises.pdf
 

Recently uploaded

Painted Grey Ware.pptx, PGW Culture of India
Painted Grey Ware.pptx, PGW Culture of IndiaPainted Grey Ware.pptx, PGW Culture of India
Painted Grey Ware.pptx, PGW Culture of IndiaVirag Sontakke
 
History Class XII Ch. 3 Kinship, Caste and Class (1).pptx
History Class XII Ch. 3 Kinship, Caste and Class (1).pptxHistory Class XII Ch. 3 Kinship, Caste and Class (1).pptx
History Class XII Ch. 3 Kinship, Caste and Class (1).pptxsocialsciencegdgrohi
 
Employee wellbeing at the workplace.pptx
Employee wellbeing at the workplace.pptxEmployee wellbeing at the workplace.pptx
Employee wellbeing at the workplace.pptxNirmalaLoungPoorunde1
 
How to Make a Pirate ship Primary Education.pptx
How to Make a Pirate ship Primary Education.pptxHow to Make a Pirate ship Primary Education.pptx
How to Make a Pirate ship Primary Education.pptxmanuelaromero2013
 
How to Configure Email Server in Odoo 17
How to Configure Email Server in Odoo 17How to Configure Email Server in Odoo 17
How to Configure Email Server in Odoo 17Celine George
 
Earth Day Presentation wow hello nice great
Earth Day Presentation wow hello nice greatEarth Day Presentation wow hello nice great
Earth Day Presentation wow hello nice greatYousafMalik24
 
Crayon Activity Handout For the Crayon A
Crayon Activity Handout For the Crayon ACrayon Activity Handout For the Crayon A
Crayon Activity Handout For the Crayon AUnboundStockton
 
Full Stack Web Development Course for Beginners
Full Stack Web Development Course  for BeginnersFull Stack Web Development Course  for Beginners
Full Stack Web Development Course for BeginnersSabitha Banu
 
MARGINALIZATION (Different learners in Marginalized Group
MARGINALIZATION (Different learners in Marginalized GroupMARGINALIZATION (Different learners in Marginalized Group
MARGINALIZATION (Different learners in Marginalized GroupJonathanParaisoCruz
 
Proudly South Africa powerpoint Thorisha.pptx
Proudly South Africa powerpoint Thorisha.pptxProudly South Africa powerpoint Thorisha.pptx
Proudly South Africa powerpoint Thorisha.pptxthorishapillay1
 
Introduction to ArtificiaI Intelligence in Higher Education
Introduction to ArtificiaI Intelligence in Higher EducationIntroduction to ArtificiaI Intelligence in Higher Education
Introduction to ArtificiaI Intelligence in Higher Educationpboyjonauth
 
“Oh GOSH! Reflecting on Hackteria's Collaborative Practices in a Global Do-It...
“Oh GOSH! Reflecting on Hackteria's Collaborative Practices in a Global Do-It...“Oh GOSH! Reflecting on Hackteria's Collaborative Practices in a Global Do-It...
“Oh GOSH! Reflecting on Hackteria's Collaborative Practices in a Global Do-It...Marc Dusseiller Dusjagr
 
Interactive Powerpoint_How to Master effective communication
Interactive Powerpoint_How to Master effective communicationInteractive Powerpoint_How to Master effective communication
Interactive Powerpoint_How to Master effective communicationnomboosow
 
ECONOMIC CONTEXT - PAPER 1 Q3: NEWSPAPERS.pptx
ECONOMIC CONTEXT - PAPER 1 Q3: NEWSPAPERS.pptxECONOMIC CONTEXT - PAPER 1 Q3: NEWSPAPERS.pptx
ECONOMIC CONTEXT - PAPER 1 Q3: NEWSPAPERS.pptxiammrhaywood
 
Alper Gobel In Media Res Media Component
Alper Gobel In Media Res Media ComponentAlper Gobel In Media Res Media Component
Alper Gobel In Media Res Media ComponentInMediaRes1
 

Recently uploaded (20)

Painted Grey Ware.pptx, PGW Culture of India
Painted Grey Ware.pptx, PGW Culture of IndiaPainted Grey Ware.pptx, PGW Culture of India
Painted Grey Ware.pptx, PGW Culture of India
 
OS-operating systems- ch04 (Threads) ...
OS-operating systems- ch04 (Threads) ...OS-operating systems- ch04 (Threads) ...
OS-operating systems- ch04 (Threads) ...
 
ESSENTIAL of (CS/IT/IS) class 06 (database)
ESSENTIAL of (CS/IT/IS) class 06 (database)ESSENTIAL of (CS/IT/IS) class 06 (database)
ESSENTIAL of (CS/IT/IS) class 06 (database)
 
History Class XII Ch. 3 Kinship, Caste and Class (1).pptx
History Class XII Ch. 3 Kinship, Caste and Class (1).pptxHistory Class XII Ch. 3 Kinship, Caste and Class (1).pptx
History Class XII Ch. 3 Kinship, Caste and Class (1).pptx
 
Employee wellbeing at the workplace.pptx
Employee wellbeing at the workplace.pptxEmployee wellbeing at the workplace.pptx
Employee wellbeing at the workplace.pptx
 
9953330565 Low Rate Call Girls In Rohini Delhi NCR
9953330565 Low Rate Call Girls In Rohini  Delhi NCR9953330565 Low Rate Call Girls In Rohini  Delhi NCR
9953330565 Low Rate Call Girls In Rohini Delhi NCR
 
How to Make a Pirate ship Primary Education.pptx
How to Make a Pirate ship Primary Education.pptxHow to Make a Pirate ship Primary Education.pptx
How to Make a Pirate ship Primary Education.pptx
 
TataKelola dan KamSiber Kecerdasan Buatan v022.pdf
TataKelola dan KamSiber Kecerdasan Buatan v022.pdfTataKelola dan KamSiber Kecerdasan Buatan v022.pdf
TataKelola dan KamSiber Kecerdasan Buatan v022.pdf
 
Model Call Girl in Tilak Nagar Delhi reach out to us at 🔝9953056974🔝
Model Call Girl in Tilak Nagar Delhi reach out to us at 🔝9953056974🔝Model Call Girl in Tilak Nagar Delhi reach out to us at 🔝9953056974🔝
Model Call Girl in Tilak Nagar Delhi reach out to us at 🔝9953056974🔝
 
How to Configure Email Server in Odoo 17
How to Configure Email Server in Odoo 17How to Configure Email Server in Odoo 17
How to Configure Email Server in Odoo 17
 
Earth Day Presentation wow hello nice great
Earth Day Presentation wow hello nice greatEarth Day Presentation wow hello nice great
Earth Day Presentation wow hello nice great
 
Crayon Activity Handout For the Crayon A
Crayon Activity Handout For the Crayon ACrayon Activity Handout For the Crayon A
Crayon Activity Handout For the Crayon A
 
Full Stack Web Development Course for Beginners
Full Stack Web Development Course  for BeginnersFull Stack Web Development Course  for Beginners
Full Stack Web Development Course for Beginners
 
MARGINALIZATION (Different learners in Marginalized Group
MARGINALIZATION (Different learners in Marginalized GroupMARGINALIZATION (Different learners in Marginalized Group
MARGINALIZATION (Different learners in Marginalized Group
 
Proudly South Africa powerpoint Thorisha.pptx
Proudly South Africa powerpoint Thorisha.pptxProudly South Africa powerpoint Thorisha.pptx
Proudly South Africa powerpoint Thorisha.pptx
 
Introduction to ArtificiaI Intelligence in Higher Education
Introduction to ArtificiaI Intelligence in Higher EducationIntroduction to ArtificiaI Intelligence in Higher Education
Introduction to ArtificiaI Intelligence in Higher Education
 
“Oh GOSH! Reflecting on Hackteria's Collaborative Practices in a Global Do-It...
“Oh GOSH! Reflecting on Hackteria's Collaborative Practices in a Global Do-It...“Oh GOSH! Reflecting on Hackteria's Collaborative Practices in a Global Do-It...
“Oh GOSH! Reflecting on Hackteria's Collaborative Practices in a Global Do-It...
 
Interactive Powerpoint_How to Master effective communication
Interactive Powerpoint_How to Master effective communicationInteractive Powerpoint_How to Master effective communication
Interactive Powerpoint_How to Master effective communication
 
ECONOMIC CONTEXT - PAPER 1 Q3: NEWSPAPERS.pptx
ECONOMIC CONTEXT - PAPER 1 Q3: NEWSPAPERS.pptxECONOMIC CONTEXT - PAPER 1 Q3: NEWSPAPERS.pptx
ECONOMIC CONTEXT - PAPER 1 Q3: NEWSPAPERS.pptx
 
Alper Gobel In Media Res Media Component
Alper Gobel In Media Res Media ComponentAlper Gobel In Media Res Media Component
Alper Gobel In Media Res Media Component
 

Handbook using computer_managing_files (1)

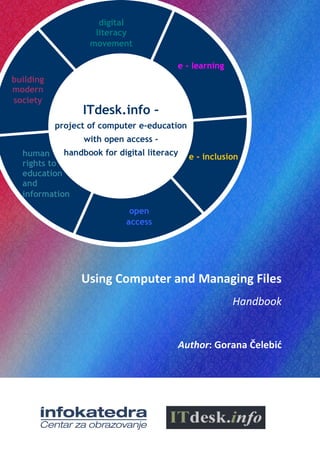
  • 1. ˝˝ ITdesk.info – project of computer e-education with open access - handbook for digital literacy digital literacy movement building modern society e - learning e - inclusion open access human rights to education and information Using Computer and Managing Files Handbook Author: Gorana Čelebić
  • 2. Author: Gorana Čelebić Translation: Dario Ilija Rendulic, Sanja Kolaric Proofreading: Kristina Vlaovic, Maja Vidan Main title: ITdesk.info – project of computer e-education with open access, handbook for digital literacy Subtitle: Using Computer and Managing Files, handbook Expert review: Surojit Chakraborty Cover: Silvija Bunic Publisher: Open Society for Idea Exchange (ODRAZI), Zagreb Expert review of Croatian version: Infokatedra, center for adult education, Zagreb ISBN: 978-953-56758-8-4 Place and year of publication: Zagreb, 2011 Education and Teacher Training Agency in Croatia has approved the use of this publication as official additional teaching resource in all the primary schools in Croatia Class: 602-09/14-01/0418 Reg: 561-03-03/10-15-4 Zagreb, April 2015. Copyright: Feel free to copy, print and further distribute the whole publication or parts of it, including for the purpose of organized education, whether in public or private educational organizations, but only for noncommercial purposes (meaning that it is free of charge for the end users of this publication) and with attribution (source: www.ITdesk.info - project of computer e- education with open access). Derivative works without prior approval of the copyright holder (NGO Open Society for Idea Exchange) are not permitted. For permission for derivative works please contact us at this e-mail address: info@ITdesk.info.
  • 3. ITdesk.info – project of computer e-education with open access ITdesk.info is licensed under a Creative Commons Attribution- Non-commercial-No Derivative Works 3.0 Croatia License PREFACE Today’s society is shaped by sudden growth and development of the information technology (IT) resulting with its great dependency on the knowledge and competence of individuals from the IT area. Although this dependency is growing day by day, the human right to education and information is not extended to the IT area. Problems that are affecting society as a whole are emerging, creating gaps and distancing people from the main reason and motivation for advancement-opportunity. Being a computer illiterate person today means being a person who is unable to participate in modern society, and a person without opportunity; and despite the acknowledged necessity and benefits of inclusive computer literacy from institutions like the European Commission, UNESCO, OECD, there are still groups of people having difficulties accessing basic computer education viz. persons with disabilities, persons with learning difficulties, migrant workers, unemployed persons, persons that live in remote (rural) areas where IT education is not accessible. This handbook, combined with other materials published on ITdesk.info, represent our effort and contribution to the realization and promotion of human rights to education and information considering the IT area. We hope that this education will help you in mastering basic computer skills and with that hope we wish you to learn as much as you can, and therefore become an active member of modern ICT society. Sincerely yours, ITdesk.info team Expert review of Croatian version:
  • 4. ITdesk.info – project of computer e-education with open access ITdesk.info is licensed under a Creative Commons Attribution- Non-commercial-No Derivative Works 3.0 Croatia License CONTENT: Operating system - OS.................................................................................... 1 Main actions.......................................................................................................................1 General information and adjusting computer settings..........................................................3 Icons...................................................................................................................................8 Basic actions with windows..............................................................................................11 Working with files.......................................................................................... 13 Basic concepts..................................................................................................................13 Files and folders ...............................................................................................................16 Working with files............................................................................................................18 Actions with files and folders............................................................................................21 Searching data storage devices..........................................................................................23 Utilities............................................................................................................ 25 Working with compressed files.........................................................................................25 Managing printing.......................................................................................... 27
  • 5. ITdesk.info – project of computer e-education with open access ITdesk.info is licensed under a Creative Commons Attribution- Noncommercial-No Derivative Works 3.0 Croatia License. 1/29 OPERATING SYSTEM - OS MAIN ACTIONS Turn on your computer  The computer turns on by pressing the power button which is located on the computer case.  If necessary, enter the username and password. The proper procedure for restarting the computer: Fig. 1. Start Menu The Start menu is the starting point of the system. Through this menu you can access programs, open frequently used folders, configure settings on the computer, access the Help function, shut down the computer, log off from Windows, and so on. The system can be restarted via Start menu: click the arrow next to the Shut Down button and then select the Restart command. Fig. 2. Computer Restart Start Button Search pane
  • 6. ITdesk.info – project of computer e-education with open access ITdesk.info is licensed under a Creative Commons Attribution- Noncommercial-No Derivative Works 3.0 Croatia License. 2/29 Shutting down a non- responding application (End Task) If the application "freezes" and stops responding, the situation, in most cases, can be solved by pressing the key combination Ctrl + Alt + Del. Pressing these keys will open the Windows Task Manager. To close an application that does not respond, select it and press the End Task button. Fig. 3. Windows Task Manager The Reset button is used when the computer does not respond to our instructions ("freezes” or “locks up"). The Reset button is usually the button below the Start button on the computer case. After you have pressed it, the computer shuts down and immediately starts again. Correct procedure for turning off the computer: The computer shuts down via Start menu, by clicking the Shut Down button. Fig. 4. Shutting down Using the Help function The Help function can be accessed from the computer desktop, by pressing the F1 key on the keyboard. Windows Help and Support opens with a search box in which you can enter terms that are of interest to you or terms you need help on. If you press F1 while in an active window or program (e.g. Microsoft Word), the Help function will relate to that program specifically. Another way to access the Help function is through the Start menu  Help and Support
  • 7. ITdesk.info – project of computer e-education with open access ITdesk.info is licensed under a Creative Commons Attribution- Noncommercial-No Derivative Works 3.0 Croatia License. 3/29 Fig. 5 Help function GENERAL INFORMATION AND ADJUSTING COMPUTER SETTINGS System Information  In the Start menu → right click on Computer, then choose the Properties command from the pop-up menu, or  Right-click on icon found on your desktop → choose the Properties command from the pop-up menu, or  Start  Control panel  System , or  The key combination Windows + Pause It will open a window that shows information about the operating system installed on your computer and some basic information about the computer (processor, installed memory etc.). Date and Time To change the time and date you need to click on the Date and Time button found on the right corner of the taskbar at the bottom of the screen. Click on Change date and time settings in the window opened (Figure 6). Fig. 6. Date and time
  • 8. ITdesk.info – project of computer e-education with open access ITdesk.info is licensed under a Creative Commons Attribution- Noncommercial-No Derivative Works 3.0 Croatia License. 4/29 Speaker Volume In order to change the speaker volume, you need to click on the icon in the notification area on the right corner of the taskbar. By moving the vertical scroll bar you can change the volume. Pressing the Mute Speakers and Headphones button turns off the sound. Fig. 7. Adjusting the speaker volume Desktop Background The appearance of your desktop background can be changed in the following manner: position your cursor over the desktop, press the right mouse button and select the command Personalize from the pop-up menu. In the opened window, click on Desktop Background and choose from any of the listed files, or click the Browse button and choose another image stored on the computer. It is also possible to select multiple background images that, in a given period of time, change on the screen, similar to screen saver. Just mark the images you want to display and then in the drop-down menu Change picture every, select the change interval. Fig. 8. Changing the background Screen Saver To set the Screen Saver, position the cursor over the desktop and press the right mouse button (the desktop context menu or pop-up menu will open), and choose the option Personalize. In the opened window select the Screen Saver icon.
  • 9. ITdesk.info – project of computer e-education with open access ITdesk.info is licensed under a Creative Commons Attribution- Noncommercial-No Derivative Works 3.0 Croatia License. 5/29 Fig. 9. Dialog box Screen Saver Resolution To change the screen resolution, right-click on the desktop and select the Screen resolution command from the pop-up menu. Fig. 10. Setting the screen resolution Control Panel The Control Panel is a special folder in which you can adjust the system settings through various system setting options (install and uninstall programs, adjust the keyboard, mouse, sound and so on) which can be viewed by category or in the form of small/large icons.
  • 10. ITdesk.info – project of computer e-education with open access ITdesk.info is licensed under a Creative Commons Attribution- Noncommercial-No Derivative Works 3.0 Croatia License. 6/29 The Control Panel is accessed via Start menu  Control Panel. Fig. 11. Control Panel –Small icons view Selecting and adding the keyboard language In the Control Panel, open the Region and Language icon and select the Keyboards and Languages tab, and then select the Change Keyboards button. In the group Installed services click on the Add button. Select the language you want to add and double-click on the Keyboard. Confirm by pressing the OK button. Fig. 12 Keyboards and Languages Fig. 13 Installed services group
  • 11. ITdesk.info – project of computer e-education with open access ITdesk.info is licensed under a Creative Commons Attribution- Noncommercial-No Derivative Works 3.0 Croatia License. 7/29 Fig. 14 Add input language Change the input language of the keyboard On the Language Bar, click the input language button (in this case Croatian is chosen) and then select the input language you want to use. Fig. 15 Change input language keyboard Program management Installing new programs:  From CD, DVD, Internet, network  When installing from a CD or a DVD, in most cases a dialog box will automatically open up from which the Run AutoRun.exe option can be selected to start the Setup Wizard.  If the installation of the program does not start automatically, you can start the installation manually by double-clicking on the file typically called Setup.exe or Install.exe.  After the Wizard installation has started, follow instructions and go to next steps by pressing the Next, Yes, and other such buttons. You will usually have to accept license terms, choose a location where the program will be installed, possibly choose components of the program you want to install etc. At the end press the Finish or Close button. Uninstalling the programs In the Control Panel, click on the Programs and Features icon, choose the software you want to uninstall and click the Uninstall button.
  • 12. ITdesk.info – project of computer e-education with open access ITdesk.info is licensed under a Creative Commons Attribution- Noncommercial-No Derivative Works 3.0 Croatia License. 8/29 Fig. 16 Uninstalling programs Using the «print screen» key on the keyboard By pressing the Print Screen key, the image currently on the screen is temporarily stored in the buffer (clipboard). To see the image and edit it, open any software for image editing like the Paint program and simultaneously press the Ctrl and V keys on the keyboard in order to paste the image in the imaging software. If you want to capture only active windows, use the keyboard key combination Alt + Print Screen and the rest of the process is the same. The Paint program comes with windows and can be accessed via Start  All Programs  Accessories  Paint. ICONS Icons are small pictures (pictograms) on a computer screen and they all represent programs, folders, files and shortcuts. A double-click on a program icon will start the appropriate program. A double-click on the folder icon will open a window that shows files and folders contained in that folder. A double-click on the file icon will start the appropriate program and open that file in the appropriate program. Shortcuts are files that point to other programs, program files or folders found somewhere on the computer. A double-click on the shortcut icon will start either the appropriate program, or the appropriate file and corresponding program, or appropriate folder.
  • 13. ITdesk.info – project of computer e-education with open access ITdesk.info is licensed under a Creative Commons Attribution- Noncommercial-No Derivative Works 3.0 Croatia License. 9/29 Microsoft Excel 2010 shortcut icon Microsoft Word 2010 shortcut icon Microsoft Access 2010 shortcut icon Microsoft PowerPoint 2010 shortcut icon Folder icon Computer icon Recycle Bin icon Select and move (one or more) icons. An icon can be selected clicking on it with the left mouse button. To select multiple icons at once:  press and hold down the left mouse button, then drag the mouse across the icons and release the mouse button, or Fig. 17. Select several icons using the above mentioned method  select an icon, press and hold down the Shift key, press the last icon in a row and release the Shift key (selecting consecutive icons), or  press and hold down the Ctrl key and select the non-consecutive icons using the left mouse button.
  • 14. ITdesk.info – project of computer e-education with open access ITdesk.info is licensed under a Creative Commons Attribution- Noncommercial-No Derivative Works 3.0 Croatia License. 10/29 Icons are moved via the drag-and-drop method – press and hold down the left mouse button over the icon, drag the mouse (with the icon) to a new location, and release the mouse button (which places the icon in the new location). Desktop shortcuts To create a shortcut:  right-click on the desktop  from the pop-up menu choose New  Shortcut  click on the Browse button and search for a folder, program or file the shortcut is being made for  press the button Next to confirm  enter the name of the shortcut (or leave the existing one) and end this action with the Finish button Fig. 18. Create a shortcut e.g. if you want to create a desktop shortcut for the folder Music:  open the Start menu  press the right mouse button over the folder Music  on the quick menu choose the Send to option  choose the Desktop (create shortcut) option Fig. 19. Create a shortcut Using icons In order to open an icon:  double-click on it with the left mouse button, or  select it and press the Enter key on the keyboard Shortcut is an icon with a recognizable arrow in the lower left corner. The shortcut links you with the file or program. It opens like any other icon; double-click on it with the left mouse button.
  • 15. ITdesk.info – project of computer e-education with open access ITdesk.info is licensed under a Creative Commons Attribution- Noncommercial-No Derivative Works 3.0 Croatia License. 11/29 BASIC ACTIONS WITH WINDOWS You can have several windows opened at the same time, but only one will be active:  The active window has a highlighted border and the inactive window is grayed out  The opened window becomes active if you left-click on it, or  The opened window becomes active if you left-click on its section on the taskbar We can move windows using the drag-and-drop method: press and hold down the left mouse button on the title bar, drag the window to where you want to move it and release the mouse button. Recognizing different elements of a window: title bar, menu bar, toolbars, status bar, scroll bar. Fig. 20. Window elements Dialog box The dialog box is a specific type of window that offers choices related to a certain task. Confirm an action by clicking the OK button, or cancel it by clicking the Cancel button. Unlike regular windows, their size is fixed. Fig. 21. Dialog box Title bar buttons Title bar Menu bar Border Slider
  • 16. ITdesk.info – project of computer e-education with open access ITdesk.info is licensed under a Creative Commons Attribution- Noncommercial-No Derivative Works 3.0 Croatia License. 12/29 Title bar buttons for manipulating the window are located on the upper right corner of the window’s title bar.  The Minimize button – minimizes the window to the taskbar  The Restore Down button - restores the window to the size before maximization  The Maximize button - spreads the window over the entire desktop  The Close button - closes the window Resizing the window: Place the cursor over the window’s border and when the mouse pointer changes its shape into , press and hold down the left mouse button and drag the mouse. Using this method you can resize the window according to your needs. Switching between a number of open windows:  Use the left mouse button to select and activate the desired window - this is possible only if the desired window is at least partially visible.  Use the left mouse button to select and activate the desired window from the taskbar – the selected window appears above all others and becomes active.  Use the key combination Alt + Tab to open a pane showing all opened windows (Fig.22). Hold down the Alt key and press Tab consecutively to move between opened windows. When the desired window is selected, release the Alt key. Fig. 22. Switching between multiple open windows- Alt + Tab
  • 17. ITdesk.info – project of computer e-education with open access ITdesk.info is licensed under a Creative Commons Attribution- Noncommercial-No Derivative Works 3.0 Croatia License. 13/29 WORKING WITH FILES BASIC CONCEPTS A File is a set of digital data. Each file has a name, an icon (assigned by the operating system) and an extension. Files are placed within folders (for easier reference). To browse computers for files and folders we use Windows Explorer. It displays a hierarchical view of folders and files. Run Windows Explorer:  position the cursor over the Start button, press the right mouse button and select the command Open Windows Explorer, or  from the Start menu select All programs, in the folder Accessories find and click Windows Explorer, or  in the search box (within the Start menu) type "Windows Explorer" and click on it when it appears in the results, or  click on in the Taskbar, or  click on the Windows Explorer shortcut on the desktop Fig. 23. Windows Explorer – Libraries There are four types of libraries:  The Documents library – this library is used for organizing and saving documents (text files, workbooks, presentations etc.)  The Pictures library – it is used for organizing and saving pictures  The Music library – it is used for organizing and saving music  The Videos library – it is used for organizing and saving video materials Each file and folder has its path – an address of its location. Fig. 24. Address bar - path to the folder Sample Music
  • 18. ITdesk.info – project of computer e-education with open access ITdesk.info is licensed under a Creative Commons Attribution- Noncommercial-No Derivative Works 3.0 Croatia License. 14/29 Create a new folder in the Music library:  open Windows Explorer  open the Music library  press the New Folder button on the toolbar  enter a name for this folder Fig. 25. Create a new folder Storage devices and hierarchical display of files and folders. Each device has an icon, name and letter in the parentheses (A, B, C, D, E,...) There can be one or more Hard Disk Drives on the computer, or there can be one HDD divided into partitions. A Floppy Disk When the hard disk is not divided into partitions and the DVD-ROM is connected When the hard disk is not divided into partitions and the DVD-ROM and CD-RW are connected When the hard disk is divided into two partitions and the DVD- ROM and CD-RW are connected C Hard Disk Drive C Hard Disk Drive C Hard Disk Drive (first partition) D DVD-ROM D DVD-ROM D Hard Disk Drive (second partition) E CD-RW E DVD-ROM F CD-RW Devices used by the operating system for data storage are marked with capital letters (e.g. Floppy (A:) ; Local Disk(C:); Removable Disk(E:) etc.) and are available in My Computer.
  • 19. ITdesk.info – project of computer e-education with open access ITdesk.info is licensed under a Creative Commons Attribution- Noncommercial-No Derivative Works 3.0 Croatia License. 15/29 Data storage devices are:  Floppy Disk  Hard Disk – the device for permanent storage  Network Drive – the hard drive that can be accessed through the network o to access it open the folder My Network Places  USB stick  CD-RW (Compact Disc Re-Writable)  DVD-RW (Digital Versatile Disc Re-Writable) Measurement unit, size of files and folders: KB, MB, GB 1 KB (kilobyte) - 1024 bytes 1 MB (megabyte) - 1024 kilobytes 1 GB (gigabyte) - 1024 megabytes Why is it necessary to make additional copies of important files on removable storage devices? It is recommended to create back-up copies of important files in case the original files become inaccessible, either due to drive failure, accidental deletion or other reasons. If you have a back- up, you can restore original files. Backup is done mainly on removable storage devices. The advantages of storing data on network devices If the computer is connected to a network, you can access shared data (shared with other users on the network). To access network disks, open the My Network Places folder usually found on the desktop or within the Start menu.
  • 20. ITdesk.info – project of computer e-education with open access ITdesk.info is licensed under a Creative Commons Attribution- Noncommercial-No Derivative Works 3.0 Croatia License. 16/29 FILES AND FOLDERS Folder properties dialog box Click the right mouse button over the folder and choose the Properties command from the quick menu. In the opened dialog box under the tab General you can find information about the name, size and location of the folder. Fig. 26.Dialog box - folder properties Manipulating window size Sometimes when the window is not maximized you can’t see all the information about the devices, folders or files. You can use vertical and / or horizontal sliders to slide through and see complete contents of the window. You can also customize the window size (height and / or length) so that the entire content is visible. To adjust the window size place the cursor (mouse pointer) over the edge of a window and when the mouse pointer changes shape, press and hold the left mouse button, drag the edge of the window, and release the left mouse button. Changing height and width of the window simultaneously can be done by positioning the mouse pointer over any corner of the window and using the method “drag-and-drop” to achieve the desired window size.
  • 21. ITdesk.info – project of computer e-education with open access ITdesk.info is licensed under a Creative Commons Attribution- Noncommercial-No Derivative Works 3.0 Croatia License. 17/29 Using Windows Explorer Fig. 27. Windows Explorer Navigation pane (left side of the window) - displays the entire folder structure. To expand maps press ; folders with are already expanded. If you wish to see the contents of a certain folder, select it in the left pane, and in the right part of the window the folder content will be displayed. You can also navigate through folders displayed in the right part of the window using the left mouse button, double click and address bar. Creating a folder and subfolder To create folders on the desktop: press the right mouse button on the desktop and from the pop- up menu choose the commands New → Folder → enter name →press Enter key. Fig. 28. Empty folder icon Fig. 29. Folder icon with content To create a subfolder using Windows Explorer: in the navigation pane, select the folder you want to create a subfolder in; and on the toolbar, choose: New Folder → enter name → press Enter key, or press the right mouse button in the right part of the window and choose: New → Folder → enter name →press Enter key
  • 22. ITdesk.info – project of computer e-education with open access ITdesk.info is licensed under a Creative Commons Attribution- Noncommercial-No Derivative Works 3.0 Croatia License. 18/29 WORKING WITH FILES A file is defined by a name and an extension. The extension indicates the file type (text, multimedia etc.) and tells the computer which application is appropriate for that file type. File extensions of some frequently used files are: .exe – executable files .sys, .dll - system files .tmp, .temp – temporary files .rar, .zip, .7z – compressed files .jpg, .jpeg, .gif, .png– image files .mp3, .wav, .wma– audio files .avi, .wmv, .mpg, .mp4 – multimedia files .txt, .odt, .doc, .docx – text files .ods, .xls, .xlsx – spreadsheet files .odp, .ppt, .pptx – presentation files .dbf, .mdb, .accdb – database files .pdf – (Portable Document Format) .htm, .html, .asp, .aspx, .php – web pages Notepad The Notepad is a simple text editor with limited options for text formatting. The Notepad can be accessed via Start menu and then clicking on All Programs → Accessories → Notepad. Fig. 30. Notepad
  • 23. ITdesk.info – project of computer e-education with open access ITdesk.info is licensed under a Creative Commons Attribution- Noncommercial-No Derivative Works 3.0 Croatia License. 19/29 To save a file for the first time, select Save As from the File menu. In the dialog box that appears specify the location you want to save the file in (Save in field) and the file name (File Name field), or just click the Save command. Saving can be done using the keyboard key combination Ctrl + S or the icon located on the Toolbar. File attributes To change a file / folder status, you need to access the file / folder attributes. Right-click over the file and select Properties from the pop-up menu. In the lower part of the dialog box there are options for Read Only and Hidden. If you select the Read only attribute option, the file can be opened and changes can be made, but when you try to save the file you will only get the Save As dialog box. Saving the file is possible only under a different name and the original file will not be changed due to the Read Only attribute. If you select the Hidden attribute, the file or folder will become invisible in Windows Explorer, provided that the OS is set not to display hidden files or folders (this option is found in Windows Explorer toolbar: Organize -> Folder and search options -> tab “view” -> “show hidden files, folders and drives”). If marked, hidden files and folders will be visible in Windows Explorer, but they will also be transparent. If this option is not marked, files or folders will be invisible, and therefore hidden. When you have selected the desired attributes, you confirm them by clicking the OK button. Fig. 31.Dialog box Properties – option Hidden is marked Option view You can choose among available views using the button found on the window toolbar:  Extra Large Icons  Large Icons  Medium Icons  Small Icons  List  Details  Tiles  Content Fig. 32. View files
  • 24. ITdesk.info – project of computer e-education with open access ITdesk.info is licensed under a Creative Commons Attribution- Noncommercial-No Derivative Works 3.0 Croatia License. 20/29 Fig. 33. Windows Explorer window – view: Details Files can be sorted (Arrange by) according to name, length, type and creation date. Fig. 34. Sorting files When naming files or folders you should choose meaningful names: names that indicate their content. Address bar Navigation buttons Title bar buttons Search pane Toolbar Navigation pane View button
  • 25. ITdesk.info – project of computer e-education with open access ITdesk.info is licensed under a Creative Commons Attribution- Noncommercial-No Derivative Works 3.0 Croatia License. 21/29 Renaming files and folders Renaming a file/folder:  right-click on the file/folder and from the pop-up menu, select the Rename command. Type in the new name and press the left mouse button next to the icon or just press Enter.  select the file/folder and press F2  select the file/folder and after a few moments press the left mouse button ACTIONS WITH FILES AND FOLDERS Select files or folders Select files/folders with a left-click of your mouse.  If you want to select consecutive files/folders: o press and hold down the left mouse button, drag the mouse over the files or folders until the group of files/folders is highlighted, or o for selecting consecutive files/folders, select the first file with a left-click, hold down the Shift key and select the last consecutive file or folder with the left mouse button. All files or folders in between will be selected, or o for selecting non-consecutive files or folders, select the first file with a left-click, hold down the Ctrl key and then select other files one by one. After you have selected all of the desired files, release the Ctrl key. To select all files in a specific folder: Click Edit on toolbar and then click on Select All, or use the keyboard shortcut Ctrl + A. To copy files / folders, open Windows Explorer and:  in the navigation pane find and select the file/folder you want to copy  right-click on the file/folder and from the pop-up menu, choose Copy (Ctrl + C)  via navigation pane find and select the folder you want to copy the file or folder into  right-click on that particular folder and from the pop-up menu, choose Paste (Ctrl + V) Copying using the drag-and-drop method:  select the file/folder you want to copy  over the selected file/folder, press and hold down the left mouse button, and then press and hold down the Ctrl button  drag the mouse pointer (with file or folder) to a new location
  • 26. ITdesk.info – project of computer e-education with open access ITdesk.info is licensed under a Creative Commons Attribution- Noncommercial-No Derivative Works 3.0 Croatia License. 22/29  release the mouse button prior to releasing the Ctrl key. The file or folder will be pasted to the new location. To move files or folders open Windows Explorer and:  in the navigation pane find and select the file/folder you want to move  right-click on the file/folder and from the pop-up menu, choose Cut (Ctrl +X)  via navigation pane find and select the folder you want to copy the file or folder into  right-click on that particular folder and from the pop-up menu, choose Paste (Ctrl + V) To move files/folders via the drag-and-drop method use the same steps as for copying, except without using the Ctrl key. Delete files and folders by moving them into the Recycle Bin: via Windows Explorer:  in the navigation pane select the location the files/folders you want to delete are in, then in the right window select the files/folders you want to delete and from the Organize menu on the toolbar, choose Delete , or  press the right mouse button over the file/folder and from the pop-up menu, choose Delete  select the file/folder you want to delete and press the Delete key via the drag-and-drop method (on the Desktop):  press and hold down the left mouse button over the file/folder/shortcut you want to delete, then drag the mouse cursor to the Recycle Bin and release the mouse button To Restore deleted items from the Recycle Bin: Deleted items (files/folders/shortcuts) can be restored from the Recycle Bin to their original location on the computer prior to deletion. After opening the Recycle Bin (by double-clicking on the Recycle Bin icon) use the following commands on the toolbar: Restore all items – restores all items from the Recycle Bin to their original location on the computer Restore this item – to make this command available, first select the file/folder you want to restore
  • 27. ITdesk.info – project of computer e-education with open access ITdesk.info is licensed under a Creative Commons Attribution- Noncommercial-No Derivative Works 3.0 Croatia License. 23/29 Fig. 35. Recycle Bin Empty the Recycle Bin  via Recycle Bin window toolbar – the Empty the Recycle Bin command permanently deletes files/folders from the computer, or  right-click on the Recycle Bin icon found on the desktop and from the pop-up menu, choose the Empty Recycle Bin command SEARCHING DATA STORAGE DEVICES Use Windows Search function to find files, folders and programs. In the search parameters, you need to enter data you know about the item (name, part of the name, file type (extension), creation date etc.). You can search for a file via: • Start menu by entering part of the text in the search box. While entering the text in the Start menu, items that match the input text appear • search box found in the upper right-hand corner of any opened window Search data storage devices using the date of modification or creation, or using the size criteria: In the upper right corner of the opened window, click on the search box and add a search filter. Date modified – searches for files according to the date they were modified Size – searches for files according to their size Fig. 36 Add search filter
  • 28. ITdesk.info – project of computer e-education with open access ITdesk.info is licensed under a Creative Commons Attribution- Noncommercial-No Derivative Works 3.0 Croatia License. 24/29 Search data storage devices using wildcards (file types, or the first letter of the file name): If you cannot remember the name of the requested files, use wildcard characters: asterisk (*) and a question mark (?) instead of letters. While question mark (?) can be used as a wildcard for a single character, an asterisk (*) can be used as a wildcard for any number of characters. In the All or part of the file name field enter the extension of the document you want to find: *.txt lists all files with the extension .txt, *.bmp lists all files with the extension .bmp, etc. You can also search by using some of the file names letters: b*.* lists all files whose name begins with the letter b *t.* lists all files whose name ends with the letter t List of recently used files The required documents can often be found on the list of recently used files. It is necessary to access the Start menu and click on the arrow next to the application you have used, and the list of recently used files will be shown.
  • 29. ITdesk.info – project of computer e-education with open access ITdesk.info is licensed under a Creative Commons Attribution- Noncommercial-No Derivative Works 3.0 Croatia License. 25/29 UTILITIES WORKING WITH COMPRESSED FILES By zipping (compressing) files, space occupied by data on the disk is reduced. Programs for compressing files are also used for compressing a large number of files and folders into a single compressed file. Some of the popular programs for compressing files are WinZip, WinRar and 7- zip. Adding files to a compressed folder Fig. 37 Send to - Compressed (zipped) Folder command Right-click on a file or folder and from the pop-up menu, choose the command Send to → Compressed (zipped) Folder. At the location you are currently at, a zipped file will be created with the same name and .zip extension. If you want to add a file or a folder to the compressed file, just drag it over the compressed file using the drag-and-drop method. Fig. 38 Compressed file icon Decompressing / extracting a compressed folder Fig. 39. Extract files command Click the right mouse button over the compressed folder, select the Extract files command and specify the location you want to extract and store them in. VIRUSES AND ANTI-VIRUS SOFTWARE A virus is a malicious program with the possibility of auto-replication. It searches for files within the computer trying to infect them, and its ultimate goal is to spread to other computers. Depending on what malicious code it contains, it can cause more or less damage to your computer. Viruses are usually spread by e-mail attachments, infected files on removable media etc.
  • 30. ITdesk.info – project of computer e-education with open access ITdesk.info is licensed under a Creative Commons Attribution- Noncommercial-No Derivative Works 3.0 Croatia License. 26/29 For example, if you want to examine (scan) a device, a folder or a file by using the Avira AntiVir Personal antivirus software, you can do so by selecting it, pressing the right mouse button over it, and selecting the command Scan selected files with AntiVir from the pop-up menu. Fig. 40. Scan selected files with antivirus software Antivirus software (Norton, McAfee, Sophos etc.) is used to find and remove malicious software. Antivirus software needs to be updated regularly (it is best to set it to update automatically when connected). If you do not do so, your antivirus program becomes useless because it cannot detect new types of malware. There is generally an icon of the installed antivirus program on the taskbar and also in the notification area: right-click on this icon and you will see the option for Update.
  • 31. ITdesk.info – project of computer e-education with open access ITdesk.info is licensed under a Creative Commons Attribution- Noncommercial-No Derivative Works 3.0 Croatia License. 27/29 MANAGING PRINTING Select a printer from the list of installed printers found in the Start menu → Devices and Printers If there are multiple printers, only one is set to default which is automatically used for printing unless specified otherwise. You can change the default printer via Start menu → Devices and Printers. Select the printer you want to set as default printer and right-click on it, and from the pop-up menu, select the Set as default printer command. Install/add a new printer to the computer:  via Start menu → Devices and Printers - on the command bar, choose Add a printer  use the installation CD provided with the printer when it was purchased Print a text document from a word processing software: From the File menu, select the Print command. Once you've set the print options (number of copies, print certain pages, and so on), press the OK button. Controlling the printing process: If you want to check what is currently in print, from the Start menu select Devices and Printers and right-click on the printer icon, and from the pop-up menu, select the See what's printing command. To stop the current document from printing, right-click over the document name in queue, and from the pop-up menu, select the Pause command. To continue printing the document, choose the Resume command. If you want to stop printing the document – in the pop-up menu, click on the Cancel command and confirm the action by clicking the Yes button.
  • 32. ITdesk.info – project of computer e-education with open access ITdesk.info is licensed under a Creative Commons Attribution- Noncommercial-No Derivative Works 3.0 Croatia License. 28/29 This handbook is intended for learning in conjunction with materials published on the following links: *Notes: http://www.itdesk.info/Basic computer use notes.pdf * Video presentations showing basic computer use and managing files:  Using Windows XP - presentation 1  Using Windows XP - presentation 2  Using Windows XP - presentation 3 * Sample exam: http://www.itdesk.info/sample exam/sample exam module 2.pdf * Solution for this sample exam: http://www.itdesk.info/en/exam-solution-module-2/ *Quiz for self-evaluation:  using the computer and managing files - quiz (to open the link contained within the .PDF document, just press the left mouse button on one of links above. The web page the link points to will open in a browser that you have installed on your computer.)
  • 33. ITdesk.info – project of computer e-education with open access ITdesk.info is licensed under a Creative Commons Attribution- Noncommercial-No Derivative Works 3.0 Croatia License. 29/29 Terms of use: All freeware programs and services listed on the ITdesk Home Website at ITdesk.info are the sole property of their respective authors. Microsoft, Windows and Windowsxx are registered trademarks of the Microsoft Corporation. Other registered trademarks used on the ITdesk Home Website are the sole property of their respective owners. If you have questions about using or redistributing any program, please refer to the program license agreement (if any) or contact: info@itdesk.info. These sites contain links to other websites or resources. The ITdesk.info team is not responsible for the text and / or advertising content or products that are on these sites / resources provided, as it is not responsible for any content that is available through them, nor the possibility of the inaccuracy of the content. Use links at your own risk. Also, the ITdesk.info team does not guarantee: - that the content on this website is free from error or suitable for any purpose, - that these websites or web services will function without error or interruption, - will be appropriate for your needs - that implementing such content will not violate patents, copyrights, trademark or other rights of a third party. If you disagree with the general terms of use or if you are not satisfied with the sites we have provided, stop using this website and web services. ITdesk.info team is not responsible to you or any third party for any resulting damages, whether direct, indirect, incidental or consequential, associated with or resulting from your use or misuse of this website or web services. Although your claim may be based on warranty, contract violation or any other legal footing, regardless whether we are informed about the possibility of such damages, we shall be released from all liability. Accepting the limitations of our responsibilities is a necessary prerequisite of using these documents, web pages and web services. Please note that all mentioned software, in this or other documents published on ITdesk.info, is stated only for educational or exemplary purposes and that we, in any case or manner, do not prefer these software over other similar software mentioned or not mentioned in the materials. Any statement that would suggest that we prefer some software over others mentioned or not mentioned in the materials, will be considered as false statement. Our direct and unconditional support is only to open source software that allows users to become digitally literate, use a computer and participate in the modern information society without barriers. The website http://www.ITdesk.info was launched by a non-governmental organization "Open Society for the Idea Exchange“ in order to actively promote the human right to free access to information and the human right to education. Feel free to copy and distribute this document, provided that you do not change anything in it!
  • 34. ITdesk.info – project of computer e-education with open access ITdesk.info is licensed under a Creative Commons Attribution- Noncommercial-No Derivative Works 3.0 Croatia License. 30/29 project of computer e-education with open access Publisher: Open Society for Idea Exchange (ODRAZI), Zagreb ISBN: 978-953-56758-8-4