SlideShare a Scribd company logo
1 of 29
Introduction
The edge-avoider robot moves on a raised platform intelligently. The sensor
modules have been calibrated to detect IR rays within a particular range.The
range of these sensors can be calibrated by adjustingthe trim-pot on the sensor
chip. The range selected is the distance between the IR sensor module and the
surface of the platform. Any IR rays reflected off surfaces beyond this range are
not detected by the sensor.
As long as the IR rays emitted by the sensor module are detected, the sensors
give a HIGH output signal that is fed back into the Arduino. the robot keeps on
advancing forward. If the robot reaches the edge of the platform, the the
sensors no longer detect any IR rays. When no IR rays are detected, the sensors
give a LOW output signal to the Arduino based on which the arduino sends
signals to the motor driver to drive the DC motors as required.
The microcontroller on the Arduino stores the program based on which the
robot is controlled. If the robot is moving forward and it reaches a dead-end,
both the sensors give a LOW output. When Arduino comes to know that both
the sensors give a LOW signal, it assumes that the robot has reaches the end of
the platform and should not move further. Therefore, it instructs both the
motors to stop, and rotate in the reverse direction. That is how the robot moves
backwards.In case the left­sensor detects an edge while the right does not; the
left sensor gives a LOW output while the right sensor gives a HIGH output.
This lets Arduino know that the edge is on the left side, and the robot should
turn right. Therefore, it sends the signal to the motor-driver instructing it to
rotate the right motor in reverse direction and the left motor in the forward
direction. Thus,the motor turns right. Likewise,the robot is capable of avoiding
an edge on the right side as well by simply turning left. The L-shaped
mechano-strips help the robot detect edges well before the robot body reaches
the edges and avoids potential falls.
Hardware Required
 Ardunino Uno with ATmega 328-PU IC.-1
 Motor Driver Kit with IC L293D.-1
 DC motors.-2
 Ultrasonic Sensor(HC-SR04).-1
 IR Sensor module.-2
 Caster Wheel.-1
 Servo Motor(SG90).-1
 Wheel.-2
 Plastic Chassis.-1
 Jumper Wire(male-male,male-female,female-female)
Ardunio Uno
Arduino/GenuinoUno is a microcontrollerboard based on the ATmega328P . It
has 14 digital input/output pins (of which 6 can be used as PWM outputs), 6
analog inputs, a 16 MHz quartz crystal, a USB connection, a power jack, an
ICSP header and a reset button. It contains everything needed to support the
microcontroller; simply connect it to a computer with a USB cable or power it
with a AC-to-DC adapter or battery to get started.. You can tinker with your
UNO without worring too much about doing something wrong, worst case
scenario you can replace the chip for a few dollars and start over again.
"Uno" means one in Italian and was chosen to mark the release of Arduino
Software (IDE) 1.0. The Uno board and version 1.0 of Arduino Software (IDE)
were the reference versions of Arduino,now evolved to newer releases.The Uno
board is the first in a series of USB Arduino boards,and the reference model for
the Arduino platform; for an extensive list of current, past or outdated boards
see the Arduino index of boards.
Arduino is open-source hardware. The hardware reference designs are
distributed undera Creative Commons Attribution Share-Alike 2.5 license and
are available on the Arduino website. Layout and production files for some
versions of the hardware are also available. The source code for the IDE is
released under the GNU General Public License, version 2. Nevertheless, an
official Bill of Materials of Arduino boards has never been released by Arduino
staff.
Although the hardware and software designs are freely available undercopyleft
licenses,the developers have requested the name Arduino to be exclusive to the
official product and not be used for derived works without permission. The
official policy documenton use of the Arduino name emphasizesthat the project
is open to incorporating work by others into the official product.Several
Arduino-compatible products commercially released have avoided the project
name by using various names ending in -duino.
An early Arduino board with an RS-232 serialinterface (upper left) and an
Atmel ATmega8 microcontrollerchip (black, lowerright); the 14 digital I/O pins
are at the top, the 6 analog input pins at the lower right, and the power
connector at the lower left.
Most Arduino boards consist of an Atmel 8-bit AVR microcontroller (ATmega8,
ATmega168,ATmega328,ATmega1280,ATmega2560)with varying amounts of
flash memory, pins, and features.The 32-bit Arduino Due, based on the Atmel
SAM3X8E was introduced in 2012.The boards use single or double-row pins or
female headers that facilitate connections for programming and incorporation
into other circuits. These may connect with add-on modules termed shields.
Multiple, and possibly stacked shields may be individually addressable via an
I²C serial bus. Most boards include a 5 V linear regulator and a 16 MHz crystal
oscillator or ceramic resonator. Some designs, such as the LilyPad, run at
8 MHz and dispense with the onboard voltage regulator due to specific form-
factor restrictions.
Arduino microcontrollers are pre-programmed with a boot loaderthat simplifies
uploading of programs to the on-chip flash memory. The default bootloader of
the Arduino UNO is the optiboot bootloader.Boards are loaded with program
code via a serial connection to another computer. Some serial Arduino boards
contain a level shifter circuit to convert between RS-232 logic levels and
transistor–transistor logic (TTL) level signals. Current Arduino boards are
programmed via Universal Serial Bus (USB), implemented using USB-to-serial
adapterchips such as the FTDI FT232. Some boards, such as later-model Uno
boards,substitute the FTDI chip with a separate AVR chip containing USB-to-
serial firmware, which is reprogrammable via its own ICSP header. Other
variants, such as the Arduino Mini and the unofficial Boarduino, use a
detachable USB-to-serial adapter board or cable, Bluetooth or other methods,
when used with traditional microcontroller tools instead of the Arduino IDE,
standard AVR in-system programming (ISP) programming is used.
The Arduino board exposes most of the microcontroller's I/O pins for use by
other circuits. The Diecimila,Duemilanove, and current Uno provide 14 digital
I/O pins, six of which can produce pulse-width modulated signals, and six
analoginputs,which can also be used as six digital I/O pins. These pins are on
the top of the board, via female 0.1-inch (2.54 mm) headers. Several plug-in
application shields are also commercially available. The Arduino Nano, and
Arduino-compatibleBare Bones Boardand Boarduinoboards may provide male
header pins on the underside of the board that can plug into solderless
breadboards.
Many Arduino-compatible and Arduino-derived boards exist. Some are
functionallyequivalent to an Arduino and can be used interchangeably. Many
enhance the basic Arduino by adding output drivers, often for use in school-
level education, to simplify making buggies and small robots. Others are
electrically equivalent but change the form factor, sometimes retaining
compatibility with shields, sometimes not.
IR Sensor
An infrared sensor is an electronic device, that emits in order to sense some
aspects of the surroundings.An IR sensor can measure the heat of an object as
well as detects the motion.These types of sensors measures only infrared
radiation,rather than emitting it that is called as a passive IR sensor. Usually
in the infrared spectrum, all the objects radiate some form of thermal
radiations. These types of radiations are invisible to our eyes, that can be
detected by an infrared sensor.The emitter is simply an IR LED (Light
Emitting Diode)and the detector is simply an IR photodiode which is sensitive
to IR light of the same wavelength as that emitted by the IR LED. When IR
light falls on the photodiode,The resistances and these output voltages, change
in proportion to the magnitude of the IR light received.
IR Sensor Circuit Diagram and Working Principle
An infrared sensor circuit is one of the basic and popular sensor module in
an electronic device. This sensor is analogous to human’s visionary senses,
which can be used to detect obstacles and it is one of the common applications
in real time.This circuit comprises of the following components
LM358 IC 2 IR transmitter and receiver pair
Resistors of the range of kilo ohms.
Variable resistors.
LED (Light Emitting Diode).
IR Sensor Circuit.
In this project, the transmitter section includes an IR sensor, which transmits
continuous IR rays to be received by an IR receiver module. An IR output
terminal of the receiver varies depending upon its receiving of IR rays. Since
this variation cannot be analyzed as such, therefore this output can be fed to a
comparatorcircuit. Here an operational amplifier (op-amp)of LM 339 is used as
comparator circuit.
When the IR receiver does not receive a signal, the potential at the inverting
input goes higher than that non-inverting input of the comparator IC (LM339).
Thus the output of the comparator goes low, but the LED does not glow. When
the IR receiver module receives signal to the potential at the inverting input
goes low. Thus the output of the comparator (LM 339) goes high and the LED
starts glowing. Resistor R1 (100 ), R2 (10k ) and R3 (330) are used to ensure
that minimum 10 mA current passes through the IR LED Devices like
Photodiode and normal LEDs respectively. Resistor VR2 (preset=5k ) is used to
adjust the output terminals. Resistor VR1 (preset=10k ) is used to set the
sensitivity of the circuit Diagram. Read more about IR sensors.
Ultrasonic Sensor
As the name indicates,ultrasonicsensors measuredistance by using ultrasonic
waves.
The sensorhead emits an ultrasonicwave and receives the wave reflected back
from the target. Ultrasonic Sensors measure the distance to the target by
measuring the time between the emission and reception.
An optical sensorhas a transmitter and receiver, whereas an ultrasonic sensor
uses a single ultrasonicelementfor both emission and reception. In a reflective
model ultrasonicsensor,a single oscillator emits and receives ultrasonic waves
alternately. This enables miniaturization of the sensor head.
The distance can be calculated with the following formula:
Distance L = 1/2 × T × C
where L is the distance,T is the time between the emission and reception, and
C is the sonicspeed.(The value is multiplied by 1/2 because T is the time for go-
and-return distance.)
Servo Motor(SG 90)
A servomotor is a rotary actuator or linear actuator that allows for precise
control of angularor linear position, velocity and acceleration.[1] It consists of a
suitable motor coupled to a sensor for position feedback. It also requires a
relatively sophisticated controller, often a dedicated module designed
specifically for use with servomotors.
Servomotors are not a specific class of motor although the term servomotor is
often used to refer to a motor suitable for use in a closed-loop controlsystem.
Servomotors are used in applications such as robotics, CNC
machinery or automated manufacturing.
A servomotor is a closed-loop servomechanism that uses position feedback to
control its motion and final position. The input to its control is a signal (either
analogueor digital) representing the position commanded for the output shaft.
The motor is paired with some type of encoder to provide position and speed
feedback. In the simplest case, only the position is measured. The measured
position of the outputis compared to the command position, the external input
to the controller. If the output position differs from that required, an error
signal is generated which then causes the motor to rotate in either direction, as
needed to bring the output shaft to the appropriate position. As the positions
approach, the error signal reduces to zero and the motor stops.
The very simplest servomotors use position-only sensing via
a potentiometerand bang-bangcontrol of their motor; the motor always rotates
at full speed (or is stopped). This type of servomotor is not widely used in
industrial motion control, but it forms the basis of the simple and
cheap servosused for radio-controlled models.
More sophisticated servomotors use optical rotary encoders to measure the
speed of the output shaft[2] and a variable-speed drive to control the motor
speed.[3] Both of these enhancements, usually in combination with a PID
control algorithm, allow the servomotor to be brought to its commanded
position more quickly and more precisely, with less overshooting.
A servomotorconsumes poweras it rotates to the commandedposition but then
the servomotorrests. Stepper motors continue to consume power to lock in and
hold the commanded position.
Servomotors are generally used as a high-performance alternative to the
stepper motor. Steppermotors have some inherentabilityto control position,as
they have built-in output steps. This often allows them to be used as an open-
loop position control, without any feedback encoder, as their drive signal
specifies the number of steps of movement to rotate, but for this the controller
needs to 'know' the position of the stepper motor on power up. Therefore, on
first power up, the controllerwill have to activate the stepper motor and turn it
to a known position, e.g. until it activates an end limit switch. This can be
observed when switching on an inkjet printer; the controller will move the ink
jet carrier to the extreme left and right to establish the end positions. A
servomotor will immediately turn to whatever angle the controller instructs it
to, regardless of the initial position at power up.
The lack of feedback of a stepper motor limits its performance, as the stepper
motor can only drive a load that is well within its capacity, otherwise missed
steps underload may lead to positioning errors and the system may have to be
restarted or recalibrated. The encoder and controller of a servomotor are an
additional cost, but they optimise the performance of the overall system (for all
of speed, power and accuracy) relative to the capacity of the basic motor. With
larger systems, where a powerful motor represents an increasing proportion of
the system cost, servomotors have the advantage.
There has been increasing popularity in closed loop stepper motors in recent
years. They act like servomotors but have some differences in their software
control to get smooth motion. The top 3 manufacturers of closed loop stepper
motor systems employ magneticencoders as their feedback device of choice due
to low cost and resistance to vibration.[citation needed] The main benefit of a closed
loop stepper motor is the cost to performance ratio. There is also no need to
tune the PID controller on a closed loop stepper system.
Motor Driver L293D
The L293 is an integrated circuit motor driver that can be used for
simultaneous, bi-directional control of two small motors. Small means small.
The L293 is limited to 600 mA, but in reality can only handle much small
currents unless you have done some serious heat sinking to keep the case
temperature down.Unsure aboutwhetherthe L293 will work with your motor?
Hookup the circuit and run your motor while keepingyour finger on the chip. If
it gets too hot to touch, you can't use it with your motor.
Construction &Working
The body of the robot consisting of the chassis, the motor brackets and the
castor wheel holder are easily available from the botkart website.
The chassis holds all the components of the robot such as sensors, servomotor,
breadboard and the Arduino board. Other parts of the robot body such as the
motor bracket, the castor wheel holder and sensor holder are also fitted onto
the chassis.
The motor bracket holds the BO motors (or DC motors) in place. The motor
brackets has holes for the motor shaft and the binding screws that help in
proper positioning of the motors. They also prevent the motors from wobbling.
The castor wheel holder is used to attach a castor wheel to the robot
body. The wheel holder has holes like the ones found on the castor wheel
body.On aligningthe holes on the wheel holder and the castor wheel body, the
two components can be bound together by means of screws and nuts or even
double tape.
DC motors
The DC motors can easily operate at a voltage of 9 - 12 V. Their direction of is
controlled by means of an L293D motor driver. These motors are supplied
power through a pin on the L293D motor driver.
L293D motor driver
The L293D is a small motor driver IC that can be used to control two DC
motors. The motor driver houses two H-bridge circuits, each controlling one DC
motor. The L293D can be powered by the 5V supply from the Arduino pin.
Alternatively, you can use an external power supply to operate this motor
driver.
IR Sensor Module
The IR sensormodule consists of an emitter that can emit infra-red rays and a
receiver that receives the emitted infra-red rays that have been reflected off
objects and surfaces.The sensormodule consists of three terminals namely the
Vcc, the GND and the Vout. The Vcc terminal is used to give power supply to
the IR sensor module. The wire from the GND terminal is connected to the
common ground in our circuit. The wire coming out of the Vout becomes the
signal wire that gives an input to the Arduino. On detection of IR rays that are
being reflected off a surface, the VOUT terminal goes HIGH, else it remains
LOW. The IR sensor module is also powered using the 5V supply from the
Arduino. The IR sensor module can be connected to the Arduino by means of
jumper wires. Students can use any sort of jumper-wire to make these
connections. However, for the sake of understanding, we use male-female
jumper wires for this purpose.
Step by Step guide :
1) Construction of Robot Body
To construct the robot body, keep the chassis, the motor brackets, the motors,
the wheels,the castor wheels and the castor wheel holder at hand. Then follow
the following steps :
Take the chassis and attach the motor clamp to the chassis as shown in the
figure below:
2. Use a spanner to hold the nut in place and tighten the screw by using a
screw driver.
3. Likewise,fix the other motor clamp. Our assemblyshould look something
like this :
Attach the castor wheel to the castor wheel clamp as shown and then fix the
clamp to the chassis using nuts and bolts. Use the technique shownin step 2 for
the purpose of tightening the screws.
5. Now, take a DC motor and remove the hex-nut from it.
Insert the shaft of the DC motor into the center-hole of the motor bracket till
the surface of the motor housing touches the surface of the motor bracket.
Now tighten the hex-nut around the thread on the motor till the motor bracket
binds the motor.
Repeat the steps 5 - 7 for other DC motor.
Now attach the wheel to the motor shaft by inserting the motor-shaft into
opening on the wheel.
Align the holes on the shaft and the cylindrical surface of the opening. Insert a
screw into this arrangement and tighten it using a screwdriver.
Use a spanner and screwdriver to make sure that all joints are tight enough
and do not wobble.
The motors will rest beneath the chassis as shown below:
If all the instructions have been followed correctly, the robot body is going to
look like this
Once the body of the robotis ready, we need to mountother parts and make the
necessary connections.
2) Mounting other components
Take the Arduino Uno board and stick a piece of double sided tape on its back.
Peel the cover off the other side of double tape and mount the arduino board on
the chassis with a little pressure to make sure the double sided-tape binds it to
the chassis
3. Mount a half-sized breadboard on the chassis and fix it by double sided
tape.
Take the L293D motor drive and plug it onto the half-sized breadboard as
shown in the figure below:
Now take an L-shaped mechano-strip and attach the IR Sensor Module using
by means of insertinga screw through both the holes of both the components as
shown in the figure below :
Repeat step 5 with the other sensor and the mechano strip.
Mount the assemblies developed in step 5 & 6 onto the robot body and bind
them by means of screws and nuts as shown in the figure below:
Once you have followed all the steps mentioned in this section. Our robot
assembly should look like this:
In the next part we will learn how to make all the necessary connections for
correct functioning of the robot.
3) Fritzing Diagram(s)
The Fritzing sketch depicting the connections between the electronics
components is given below:
Observe the up-close schematic of that component, the up-close picture of
Arduino and breadboard
Compare them to the overall schematic
to get a clear idea about the wiring.
4) Schematics/Connections
The figure below illustrates the L293D schematic.Read the points mentioned in
this section and refer to both,the schematic and the fritzing diagram to make
the connections .
It can be observed that the L293D motor driver has 16 pins. The pins of this
motor driver that need to be connecting with power supplies, motors and the
Arduino have also been labelled.Now, we are going to follow the steps given
below to interface our motor and the motor drivers with the Arduino.
Connect pin 2 of L293D to the digital pin 9 of the Arduino board by ajumper
wire.
Use jumperwires to connect pin 7 to Arduino’s digital pin 8, pin 15 to Arduino’s
digital pin 11 and pin 10 to Arduino’s digital pin 10 respectively.
Pin 3 and Pin 6 of the motor Driver are connected to two terminals of the left
DC motor.
Connectthe wire coming from the + terminal of the left DC motor to pin 3. Also
connect the other wire coming from the DC motor to pin 6.
Also note that, pin 14 and pin 11 of L293D are connected to the terminals of the
right DC motor.
Connect the wire coming from the + terminal of the right DC motor to pin 14.
Also connect the other wire coming from this DC motor to pin 11.
Connect pin 16 of L293D to the 5V supply pin on the Arduino.
Use jumperwires to connect Pins 4,5,12 and 13 to each other. These pins serve
as the ground connection.
Connect this ground of L293D to the Arduino ground.
Connect pin 8 of the battery to an external power as shown in the fritzing
sketch. The negative terminal of the batteries must also be connected to the
ground.
5) IR Sensor Module connections
The IR Sensor Module has three terminals : the supply terminal (VCC), the
ground terminal (GND) and the output (VOUT) terminal. On detection of IR
rays that are being reflected off a surface, the VOUT terminal goes HIGH, else
it remains LOW.
Connectthe VCC terminals of both the left and right IR sensors to the common
point of Arduino’s 5V supply on the half­sized breadboard.
Connectthe GND terminal of both the left and right IR sensors to the common
point of Arduino’s GND.
Connect the VOUT terminal of the left sensor to the digital pin 3 of the
Arduino.
Connect the VOUT terminal of the left sensor to the digital pin 6 of the
Arduino.
6) External Supply/Batteries connections
Mount the 12V battery at the back of the chassis and use double-sided tape to
for the purpose of adhesion
From the positive terminal for 12V supply on the breadboard, connect a jumper
wire to the Vin pin of the Arduino. This will power the Arduino when it is not
powered via USB connection.
Connect the negative terminal of 12V battery to the GND terminal of Arduino
at a common node on the breadboard.
This completes the assembly of the Line Follower. Now, the robot needs to be
coded so that it can avoid obstacles should it detect any in its path.
Applications
 Obstacle avoidingrobots can be used in almost all mobile robotnavigation
systems.
 Theycan be used for household worklike automaticvacuum cleaning.
 They can also be used in dangerous environments, where human
penetration could be fatal.
Conclusion
By presentingthe idea of remote innovation in the field of correspondence we
can make our correspondence more productive and speedier, with more
noteworthy proficiency we can show the messages and with less blunders
and support. This model can be utilized effectively as a part of foundations
like chain eateries wherein the requestand exceptional rebates can be shown
at all branches all the while,in universities wherein understudies and staffs
can be educated at the same time in the blink of an eye. It can be set up at
open transport places like railroads,transport station,and airplane terminal
furthermore at roadside for movement control and in crisis circumstances, it
is cost proficient framework and simple to handle.
Content
Abstract.
Introduction.
Hardware Required.
Ardunio Uno.
IR Sensor.
Ultrasonic Sensor.
Servo Motor
Motor Driver.
Construction &Working.
Application.
Conclusion.
References.
A MINOR PROJECT
On
OBSTACLE AND EDGE DETECTOR
Submitted in partial fulfillment of the requirement for the Awards of
The Degree of Bachelor of Technology
In
Electronics & Communication Engineering
Submitted by-
VERMA SAHIL VINOD KUMAR-1405431105
HIMANSHU KUMAR SINGH- 1405431033
Babu Banarasi Das National Institute of Technology &Management
(Affiliated to Dr. A.P.J Abdul Kalam University, Lucknow)
SESSION (2017-2018)
ACKNOWLEDGEMENT
It is not possible to prepare a project report without the assistance and
encouragement of other people. This one is certainly no exception.
On the very outset of this report, we would like to extend our sincere and
heartfelt obligation towards all the personages who have helped us in this
endeavor.Withouttheir active guidance,help, co-operation and encouragement,
we would not have made headway in the project.
We are extremely thankful and pay our gratitude to our faculty for their
valuable guidance and support on completion of this project in it’s presently.
We extend our gratitude to our college for giving us this opportunity.
We also acknowledge with a deep sense of reverence, our gratitude towards our
parents and members of our family, who has always supported us morally as
well as economically.
At last but not least gratitude goes to all of our friends who directly or
indirectly helped us to complete this project report.
Any omission in this brief acknowledgement does not mean lack of gratitude.
Thanking you,
HIMANSHU KUMAR SINGH.
VERMA SAHIL VINOD KUMAR.
CERTIFICATE
This is to certify that HIMANSHU KUMAR SINGH and
VERMA SAHIL VINOD KUMAR, B.Tech 4th year, Electronics &
Communication Engineering, B.B.D.N.I.T.M., Lucknow have made
their Mini Project of 7th semester on “OBSTACLE AND EDGE
DETECTOR”.
During the project they were regular and have completed the project
sincerely and successfully.
I wish them good luck and success in future.
Prof. SHAILENDRA TAHILYANI
HOD
(Dept. of EC Engineering)
References
 http://www.eisystems.in/
 https://www.arduino.cc/
 https://onlinecourses.nptel.ac.in/explorer
 https://www.tutorialspoint.com/arduino/
 https://programmingelectronics.com/tutorial-3-arduino-ide-and-sketch-
overview/
ABSTRACT
The edge and obstacle avoiding robot is a differential drive based
robot that is made to traverse smooth surface and avoid any edges
and obstacle that come in its way. For the edge and obstacle avoider
to locomote about a surface and obstacle, the robot has been powered
by two DC motors.
The robot makes use of an Arduino Uno an Atmega 328-PU
based microcontroller board as its brains.
The robot has been equipped with two IR sensor Modules.
These sensor modules are capable of both, emitting infrared rays and
detecting infrared rays and also there is ultrasonic sensors which has
transmitting and receiving terminals, based on sound speed and time
to calculate distance and avoid obstacle. In addition to that, an L293D
motor driver has been employed to control the DC motors separately.
Both the motordriver and sensor modules are interfaced together
though the terminals on the Arduino board. A 9V Lipo battery has
been included so as to power the Arduino board and the DC motors.

More Related Content

What's hot

LINE FOLLOWER ROBOT
LINE FOLLOWER ROBOTLINE FOLLOWER ROBOT
LINE FOLLOWER ROBOTMohit Kumar
 
Obstacle Avoidance Robot
Obstacle Avoidance RobotObstacle Avoidance Robot
Obstacle Avoidance RobotRatan Srikanth
 
Obstacle detection Robot using Ultrasonic Sensor and Arduino UNO
Obstacle detection Robot using Ultrasonic Sensor and Arduino UNOObstacle detection Robot using Ultrasonic Sensor and Arduino UNO
Obstacle detection Robot using Ultrasonic Sensor and Arduino UNOSanjay Kumar
 
Gesture control robot using by Ardiuno
Gesture control robot using by ArdiunoGesture control robot using by Ardiuno
Gesture control robot using by ArdiunoSudhir Kumar
 
Automatized railway gate controller
Automatized railway gate controllerAutomatized railway gate controller
Automatized railway gate controllerAakash Varma
 
Line Following Robot
Line Following RobotLine Following Robot
Line Following RobotSelf-employed
 
Line follower robot 5th semster
Line follower robot 5th semsterLine follower robot 5th semster
Line follower robot 5th semsteraqeel shoukat
 
Final report obstacle avoiding roboat
Final report obstacle avoiding roboatFinal report obstacle avoiding roboat
Final report obstacle avoiding roboatShubham Thakur
 
Fire fighting robot using arduino
Fire fighting robot using arduinoFire fighting robot using arduino
Fire fighting robot using arduinoNiranjan Kumar
 
Metal detector robot
Metal detector robotMetal detector robot
Metal detector robotf114n
 
Automatic railway gate control using arduino uno
Automatic railway gate control using arduino unoAutomatic railway gate control using arduino uno
Automatic railway gate control using arduino unoselvalakshmi24
 
Line Following Robot
Line Following RobotLine Following Robot
Line Following RobotFarooq Saeed
 
Gesture Control Robot
Gesture Control RobotGesture Control Robot
Gesture Control Robotnikhilsaini25
 
Line follower(theory + coding + videos)
Line follower(theory + coding + videos)Line follower(theory + coding + videos)
Line follower(theory + coding + videos)Yash Patel
 
Light Automation System Using Bidirectional Visitor Counter
Light Automation System Using Bidirectional Visitor CounterLight Automation System Using Bidirectional Visitor Counter
Light Automation System Using Bidirectional Visitor CounterRituraj Singh
 
Laser light security system
Laser light security systemLaser light security system
Laser light security systemMehenaz Sorna
 
How to make a Line Follower Robot
How to make a Line Follower RobotHow to make a Line Follower Robot
How to make a Line Follower RobotroboVITics club
 

What's hot (20)

LINE FOLLOWER ROBOT
LINE FOLLOWER ROBOTLINE FOLLOWER ROBOT
LINE FOLLOWER ROBOT
 
Obstacle avoiding robot(Lab report)
Obstacle  avoiding  robot(Lab report)Obstacle  avoiding  robot(Lab report)
Obstacle avoiding robot(Lab report)
 
Obstacle avoiding robot
Obstacle avoiding robotObstacle avoiding robot
Obstacle avoiding robot
 
Obstacle Avoidance Robot
Obstacle Avoidance RobotObstacle Avoidance Robot
Obstacle Avoidance Robot
 
Obstacle detection Robot using Ultrasonic Sensor and Arduino UNO
Obstacle detection Robot using Ultrasonic Sensor and Arduino UNOObstacle detection Robot using Ultrasonic Sensor and Arduino UNO
Obstacle detection Robot using Ultrasonic Sensor and Arduino UNO
 
Gesture control robot using by Ardiuno
Gesture control robot using by ArdiunoGesture control robot using by Ardiuno
Gesture control robot using by Ardiuno
 
Automatized railway gate controller
Automatized railway gate controllerAutomatized railway gate controller
Automatized railway gate controller
 
Line Following Robot
Line Following RobotLine Following Robot
Line Following Robot
 
Line follower robot 5th semster
Line follower robot 5th semsterLine follower robot 5th semster
Line follower robot 5th semster
 
Final report obstacle avoiding roboat
Final report obstacle avoiding roboatFinal report obstacle avoiding roboat
Final report obstacle avoiding roboat
 
Fire fighting robot using arduino
Fire fighting robot using arduinoFire fighting robot using arduino
Fire fighting robot using arduino
 
Metal detector robot
Metal detector robotMetal detector robot
Metal detector robot
 
Line Follower Robot
Line Follower RobotLine Follower Robot
Line Follower Robot
 
Automatic railway gate control using arduino uno
Automatic railway gate control using arduino unoAutomatic railway gate control using arduino uno
Automatic railway gate control using arduino uno
 
Line Following Robot
Line Following RobotLine Following Robot
Line Following Robot
 
Gesture Control Robot
Gesture Control RobotGesture Control Robot
Gesture Control Robot
 
Line follower(theory + coding + videos)
Line follower(theory + coding + videos)Line follower(theory + coding + videos)
Line follower(theory + coding + videos)
 
Light Automation System Using Bidirectional Visitor Counter
Light Automation System Using Bidirectional Visitor CounterLight Automation System Using Bidirectional Visitor Counter
Light Automation System Using Bidirectional Visitor Counter
 
Laser light security system
Laser light security systemLaser light security system
Laser light security system
 
How to make a Line Follower Robot
How to make a Line Follower RobotHow to make a Line Follower Robot
How to make a Line Follower Robot
 

Similar to Obstacle and edge detector report.

Arduino with brief description of sensorsppt.pptx
Arduino with brief description of sensorsppt.pptxArduino with brief description of sensorsppt.pptx
Arduino with brief description of sensorsppt.pptxBhuvanaN12
 
Introduction to Arduino 16822775 (2).ppt
Introduction to Arduino 16822775 (2).pptIntroduction to Arduino 16822775 (2).ppt
Introduction to Arduino 16822775 (2).pptansariparveen06
 
Chapter 5 Arduino Microcontroller Systems .pptx
Chapter 5 Arduino Microcontroller Systems .pptxChapter 5 Arduino Microcontroller Systems .pptx
Chapter 5 Arduino Microcontroller Systems .pptxkhgh7
 
Introduction to arduino ppt main
Introduction to  arduino ppt mainIntroduction to  arduino ppt main
Introduction to arduino ppt maineddy royappa
 
Robotics and Automation Using Arduino
Robotics and Automation Using ArduinoRobotics and Automation Using Arduino
Robotics and Automation Using ArduinoABHISHEKJAISWAL282
 
Arduino embedded systems and advanced robotics
Arduino embedded systems and advanced roboticsArduino embedded systems and advanced robotics
Arduino embedded systems and advanced roboticsShubham Bhattacharya
 
1.Arduino Ecosystem.pptx
1.Arduino Ecosystem.pptx1.Arduino Ecosystem.pptx
1.Arduino Ecosystem.pptxMohamed Essam
 
TECH TALK-4TH SEM.pptx.which is about the arduino uno types and uses.
TECH TALK-4TH  SEM.pptx.which is about the arduino uno types and uses.TECH TALK-4TH  SEM.pptx.which is about the arduino uno types and uses.
TECH TALK-4TH SEM.pptx.which is about the arduino uno types and uses.gokulprasanna4
 
TECH TALK-4TH SEM.pptx the arduino haha
TECH TALK-4TH  SEM.pptx the arduino hahaTECH TALK-4TH  SEM.pptx the arduino haha
TECH TALK-4TH SEM.pptx the arduino hahagokulprasanna4
 
Ball following Robot using ESP32-cam & Arduino UNO
Ball following Robot using ESP32-cam & Arduino UNOBall following Robot using ESP32-cam & Arduino UNO
Ball following Robot using ESP32-cam & Arduino UNOIRJET Journal
 
Office automation system using arduino
Office automation system using arduinoOffice automation system using arduino
Office automation system using arduinoAshfaqul Haque John
 
IRJET- Automatic Bin Bot- Garbage Collecting System in Residential Areas and ...
IRJET- Automatic Bin Bot- Garbage Collecting System in Residential Areas and ...IRJET- Automatic Bin Bot- Garbage Collecting System in Residential Areas and ...
IRJET- Automatic Bin Bot- Garbage Collecting System in Residential Areas and ...IRJET Journal
 
Basics of open source embedded development board (
Basics of open source embedded development board (Basics of open source embedded development board (
Basics of open source embedded development board (Dhruwank Vankawala
 
Basics of open source embedded development board (
Basics of open source embedded development board (Basics of open source embedded development board (
Basics of open source embedded development board (Dhruwank Vankawala
 
An Introduction To Arduino.pptx
An Introduction To Arduino.pptxAn Introduction To Arduino.pptx
An Introduction To Arduino.pptxRoboDJ
 

Similar to Obstacle and edge detector report. (20)

Neno Project.docx
Neno Project.docxNeno Project.docx
Neno Project.docx
 
Arduino with brief description of sensorsppt.pptx
Arduino with brief description of sensorsppt.pptxArduino with brief description of sensorsppt.pptx
Arduino with brief description of sensorsppt.pptx
 
Introduction to Arduino 16822775 (2).ppt
Introduction to Arduino 16822775 (2).pptIntroduction to Arduino 16822775 (2).ppt
Introduction to Arduino 16822775 (2).ppt
 
Chapter 5 Arduino Microcontroller Systems .pptx
Chapter 5 Arduino Microcontroller Systems .pptxChapter 5 Arduino Microcontroller Systems .pptx
Chapter 5 Arduino Microcontroller Systems .pptx
 
Introduction to arduino ppt main
Introduction to  arduino ppt mainIntroduction to  arduino ppt main
Introduction to arduino ppt main
 
Smart Blind stick by using arduino uno and sensor
 Smart Blind stick  by using arduino  uno  and sensor Smart Blind stick  by using arduino  uno  and sensor
Smart Blind stick by using arduino uno and sensor
 
ir sensor.docx
ir sensor.docxir sensor.docx
ir sensor.docx
 
Robotics and Automation Using Arduino
Robotics and Automation Using ArduinoRobotics and Automation Using Arduino
Robotics and Automation Using Arduino
 
Animatronic hand controller
Animatronic hand controllerAnimatronic hand controller
Animatronic hand controller
 
Arduino embedded systems and advanced robotics
Arduino embedded systems and advanced roboticsArduino embedded systems and advanced robotics
Arduino embedded systems and advanced robotics
 
1.Arduino Ecosystem.pptx
1.Arduino Ecosystem.pptx1.Arduino Ecosystem.pptx
1.Arduino Ecosystem.pptx
 
TECH TALK-4TH SEM.pptx.which is about the arduino uno types and uses.
TECH TALK-4TH  SEM.pptx.which is about the arduino uno types and uses.TECH TALK-4TH  SEM.pptx.which is about the arduino uno types and uses.
TECH TALK-4TH SEM.pptx.which is about the arduino uno types and uses.
 
TECH TALK-4TH SEM.pptx the arduino haha
TECH TALK-4TH  SEM.pptx the arduino hahaTECH TALK-4TH  SEM.pptx the arduino haha
TECH TALK-4TH SEM.pptx the arduino haha
 
Ball following Robot using ESP32-cam & Arduino UNO
Ball following Robot using ESP32-cam & Arduino UNOBall following Robot using ESP32-cam & Arduino UNO
Ball following Robot using ESP32-cam & Arduino UNO
 
Office automation system using arduino
Office automation system using arduinoOffice automation system using arduino
Office automation system using arduino
 
IRJET- Automatic Bin Bot- Garbage Collecting System in Residential Areas and ...
IRJET- Automatic Bin Bot- Garbage Collecting System in Residential Areas and ...IRJET- Automatic Bin Bot- Garbage Collecting System in Residential Areas and ...
IRJET- Automatic Bin Bot- Garbage Collecting System in Residential Areas and ...
 
PPT ON Arduino
PPT ON Arduino PPT ON Arduino
PPT ON Arduino
 
Basics of open source embedded development board (
Basics of open source embedded development board (Basics of open source embedded development board (
Basics of open source embedded development board (
 
Basics of open source embedded development board (
Basics of open source embedded development board (Basics of open source embedded development board (
Basics of open source embedded development board (
 
An Introduction To Arduino.pptx
An Introduction To Arduino.pptxAn Introduction To Arduino.pptx
An Introduction To Arduino.pptx
 

Recently uploaded

HARDNESS, FRACTURE TOUGHNESS AND STRENGTH OF CERAMICS
HARDNESS, FRACTURE TOUGHNESS AND STRENGTH OF CERAMICSHARDNESS, FRACTURE TOUGHNESS AND STRENGTH OF CERAMICS
HARDNESS, FRACTURE TOUGHNESS AND STRENGTH OF CERAMICSRajkumarAkumalla
 
Extrusion Processes and Their Limitations
Extrusion Processes and Their LimitationsExtrusion Processes and Their Limitations
Extrusion Processes and Their Limitations120cr0395
 
main PPT.pptx of girls hostel security using rfid
main PPT.pptx of girls hostel security using rfidmain PPT.pptx of girls hostel security using rfid
main PPT.pptx of girls hostel security using rfidNikhilNagaraju
 
MANUFACTURING PROCESS-II UNIT-2 LATHE MACHINE
MANUFACTURING PROCESS-II UNIT-2 LATHE MACHINEMANUFACTURING PROCESS-II UNIT-2 LATHE MACHINE
MANUFACTURING PROCESS-II UNIT-2 LATHE MACHINESIVASHANKAR N
 
Introduction to IEEE STANDARDS and its different types.pptx
Introduction to IEEE STANDARDS and its different types.pptxIntroduction to IEEE STANDARDS and its different types.pptx
Introduction to IEEE STANDARDS and its different types.pptxupamatechverse
 
Call Girls Service Nagpur Tanvi Call 7001035870 Meet With Nagpur Escorts
Call Girls Service Nagpur Tanvi Call 7001035870 Meet With Nagpur EscortsCall Girls Service Nagpur Tanvi Call 7001035870 Meet With Nagpur Escorts
Call Girls Service Nagpur Tanvi Call 7001035870 Meet With Nagpur EscortsCall Girls in Nagpur High Profile
 
MANUFACTURING PROCESS-II UNIT-5 NC MACHINE TOOLS
MANUFACTURING PROCESS-II UNIT-5 NC MACHINE TOOLSMANUFACTURING PROCESS-II UNIT-5 NC MACHINE TOOLS
MANUFACTURING PROCESS-II UNIT-5 NC MACHINE TOOLSSIVASHANKAR N
 
(ANJALI) Dange Chowk Call Girls Just Call 7001035870 [ Cash on Delivery ] Pun...
(ANJALI) Dange Chowk Call Girls Just Call 7001035870 [ Cash on Delivery ] Pun...(ANJALI) Dange Chowk Call Girls Just Call 7001035870 [ Cash on Delivery ] Pun...
(ANJALI) Dange Chowk Call Girls Just Call 7001035870 [ Cash on Delivery ] Pun...ranjana rawat
 
(SHREYA) Chakan Call Girls Just Call 7001035870 [ Cash on Delivery ] Pune Esc...
(SHREYA) Chakan Call Girls Just Call 7001035870 [ Cash on Delivery ] Pune Esc...(SHREYA) Chakan Call Girls Just Call 7001035870 [ Cash on Delivery ] Pune Esc...
(SHREYA) Chakan Call Girls Just Call 7001035870 [ Cash on Delivery ] Pune Esc...ranjana rawat
 
Decoding Kotlin - Your guide to solving the mysterious in Kotlin.pptx
Decoding Kotlin - Your guide to solving the mysterious in Kotlin.pptxDecoding Kotlin - Your guide to solving the mysterious in Kotlin.pptx
Decoding Kotlin - Your guide to solving the mysterious in Kotlin.pptxJoão Esperancinha
 
OSVC_Meta-Data based Simulation Automation to overcome Verification Challenge...
OSVC_Meta-Data based Simulation Automation to overcome Verification Challenge...OSVC_Meta-Data based Simulation Automation to overcome Verification Challenge...
OSVC_Meta-Data based Simulation Automation to overcome Verification Challenge...Soham Mondal
 
Porous Ceramics seminar and technical writing
Porous Ceramics seminar and technical writingPorous Ceramics seminar and technical writing
Porous Ceramics seminar and technical writingrakeshbaidya232001
 
What are the advantages and disadvantages of membrane structures.pptx
What are the advantages and disadvantages of membrane structures.pptxWhat are the advantages and disadvantages of membrane structures.pptx
What are the advantages and disadvantages of membrane structures.pptxwendy cai
 
Gfe Mayur Vihar Call Girls Service WhatsApp -> 9999965857 Available 24x7 ^ De...
Gfe Mayur Vihar Call Girls Service WhatsApp -> 9999965857 Available 24x7 ^ De...Gfe Mayur Vihar Call Girls Service WhatsApp -> 9999965857 Available 24x7 ^ De...
Gfe Mayur Vihar Call Girls Service WhatsApp -> 9999965857 Available 24x7 ^ De...srsj9000
 
HARMONY IN THE NATURE AND EXISTENCE - Unit-IV
HARMONY IN THE NATURE AND EXISTENCE - Unit-IVHARMONY IN THE NATURE AND EXISTENCE - Unit-IV
HARMONY IN THE NATURE AND EXISTENCE - Unit-IVRajaP95
 
Software Development Life Cycle By Team Orange (Dept. of Pharmacy)
Software Development Life Cycle By  Team Orange (Dept. of Pharmacy)Software Development Life Cycle By  Team Orange (Dept. of Pharmacy)
Software Development Life Cycle By Team Orange (Dept. of Pharmacy)Suman Mia
 
Microscopic Analysis of Ceramic Materials.pptx
Microscopic Analysis of Ceramic Materials.pptxMicroscopic Analysis of Ceramic Materials.pptx
Microscopic Analysis of Ceramic Materials.pptxpurnimasatapathy1234
 
Call Girls Delhi {Jodhpur} 9711199012 high profile service
Call Girls Delhi {Jodhpur} 9711199012 high profile serviceCall Girls Delhi {Jodhpur} 9711199012 high profile service
Call Girls Delhi {Jodhpur} 9711199012 high profile servicerehmti665
 

Recently uploaded (20)

HARDNESS, FRACTURE TOUGHNESS AND STRENGTH OF CERAMICS
HARDNESS, FRACTURE TOUGHNESS AND STRENGTH OF CERAMICSHARDNESS, FRACTURE TOUGHNESS AND STRENGTH OF CERAMICS
HARDNESS, FRACTURE TOUGHNESS AND STRENGTH OF CERAMICS
 
Extrusion Processes and Their Limitations
Extrusion Processes and Their LimitationsExtrusion Processes and Their Limitations
Extrusion Processes and Their Limitations
 
main PPT.pptx of girls hostel security using rfid
main PPT.pptx of girls hostel security using rfidmain PPT.pptx of girls hostel security using rfid
main PPT.pptx of girls hostel security using rfid
 
MANUFACTURING PROCESS-II UNIT-2 LATHE MACHINE
MANUFACTURING PROCESS-II UNIT-2 LATHE MACHINEMANUFACTURING PROCESS-II UNIT-2 LATHE MACHINE
MANUFACTURING PROCESS-II UNIT-2 LATHE MACHINE
 
Introduction to IEEE STANDARDS and its different types.pptx
Introduction to IEEE STANDARDS and its different types.pptxIntroduction to IEEE STANDARDS and its different types.pptx
Introduction to IEEE STANDARDS and its different types.pptx
 
9953056974 Call Girls In South Ex, Escorts (Delhi) NCR.pdf
9953056974 Call Girls In South Ex, Escorts (Delhi) NCR.pdf9953056974 Call Girls In South Ex, Escorts (Delhi) NCR.pdf
9953056974 Call Girls In South Ex, Escorts (Delhi) NCR.pdf
 
Call Girls Service Nagpur Tanvi Call 7001035870 Meet With Nagpur Escorts
Call Girls Service Nagpur Tanvi Call 7001035870 Meet With Nagpur EscortsCall Girls Service Nagpur Tanvi Call 7001035870 Meet With Nagpur Escorts
Call Girls Service Nagpur Tanvi Call 7001035870 Meet With Nagpur Escorts
 
MANUFACTURING PROCESS-II UNIT-5 NC MACHINE TOOLS
MANUFACTURING PROCESS-II UNIT-5 NC MACHINE TOOLSMANUFACTURING PROCESS-II UNIT-5 NC MACHINE TOOLS
MANUFACTURING PROCESS-II UNIT-5 NC MACHINE TOOLS
 
(ANJALI) Dange Chowk Call Girls Just Call 7001035870 [ Cash on Delivery ] Pun...
(ANJALI) Dange Chowk Call Girls Just Call 7001035870 [ Cash on Delivery ] Pun...(ANJALI) Dange Chowk Call Girls Just Call 7001035870 [ Cash on Delivery ] Pun...
(ANJALI) Dange Chowk Call Girls Just Call 7001035870 [ Cash on Delivery ] Pun...
 
(SHREYA) Chakan Call Girls Just Call 7001035870 [ Cash on Delivery ] Pune Esc...
(SHREYA) Chakan Call Girls Just Call 7001035870 [ Cash on Delivery ] Pune Esc...(SHREYA) Chakan Call Girls Just Call 7001035870 [ Cash on Delivery ] Pune Esc...
(SHREYA) Chakan Call Girls Just Call 7001035870 [ Cash on Delivery ] Pune Esc...
 
Decoding Kotlin - Your guide to solving the mysterious in Kotlin.pptx
Decoding Kotlin - Your guide to solving the mysterious in Kotlin.pptxDecoding Kotlin - Your guide to solving the mysterious in Kotlin.pptx
Decoding Kotlin - Your guide to solving the mysterious in Kotlin.pptx
 
OSVC_Meta-Data based Simulation Automation to overcome Verification Challenge...
OSVC_Meta-Data based Simulation Automation to overcome Verification Challenge...OSVC_Meta-Data based Simulation Automation to overcome Verification Challenge...
OSVC_Meta-Data based Simulation Automation to overcome Verification Challenge...
 
Porous Ceramics seminar and technical writing
Porous Ceramics seminar and technical writingPorous Ceramics seminar and technical writing
Porous Ceramics seminar and technical writing
 
What are the advantages and disadvantages of membrane structures.pptx
What are the advantages and disadvantages of membrane structures.pptxWhat are the advantages and disadvantages of membrane structures.pptx
What are the advantages and disadvantages of membrane structures.pptx
 
Call Us -/9953056974- Call Girls In Vikaspuri-/- Delhi NCR
Call Us -/9953056974- Call Girls In Vikaspuri-/- Delhi NCRCall Us -/9953056974- Call Girls In Vikaspuri-/- Delhi NCR
Call Us -/9953056974- Call Girls In Vikaspuri-/- Delhi NCR
 
Gfe Mayur Vihar Call Girls Service WhatsApp -> 9999965857 Available 24x7 ^ De...
Gfe Mayur Vihar Call Girls Service WhatsApp -> 9999965857 Available 24x7 ^ De...Gfe Mayur Vihar Call Girls Service WhatsApp -> 9999965857 Available 24x7 ^ De...
Gfe Mayur Vihar Call Girls Service WhatsApp -> 9999965857 Available 24x7 ^ De...
 
HARMONY IN THE NATURE AND EXISTENCE - Unit-IV
HARMONY IN THE NATURE AND EXISTENCE - Unit-IVHARMONY IN THE NATURE AND EXISTENCE - Unit-IV
HARMONY IN THE NATURE AND EXISTENCE - Unit-IV
 
Software Development Life Cycle By Team Orange (Dept. of Pharmacy)
Software Development Life Cycle By  Team Orange (Dept. of Pharmacy)Software Development Life Cycle By  Team Orange (Dept. of Pharmacy)
Software Development Life Cycle By Team Orange (Dept. of Pharmacy)
 
Microscopic Analysis of Ceramic Materials.pptx
Microscopic Analysis of Ceramic Materials.pptxMicroscopic Analysis of Ceramic Materials.pptx
Microscopic Analysis of Ceramic Materials.pptx
 
Call Girls Delhi {Jodhpur} 9711199012 high profile service
Call Girls Delhi {Jodhpur} 9711199012 high profile serviceCall Girls Delhi {Jodhpur} 9711199012 high profile service
Call Girls Delhi {Jodhpur} 9711199012 high profile service
 

Obstacle and edge detector report.

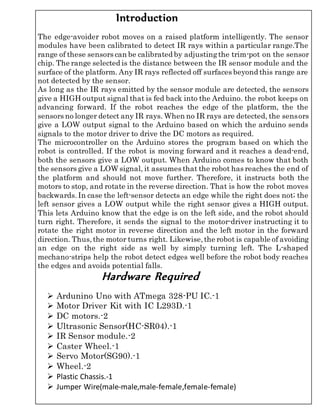
  • 1. Introduction The edge-avoider robot moves on a raised platform intelligently. The sensor modules have been calibrated to detect IR rays within a particular range.The range of these sensors can be calibrated by adjustingthe trim-pot on the sensor chip. The range selected is the distance between the IR sensor module and the surface of the platform. Any IR rays reflected off surfaces beyond this range are not detected by the sensor. As long as the IR rays emitted by the sensor module are detected, the sensors give a HIGH output signal that is fed back into the Arduino. the robot keeps on advancing forward. If the robot reaches the edge of the platform, the the sensors no longer detect any IR rays. When no IR rays are detected, the sensors give a LOW output signal to the Arduino based on which the arduino sends signals to the motor driver to drive the DC motors as required. The microcontroller on the Arduino stores the program based on which the robot is controlled. If the robot is moving forward and it reaches a dead-end, both the sensors give a LOW output. When Arduino comes to know that both the sensors give a LOW signal, it assumes that the robot has reaches the end of the platform and should not move further. Therefore, it instructs both the motors to stop, and rotate in the reverse direction. That is how the robot moves backwards.In case the left­sensor detects an edge while the right does not; the left sensor gives a LOW output while the right sensor gives a HIGH output. This lets Arduino know that the edge is on the left side, and the robot should turn right. Therefore, it sends the signal to the motor-driver instructing it to rotate the right motor in reverse direction and the left motor in the forward direction. Thus,the motor turns right. Likewise,the robot is capable of avoiding an edge on the right side as well by simply turning left. The L-shaped mechano-strips help the robot detect edges well before the robot body reaches the edges and avoids potential falls. Hardware Required  Ardunino Uno with ATmega 328-PU IC.-1  Motor Driver Kit with IC L293D.-1  DC motors.-2  Ultrasonic Sensor(HC-SR04).-1  IR Sensor module.-2  Caster Wheel.-1  Servo Motor(SG90).-1  Wheel.-2  Plastic Chassis.-1  Jumper Wire(male-male,male-female,female-female)
  • 2.
  • 3. Ardunio Uno Arduino/GenuinoUno is a microcontrollerboard based on the ATmega328P . It has 14 digital input/output pins (of which 6 can be used as PWM outputs), 6 analog inputs, a 16 MHz quartz crystal, a USB connection, a power jack, an ICSP header and a reset button. It contains everything needed to support the microcontroller; simply connect it to a computer with a USB cable or power it with a AC-to-DC adapter or battery to get started.. You can tinker with your UNO without worring too much about doing something wrong, worst case scenario you can replace the chip for a few dollars and start over again. "Uno" means one in Italian and was chosen to mark the release of Arduino Software (IDE) 1.0. The Uno board and version 1.0 of Arduino Software (IDE) were the reference versions of Arduino,now evolved to newer releases.The Uno board is the first in a series of USB Arduino boards,and the reference model for
  • 4. the Arduino platform; for an extensive list of current, past or outdated boards see the Arduino index of boards. Arduino is open-source hardware. The hardware reference designs are distributed undera Creative Commons Attribution Share-Alike 2.5 license and are available on the Arduino website. Layout and production files for some versions of the hardware are also available. The source code for the IDE is released under the GNU General Public License, version 2. Nevertheless, an official Bill of Materials of Arduino boards has never been released by Arduino staff. Although the hardware and software designs are freely available undercopyleft licenses,the developers have requested the name Arduino to be exclusive to the official product and not be used for derived works without permission. The official policy documenton use of the Arduino name emphasizesthat the project is open to incorporating work by others into the official product.Several Arduino-compatible products commercially released have avoided the project name by using various names ending in -duino. An early Arduino board with an RS-232 serialinterface (upper left) and an Atmel ATmega8 microcontrollerchip (black, lowerright); the 14 digital I/O pins are at the top, the 6 analog input pins at the lower right, and the power connector at the lower left. Most Arduino boards consist of an Atmel 8-bit AVR microcontroller (ATmega8, ATmega168,ATmega328,ATmega1280,ATmega2560)with varying amounts of flash memory, pins, and features.The 32-bit Arduino Due, based on the Atmel SAM3X8E was introduced in 2012.The boards use single or double-row pins or female headers that facilitate connections for programming and incorporation into other circuits. These may connect with add-on modules termed shields. Multiple, and possibly stacked shields may be individually addressable via an I²C serial bus. Most boards include a 5 V linear regulator and a 16 MHz crystal oscillator or ceramic resonator. Some designs, such as the LilyPad, run at 8 MHz and dispense with the onboard voltage regulator due to specific form- factor restrictions. Arduino microcontrollers are pre-programmed with a boot loaderthat simplifies uploading of programs to the on-chip flash memory. The default bootloader of the Arduino UNO is the optiboot bootloader.Boards are loaded with program code via a serial connection to another computer. Some serial Arduino boards contain a level shifter circuit to convert between RS-232 logic levels and transistor–transistor logic (TTL) level signals. Current Arduino boards are programmed via Universal Serial Bus (USB), implemented using USB-to-serial adapterchips such as the FTDI FT232. Some boards, such as later-model Uno boards,substitute the FTDI chip with a separate AVR chip containing USB-to- serial firmware, which is reprogrammable via its own ICSP header. Other variants, such as the Arduino Mini and the unofficial Boarduino, use a detachable USB-to-serial adapter board or cable, Bluetooth or other methods,
  • 5. when used with traditional microcontroller tools instead of the Arduino IDE, standard AVR in-system programming (ISP) programming is used. The Arduino board exposes most of the microcontroller's I/O pins for use by other circuits. The Diecimila,Duemilanove, and current Uno provide 14 digital I/O pins, six of which can produce pulse-width modulated signals, and six analoginputs,which can also be used as six digital I/O pins. These pins are on the top of the board, via female 0.1-inch (2.54 mm) headers. Several plug-in application shields are also commercially available. The Arduino Nano, and Arduino-compatibleBare Bones Boardand Boarduinoboards may provide male header pins on the underside of the board that can plug into solderless breadboards. Many Arduino-compatible and Arduino-derived boards exist. Some are functionallyequivalent to an Arduino and can be used interchangeably. Many enhance the basic Arduino by adding output drivers, often for use in school- level education, to simplify making buggies and small robots. Others are electrically equivalent but change the form factor, sometimes retaining compatibility with shields, sometimes not. IR Sensor An infrared sensor is an electronic device, that emits in order to sense some aspects of the surroundings.An IR sensor can measure the heat of an object as well as detects the motion.These types of sensors measures only infrared radiation,rather than emitting it that is called as a passive IR sensor. Usually in the infrared spectrum, all the objects radiate some form of thermal radiations. These types of radiations are invisible to our eyes, that can be detected by an infrared sensor.The emitter is simply an IR LED (Light Emitting Diode)and the detector is simply an IR photodiode which is sensitive to IR light of the same wavelength as that emitted by the IR LED. When IR light falls on the photodiode,The resistances and these output voltages, change in proportion to the magnitude of the IR light received. IR Sensor Circuit Diagram and Working Principle An infrared sensor circuit is one of the basic and popular sensor module in an electronic device. This sensor is analogous to human’s visionary senses, which can be used to detect obstacles and it is one of the common applications in real time.This circuit comprises of the following components LM358 IC 2 IR transmitter and receiver pair Resistors of the range of kilo ohms. Variable resistors. LED (Light Emitting Diode).
  • 6. IR Sensor Circuit. In this project, the transmitter section includes an IR sensor, which transmits continuous IR rays to be received by an IR receiver module. An IR output terminal of the receiver varies depending upon its receiving of IR rays. Since this variation cannot be analyzed as such, therefore this output can be fed to a comparatorcircuit. Here an operational amplifier (op-amp)of LM 339 is used as comparator circuit. When the IR receiver does not receive a signal, the potential at the inverting input goes higher than that non-inverting input of the comparator IC (LM339). Thus the output of the comparator goes low, but the LED does not glow. When the IR receiver module receives signal to the potential at the inverting input goes low. Thus the output of the comparator (LM 339) goes high and the LED starts glowing. Resistor R1 (100 ), R2 (10k ) and R3 (330) are used to ensure that minimum 10 mA current passes through the IR LED Devices like Photodiode and normal LEDs respectively. Resistor VR2 (preset=5k ) is used to adjust the output terminals. Resistor VR1 (preset=10k ) is used to set the sensitivity of the circuit Diagram. Read more about IR sensors.
  • 7. Ultrasonic Sensor As the name indicates,ultrasonicsensors measuredistance by using ultrasonic waves. The sensorhead emits an ultrasonicwave and receives the wave reflected back from the target. Ultrasonic Sensors measure the distance to the target by measuring the time between the emission and reception. An optical sensorhas a transmitter and receiver, whereas an ultrasonic sensor uses a single ultrasonicelementfor both emission and reception. In a reflective model ultrasonicsensor,a single oscillator emits and receives ultrasonic waves alternately. This enables miniaturization of the sensor head. The distance can be calculated with the following formula: Distance L = 1/2 × T × C where L is the distance,T is the time between the emission and reception, and C is the sonicspeed.(The value is multiplied by 1/2 because T is the time for go- and-return distance.)
  • 8. Servo Motor(SG 90) A servomotor is a rotary actuator or linear actuator that allows for precise control of angularor linear position, velocity and acceleration.[1] It consists of a suitable motor coupled to a sensor for position feedback. It also requires a relatively sophisticated controller, often a dedicated module designed specifically for use with servomotors. Servomotors are not a specific class of motor although the term servomotor is often used to refer to a motor suitable for use in a closed-loop controlsystem. Servomotors are used in applications such as robotics, CNC machinery or automated manufacturing. A servomotor is a closed-loop servomechanism that uses position feedback to control its motion and final position. The input to its control is a signal (either analogueor digital) representing the position commanded for the output shaft. The motor is paired with some type of encoder to provide position and speed feedback. In the simplest case, only the position is measured. The measured position of the outputis compared to the command position, the external input to the controller. If the output position differs from that required, an error signal is generated which then causes the motor to rotate in either direction, as needed to bring the output shaft to the appropriate position. As the positions approach, the error signal reduces to zero and the motor stops. The very simplest servomotors use position-only sensing via a potentiometerand bang-bangcontrol of their motor; the motor always rotates at full speed (or is stopped). This type of servomotor is not widely used in industrial motion control, but it forms the basis of the simple and cheap servosused for radio-controlled models. More sophisticated servomotors use optical rotary encoders to measure the speed of the output shaft[2] and a variable-speed drive to control the motor speed.[3] Both of these enhancements, usually in combination with a PID control algorithm, allow the servomotor to be brought to its commanded position more quickly and more precisely, with less overshooting.
  • 9. A servomotorconsumes poweras it rotates to the commandedposition but then the servomotorrests. Stepper motors continue to consume power to lock in and hold the commanded position. Servomotors are generally used as a high-performance alternative to the stepper motor. Steppermotors have some inherentabilityto control position,as they have built-in output steps. This often allows them to be used as an open- loop position control, without any feedback encoder, as their drive signal specifies the number of steps of movement to rotate, but for this the controller needs to 'know' the position of the stepper motor on power up. Therefore, on first power up, the controllerwill have to activate the stepper motor and turn it to a known position, e.g. until it activates an end limit switch. This can be observed when switching on an inkjet printer; the controller will move the ink jet carrier to the extreme left and right to establish the end positions. A servomotor will immediately turn to whatever angle the controller instructs it to, regardless of the initial position at power up. The lack of feedback of a stepper motor limits its performance, as the stepper motor can only drive a load that is well within its capacity, otherwise missed steps underload may lead to positioning errors and the system may have to be restarted or recalibrated. The encoder and controller of a servomotor are an additional cost, but they optimise the performance of the overall system (for all of speed, power and accuracy) relative to the capacity of the basic motor. With larger systems, where a powerful motor represents an increasing proportion of the system cost, servomotors have the advantage. There has been increasing popularity in closed loop stepper motors in recent years. They act like servomotors but have some differences in their software control to get smooth motion. The top 3 manufacturers of closed loop stepper motor systems employ magneticencoders as their feedback device of choice due to low cost and resistance to vibration.[citation needed] The main benefit of a closed loop stepper motor is the cost to performance ratio. There is also no need to tune the PID controller on a closed loop stepper system.
  • 10. Motor Driver L293D The L293 is an integrated circuit motor driver that can be used for simultaneous, bi-directional control of two small motors. Small means small. The L293 is limited to 600 mA, but in reality can only handle much small currents unless you have done some serious heat sinking to keep the case temperature down.Unsure aboutwhetherthe L293 will work with your motor? Hookup the circuit and run your motor while keepingyour finger on the chip. If it gets too hot to touch, you can't use it with your motor.
  • 11. Construction &Working The body of the robot consisting of the chassis, the motor brackets and the castor wheel holder are easily available from the botkart website. The chassis holds all the components of the robot such as sensors, servomotor, breadboard and the Arduino board. Other parts of the robot body such as the motor bracket, the castor wheel holder and sensor holder are also fitted onto the chassis. The motor bracket holds the BO motors (or DC motors) in place. The motor brackets has holes for the motor shaft and the binding screws that help in proper positioning of the motors. They also prevent the motors from wobbling. The castor wheel holder is used to attach a castor wheel to the robot body. The wheel holder has holes like the ones found on the castor wheel body.On aligningthe holes on the wheel holder and the castor wheel body, the two components can be bound together by means of screws and nuts or even double tape. DC motors The DC motors can easily operate at a voltage of 9 - 12 V. Their direction of is controlled by means of an L293D motor driver. These motors are supplied power through a pin on the L293D motor driver. L293D motor driver The L293D is a small motor driver IC that can be used to control two DC motors. The motor driver houses two H-bridge circuits, each controlling one DC motor. The L293D can be powered by the 5V supply from the Arduino pin. Alternatively, you can use an external power supply to operate this motor driver. IR Sensor Module The IR sensormodule consists of an emitter that can emit infra-red rays and a receiver that receives the emitted infra-red rays that have been reflected off objects and surfaces.The sensormodule consists of three terminals namely the Vcc, the GND and the Vout. The Vcc terminal is used to give power supply to the IR sensor module. The wire from the GND terminal is connected to the common ground in our circuit. The wire coming out of the Vout becomes the signal wire that gives an input to the Arduino. On detection of IR rays that are being reflected off a surface, the VOUT terminal goes HIGH, else it remains LOW. The IR sensor module is also powered using the 5V supply from the Arduino. The IR sensor module can be connected to the Arduino by means of jumper wires. Students can use any sort of jumper-wire to make these
  • 12. connections. However, for the sake of understanding, we use male-female jumper wires for this purpose. Step by Step guide : 1) Construction of Robot Body To construct the robot body, keep the chassis, the motor brackets, the motors, the wheels,the castor wheels and the castor wheel holder at hand. Then follow the following steps : Take the chassis and attach the motor clamp to the chassis as shown in the figure below: 2. Use a spanner to hold the nut in place and tighten the screw by using a screw driver.
  • 13. 3. Likewise,fix the other motor clamp. Our assemblyshould look something like this : Attach the castor wheel to the castor wheel clamp as shown and then fix the clamp to the chassis using nuts and bolts. Use the technique shownin step 2 for the purpose of tightening the screws. 5. Now, take a DC motor and remove the hex-nut from it.
  • 14. Insert the shaft of the DC motor into the center-hole of the motor bracket till the surface of the motor housing touches the surface of the motor bracket. Now tighten the hex-nut around the thread on the motor till the motor bracket binds the motor. Repeat the steps 5 - 7 for other DC motor. Now attach the wheel to the motor shaft by inserting the motor-shaft into opening on the wheel. Align the holes on the shaft and the cylindrical surface of the opening. Insert a screw into this arrangement and tighten it using a screwdriver. Use a spanner and screwdriver to make sure that all joints are tight enough and do not wobble. The motors will rest beneath the chassis as shown below: If all the instructions have been followed correctly, the robot body is going to look like this Once the body of the robotis ready, we need to mountother parts and make the necessary connections. 2) Mounting other components Take the Arduino Uno board and stick a piece of double sided tape on its back.
  • 15. Peel the cover off the other side of double tape and mount the arduino board on the chassis with a little pressure to make sure the double sided-tape binds it to the chassis 3. Mount a half-sized breadboard on the chassis and fix it by double sided tape. Take the L293D motor drive and plug it onto the half-sized breadboard as shown in the figure below:
  • 16. Now take an L-shaped mechano-strip and attach the IR Sensor Module using by means of insertinga screw through both the holes of both the components as shown in the figure below : Repeat step 5 with the other sensor and the mechano strip. Mount the assemblies developed in step 5 & 6 onto the robot body and bind them by means of screws and nuts as shown in the figure below:
  • 17. Once you have followed all the steps mentioned in this section. Our robot assembly should look like this: In the next part we will learn how to make all the necessary connections for correct functioning of the robot. 3) Fritzing Diagram(s) The Fritzing sketch depicting the connections between the electronics components is given below: Observe the up-close schematic of that component, the up-close picture of Arduino and breadboard Compare them to the overall schematic to get a clear idea about the wiring. 4) Schematics/Connections The figure below illustrates the L293D schematic.Read the points mentioned in this section and refer to both,the schematic and the fritzing diagram to make the connections .
  • 18. It can be observed that the L293D motor driver has 16 pins. The pins of this motor driver that need to be connecting with power supplies, motors and the Arduino have also been labelled.Now, we are going to follow the steps given below to interface our motor and the motor drivers with the Arduino. Connect pin 2 of L293D to the digital pin 9 of the Arduino board by ajumper wire. Use jumperwires to connect pin 7 to Arduino’s digital pin 8, pin 15 to Arduino’s digital pin 11 and pin 10 to Arduino’s digital pin 10 respectively. Pin 3 and Pin 6 of the motor Driver are connected to two terminals of the left DC motor. Connectthe wire coming from the + terminal of the left DC motor to pin 3. Also connect the other wire coming from the DC motor to pin 6. Also note that, pin 14 and pin 11 of L293D are connected to the terminals of the right DC motor. Connect the wire coming from the + terminal of the right DC motor to pin 14. Also connect the other wire coming from this DC motor to pin 11. Connect pin 16 of L293D to the 5V supply pin on the Arduino.
  • 19. Use jumperwires to connect Pins 4,5,12 and 13 to each other. These pins serve as the ground connection. Connect this ground of L293D to the Arduino ground. Connect pin 8 of the battery to an external power as shown in the fritzing sketch. The negative terminal of the batteries must also be connected to the ground. 5) IR Sensor Module connections The IR Sensor Module has three terminals : the supply terminal (VCC), the ground terminal (GND) and the output (VOUT) terminal. On detection of IR rays that are being reflected off a surface, the VOUT terminal goes HIGH, else it remains LOW.
  • 20. Connectthe VCC terminals of both the left and right IR sensors to the common point of Arduino’s 5V supply on the half­sized breadboard. Connectthe GND terminal of both the left and right IR sensors to the common point of Arduino’s GND. Connect the VOUT terminal of the left sensor to the digital pin 3 of the Arduino. Connect the VOUT terminal of the left sensor to the digital pin 6 of the Arduino. 6) External Supply/Batteries connections Mount the 12V battery at the back of the chassis and use double-sided tape to for the purpose of adhesion From the positive terminal for 12V supply on the breadboard, connect a jumper wire to the Vin pin of the Arduino. This will power the Arduino when it is not powered via USB connection. Connect the negative terminal of 12V battery to the GND terminal of Arduino at a common node on the breadboard. This completes the assembly of the Line Follower. Now, the robot needs to be coded so that it can avoid obstacles should it detect any in its path.
  • 21. Applications  Obstacle avoidingrobots can be used in almost all mobile robotnavigation systems.  Theycan be used for household worklike automaticvacuum cleaning.  They can also be used in dangerous environments, where human penetration could be fatal.
  • 22.
  • 23. Conclusion By presentingthe idea of remote innovation in the field of correspondence we can make our correspondence more productive and speedier, with more noteworthy proficiency we can show the messages and with less blunders and support. This model can be utilized effectively as a part of foundations like chain eateries wherein the requestand exceptional rebates can be shown at all branches all the while,in universities wherein understudies and staffs can be educated at the same time in the blink of an eye. It can be set up at open transport places like railroads,transport station,and airplane terminal furthermore at roadside for movement control and in crisis circumstances, it is cost proficient framework and simple to handle. Content Abstract. Introduction. Hardware Required.
  • 24. Ardunio Uno. IR Sensor. Ultrasonic Sensor. Servo Motor Motor Driver. Construction &Working. Application. Conclusion. References. A MINOR PROJECT On OBSTACLE AND EDGE DETECTOR
  • 25. Submitted in partial fulfillment of the requirement for the Awards of The Degree of Bachelor of Technology In Electronics & Communication Engineering Submitted by- VERMA SAHIL VINOD KUMAR-1405431105 HIMANSHU KUMAR SINGH- 1405431033 Babu Banarasi Das National Institute of Technology &Management (Affiliated to Dr. A.P.J Abdul Kalam University, Lucknow) SESSION (2017-2018) ACKNOWLEDGEMENT It is not possible to prepare a project report without the assistance and encouragement of other people. This one is certainly no exception.
  • 26. On the very outset of this report, we would like to extend our sincere and heartfelt obligation towards all the personages who have helped us in this endeavor.Withouttheir active guidance,help, co-operation and encouragement, we would not have made headway in the project. We are extremely thankful and pay our gratitude to our faculty for their valuable guidance and support on completion of this project in it’s presently. We extend our gratitude to our college for giving us this opportunity. We also acknowledge with a deep sense of reverence, our gratitude towards our parents and members of our family, who has always supported us morally as well as economically. At last but not least gratitude goes to all of our friends who directly or indirectly helped us to complete this project report. Any omission in this brief acknowledgement does not mean lack of gratitude. Thanking you, HIMANSHU KUMAR SINGH. VERMA SAHIL VINOD KUMAR. CERTIFICATE This is to certify that HIMANSHU KUMAR SINGH and VERMA SAHIL VINOD KUMAR, B.Tech 4th year, Electronics &
  • 27. Communication Engineering, B.B.D.N.I.T.M., Lucknow have made their Mini Project of 7th semester on “OBSTACLE AND EDGE DETECTOR”. During the project they were regular and have completed the project sincerely and successfully. I wish them good luck and success in future. Prof. SHAILENDRA TAHILYANI HOD (Dept. of EC Engineering) References  http://www.eisystems.in/  https://www.arduino.cc/  https://onlinecourses.nptel.ac.in/explorer  https://www.tutorialspoint.com/arduino/  https://programmingelectronics.com/tutorial-3-arduino-ide-and-sketch- overview/
  • 28. ABSTRACT The edge and obstacle avoiding robot is a differential drive based robot that is made to traverse smooth surface and avoid any edges and obstacle that come in its way. For the edge and obstacle avoider to locomote about a surface and obstacle, the robot has been powered by two DC motors.
  • 29. The robot makes use of an Arduino Uno an Atmega 328-PU based microcontroller board as its brains. The robot has been equipped with two IR sensor Modules. These sensor modules are capable of both, emitting infrared rays and detecting infrared rays and also there is ultrasonic sensors which has transmitting and receiving terminals, based on sound speed and time to calculate distance and avoid obstacle. In addition to that, an L293D motor driver has been employed to control the DC motors separately. Both the motordriver and sensor modules are interfaced together though the terminals on the Arduino board. A 9V Lipo battery has been included so as to power the Arduino board and the DC motors.