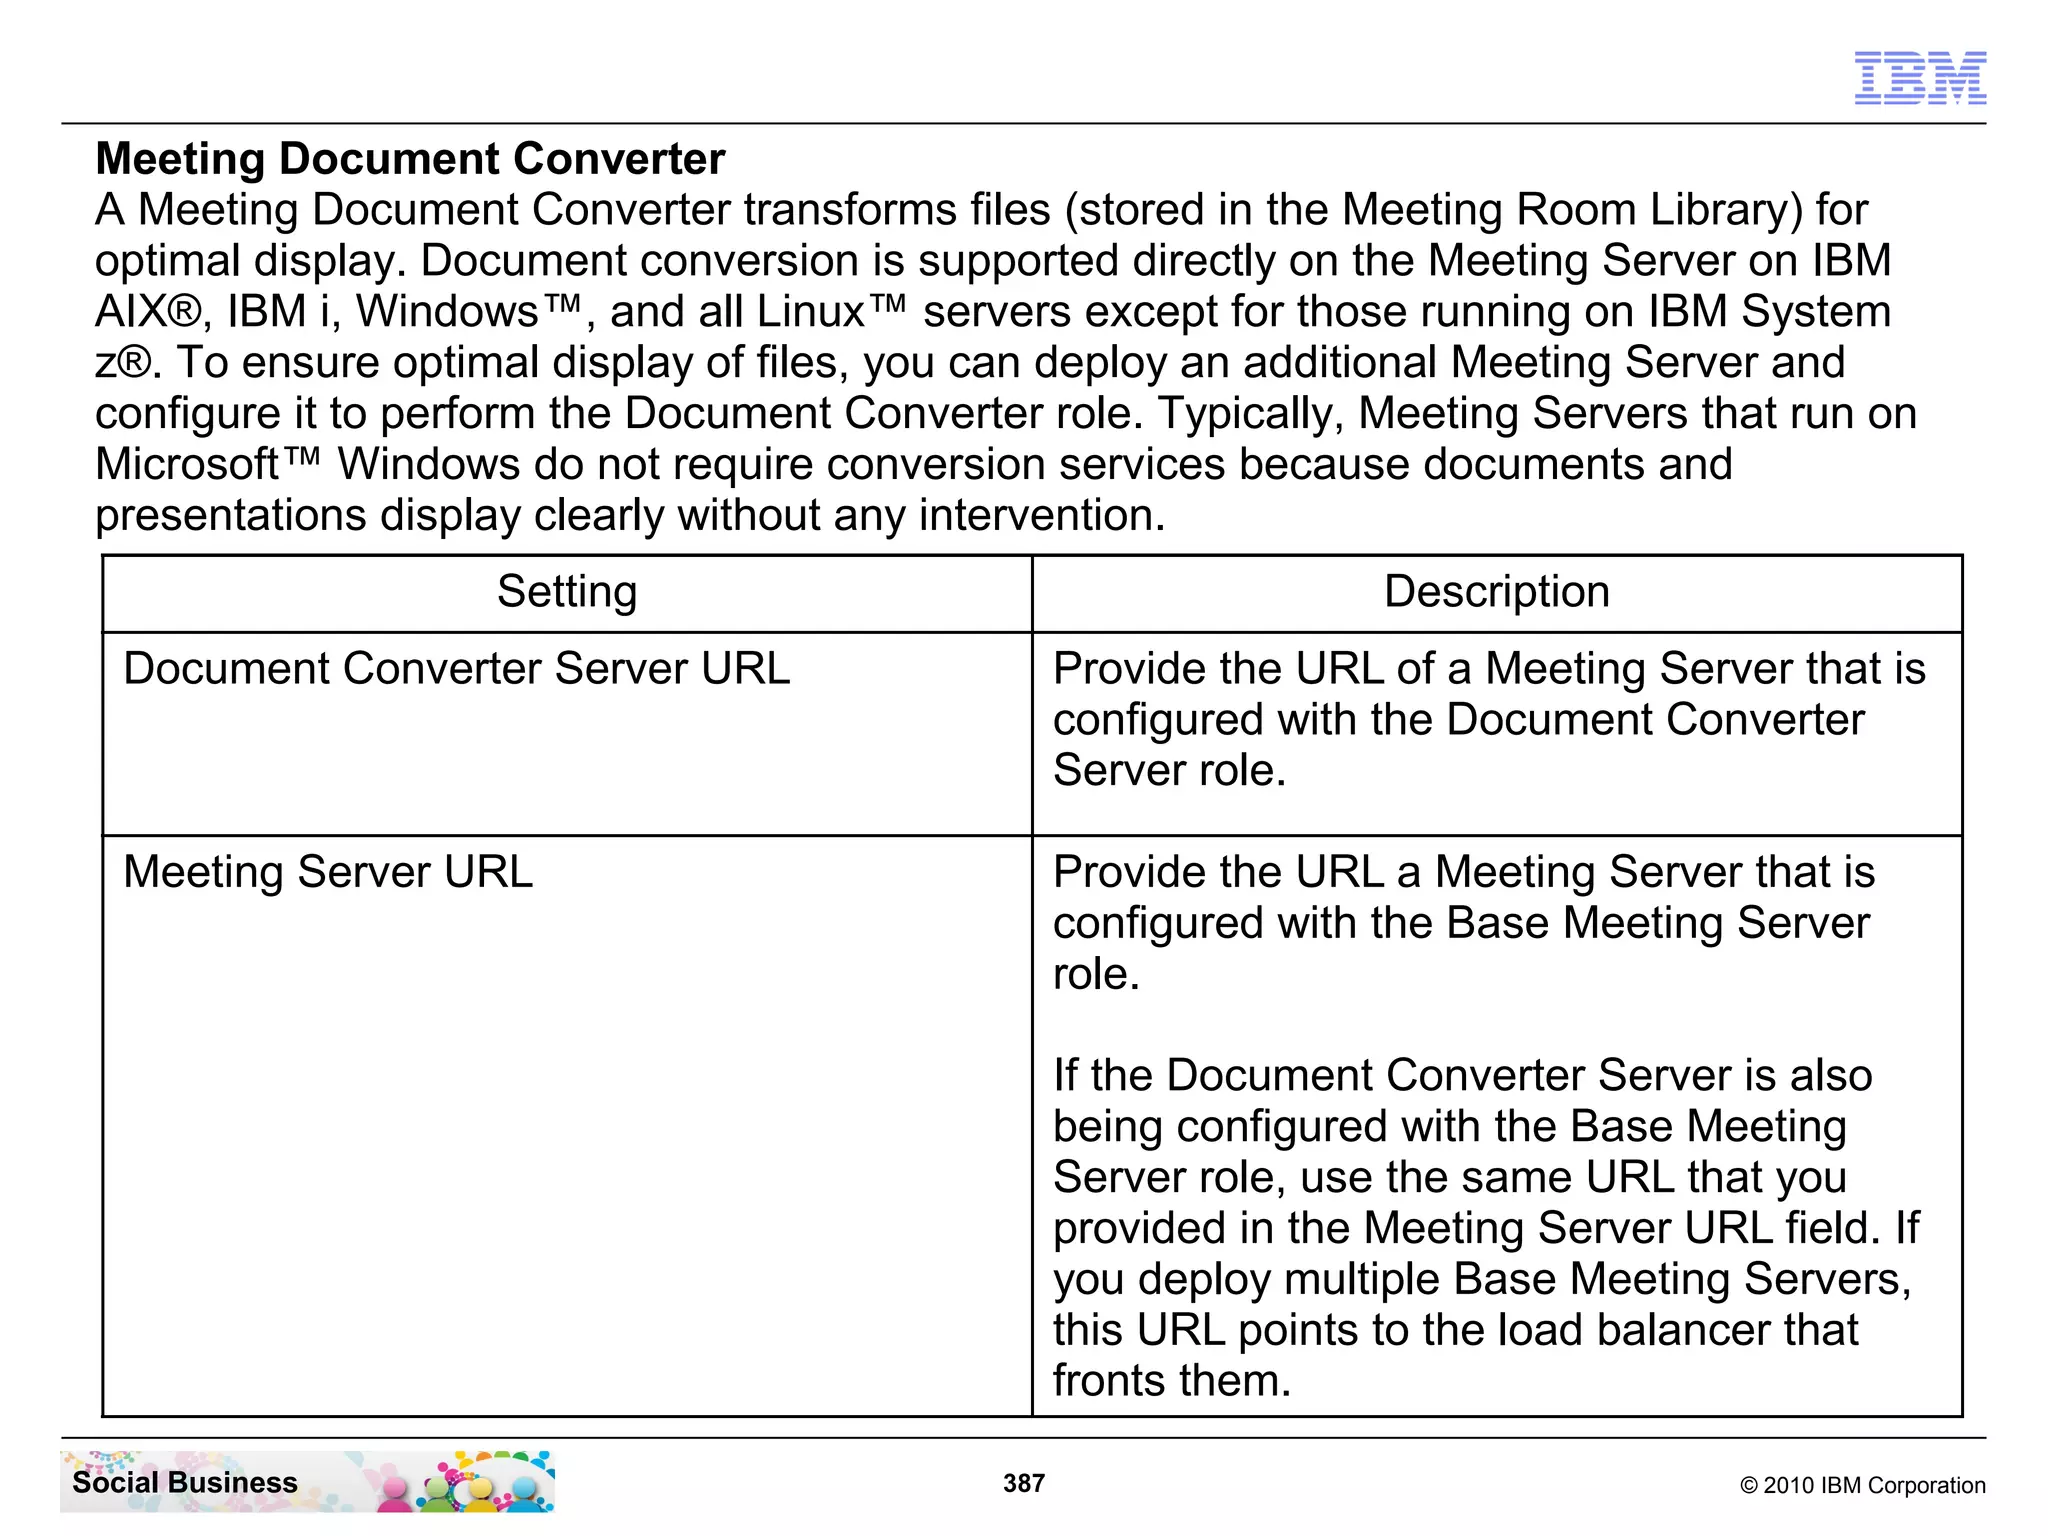
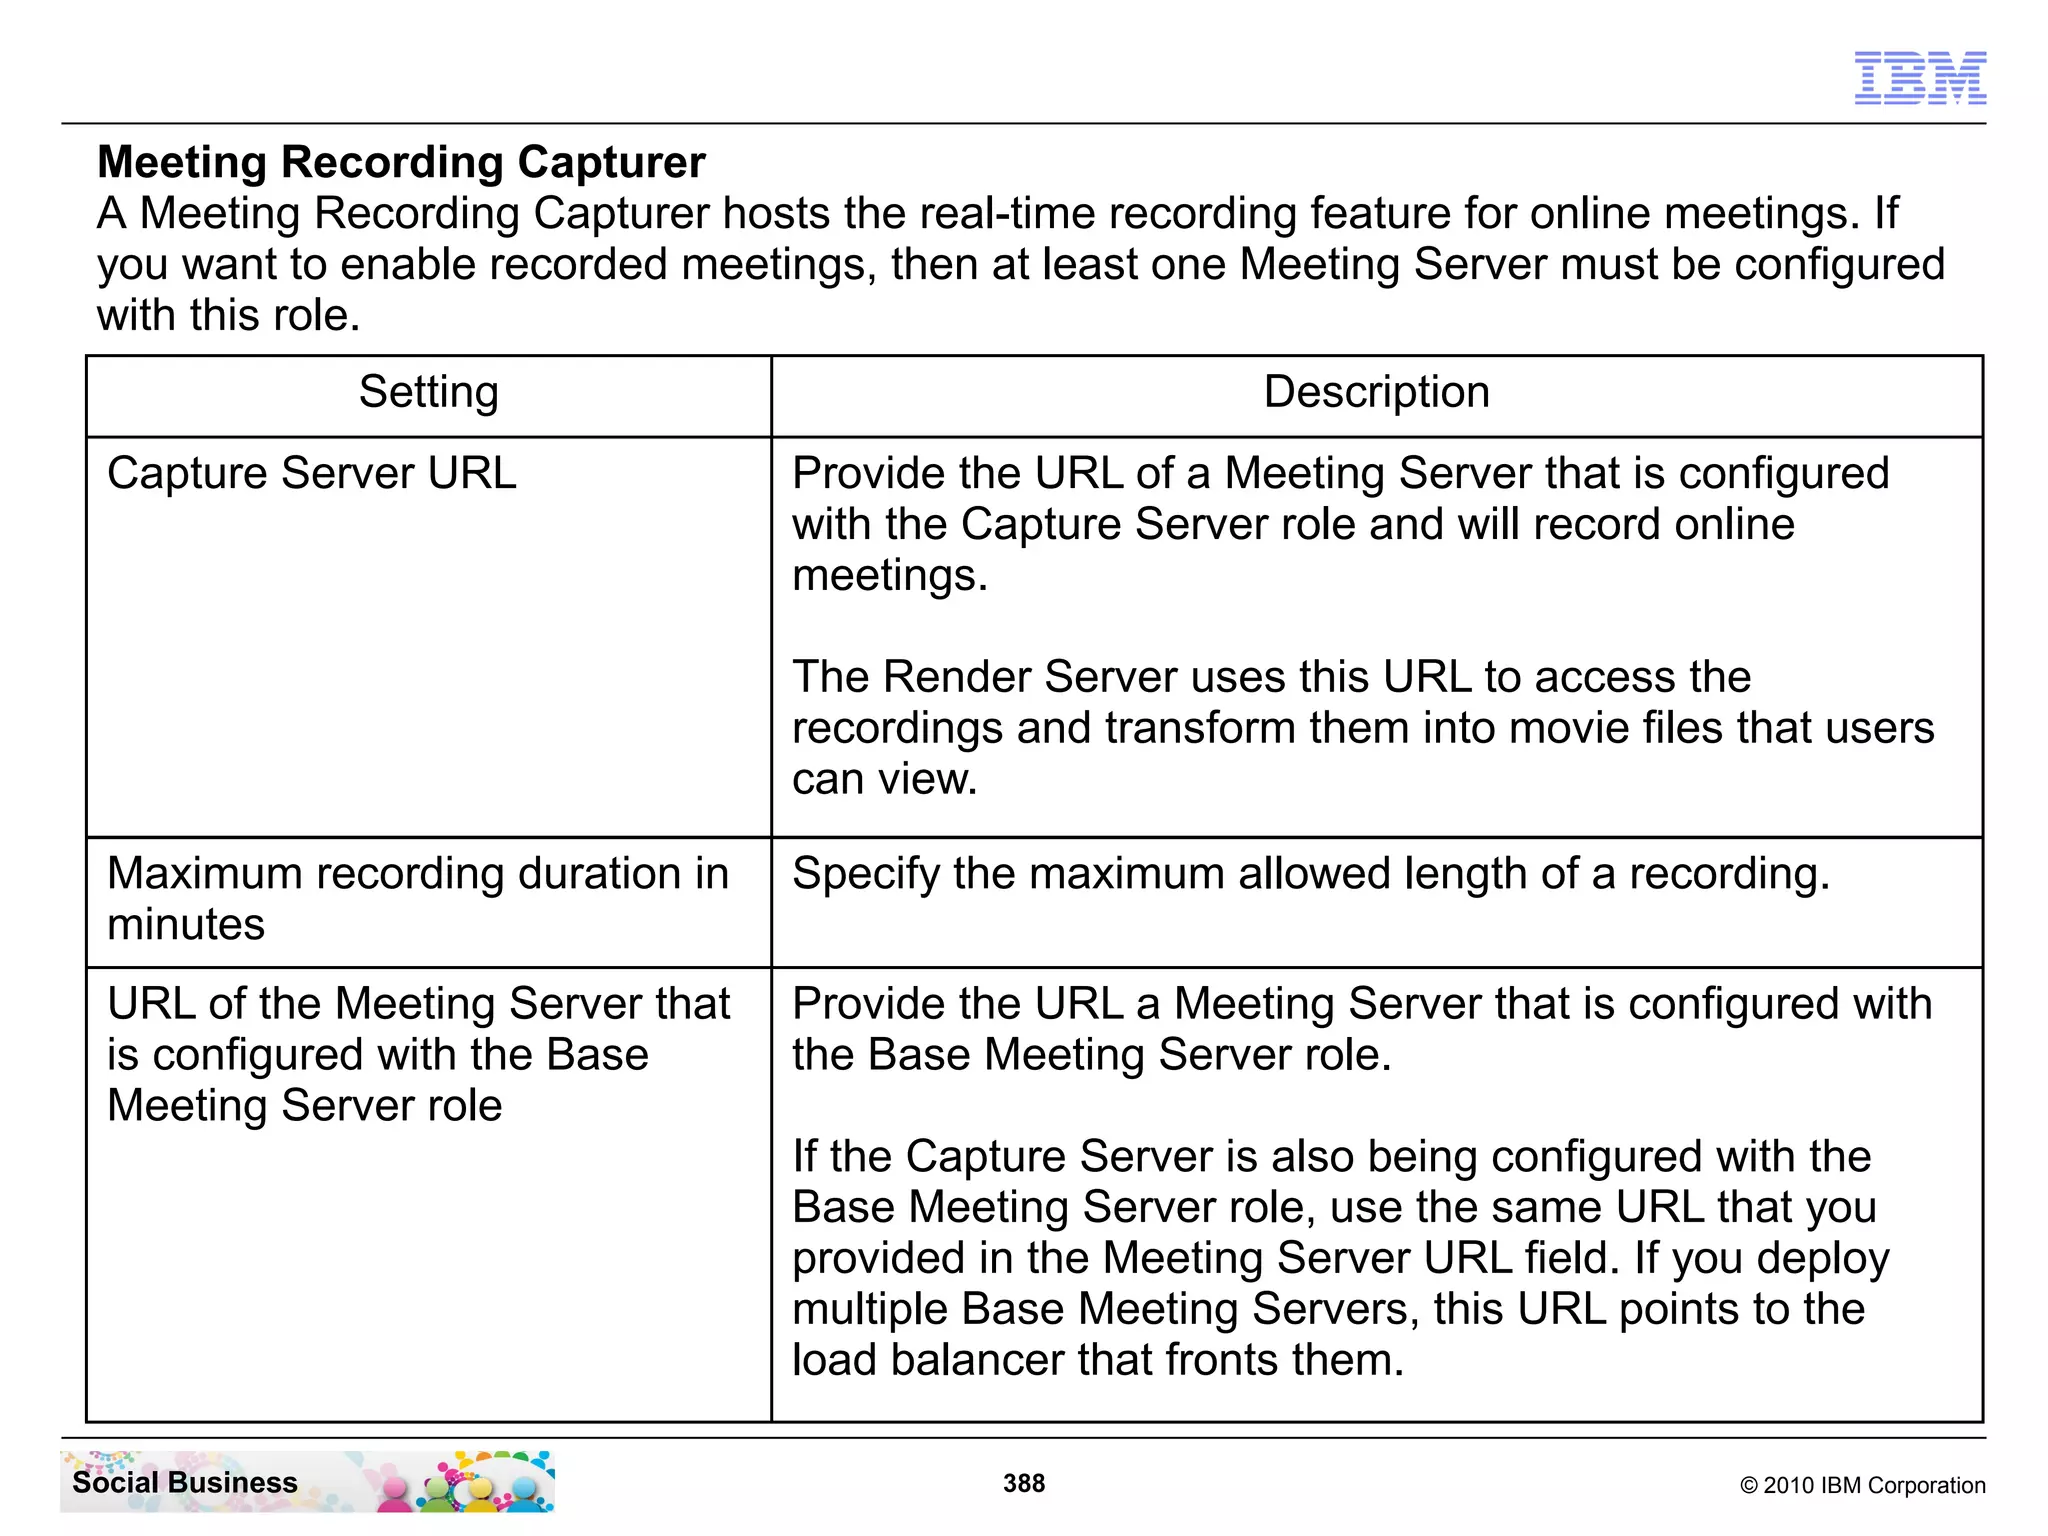
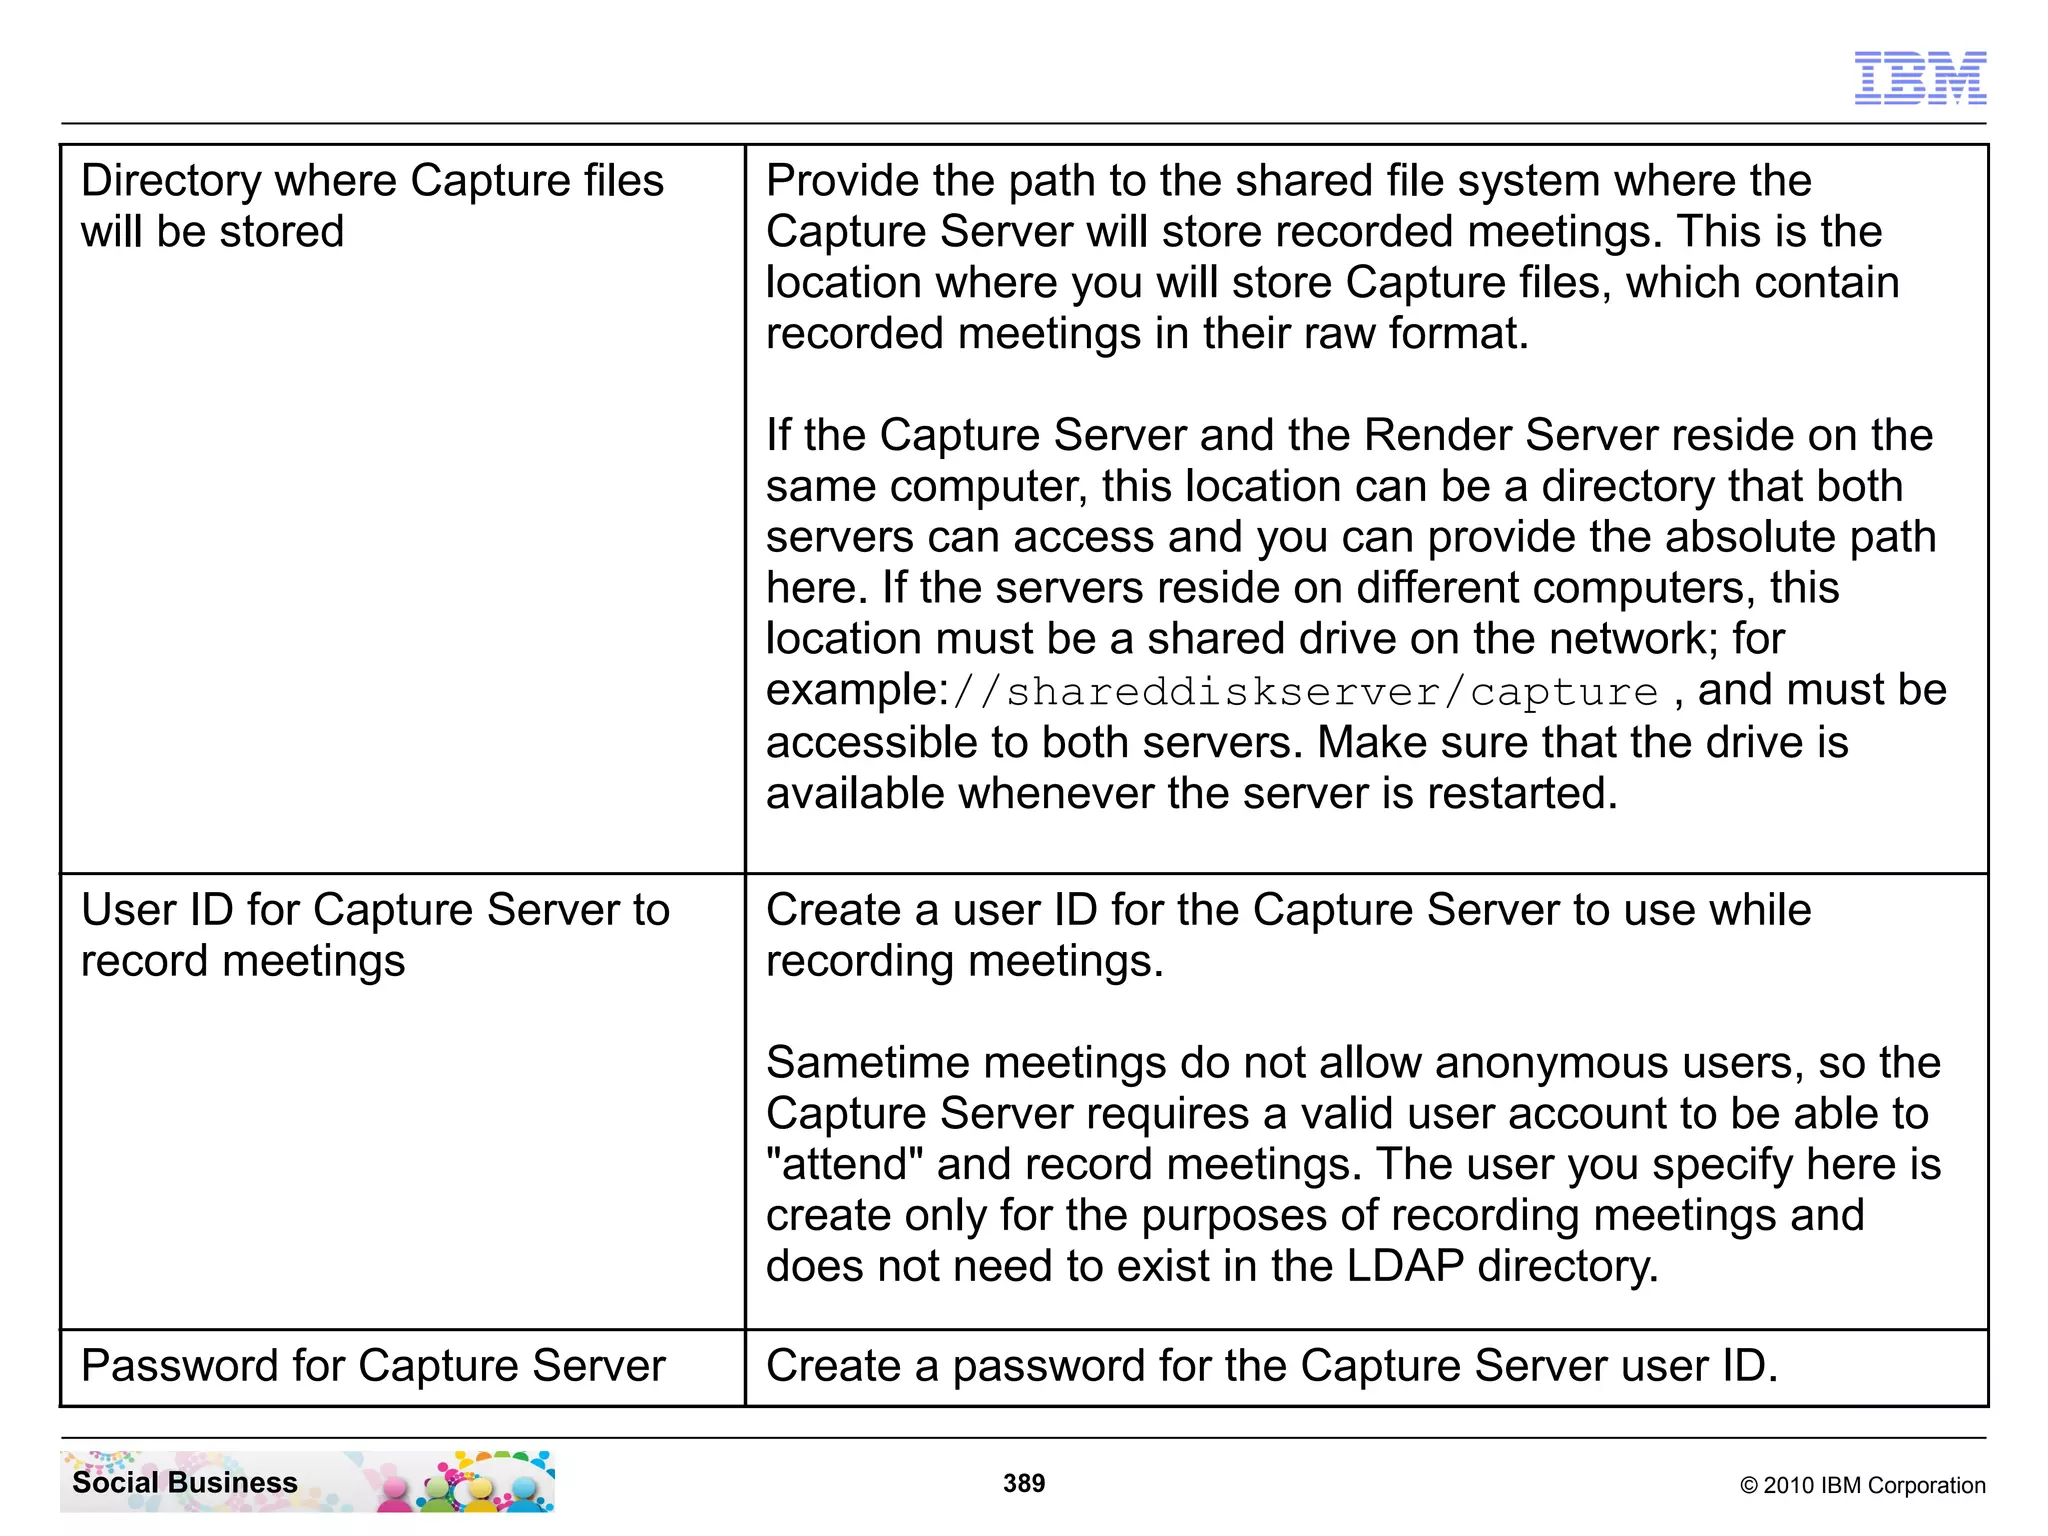
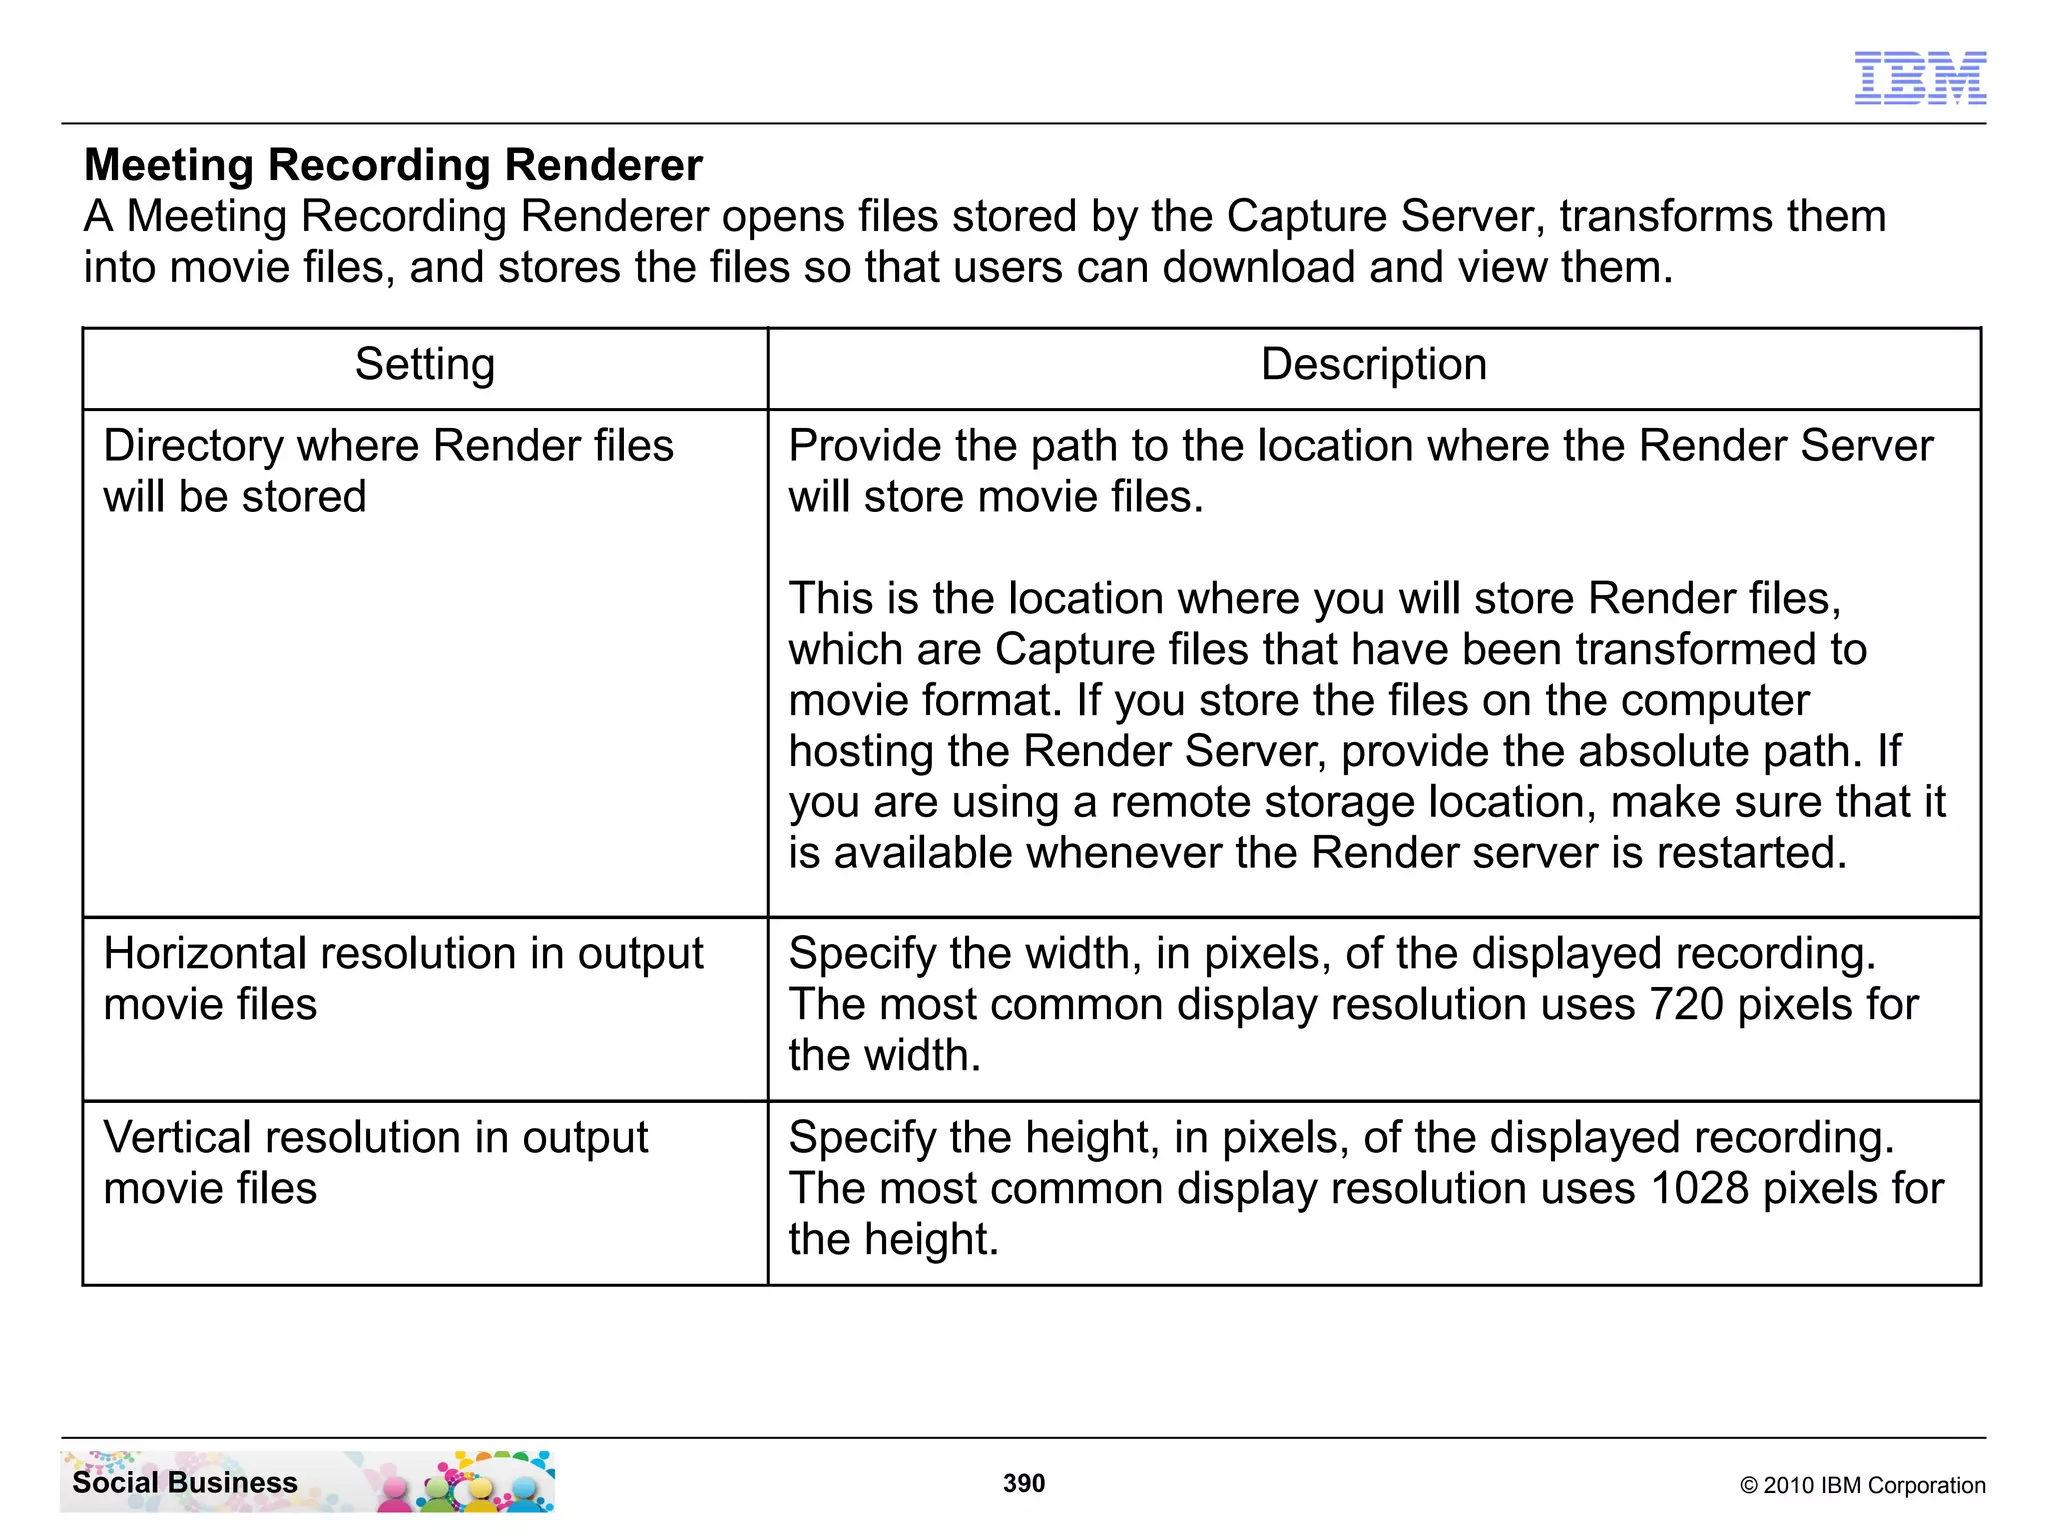
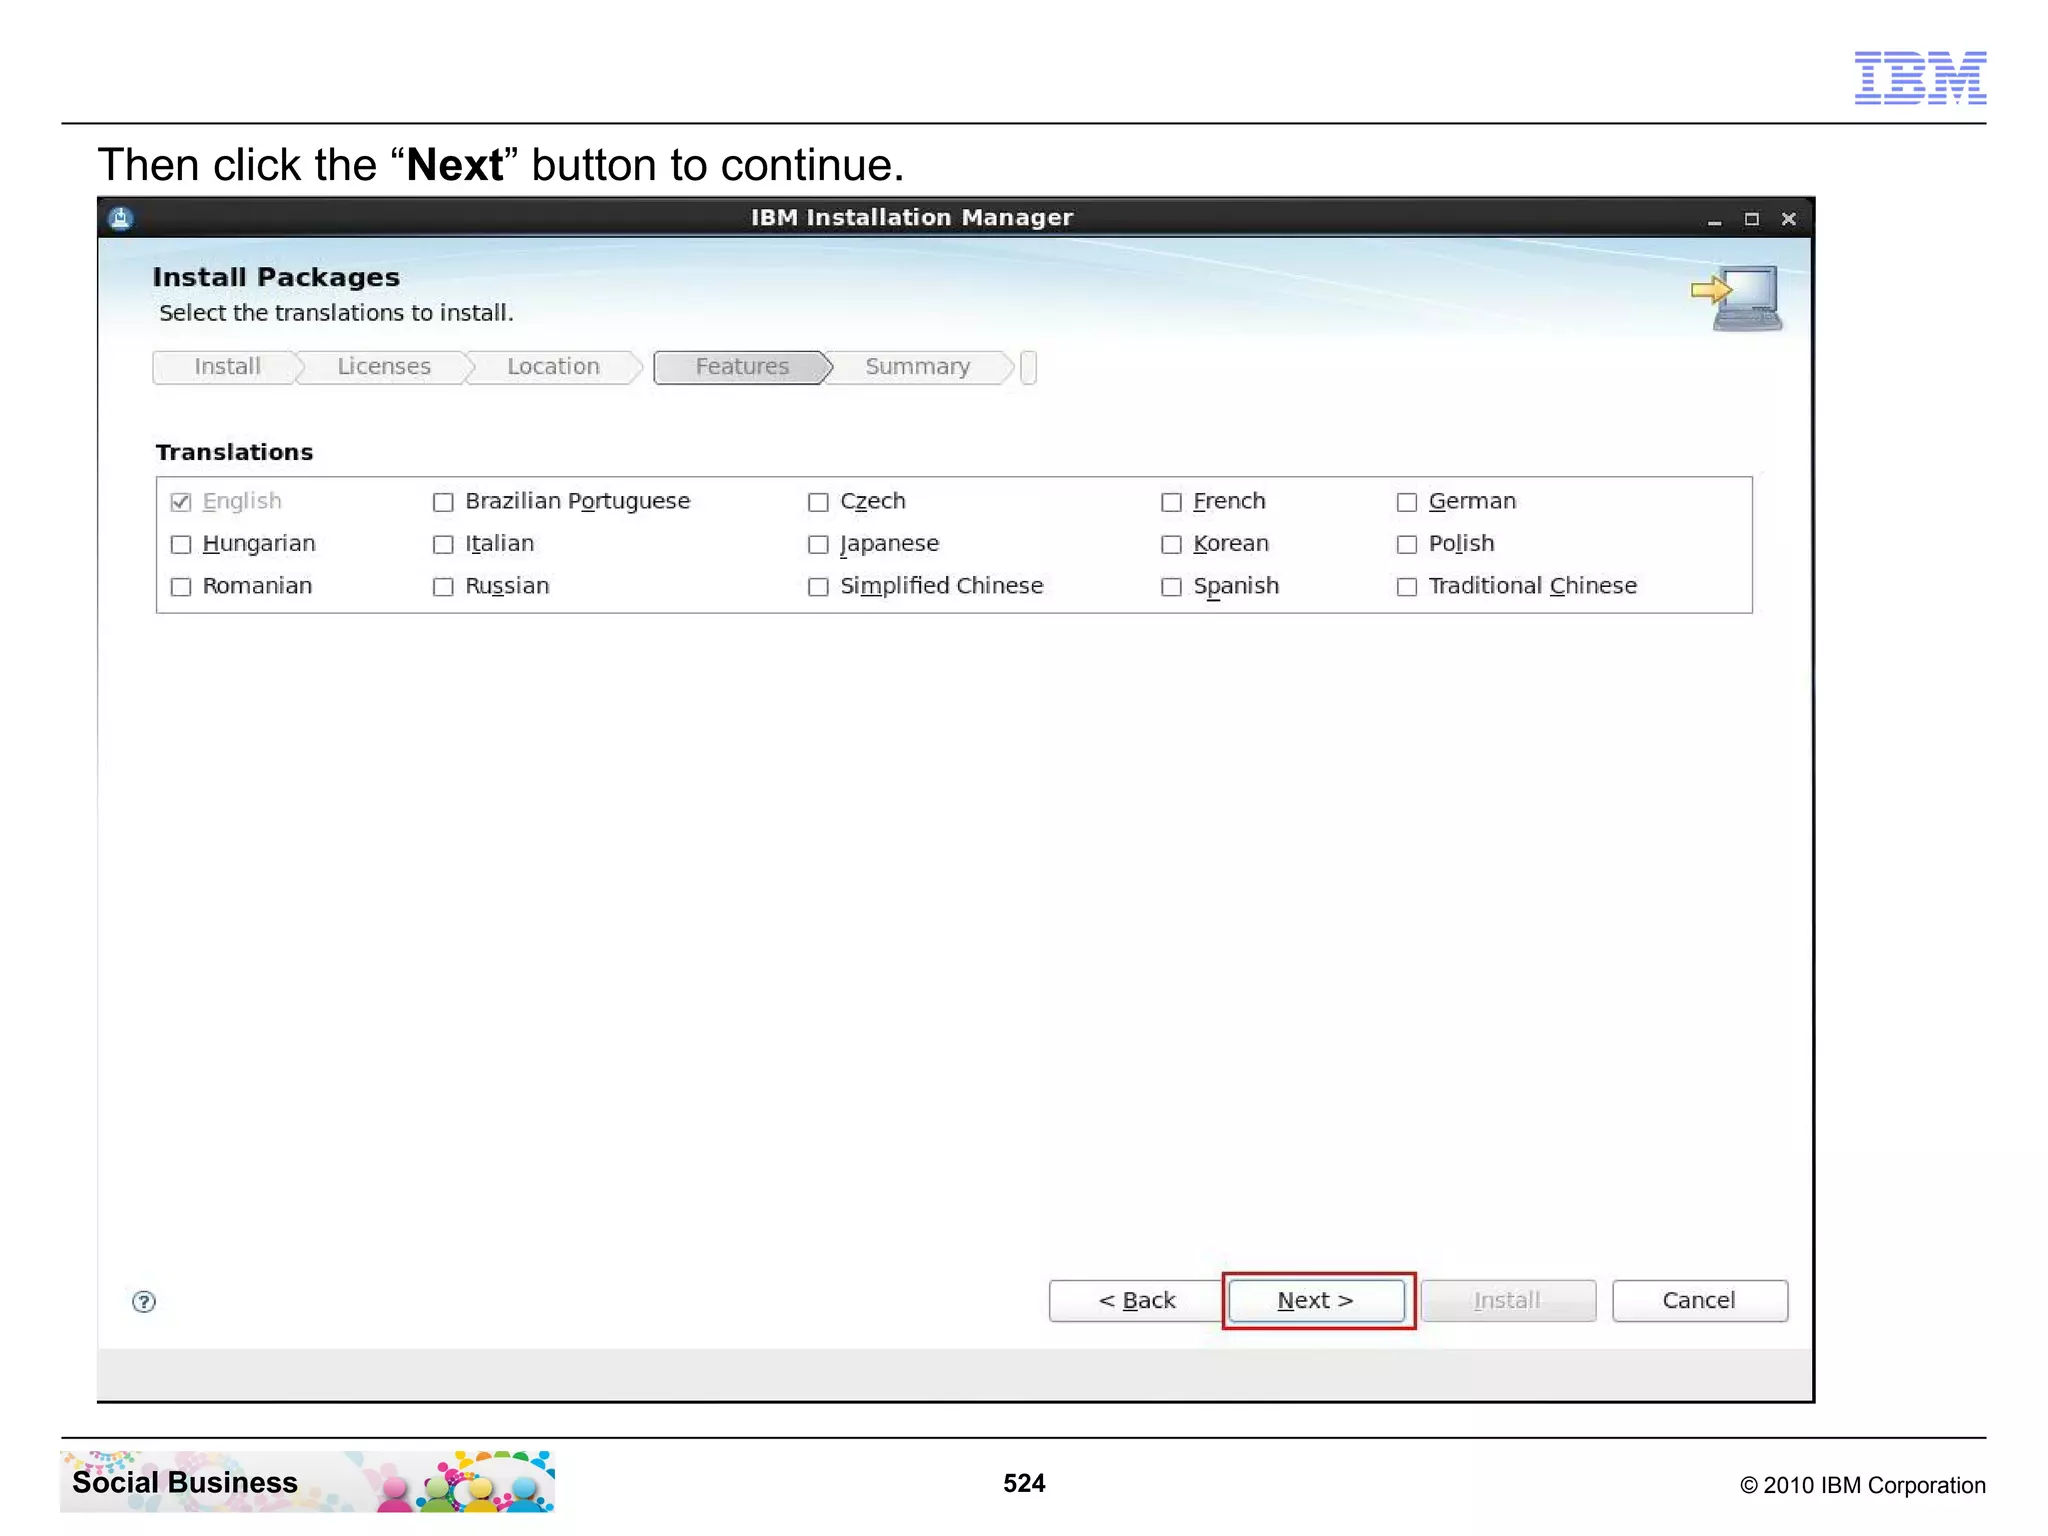
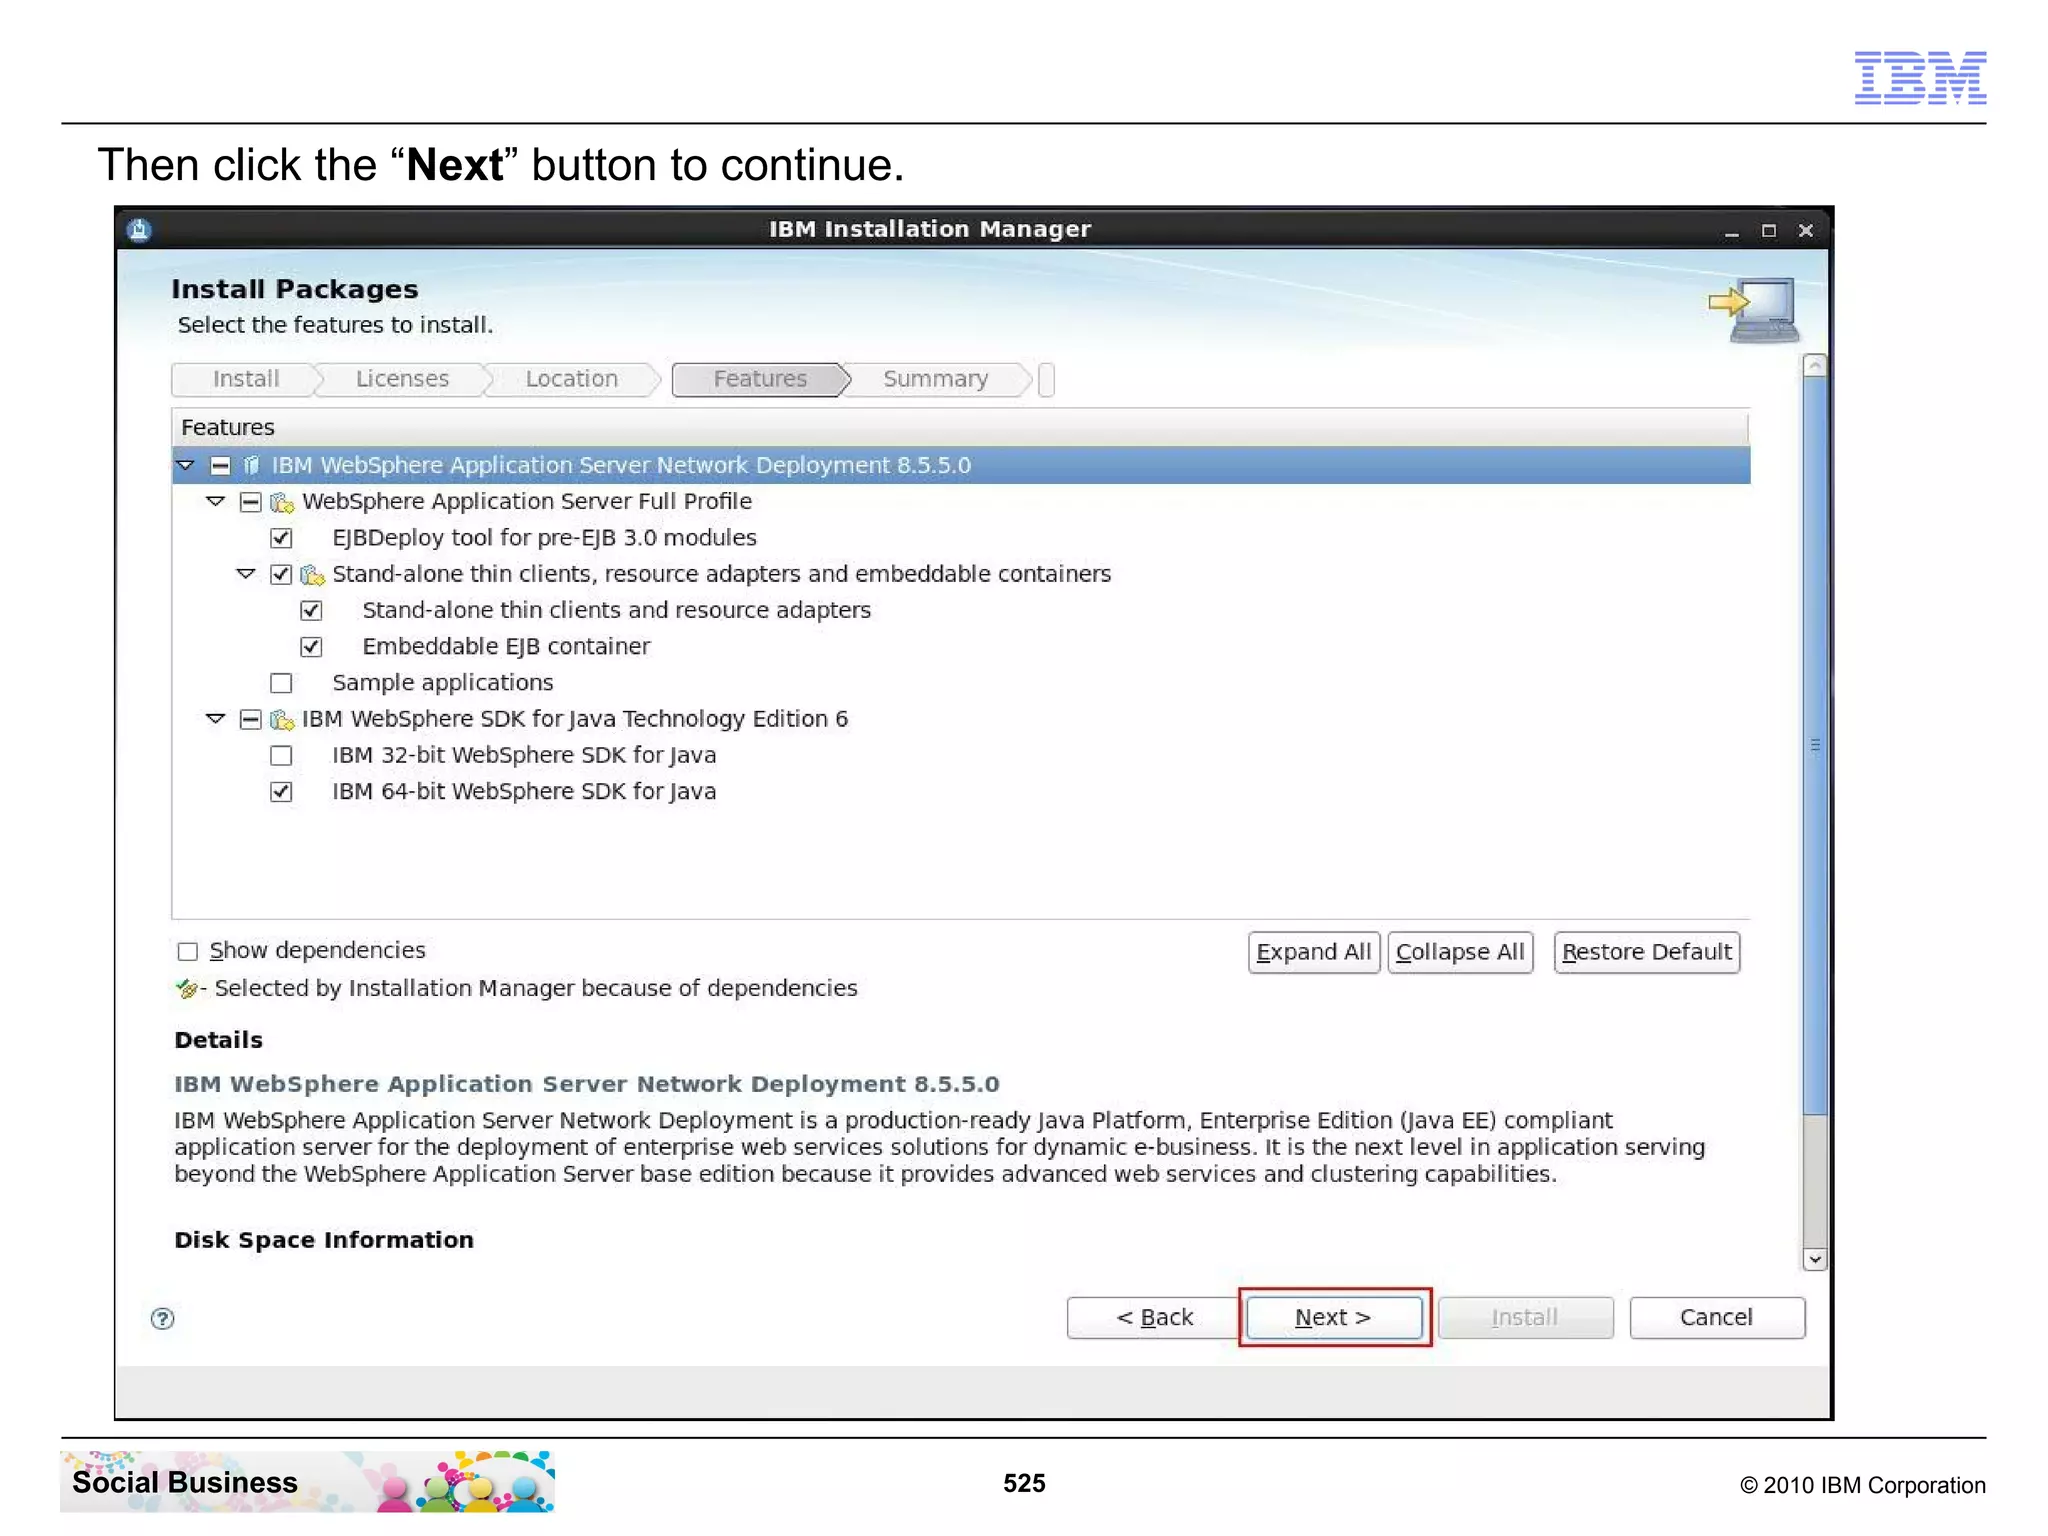
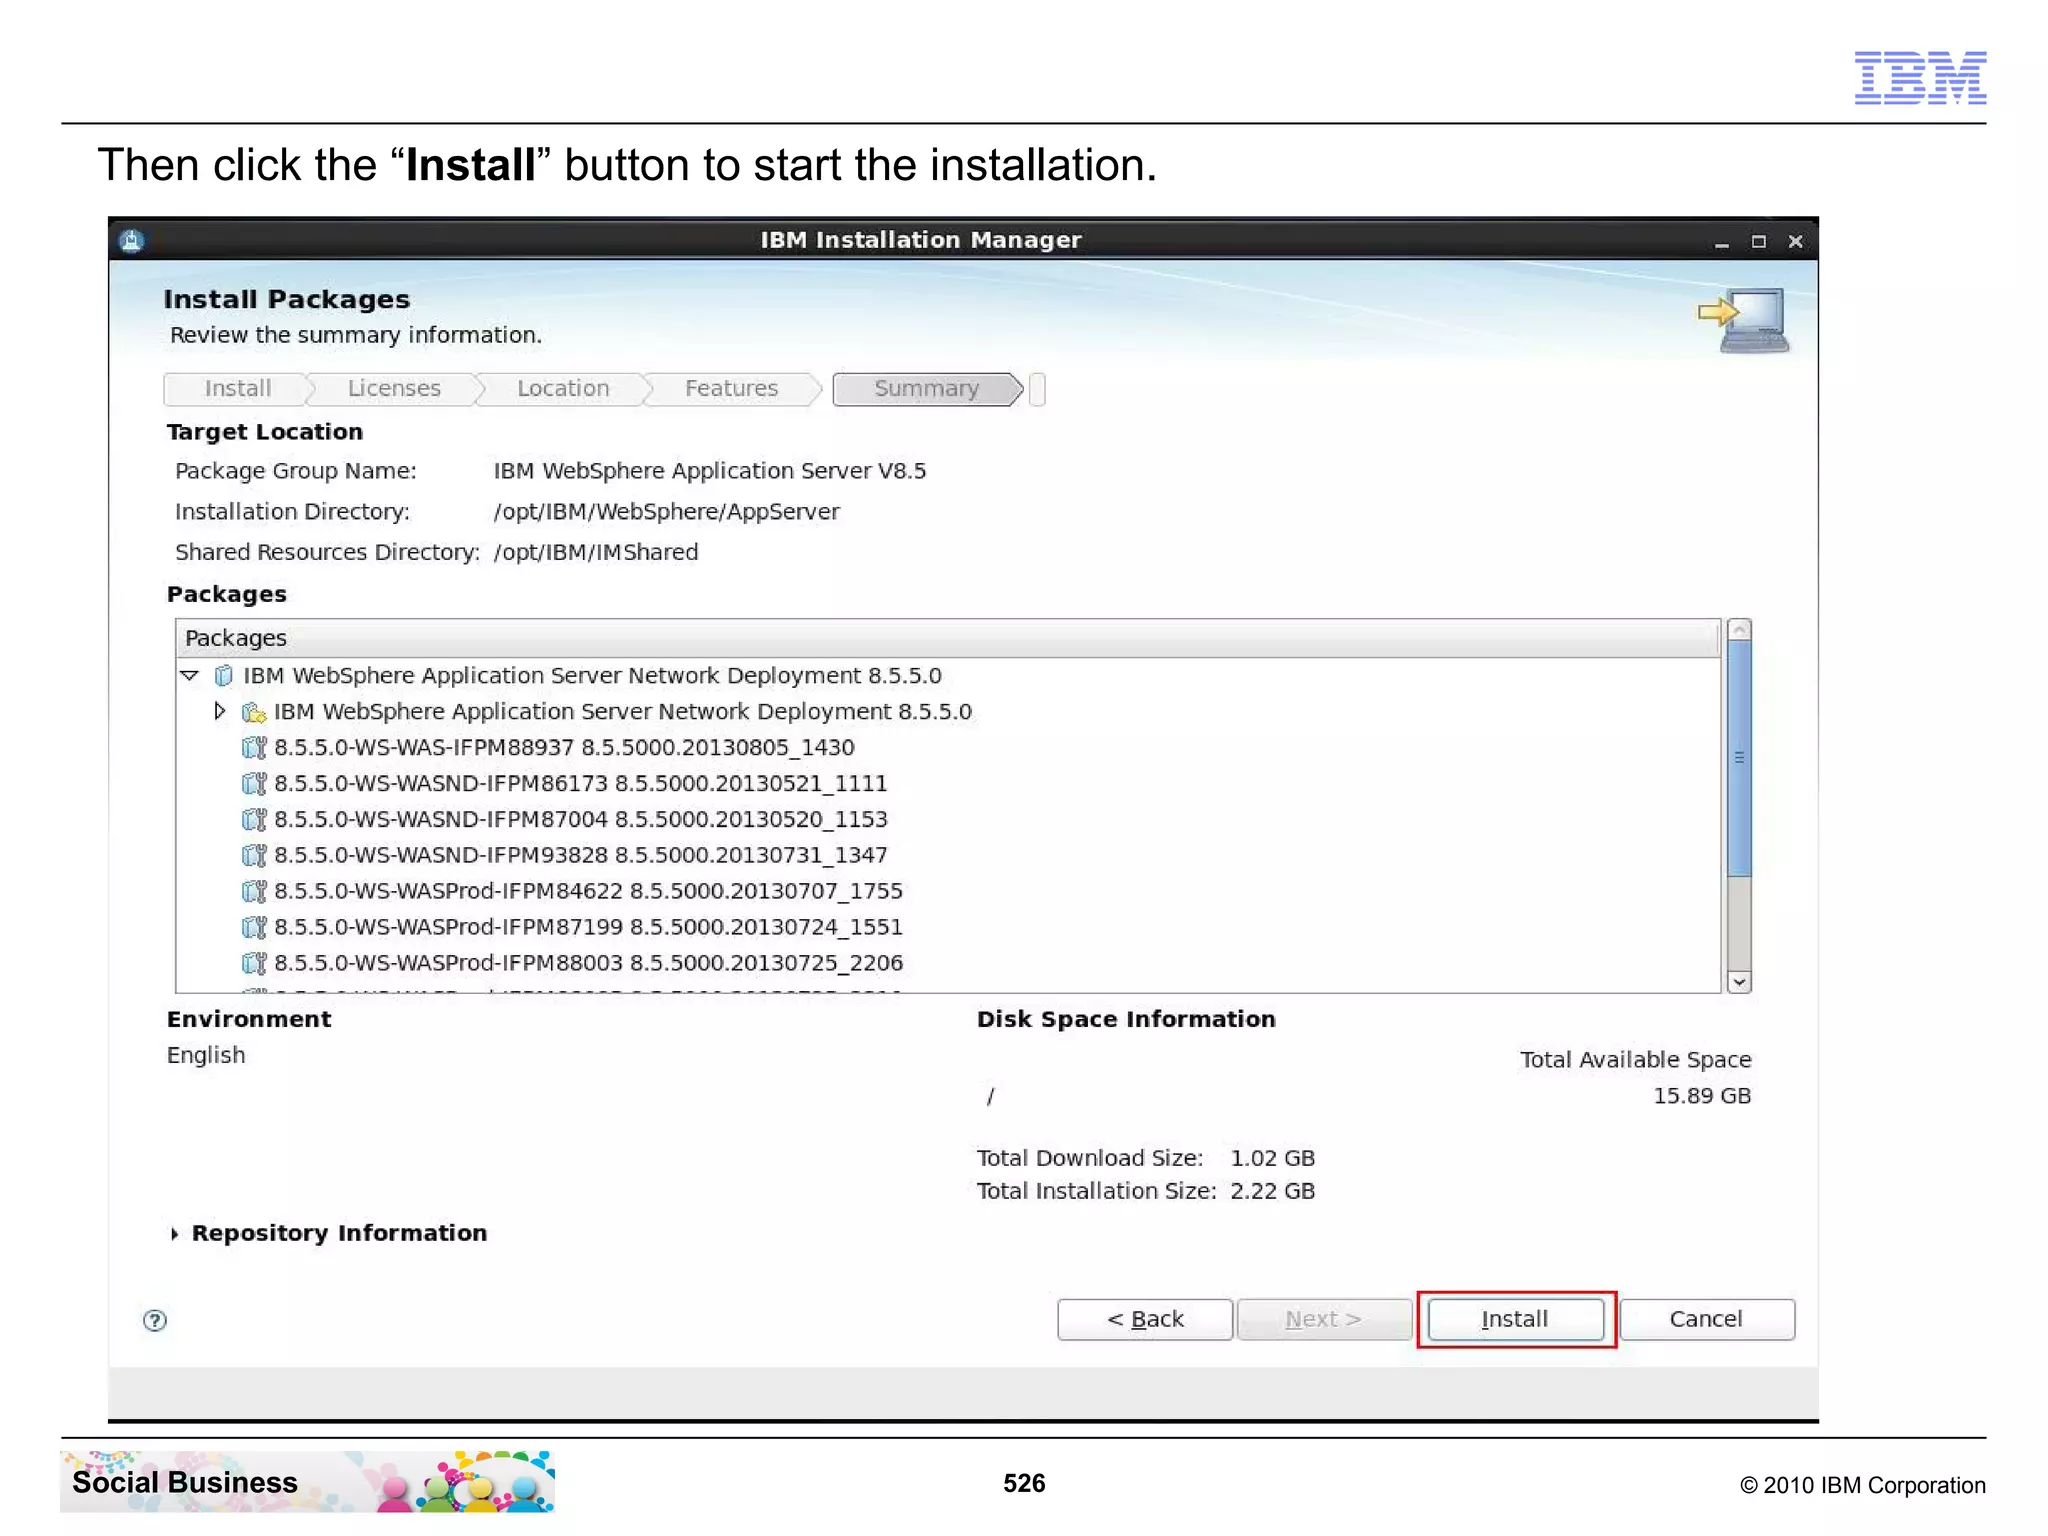
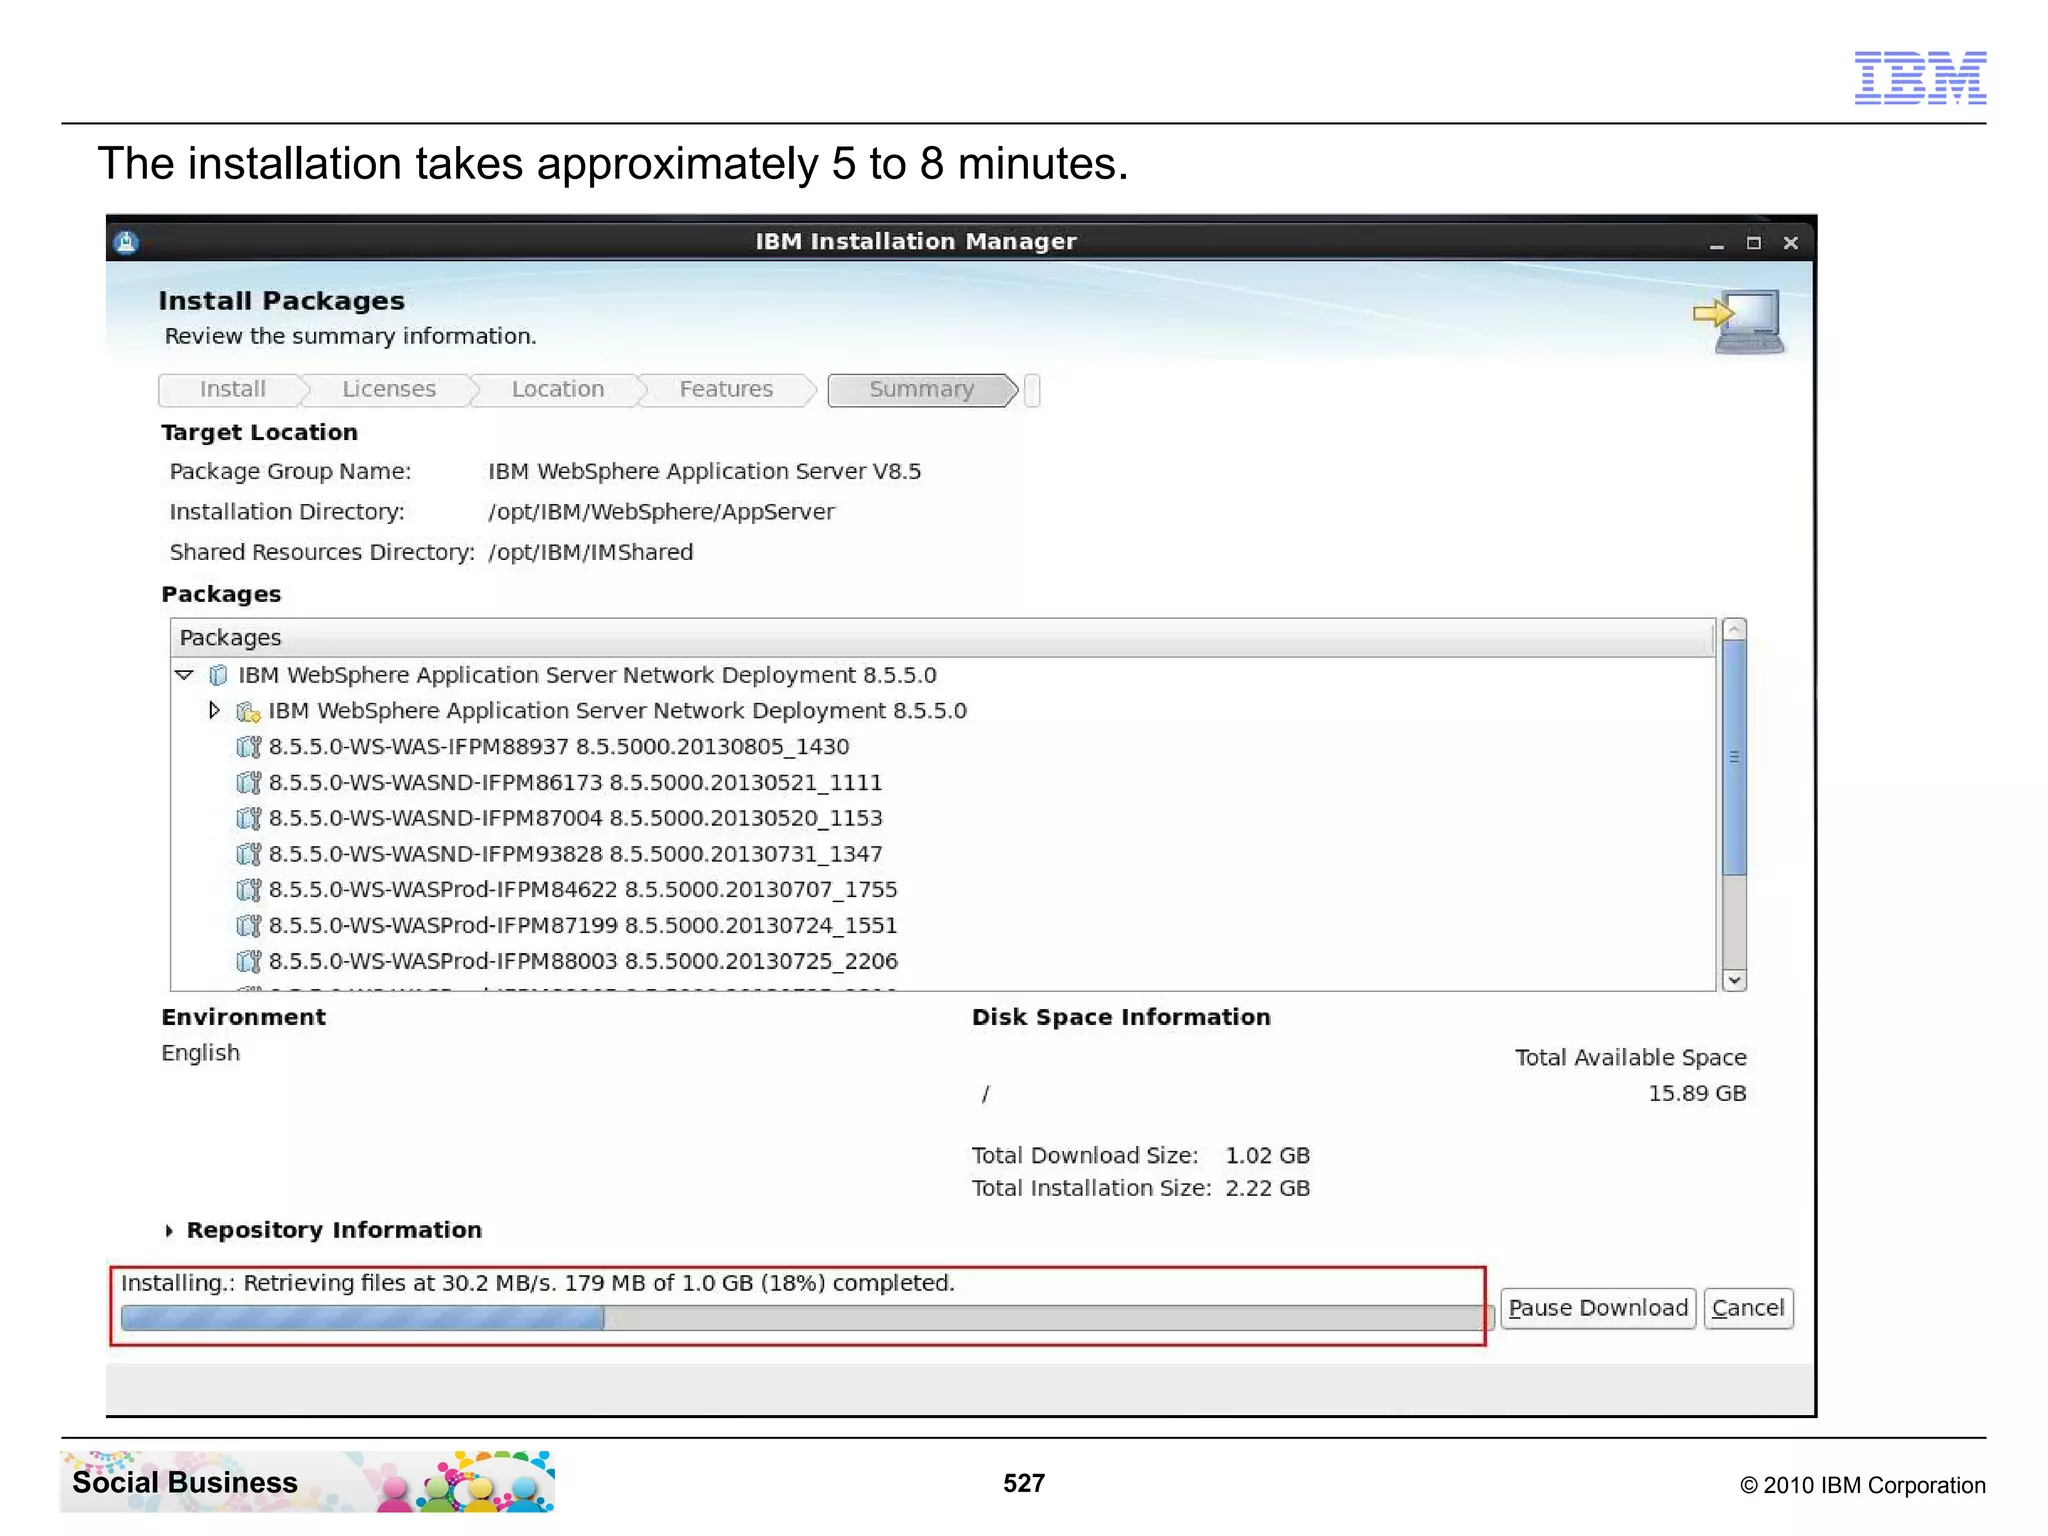
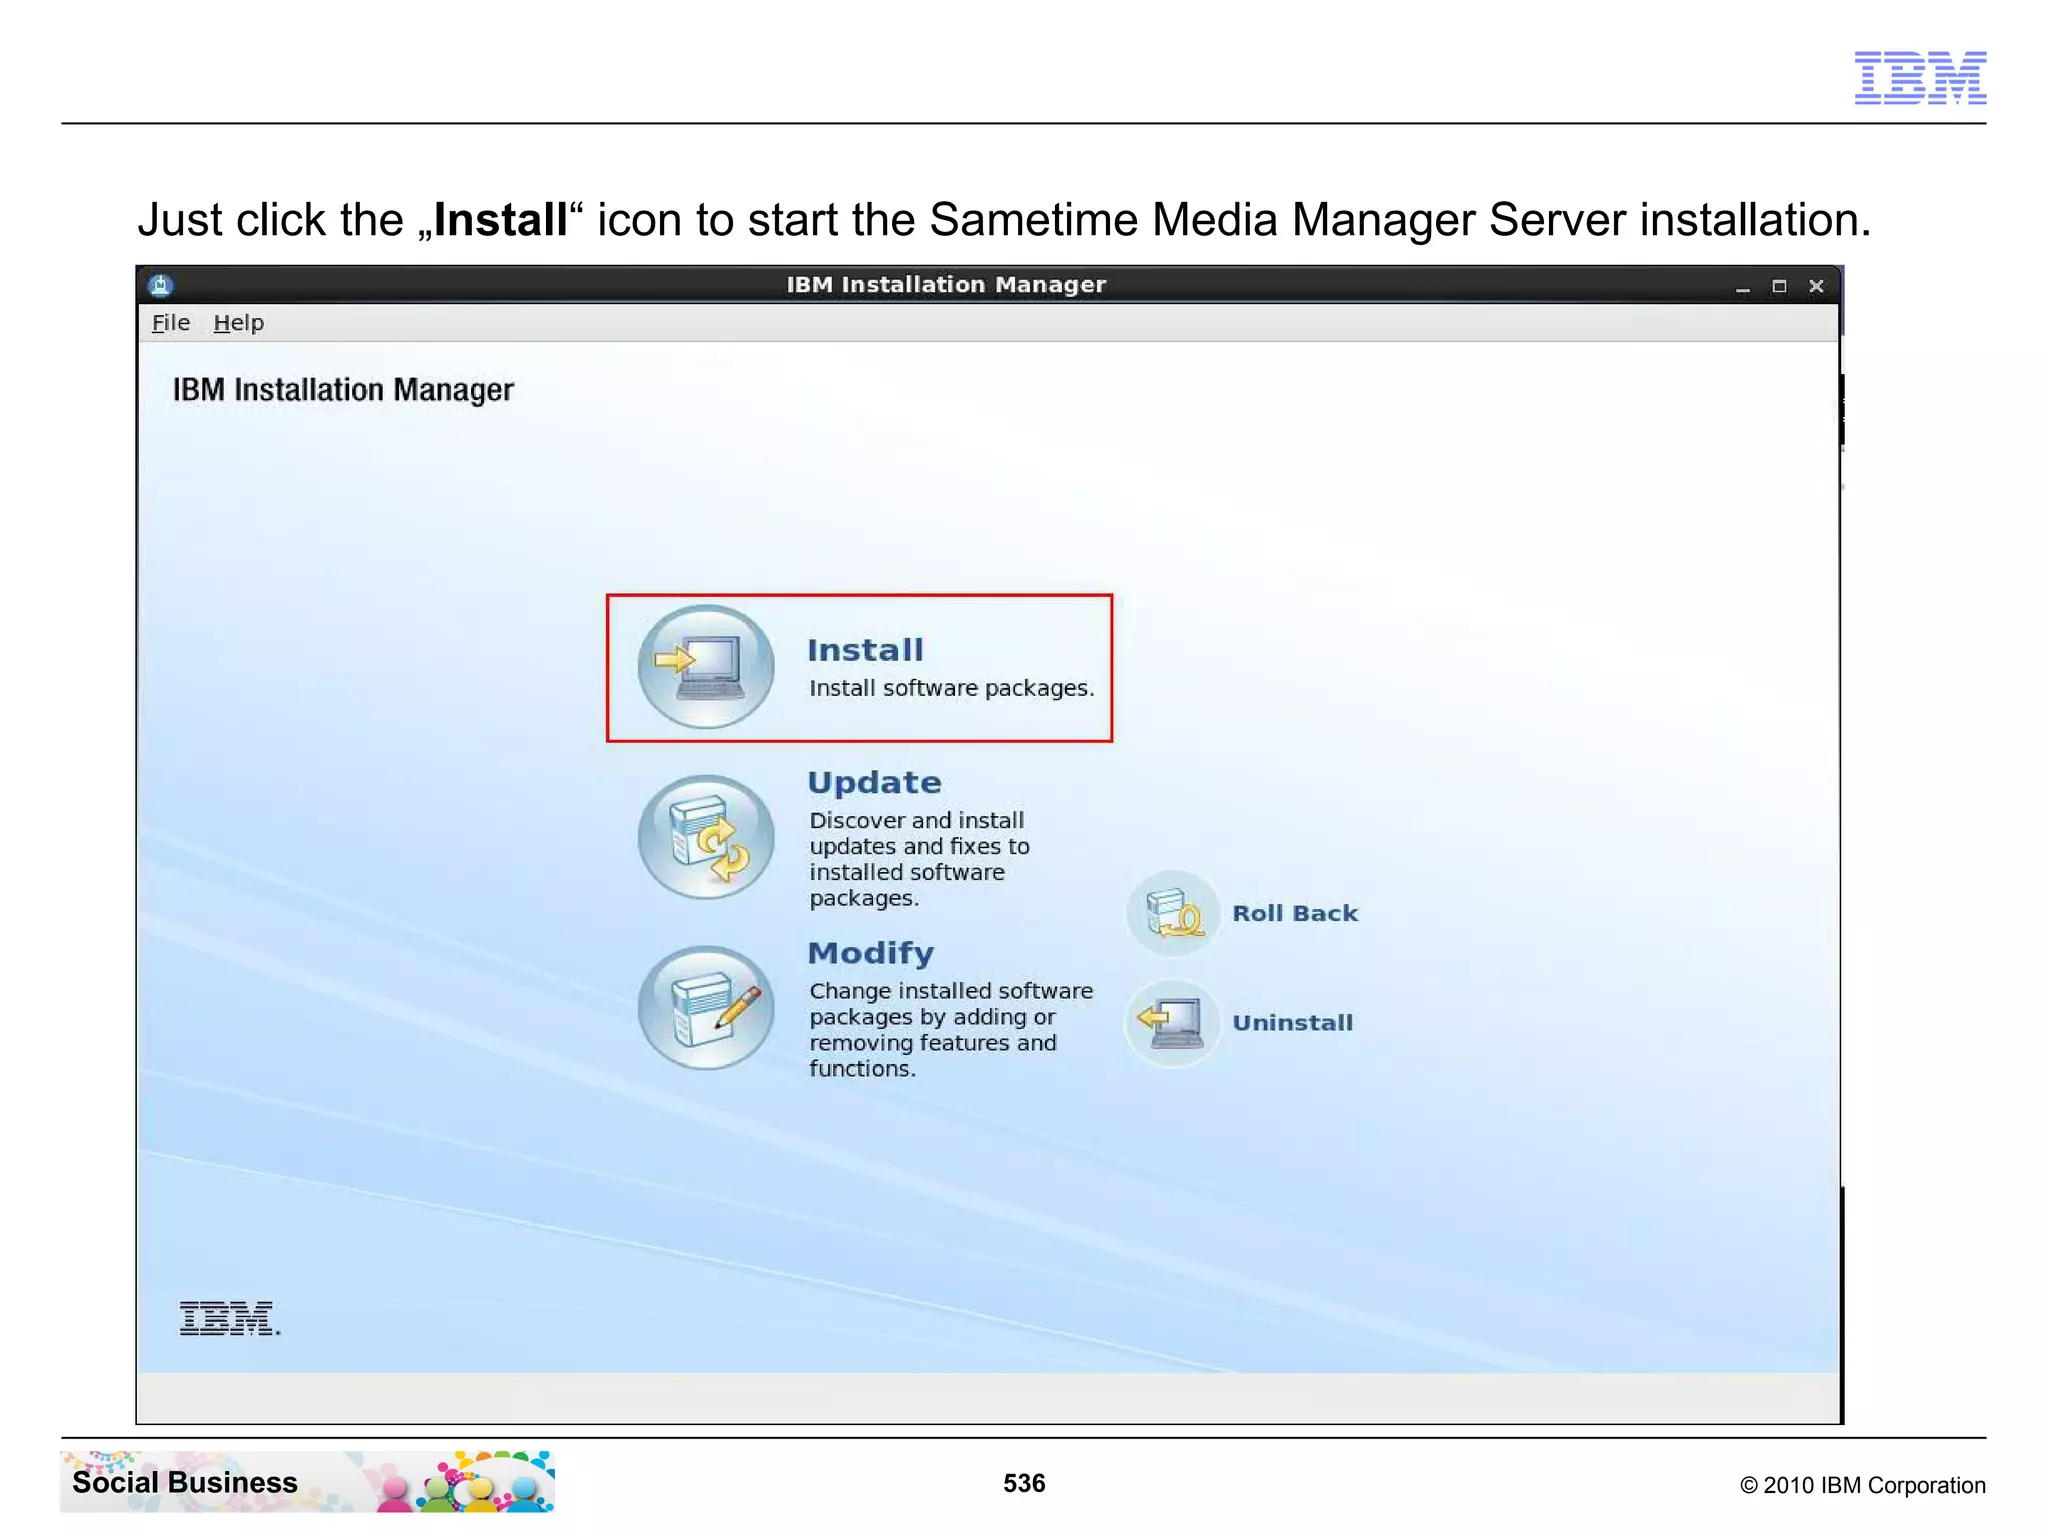
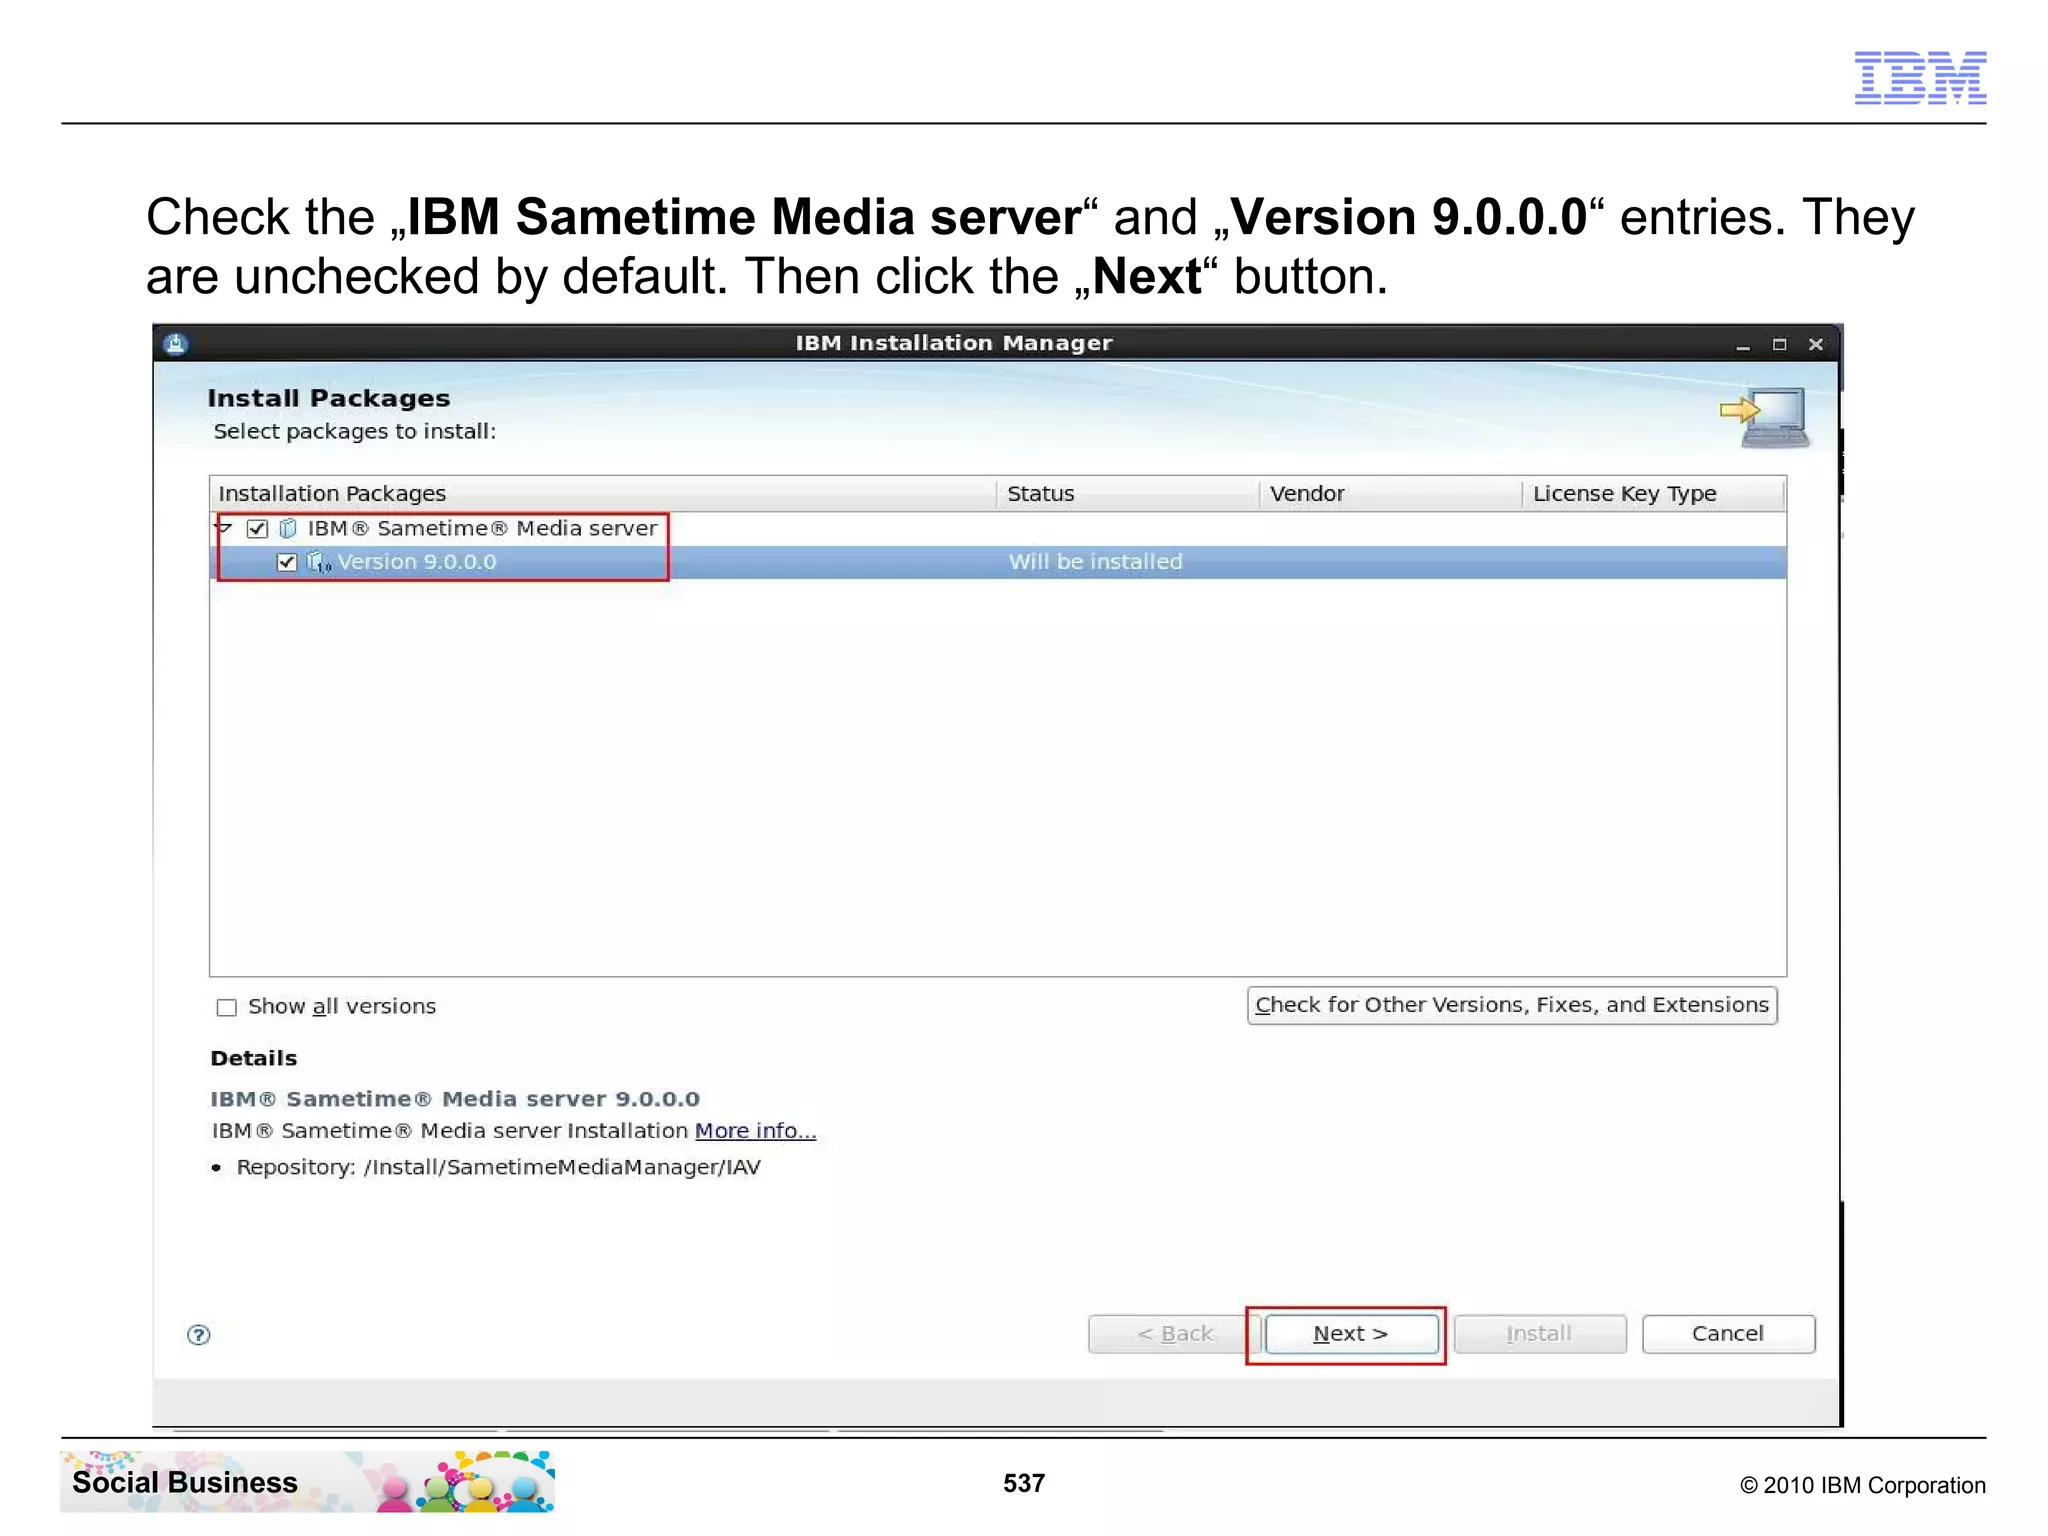
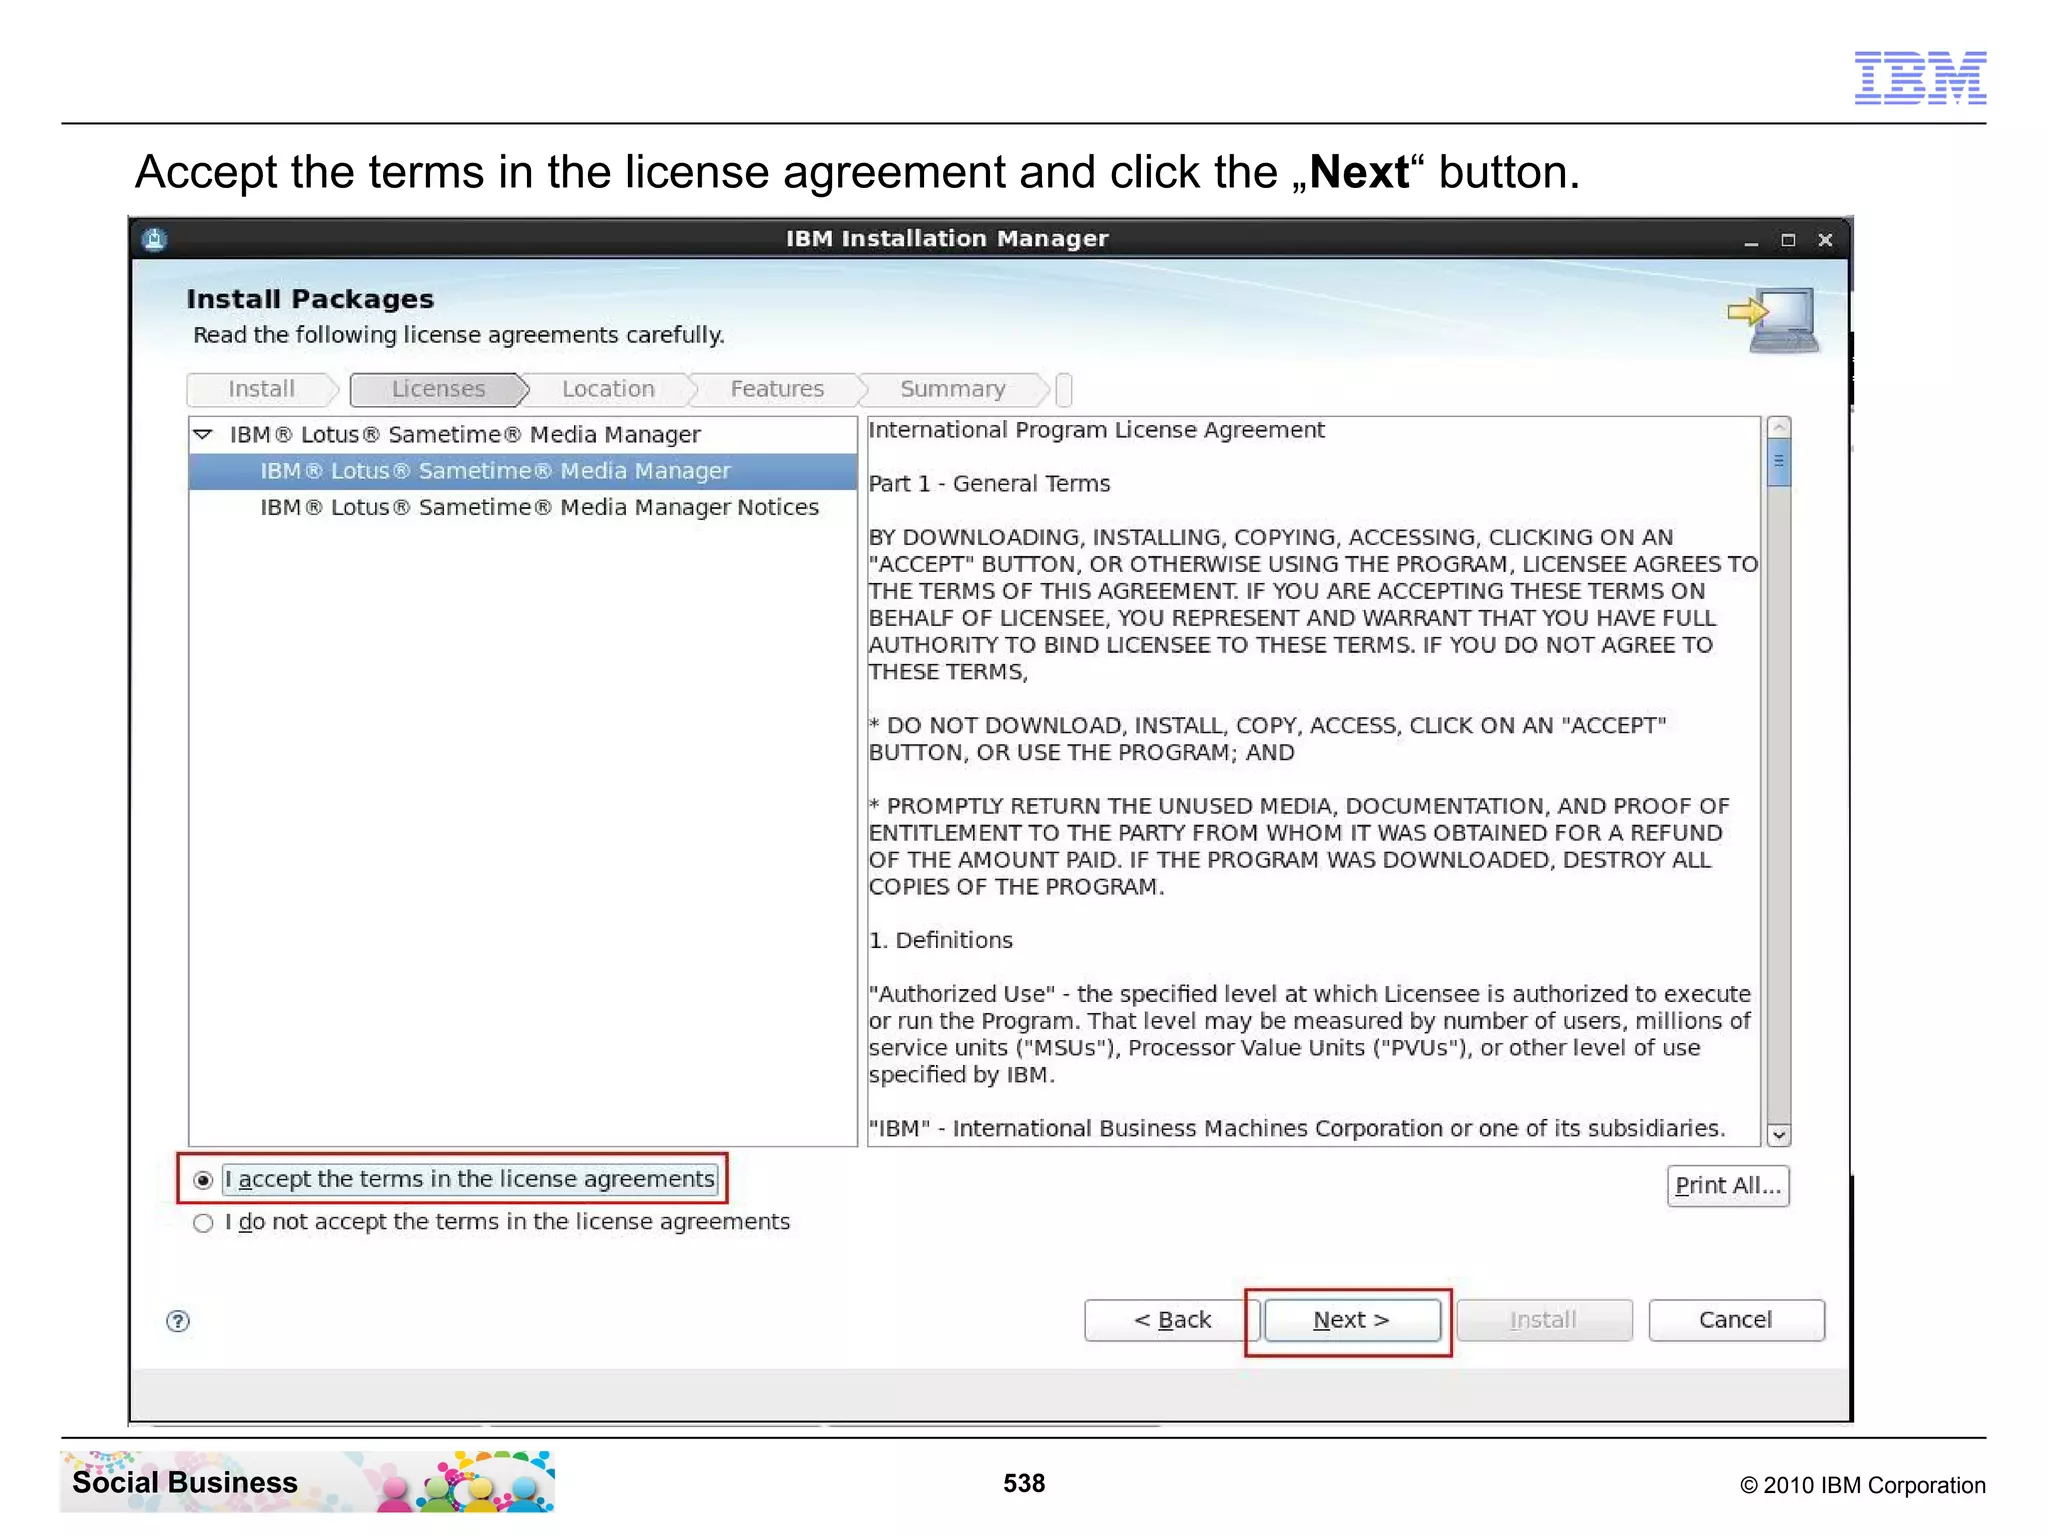
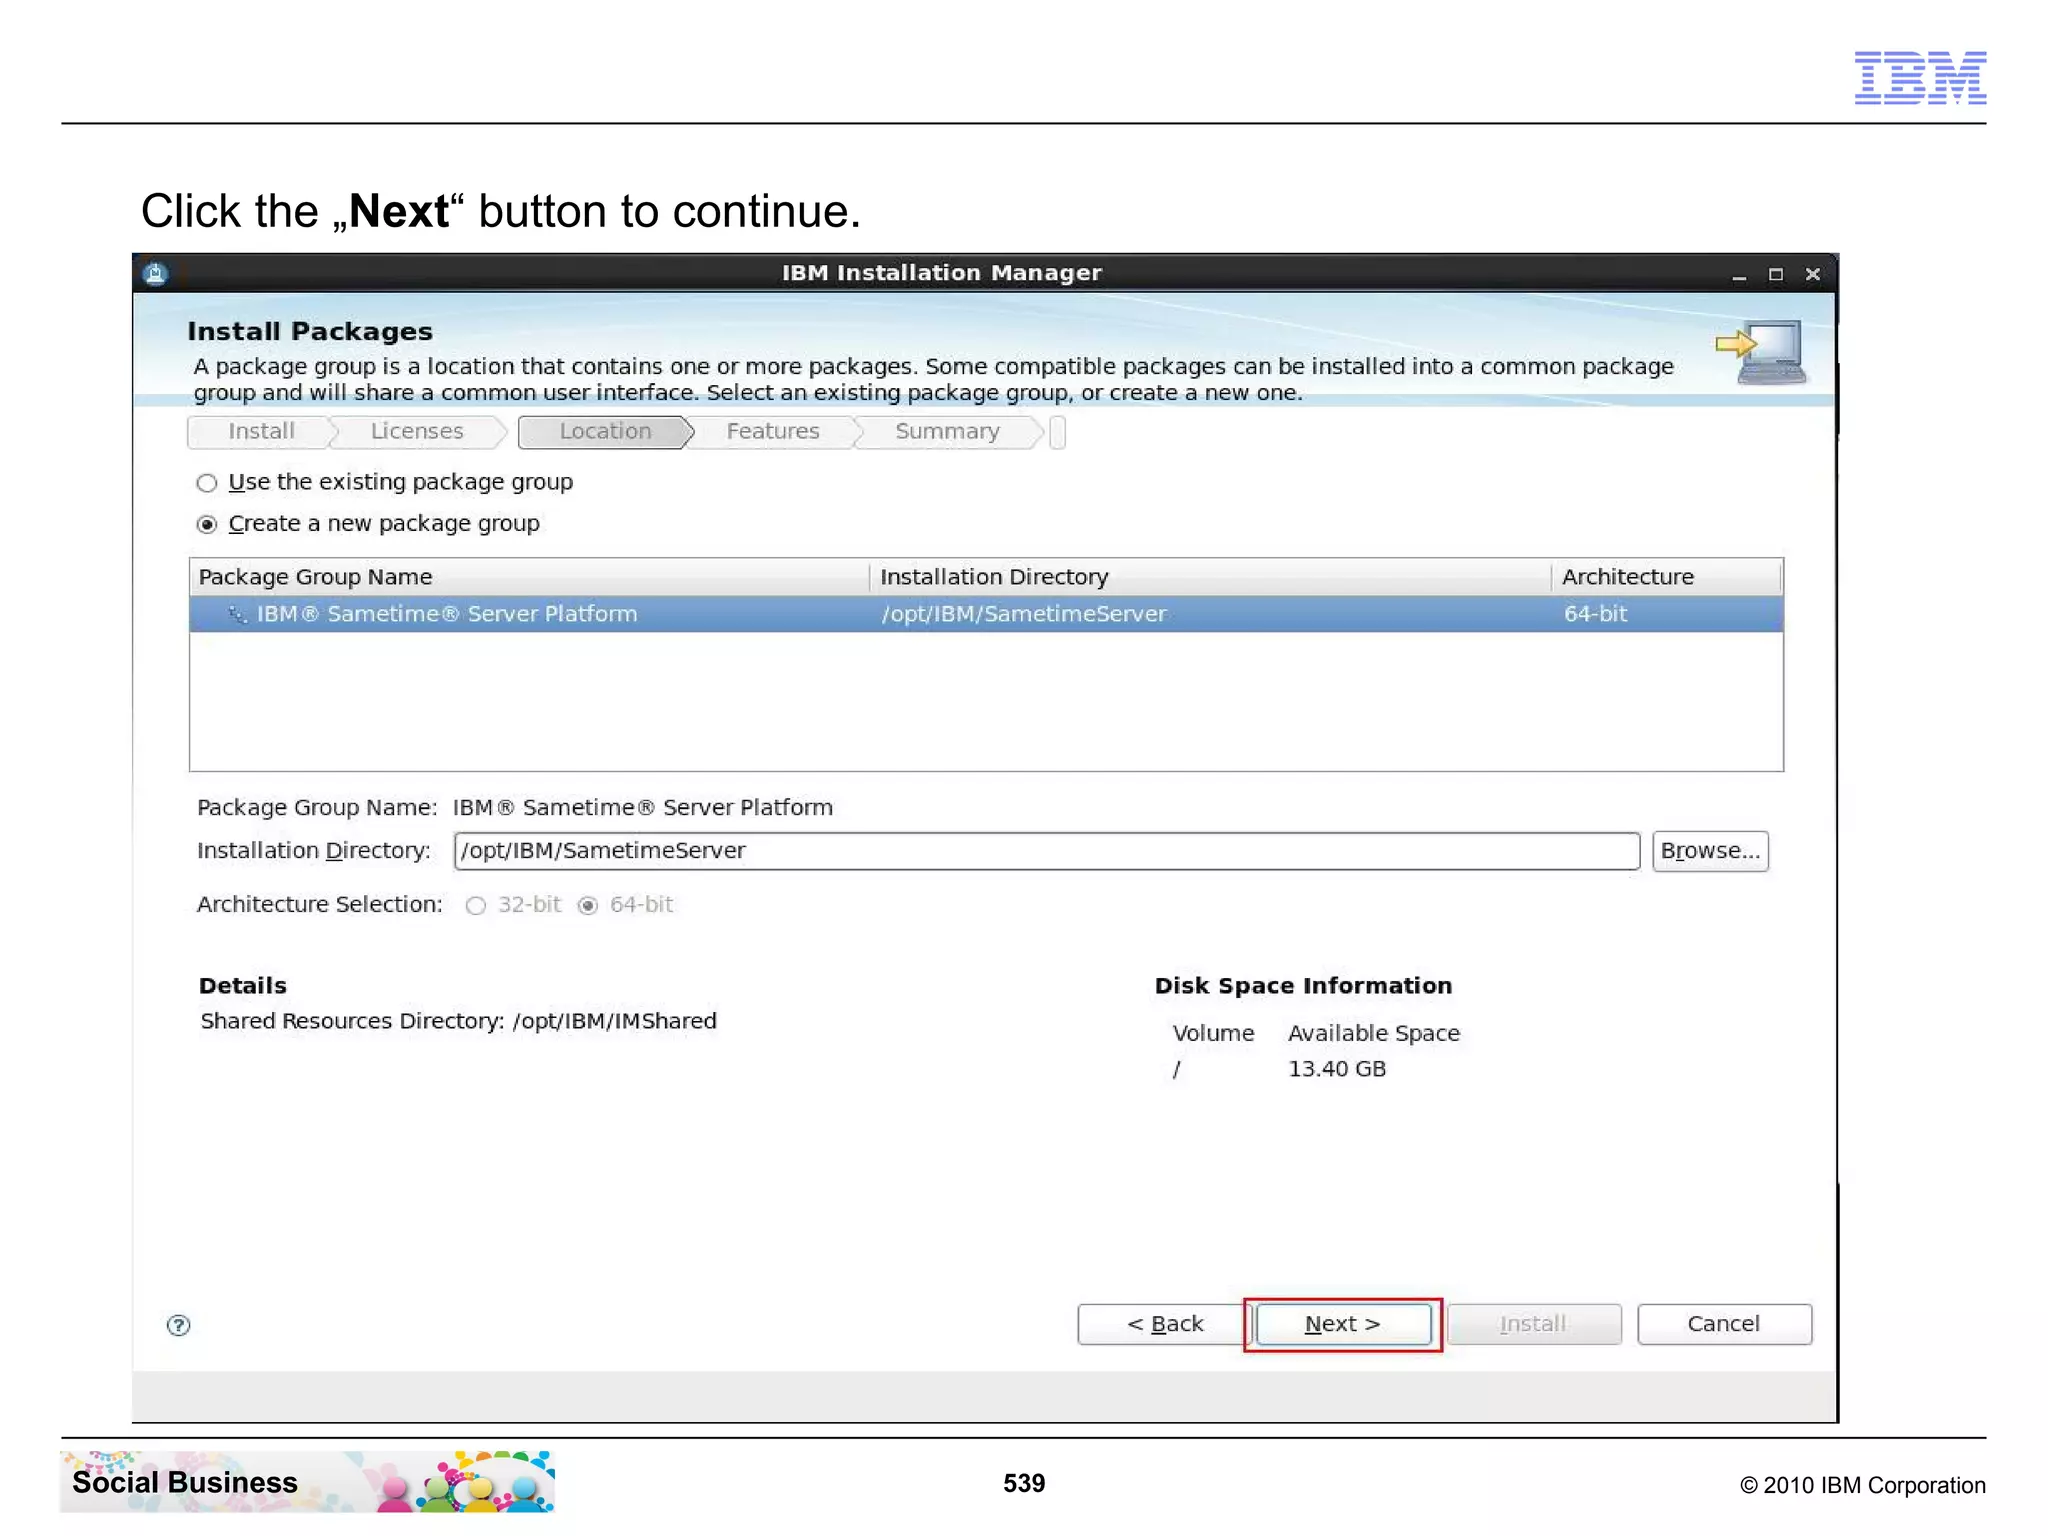
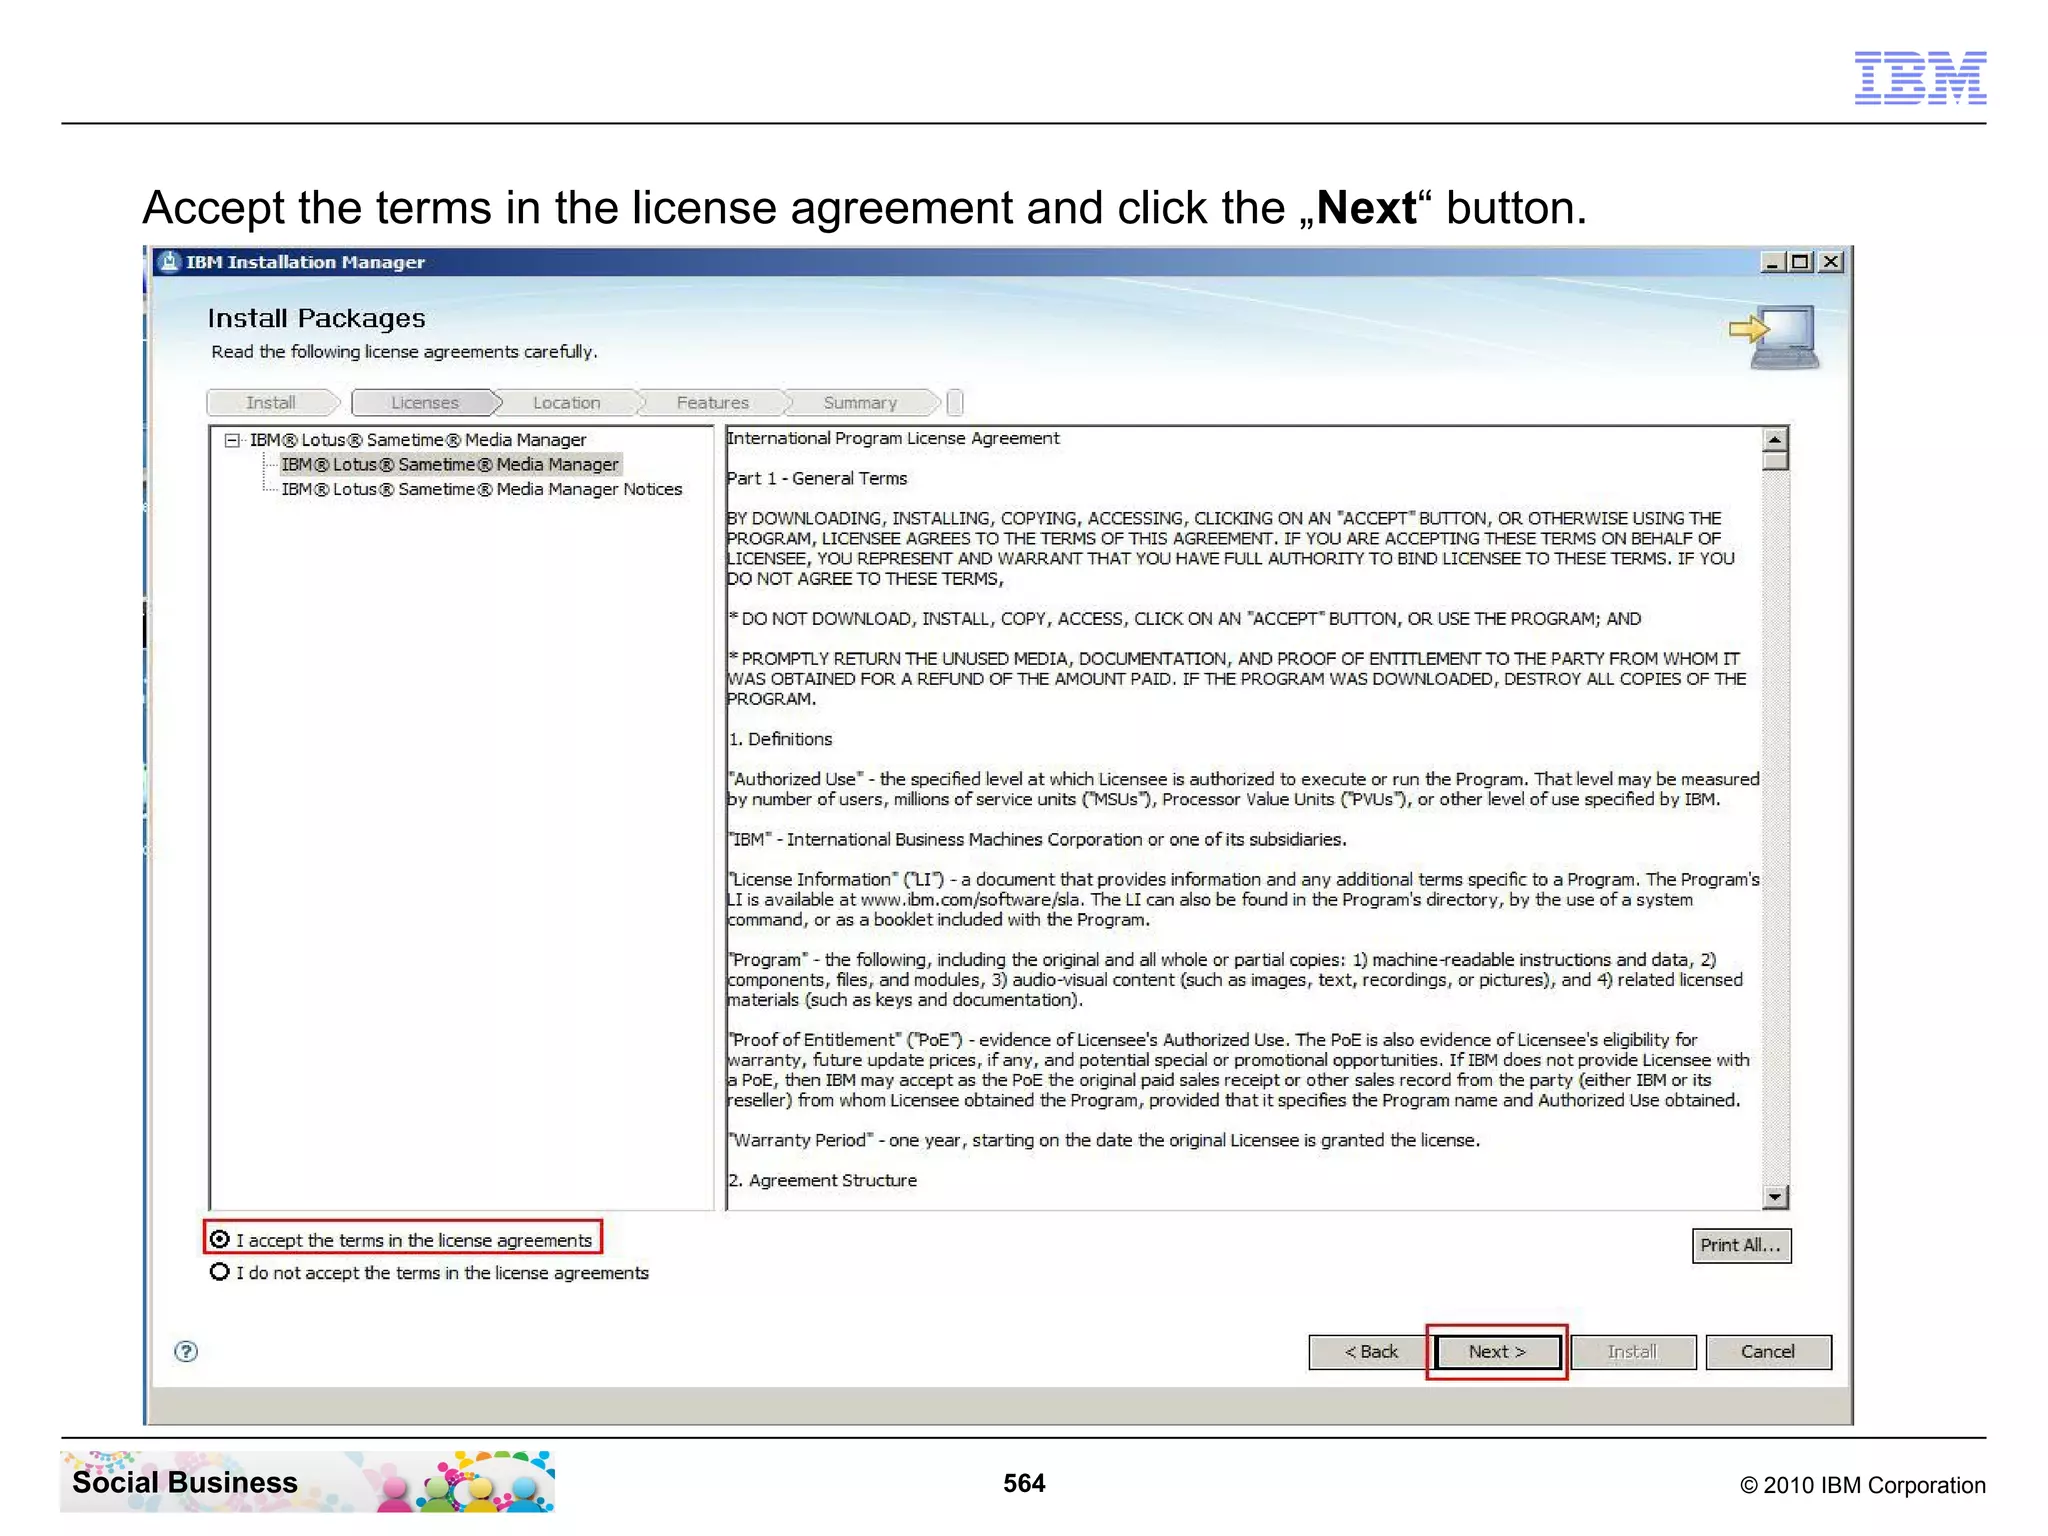
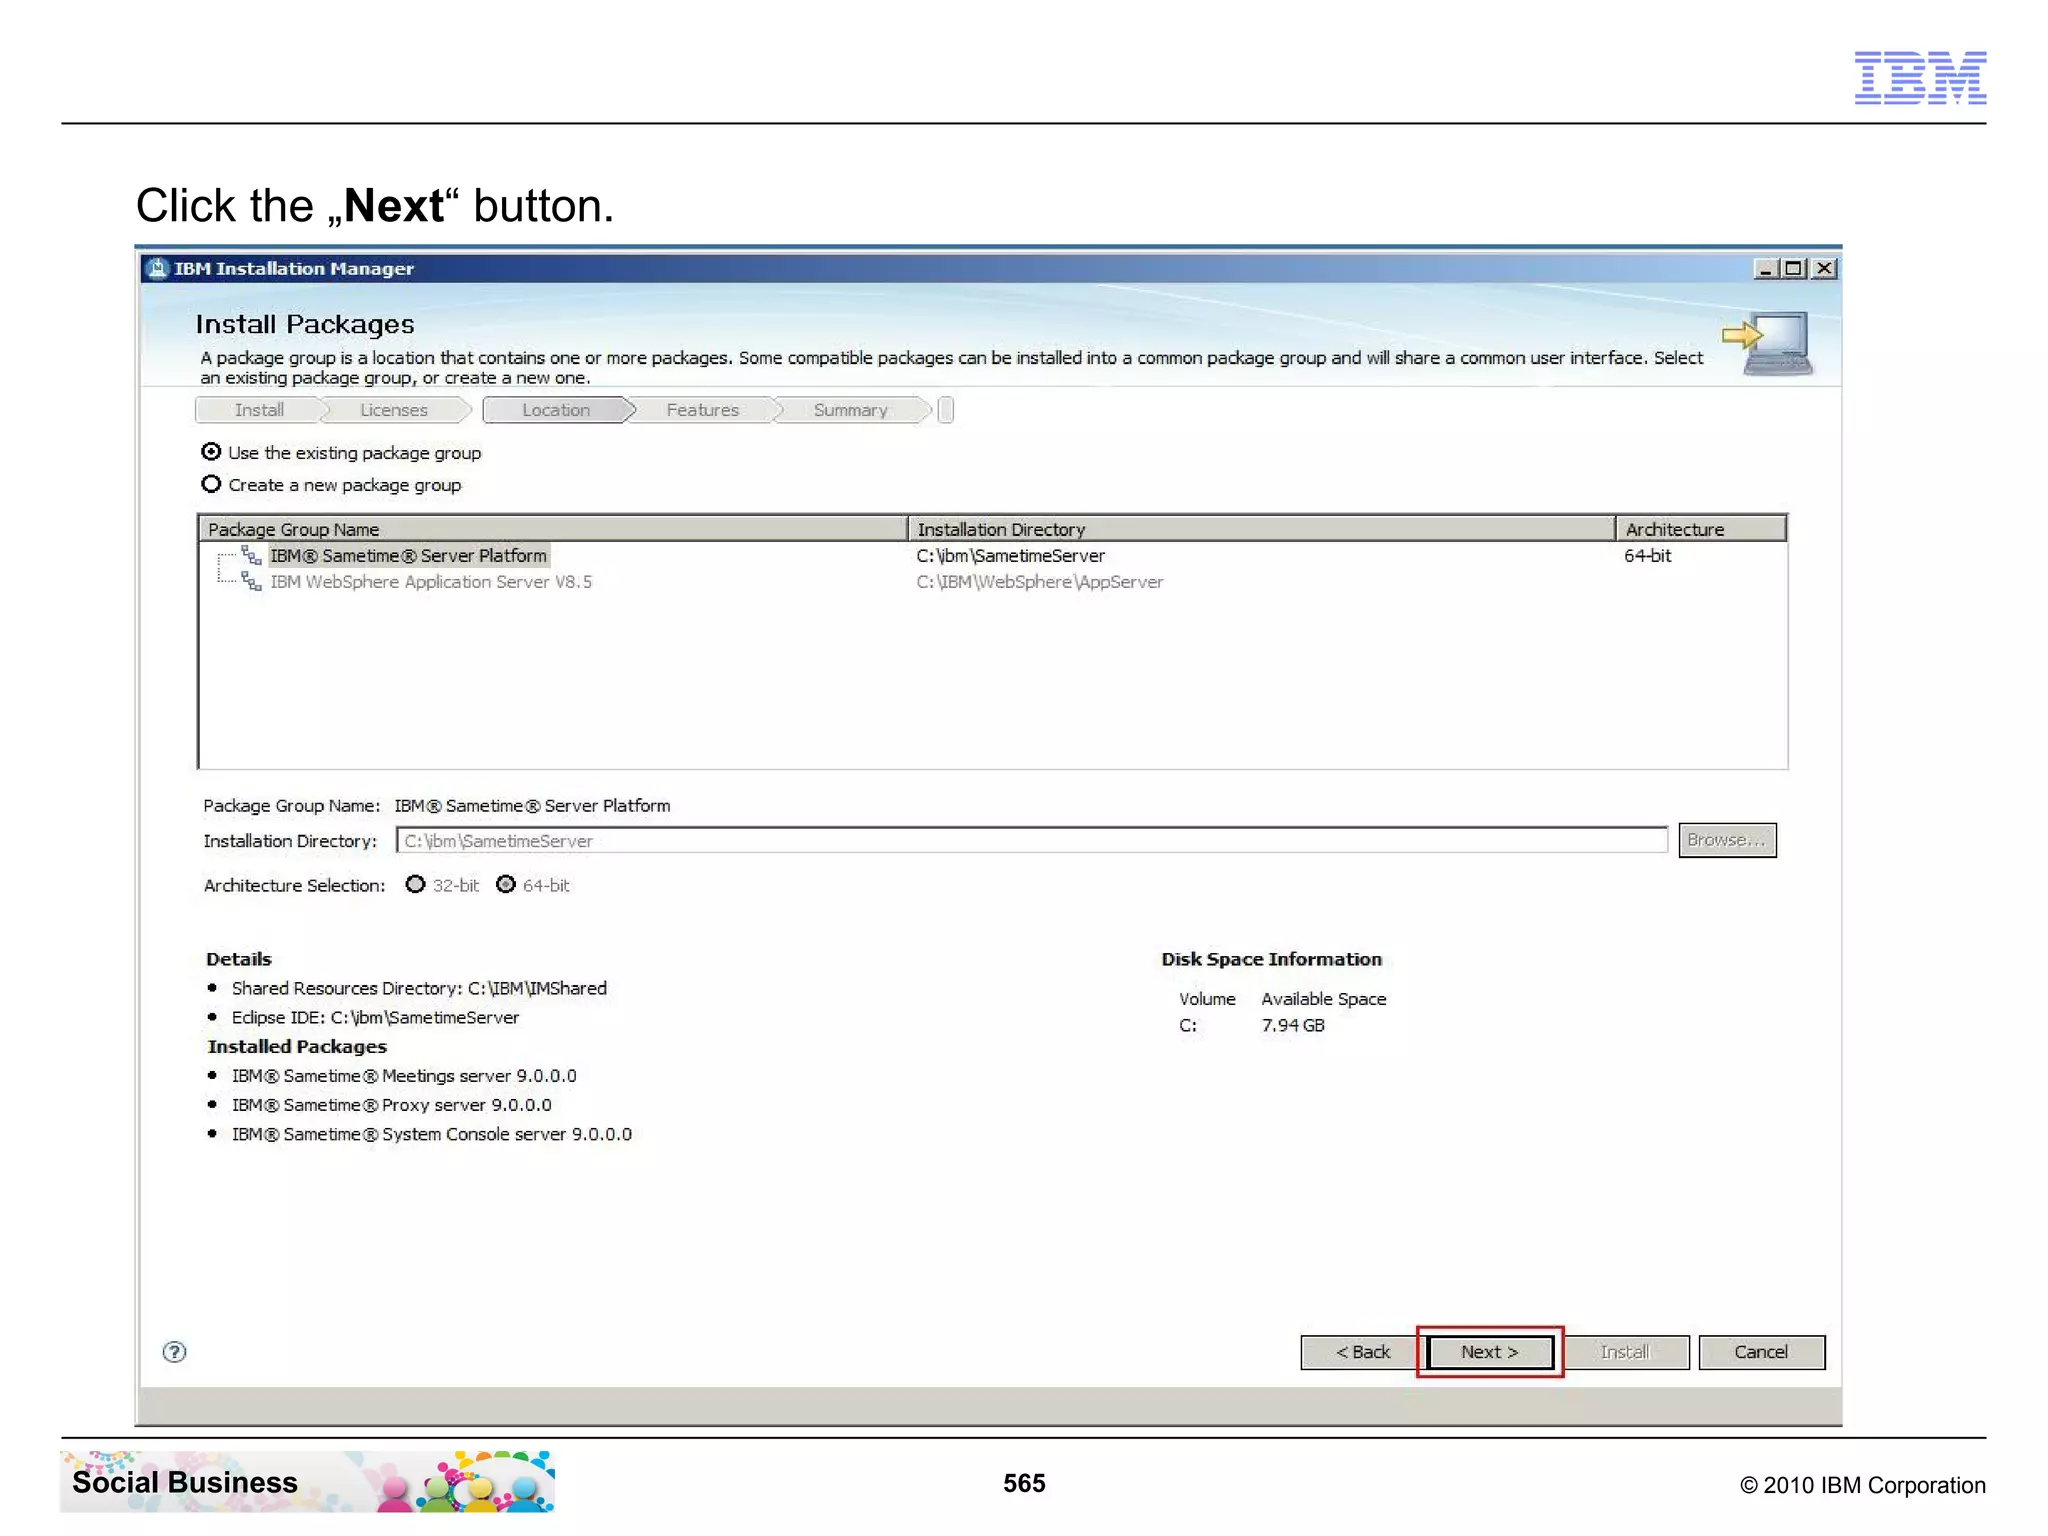
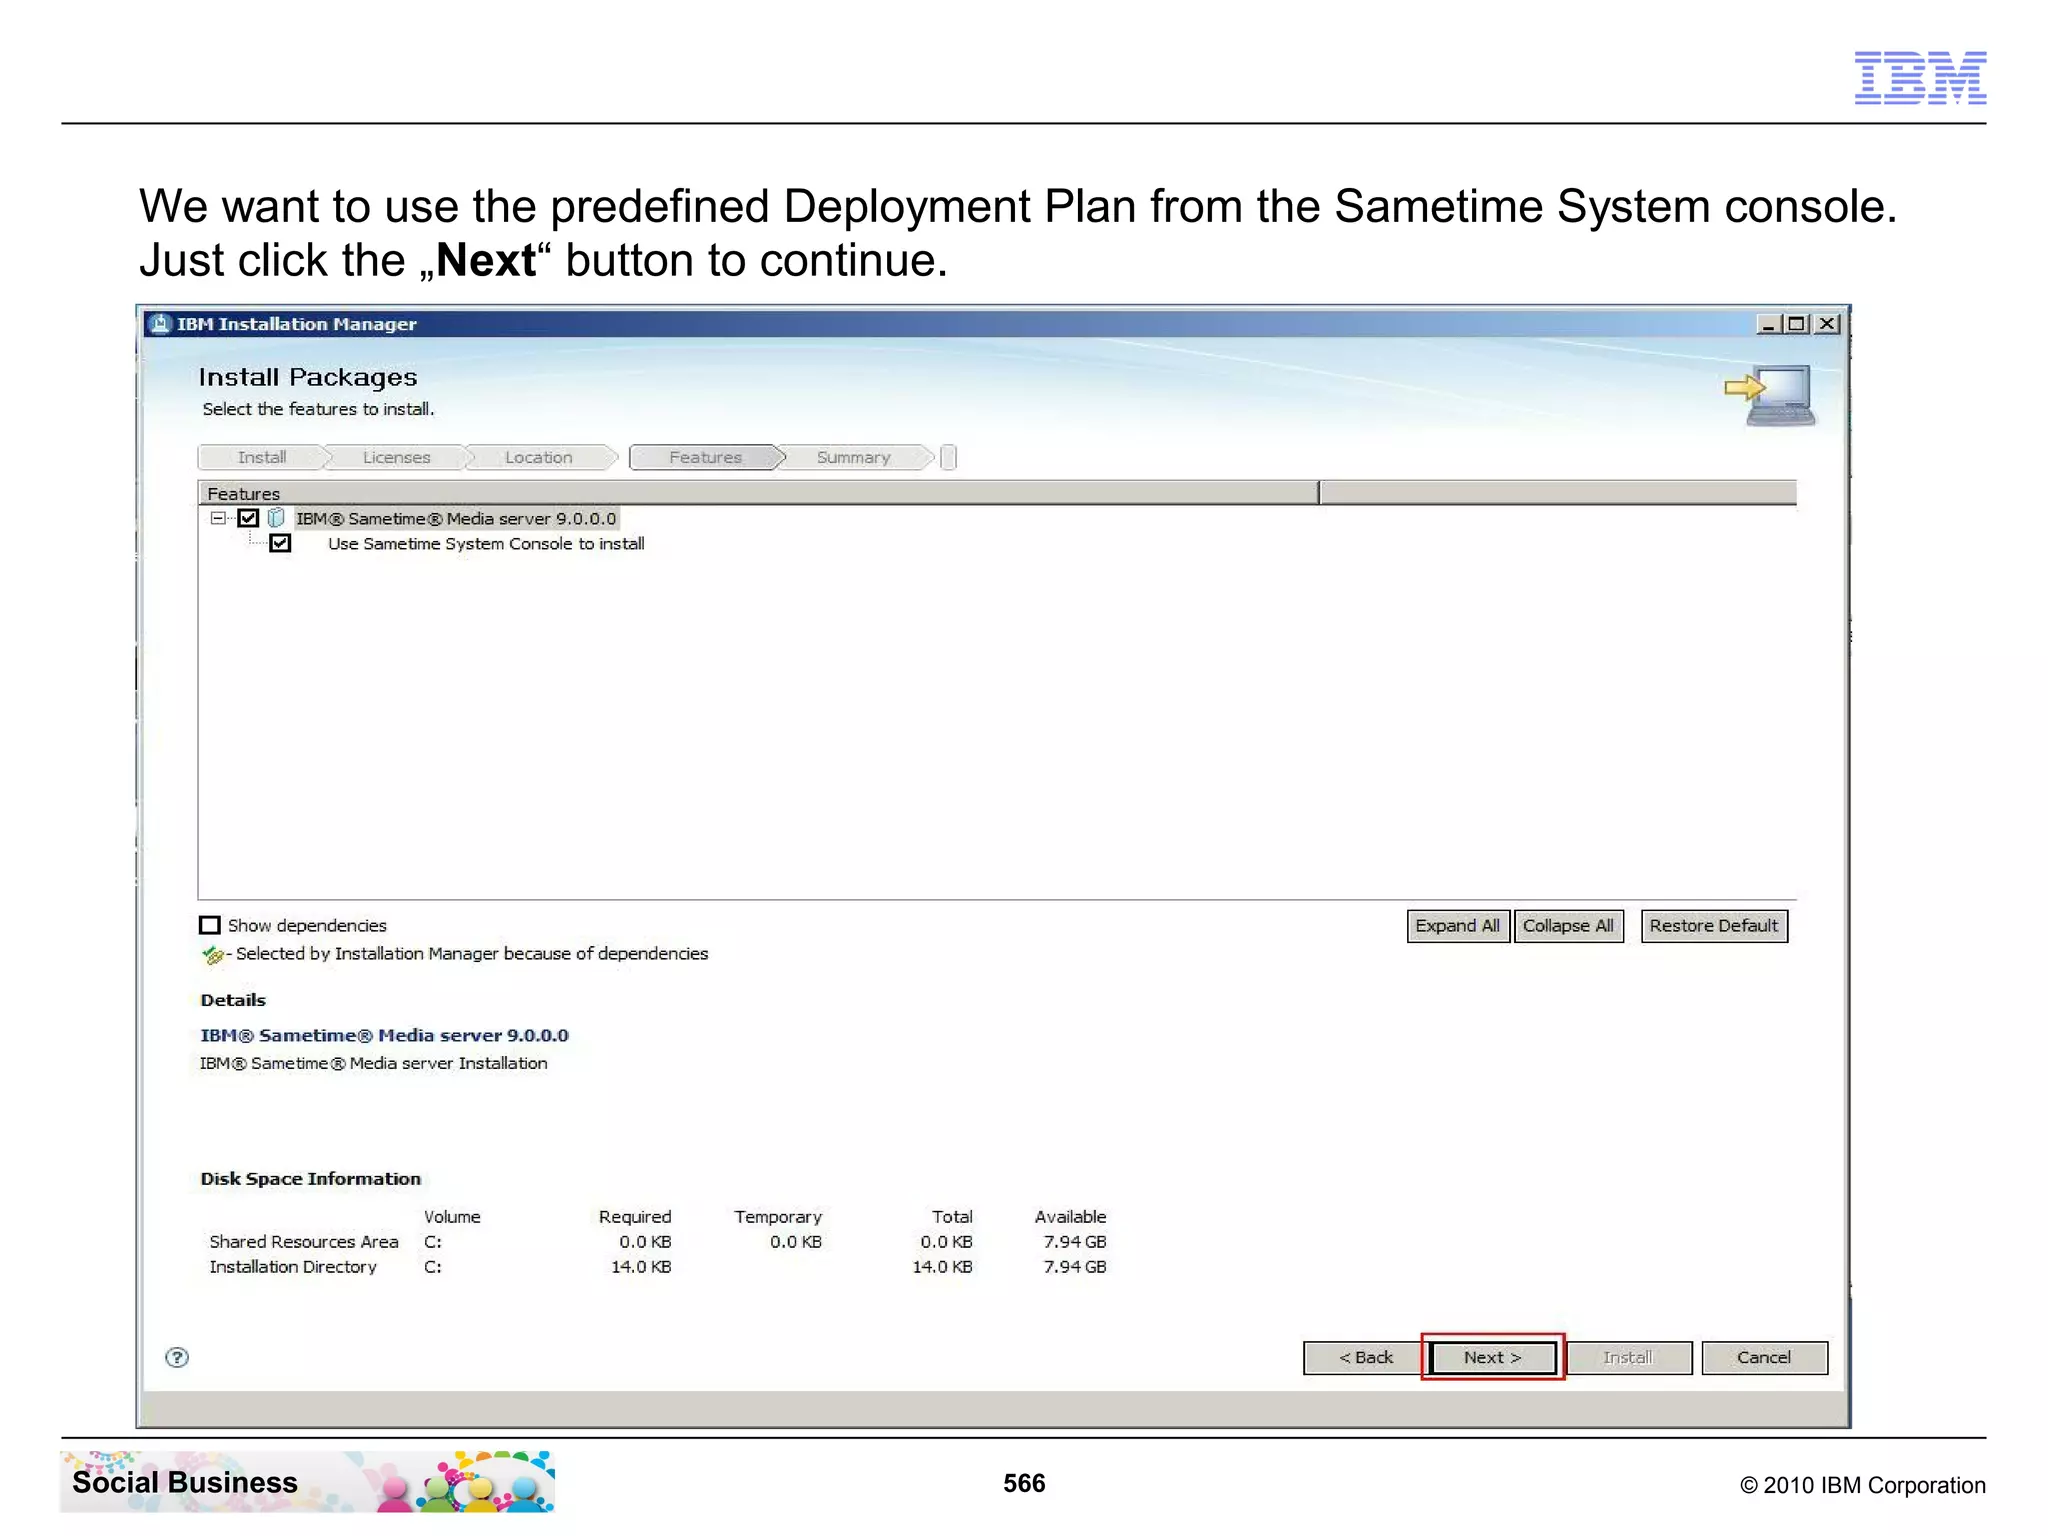
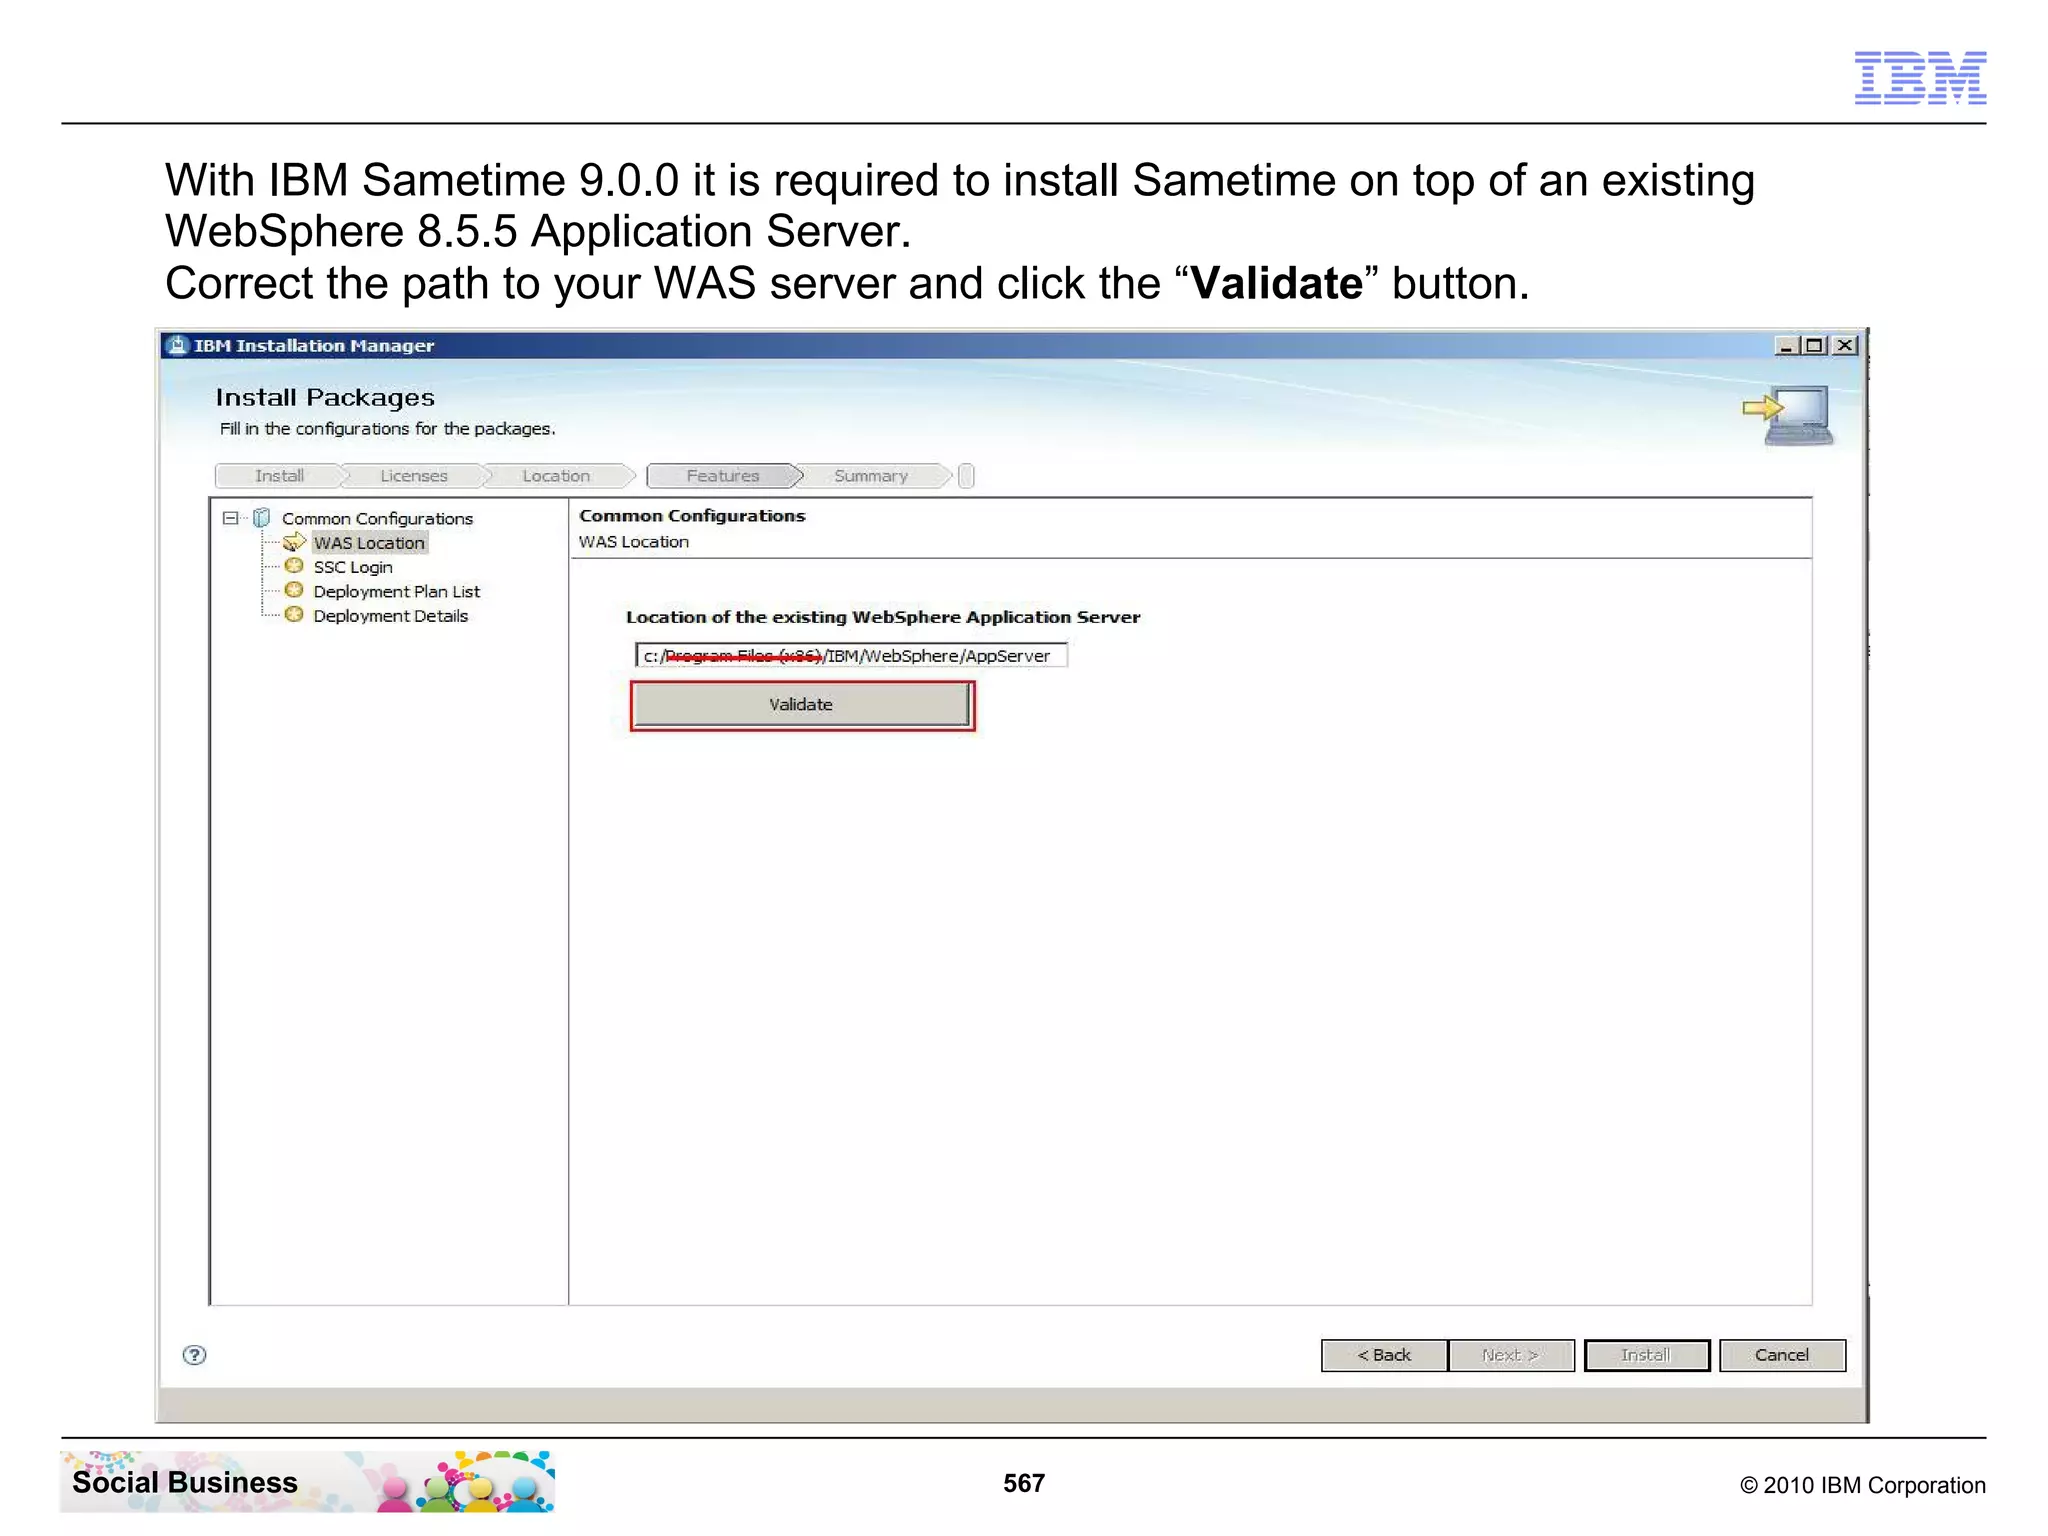
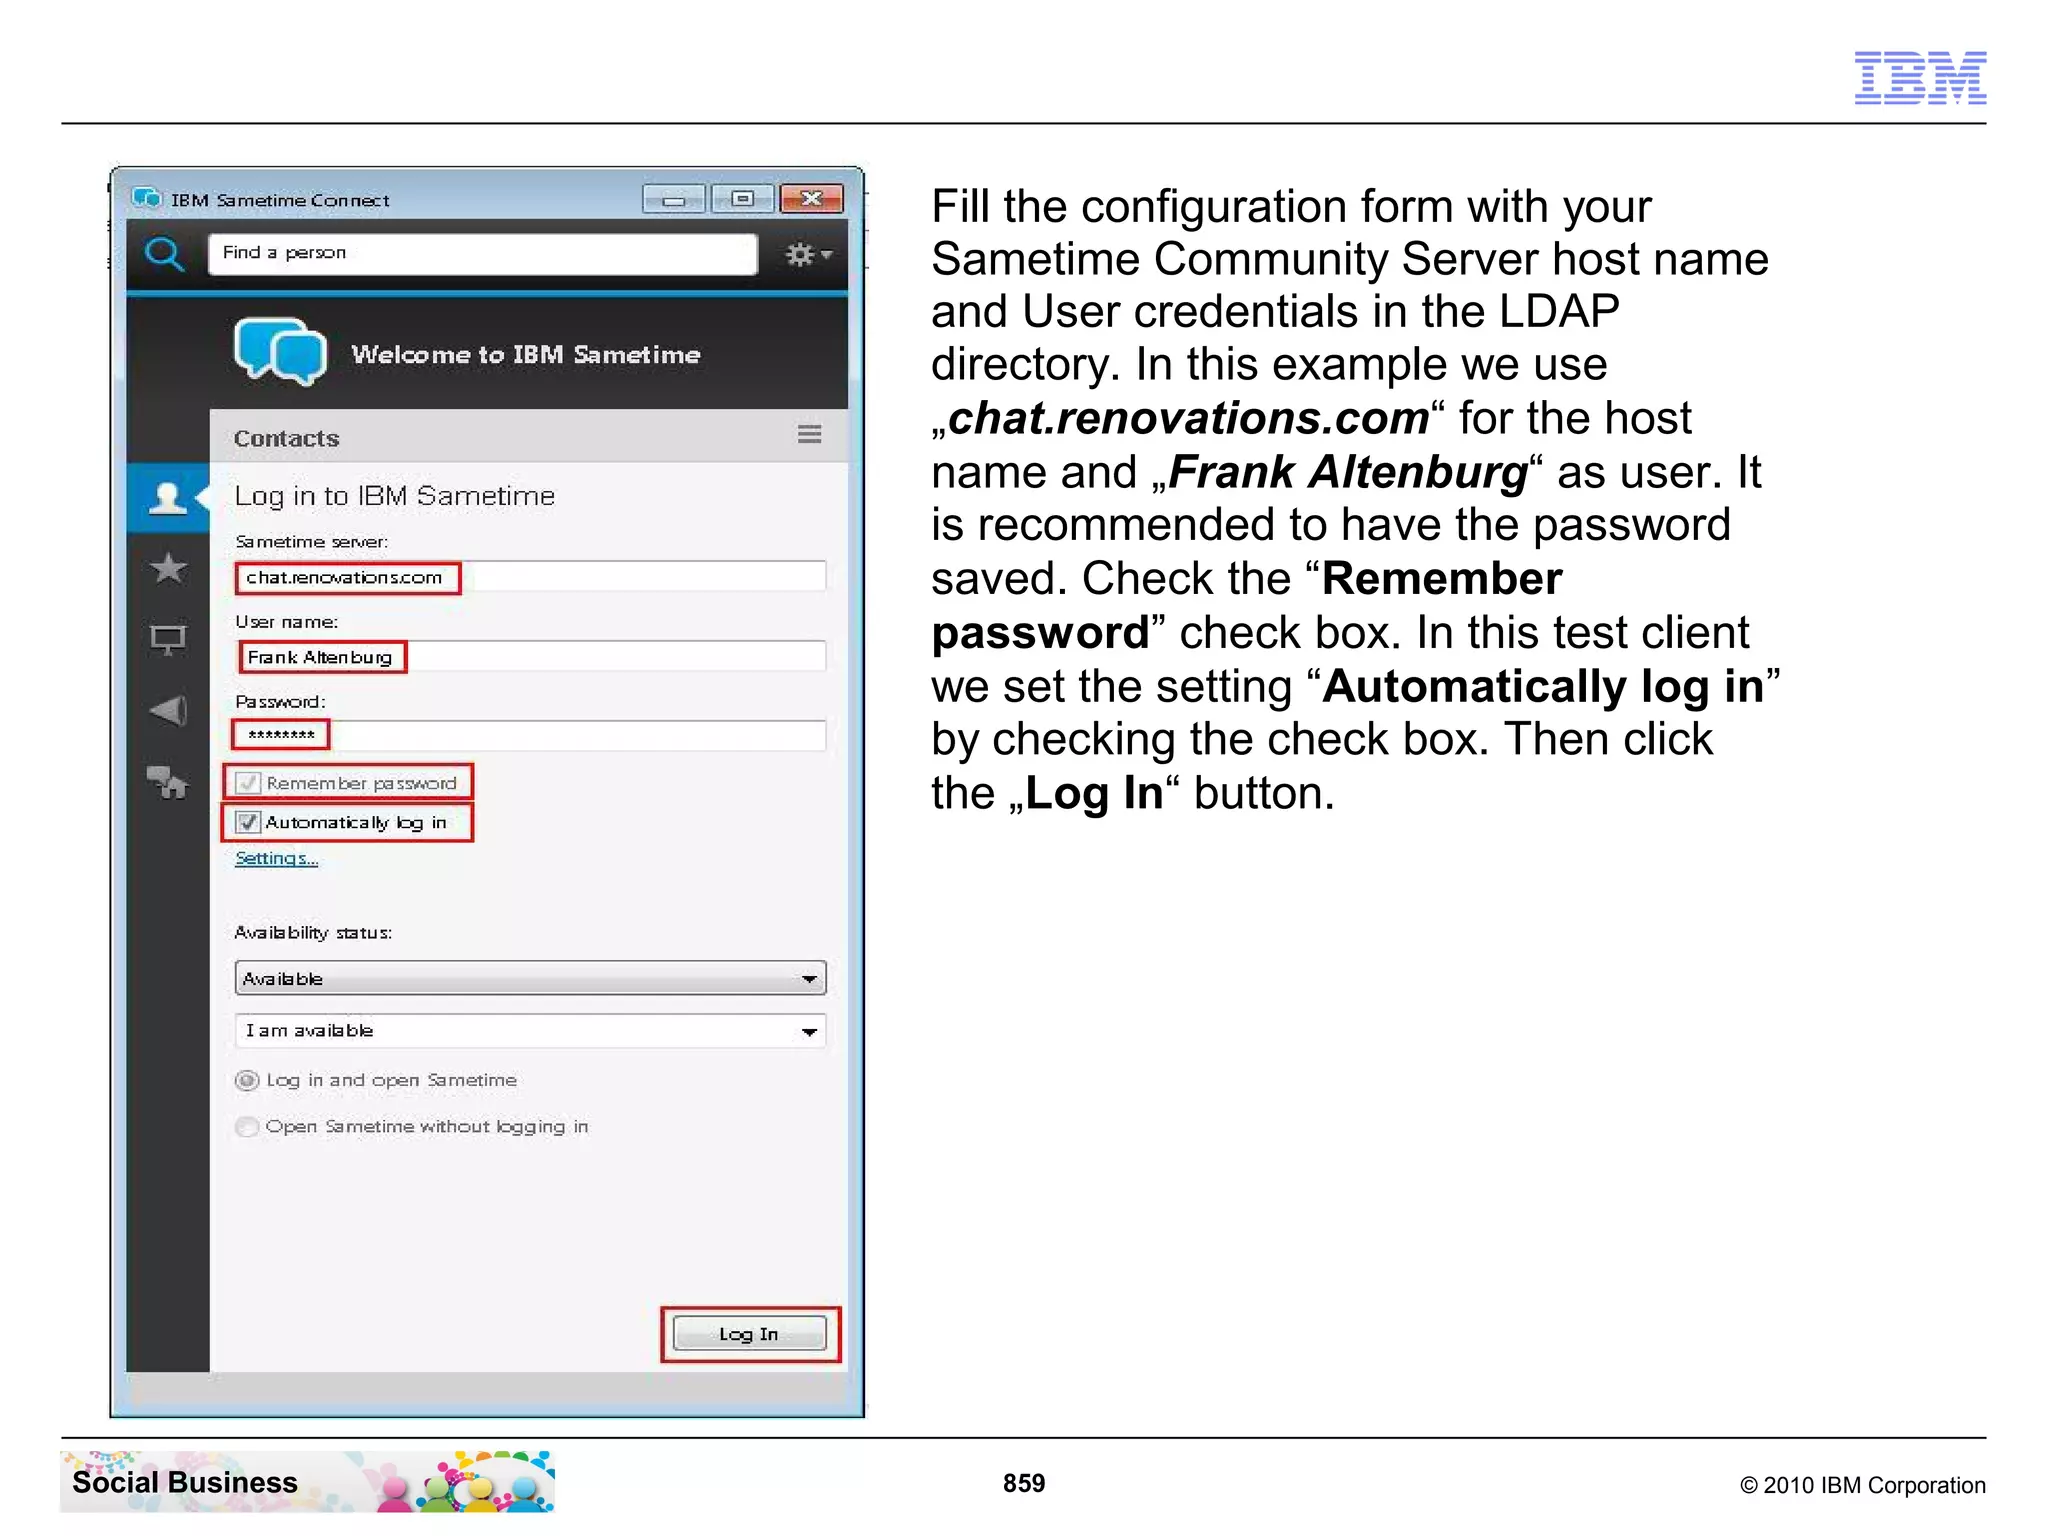
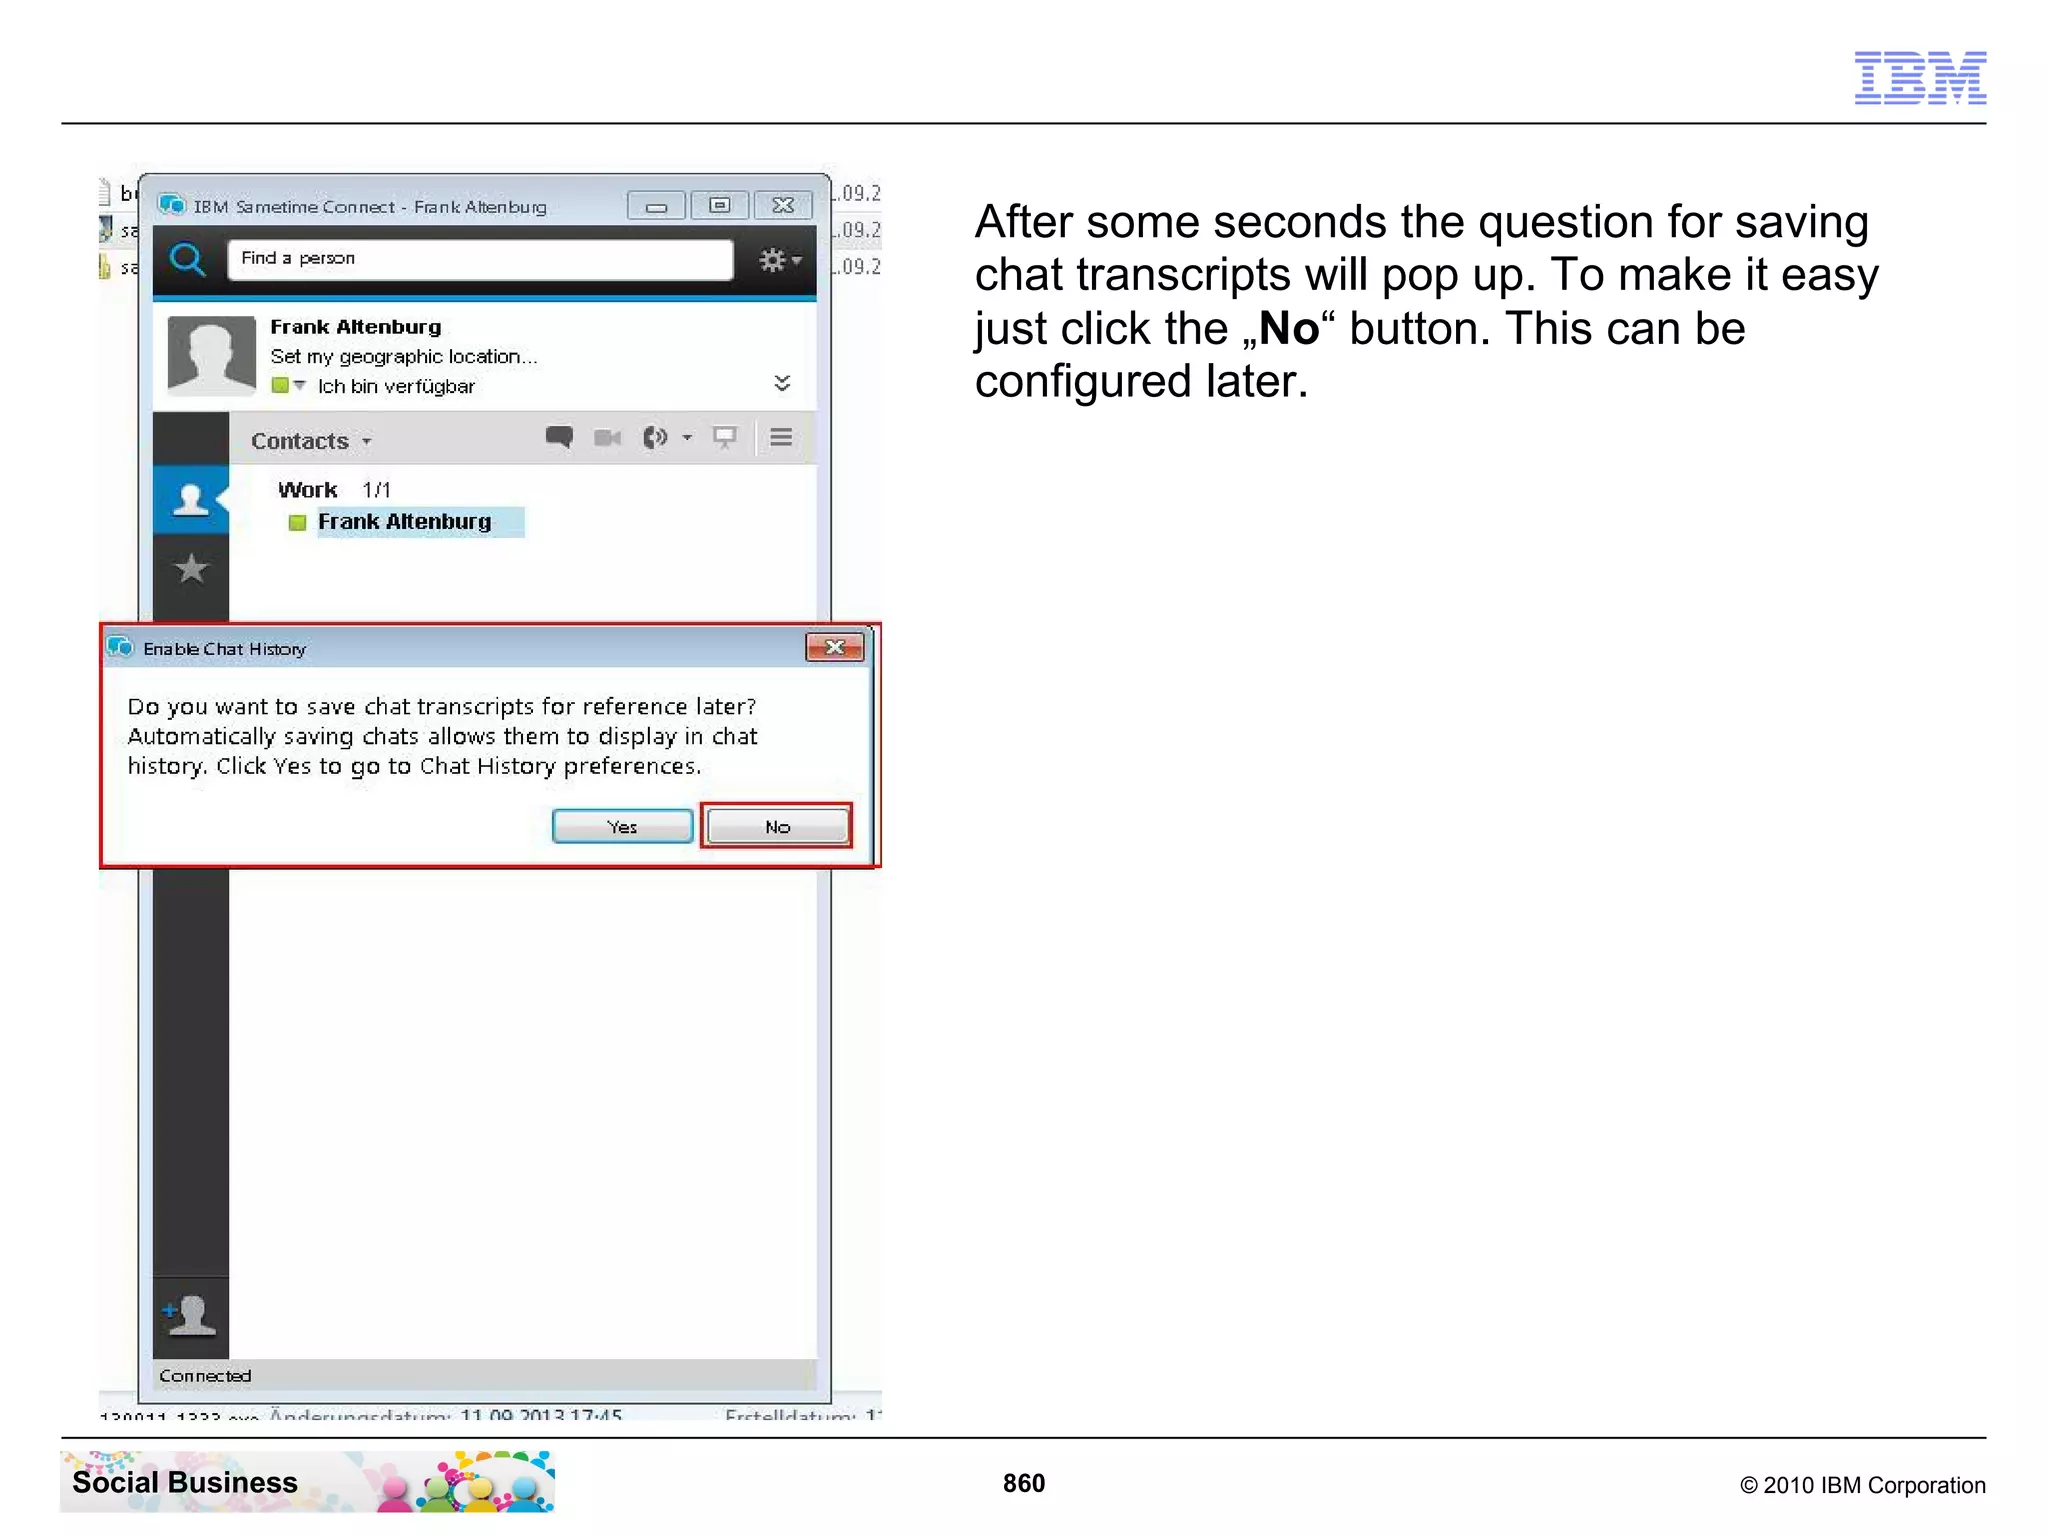
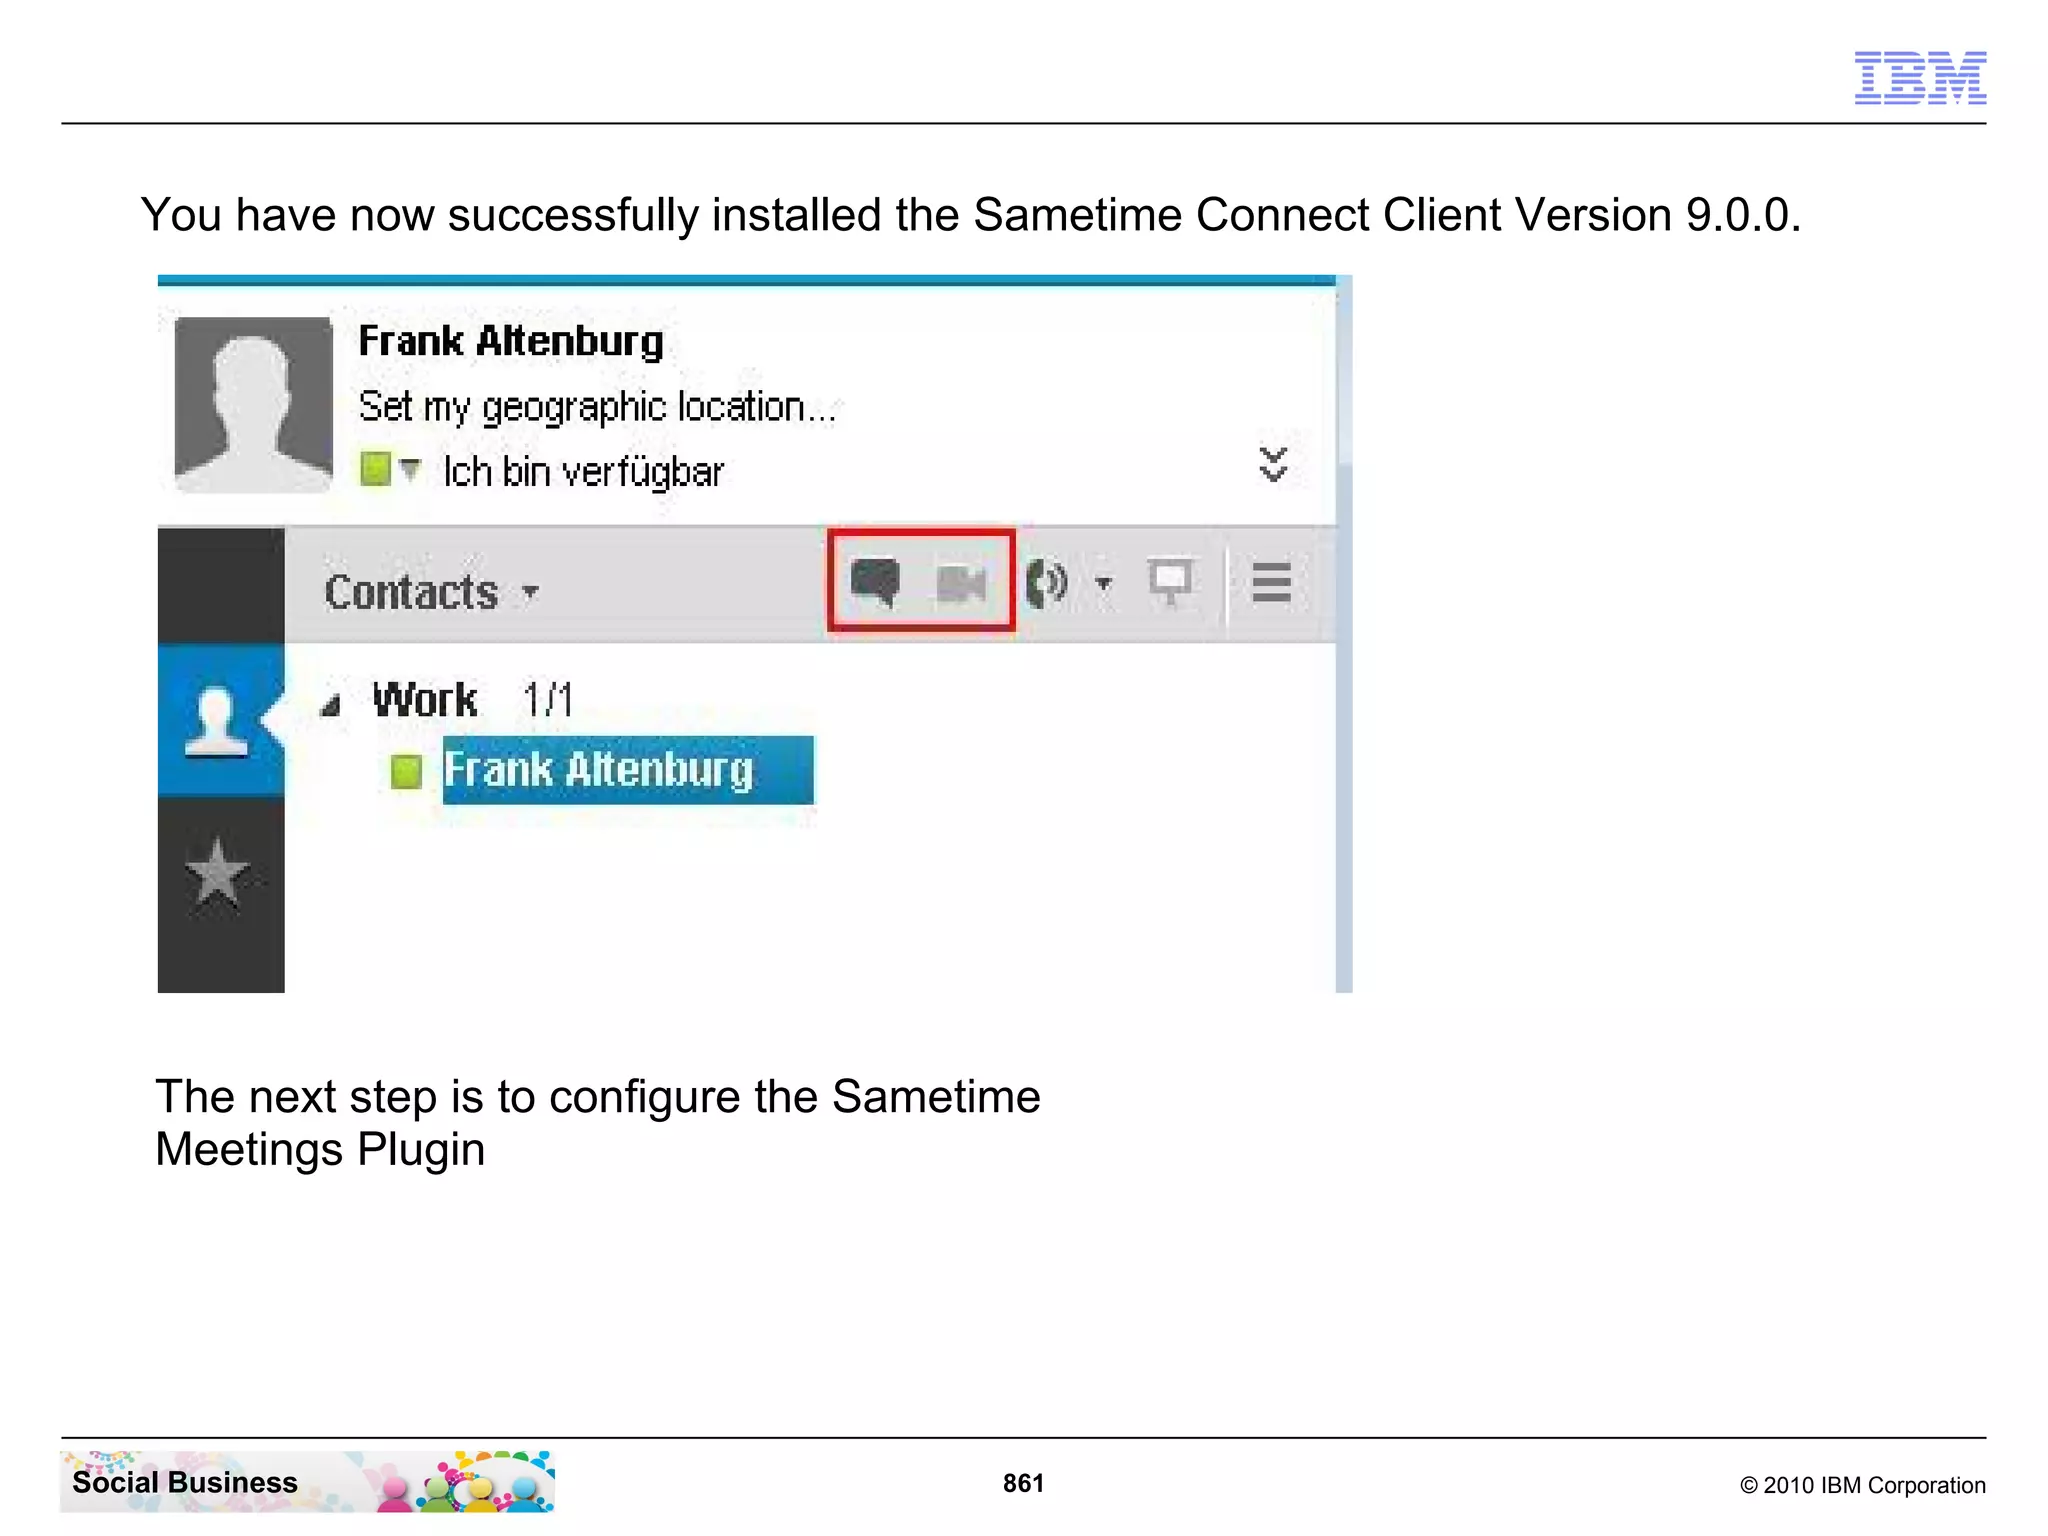
Download as PDF, PPTX


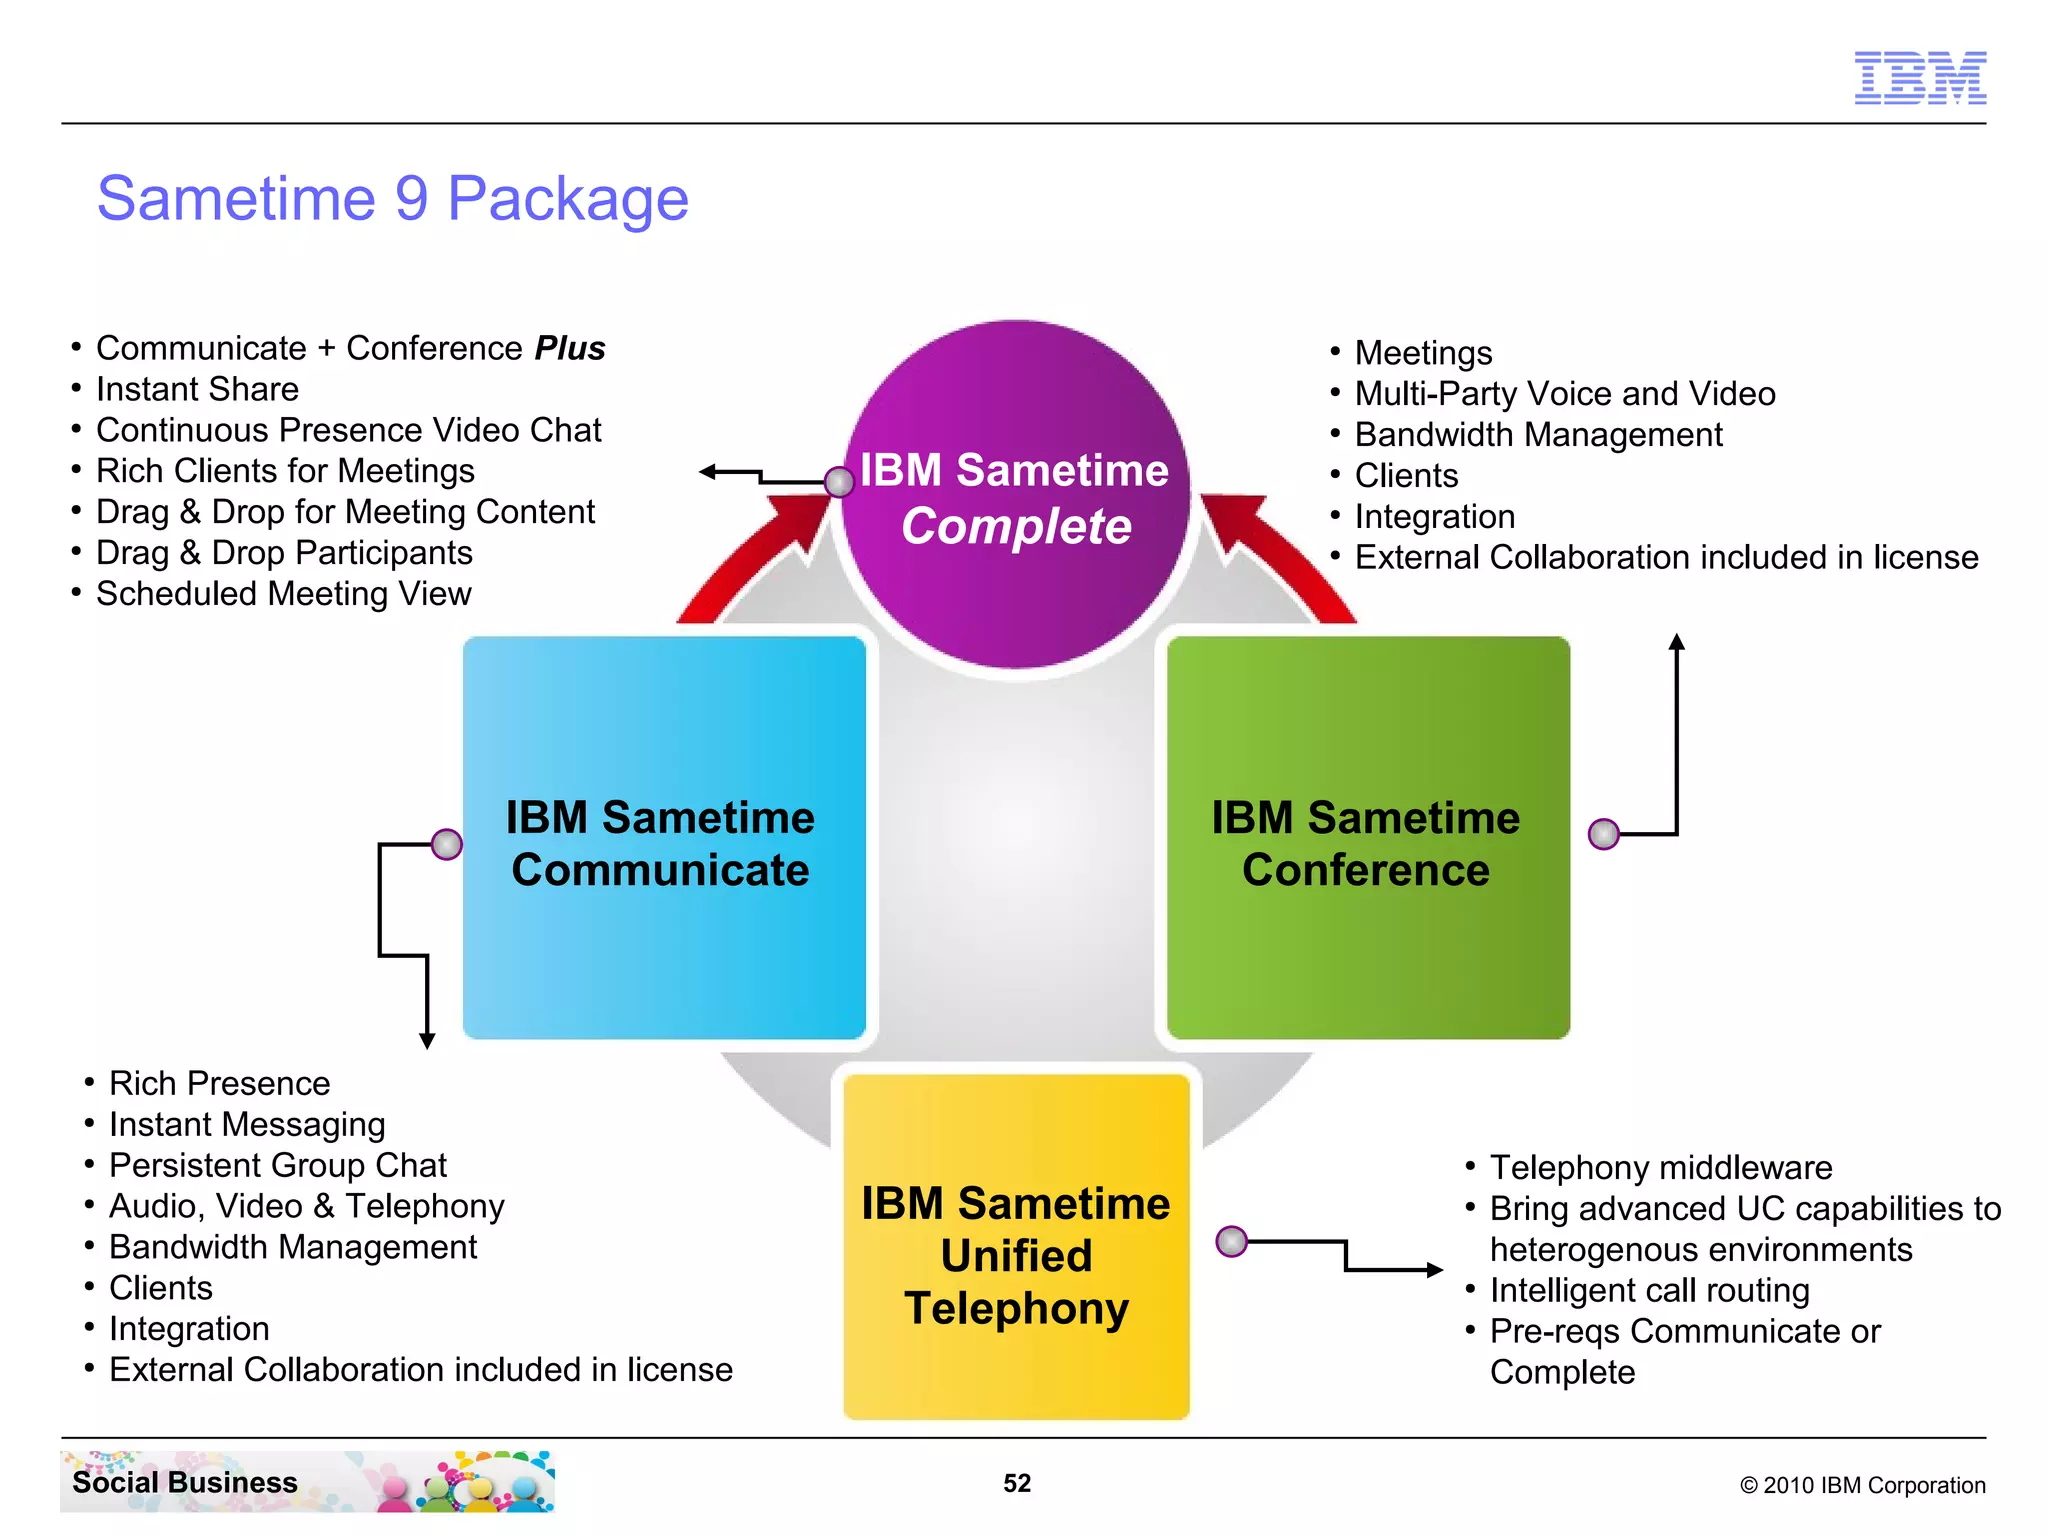
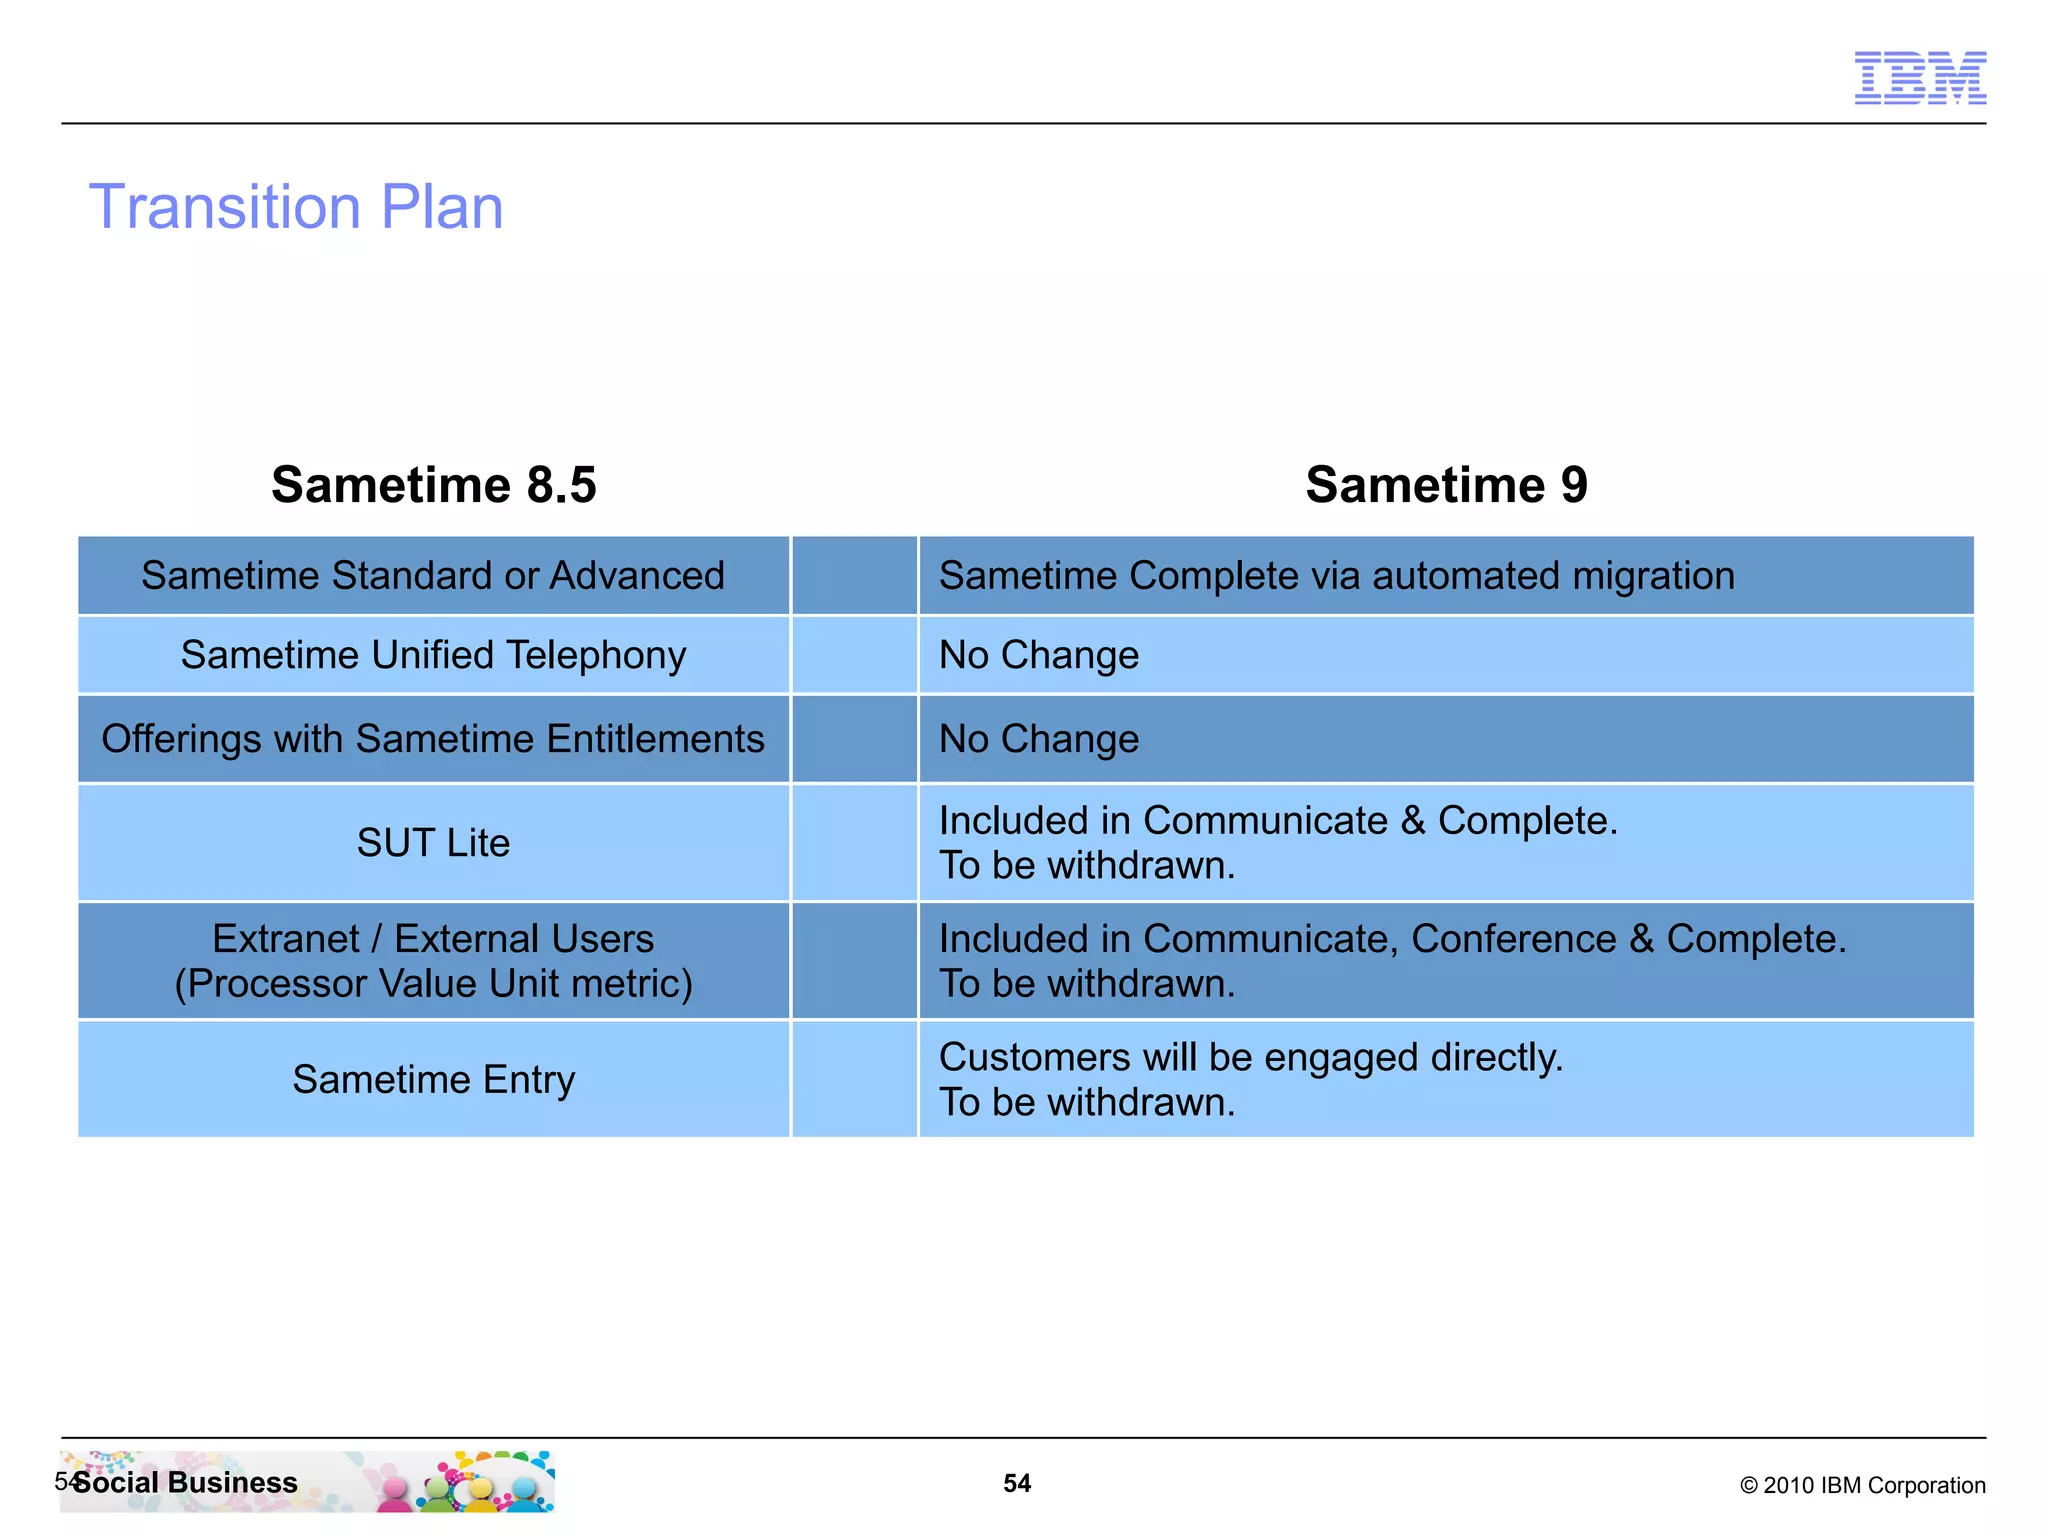


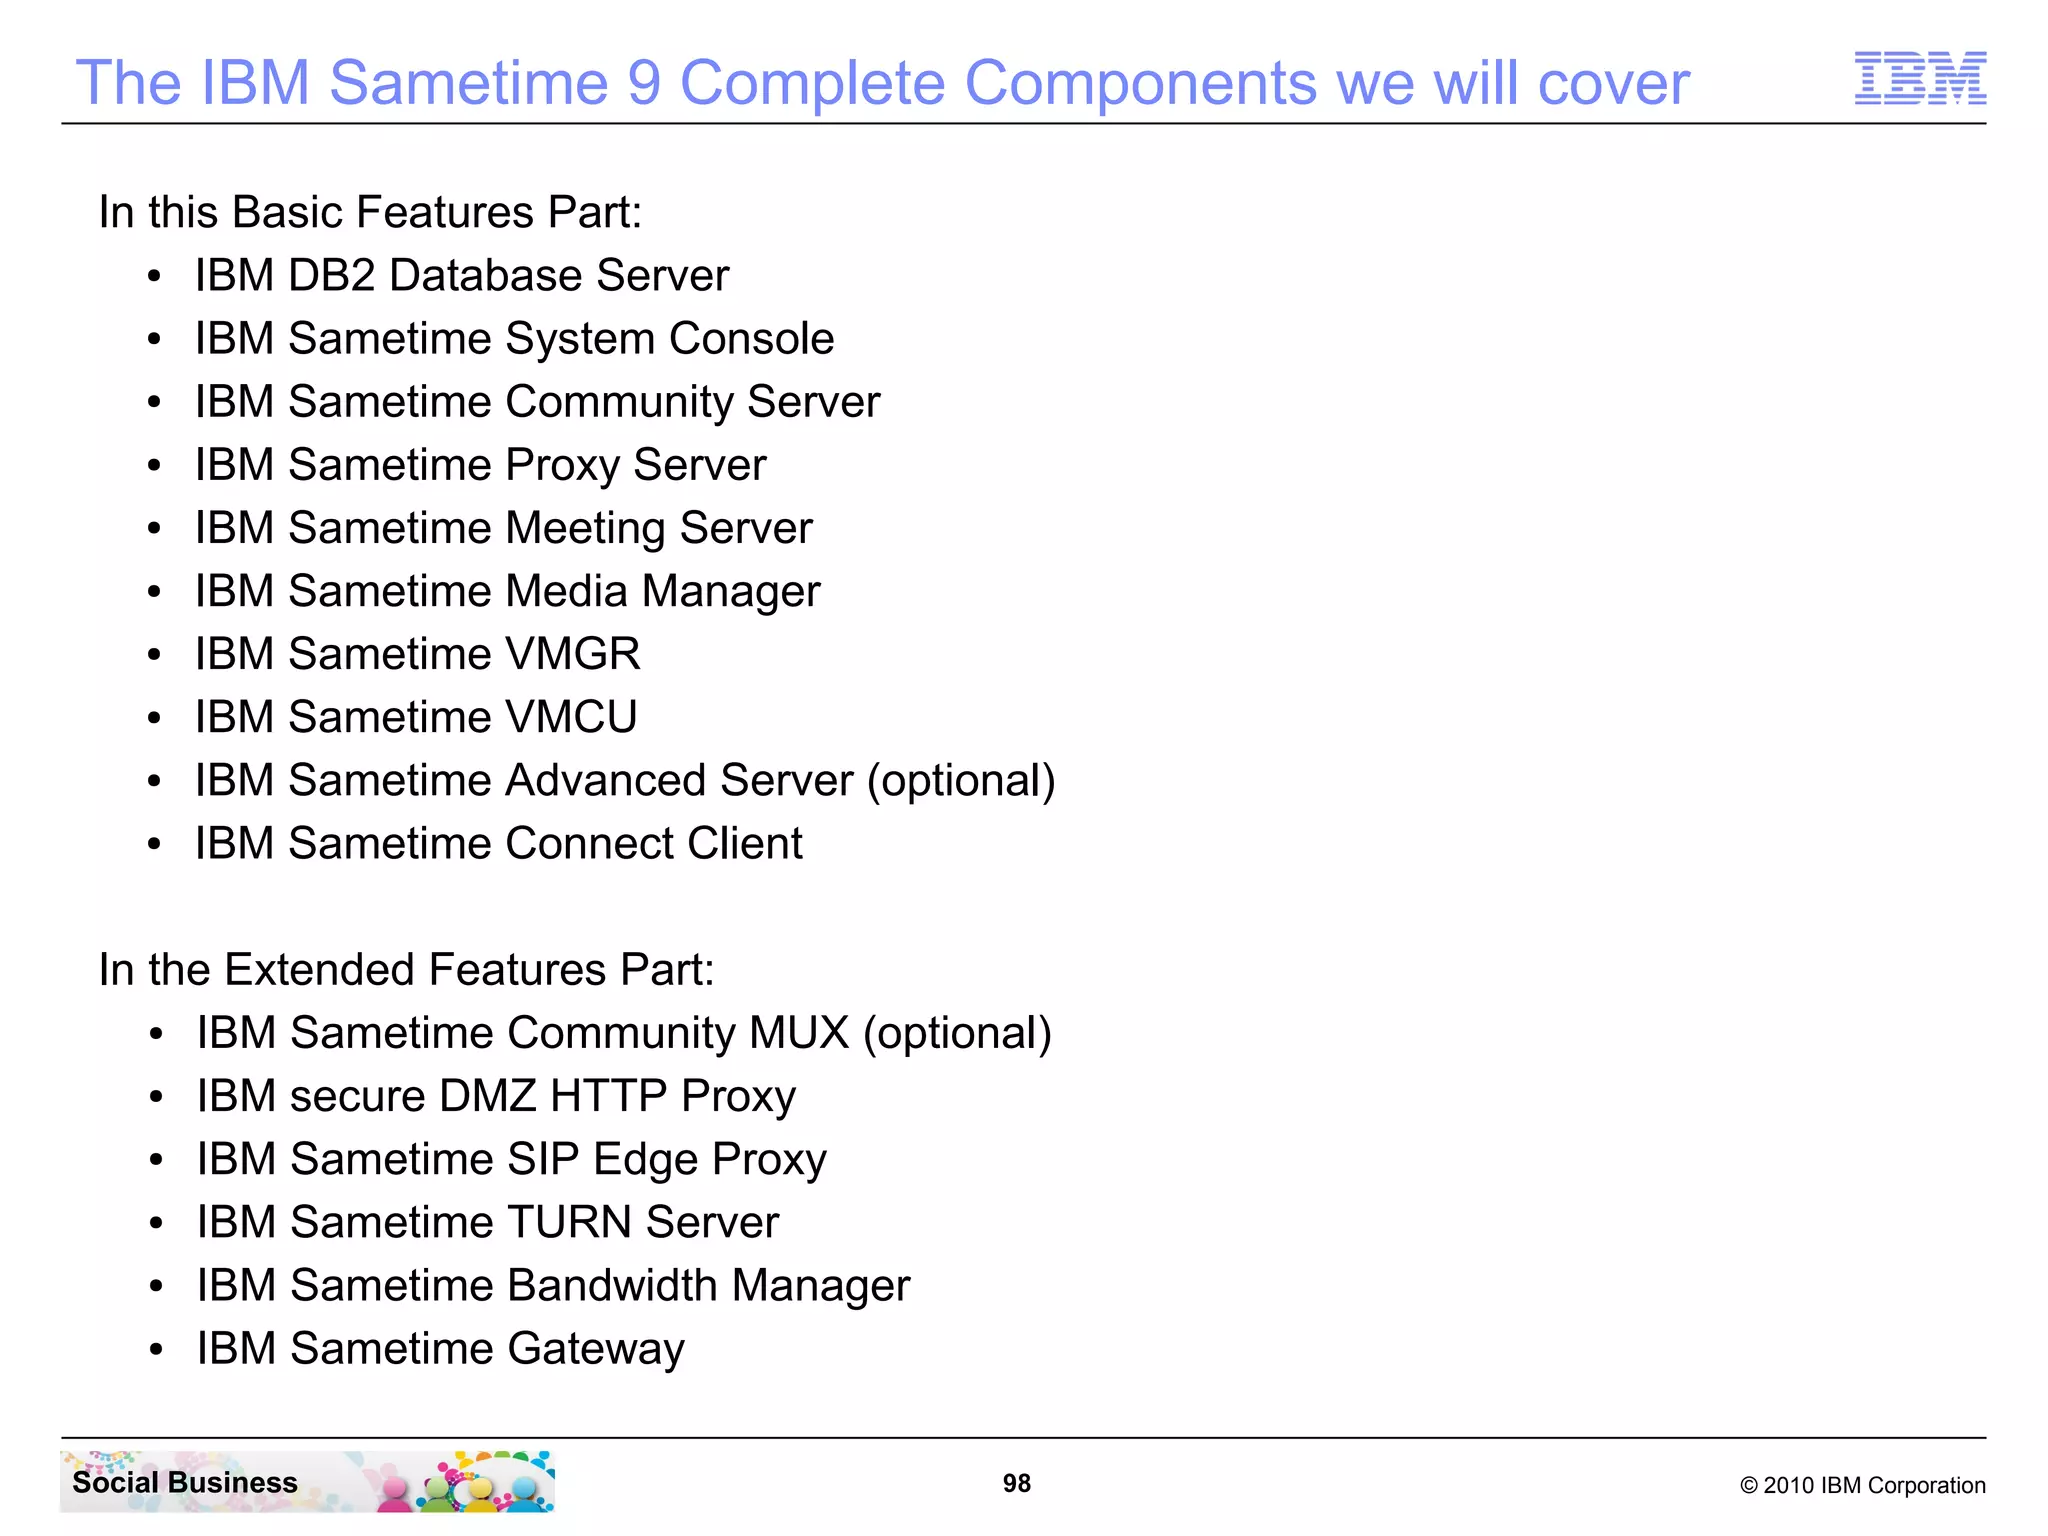
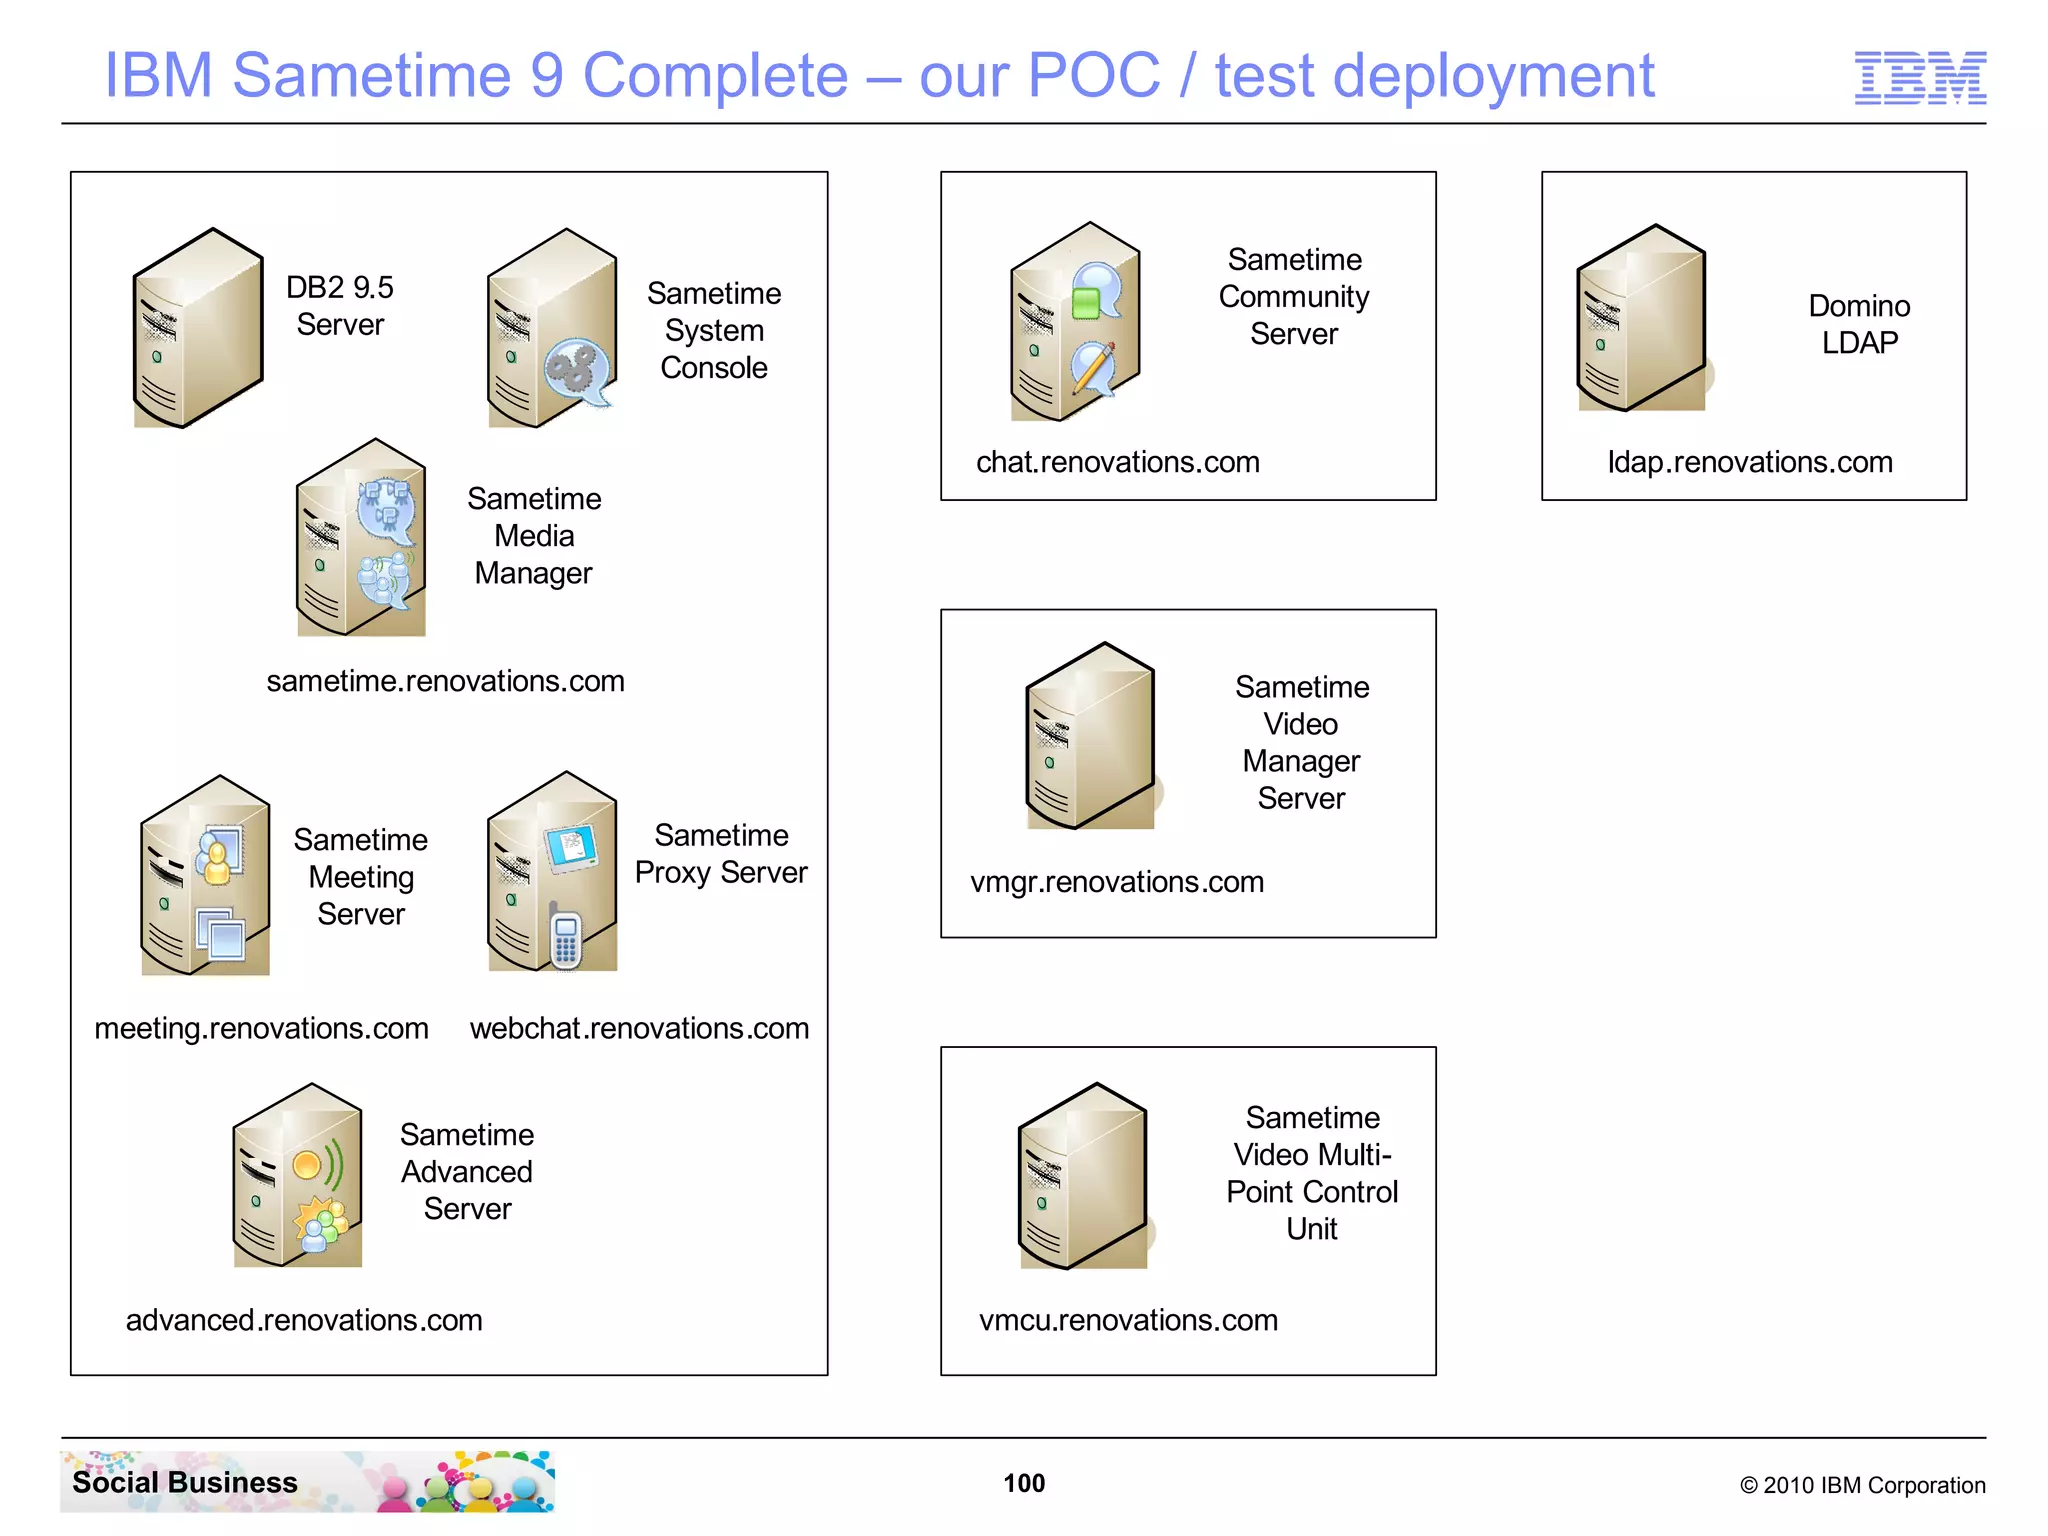


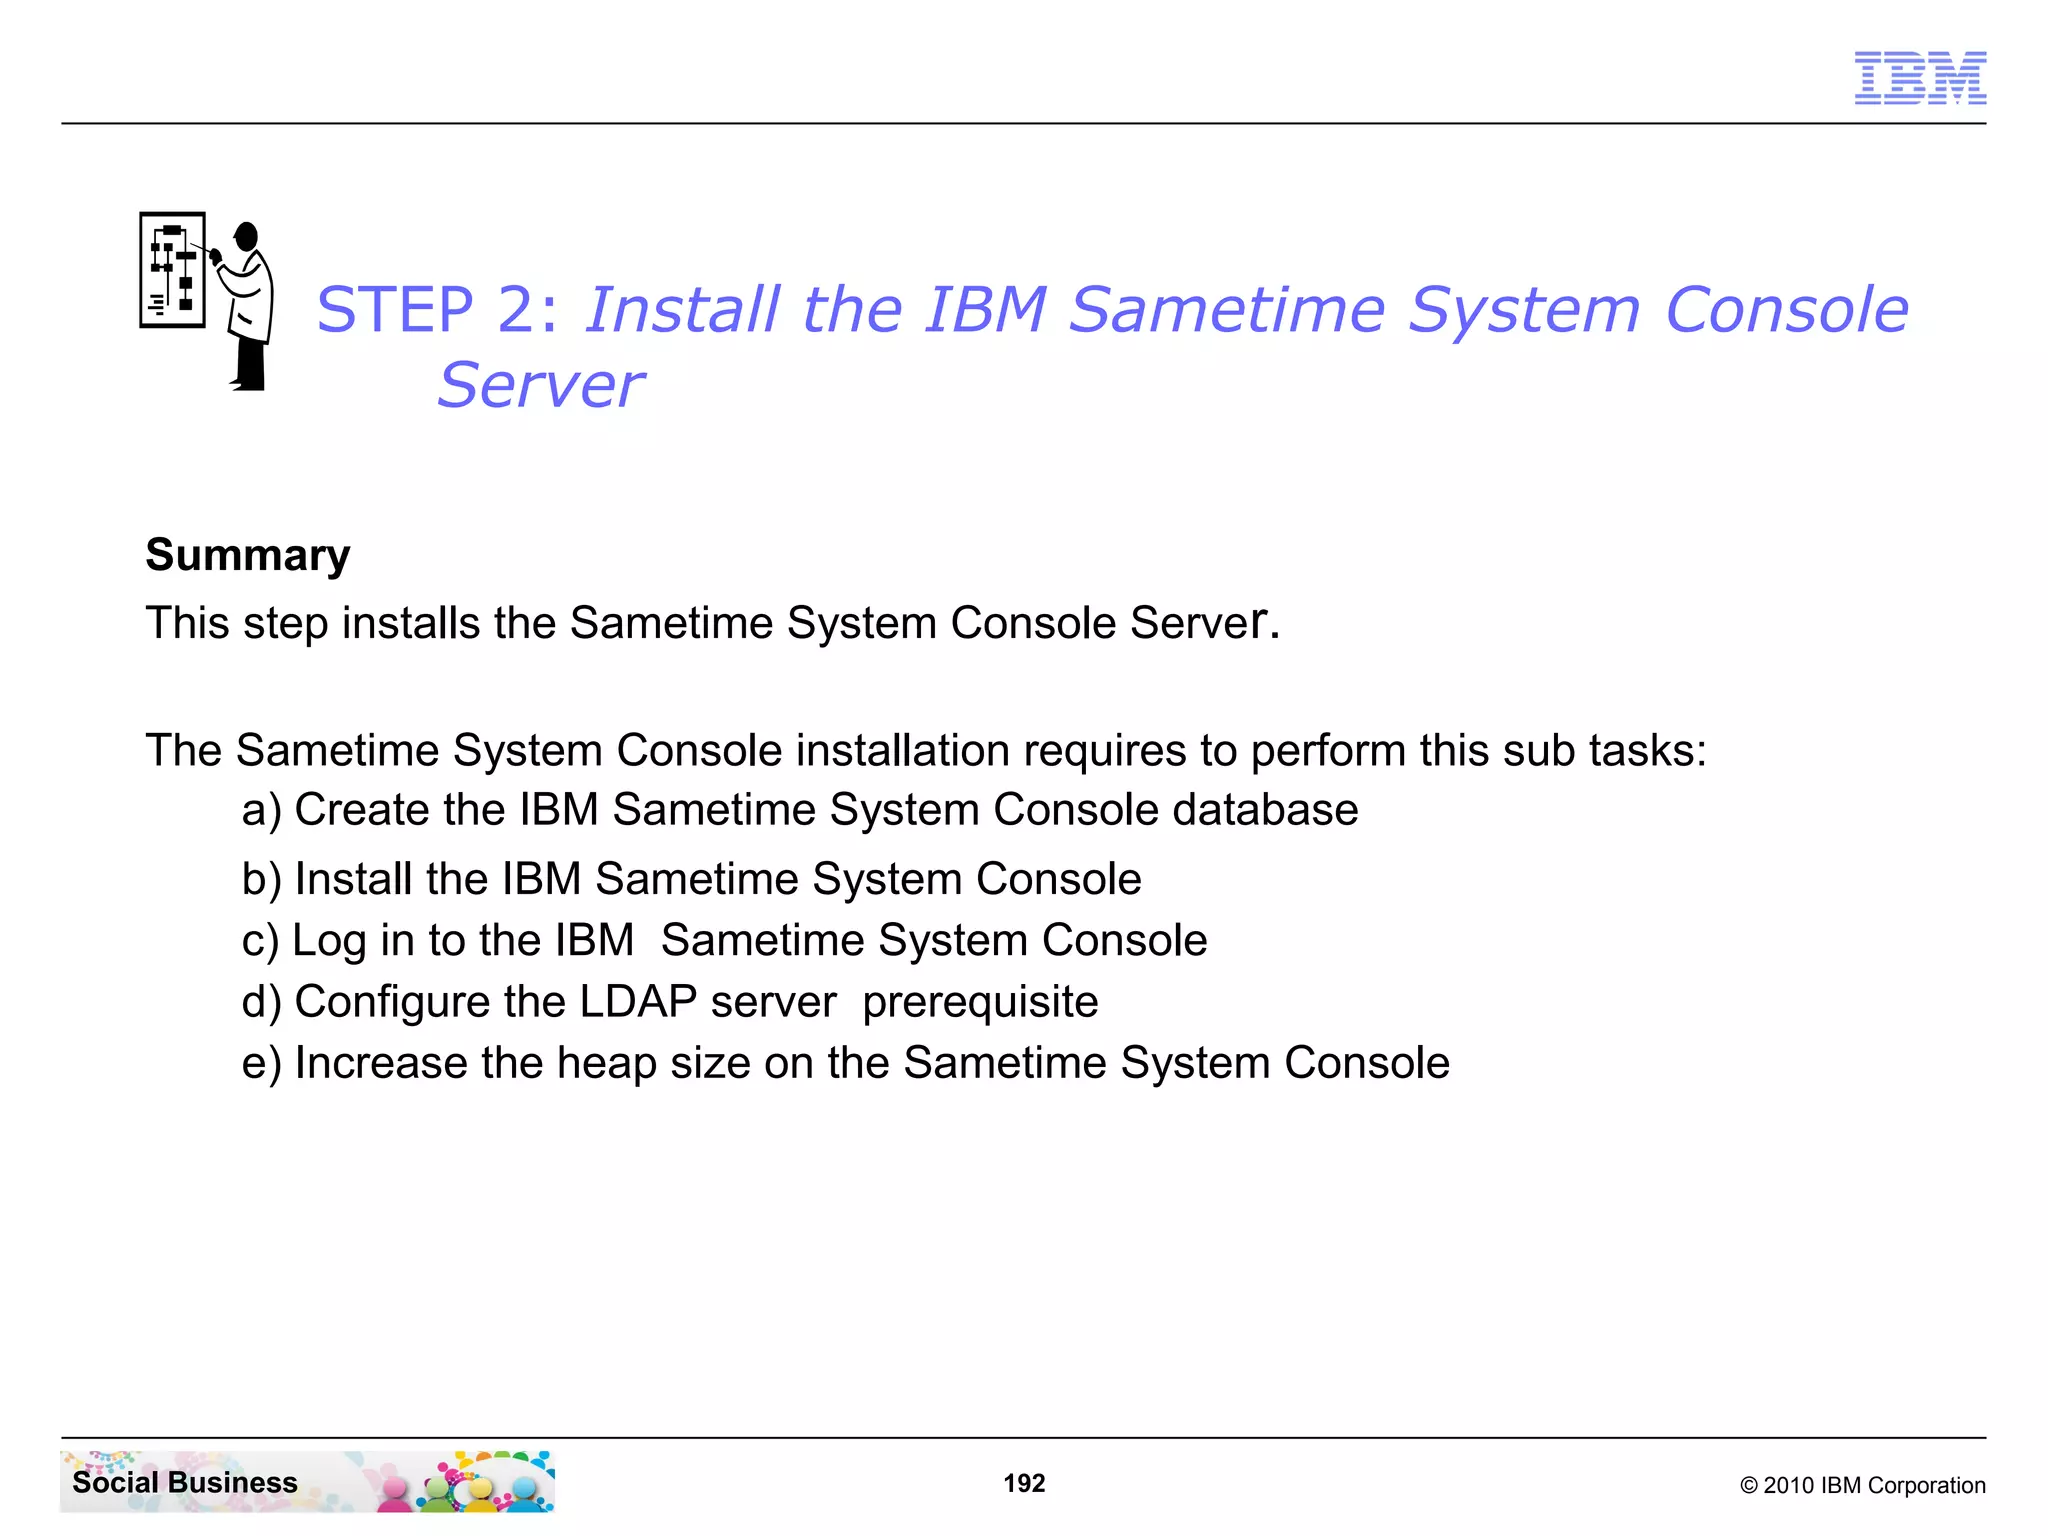


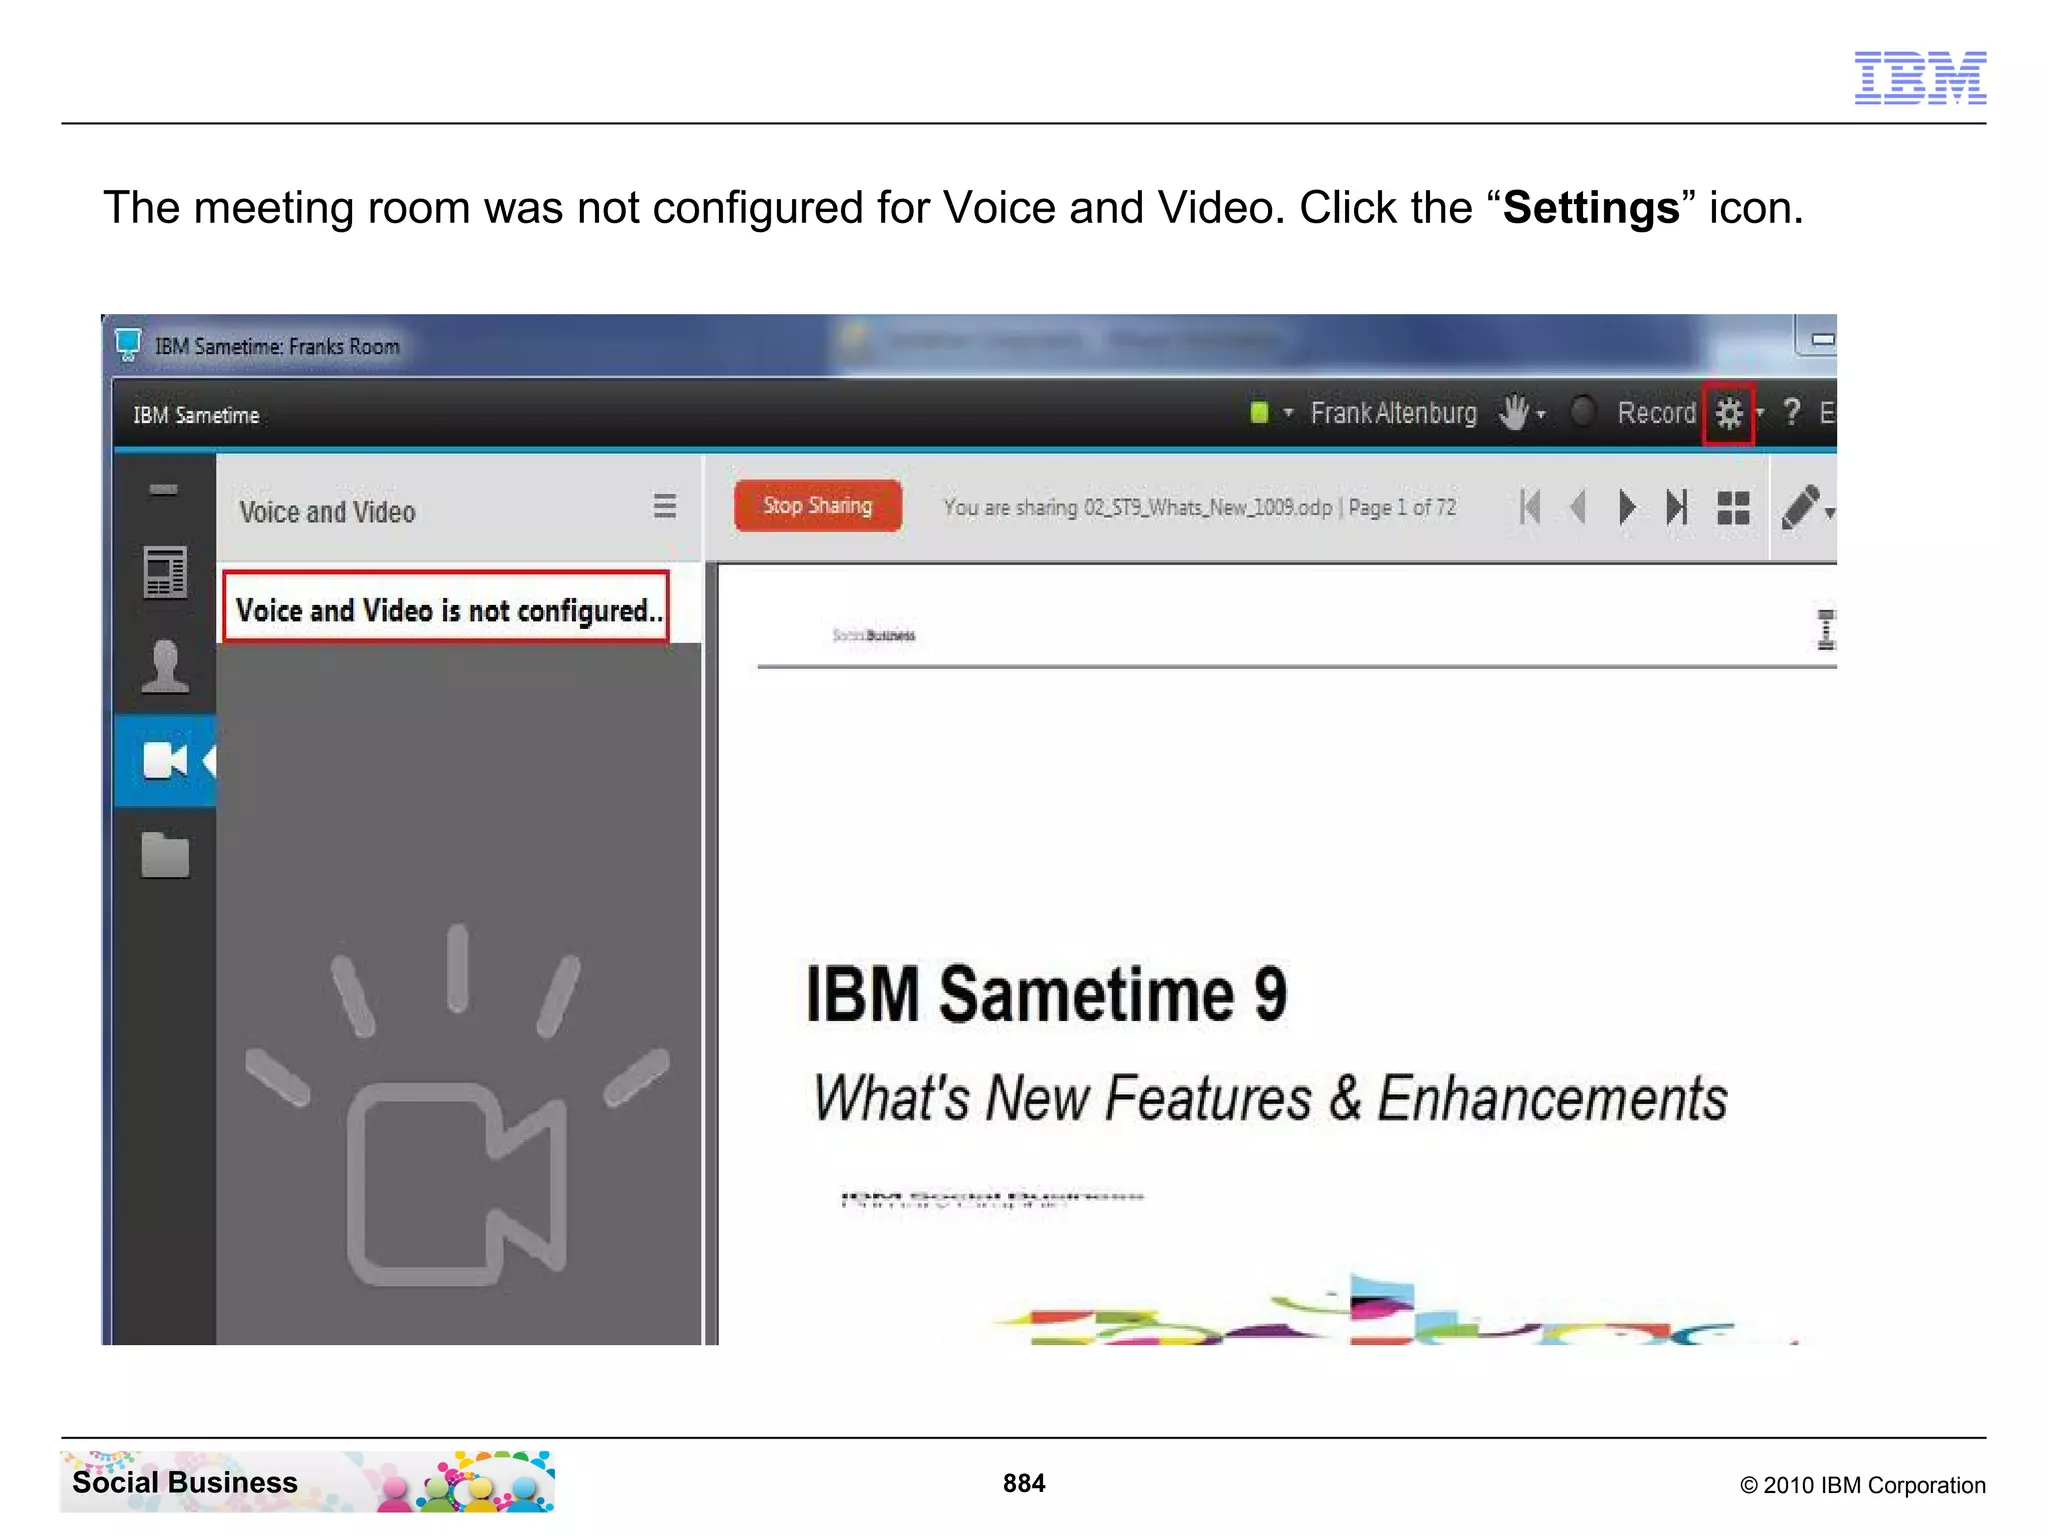
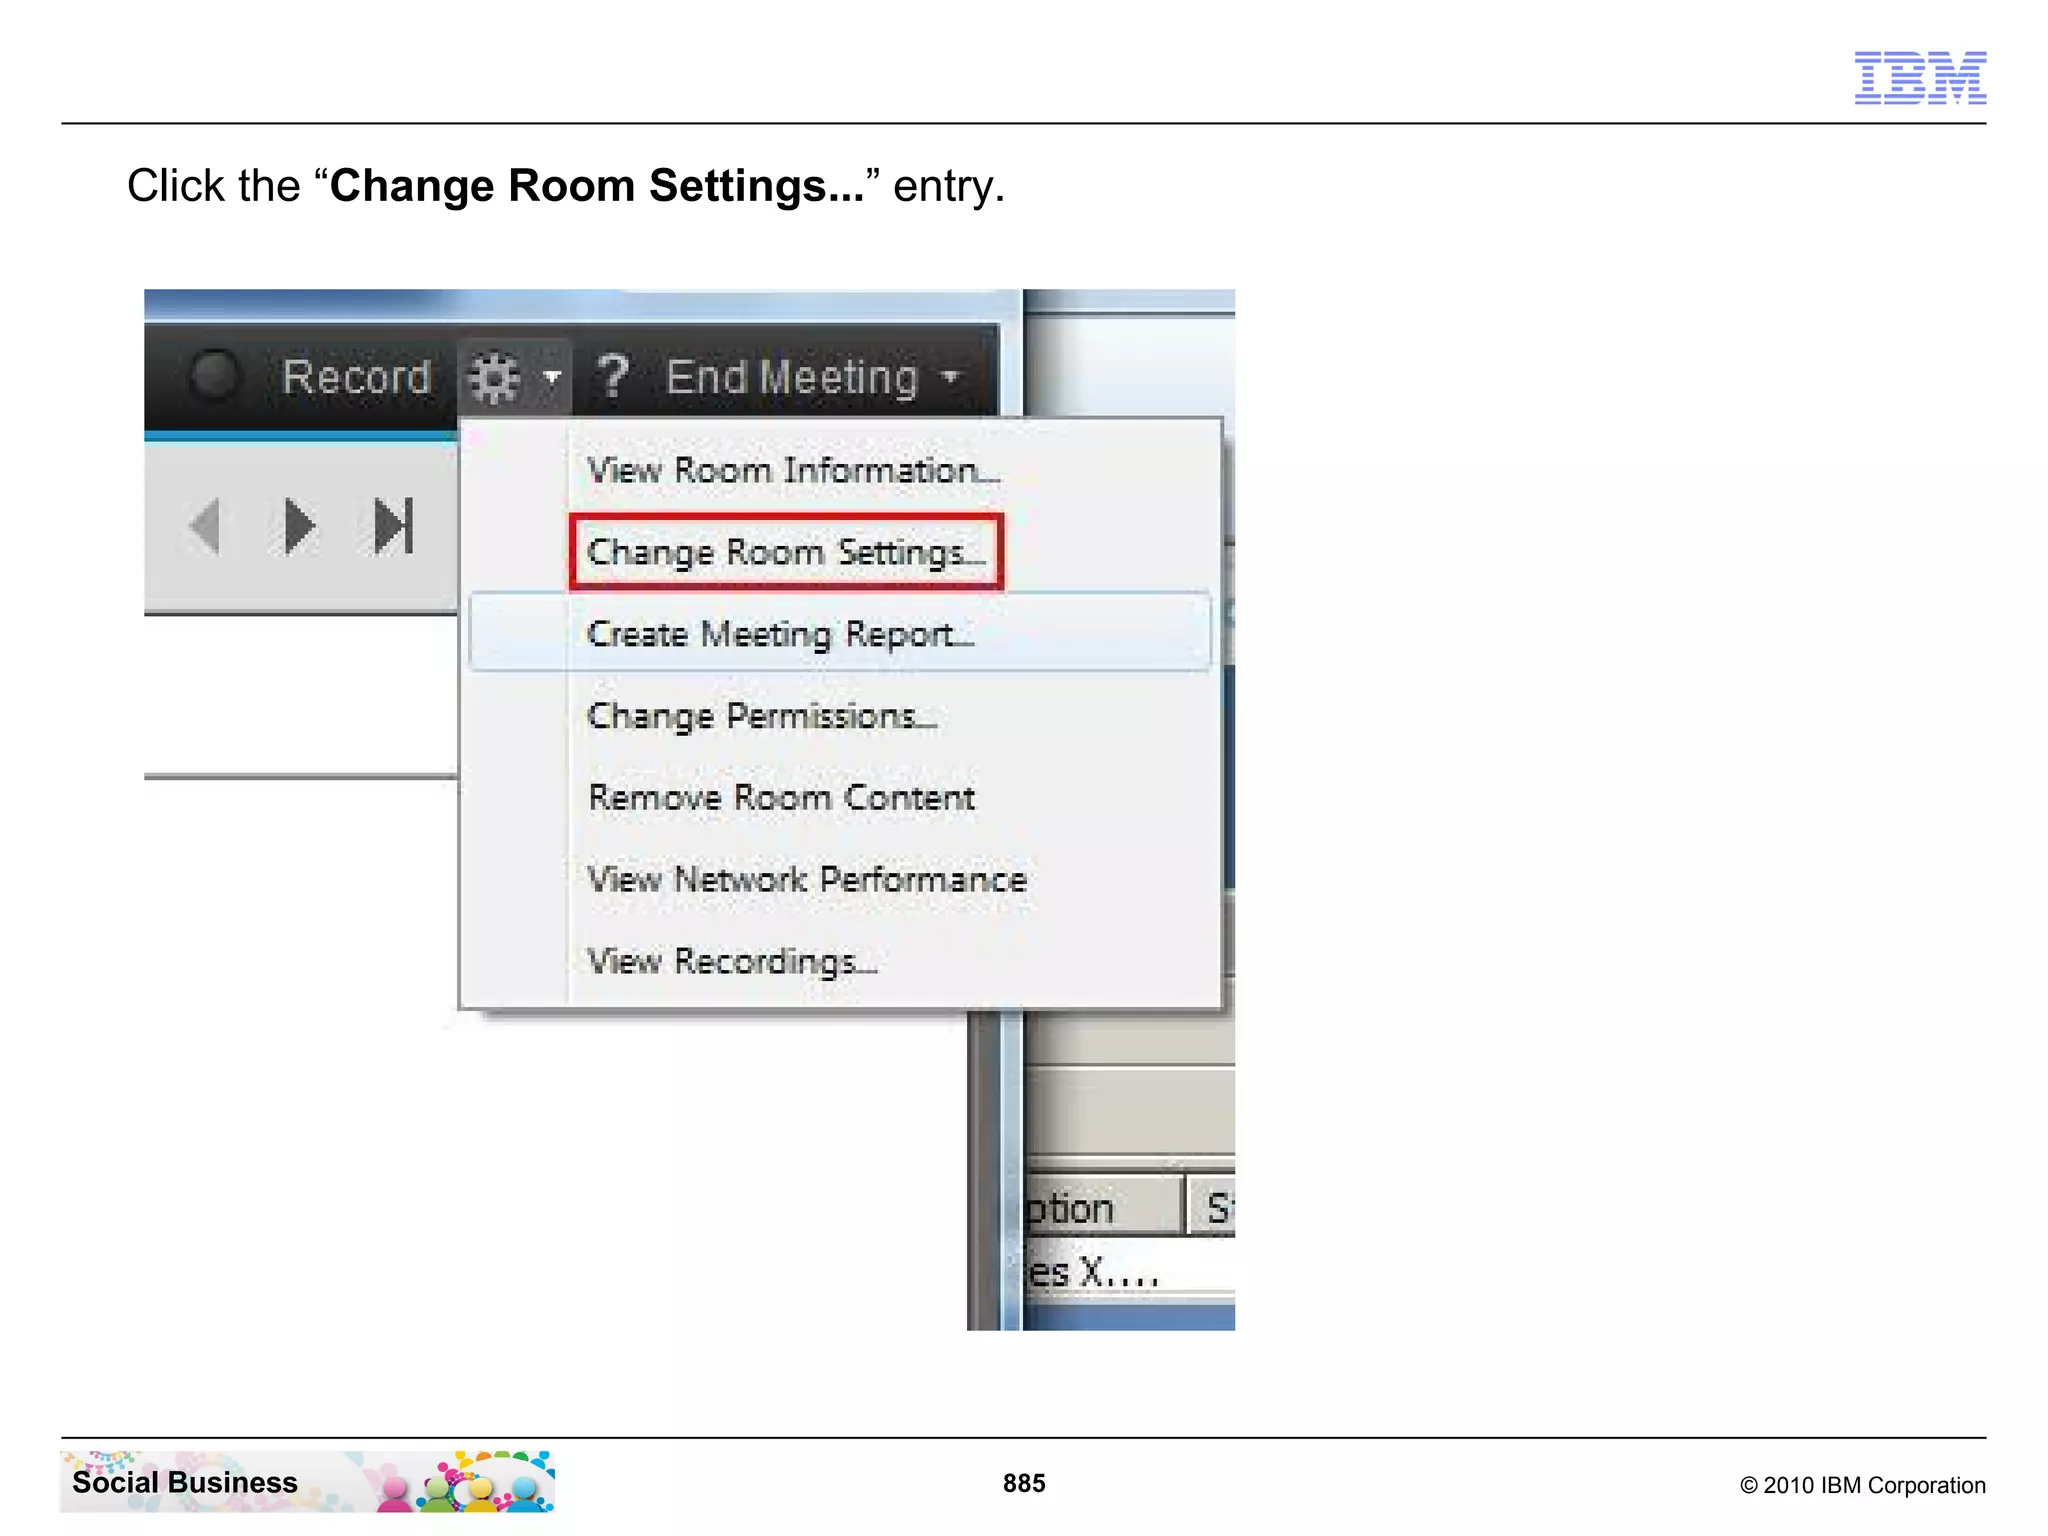
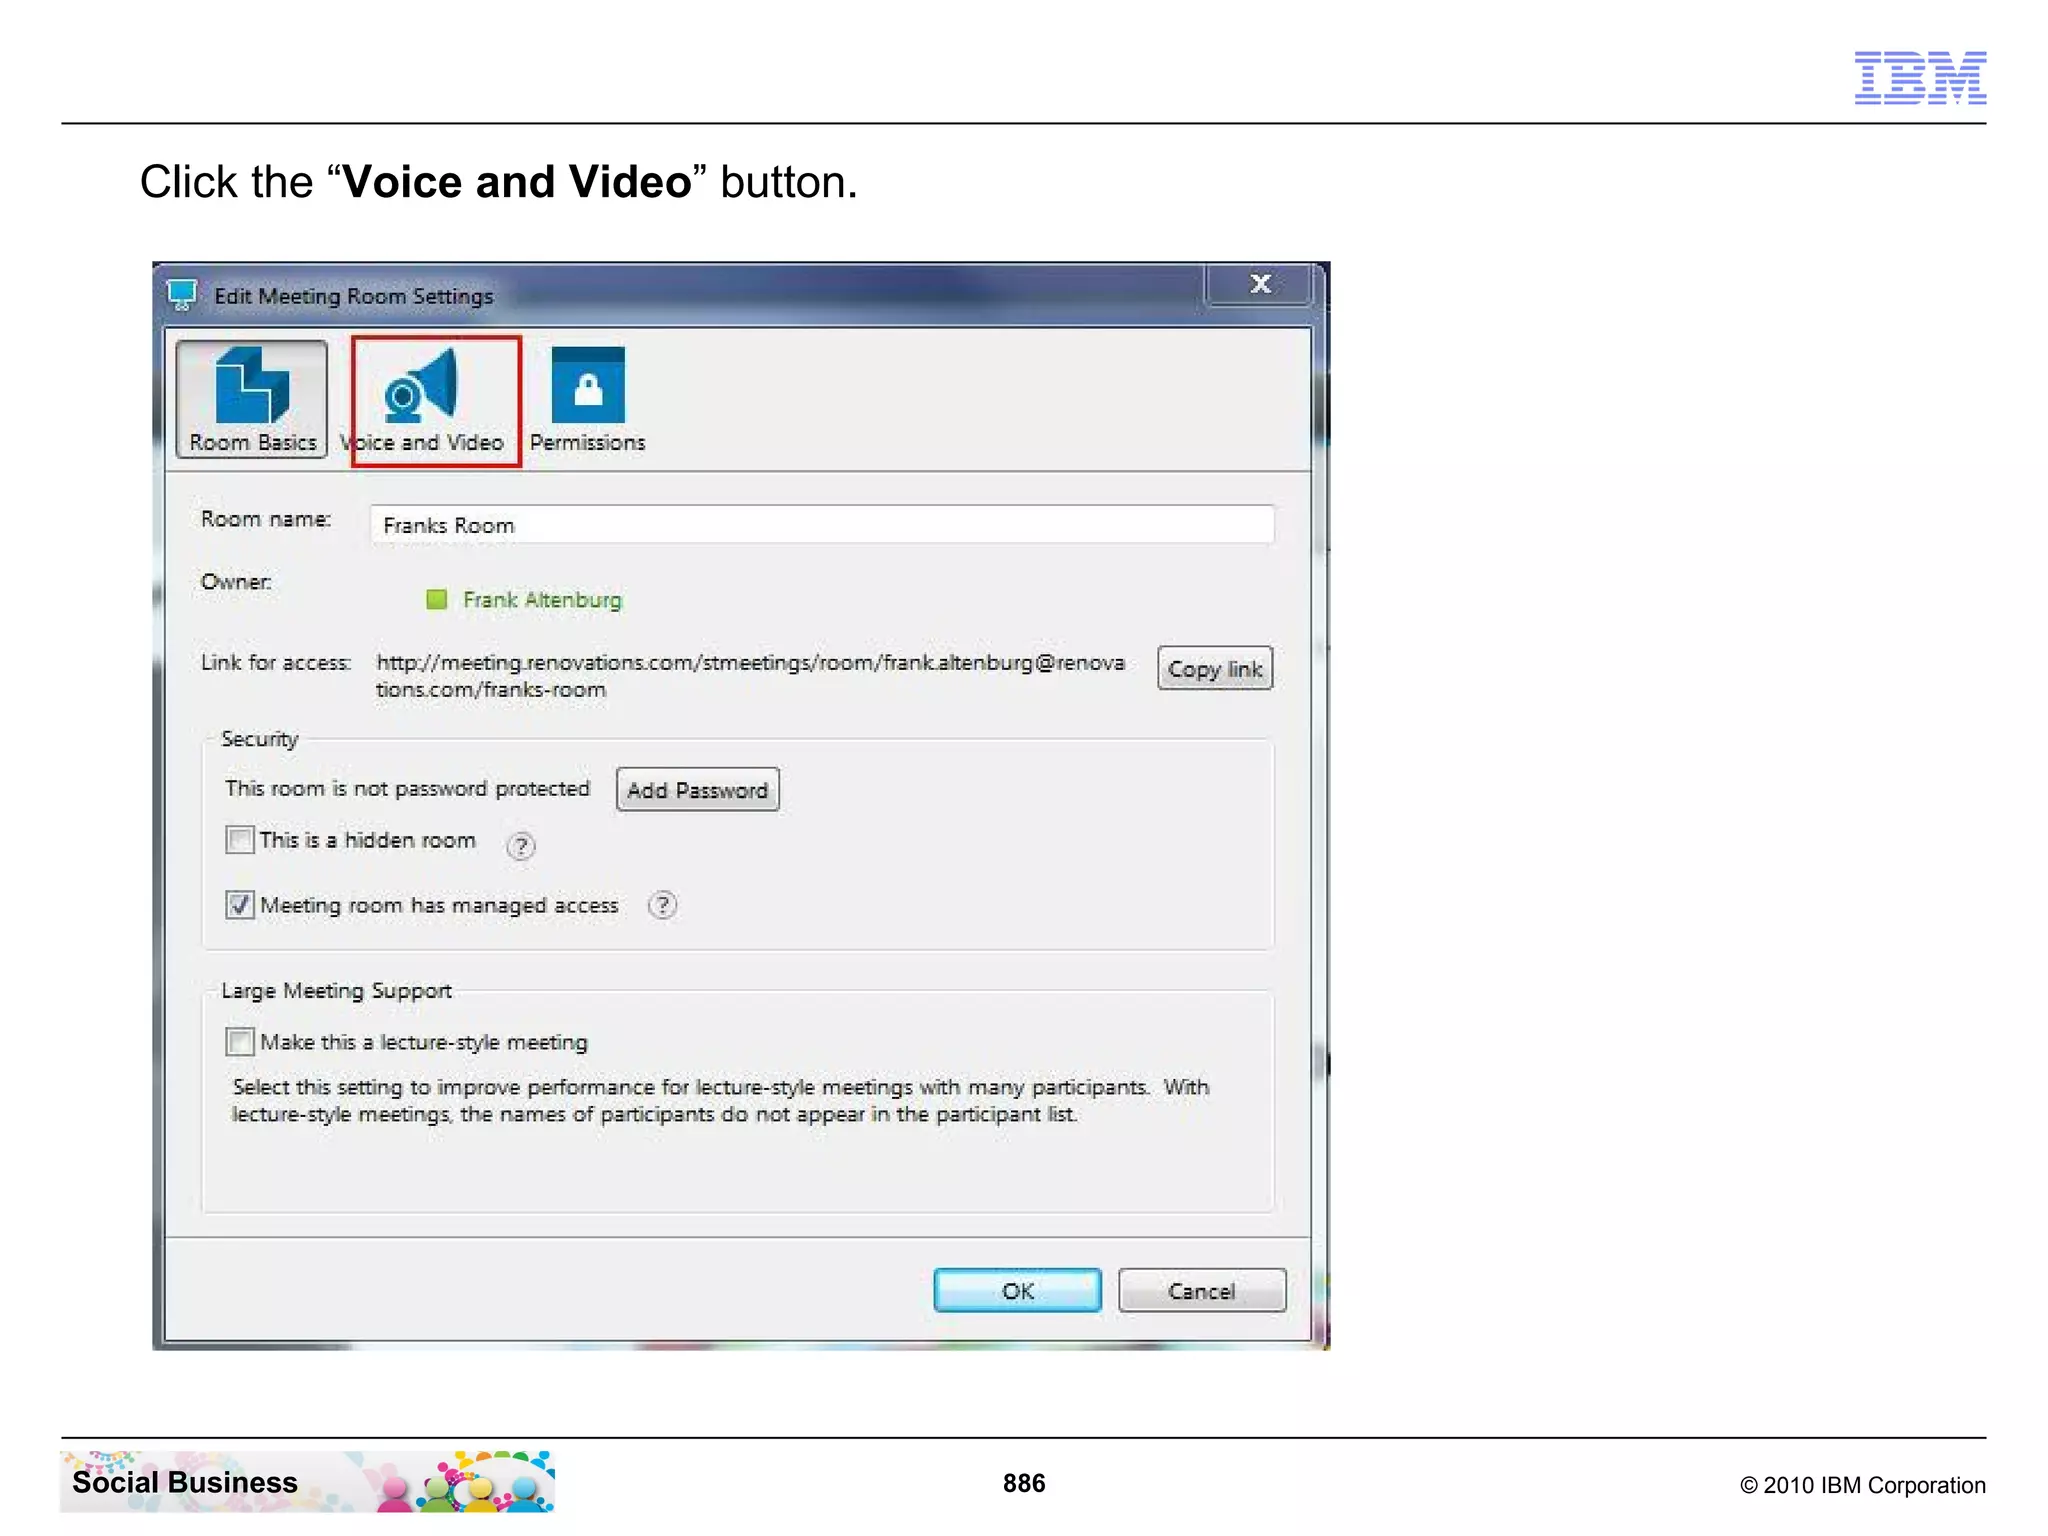
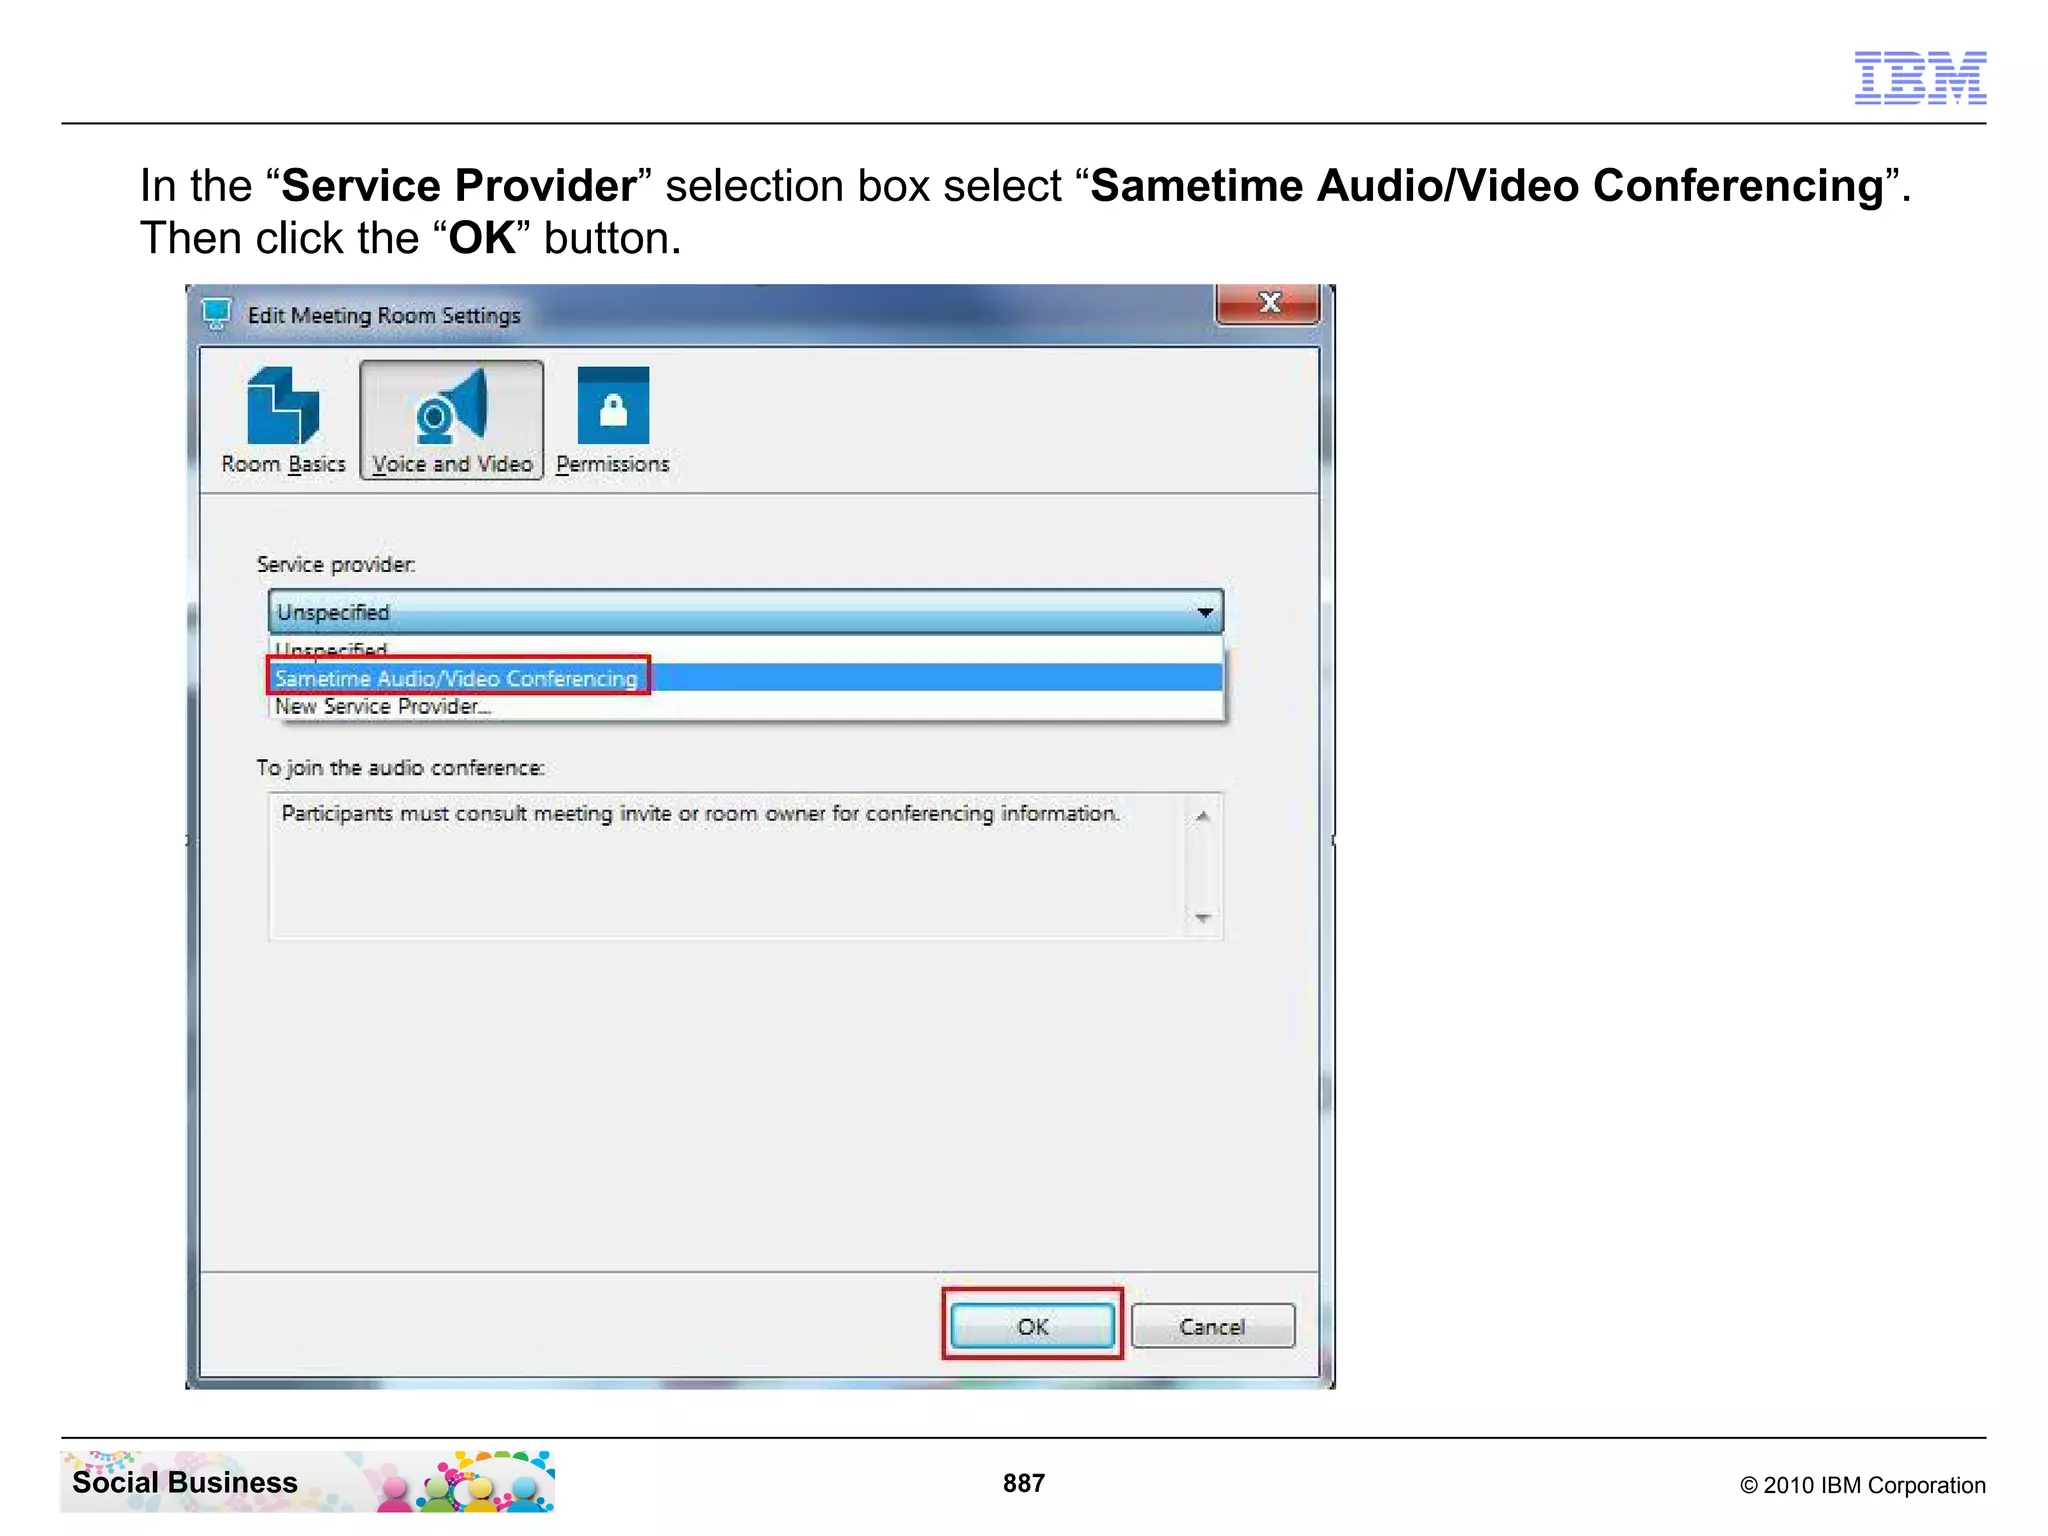


This document provides a guide for quickly implementing IBM Sametime 9 in a proof of concept or small test deployment. It details new features, system requirements, and offers a streamlined installation process designed to support small teams, emphasizing that larger deployments should involve IBM services for proper infrastructure. Frank Altenburg, the author, brings over 15 years of experience in IBM social collaboration software, particularly in the Sametime product family.


![Coded Agents – with UiPath SDK + LangGraph [Virtual Hands-on Workshop]](https://cdn.slidesharecdn.com/ss_thumbnails/codedagentsdeck-251215155422-5497c599-thumbnail.jpg?width=640&height=640&fit=bounds)


