Create Forms in Access with Ease

A form in Access is a database object that you can use to create a user interface for a database application. A "bound" form is one that is directly connected to a data source such as a table or query, and can be used to enter, edit, or display data from that data source. Alternatively, you can create an "unbound" form that does not link directly to a data source, but which still contains command buttons, labels, or other controls that you need to operate your application. This article focuses primarily on bound forms. You can use bound forms to control access to data, such as which fields or rows of data are displayed. For example, certain users might need to see only several fields in a table with many fields. Providing those users with a form that contains only those fields makes it easier for them to use the database. You can also add command buttons and other features to a form to automate frequently performed actions. Think of bound forms as windows through which people see and reach your database. An effective form speeds the use of your database, because people don't have to search for what they need. A visually attractive form makes working with the database more pleasant and more efficient, and it can also help prevent incorrect data from being entered.

Recommended
More Related Content
What's hot
What's hot (20)
Similar to Create Forms in Access with Ease
Similar to Create Forms in Access with Ease (20)
More from FaHaD .H. NooR
More from FaHaD .H. NooR (20)
Recently uploaded
Recently uploaded (20)
Create Forms in Access with Ease
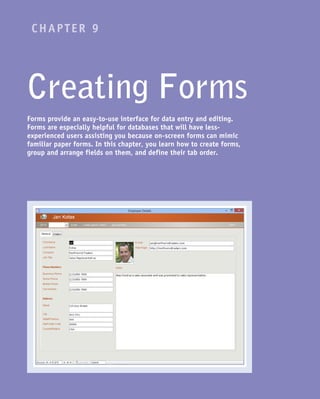
- 1. CHAPTER 9 Creating Forms Forms provide an easy-to-use interface for data entry and editing. Forms are especially helpful for databases that will have less- experienced users assisting you because on-screen forms can mimic familiar paper forms. In this chapter, you learn how to create forms, group and arrange fields on them, and define their tab order.
- 2. Understanding Forms . . . . . . . . . . . . . . . . . . 162 Create and Save a Form . . . . . . . . . . . . . . . . . 164 Create a Form with the Form Wizard . . . . . . . . . . . 166 Create a Form in the Layout View . . . . . . . . . . . . 170 Create a Form in the Design View . . . . . . . . . . . . 172 Delete a Field from the Design View . . . . . . . . . . .173 Arrange Fields on a Form . . . . . . . . . . . . . . . . 174 Group Fields Together . . . . . . . . . . . . . . . . . .176 Define the Tab Order on a Form . . . . . . . . . . . . . 177
- 3. 162 The datasheet is a reasonable tool if you are only entering one or two records, but if you are entering a dozen records or even a hundred, you need to leave the datasheet behind and use the Access data-entry tool of choice: the form. A form is a collection of controls — usually labels and text boxes, but also lists, check boxes, and option buttons — each of which represents either a field or the name of a field. Forms make data entry easier and more efficient. Understanding Forms A One record at a time The default form shows the fields as fill-in boxes for one record at a time. This makes it easier for users to enter a new record without becoming confused by the multiple rows and columns of a datasheet. B Object display In the Datasheet view, imported objects such as graphics appear as text names, but on a form, depending on the data type, Access might be able to display them as they actually appear. For example, pictures of employees can be displayed with each employee record. C Form header A form can have a running header that appears the same no matter which record is displayed. You can put anything that you want in this header. In this example, hyperlinks to other forms appear, making it easy for the user to navigate between forms. D Search To search for a particular record, the user can type a word or phrase in the Search box and then press . The records are filtered so that only records that contain the word or phrase appear when the user scrolls through them with the record navigation controls. The user can click No Filter to remove the filter. E Record navigation To move between records, users can use the Record navigation buttons. These are the same as in a datasheet, but they are more useful here because you cannot see other records without them.
- 4. 163 CHAPTER 9Creating Forms F Tabbed or pop-up forms A form can appear on a tab, as shown here, or as a pop-up window, as shown on the preceding page. This is controlled by the pop-up setting in the form’s properties. G Multitabbed forms A form can consist of multiple tabbed pages, with different form controls on each tab. H Datasheet-style forms There are several design styles for forms besides the standard one shown on the preceding page. For example, a form can resemble a datasheet and can show multiple records at once. I Subforms A subform shows the records from a different table or query that are related to the main record shown. In this example, the orders for a particular customer are being pulled from the Orders table depending on which customer is chosen in the main form. J Navigation buttons This subform does not have navigation buttons at the bottom. That is because having two sets of buttons (one for the main form and one for the subform) would be confusing. Navigation buttons are turned off with the Navigation Buttons property for the subform.
- 5. 164 Create a Split Form 1 In the Objects pane, click the table or query for which you want to create a form. 2 Click the Create tab. 3 Click More Forms. 4 Click Split Form. A The form appears in the upper part of the screen. B The datasheet for the table or query appears in the lower part of the screen. Create a Basic Form 1 In the Objects list, click the table or query for which you want to create a form. 2 Click the Create tab. 3 Click Form. The form appears. Note: You might also see a subform showing a related table, if any usable relationships exist. Create and Save a Form The easiest way to create a form is to use a predefined form layout. Access has several of these layouts, but the basic, split, and multiple-items forms are the ones that you will use most often. A basic form layout shows just the data from one record at a time. A split form displays a datasheet on top and a form below, and when you click a record in the datasheet, the record data appears in the form. A multiple-items form is a tabular layout that shows the field names at the top and the records in rows. Create and Save a Form
- 6. 165 CHAPTER 9Creating Forms TIPS What other form types can I create? Click the Home tab, click the More Forms button, and then click one of the following: • Datasheet: This looks just like a regular datasheet, but it is actually a form. This is useful when you want to show a datasheet on a subform, for example. • Modal Dialog: This looks just like a dialog box, but it is actually a form. This is useful for creating navigational menu systems. What if I do not want a subform on a form created with the Form button? If you do not require the subform, you can delete it from the form. First click any border of the subform to select it. You will know that it is selected when you see a thick border around the subform. Click the Home tab and then click Delete (alternatively, press ). Save a Form 1 Click . The Save As dialog box opens. 2 Type a name for the form. 3 Click OK. The form is saved. C You can right-click the form tab and then click Close on the shortcut menu to close the form. Create a Multiple-Items Form 1 In the Objects pane, click the table or query for which you want to create a form. 2 Click the Create tab. 3 Click More Forms. 4 Click Multiple Items. A form appears with multiple records visible at the same time.
- 7. 166 The Form Wizard appears. 3 Click the Tables/Queries and click the table or query from which you want to select fields. 1 Click the Create tab. 2 Click Form Wizard. Create a Form with the Form Wizard The basic, split, and multiple-items forms are fine for very simple form needs, but it is likely that in most cases the resulting form will not suit your needs exactly. For a bit more control over your forms, you need to use the Form Wizard, which takes you step-by-step through the entire form- creation process. The Form Wizard enables you to create a form based on more than one table or query, not necessarily using all the available fields from them. With the Form Wizard, you gain some flexibility without having to do all the form design work yourself. Create a Form with the Form Wizard
- 8. 167 CHAPTER 9Creating Forms TIPS Can I use fields from more than two tables or queries? Yes. But you are not prompted for subform information. Instead, all the fields appear on a single form. It is possible to create subforms within subforms using the Form Design view but not using the wizard. Is it okay to not use all the fields from the table or tables? Yes. But keep in mind that users filling out that form will have no way of entering values in the fields that do not appear on the form. With an AutoNumber field, that is not a problem because the user cannot enter data into that field anyway, but any other field will be blank if it is not included on the form. 6 Repeat steps 4 and 5 to add more fields from the chosen table or query. 7 Repeat steps 3 to 6 for other tables or queries if needed. Note: If you choose fields from more than one table or query, they must be related. 8 Click Next. 4 Click a field. 5 Click to move the field to the Selected Fields list. Note: Add fields in the order in which you want them to appear on the form. A If you make a mistake, you can remove a field by clicking .
- 9. 168 The layout page of the wizard appears. @ Click the layout that you want for the form ( changes to ). Note: If you are creating a form with a subform, this screen asks you to choose the layout for the subform rather than for the main form. For a form/subform layout, the main form is always columnar when constructed by the wizard. # Click Next. If you chose fields from two different tables or queries, you are asked which one should be the subform. 9 Click the option that best represents the layout that you want. 0 If you would rather have a linked form than a subform, click Linked forms ( changes to ). Note: A linked form means that Access creates a second form instead of a subform. The main form includes a button that, when clicked, displays the second form. ! Click Next. Create a Form with the Form Wizard (continued) The Form Wizard is useful not only for selecting the exact fields to include but also for choosing a format and appearance for the form. You can also change the fields and format later in the Form Design view, but it is often easier to specify upfront what you want via the wizard. In particular, you can use the Form Wizard to determine the form layout to use when you choose fields from two related tables. For example, if your form includes fields from the Customers and Order Details tables, you can choose one table for the main form and the other for the subform. Create a Form with the Form Wizard (continued)
- 10. 169 CHAPTER 9Creating Forms TIPS Do I need to save the form before I close it? No. When you specify a name in step 14 and optionally in step 15, you are supplying the object names to be used. Access automatically saves the form and subform, if applicable, with those names. I made a mistake; how do I delete the form that I just created? Delete the form as you would any other object: 1 Locate the form in the Objects list. 2 Right-click the form name. 3 Click Delete. 4 In the warning dialog box that appears, click Yes. The form appears in the Form view. If some of the labels appear truncated, you can fix this problem in the Form Design view. Note: See the section “Arrange Fields on a Form” for more on fixing truncated fields. The title page appears. $ Type a name for the form, replacing the default name. % If you created a subform, type a name for the subform, replacing the default name. ^ Click Finish.
- 11. 170 A A list of all the tables appears; each table’s field list is collapsed. 4 Click next to a table. A list of the fields in the table appears ( changes to ). 5 Drag a field from the Field List on to the form. You can also double-click a field to add it to the form. 6 Repeat step 5 to add more fields. Create the Form 1 Click the Create tab. 2 Click Blank Form. A blank form appears, along with a Field List pane. 3 Click Show all tables. Create a Form in the Layout View The Form Wizard offers the easiest path to creating a form, but it does not give you much flexibility in terms of the form layout. The Form Design view, which you learn about in the “Create a Form in the Design View” section, gives you complete flexibility but is more complex to learn and use. In between these extremes is the Form Layout view, which lets you create a form by dragging and dropping fields on to a blank page. It is not as powerful as the Design view, but it is much easier to use. Create a Form in the Layout View
- 12. 171 CHAPTER 9Creating Forms TIP Can I rearrange fields after placing them on the layout? Yes. Follow these steps: 1 Click the field’s label to select it. 2 Press and hold and then click the field to also select it. 3 Position over either the field or the label ( changes to ). 4 Click and drag up or down to move the field and its label. A A horizontal line shows where the field is being moved. Adjust the Spacing between Labels and Fields B This is the field label. C This is the field. 1 Click any label to select it. 2 Position between the field and its label ( changes to ). 3 Click and drag to the left or right to change the spacing. The change affects all the fields. Adjust Label Alignment 1 Click any label to select it. 2 Position above the top label so that a black arrow appears and then click. Access selects the entire column. 3 Click the Format tab. 4 Click the Align Right button ( ). Access aligns the labels on the right.
- 13. 172 1 Click the Create tab. 2 Click Form Design. A new form appears in the Form Design view. A The Field List appears. B If the Field List does not appear, click the Design tab and then click Add Existing Fields. 3 In the Field List, click next to the table from which you want to select fields. changes to , and the list of fields appears. 4 Click and drag a field on to the design grid. Both the field and its associated label appear. C This is the field label. D This is the field. 5 Drag and drop more fields on to the form. Note: You can drag more than one field at a time by selecting multiple fields in the Field List before dragging. Hold down and then click the fields that you want. Create a Form in the Design View Although the Layout view is a step up from the Form Wizard in terms of control, the resulting form still might not satisfy your needs. For maximum form flexibility, you need to use the Form Design view, which gives you total control over the form, including the positioning of the controls, the formatting of the text, and the colors. This section shows you how to create a basic form layout using the Design view. The rest of the sections in this chapter and in Chapter 10, “Editing Forms,” show you how to customize your form using the Design view tools. Create a Form in the Design View
- 14. 173 CHAPTER 9 Delete Just the Field Label 1 Click the field label — not the actual field — to select it. B A selection box appears around the label. 2 Press . The label is deleted, but the field remains. Note: You cannot delete the field but leave its label. You can, however, place freestanding labels on a form. See Chapter 10 for more information. Delete a Field and Its Label 1 Click the field — not its label — to select it. A A selection box appears around the field. 2 Press . Both the field and its label are deleted. Delete a Field from the Design View If you no longer need a form object, you can either remove an entire field, including its label, or remove only the label. When you remove the label, this enables the field to remain on the form but without a label. This can be useful, for example, when you want a single label, such as Name, followed by two different fields, such as FirstName and LastName. It can also be useful when fields on the form are obvious and do not need labels to name them, such as Notes or Memo. Delete a Field from the Design View
- 15. 174 One advantage of working in the Form Design view, as opposed to the Layout view, is the flexibility it offers in arranging fields. You can freely drag a field around on the grid or make a field align or conform in size with other fields. An invisible rectangular frame surrounds each label and field. When you select an item, Access displays a selection box on this frame, which includes selection handles at the frame’s corners and midpoints. You can use this frame to resize any label or field to change its shape or dimensions, as well as to move the label or field. Arrange Fields on a Form Resize a Field or Label Box When you hover over a selection handle on a selected field or label, turns into a two-headed arrow ( or ). To resize the width of a field or label, click and drag a selection handle on the left or right side of the box. To resize the height of a field or label, click and drag a selection handle on the top or bottom of the box. Move a Field When you move a field, its label travels with it. To move a field, position over the border of the selected field or label — but not over a selection handle — so changes to . Then click and drag the field to its new location. Move Only the Field or Only the Label Each field and each field label has a larger selection handle in its upper-left corner. If you drag the box by that selection handle, it moves separately from its associated objects. So, for example, you can move a label independently of its field or vice versa. This can be useful if you want to place the label closer to the field or above the field.
- 16. 175 CHAPTER 9Creating Forms Align Fields and Labels It is often useful to right-align or left-align a series of fields or field labels. You can select several fields and then click one of the alignment buttons to make the fields align neatly with one another. Click the Arrange tab, click Align ( ), and then choose an alignment from the menu that appears. Note that Access aligns the selected controls with a single base control, which is the control that is the farthest positioned in whatever direction you are aligning the controls. For example, if you want to align the controls on their right edges, the base control is the one that is farthest to the right. Make Field Sizes Consistent Sometimes, a form looks best when all the fields are the same size. Access enables you to select multiple items and then automatically size them horizontally to either the widest item in the selection or the narrowest. You can also size the selected items vertically to the tallest or shortest item in the selection. Select the fields and/or labels that you want to size consistently, click the Arrange tab, click the Size/Space button ( ), and then click a sizing command. Align Fields in a Grid Access gives you an easy way to arrange your form controls: the control layout. This simple layout acts as a kind of table, and your controls are slotted neatly into the layout’s rows and columns. In a stacked layout, the controls are arranged vertically in two columns, with field names in the left column and fields in the right column. In a tabular layout, the controls are arranged horizontally in two rows, with field labels in the top row and fields in the bottom row. Select the items that you want to align, click the Arrange tab, and then click either Stacked ( ) or Tabular ( ).
- 17. 176 2 Click the Arrange tab. 3 Click Size/Space ( ). 4 Click Group. The fields are grouped together. A To ungroup the fields, click any item in the group to select it, click the Arrange tab, click , and then click Ungroup. Note: Grouping works only with fields that are not part of a layout grid (stacked or tabular). If the Group command is unavailable, select the fields, click the Arrange tab, and then click Remove Layout to remove them from the grid. 1 Drag a marquee around a group of fields to select them. Note: To create a marquee, click and drag an imaginary box from a spot above and to the left of the fields to a spot below and to the right of the fields. You can also press and hold and then click each field that you want to select. Group Fields Together When working with fields, it can be easier to work with multiple fields together than to select and move each one individually. You can do this by creating a group, which is a collection of fields you can format, size, and move together, similarly to the way you format, size, and move a single control. Access treats a group as a single item with its own frame. To select an entire group, you just need to select one item from the group. Group Fields Together
- 18. 177 CHAPTER 9 The Tab Order dialog box opens. 3 Click to the left of a field name to select it. 4 Drag the selected field name up or down in the list. A Alternatively, you can click Auto Order to set the tab order based on the positions on the form. Note: Auto Order orders fields from top to bottom. If two fields have the same vertical position, it orders them from left to right. 5 Click OK. The dialog box closes, and Access puts the new tab order into effect. 1 Click the Design tab. 2 Click Tab Order ( ). Define the Tab Order on a Form You can navigate a form by pressing the key. As you press , the order in which Access selects the controls is called the tab order. Access sets the tab order according to the order that you added the controls to the form. You will often find that this order does not correspond to the “natural” order of the controls, so pressing causes the selection to jump haphazardly around the form. To fix this, Access lets you control the tab order yourself. Define the Tab Order on a Form