Picture manipulation in MS Word
•Download as PPSX, PDF•
0 likes•109 views

Use Microsoft Word to remove picture background and make it transparent.

Recommended
More Related Content
What's hot
What's hot (20)
Similar to Picture manipulation in MS Word
Similar to Picture manipulation in MS Word (20)
Recently uploaded
Recently uploaded (20)
Picture manipulation in MS Word
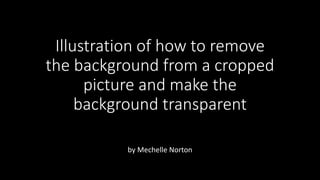
- 1. Illustration of how to remove the background from a cropped picture and make the background transparent by Mechelle Norton
- 2. 1. On a blank Word document, Insert a picture.
- 3. 2. With the picture selected, Remove the background
- 4. 3. Word will take its best guest at what to remove. It will color that section fuscia.
- 5. 4. Mark the areas that Word colored fuscia that you want it NOT to remove by selecting “Mark Areas to Keep” and clicking on them. Tips: Increase the magnification to make sure you get all the spots you want. You can draw curves with the tool to save time. You can undo (ctrl-Z) a change if you don’t like the results.
- 6. 5. When you’re satisfied, click “Keep Changes”.
- 7. 6. The fuscia background will be removed and replaced with white. 7. Select “Crop” to crop the picture.
- 8. 8. Move the cursor to one of the crop handles. Drag in the crop handle once the cursor changes shape to match it.
- 9. 9. Click “Crop” to set the picture
- 10. 10. Select “Color” 11. Select “Set Transparent Color”
- 11. 12. Move the tool over the white background area and click to set it to be transparent.
- 12. 13. Right-click on the picture to save it as a picture 14. Save it as type “gif”
- 13. 15. Open the document you want to paste the picture into.
- 14. 16. Insert from file.
- 15. 17. Select the “gif” picture you just saved and insert it.
- 16. 18. You will see the picture you inserted (see the upper left corner)
- 17. 19. Drag the picture to where you want it. 20. Right-click on the picture and select “Wrap Text” and then “In Front of Text” 21. Now you can move the picture freely.
- 18. 22. Resize the picture. Tip: So as not to change the aspect/ratio, use the corner handles.