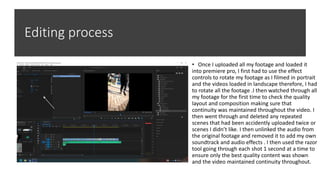
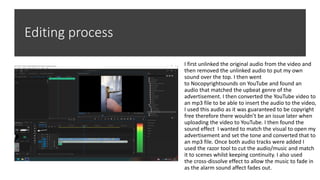
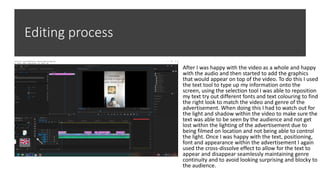
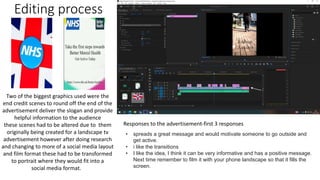
Editing process
Tools used
Unlink tool
Razor tool
Type tool
Cross dissolve
Selection tool
Rotation control
And many more...
Editing process
• Once I uploaded all my footage and loaded it
into premiere pro, I first had to use the effect
controls to rotate my footage as I filmed in portrait
and the videos loaded in landscape therefore, I had
to rotate all the footage .I then watched through all
my footage for the first time to check the quality
layout and composition making sure that
continuity was maintained throughout the video. I
then went through and deleted any repeated
scenes that had been accidently uploaded twice or
scenes I didn’t like. I then unlinked the audio from
the original footage and removed it to add my own
soundtrack and audio effects . I then used the razor
tool going through each shot 1 second at a time to
ensure only the best quality content was shown
and the video maintained continuity throughout.
Editing process
I first unlinked the original audio from the video and
then removed the unlinked audio to put my own
sound over the top. I then went
to Nocopyrightsounds on YouTube and found an
audio that matched the upbeat genre of the
advertisement. I then converted the YouTube video to
an mp3 file to be able to insert the audio to the video,
I used this audio as it was guaranteed to be copyright
free therefore there wouldn’t be an issue later when
uploading the video to YouTube. I then found the
sound effect I wanted to match the visual to open my
advertisement and set the tone and converted that to
an mp3 file. Once both audio tracks were added I
used the razor tool to cut the audio/music and match
it to scenes whilst keeping continuity. I also used
the cross-dissolve effect to allow the music to fade in
as the alarm sound affect fades out.
Editing process
After I was happy with the video as a whole and happy
with the audio and then started to add the graphics
that would appear on top of the video. To do this I used
the text tool to type up my information onto the
screen, using the selection tool I was able to reposition
my text try out different fonts and text colouring to find
the right look to match the video and genre of the
advertisement. When doing this I had to watch out for
the light and shadow within the video to make sure the
text was able to be seen by the audience and not get
lost within the lighting of the advertisement due to
being filmed on location and not being able to control
the light. Once I was happy with the text, positioning,
font and appearance within the advertisement I again
used the cross-dissolve effect to allow for the text to
appear and disappear seamlessly maintaining genre
continuity and to avoid looking surprising and blocky to
the audience.
Editing process
Two of the biggest graphics used were the
end credit scenes to round off the end of the
advertisement deliver the slogan and provide
helpful information to the audience
these scenes had to be altered due to them
originally being created for a landscape tv
advertisement however after doing research
and changing to more of a social media layout
and film format these had to be transformed
to portrait where they would fit into a
social media format.
Responses to the advertisement-first 3 responses
• spreads a great message and would motivate someone to go outside and
get active.
• i like the transitions
• I like the idea, I think it can be very informative and has a positive message.
Next time remember to film it with your phone landscape so that it fills the
screen.

editing priemier pro.pptx

  • 1.
  • 2.
    Tools used Unlink tool Razortool Type tool Cross dissolve Selection tool Rotation control And many more...
  • 3.
    Editing process • OnceI uploaded all my footage and loaded it into premiere pro, I first had to use the effect controls to rotate my footage as I filmed in portrait and the videos loaded in landscape therefore, I had to rotate all the footage .I then watched through all my footage for the first time to check the quality layout and composition making sure that continuity was maintained throughout the video. I then went through and deleted any repeated scenes that had been accidently uploaded twice or scenes I didn’t like. I then unlinked the audio from the original footage and removed it to add my own soundtrack and audio effects . I then used the razor tool going through each shot 1 second at a time to ensure only the best quality content was shown and the video maintained continuity throughout.
  • 4.
    Editing process I firstunlinked the original audio from the video and then removed the unlinked audio to put my own sound over the top. I then went to Nocopyrightsounds on YouTube and found an audio that matched the upbeat genre of the advertisement. I then converted the YouTube video to an mp3 file to be able to insert the audio to the video, I used this audio as it was guaranteed to be copyright free therefore there wouldn’t be an issue later when uploading the video to YouTube. I then found the sound effect I wanted to match the visual to open my advertisement and set the tone and converted that to an mp3 file. Once both audio tracks were added I used the razor tool to cut the audio/music and match it to scenes whilst keeping continuity. I also used the cross-dissolve effect to allow the music to fade in as the alarm sound affect fades out.
  • 5.
    Editing process After Iwas happy with the video as a whole and happy with the audio and then started to add the graphics that would appear on top of the video. To do this I used the text tool to type up my information onto the screen, using the selection tool I was able to reposition my text try out different fonts and text colouring to find the right look to match the video and genre of the advertisement. When doing this I had to watch out for the light and shadow within the video to make sure the text was able to be seen by the audience and not get lost within the lighting of the advertisement due to being filmed on location and not being able to control the light. Once I was happy with the text, positioning, font and appearance within the advertisement I again used the cross-dissolve effect to allow for the text to appear and disappear seamlessly maintaining genre continuity and to avoid looking surprising and blocky to the audience.
  • 6.
    Editing process Two ofthe biggest graphics used were the end credit scenes to round off the end of the advertisement deliver the slogan and provide helpful information to the audience these scenes had to be altered due to them originally being created for a landscape tv advertisement however after doing research and changing to more of a social media layout and film format these had to be transformed to portrait where they would fit into a social media format. Responses to the advertisement-first 3 responses • spreads a great message and would motivate someone to go outside and get active. • i like the transitions • I like the idea, I think it can be very informative and has a positive message. Next time remember to film it with your phone landscape so that it fills the screen.