
Recommended
Recommended
More Related Content
What's hot
What's hot (20)
Similar to Learn How to Manage Storage Locations Odoo 15
Similar to Learn How to Manage Storage Locations Odoo 15 (20)
More from Celine George
More from Celine George (20)
Recently uploaded
Recently uploaded (20)
Learn How to Manage Storage Locations Odoo 15
- 1. How to Manage Storage Locations in Odoo 15 www.cybrosys.com
- 2. INTRODUCTION ❖ One is permitted to build separate warehouses in Odoo and can make adjustments or switch between these stock rooms. ❖ So a storage place inside this or a sub-location of one's warehouse may be said as a specific room, such as a floor, a passageway or a shelf, and so on. ❖ But it is not feasible to connect a position to numerous warehouses.
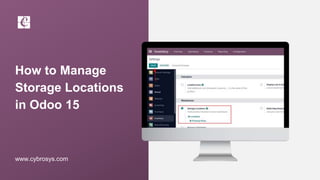
- 3. ❖ First of all, we need to enable Storage Locations. ❖ For that goto Inventory > Configuration > Settings
- 4. ❖ After that Storage Locations and save your changes.
- 5. ❖ After that Go to Configuration > Locations.
- 6. ❖ The Locations window will display every location described in the platform including the details such as Location, Location Type, Storage Category and Company. ❖ You can use the filtering option for sorting out your data easily. We will get a list view for the locations. You can create a new location by CREATE button
- 7. ❖ Generally, we have three Location Types. ○ Physical Location - Physical location is the area where one's product is held in hand, it's the warehouse's internal site. Which can also be assigned to the loading and unloading location in a warehouse or shelf etc. ○ Location of Partners - This acts as a physical location, too. This could be seen as the spaces in which you were not the owner but stands between a seller or a customer warehouse. ○ Virtual Location - The Simulated Position is meant to be spaces or areas that do not exist in reality or physical. These places were established to retain the inventory missing or to take in the items making their way to the warehouse.
- 8. ❖ In the Location creation form, you can allocate the Location Name along with the Parent Location.
- 9. ❖ The Location Type can be filled using the dropdown menu available. The dropdown menu includes some options such as ○ Vendor Location: Vendor Location is the virtual location representing the source location for the products coming from your vendors. ○ View: Virtual location used to create hierarchical structures for your warehouses, aggregating its child locations, which cannot directly contain products. ○ Internal Locations: It is the physical locations inside your own warehouses. ○ Customer Location: Virtual location representing the destination location for products sent to your customers. ○ Inventory Loss: Virtual location serving as counterpart for inventory operations used to correct stock levels (physical inventories).
- 10. ❖ Then the location can be mentioned as scrap location or return location by enabling the boxes. ❖ Moreover you can allocate the Cyclic Inventory details such as Inventory Frequency, Last Effective Inventory, and Next Expected Inventory. ❖ Moreover, the Removal strategies of this particular location can be specified based on the default methods available. ❖ The default methods available in the dropdown menu are shown in the below image. This dropdown menu includes the First In First Out (FIFO), Last In First Out( LIFO), First Expiry First Out( FEFO), and Closest Locations.
- 11. ○ Production: Virtual counterpart locations for production operations. This location consumes the components and produces finished products. ○ Transit Location: Counterpart location that should be used in intercompany or inter warehouse operations. ❖ In the new scrap order creation window, you can add the Product Name, Quantity, Source Document, and Company name in the specified fields. By clicking on the Save button, you will get a draft form of the scrap order. ❖ In order to validate the newly created scrap order, you are allowed to click on the ‘Validate’ button from the same window.
- 12. ❖ Now create a Transfers from Operations > Transfers
- 13. ❖ Provide the contact details , operation type , source and destination locations,product details etc.VALIDATE the transfer.
- 14. ❖ Now let’s check the current stock for this location.
- 15. ❖ We can see the transferred product on this location.
- 16. For More Details Check our company website for related blogs and Odoo book. Inventory- Odoo 15 Enterprise Book Check our YouTube channel for functional and technical videos in Odoo. How to Manage Storage Locations Odoo 15
- 18. Thank You