
Recommended
More Related Content
What's hot
What's hot (19)
Similar to The Writing Process ENG 111 Lowe
Similar to The Writing Process ENG 111 Lowe (20)
Recently uploaded
Recently uploaded (20)
The Writing Process ENG 111 Lowe
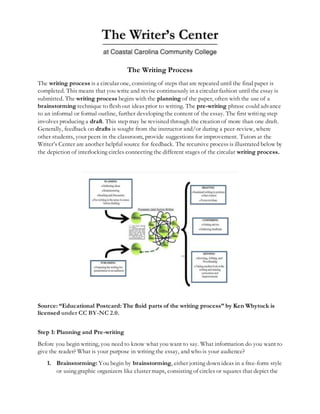
- 1. The Writing Process The writing process is a circular one, consisting of steps that are repeated until the final paper is completed. This means that you write and revise continuously in a circular fashion until the essay is submitted. The writing process begins with the planning of the paper, often with the use of a brainstorming technique to flesh out ideas prior to writing. The pre-writing phrase could advance to an informal or formal outline, further developing the content of the essay. The first writing step involves producing a draft. This step may be revisited through the creation of more than one draft. Generally, feedback on drafts is sought from the instructor and/or during a peer-review, where other students, your peers in the classroom, provide suggestions for improvement. Tutors at the Writer’s Center are another helpful source for feedback. The recursive process is illustrated below by the depiction of interlocking circles connecting the different stages of the circular writing process. Source: “Educational Postcard: The fluid parts of the writing process” by Ken Whytock is licensed under CC BY-NC 2.0. Step 1: Planning and Pre-writing Before you begin writing, you need to know what you want to say. What information do you want to give the reader? What is your purpose in writing the essay, and who is your audience? 1. Brainstorming: You begin by brainstorming, either jotting down ideas in a free-form style or using graphic organizers like cluster maps, consisting of circles or squares that depict the
- 2. 2 larger ideas with lines like spokes of a wheel connected to other shapes that depict the details. The brainstorming process is creative and informal. You are recording any ideas that could be relevant. Ask yourself questions like who, what, where, when, why, and how to further your understanding of your topic. You will prune this information later in the pre-writing process, when you decide upon the pertinent information to include, and determine the unnecessary information to omit. The use of a graphic organizer, as shown below, illustrates how it helps organize ideas for an essay on animal habitats. Source: Animal Habitats by Anchor, a North Carolina History Online Resources, as shown on NCpedia, is licensed under CC BY-NC 4.0. To further explore brainstorming techniques, see the other handouts under pre-writing. Outlines: An outline helps to organize ideas, showing the main ideas, followed by the related secondary ones. Each main idea should have its own line with a Roman numeral followed by a phrase that explains the idea. Secondary ideas or subtopics of the main ideas should be numbered. If needed, a third level may be added to the outline, noting ideas that are related to the secondary-level topic. In the outline shown below, the ideas related to a planned essay on digital technology are generally organized in two- or three-tier formats. In the topic outline graphic below, created for the open source textbook Writing for Success published by the Minnesota Libraries Publishing Project, the student includes the thesis statement. Then, the main ideas and associated details are provided in phrases, not complete sentences. There are different ways of producing an outline. Follow the guidance of your instructor if an outline is suggested or required.
- 3. 3 Source: Writing for Success, Minnesota Libraries Publishing Project, licensed under CC BY-NC 4.0. Step 2: Drafting The first draft of an essay should contain all the necessary components: the introduction, body (supporting) paragraphs, and the conclusion. A rough draft is a written plan for an essay that can change as needed. At this stage of the writing process, ideas are more fluid. The writer may still be determining the breadth of the paper, deciding upon the content that is necessary to fully address the topic. It is at this stage that the writer may identify areas that haven’t been duly developed or areas that don’t fit in with the content and that should be omitted. 1. Refer to brainstorming exercises and an outline, as needed, to create an organized rough draft. 2. Follow the instructions for the assignment to make sure that the rough draft meets its requirements. Step 3: Revising and Conferring The first draft may be submitted to an instructor and/or a Writer’s Center tutor for suggestions and feedback on improving it. Your instructor also may require a peer-review exercise. When you confer with others, you benefit from their input. If it is not feasible for you to have others review your essay, consider reading it out loud to identify errors and problem areas that need revision. Drafting is
- 4. 4 a recursive, circular process. You may return to this revision step repeatedly during the writing of your paper as you create new drafts, beforeyou complete the final version. 1. Use your notes or the comments inserted in your rough draft or the comments made by others to begin the revision process. 2. Add and omit information liberally at this stage to ensure that you are focusing on the topic of your paper, including the required details and deleting information that is extraneous. 3. Check to make sure the basics are met. Do the paragraphs contain the necessary components? For assistance, click on Components of a Paragraph, a Writer’s Center handout. 4. Consult with your instructor if you have any questions about the requirements for the paper. In the example below, a marked-up paper about the textile industry is shown that will be used as a guide during revision. Source: Excelsior Online Writing Lab (OWL) image licensed under CC BY-NC 2.0. Step 4: Refining to create a polished final copy for submission or publishing 1. Review feedback: Continue to rely on provided feedback to improve the essay.
- 5. 5 2. Review the introduction: Does it provide the necessary background and explanation of the topic? Have you included a thesis statement in the introduction that briefly summarizes the main point of your essay? For assistance, click on Introductions and Conclusions, a Writer’s Center handout. 3. Review the body (supporting) paragraphs: Look for problems with organization. Are the ideas in the body (supporting) paragraphs presented in a logical manner? Are transitions used when a new topic or idea is introduced? For assistance, click on Components of a Paragraph, a Writer’s Center handout. 4. Review the conclusion: Does it restate the thesis statement? Does it briefly mention each of the key points? Is an insightful or analytical observation included at the end? Does it bring the paper to a logical close? For assistance, click on Introductions and Conclusions, a Writer’s Center handout. 5. Review sentence structure: Look for problems with sentence structure that should be corrected, including run-on sentences or sentence fragments. For assistance, see the grammar handouts on this subject. 6. Review the paper for grammar: Check for grammatical errors that should be corrected. 7. Review spelling: Have you verified the spelling of words? If you used a spellchecker, were you careful not to rely on it exclusively? Remember that it will not alert you to errors where the wrong word was used; it will only identify misspelled words. 8. Review documentation: Have you credited your sources for ideas or for quotes, using the assigned style? 9. Review the assigned style: If a style guide was assigned to use for the paper, make sure that it has been followed and the formatting is correct. Use Writer’s Center handouts for help with these styles, including APA, MLA, the Chicago Manual of Style, and the Council of Science Editors. For assistance, use these Writer’s Center handouts under Writing Styles + Citations. Remember that the writing process doesn’t end until the paper is submitted. Continuous revision is the key to producing a professional paper suitable for the academic environment.