Call girls Service in Ajman 0505086370 Ajman call girls
Microsoft office powerpoint
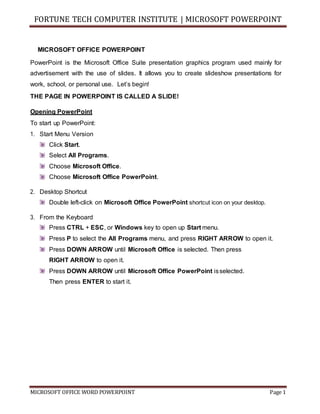
1. FORTUNE TECH COMPUTER INSTITUTE | MICROSOFT POWERPOINT
MICROSOFT OFFICE WORD POWERPOINT Page 1`
MICROSOFT OFFICE POWERPOINT
PowerPoint is the Microsoft Office Suite presentation graphics program used mainly for
advertisement with the use of slides. It allows you to create slideshow presentations for
work, school, or personal use. Let’s begin!
THE PAGE IN POWERPOINT IS CALLED A SLIDE!
Opening PowerPoint
To start up PowerPoint:
1. Start Menu Version
Click Start.
Select All Programs.
Choose Microsoft Office.
Choose Microsoft Office PowerPoint.
2. Desktop Shortcut
Double left-click on Microsoft Office PowerPoint shortcut icon on your desktop.
3. From the Keyboard
Press CTRL + ESC, or Windows key to open up Start menu.
Press P to select the All Programs menu, and press RIGHT ARROW to open it.
Press DOWN ARROW until Microsoft Office is selected. Then press
RIGHT ARROW to open it.
Press DOWN ARROW until Microsoft Office PowerPoint isselected.
Then press ENTER to start it.
2. FORTUNE TECH COMPUTER INSTITUTE | MICROSOFT POWERPOINT
MICROSOFT OFFICE WORD POWERPOINT Page 2`
Menu Tabs
The Menu Tabs allow you to see buttons in different
categories. The Home tab displays items pertaining to text
formatting. The other tabs will display other options.
Ribbon
The Ribbon displays the contents of the tab you have
chosen. You will see different buttons based on which tab is
showing.
Outline/Slides Tab
These tabs allow you to switch between a text outline of your
presentation and a visual representation of your slides with
thumbnails.
Presentation Window
This window represents the slide that you are currently
working on.
Changing the Slide Design
Choose the Design tab from the menu. The Ribbon will change to display your
design
To change the slide design, click on one you like from the Ribbon. To see more options,
either scroll through the list with the up and down arrows to the right of the designs or
click on the second down arrow to see them in a larger window. Hovering over the
design with your mouse will change the design without you having to click. To make a
final selection, click on one.
Colors can easily be changed for each theme. Click on the Colors button on the Ribbon
to select a different color scheme.
The same thing can be done for the font styles. Click on the
Fonts button to see a list of available font schemes. Hover
over each one to see that theme reflected on your current
slide.
options. Scroll through the available options
or see the list in a larger window.
3. FORTUNE TECH COMPUTER INSTITUTE | MICROSOFT POWERPOINT
MICROSOFT OFFICE WORD POWERPOINT Page 3`
Inserting a Slide
To insert a slide into your presentation click on the Home tab. To immediately get a new
slide, click on the top half of the button. To see what your available slide options are, click
on the lower half of the button. In the window that opens, select the type of slide you would
like to insert.
Navigating from Slide to Slide
You can switch between your slides by clicking on that slide in the Outline/Slides Tab.
The selected slide will then appear in the Presentation Window.
Changing the Slide Layout
If you change your mind about what type of slide you would like, you
can always change the layout after the fact by clicking on the Layout
button. The same options that appeared for the lower half of the New
Slide button will come up. Choose the one you would like to use from
the list, and your current slide’s layout will change.
Adding Text
The slide layout will contain instructions on how to proceed in putting content into your
slide. For example, the slide below prompts you to “click to add text.” To add a table, chart,
picture, clip art image, or movie, click on the appropriate picture from the center of the text
box.
Inserting a Text Box
Even with a layout that includes space for text you may decide to add an additional text
area.
Display the slide that you wish to add the text box to.
Select the Insert tab.
Click on the Text Box button.
Place the pointer where you would like to put the text box.
Hold down the left mouse button and drag the box out to the desiredwidth.
Note: The depth of the box will increase as you type or hit Enter.
Type into text box and click outside the box when finished.
4. FORTUNE TECH COMPUTER INSTITUTE | MICROSOFT POWERPOINT
MICROSOFT OFFICE WORD POWERPOINT Page 4`
Moving a Text Box
Once you have created your text box you have the option to relocate it.
Click on the text box border until you see this type of border:
Once the text box is selected you can move the box by using the arrow keys on
the keyboard.
OR
Pass the mouse over the box border until the cross shape appears. Hold down
the left mouse button and drag your text box to its new location.
Release the mouse button to place the box.
Copy & Paste a Text Box
Click on the text box border to get this type of border:
Select the copy button
OR right click on the text box and select Copy.
Select the paste button
OR right click near the text box and select Paste.
You can then move the new text box where you need it.
Delete a Text Box
Click on the text box border to get this type of border:
Press the Delete key on your keyboard to erase your
text box.
Align Text
Click on the text box border to get this type of border:
Select the appropriate Alignment button from the Hometab.
Using Lists
Select the text you wish to make into a list.
Select the Numbering or Bullet button.
5. FORTUNE TECH COMPUTER INSTITUTE | MICROSOFT POWERPOINT
MICROSOFT OFFICE WORD POWERPOINT Page 5`
Formatting the Text Box
Either click on the text box border or inside of the text box you wish to modify. The Format
tab will open up on the Ribbon. The center section will allow you to change the fill and
border colors. Just like the premade slide designs, there are a variety of premade text box
designs. Navigate this list the same way you did for the slide designs.
To customize your text box beyond the available options, use the Shape Fill, Shape
Outline, and Shape Effects buttons.
Using Format Painter
If you would like to copy the format of a text box (not the text, itself) and apply that to
another text box, then select the textbox that has the format that you want to copy.
Click the Format Painter button from the Home tab.
Now select the textbox that you want the format to be copiedto.
Note: If you want to use the Format Painter longer (for multiple areas or documents),
repeat step 1 and then double-click on the Format Painter button. This will allow you to
paint the format to multiple areas. To turn Format Painter off, click on the button again or hit
ESC on keyboard.
Moving Slides
In the Outline/Slides Tab, select the slide you wish to move by
clicking on it and holding the left mouse button down.
While holding down the mouse button, drag your slide to the
position you desire. A bar will appear above the slides as you
drag your slide out of order.
Once the bar is in the position you desire to place your slide,
release the mouse button in order to “drop” your slide into its new
slot.
Copying Slides
In the Outline/Slides Tab, right-click on the slide you wish to copy and select Copy.
Right click on any of the slides and select Paste or select the Paste
button. The slide will appear and can be moved as described in the section
above.
6. FORTUNE TECH COMPUTER INSTITUTE | MICROSOFT POWERPOINT
MICROSOFT OFFICE POWERPOINT Page 11
Duplicating a Slide
Click on the slide you wish to duplicate.
From the Home tab, click on the lower half of the New Slide button.
At the bottom, click on Duplicate Selected Slides.
An exact copy of the most recent or highlighted slide
will appear in the Presentation Window.
Inserting Clip Art and
Pictures Find and Insert
Clip Art
Click on the Insert tab.
Click on the Clip Art button. The Clip Art Task Pane will appear to the right.
Type a word into the search box in order to find a picture.
Click on the image you wish to insert and it will appear on your slide.
In order to move your image around the page, click anywhere on the image, hold
down the button, and drag your mouse to the location you wish to place it.
You can also resize the image by clicking and dragging from any one of the
circles or squares around the edges.
The green circle at the top of the image will allow you to rotate the image. Click
and drag to rotate.
Find and Insert a Photo
Click on the Insert tab.
Click on the Picture button.
The Insert Picture dialog box will appear.
Select your picture from the appropriate file and click on the Insert button.
7. FORTUNE TECH COMPUTER INSTITUTE | MICROSOFT POWERPOINT
MICROSOFT OFFICE POWERPOINT Page 12
Slide Shows
In order to display your slide show on the screen:
Select the Slide Show tab.
Either click on the From Beginning button to start from the
beginning of the show, or the From Current
Slide to start on the slide that is currently showing in the presentation window.
Navigate from slide to slide using the arrow keys, the space bar, or the left mouse
button.
Ending a Slide Show
To end a slide show, do one of the following:
Press ESC.
OR
Right-Click and select End Show.
Printing
Your presentations can be shared by printing them or displaying them on a computer.
Printing a Slide Show
Click on the Office button in the upper left corner.
Select Print. The Print dialog box will appear.
The Print Range section of the dialog box allows you to select all or only specified
slides for printing.
The Print What section gives you the options to print entire slides or handouts.
The Color/Grayscale section allows you to choose Color, Grayscale, orPure
Black and White for your printout.
The Handouts section allows you to print your handouts horizontally or vertically and
lets you choose how many slides you would like represented on eachpage.
Other options include scaling individual slide printouts to fit to the page, framing your
slides, printing hidden slides, and/or printing comments and ink markup on your slides.
The Preview allows you to review your print job before you print.
Click OK when you are finished.
8. FORTUNE TECH COMPUTER INSTITUTE | MICROSOFT POWERPOINT
MICROSOFT OFFICE POWERPOINT Page 13
Notes
The Notes section is used to create speaker notes to aid a speaker during a presentation. It
can also be used to take notes on audience discussion as well.
You have a little more to say about spring than space would allow on the slide. You want to
take note of what else you will be saying during the presentation by typing it in the notes
section.
Create a Note
To create a note, simply click in the Notes Pane section and start typing. You can also go
to View > Notes Page and type in your notes.
Highlight the text you have already typed on the slide.
Copy it by clicking on the Copy button on the Home tab.
Click down in the notes pane area.
Paste it into the area by clicking on the Paste button.
Expand the Notes Section
To expand the Notes Pane section, place your cursor over the blue line at the
top of the Notes Pane.
When your cursor changes to a double arrow click and drag your mouse up to
make the area larger.
Preview Speaker Notes
To preview your speaker notes click on the View tab.
Click on the Notes Page button.
When finished previewing, click on the Normal button.
Print Notes on Handouts
To print your Notes for yourself or others:
Click on the Office button.
Select Print.
Select Notes Pages in the Print What drop down box.
Click OK.
9. FORTUNE TECH COMPUTER INSTITUTE | MICROSOFT POWERPOINT
MICROSOFT OFFICE POWERPOINT Page 14
Adding a Movie
There is a video of a bee going to a flower on the hard drive of the computer. You
want to put it on the summer slide.
Click on the Movie icon in the center of the left text box.
Select your file (bee.mpg) from its location on the hard drive
(in this case, it’s in the My Documents folder and in the Power Point Class
folder), and select OK.
You will be prompted to indicate whether the movie is to play automatically or only
when clicked on. For our purposes you want it to start when clicked.
Resize it to make it a little larger.
To preview your movie, click on the Slide Show tab and on the
From Current Slide button. Then click on the movie to watch it.
Adding a Hyperlink
A Hyperlink is a direct link (or reference) in a hypertext document to another document or
other resource. This is usually used to link to a web page or other document on your
computer such as an Excel file or Word document. To add a hyperlink:
Highlight the appropriate text. (In our case, highlight the word ―Akron‖ on our summer
slide.)
Click on the Insert tab and then on the Hyperlink button.
Your highlighted text will appear in the Text to Display box of the
Insert Hyperlink dialog box.
Either choose to link your text to an
existing document by selecting it in
the Look in section of the dialog box
or type in a hyperlink to a website.
(We are going to look in the My
Documents folder, and then the
Power Point Class folder. Click on
the Excel document named ―Average
Precipitaion.xls.‖)
Modifying a Picture
10. FORTUNE TECH COMPUTER INSTITUTE | MICROSOFT POWERPOINT
MICROSOFT OFFICE POWERPOINT Page 15
PowerPoint 2007 gives you many new options for displaying clipart and photos that
were not available before. To gain access to these options, click on a picture in your
presentation and then on the Format tab. A few you may want to play around with
include:
Adjust settings like Brightness, Compress, Contrast, Change Picture, and Recolor.
Picture Styles settings like adding a style, Picture Shape, Picture Border, and Picture
Effects.
Arrange settings like Bring to Front, Send to Back, Align, Group, and Rotate.
Size settings like Crop and manually entering a width and height for your image.
Notice that you can preview a lot of the changes by merely placing your mouse over top of
an item. The change will be temporary until you click on the selection.
Automate a Slide Show
You can configure your presentation to self-run by following the steps below:
Click on your first slide.
Click on the Animations tab.
To the right, check the box next to Automatically After (uncheck On mouse
To modify the type of slide transition (fade, dissolve, uncover, blinds, etc.) click
on the down arrow to the right of the most popular slide transitions. Place your cursor
over top of a transition to preview it (without clicking). Click on one to select it.
When finished, click Apply to All. (Note: If you do not wish every slide to have the
same type of transition and speed, you will have to click on each, individual slide and
manually select your changes. Stay away from the Apply to All button or your
individual settings will be erased.)
To make your slide show run on a continuous loop so that you don’t have to restart it
click) and choose an amount of time (in seconds) you wish each slide to be up.
11. FORTUNE TECH COMPUTER INSTITUTE | MICROSOFT POWERPOINT
MICROSOFT OFFICE POWERPOINT Page 16
every time it gets to the end:
Click on the Slide Show tab and on the Set Up Slide Show button.
Check the box next to Loop continuously until ‘Esc’
Click OK.
Adding a Song
You want to add a song file to play in the background while the slide show is running.
Go to the first slide of your presentation.
Click on the Insert tab. Click on the lower half of the Movies and Sound button
and choose Sound from File…
Locate the song file on your computer. For class purposes,
the song is in the My Documents folder, in the Power
Point class folder, and is titled 08-Lucid Meadow.mp3.
A box will come up asking you when you would like it to
play. Click on Automatically. The sound icon will show up
in the middle of your slide.
On the ribbon, check boxes for Hide During Show and
Loop Until Stopped. One will hide the sound icon during
the presentation, and the other will loop the music if your
song is shorter than the slide show.
While the sound icon is still selected, go to the Animations tab.
Click on the down arrow to the right of
the Animate option. Choose Play
across slides. That way your song will
play through multiple slides rather than
just one. Run your slide show to preview it.
Pausing a Slide Show
When you're running an automatic slide show, to stop or restart it, press S or
PLUS SIGN (+).
OR
12. FORTUNE TECH COMPUTER INSTITUTE | MICROSOFT POWERPOINT
MICROSOFT OFFICE POWERPOINT Page 17
Click on the transparent square in the bottom left-hand corner of your slide.
Select Pause.
Note: You can choose to change the screen to black or white using this menu as
well. Go to Screen > Black Screen or White Screen.
Drawing In a Slide Show
PowerPoint allows you to draw on a presentation while it is running. To select the
drawing feature:
While the presentation is running, locate and click on the pen tool in the lower left –
hand corner of the slide show screen.
The following pen menu will appear:
Choose your pen tool choice to begin drawing.
To turn the pen tool off, click on the Arrow icon.
Custom Animation
Custom animation is useful for making individual objects (text or pictures) appear on
your slide, one at a time.
Open your presentation by clicking on the Office button and then on Open. Open
the Folder where you saved your already designed or typed work
Click on the Animations tab and on the Custom
Animation button to open the
Custom Animation task pane.
Click on your main title text box.
Click on the Add Effect button.
Move your mouse down to Entrance and
choose the Fly In option. The effect will be
demonstrated on the slide.
13. FORTUNE TECH COMPUTER INSTITUTE | MICROSOFT POWERPOINT
MICROSOFT OFFICE POWERPOINT Page 18
The Modify effect area will become active. Here you
can choose when to start the effect (on click, with
previous, or after previous).
Choose With Previous. This way your text will
appear as soon as the slide show has started.
You can also choose other options like fly-in direction and speed.
Continue to slide 2, the Spring slide.
Click on the title box.
Click on the Add Effect button, and choose another Entrance option. You can see
a wider range of choices from the More Effects option in the Entrance menu.
Make this one appear With Previous as well. Customize your direction and
speed setting to what you would prefer (if possible).
To animate your text, click and drag your mouse to
highlight the first bullet point.
From the Add Effect button, go to Entrance and More
Options. You want to find the Appear effect. Click OK to
select it.
Keep this one’s start option as On Click.
In the Task Pane on the right, click on the down arrow next
to this animation and select Effect Options…
In the window that appears, select By word
under the Animate text: menu and change the
seconds delay between words to 0.2 seconds.
Click OK. This way your text will appear one
word at time. You could also have chosen All at
once or By letter.
Repeat this step for the other two
bullet points. Choose a different Entrance effect if you like, and see what other
Effect Options are available for the different entrances. Remember to highlight the
portion of text you wish to add the effect to before selecting an entrance.
14. FORTUNE TECH COMPUTER INSTITUTE | MICROSOFT POWERPOINT
MICROSOFT OFFICE POWERPOINT Page 19
To animate the pictures, click on the first picture on your slide to select it.
From the Add Effect button choose a type of Entrance.
Change the start option to After Previous. This way your picture will come in
right after your third bullet point, without you having to do anything.
Repeat this process for the second picture, choosing another Entrance type and
making it appear With Previous.
Your slide should look something like this:
The numbers beside each item indicate the order in which they will appear. The
Task Pane on the right shows if the objects are going to appear On click (mouse
icon), With Previous (no icon), or After Previous (clock icon).
Start your slide show by going to the Slide Show tab and select From Current
Slide. Click through it to see how it looks. Remember that you have to click the
mouse button or hit the right arrow key for the text areas to show up.
There are other transitions available besides Entrance, like Emphasis, Exit, and
Motion Paths. Now that you have a general understanding about how these
animations work, play around with the other objects on the other sides to see what
happens.
Note that you can 1) switch the order of transitions at any time by clicking and
dragging them up and down the list and 2) remove an effect at any time by clicking
on the down arrow next to the item in the Task Pane and choosing Remove.
Adding a Secondary Background
After you have chosen a particular background or design for all of your slides you may
wish to change the background of one or more slides to a different picture or color.
Go to the Autumn slide.
Click on the Design tab.
On the right side of the ribbon, click on Background Styles. The window that
appears will have options to change the colors of thecurrent background style.
To select something other than their 12 options, click on Format Background… at
the bottom of that window.
This window brings up three options.
15. FORTUNE TECH COMPUTER INSTITUTE | MICROSOFT POWERPOINT
MICROSOFT OFFICE POWERPOINT Page 20
Solid fill, Gradient fill, and Picture or texture fill. To set the color of the solid fill, click
on the Color button and choose a different color. The Gradient fill has a lot more options
and will take some time to familiarize yourself with. (We’ll cover Picture or texture fill in
the next section.)
There is a check box next to Hide background graphics. Check this box if you wish the
background design graphics to disappear.
Click the Close button to apply your changes to this slide, or Apply to All to make all of
your slides change.
You may have to manually change the color of your text because it does not fit with
your new background color(s).
You can also use a picture or textured area as the background of your slide.
From the Design tab, click on the Background Styles button and then on
Format Background.
Check the circle next to Picture or texture fill. The options that show up in the current
window will allow you to choose a textured background or to select an image saved on
your computer.
Select some of the textures to see what is available.
The File… button will allow you to import a picture from your computer. Click on it to
open the Insert Picture window. Select an image from your computer to see what
happens. (For class, go to the My Pictures folder and the Sample Pictures folder.
Select one of the images.)
When finished making your selections, click on the Close button. Click on Apply to All
to make that change for every slide. Click on Reset Background to go back to the
original settings.
16. FORTUNE TECH COMPUTER INSTITUTE | MICROSOFT POWERPOINT
MICROSOFT OFFICE POWERPOINT Page 21
Adding a Chart
You prepared a chart to illustrate your point about the wide range in sales amounts that
you would like to add to your presentation. The chart will go between slides 3 and 4.
Navigate to slide 3.
Click on the top half of the New Slide button.
The easiest way to enter a preexisting chart is to copy and paste it right from the
Excel document. To do so, open Excel by clicking on the Start menu > All
Programs > Microsoft Office > Microsoft Excel.
Click on the Office button and on Open. Open the Power Point Class folder and
select the document Sales Comparison.xlsx.
Right click on the border of the chart that opens up, and select Copy.
Minimize the Excel window.
In PowerPoint, right click inside
the main text box and select Paste. Your chart will appear within the window.
Use the three Chart Tools tabs (Design, Layout, and Format) to customize it.
A good way to increase the text size is to click on one of the preset chart design
styles from the Design tab.
Alternately, you can use the basic font editing buttons from
the Home tab. Click on the text area you wish to modify, and
then click on the appropriate button from the menu.
Add a title to the slide (like
Sales Comparison).
For more details about
charts, see the Things to
Explore at Home section at the end of the handout.
17. FORTUNE TECH COMPUTER INSTITUTE | MICROSOFT POWERPOINT
MICROSOFT OFFICE POWERPOINT Page 22
Things to Explore at Home
AutoShapes consist of various shapes, such as circles, squares, callouts, and arrows,
that aid in illustrating points in your presentations. To insert AutoShapes:
Click on the Insert tab and then on the
Shapes button.
Select the type of shape you need.
The menu will disappear and your cursor
will change to a black cross shape when
moved into the slide area.
Click and drag your mouse to tell the
computer how large you would like your
shape to be. You can use the resizing
circles to change the size of the shape
once it has been drawn.
To change the color of your shape:
Click on the shape you wish to change.
The Format tab should become active.
Click on the option you wish to change
from the Shape Styles area.
Notice that the change will take place if you
merely place your cursor over the color or
effect from the lists. Click on one to make
your final selection.
AutoShapes
18. FORTUNE TECH COMPUTER INSTITUTE | MICROSOFT POWERPOINT
MICROSOFT OFFICE POWERPOINT Page 23
Note: To change which item appears on top and which item appears on the bottom,
use the Order feature.
To Order items:
Right click on the item you wish to change the order of.
Select Send to Back or Bring to Front.
WordArt allows you to add graphic design qualities to your text.
Click on the Insert tab and then on the WordArt button.
Choose a WordArt style.
Type your text into the text box that appears.
Diagram/Organization Charts
Click on the Insert tab and select SmartArt. OR Click on the
SmartArt icon in the center of your blank text box.
The Choose a SmartArt Graphic window will open. Select a category from the
left, and then choose a diagram from the center.
Click OK when finished.
Your new shape will appear on your active slide. You can click on an individual
item to add text to it, or you can type
the information into the pop-out panel to the side. The panel to the side is an
easy way to add more shapes to your diagram. The bullet points act the same as
in Microsoft Word. Hit the enter key after bullet point to add another one.
Use the tab key to create a new sub category. If the side panel is hiding,
click on the arrow button to the left of the diagram to display it.
To change the colors and styles of your diagram, use the two SmartArt
Tools tabs (Design and Format).
19. FORTUNE TECH COMPUTER INSTITUTE | MICROSOFT POWERPOINT
MICROSOFT OFFICE POWERPOINT Page 24
Tables
Click on the Insert tab and click on the Tablesbutton.
From the window that appears, move your mouse cursor over the boxes to select
the number of columns and rows. Your new table will appear on the slide as you
move your mouse to show you what it would look like if you chose that option.
OR
Click on the Table button from the center of a blank
text box.
The Insert Table window will appear. Select the
number of columns and rows you desire and click OK.
Once you have your new table, click in the cells to enter data.
There are a variety of table designs and layout options under the TableTools
tabs. Explore your options.
20. FORTUNE TECH COMPUTER INSTITUTE | MICROSOFT POWERPOINT
MICROSOFT OFFICE POWERPOINT Page 25
More on Charts
An alternative way to insert a chart is to type in the data as you are creating the chart.
Click on the chart button in the center of the main text box OR
click on the Insert tab and click on the Chart button. A pre-
made chart will appear on your slide that you are free to
customize using the spreadsheet that will open up in a new window.
Type your chart data into the Excel spreadsheet. To add more columns and rows, type
outside of the blue box and then click and drag the square in the lower right corner to
expand the selected area.
There are a lot of things you can do to customize your chart by using the Chart
Tools tabs (Design, Layout, and Format).
You can:
o Change the Chart Type
o Switch the Columns and Rows
o Select different data
o Edit the current data
o Change the colors of the design
21. FORTUNE TECH COMPUTER INSTITUTE | MICROSOFT POWERPOINT
MICROSOFT OFFICE POWERPOINT Page 26
o Edit the shapes and colors of each bar or line. (Remember to click on
the bar or line you want to change before clicking on the option from
the ribbon.)
Headers and Footers
Headers and footers can be added to one or all slides. It is helpful when you would like a
certain text or page number to appear at the bottom of every slide.
Click on the slide that you wish to add a header or footer to (or pick any one if you
want a header or footer on all of the slides).
Click on the Insert tab and on the Header & Footer button.
The Header and Footer dialog box will appear.
Note that under the Slide tab you are
only able to set the footer of the slides.
The Notes and Handouts tab will
allow you to set the header and footer
of the printed out notes pages, only.
You can choose to display a fixed
date and time or it can be updated
every time the presentation is loaded.
o Edit the chart and axis titles
o See Legend options
o Edit Data Labels
o Edit axis labels
o Add or remove Gridlines
o Add a Trendline
22. FORTUNE TECH COMPUTER INSTITUTE | MICROSOFT POWERPOINT
MICROSOFT OFFICE POWERPOINT Page 27
You can also choose to display a slide
number and a custom footer.
The preview window shows which area of your slide your change will apply to. The
three small boxes at the bottom will have a thick black border to indicate which ones
are selected. The one on the left is for the Date and time option, the middle box is for
a custom footer, and the one on the right is for the Slide number.
Click on Apply to only have your footer on the current slide. Click on Apply to All
to have it appear on every slide.
Once your footer is on the slide, click on an individual item to modify its font color and
style using the buttons under the Home tab.