Download to read offline
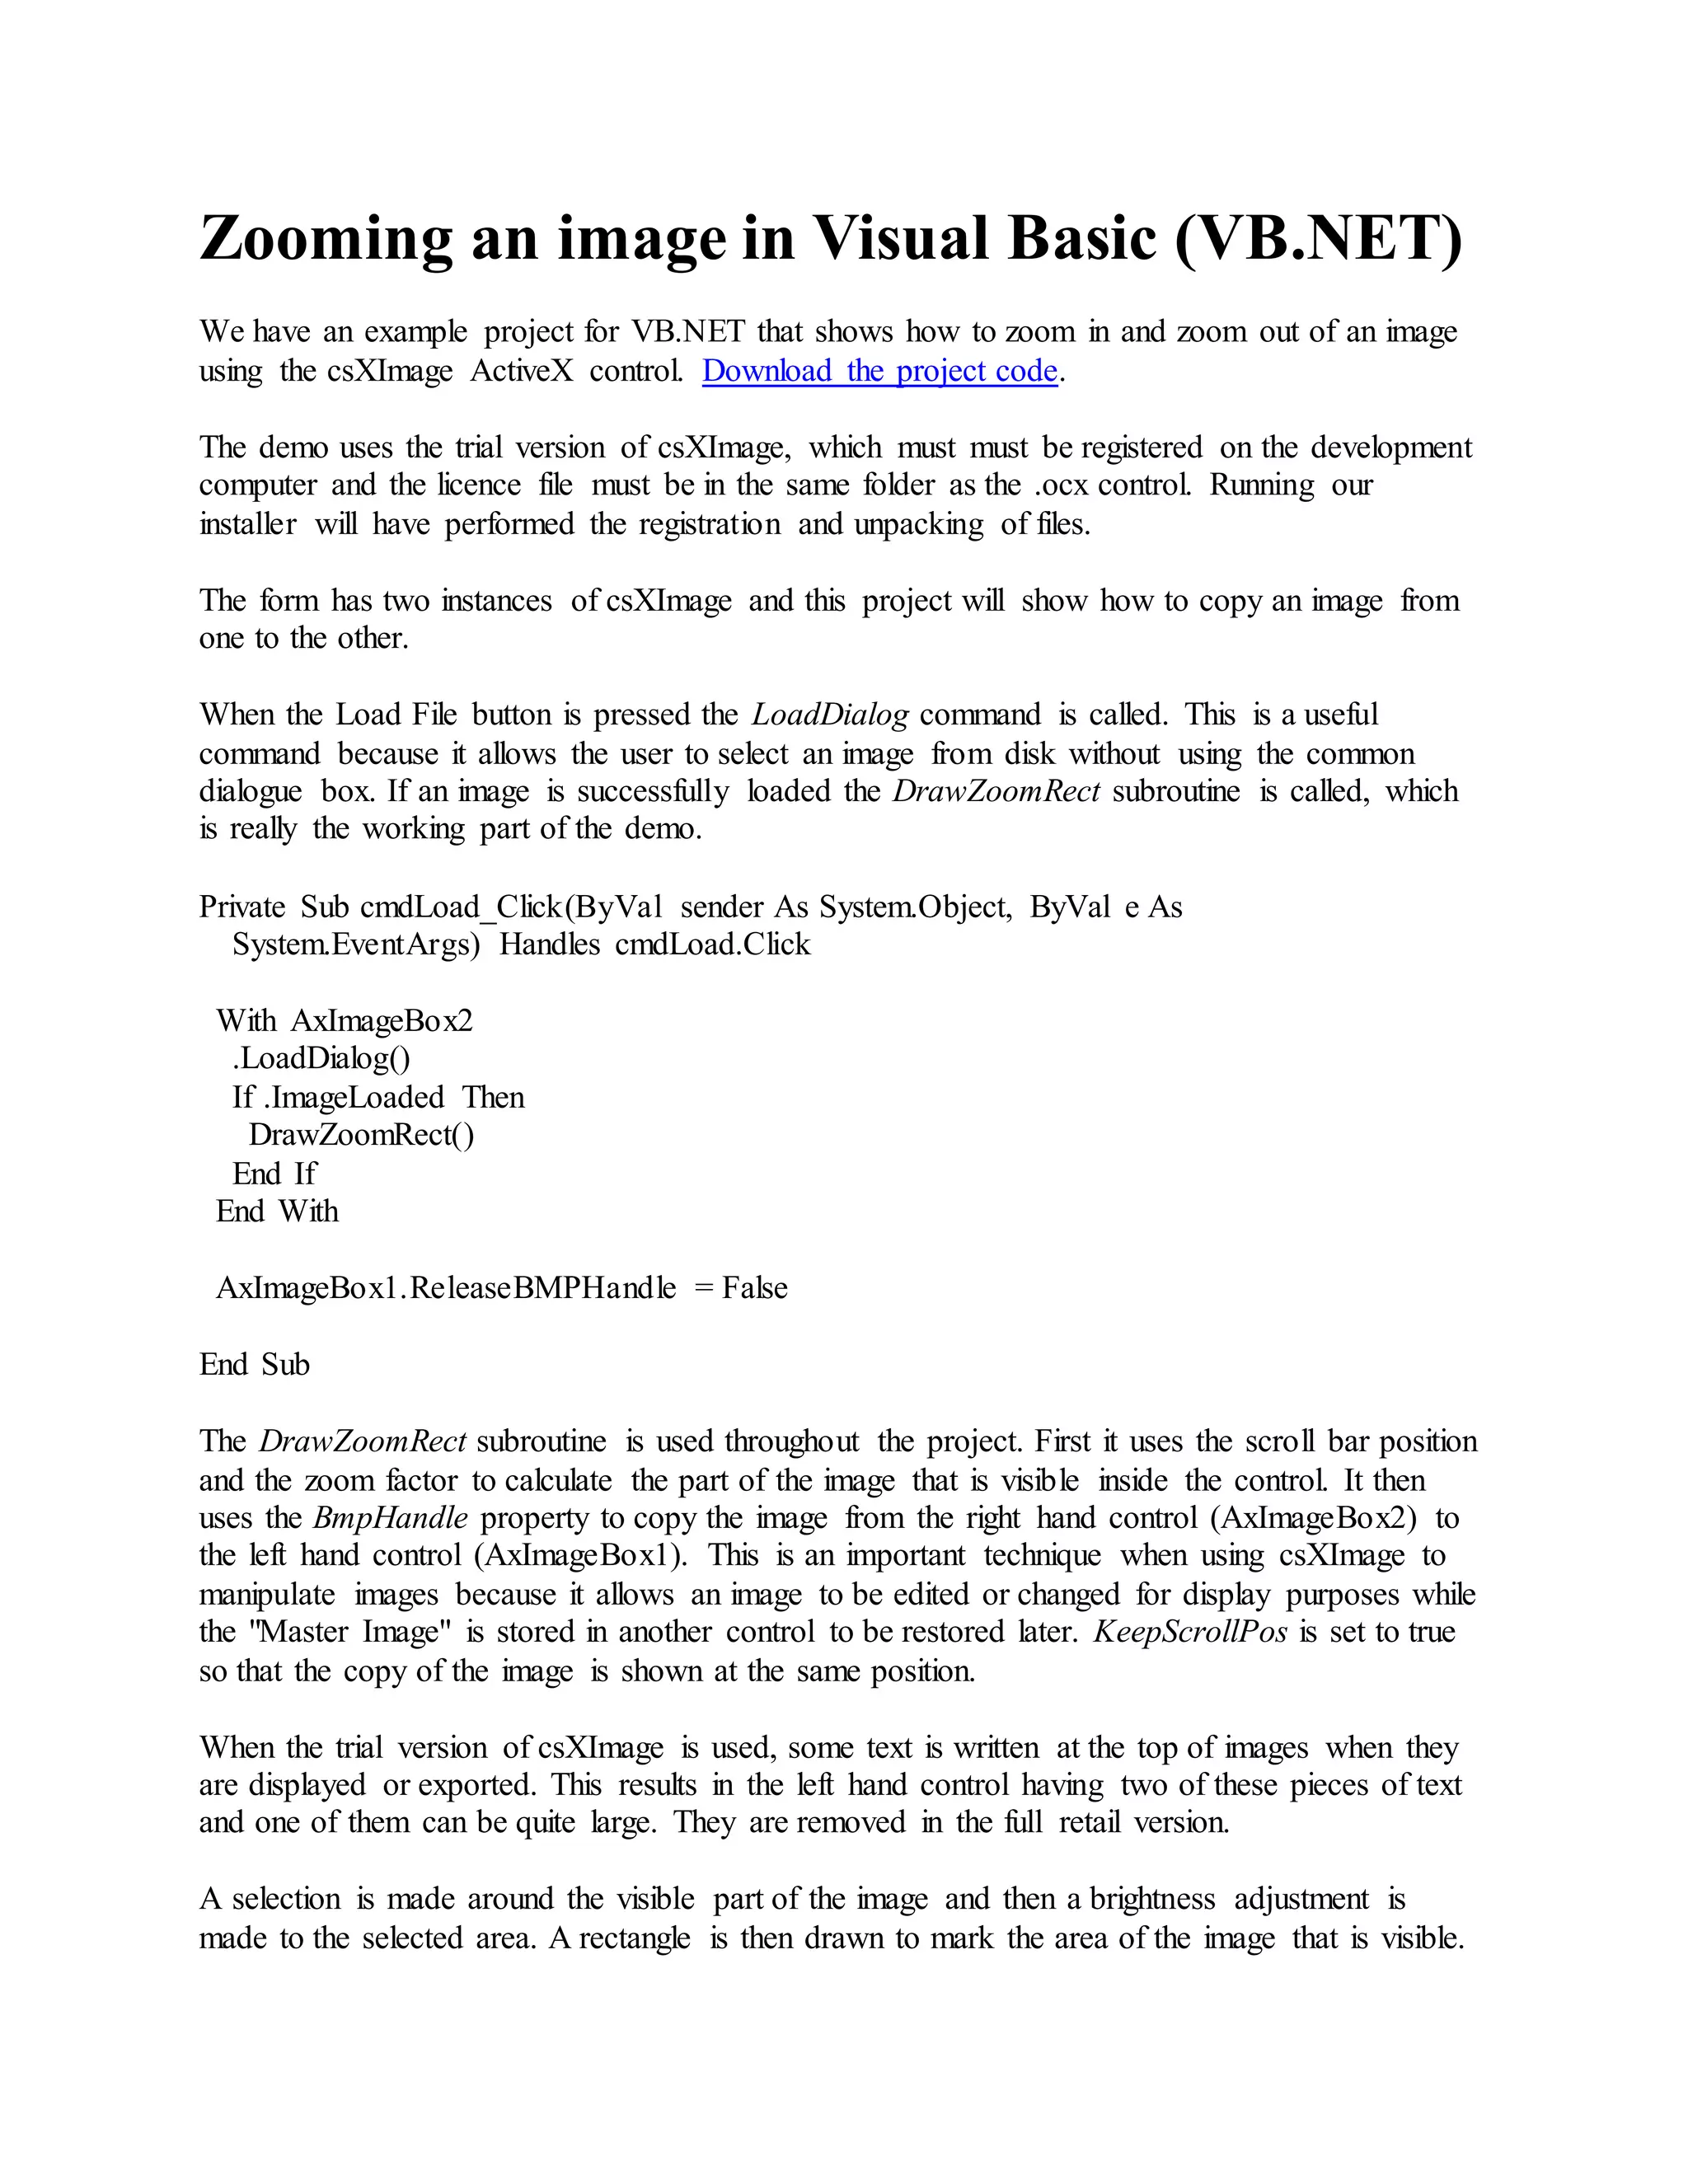
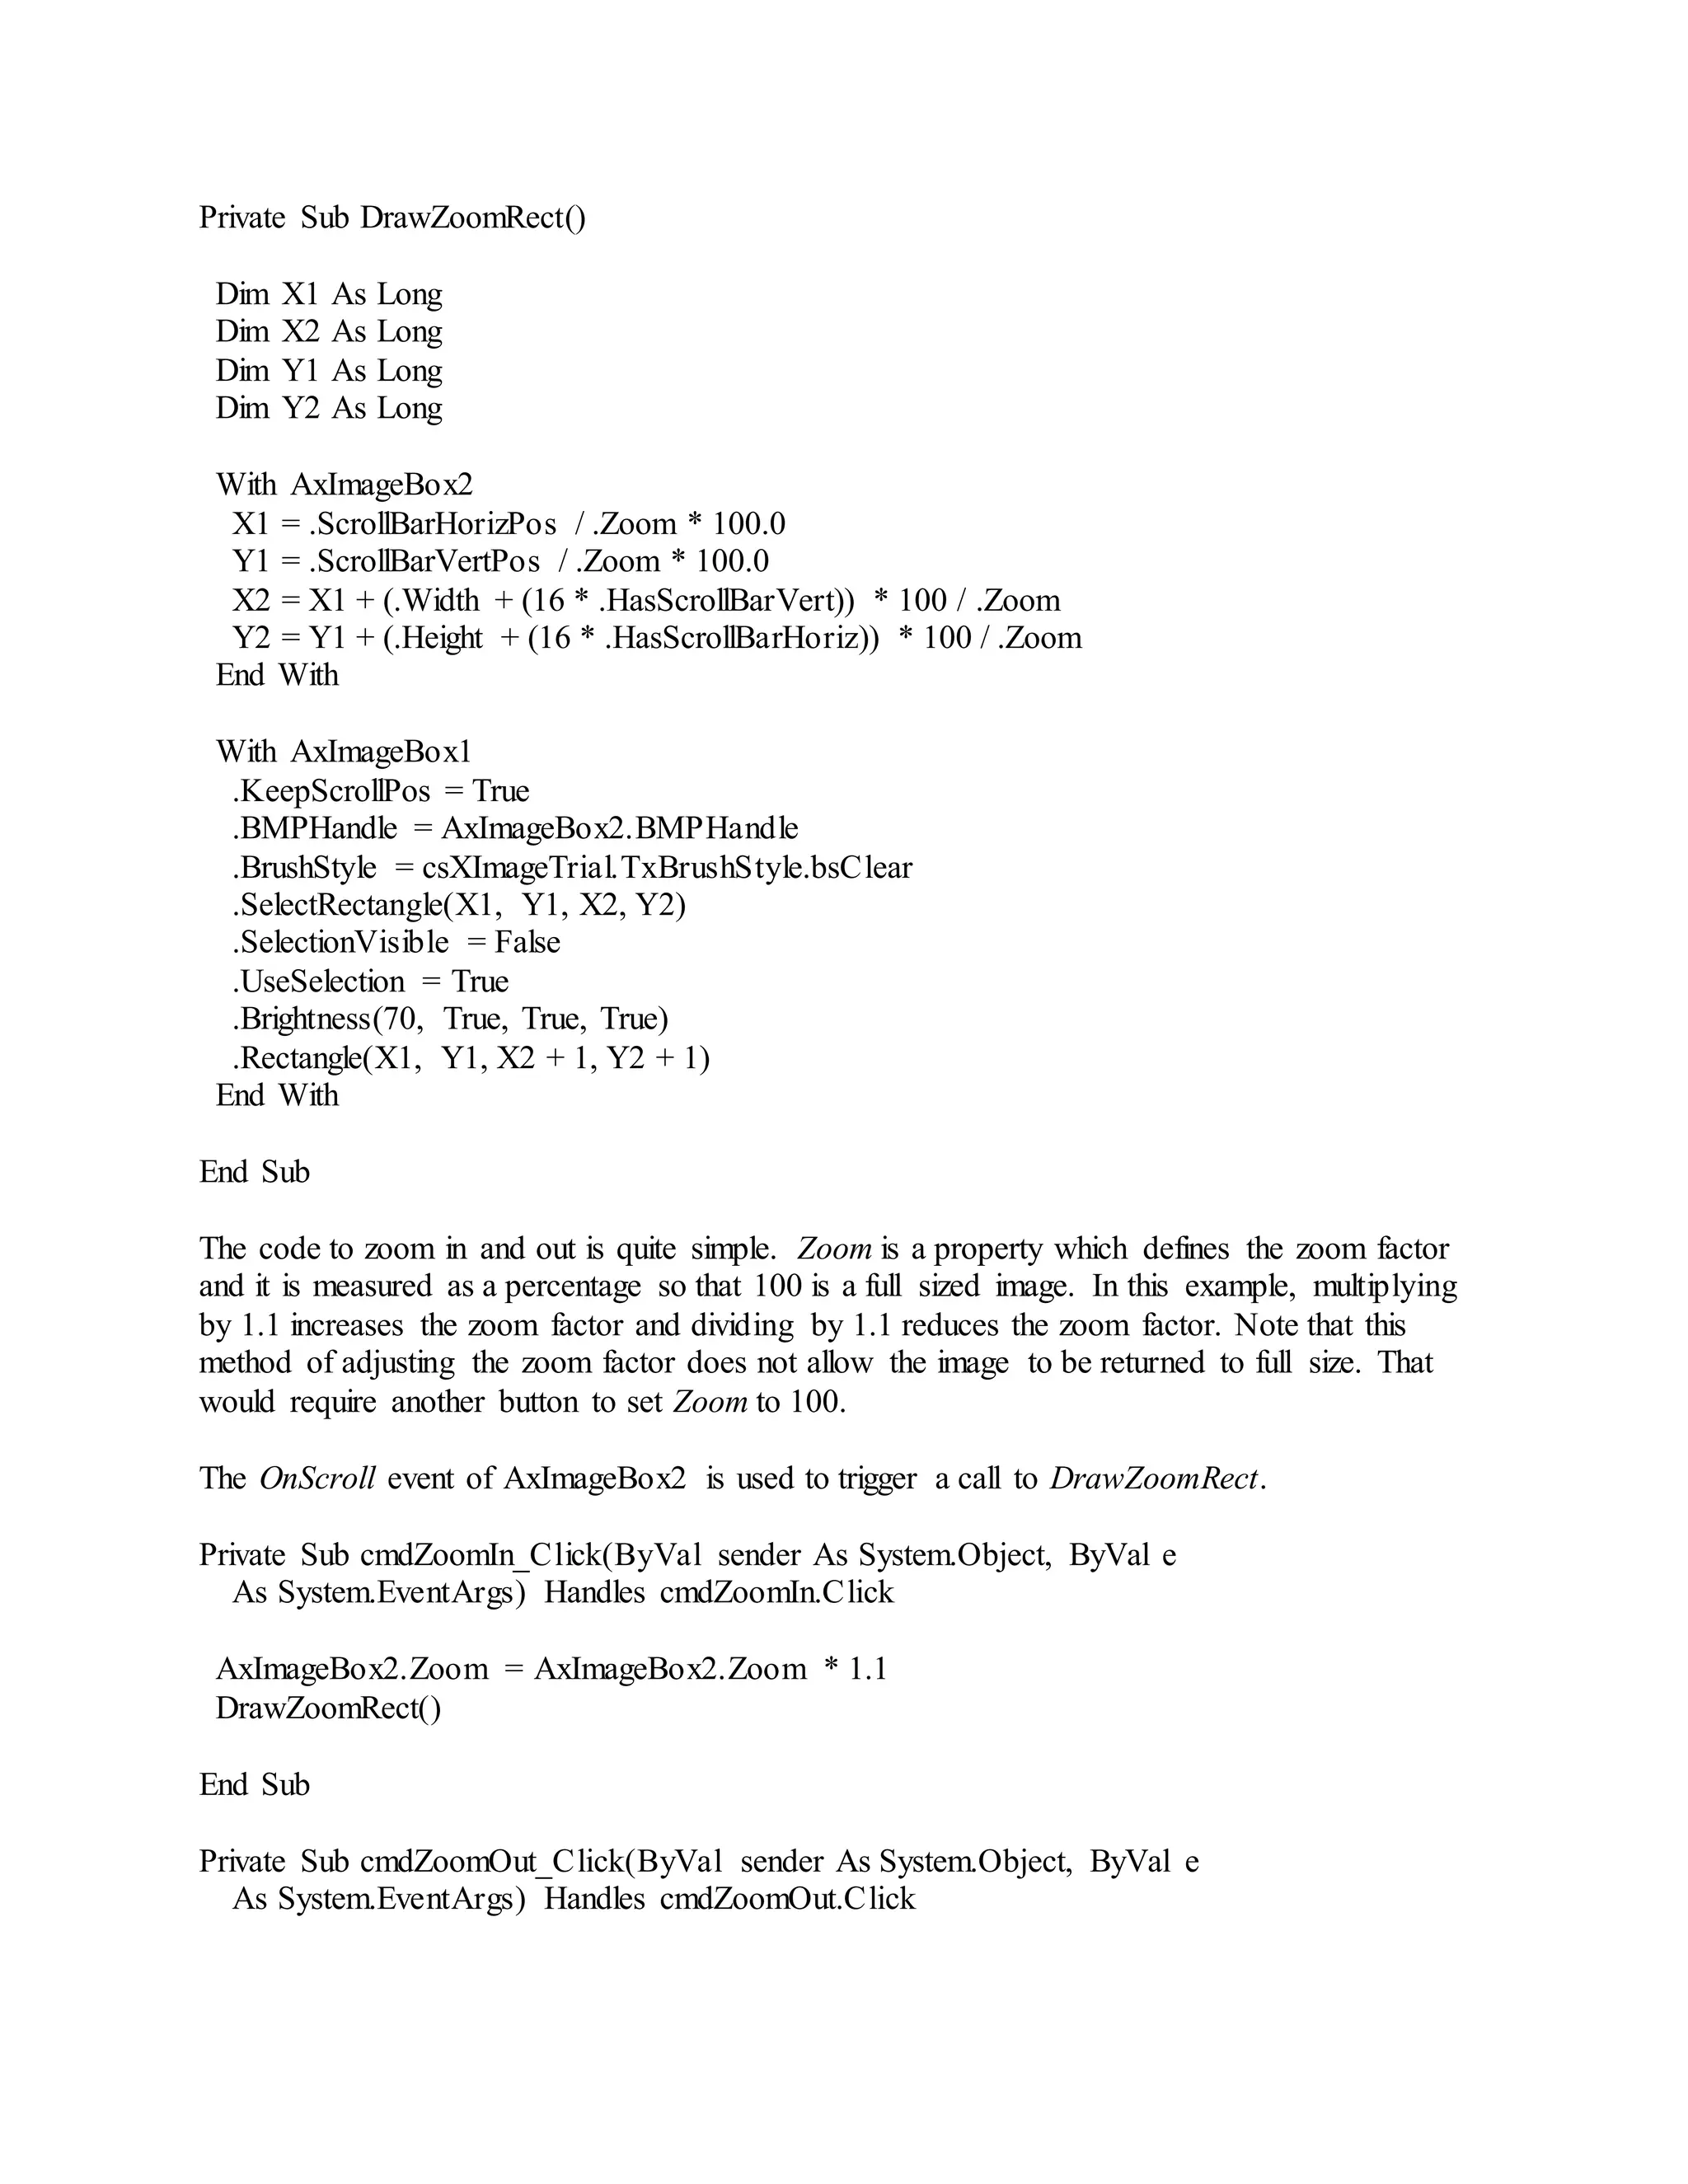

The document discusses how to zoom in and out of images in Visual Basic .NET using the csXImage ActiveX control. It describes loading an image, copying it between two instances of the control, and manipulating the visible portion by adjusting the zoom level and scrolling. Key steps include using the LoadDialog method to select a file, calling DrawZoomRect to copy and adjust the image, and modifying the Zoom property and calling DrawZoomRect in response to zoom buttons or scrolling.