Word Spell check, page no, page break, bookmarks,pictues, bullets, date and time
•Download as PPTX, PDF•
1 like•1,705 views

steps to insert or do Spell check, page no, page break, bookmarks,pictues, bullets, date and time or other features of word

Recommended
More Related Content
What's hot
What's hot (20)
Viewers also liked
Viewers also liked (16)
Similar to Word Spell check, page no, page break, bookmarks,pictues, bullets, date and time
Similar to Word Spell check, page no, page break, bookmarks,pictues, bullets, date and time (20)
More from Sajna Fathima
More from Sajna Fathima (20)
Recently uploaded
Recently uploaded (20)
Word Spell check, page no, page break, bookmarks,pictues, bullets, date and time
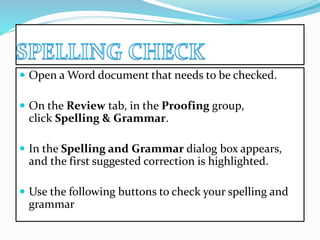
- 1. Open a Word document that needs to be checked. On the Review tab, in the Proofing group, click Spelling & Grammar. In the Spelling and Grammar dialog box appears, and the first suggested correction is highlighted. Use the following buttons to check your spelling and grammar
- 2. IGNORE ONCE IGNORE THIS WORD ONCE, BUT CHECK IT AGAIN. IGNORE ALL IGNORE THIS WORD THROUGHOUT THE DOCUMENT. Ignore Rule Ignore this rule throughout the document. Next Sentence Check the next sentence. Add to Dictionary Include this word in the program's dictionary. Change Use the suggested word in the Suggestions pane. Explain See an explanation for the suggested change. Change All Use the suggested word to change all instances of this word. AutoCorrect Use the first suggested word each time you click AutoCorrect Check grammar Select to correct the grammar in this document. Undo Undo the change. Continue clicking for previous corrections. Options The Options dialog box appears. Select how the program corrects spelling and grammar for all documents.
- 3. Under Insert, click Page Number, click a location (such as Top of Page), and then pick a style. Word automatically numbers every page. When you’re done, under Design > Header & Footer Tools, click Close Header and Footer, or double-click anywhere outside the header and footer area.
- 4. INSERTING PAGE BREAK Click where you want to start a new page. On the Insert tab, in the Pages group, click Page Break.
- 5. INSERTING BOOKMARKS Select the desire text or put the cursor at the desire location; Click Insert tab, click Bookmark in Links group; In Bookmark window, set a name to bookmark in Bookmark name box: Click Add button.
- 6. INSERTING PICTURES On the Insert tab, in the Illustrations group, click Clip Art. NOTE Some commands shown are not available in Word Starter. In the Clip Art task pane, in the Search for text box, type a word or phrase that describes the clip art that you want, or type in all or some of the file name of the clip art. To modify your search, do one or both of the following: To expand your search to include clip art on the Web, click the Include Office.com content checkbox. To limit the search results to a specific media type, click the arrow in the Results should be box and select the check box next to Illustrations, Photographs, Videos, or Audio. Click Go. In the list of results, click the clip art to insert it.
- 7. DATE AND TIME Click where you want to insert the date or time. On the Insert menu, click Date and Time.
- 8. INSERTING BULLETS Select the items you want to add bullets or numbering to. On the Formatting toolbar, click Bullets or Numbering .