Wind turbine doc
•
4 likes•1,886 views

The document provides instructions for modeling and 3D printing a wind turbine assembly with 9 main parts. It describes each part in detail and provides diagrams of blade and nacelle cross-sections to model. It outlines a multi-step process for creating the complex nacelle part using lofts and extrusions to add material and cuts to remove it, forming bearing holes and allowing the nacelle to spin on support masts. The overall goal is for students to correctly model each component and assemble a working prototype of the wind turbine.

Recommended
More Related Content
What's hot
What's hot (20)
Viewers also liked
Viewers also liked (14)
Similar to Wind turbine doc
Similar to Wind turbine doc (20)
More from sayed fathy
More from sayed fathy (17)
Recently uploaded
Recently uploaded (11)
Wind turbine doc
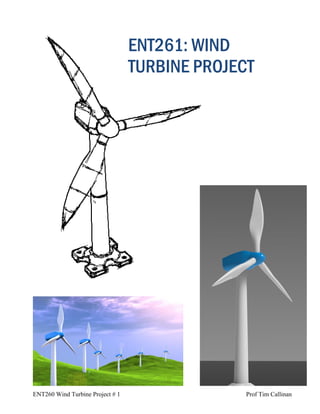
- 1. ENT260 Wind Turbine Project # 1 Prof Tim Callinan ENT261: WIND TURBINE PROJECT
- 2. ENT260 Wind Turbine Project # 1 Prof Tim Callinan BLADES BASE LOWER MAST UPPER MAST RIGHT NACELLE LEFT NACELLE HUB
- 3. ENT260 Wind Turbine Project # 1 Prof Tim Callinan The objective of this project is for everyone to model up the entire turbine assembly and to print out and assemble a working prototype. There are 9 main parts to model up. The Base, Lower mast, Upper mast & Hub are simple enough parts so all I’ve provided are working drawings. You should have little trouble modeling these parts up. The Nacelle & Blades have more complex Lofts so we will work though these together in class. TURBINE AXLE UPPER MAST BACK BEARING FRONT BEARING HUB
- 4. ENT260 Wind Turbine Project # 1 Prof Tim Callinan Some design questions you need to think about….. 1. What is the purpose of the AXLE? 2. Why do we need ball-bearings? 3. How do we keep the ball bearings in place? 4. How are we going to keep the axle from coming out? 5. Do we need to model up all balls in the ball-bearing and produce an accurate model? 6. What dimensions do we need from the bearing? 7. How will you obtain this? 8. Is it important how much of a twist is on the blade? 9. Why do we need to break the Nacelle up into 2 parts? 10. How is the HUB going to be connected to the main axle? 11. Why couldn’t we make the upper and lower mast just one piece? 12. Do you have any idea on how you will hide the joint line? 13. How are we going to hold the 2 nacelle parts together? 14. The Nacelle will swivel on the top of the mast – How?
- 5. ENT260 Wind Turbine Project # 1 Prof Tim Callinan C-SECTION 1 C-SECTION 2 C-SECTION 3 C-SECTION 4 TOP POINT WIND TURBINE BLADE The blade is comprised of 1 extrusion (at the bottom) and a LOFT (4 cross – sections and a point.) If AutoCAD won’t let you use a point at the top of the blade – use a very small circle. Shown below are the locations of each of the cross–sections. CSECTION-1 EXTRUDE DISTANCE IS 1 INCH. C-SECTION 2 C-SECTION 3 C-SECTION 4 TOP POINT
- 6. ENT260 Wind Turbine Project # 1 Prof Tim Callinan C-SECTION 1 C-SECTION 2 C-SECTION 3 C-SECTION 4 Here are the cross sections sketches for the LOFT. NOTICE how all of the dimensions reference the center point of the circle – This is important. The large arcs (E.G: R1.64) – you don’t need to know the center point of these. Use Tan, Tan, Radius circles.
- 7. ENT260 Wind Turbine Project # 1 Prof Tim Callinan Make sure you convert each of your sketches to POLYLINES – From experience, I’ve found whenever I don’t convert the lines to POLYLINES – it creates a surface loft. This means the LOFT has no thickness. In order to 3D print the part, you need to ensure that all your models are SOLID NOT SURFACE. If everything has gone well, you should be left with 4 cross sections are shown to the left. These are my screen captures from AUTOCAD.
- 8. ENT260 Wind Turbine Project # 1 Prof Tim Callinan MODELING THE NACELLE The Nacelle is comprised of 2 parts (Left & Right sections) This means, if we can successfully model up one side we can just MIRROR it to obtain the other side. The nacelle is a complex enough part so I’m going to break it down step by step. STEP 1: LOFT The first loft is comprised of 2 sketches with a distance of 3 inches between them. Notice that the center points of the circle need to line up. Make sure that DELOBJ is set to zero. IF YOU CAN, MAKE THE LOFT NORMAL TO SKETCH 1. I WILL EXPLAIN THIS IN CLASS LOFT 1 – SKETCH 1 LOFT 1 – SKETCH 2
- 9. ENT260 Wind Turbine Project # 1 Prof Tim Callinan STEP 2: LOFT The second LOFT is made by creating a semi-circle R0.75, 1 inch away from the front surface. Make the LOFT normal to the original surface. STEP 3: EXTRUDE CUT Next is to cut away the back end of the LOFT using these dimensions. STEP 4: SHELL Use a shell command (distance = 0.1) to Shell the object. Why are we doing this?
- 10. ENT260 Wind Turbine Project # 1 Prof Tim Callinan STEP 5: LOFTS Shown below is the Nacelle part with 2 added Lofts. What is the purpose in doing this? In order to put the LOFTS in, you need to know where they are in relation to the front. This is shown in the bottom left and the distance beside each sketch. Section planes will make it easier to place the sketches. Create both LOFTS and union them to the Nacelle. LOFT 3 – SKETCH 1 (0.75) LOFT 3 – SKETCH 2 (1.25) LOFT 4 – SKETCH 1 (2.50) LOFT 4 – SKETCH 2 (3.00)
- 11. ENT260 Wind Turbine Project # 1 Prof Tim Callinan STEP 6: REVOLVE In the previous step, we created material to sit the bearings in. In STEP 6, we will use a REVOLVE with SUBTRACT command to cut out the space for the bearings and the axle. Shown below are the dimensions. STEP 7: EXTRUDE We are nearly finished! If you look at the Nacelle in the assembly drawing, you will notice that we have a small axle coming up from the mast which allows the nacelle to spin. We need to add material in the center of the nacelle and then a semi circle in it using a revolve command – dimension on the next page. EXTRUDE DEPTH = 0.5 inch
- 12. ENT260 Wind Turbine Project # 1 Prof Tim Callinan When both Nacelles are put together, you should have a full circle in the bottom side in which the axle will sit into. The dimensions for the revolve command are on the right. If everything has gone well you should have something similar to the nacelle in the bottom. The last thing we need to do is MIRROR the part and add the holes. GOOD WORK IF YOU HAVE GOT THIS FAR