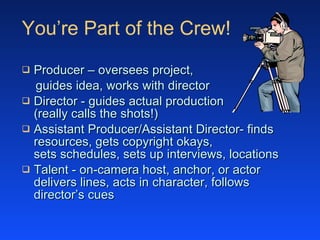
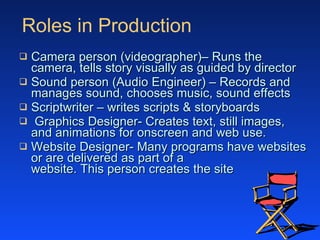
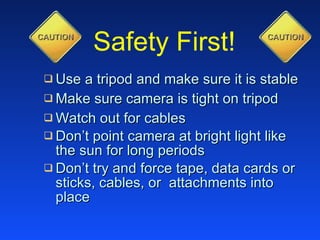
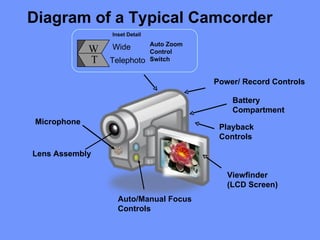
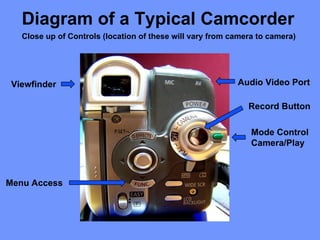
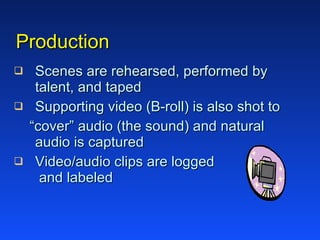
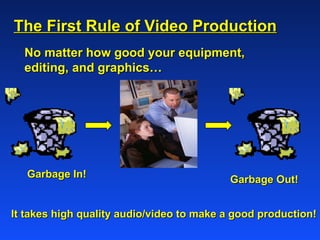
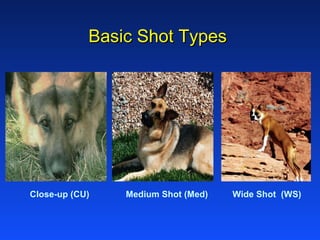
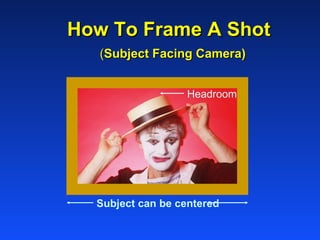
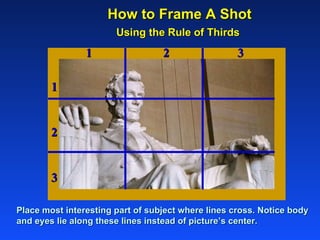
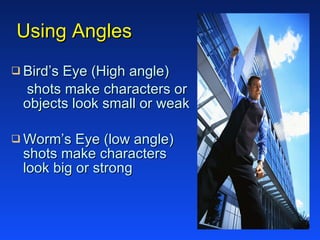
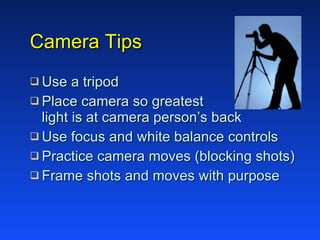
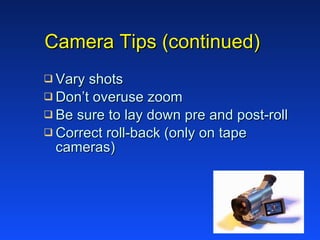
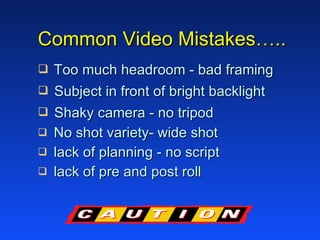
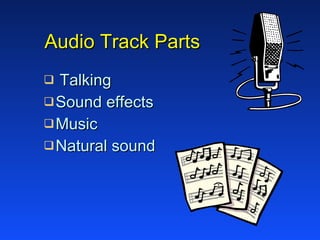
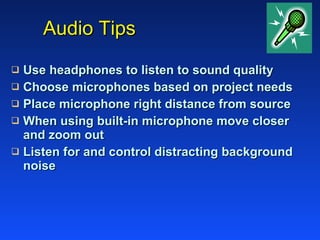
Telling Your Story With Video Reading and Writing Video
You’re Part of the Crew! Producer – oversees project, guides idea, works with director Director - guides actual production  (really calls the shots!) Assistant Producer/Assistant Director- finds resources, gets copyright okays, sets schedules, sets up interviews, locations Talent - on-camera host, anchor, or actor delivers lines, acts in character, follows director’s cues
Roles in Production Camera person (videographer)– Runs the camera, tells story visually as guided by director Sound person (Audio Engineer) – Records and manages sound, chooses music, sound effects  Scriptwriter – writes scripts & storyboards Graphics Designer- Creates text, still images, and animations for onscreen and web use. Website Designer- Many programs have websites or are delivered as part of a  website. This person creates the site
Safety First! Use a tripod and make sure it is stable Make sure camera is tight on tripod Watch out for cables Don’t point camera at bright light like  the sun for long periods  Don’t try and force tape, data cards or sticks, cables, or  attachments into place
Viewfinder (LCD Screen) Lens Assembly Auto Zoom Control Switch Wide Telephoto Inset Detail Auto/Manual Focus Controls W T Battery Compartment Power/ Record Controls Microphone Playback Controls Diagram of a Typical Camcorder
Close up of Controls (location of these will vary from camera to camera)  Diagram of a Typical Camcorder Viewfinder Menu Access  Mode Control Camera/Play Audio Video Port Record Button
Production Scenes are rehearsed, performed by talent, and taped Supporting video (B-roll) is also shot to  “ cover” audio (the sound) and natural audio is captured   Video/audio clips are logged  and labeled
The First Rule of Video Production No matter how good your equipment, editing, and graphics…  Garbage In!  Garbage Out!  It takes high quality audio/video to make a good production!
Telling Your Story With Shots
Basic Shot Types Close-up (CU) Wide Shot  (WS) Medium Shot (Med)
Shot Purposes  Close-up/Extreme CU shots- “tell” what characters look like, show emotions, point out details Medium shots- create comfortable “talking” distance Wide Shots- Show setting or action. Point of View (POV) shot lets viewer  “ see” through a character’s eyes
How To Frame A Shot   ( Subject Facing Camera) Subject can be centered   Headroom
How to Frame A Shot   (Subject looking to one side) Headroom Give lead or “ talking”  room
How to Frame A Shot   Using the Rule of Thirds Place most interesting part of subject where lines cross. Notice body and eyes lie along these lines instead of picture’s center. 1 2 3 1  2  3
ZOOMING! Zoom – Zooming in or out can be used to “guide” viewer through a scene but should not be overused to avoid audience “seasickness”
Using Angles  Bird’s Eye (High angle) shots make characters or  objects look small or weak Worm’s Eye (low angle)  shots make characters  look big or strong
Camera Tips Use a tripod Place camera so greatest  light is at camera person’s back Use focus and white balance controls Practice camera moves (blocking shots)  Frame shots and moves with purpose
Camera Tips (continued) Vary shots Don’t overuse zoom  Be sure to lay down pre and post-roll Correct roll-back (only on tape cameras)
Don’t do This! The “witness Protection” shot When shooting don’t place your subject in front of a strong light like a window, lamp, mirror, etc.
Common Video Mistakes….. Too much headroom - bad framing Subject in front of bright backlight Shaky camera - no tripod No shot variety- wide shot lack of planning - no script lack of pre and post roll
Audio Track Parts Talking Sound effects Music Natural sound
Audio Tips Use headphones to listen to sound quality  Choose microphones based on project needs Place microphone right distance from source When using built-in microphone move closer and zoom out  Listen for and control distracting background noise
Common Audio Mistakes….. using only cam mike mike too far from sound source not monitoring  (listening to) audio
On-Air Tips for Talent Make sure ahead of time that you can read and properly pronounce words (especially people’s names) Wait for your cue before speaking Smile! (when it feels right)
On-Air Tips for Talent When addressing audience, look into camera when speaking as much as possible. Hold objects you are speaking about close to face when possible so it is easy to frame shot (spokesmodel pose)  Speak clearly, projecting your  voice toward the microphone
Interview Tips Write a focus sentence Research the subject  Target  your  audience correctly Prepare a complete list of questions Describe the purpose to the subject  before the interview
Interview Tips Don’t interview the subject without   the camera before the actual interview LISTEN Ask good follow-up questions Be polite and professional
Interview No-No’s Yes and no questions “ I see” and “Uh-huh” Two-part questions Obvious questions Questions in poor taste Questions that have already been answered
You may use this PowerPoint in whole or in part but please cite KET  as the source!

Video And Audio Production

  • 1.
    Telling Your StoryWith Video Reading and Writing Video
  • 2.
    You’re Part ofthe Crew! Producer – oversees project, guides idea, works with director Director - guides actual production (really calls the shots!) Assistant Producer/Assistant Director- finds resources, gets copyright okays, sets schedules, sets up interviews, locations Talent - on-camera host, anchor, or actor delivers lines, acts in character, follows director’s cues
  • 3.
    Roles in ProductionCamera person (videographer)– Runs the camera, tells story visually as guided by director Sound person (Audio Engineer) – Records and manages sound, chooses music, sound effects Scriptwriter – writes scripts & storyboards Graphics Designer- Creates text, still images, and animations for onscreen and web use. Website Designer- Many programs have websites or are delivered as part of a website. This person creates the site
  • 4.
    Safety First! Usea tripod and make sure it is stable Make sure camera is tight on tripod Watch out for cables Don’t point camera at bright light like the sun for long periods Don’t try and force tape, data cards or sticks, cables, or attachments into place
  • 5.
    Viewfinder (LCD Screen)Lens Assembly Auto Zoom Control Switch Wide Telephoto Inset Detail Auto/Manual Focus Controls W T Battery Compartment Power/ Record Controls Microphone Playback Controls Diagram of a Typical Camcorder
  • 6.
    Close up ofControls (location of these will vary from camera to camera) Diagram of a Typical Camcorder Viewfinder Menu Access Mode Control Camera/Play Audio Video Port Record Button
  • 7.
    Production Scenes arerehearsed, performed by talent, and taped Supporting video (B-roll) is also shot to “ cover” audio (the sound) and natural audio is captured Video/audio clips are logged and labeled
  • 8.
    The First Ruleof Video Production No matter how good your equipment, editing, and graphics… Garbage In! Garbage Out! It takes high quality audio/video to make a good production!
  • 9.
  • 10.
    Basic Shot TypesClose-up (CU) Wide Shot (WS) Medium Shot (Med)
  • 11.
    Shot Purposes Close-up/Extreme CU shots- “tell” what characters look like, show emotions, point out details Medium shots- create comfortable “talking” distance Wide Shots- Show setting or action. Point of View (POV) shot lets viewer “ see” through a character’s eyes
  • 12.
    How To FrameA Shot ( Subject Facing Camera) Subject can be centered Headroom
  • 13.
    How to FrameA Shot (Subject looking to one side) Headroom Give lead or “ talking” room
  • 14.
    How to FrameA Shot Using the Rule of Thirds Place most interesting part of subject where lines cross. Notice body and eyes lie along these lines instead of picture’s center. 1 2 3 1 2 3
  • 15.
    ZOOMING! Zoom –Zooming in or out can be used to “guide” viewer through a scene but should not be overused to avoid audience “seasickness”
  • 16.
    Using Angles Bird’s Eye (High angle) shots make characters or objects look small or weak Worm’s Eye (low angle) shots make characters look big or strong
  • 17.
    Camera Tips Usea tripod Place camera so greatest light is at camera person’s back Use focus and white balance controls Practice camera moves (blocking shots) Frame shots and moves with purpose
  • 18.
    Camera Tips (continued)Vary shots Don’t overuse zoom Be sure to lay down pre and post-roll Correct roll-back (only on tape cameras)
  • 19.
    Don’t do This!The “witness Protection” shot When shooting don’t place your subject in front of a strong light like a window, lamp, mirror, etc.
  • 20.
    Common Video Mistakes…..Too much headroom - bad framing Subject in front of bright backlight Shaky camera - no tripod No shot variety- wide shot lack of planning - no script lack of pre and post roll
  • 21.
    Audio Track PartsTalking Sound effects Music Natural sound
  • 22.
    Audio Tips Useheadphones to listen to sound quality Choose microphones based on project needs Place microphone right distance from source When using built-in microphone move closer and zoom out Listen for and control distracting background noise
  • 23.
    Common Audio Mistakes…..using only cam mike mike too far from sound source not monitoring (listening to) audio
  • 24.
    On-Air Tips forTalent Make sure ahead of time that you can read and properly pronounce words (especially people’s names) Wait for your cue before speaking Smile! (when it feels right)
  • 25.
    On-Air Tips forTalent When addressing audience, look into camera when speaking as much as possible. Hold objects you are speaking about close to face when possible so it is easy to frame shot (spokesmodel pose) Speak clearly, projecting your voice toward the microphone
  • 26.
    Interview Tips Writea focus sentence Research the subject Target your audience correctly Prepare a complete list of questions Describe the purpose to the subject before the interview
  • 27.
    Interview Tips Don’tinterview the subject without the camera before the actual interview LISTEN Ask good follow-up questions Be polite and professional
  • 28.
    Interview No-No’s Yesand no questions “ I see” and “Uh-huh” Two-part questions Obvious questions Questions in poor taste Questions that have already been answered
  • 29.
    You may usethis PowerPoint in whole or in part but please cite KET as the source!

Editor's Notes