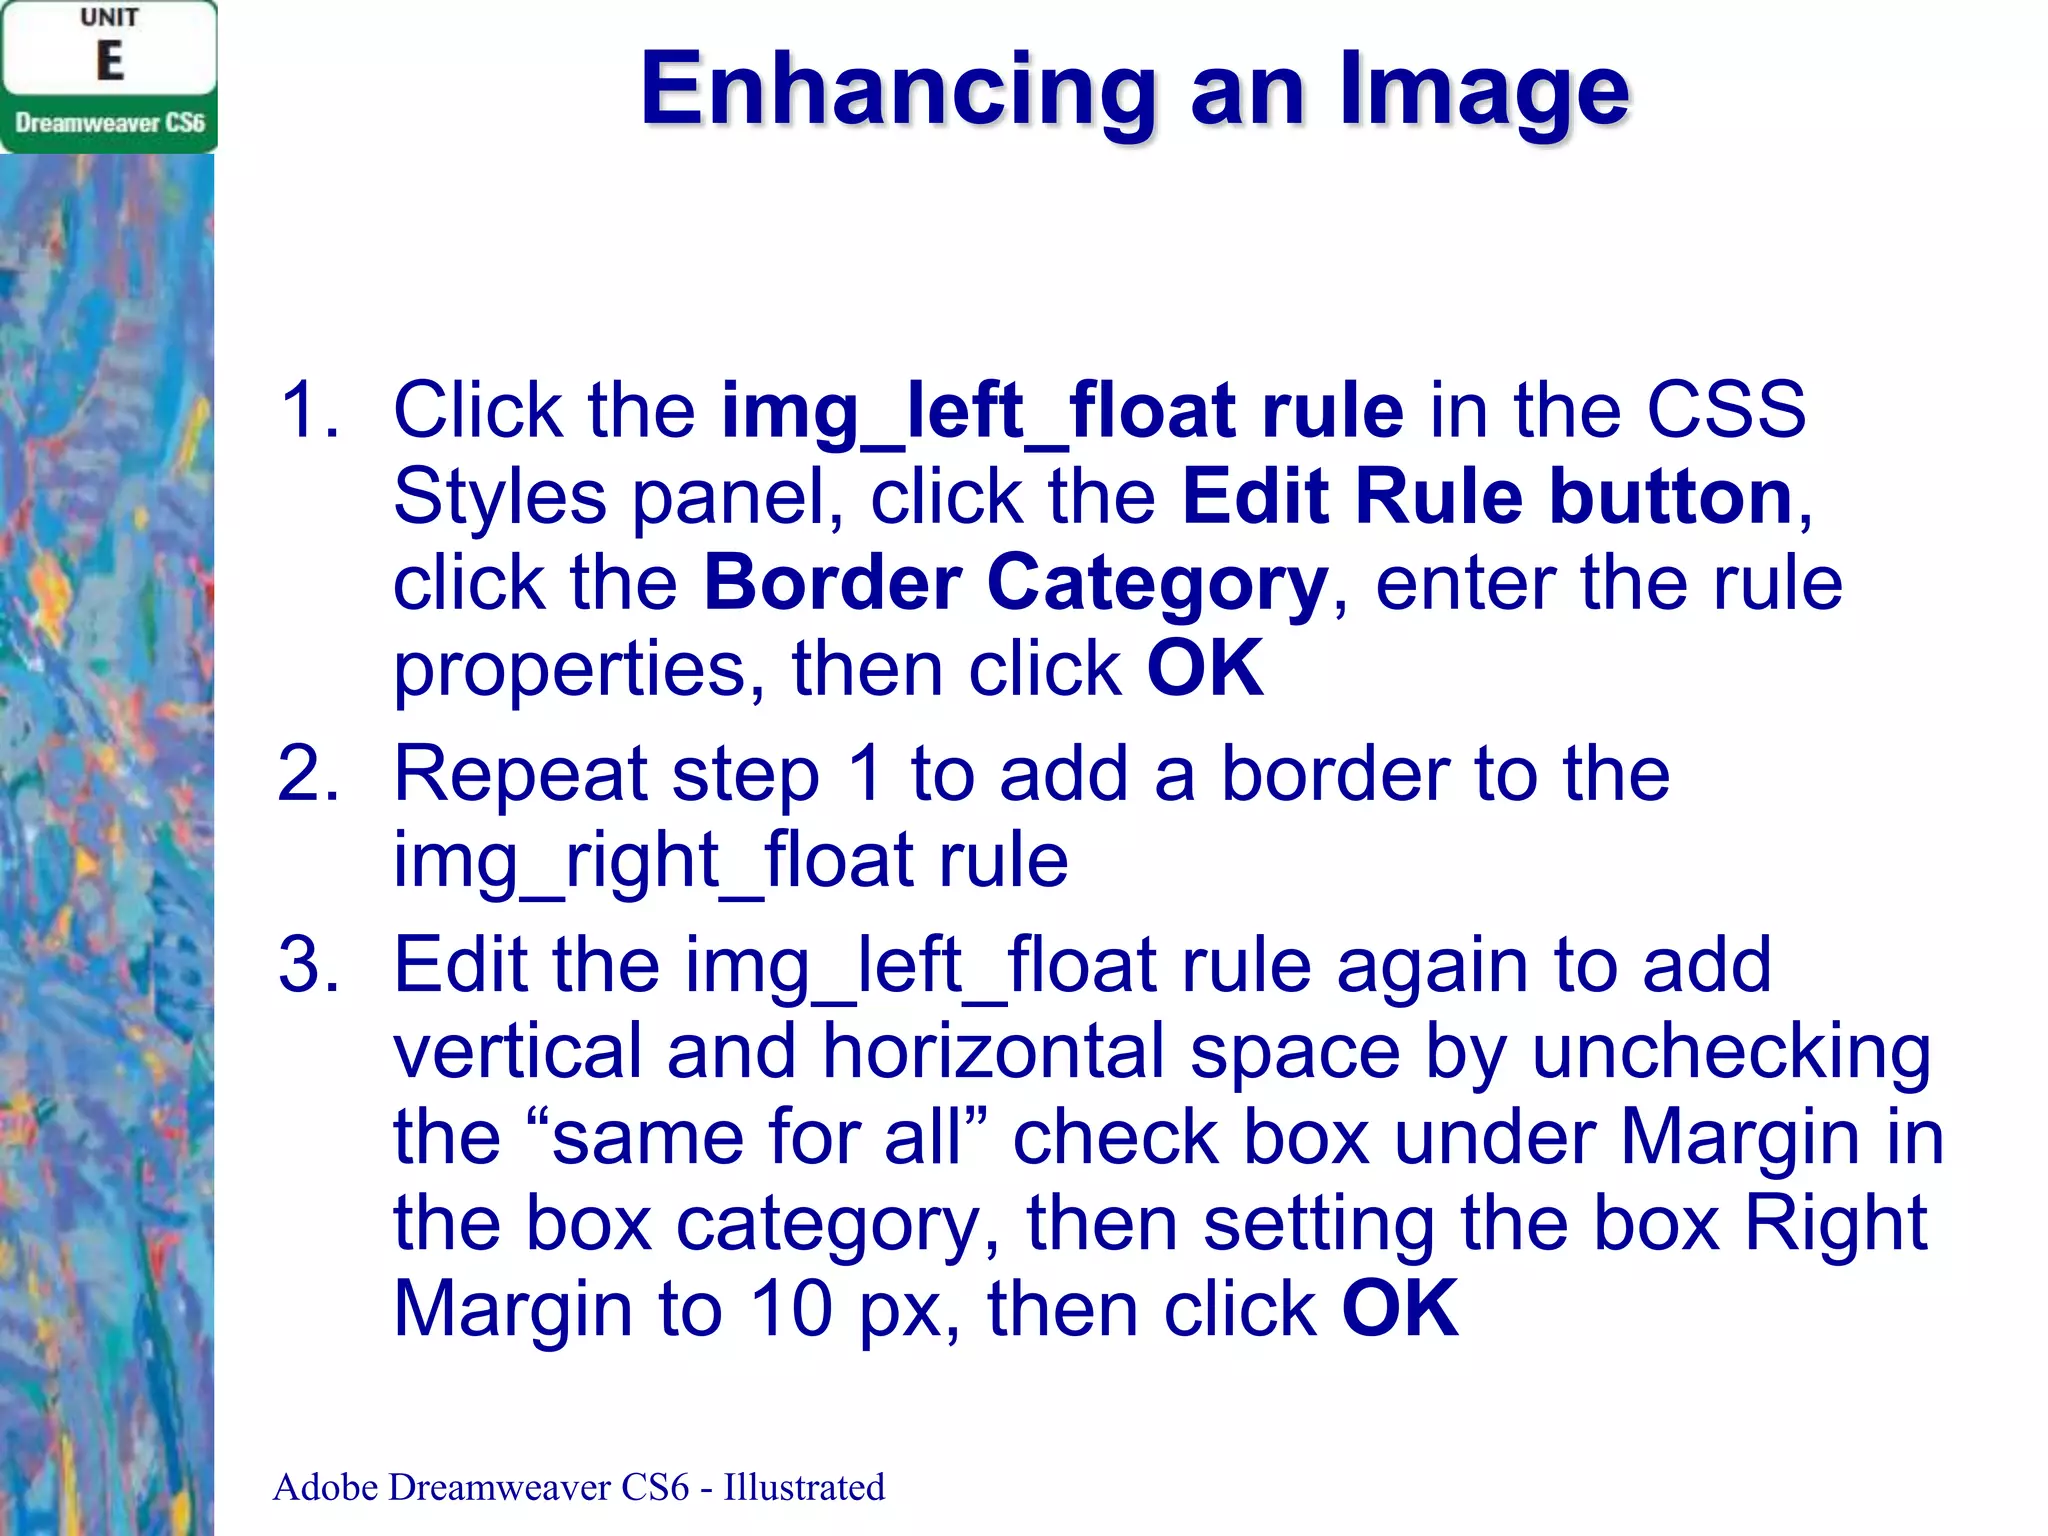
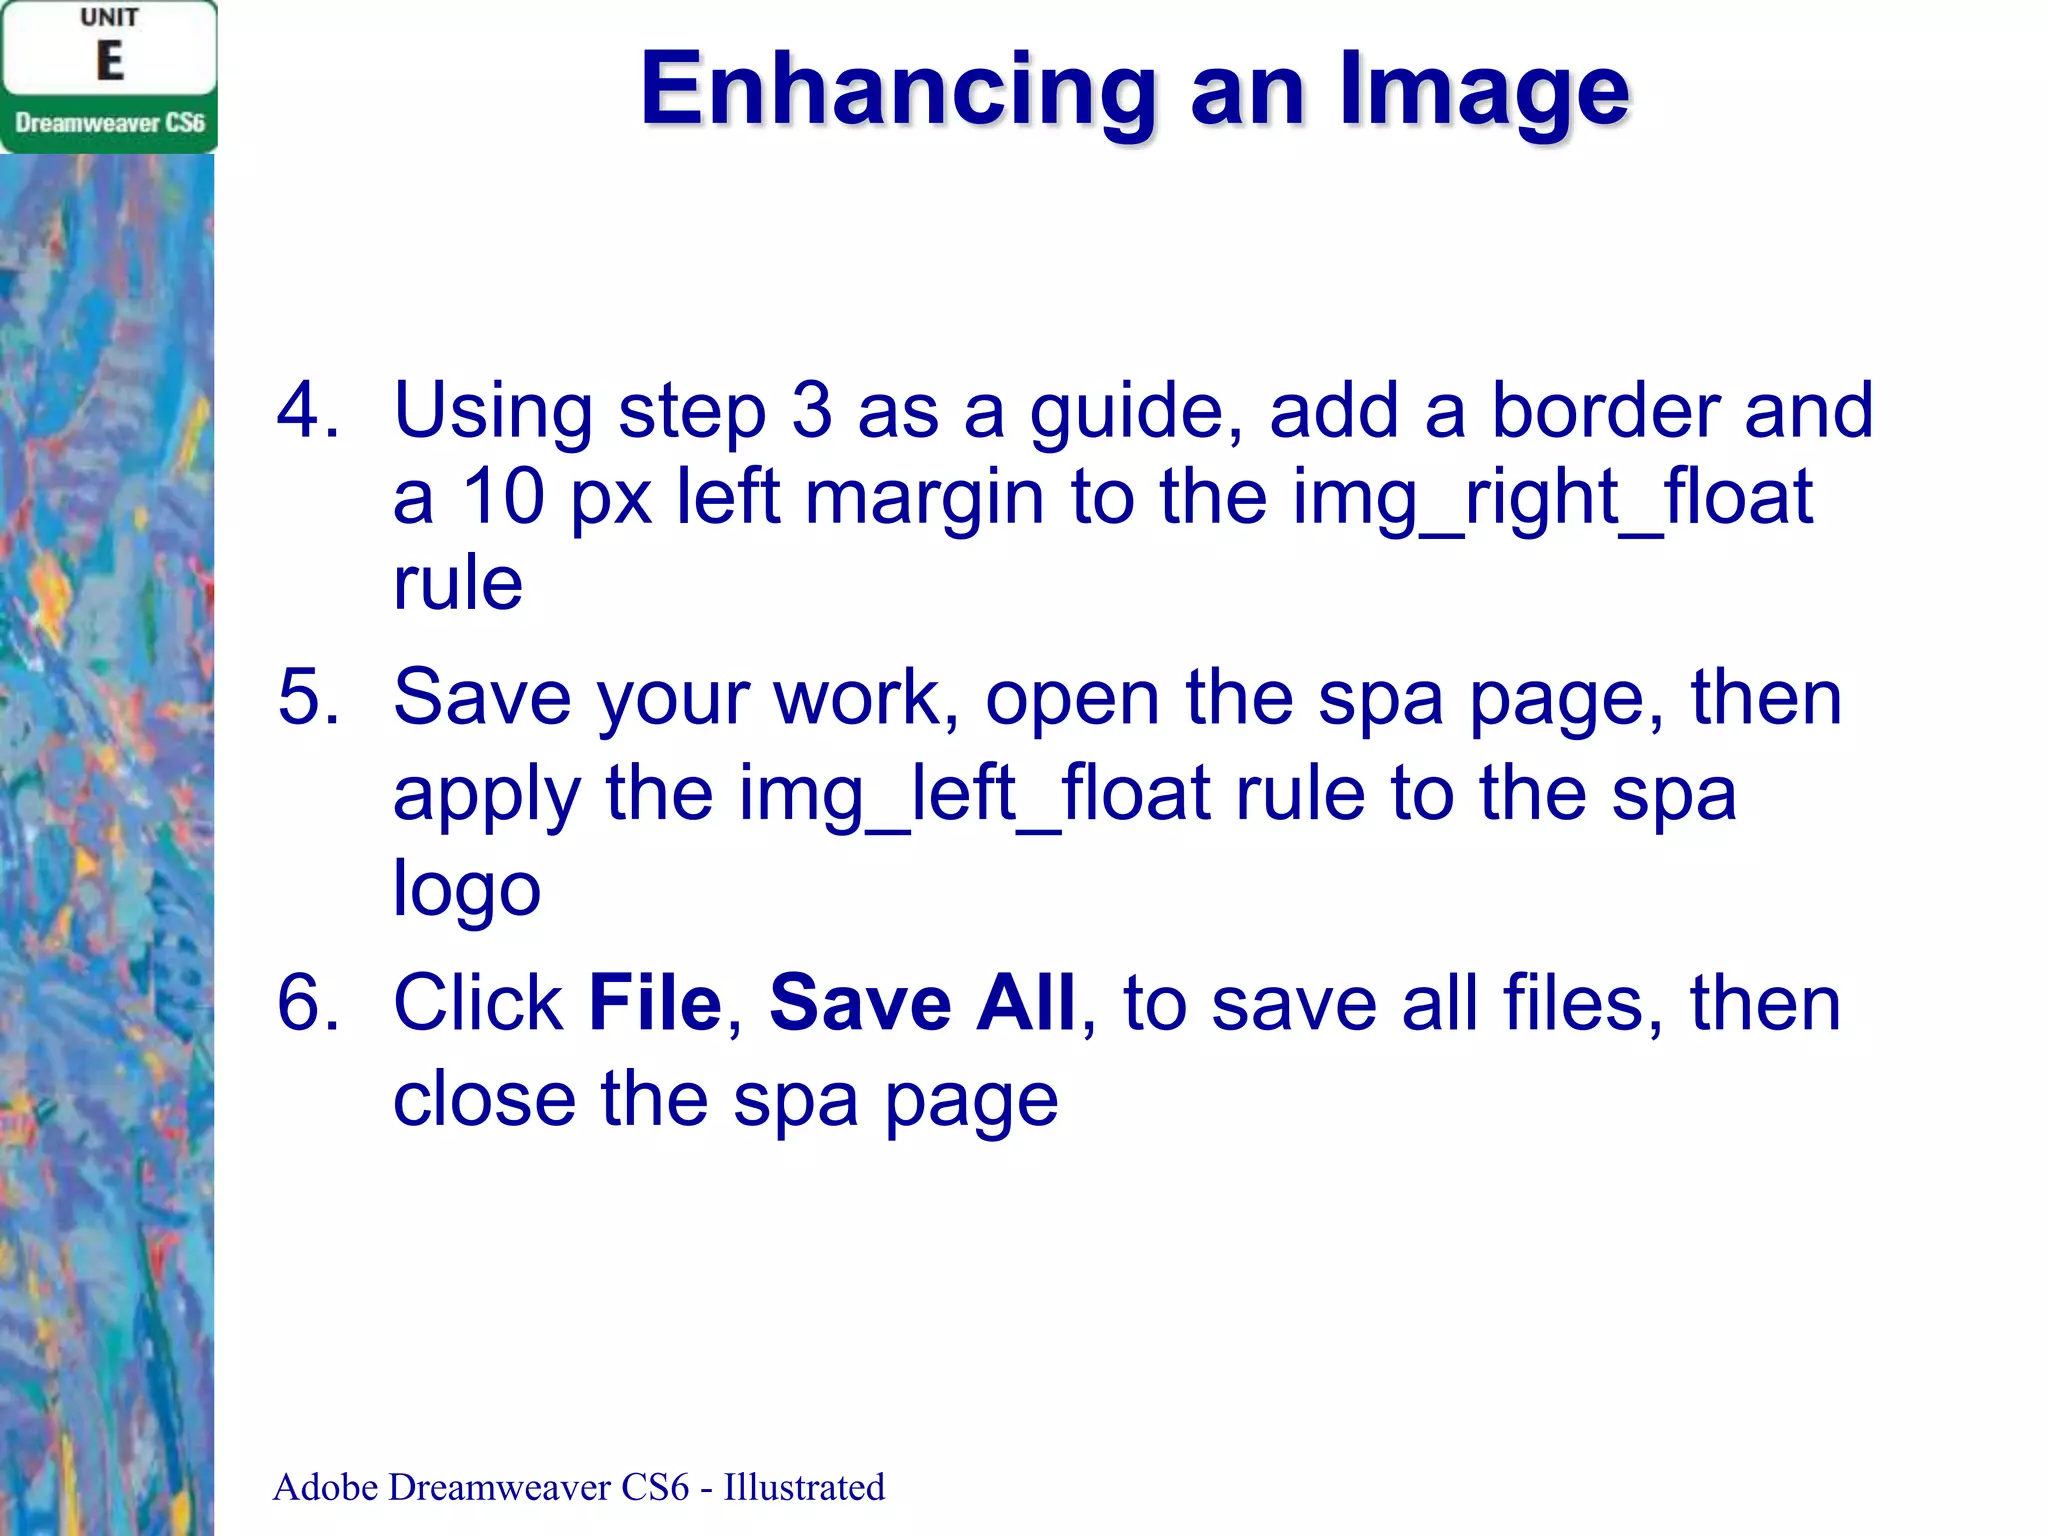
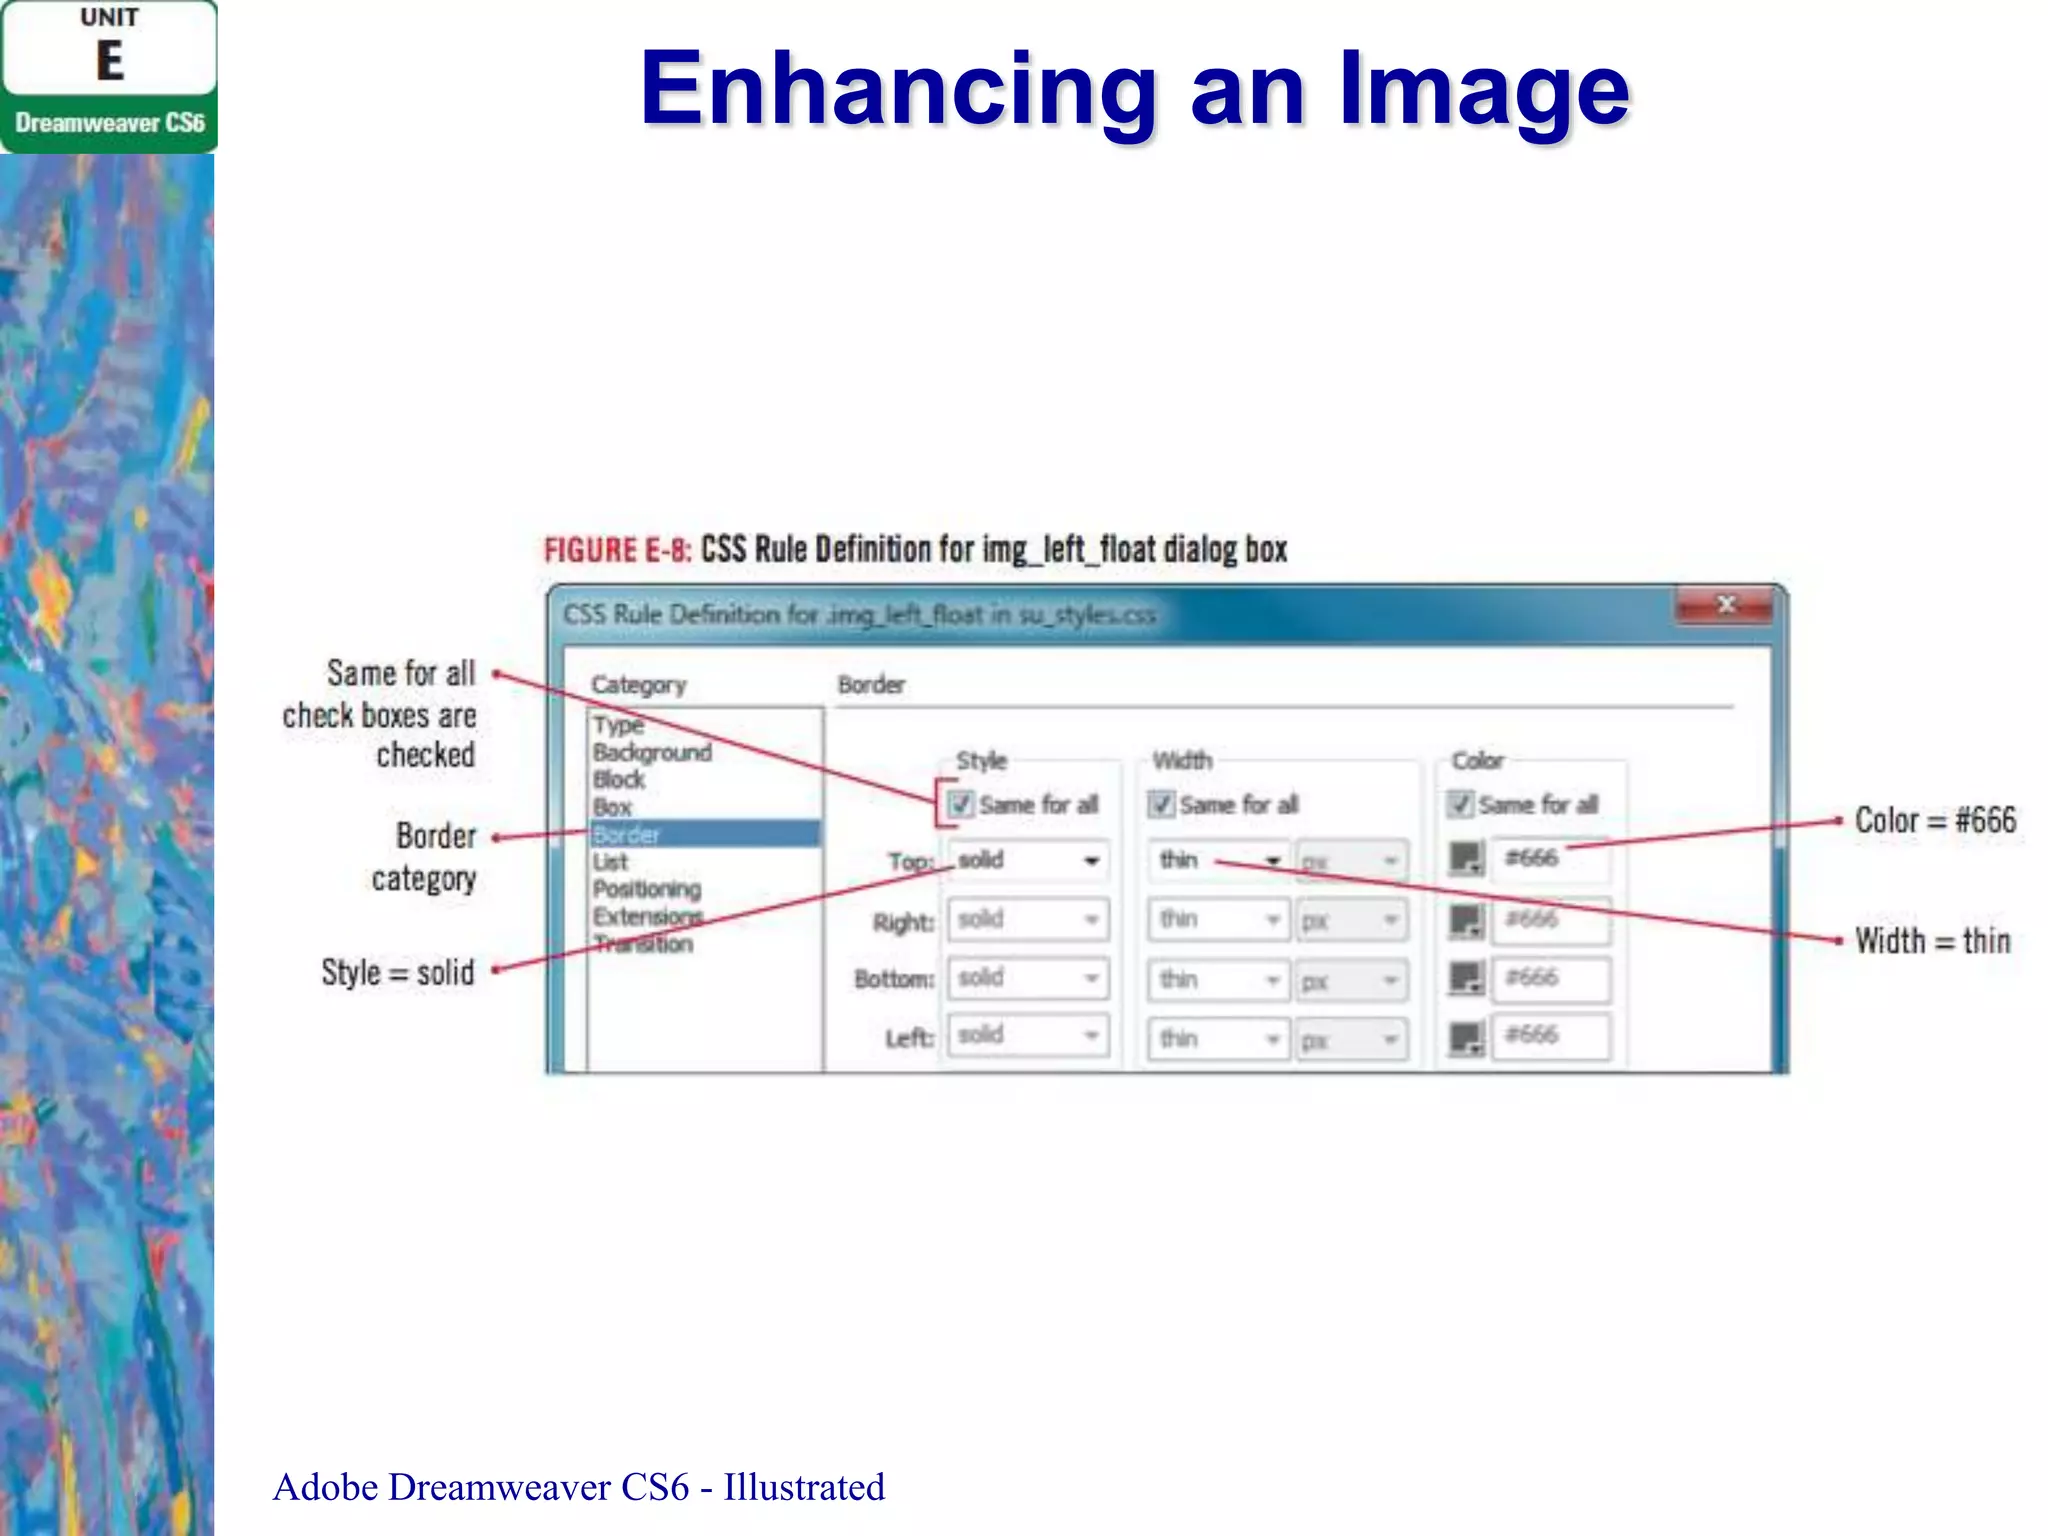
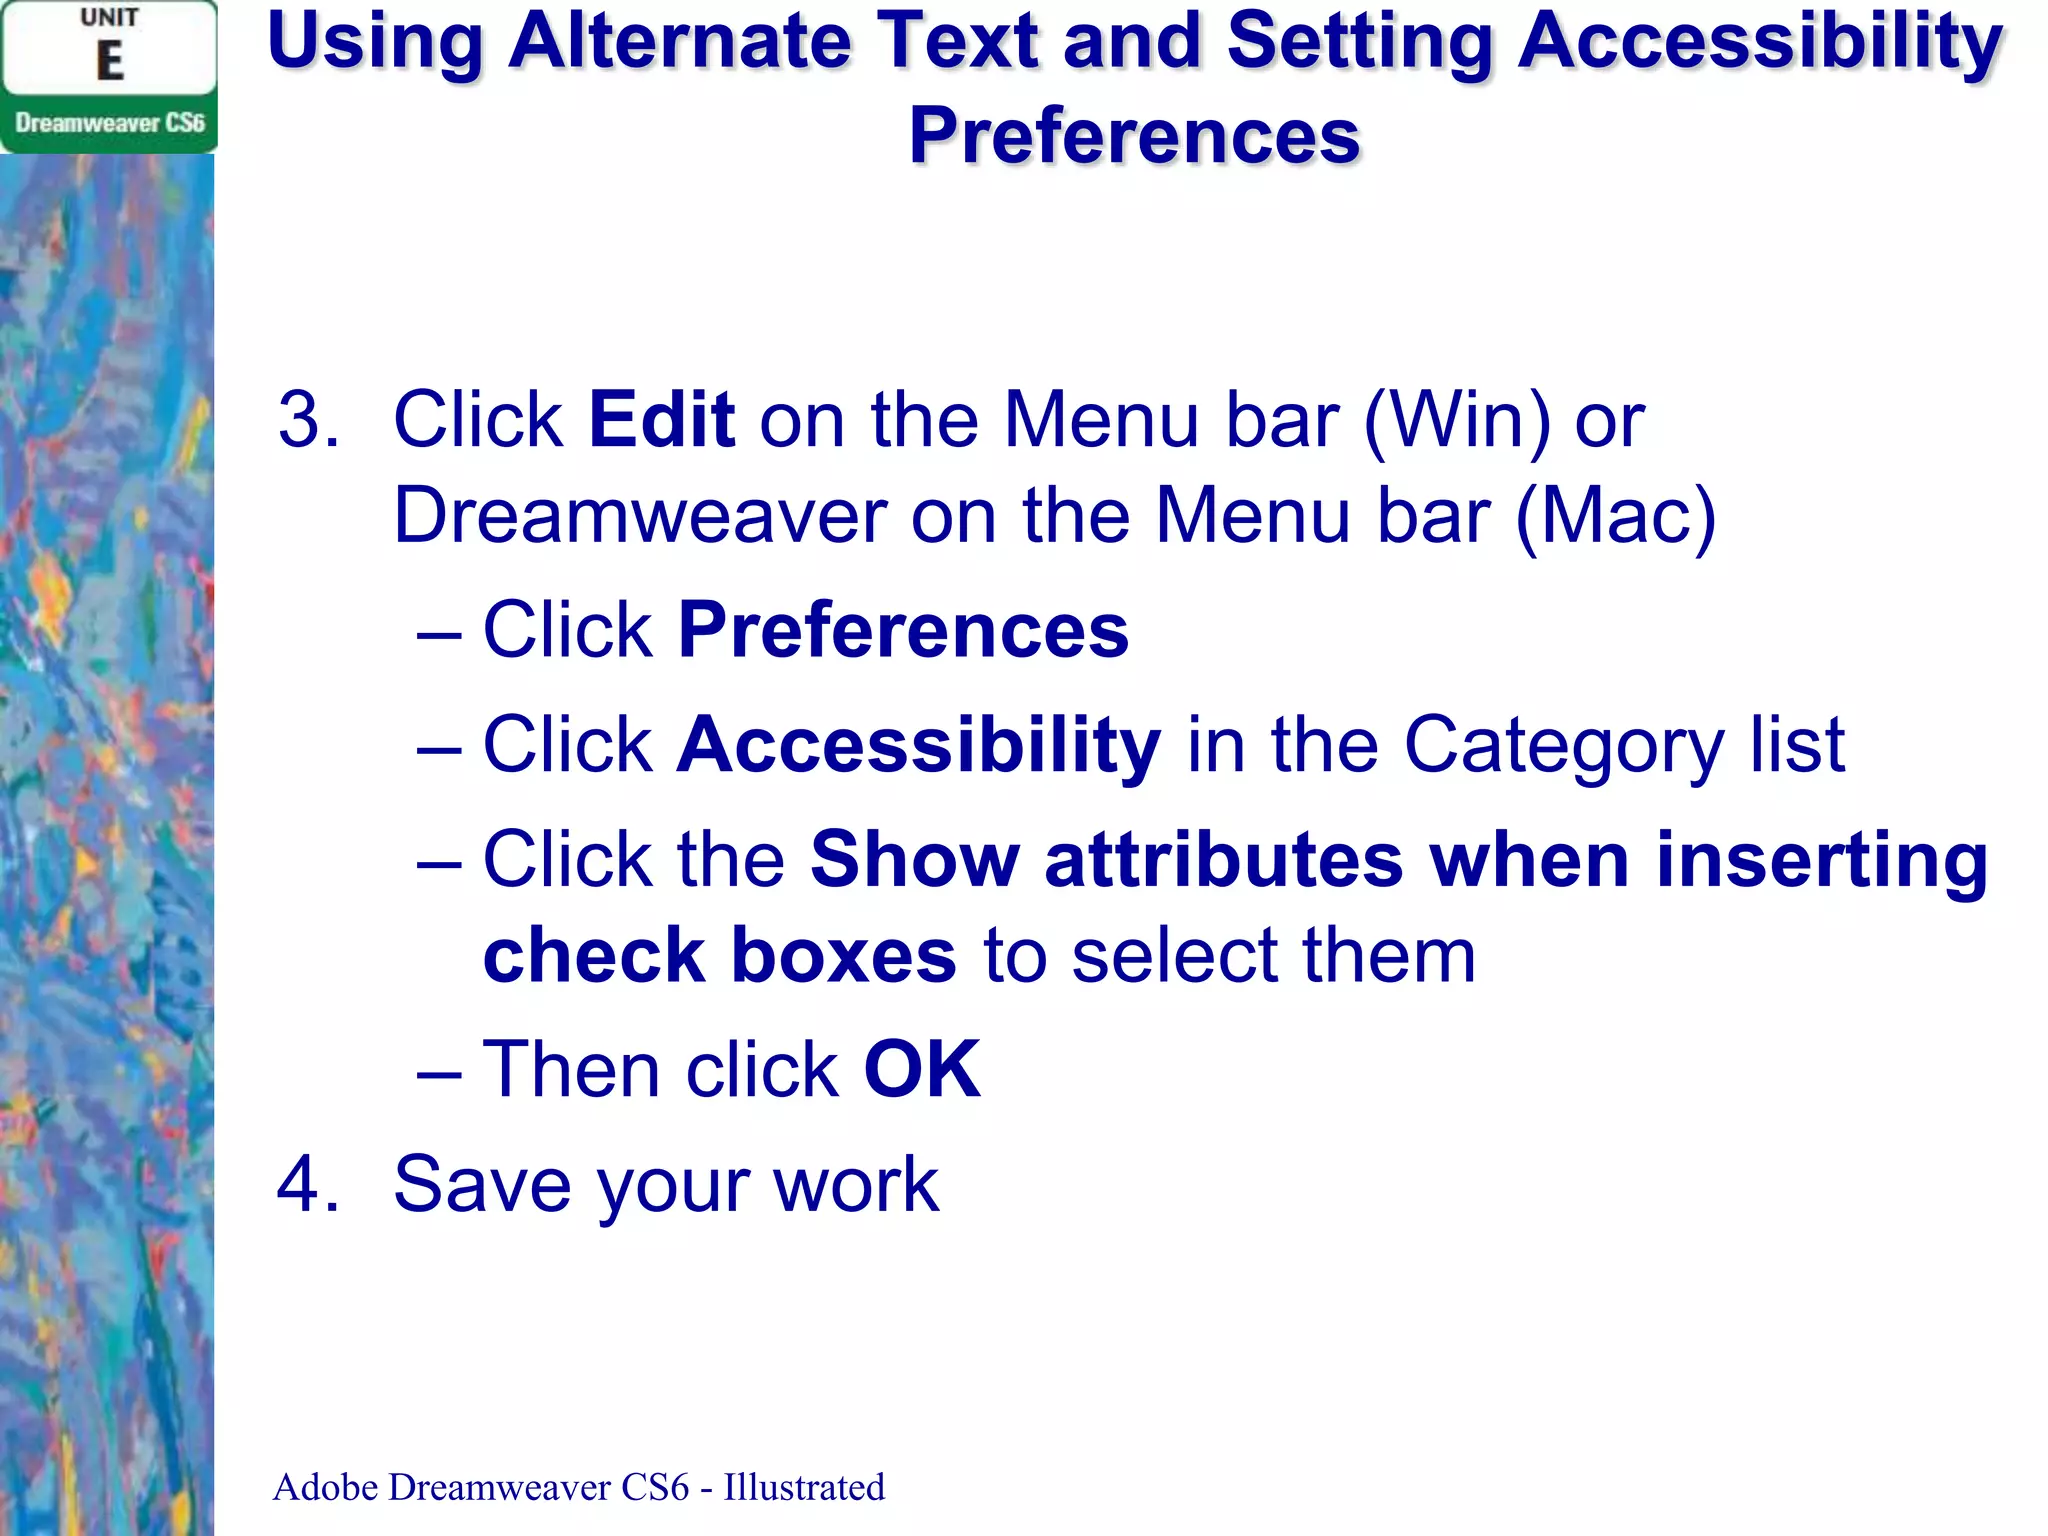
The document discusses various techniques for working with images in Adobe Dreamweaver, including inserting, aligning, and enhancing images; setting alternate text and accessibility preferences; using the Assets panel; inserting background images; deleting image files; creating and finding images; and examining copyright rules. The step-by-step instructions demonstrate how to perform tasks like floating images left and right, adding borders and spacing, and viewing the assets used on a website.


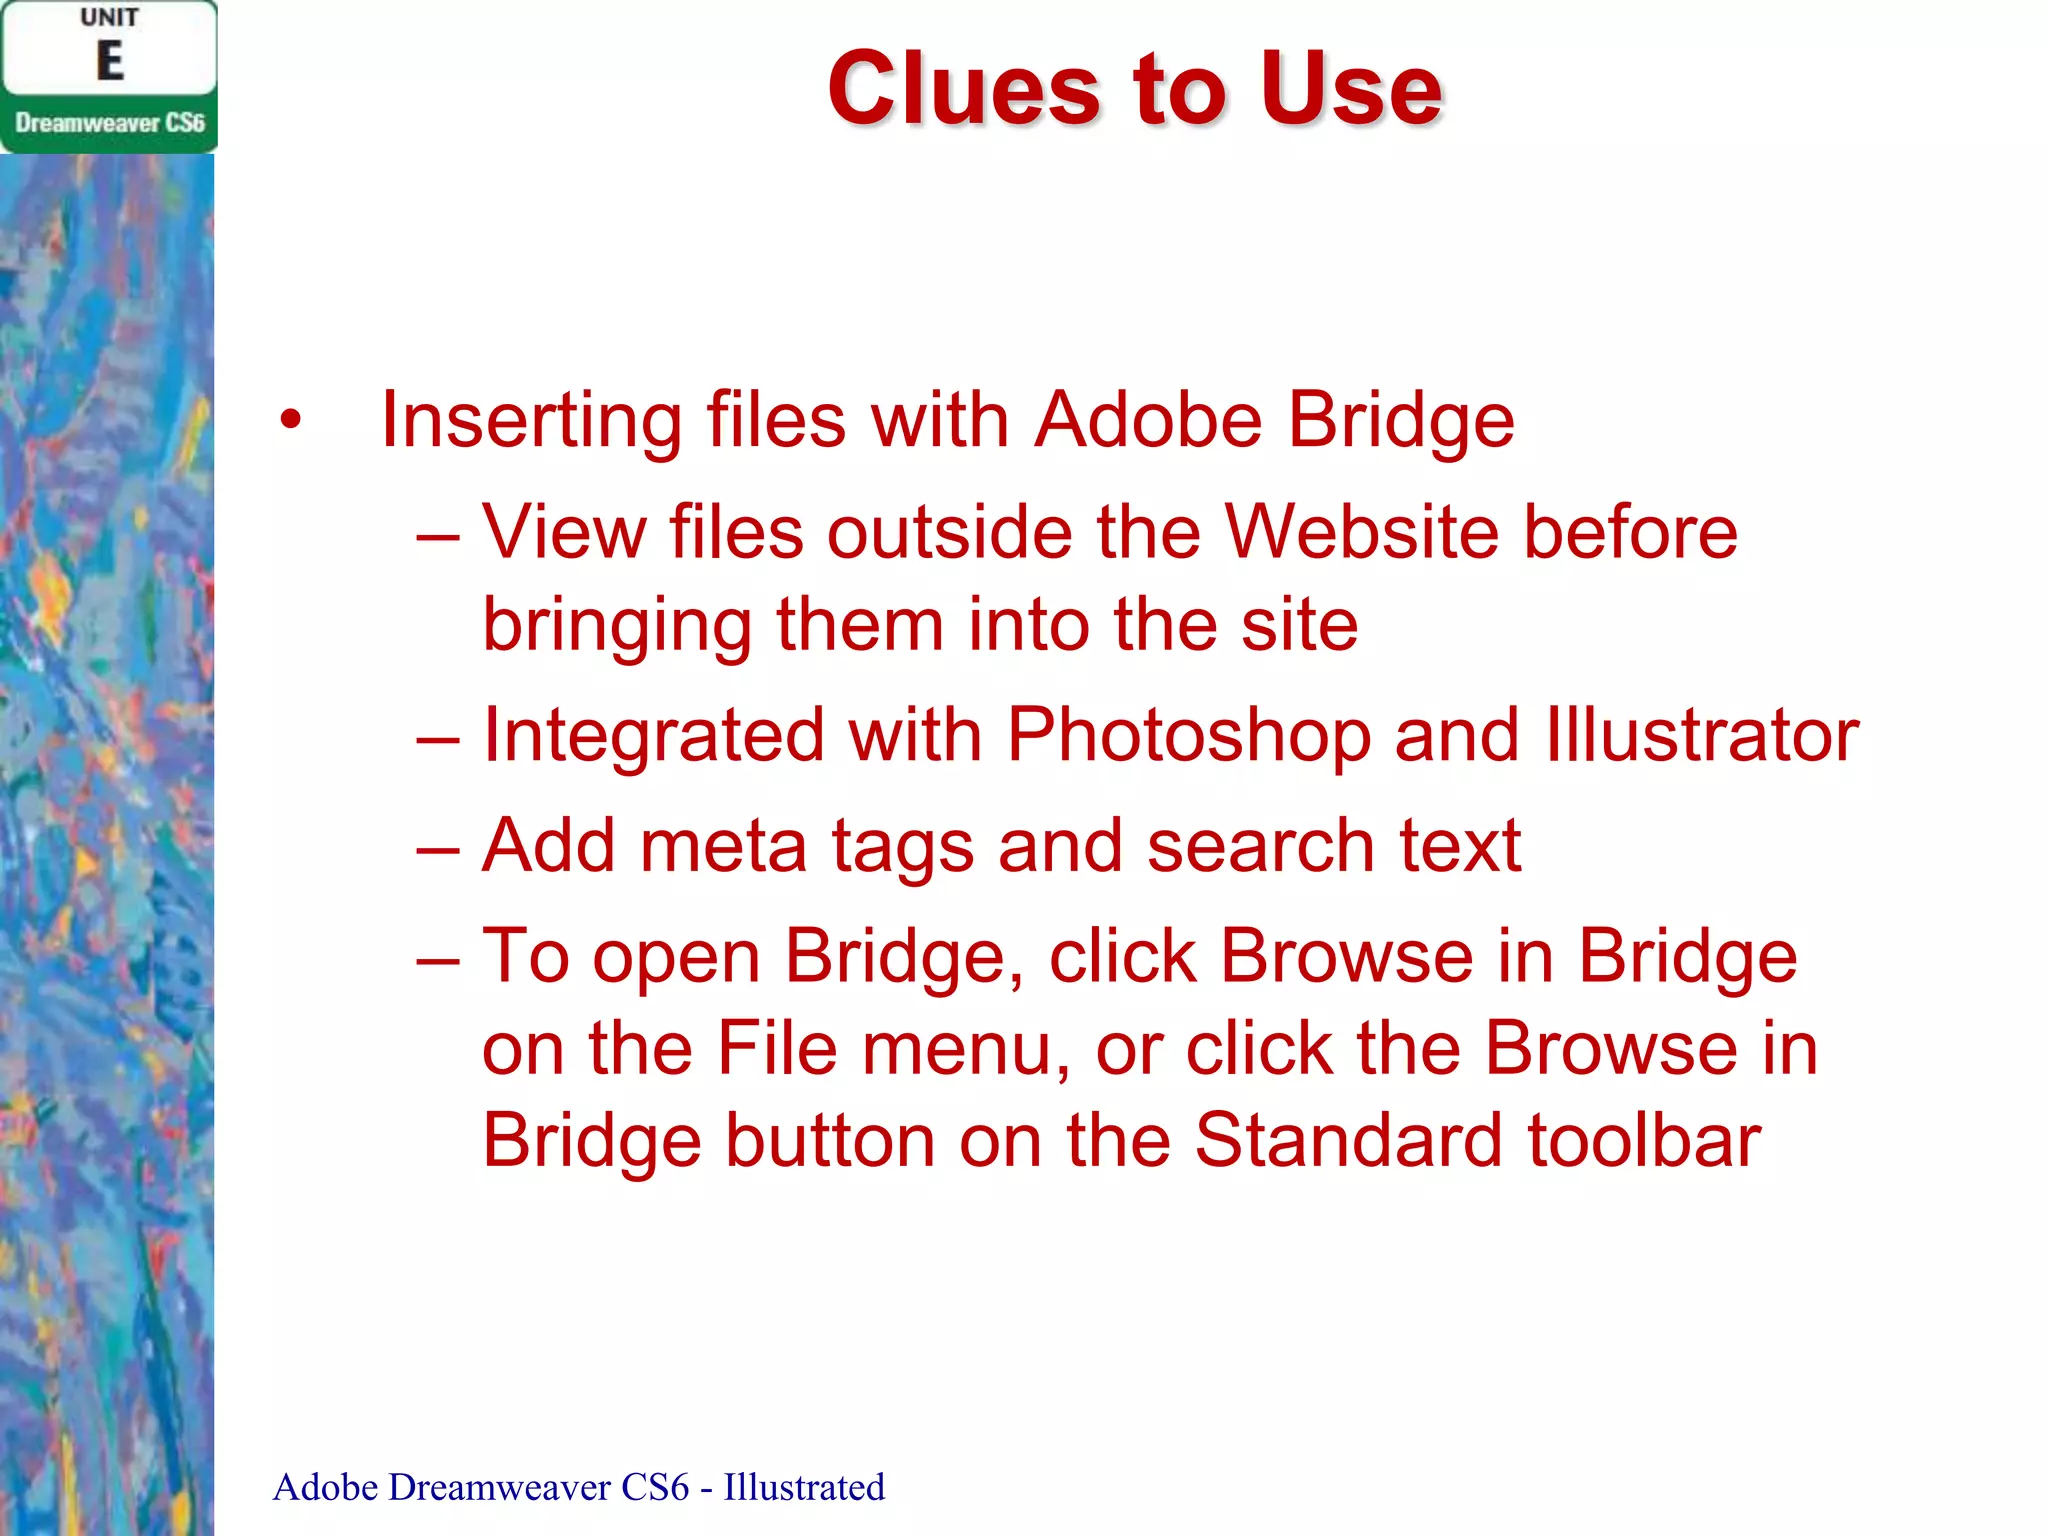
![Clues to Use
• Simply select the image, then drag a
selection handle toward the center of the
image
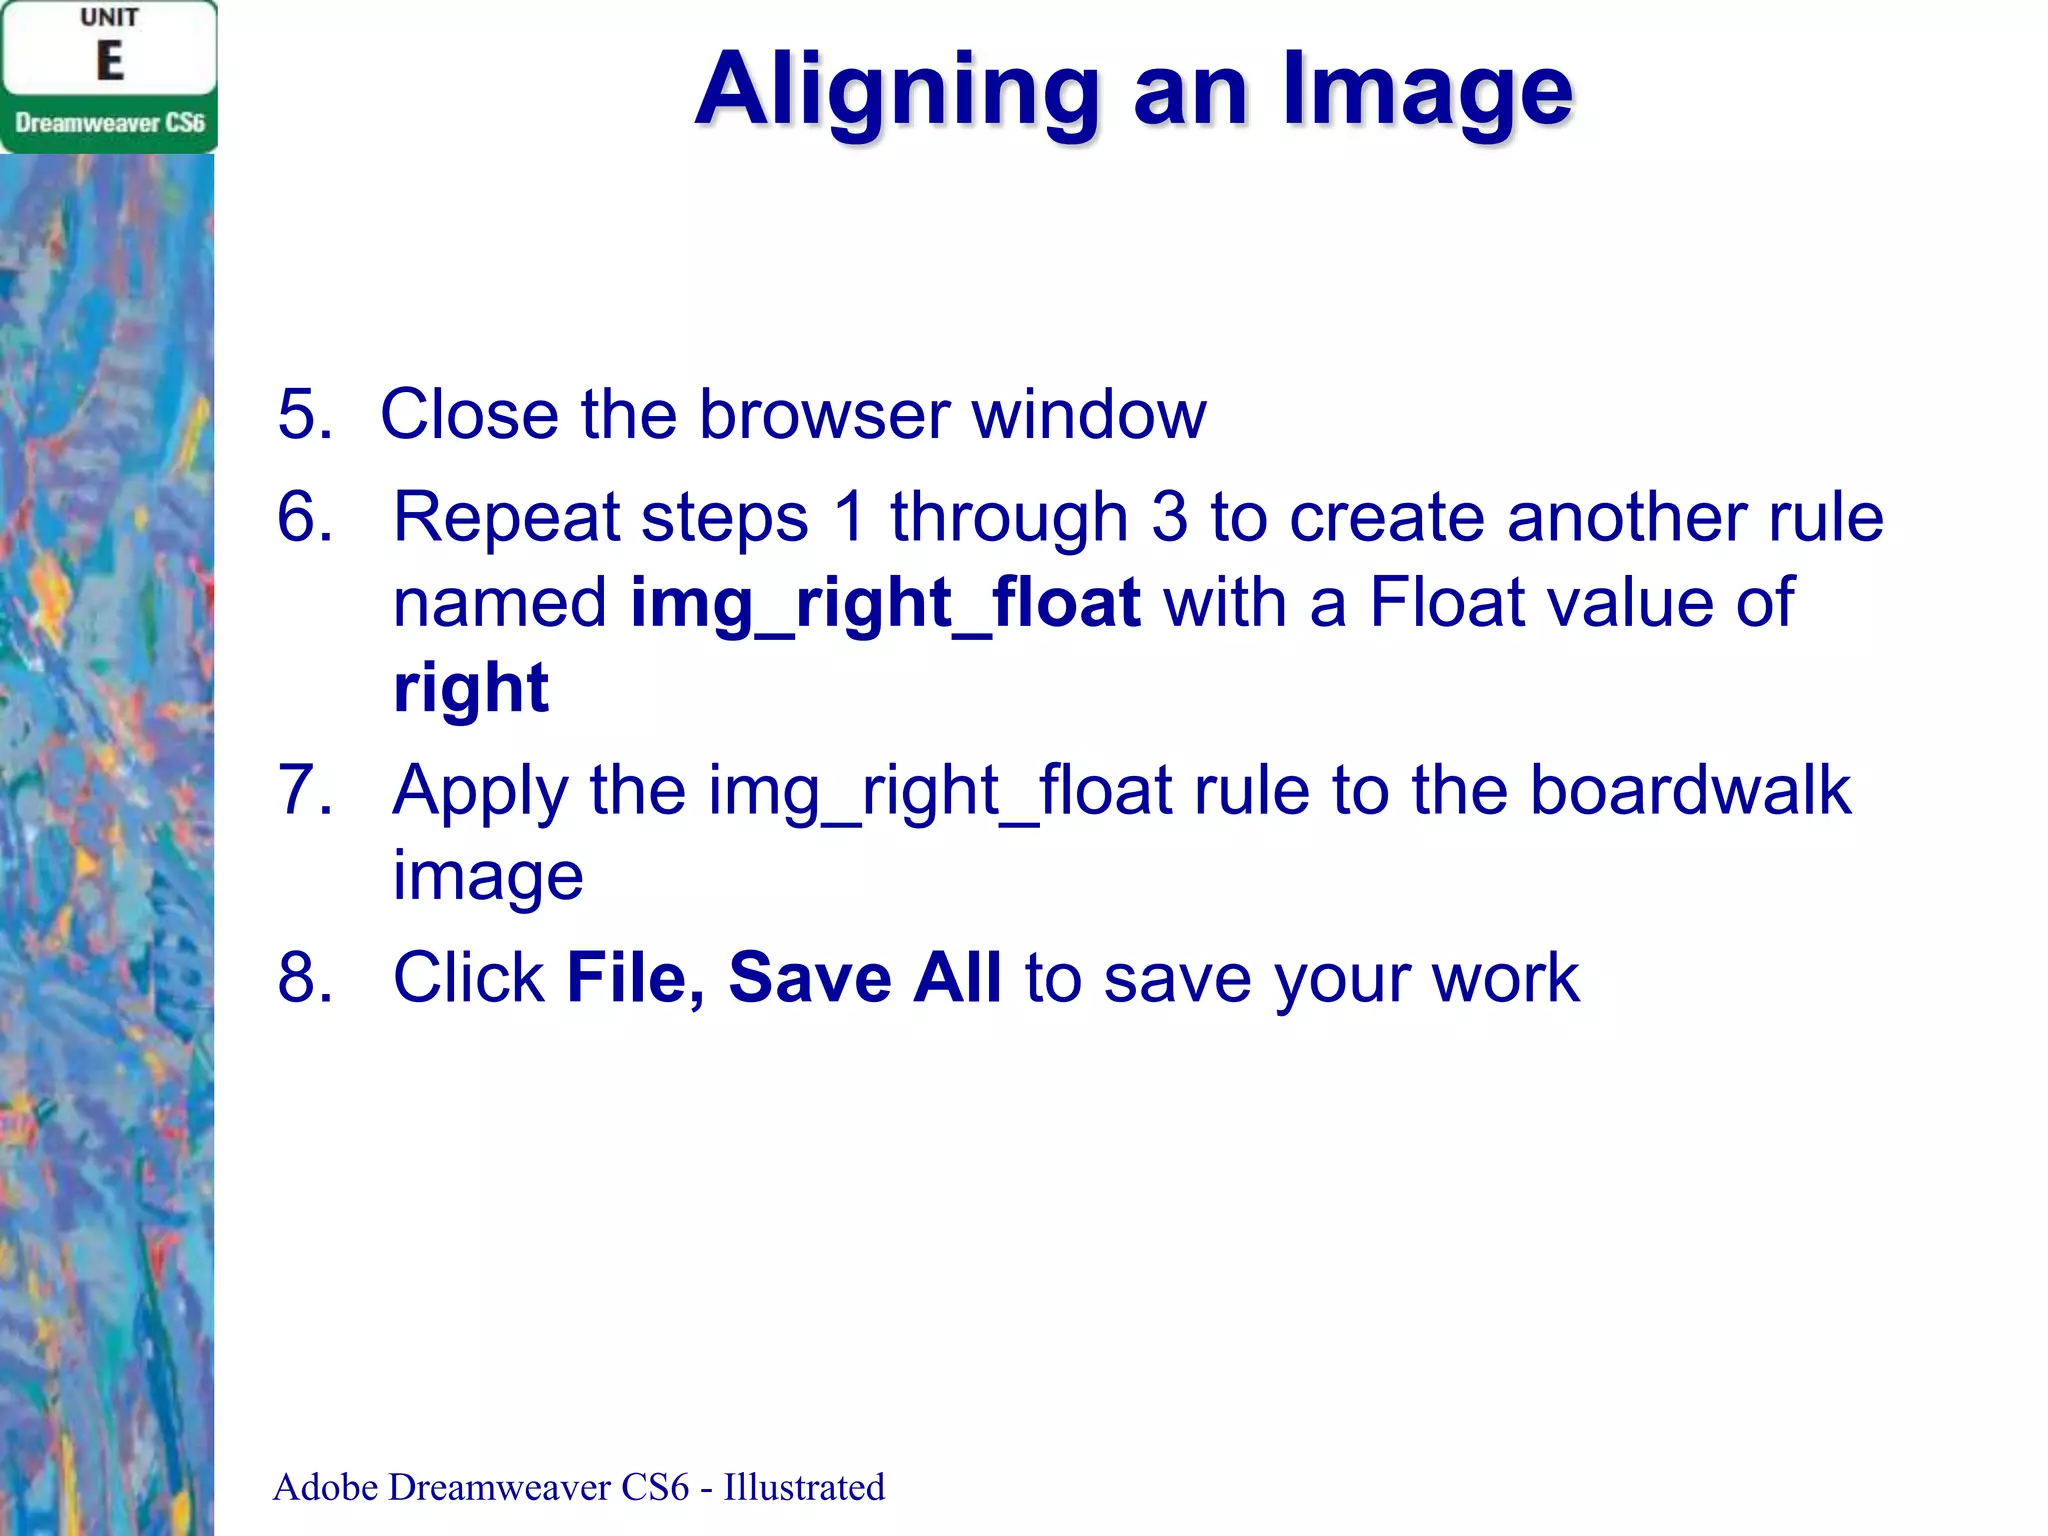
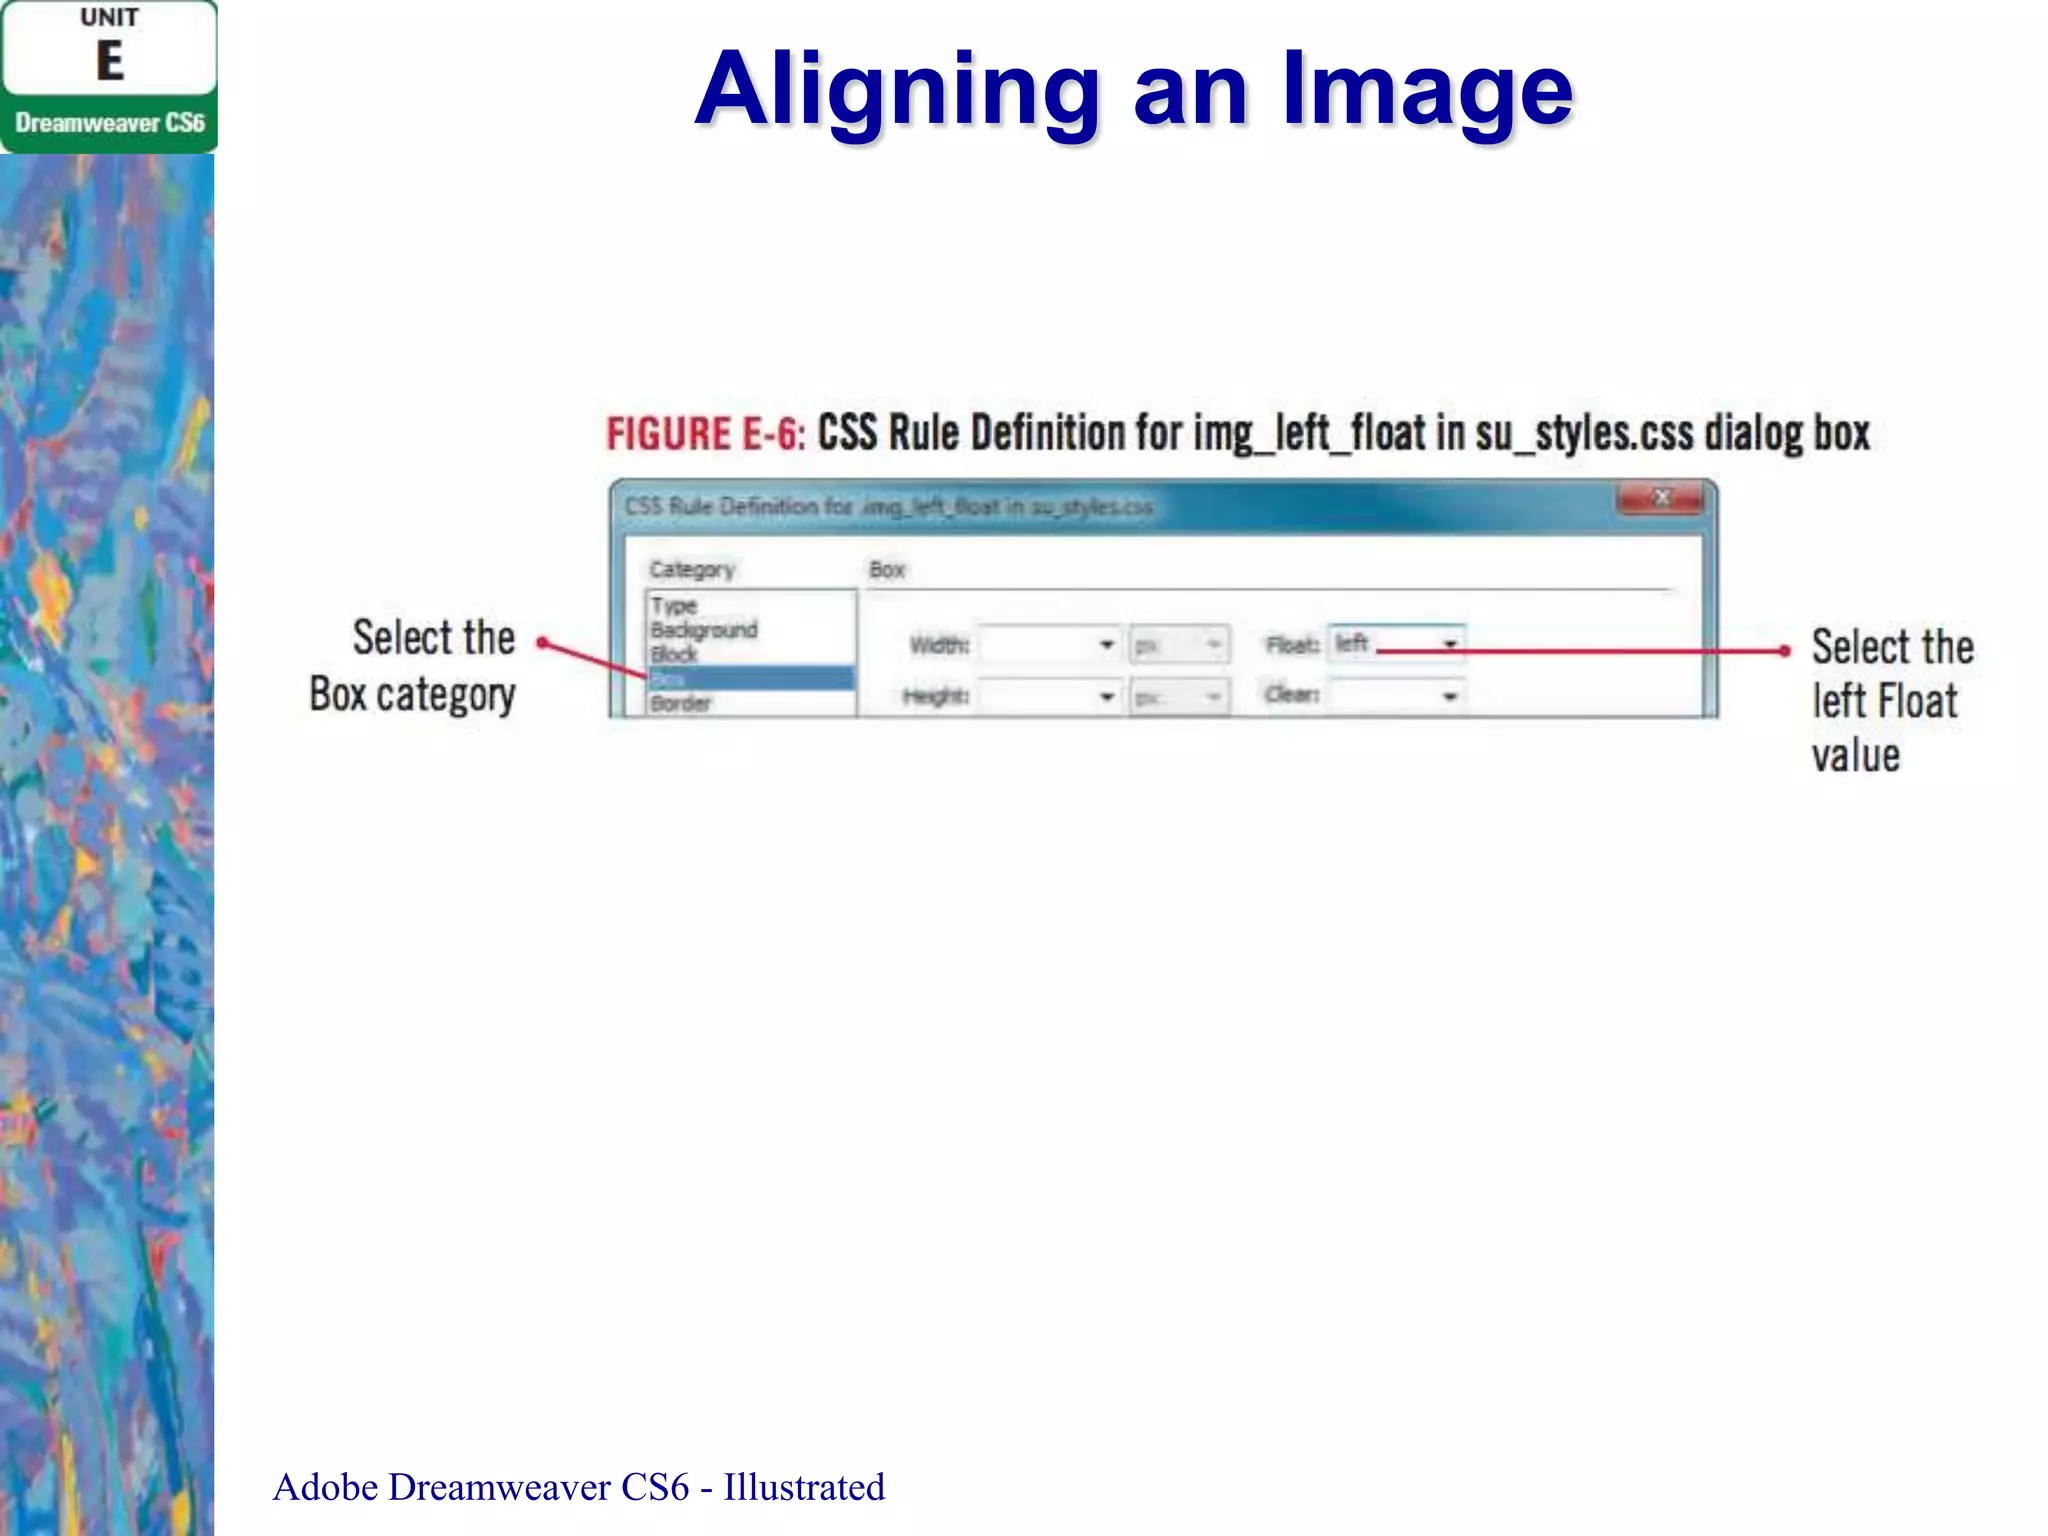
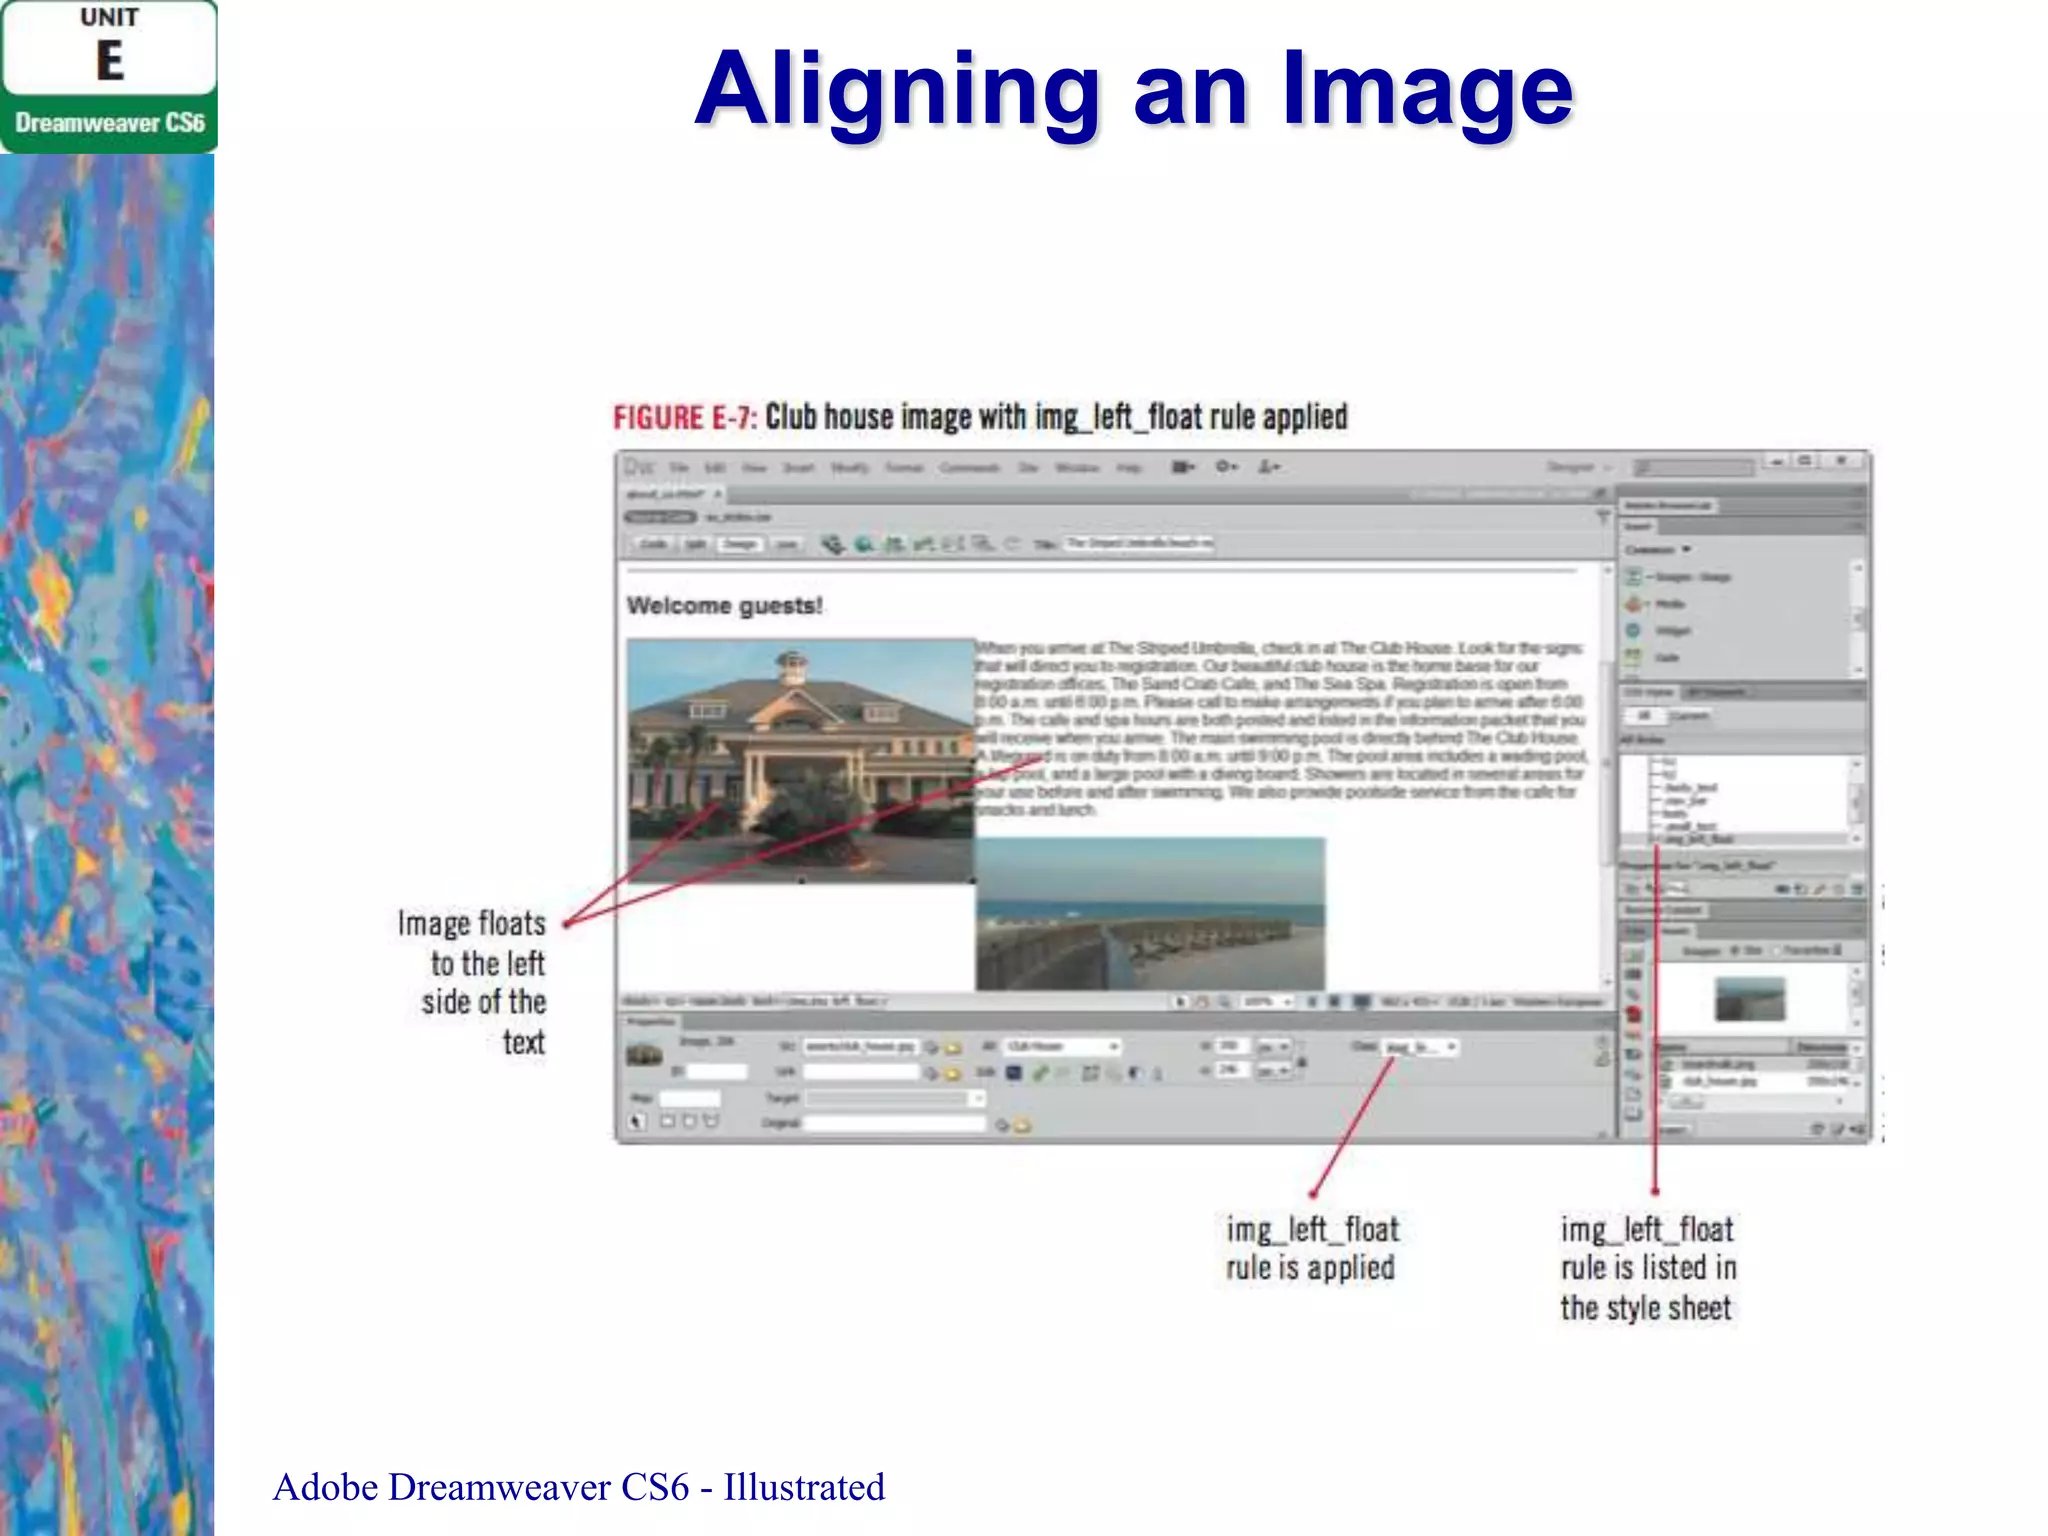
• Hold [Shift] to retain original proportions
• The new dimensions appear in the
Property inspector in bold
• Do not use this method to significantly
resize an image
Adobe Dreamweaver CS4 - Illustrated](https://image.slidesharecdn.com/uniteadobedreamweavercs6-140120151914-phpapp02/75/Unit-e-adobe-dreamweaver-cs6-17-2048.jpg)
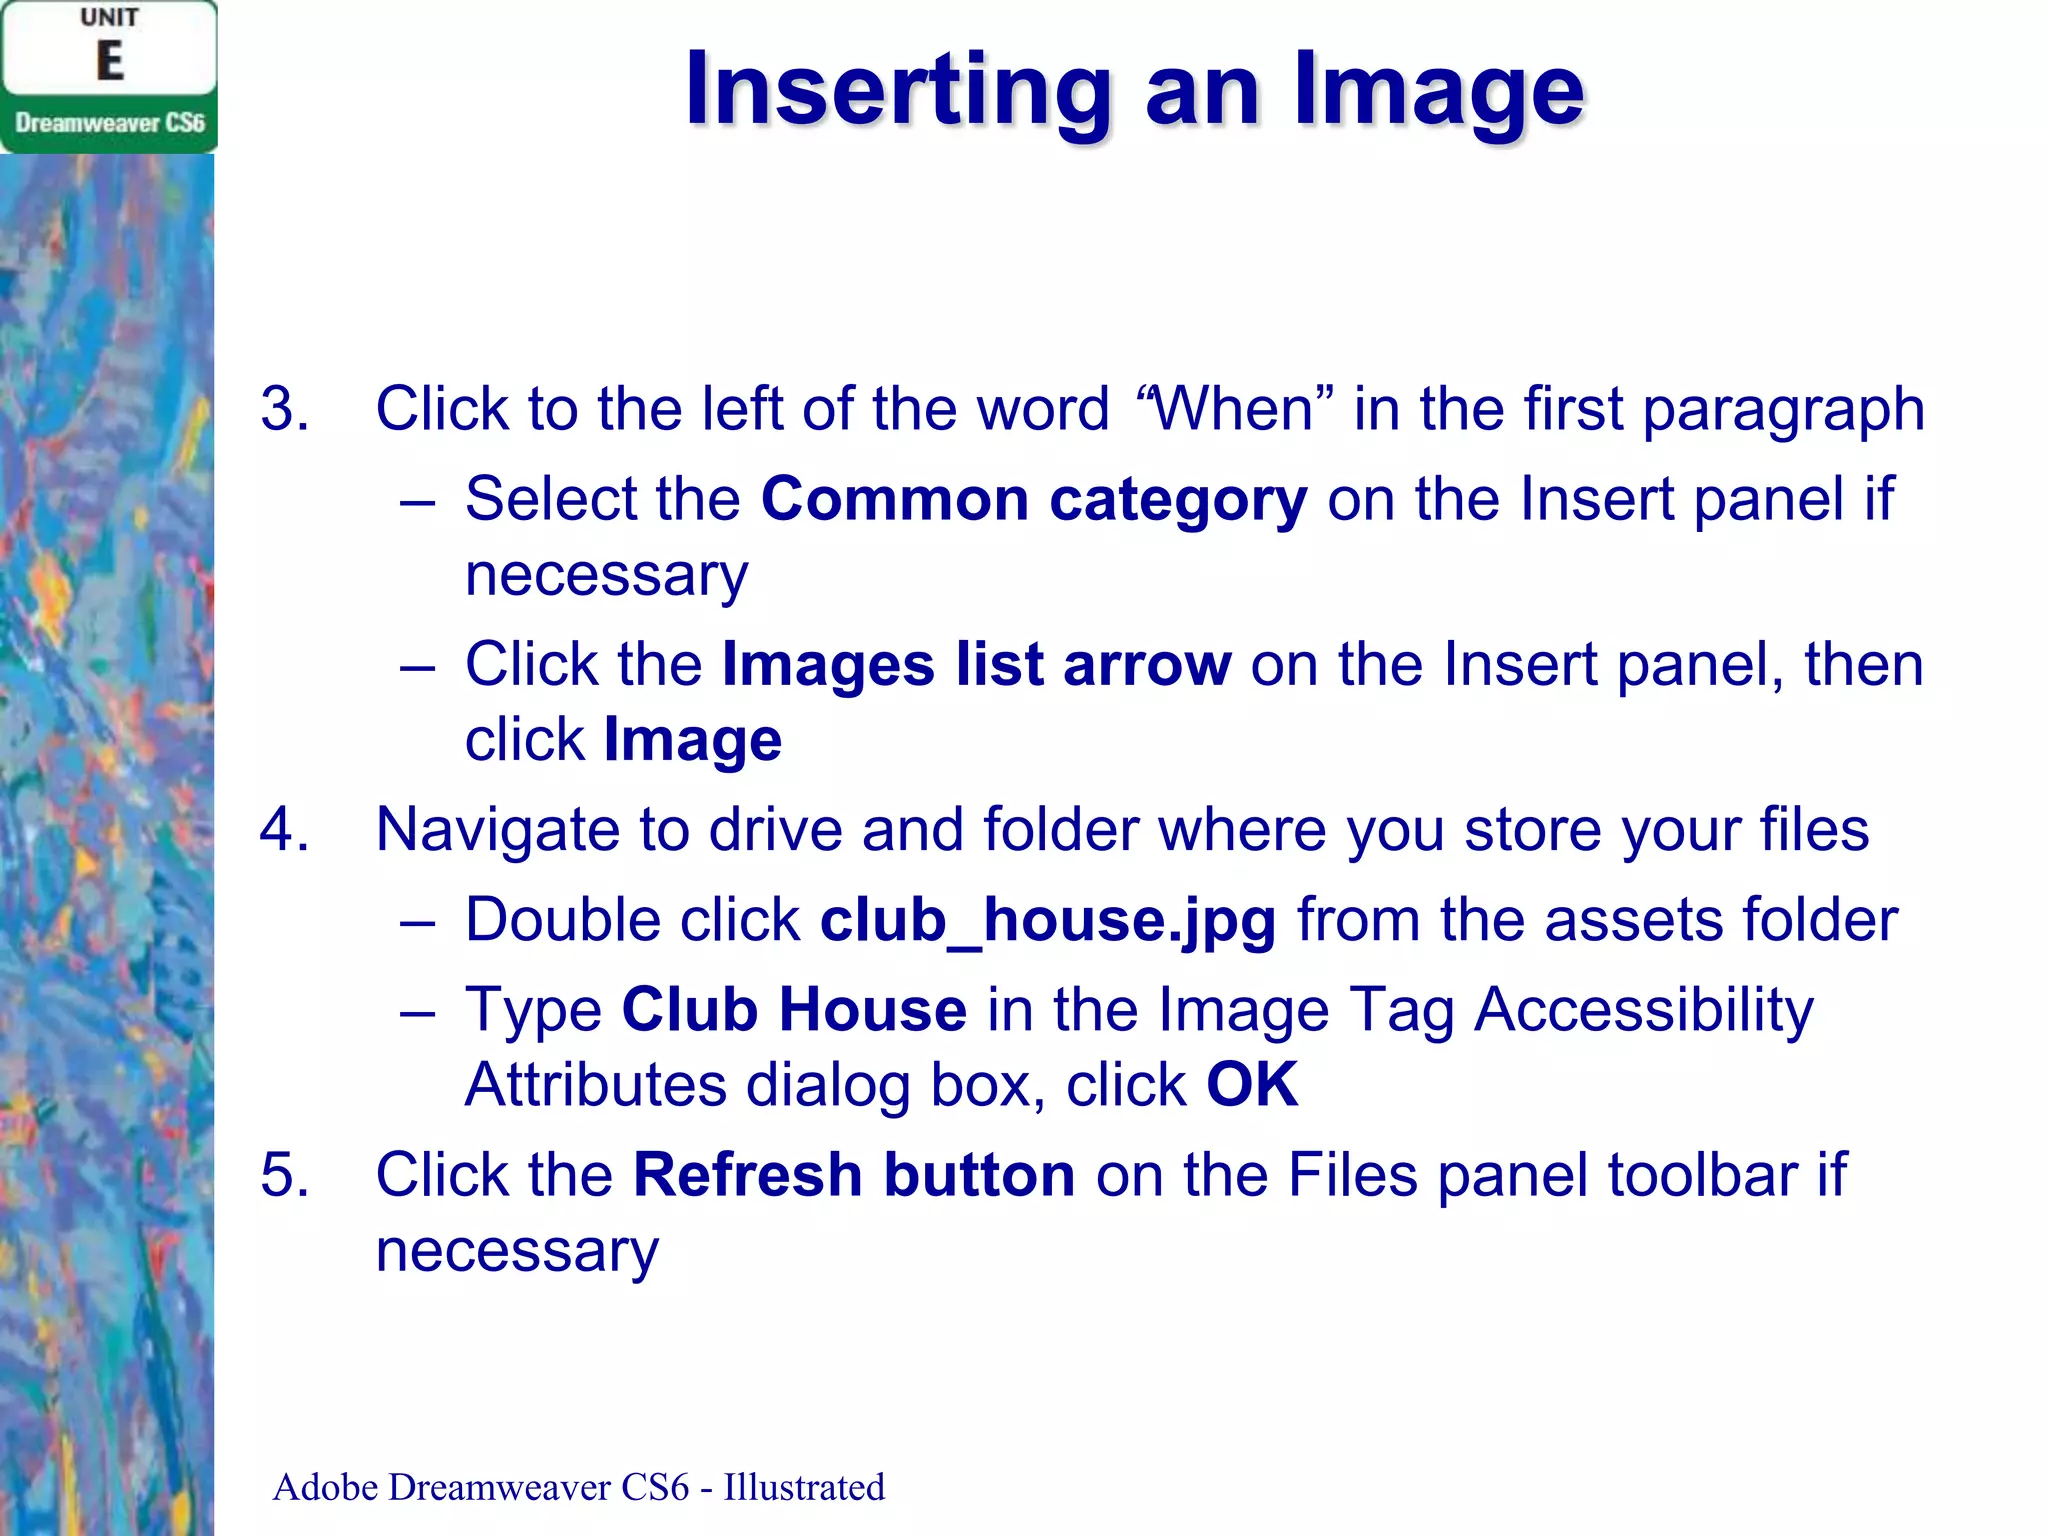
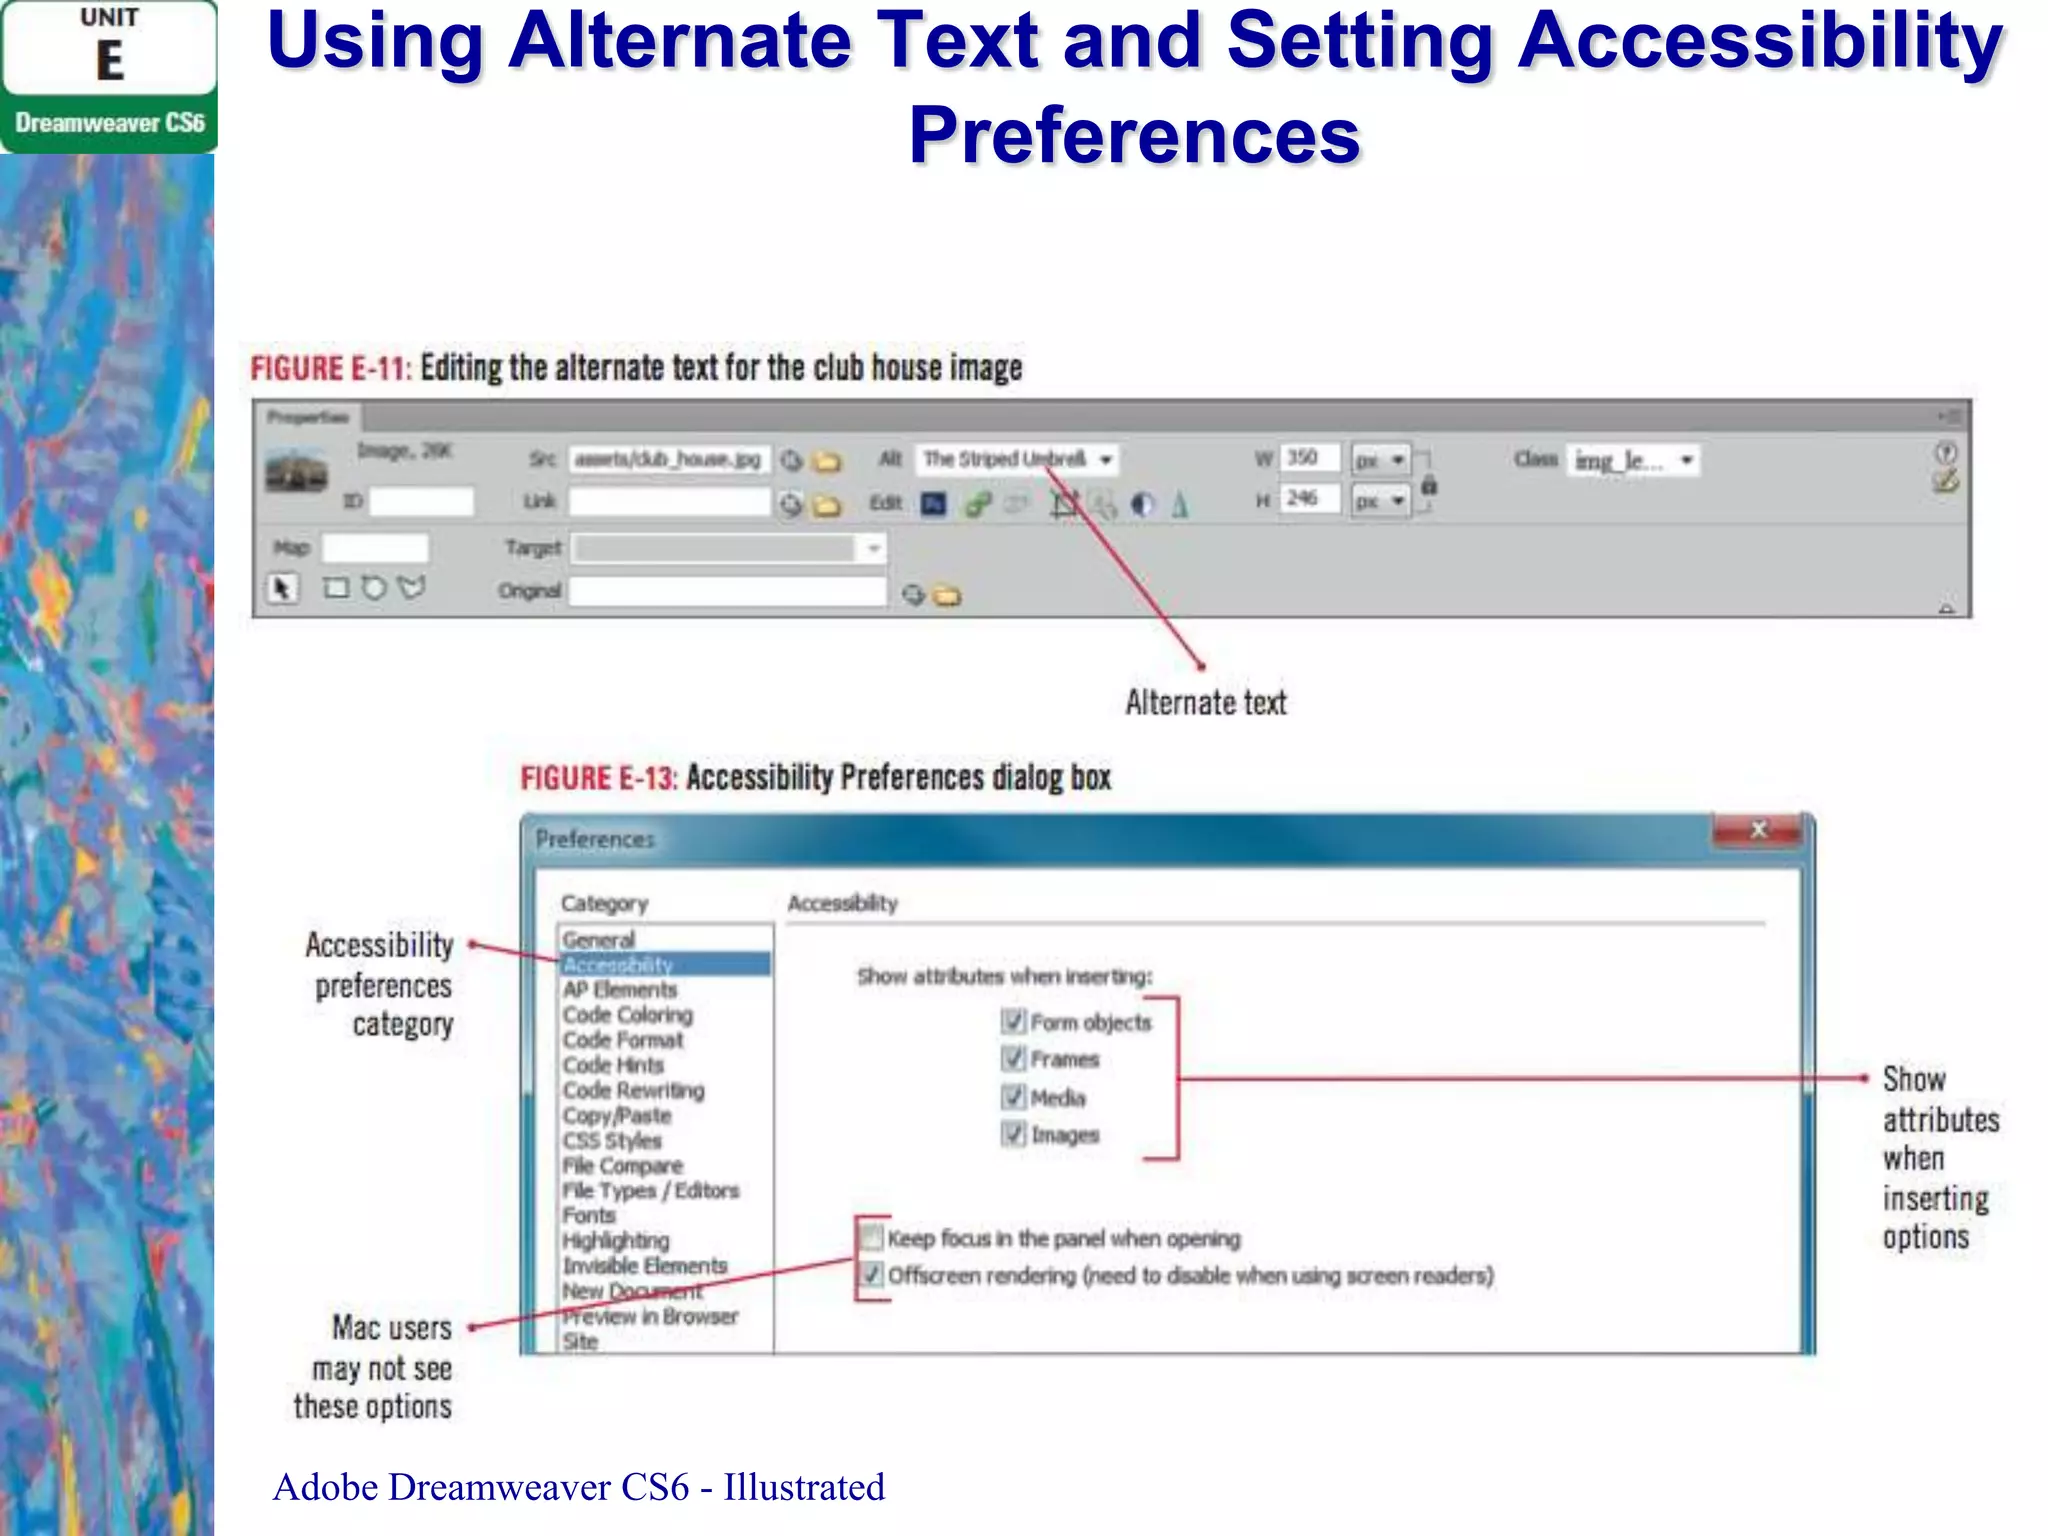
![Using Alternate Text and Setting Accessibility
Preferences
1. Click the club house image to select it
– Select the text in the Alt text box in the
Property inspector
– Type The Striped Umbrella Club House,
press [Tab], then save the file
2. Repeat step 1 to edit alternate text for
boardwalk image
Adobe Dreamweaver CS6 - Illustrated](https://image.slidesharecdn.com/uniteadobedreamweavercs6-140120151914-phpapp02/75/Unit-e-adobe-dreamweaver-cs6-18-2048.jpg)
![Clues to Use
• Using Favorites in the Assets panel
– Place frequently-used assets in the Favorites
list in the Assets panel
– Right-click (Win) or [ctrl]-click (Mac) an image
in Design view, then click Add to Image
Favorites
– Clicking the Favorites option in the Assets
panel will display the image in the list
Adobe Dreamweaver CS6 - Illustrated](https://image.slidesharecdn.com/uniteadobedreamweavercs6-140120151914-phpapp02/75/Unit-e-adobe-dreamweaver-cs6-25-2048.jpg)
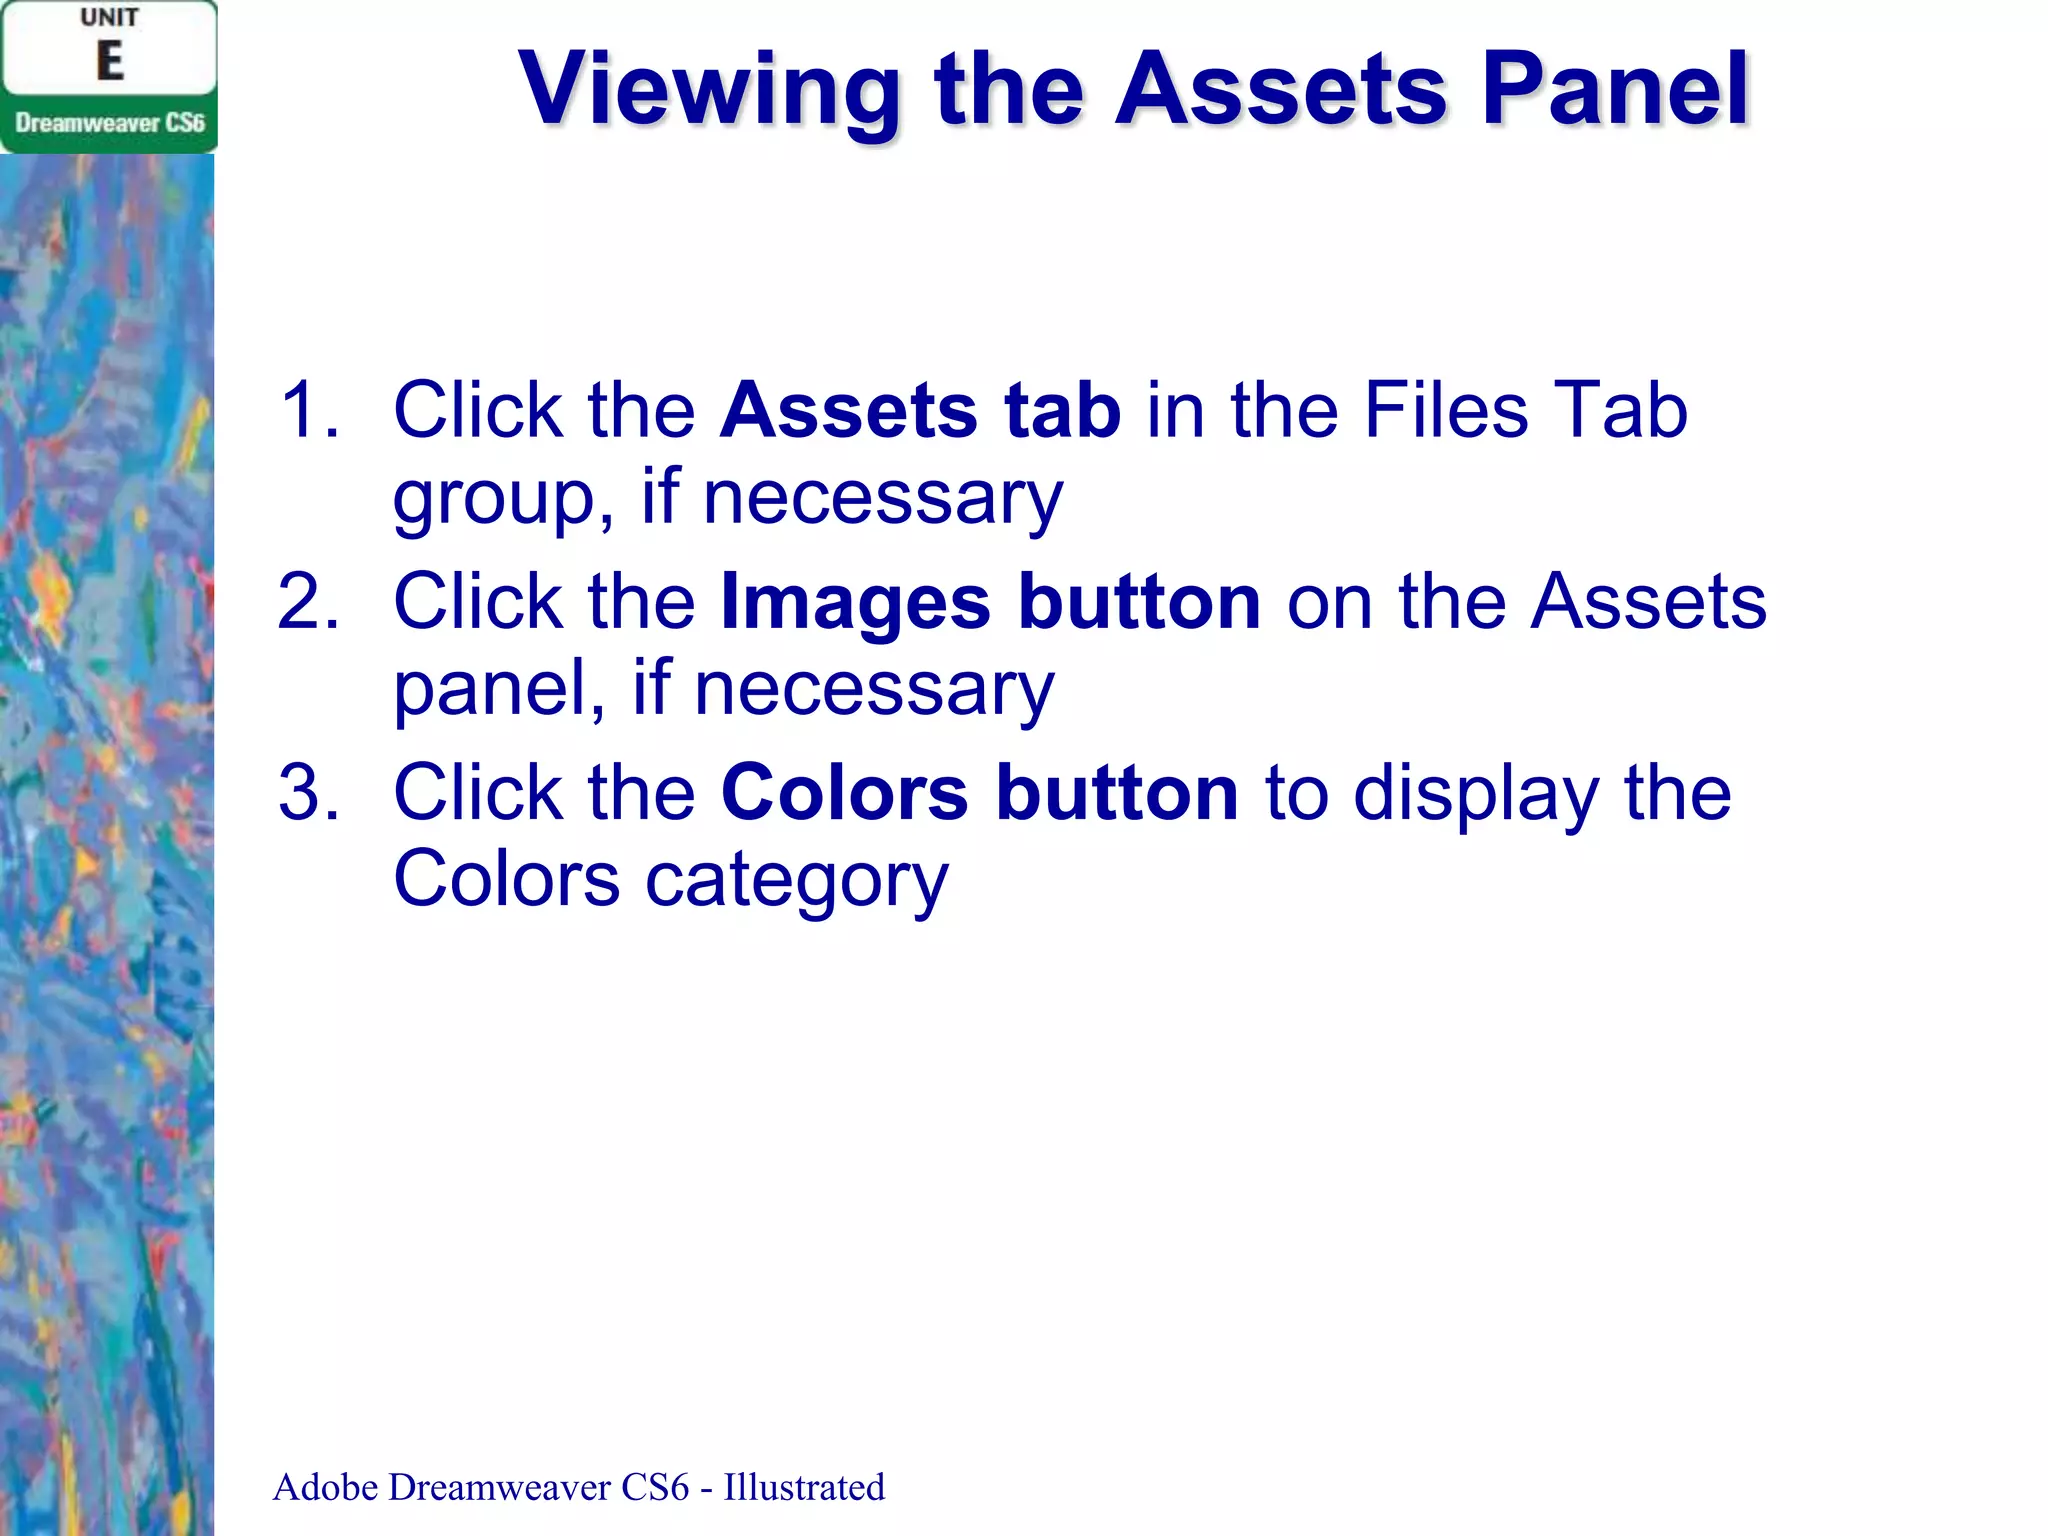
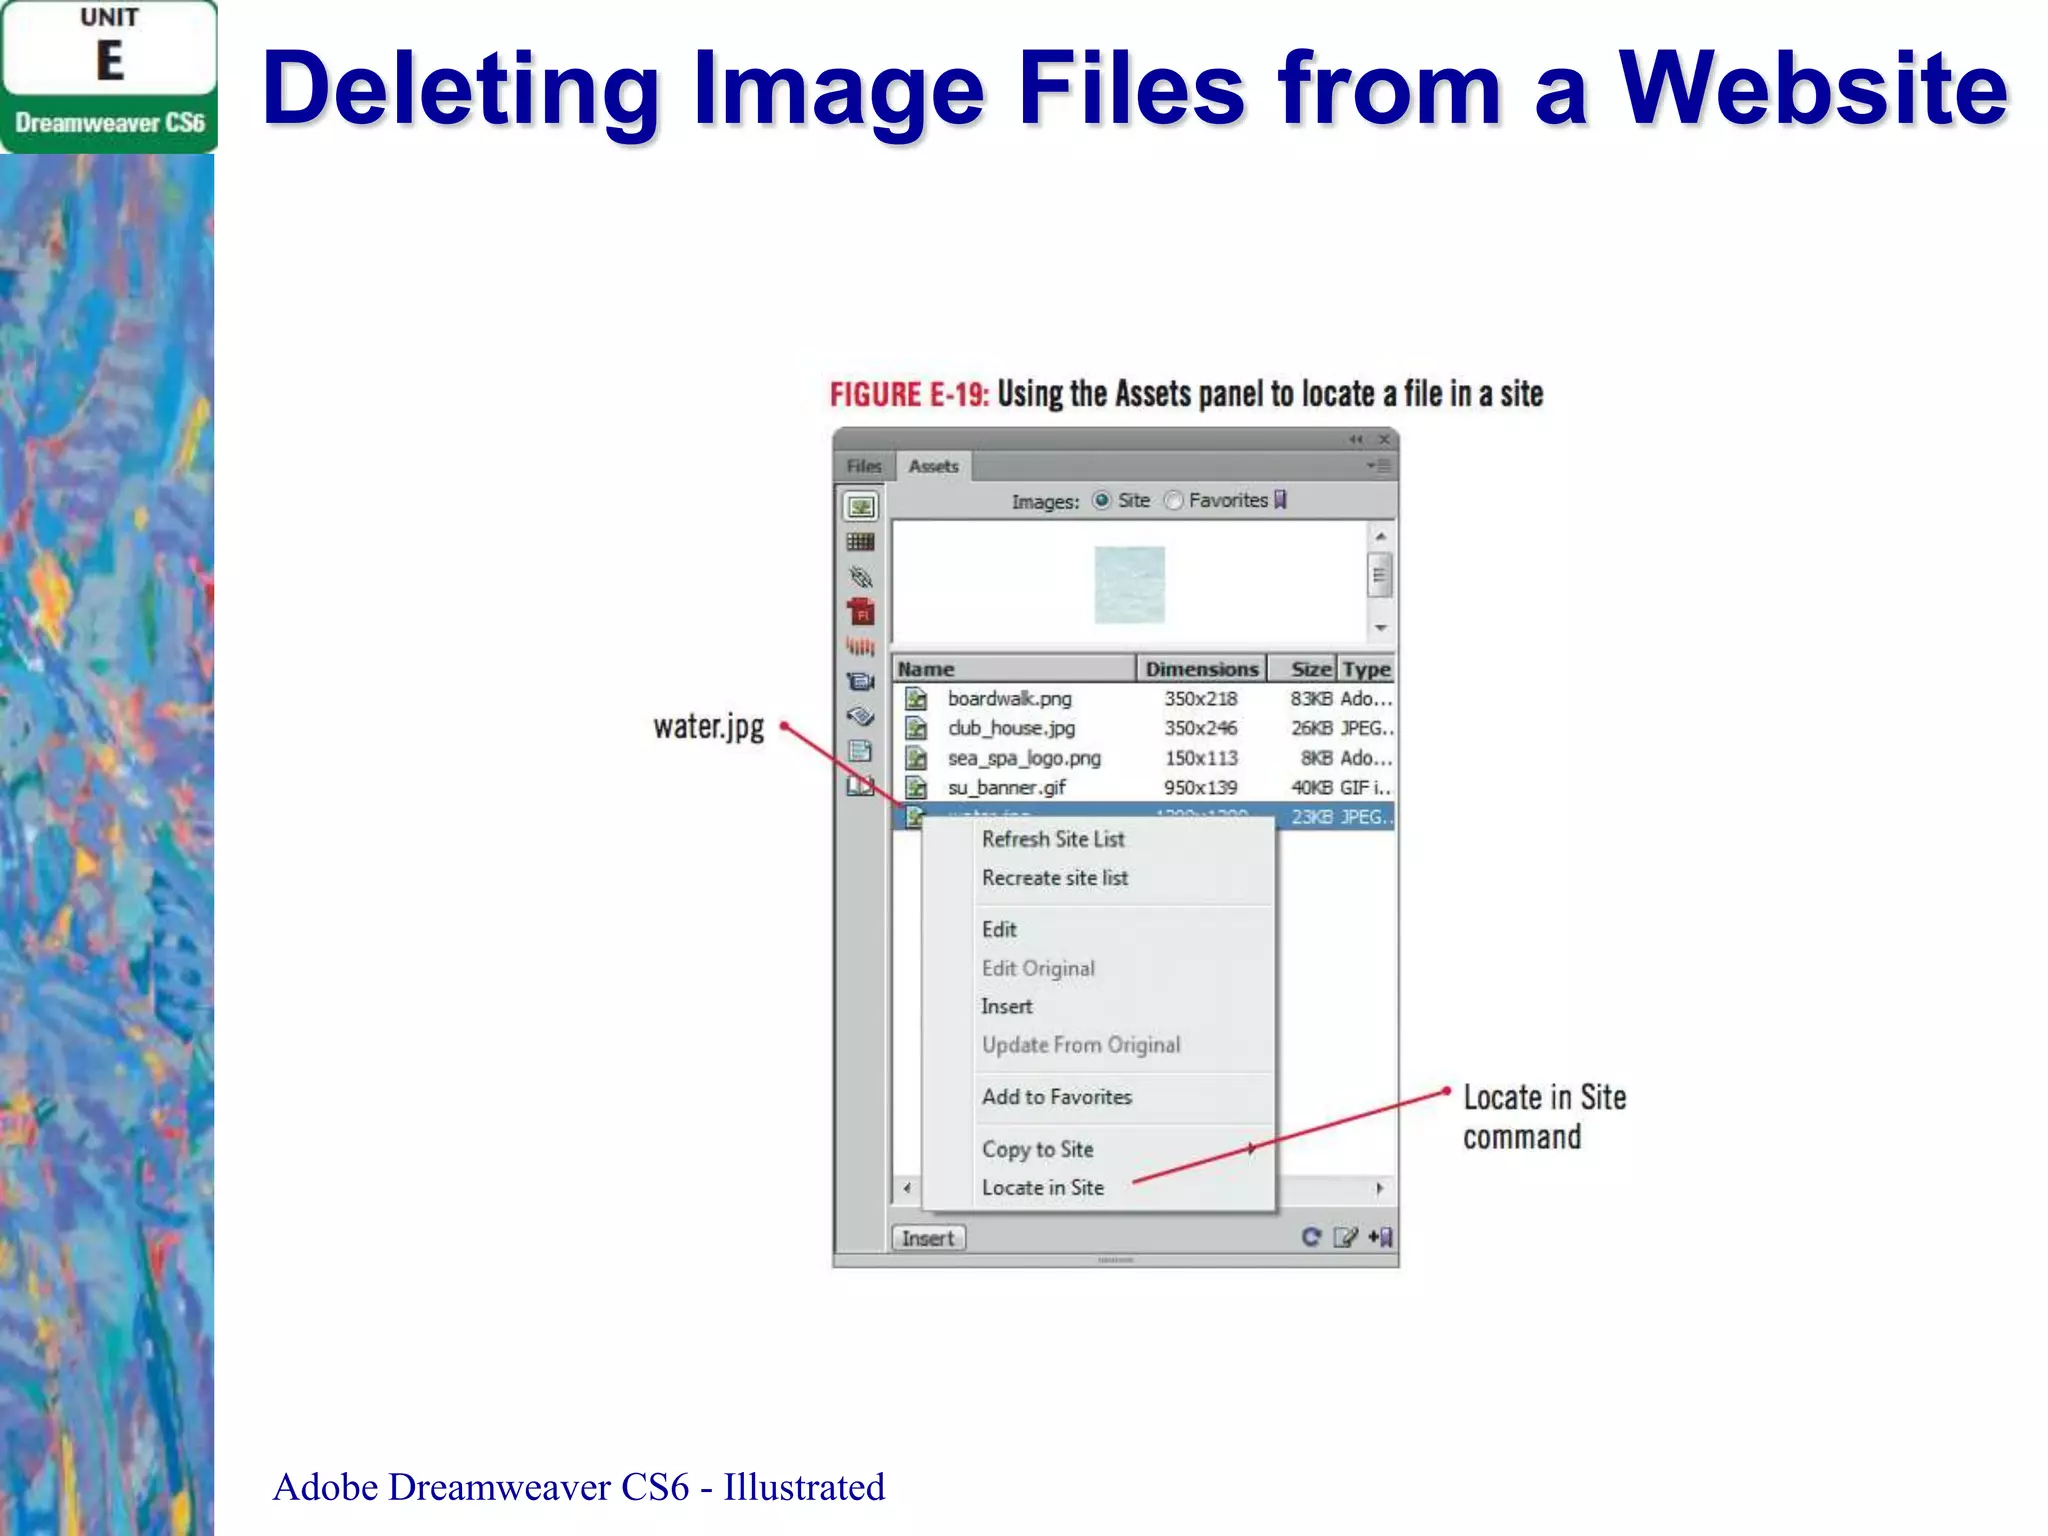
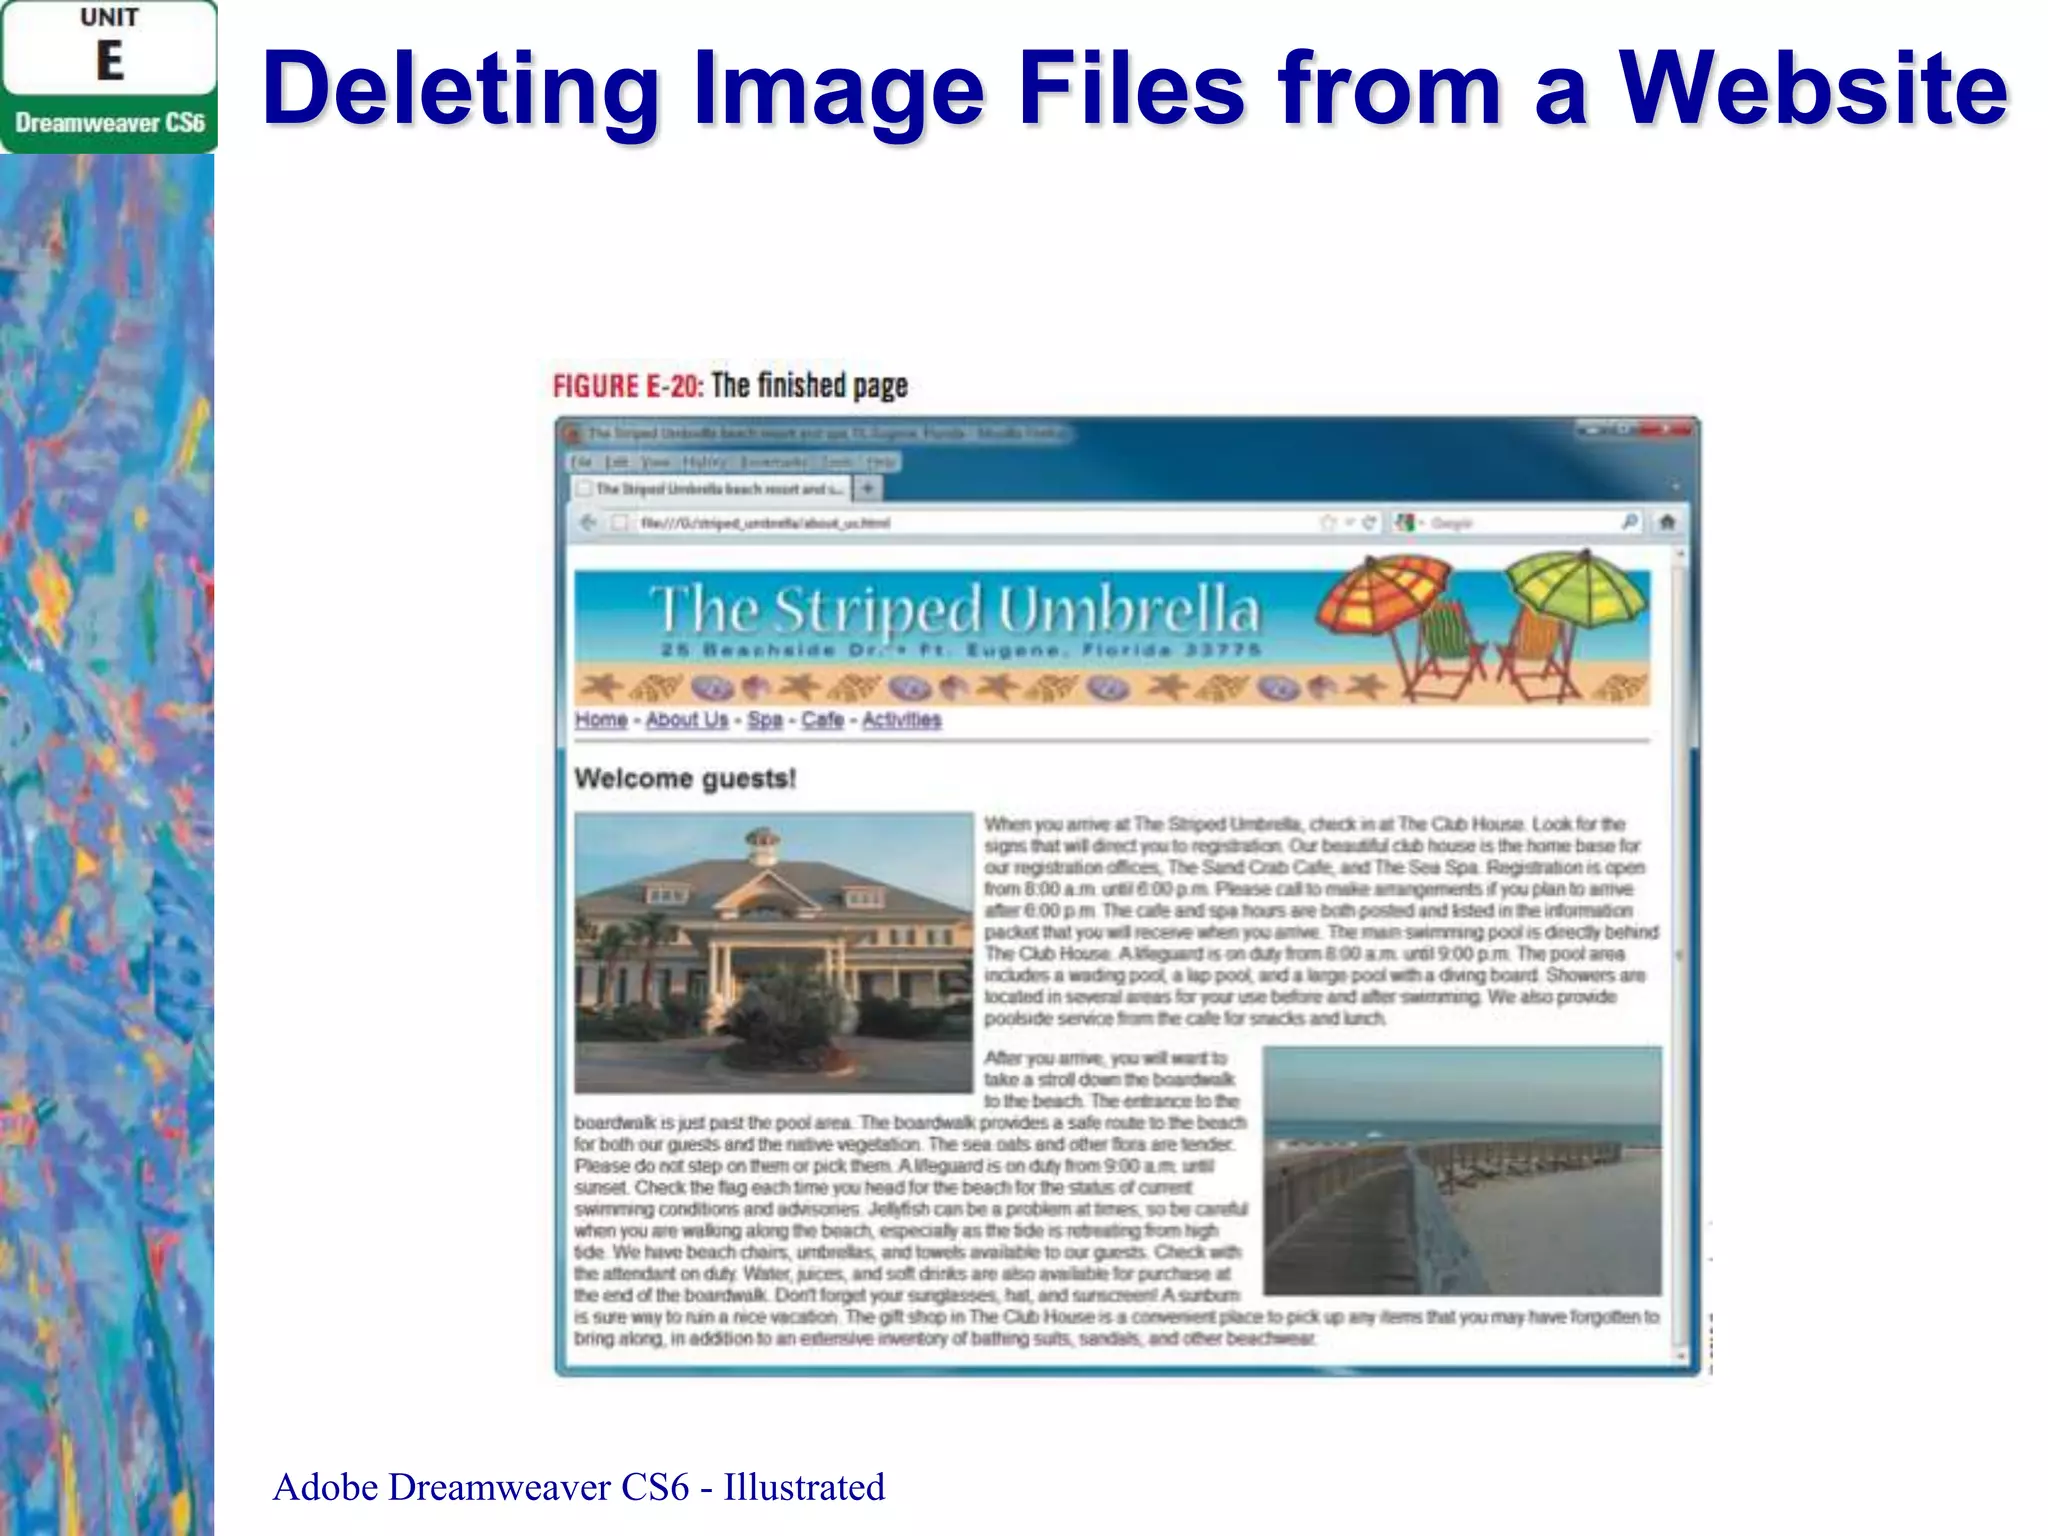
![Deleting Image Files from a Website
1. Display the Assets panel, if necessary, click the
Images button on the Assets panel, verify that the
Site option is selected, then click the Refresh button
on the Assets panel
2. Right-click water.jpg in the Assets panel, then click
Locate in Site
3. Press [Delete] to delete the file, click Yes in the
confirmation dialog box
4. Save your work, then preview your file in your
browser
5. Close the page, then Exit (Win) or Quit (Mac)
Dreamweaver
Adobe Dreamweaver CS6 - Illustrated](https://image.slidesharecdn.com/uniteadobedreamweavercs6-140120151914-phpapp02/75/Unit-e-adobe-dreamweaver-cs6-29-2048.jpg)


![Bootstrap [part 1]](https://cdn.slidesharecdn.com/ss_thumbnails/bootstrappart-11-170208154053-thumbnail.jpg?width=640&height=640&fit=bounds)