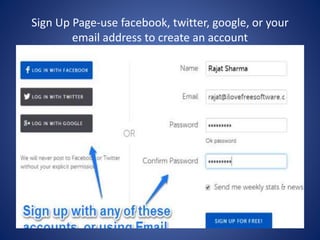
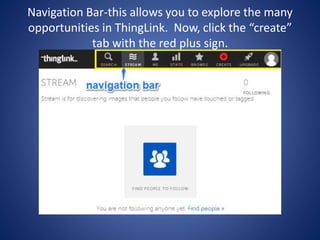
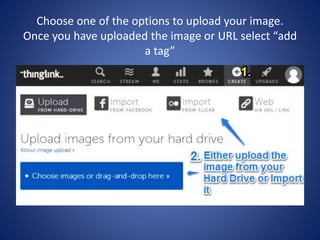
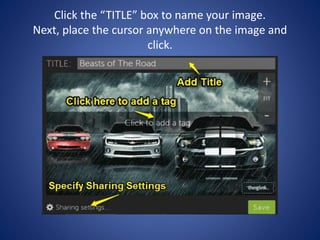
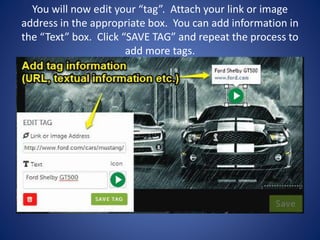
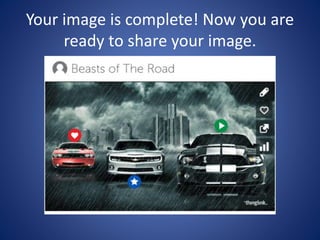
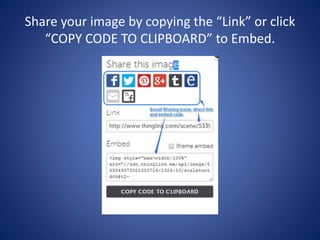
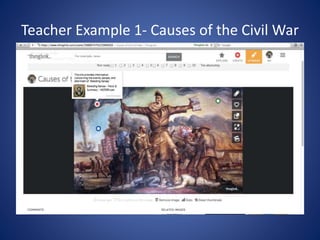
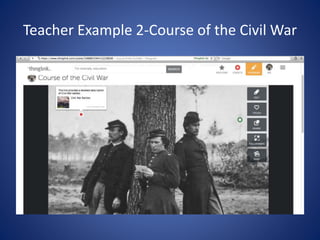
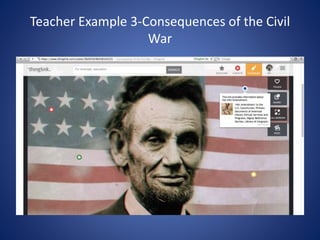
How To Use The Web 2.0 Tool
ThingLink In The Classroom
Workshop by Drew Elrod
Spring 2016
Why ‘Web 2.0’
tools?
Web 2.0 is about
revolutionary new
ways of creating,
collaborating,
editing and sharing
user-generated
content online. It's
also about ease of
use.
Why ‘ThingLink’
• ThingLink is a web 2.0
tool used for creating
interactive images and
videos for web, social,
advertising, and
educational channels.
• ThingLink allows teachers
and students to be
creative in making images
come alive with video,
text, images, shops, music
and more!
Advantages
• Free
• User Friendly
• School Accessible
• Mobile
• Interactive
• Collaborative
• Differentiation
Opportunities
• Fun!
Let’s Get Started!
• First, go to www.thinglink.com
• If you already have an account click on the
“log in” tab
• If you do not have an account click on the
“sign up” tab and fill in the information
provided.
– ThingLink is FREE!!
Sign Up Page-use facebook, twitter, google, or your
email address to create an account
Navigation Bar-this allows you to explore the many
opportunities in ThingLink. Now, click the “create”
tab with the red plus sign.
Choose one of the options to upload your image.
Once you have uploaded the image or URL select “add
a tag”
Click the “TITLE” box to name your image.
Next, place the cursor anywhere on the image and
click.
You will now edit your “tag”. Attach your link or image
address in the appropriate box. You can add information in
the “Text” box. Click “SAVE TAG” and repeat the process to
add more tags.
Your image is complete! Now you are
ready to share your image.
Share your image by copying the “Link” or click
“COPY CODE TO CLIPBOARD” to Embed.
Teacher Example 1- Causes of the Civil War
Teacher Example 2-Course of the Civil War
Teacher Example 3-Consequences of the Civil
War
Student Example 1
Now it’s your turn to create a
ThingLink!
Follow the instructions on your
information sheet.
Thank you for your time and keep
creating!

Thing link

  • 1.
    How To UseThe Web 2.0 Tool ThingLink In The Classroom Workshop by Drew Elrod Spring 2016
  • 2.
    Why ‘Web 2.0’ tools? Web2.0 is about revolutionary new ways of creating, collaborating, editing and sharing user-generated content online. It's also about ease of use.
  • 3.
    Why ‘ThingLink’ • ThingLinkis a web 2.0 tool used for creating interactive images and videos for web, social, advertising, and educational channels. • ThingLink allows teachers and students to be creative in making images come alive with video, text, images, shops, music and more!
  • 4.
    Advantages • Free • UserFriendly • School Accessible • Mobile • Interactive • Collaborative • Differentiation Opportunities • Fun!
  • 5.
    Let’s Get Started! •First, go to www.thinglink.com • If you already have an account click on the “log in” tab • If you do not have an account click on the “sign up” tab and fill in the information provided. – ThingLink is FREE!!
  • 6.
    Sign Up Page-usefacebook, twitter, google, or your email address to create an account
  • 7.
    Navigation Bar-this allowsyou to explore the many opportunities in ThingLink. Now, click the “create” tab with the red plus sign.
  • 8.
    Choose one ofthe options to upload your image. Once you have uploaded the image or URL select “add a tag”
  • 9.
    Click the “TITLE”box to name your image. Next, place the cursor anywhere on the image and click.
  • 10.
    You will nowedit your “tag”. Attach your link or image address in the appropriate box. You can add information in the “Text” box. Click “SAVE TAG” and repeat the process to add more tags.
  • 11.
    Your image iscomplete! Now you are ready to share your image.
  • 12.
    Share your imageby copying the “Link” or click “COPY CODE TO CLIPBOARD” to Embed.
  • 13.
    Teacher Example 1-Causes of the Civil War
  • 14.
    Teacher Example 2-Courseof the Civil War
  • 15.
  • 16.
  • 17.
    Now it’s yourturn to create a ThingLink! Follow the instructions on your information sheet. Thank you for your time and keep creating!