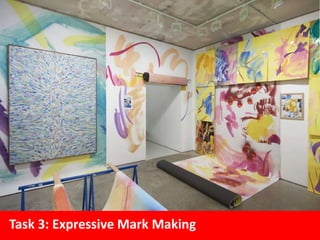
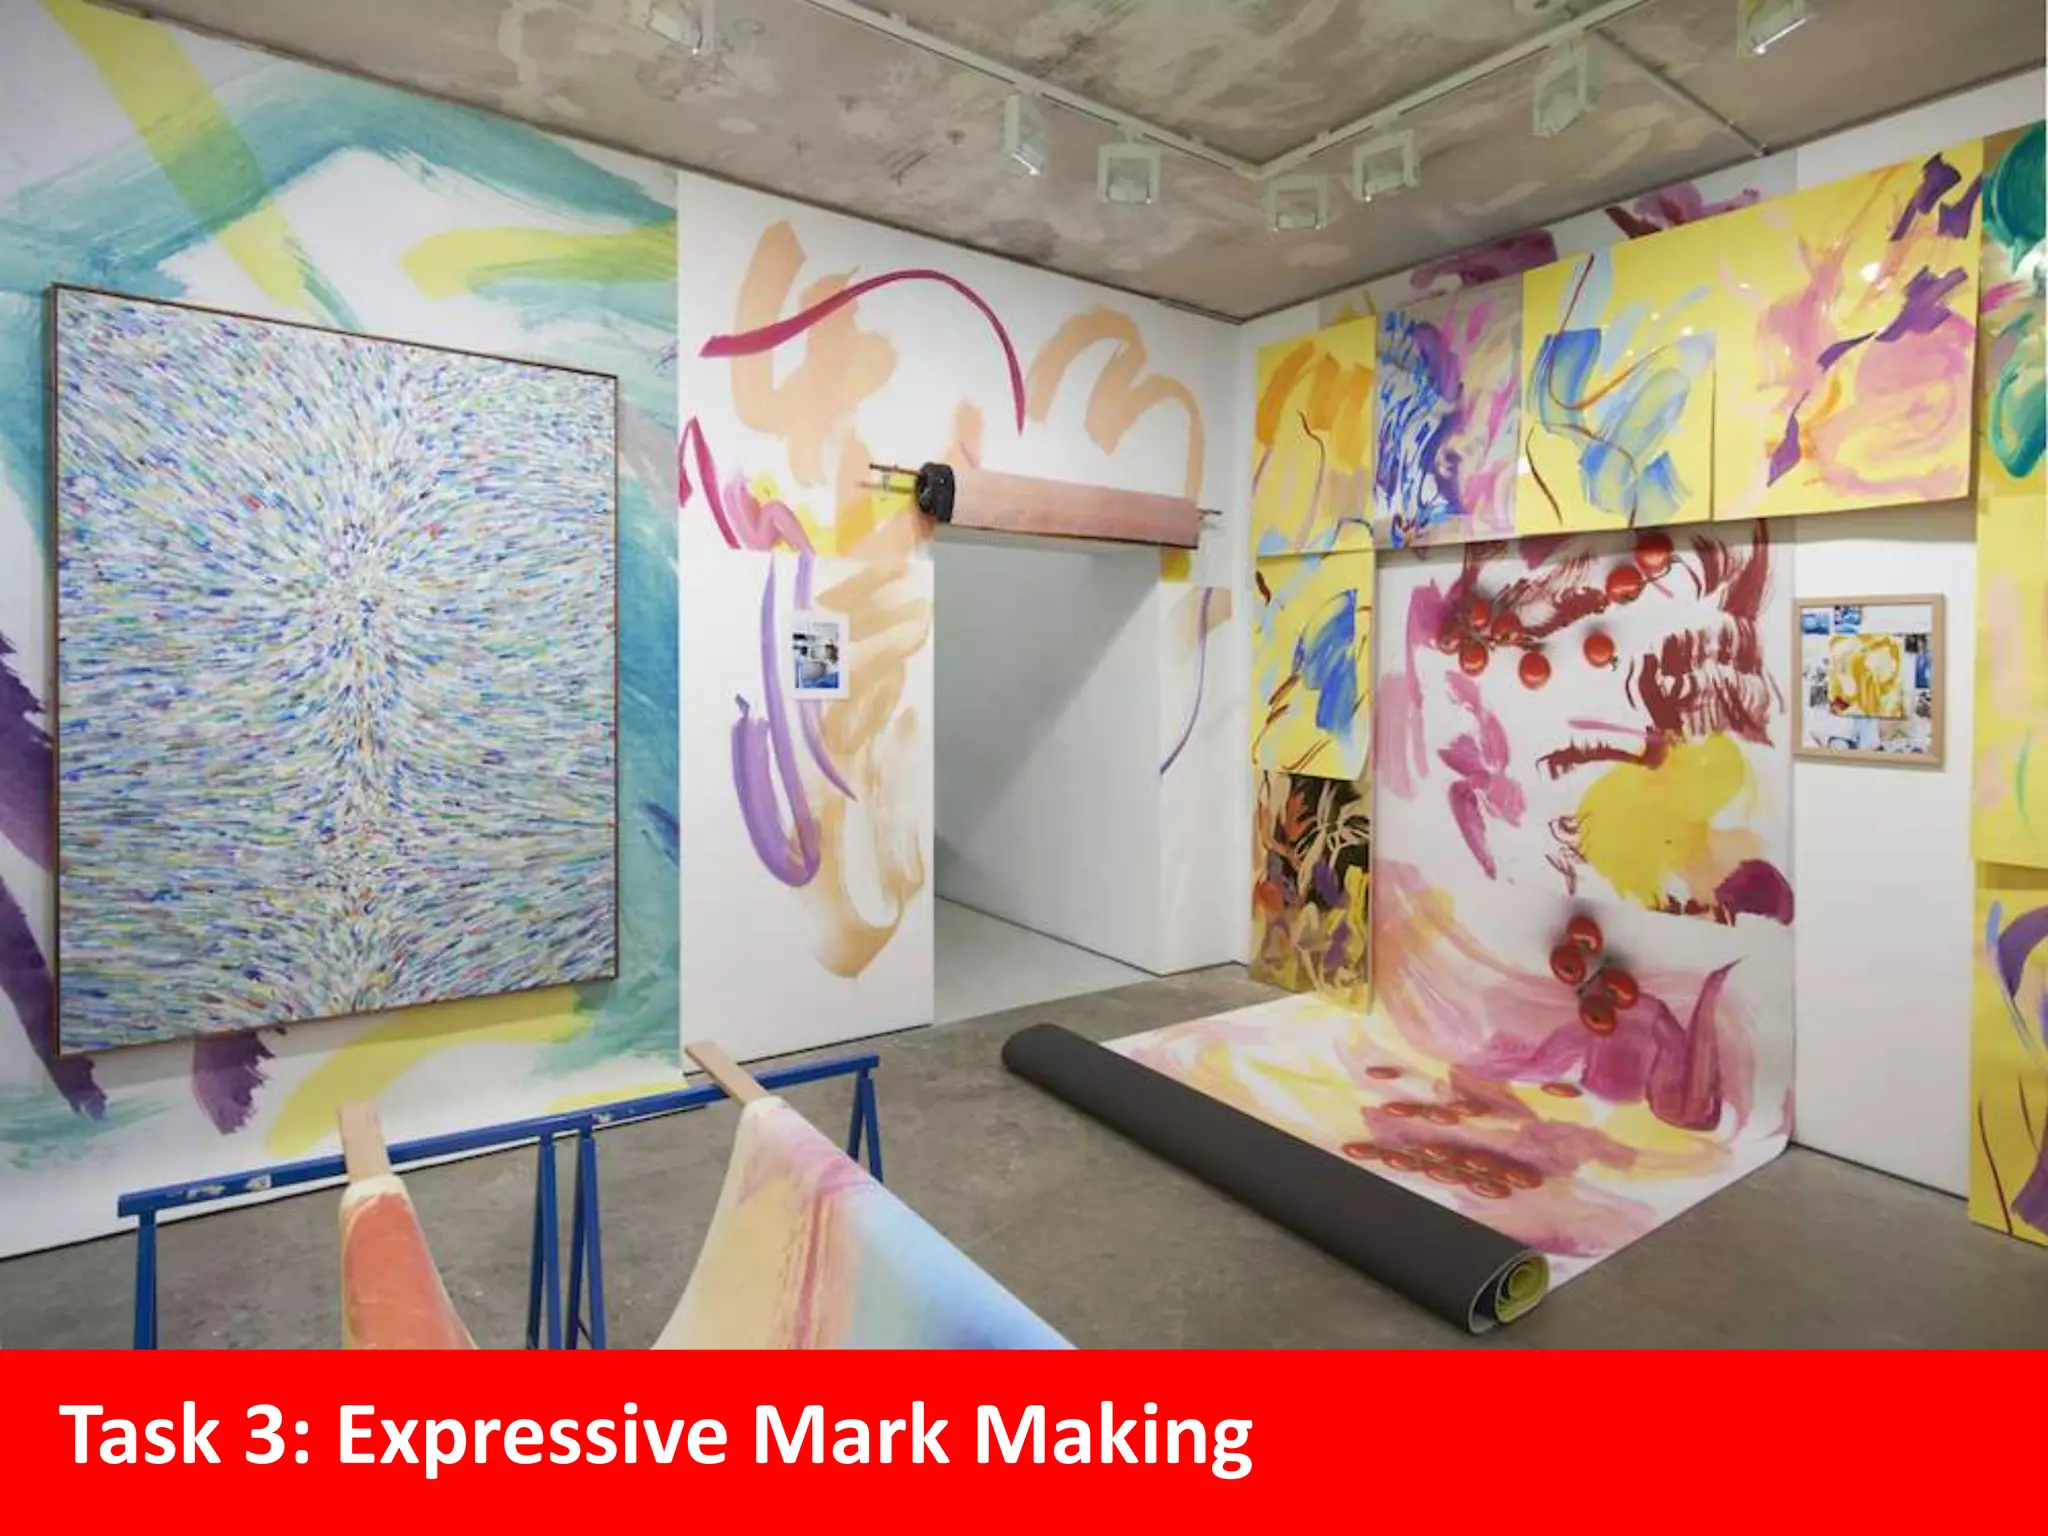
Task 3: Expressive Mark Making
MAKE YOUR OWN TOOLS
Unorthodox brushes can create exciting
marks in a drawing. These marks can, in
turn, give a drawing an added depth or
texture that couldn’t be achieved with a
conventional brush.
Use the materials provided to create
your own drawing tools.
EXPLORE MARK MAKING
Use the inks & paint provided to explore
the types of marks your DIY tools can
create.
Also explore using different concentration
of ink / paint.
In your sketchbook
Explore these different painting techniques.
Experiment with different colour combinations and paints
Sgraffito (from
Italian "graffiare")
means to scratch
into the paint to
reveal areas of the
surface underneath.
Spattering is a
technique where
the paint is being
sprayed or flicked
onto the surface of
a using
either a paint
brush, toothbrush
or a spray diffuser.
Scumbling is a
painting technique
for dry brushing a
layer of broken
colour over another
colour.
Don’t forget to label your experiments and explain the process….
Stippling is a
technique when the
brush is used end
on.
COLLABORATE
Step 1:
Select shapes and/or sections from any work you have
completed in this project so far.
Use your unorthodox tools and the materials available to
paint these selections on the large paper provided.
You can paint more than one and overlap shapes if you
wish.
Step 2:
Enjoy a conversation with marks instead
of words. Explore expressive mark
making in response to the shapes
created by each other.
Move around the piece.
Yes, we want you to work
over and around each
others paintings.
Use your phone to
photograph successful
sections…
What determines success?
How do you know?
What is your criteria? Write it down.
Step 3:
Cut out shapes and patterns and
arrange them on paper or on the
floor.
Work together to make decisions-
question your selection and
choices.
How will you document this
dialogue / process?
PHOTOGRAPH
Step 4: Drawing into Space
Respond to the painting experiments using the entire room as your canvas.
Create three-dimensional drawings from tape, string and paper. Include parts of
the collaborative painting as appropriate.
Look at work by Peggy Franck
Peggy Franck (born 1978) is a young Dutch artist working with different media, photography,
paintings, installations. Her work is based on her practice in the studio mixing everyday
objects with materials such as Plexiglas, mirror, tape etc. She knows how to skillfully mix
references for the viewers, is it a painting, a photograph, an abstract installation, her studio,
or another place?
Maintain an awareness of what others are
making. Develop a sense that you are
creating this work together.
For example, you might like to work with
someone else, to create pathways or
negative spaces between the pieces, or
visually relate your work to something
happening next to it or on the other side of
the room.
What determines success?
How do you know?
What is your criteria? Write it down.
Use your phone to
photograph successful
sections…

Task 3 Expressive Mark Making

  • 1.
    Task 3: ExpressiveMark Making
  • 2.
    MAKE YOUR OWNTOOLS Unorthodox brushes can create exciting marks in a drawing. These marks can, in turn, give a drawing an added depth or texture that couldn’t be achieved with a conventional brush. Use the materials provided to create your own drawing tools.
  • 3.
    EXPLORE MARK MAKING Usethe inks & paint provided to explore the types of marks your DIY tools can create. Also explore using different concentration of ink / paint. In your sketchbook
  • 4.
    Explore these differentpainting techniques. Experiment with different colour combinations and paints Sgraffito (from Italian "graffiare") means to scratch into the paint to reveal areas of the surface underneath. Spattering is a technique where the paint is being sprayed or flicked onto the surface of a using either a paint brush, toothbrush or a spray diffuser. Scumbling is a painting technique for dry brushing a layer of broken colour over another colour. Don’t forget to label your experiments and explain the process…. Stippling is a technique when the brush is used end on.
  • 5.
    COLLABORATE Step 1: Select shapesand/or sections from any work you have completed in this project so far. Use your unorthodox tools and the materials available to paint these selections on the large paper provided. You can paint more than one and overlap shapes if you wish.
  • 6.
    Step 2: Enjoy aconversation with marks instead of words. Explore expressive mark making in response to the shapes created by each other. Move around the piece. Yes, we want you to work over and around each others paintings.
  • 7.
    Use your phoneto photograph successful sections… What determines success? How do you know? What is your criteria? Write it down.
  • 8.
    Step 3: Cut outshapes and patterns and arrange them on paper or on the floor. Work together to make decisions- question your selection and choices. How will you document this dialogue / process? PHOTOGRAPH
  • 9.
    Step 4: Drawinginto Space Respond to the painting experiments using the entire room as your canvas. Create three-dimensional drawings from tape, string and paper. Include parts of the collaborative painting as appropriate.
  • 10.
    Look at workby Peggy Franck
  • 11.
    Peggy Franck (born1978) is a young Dutch artist working with different media, photography, paintings, installations. Her work is based on her practice in the studio mixing everyday objects with materials such as Plexiglas, mirror, tape etc. She knows how to skillfully mix references for the viewers, is it a painting, a photograph, an abstract installation, her studio, or another place?
  • 13.
    Maintain an awarenessof what others are making. Develop a sense that you are creating this work together. For example, you might like to work with someone else, to create pathways or negative spaces between the pieces, or visually relate your work to something happening next to it or on the other side of the room.
  • 15.
    What determines success? Howdo you know? What is your criteria? Write it down. Use your phone to photograph successful sections…