This document provides an overview of preparing to switch from Windows to Mac. Some key points:
- Reasons for switching include Mac stability, lack of viruses, ease of use, attractive software and details, and Apple's current success.
- Challenges include the work of switching habits, Macs sometimes seeming harder to use due to fewer resources than Windows, and connecting to Windows networks can be tricky.
- Tips for addressing challenges include slowing down during the transition, taking advantage of Apple Stores and Genius Bars for help, forming user groups, and realizing Macs typically need less support. Connectivity issues are a pain but Apple works to enable compatibility.
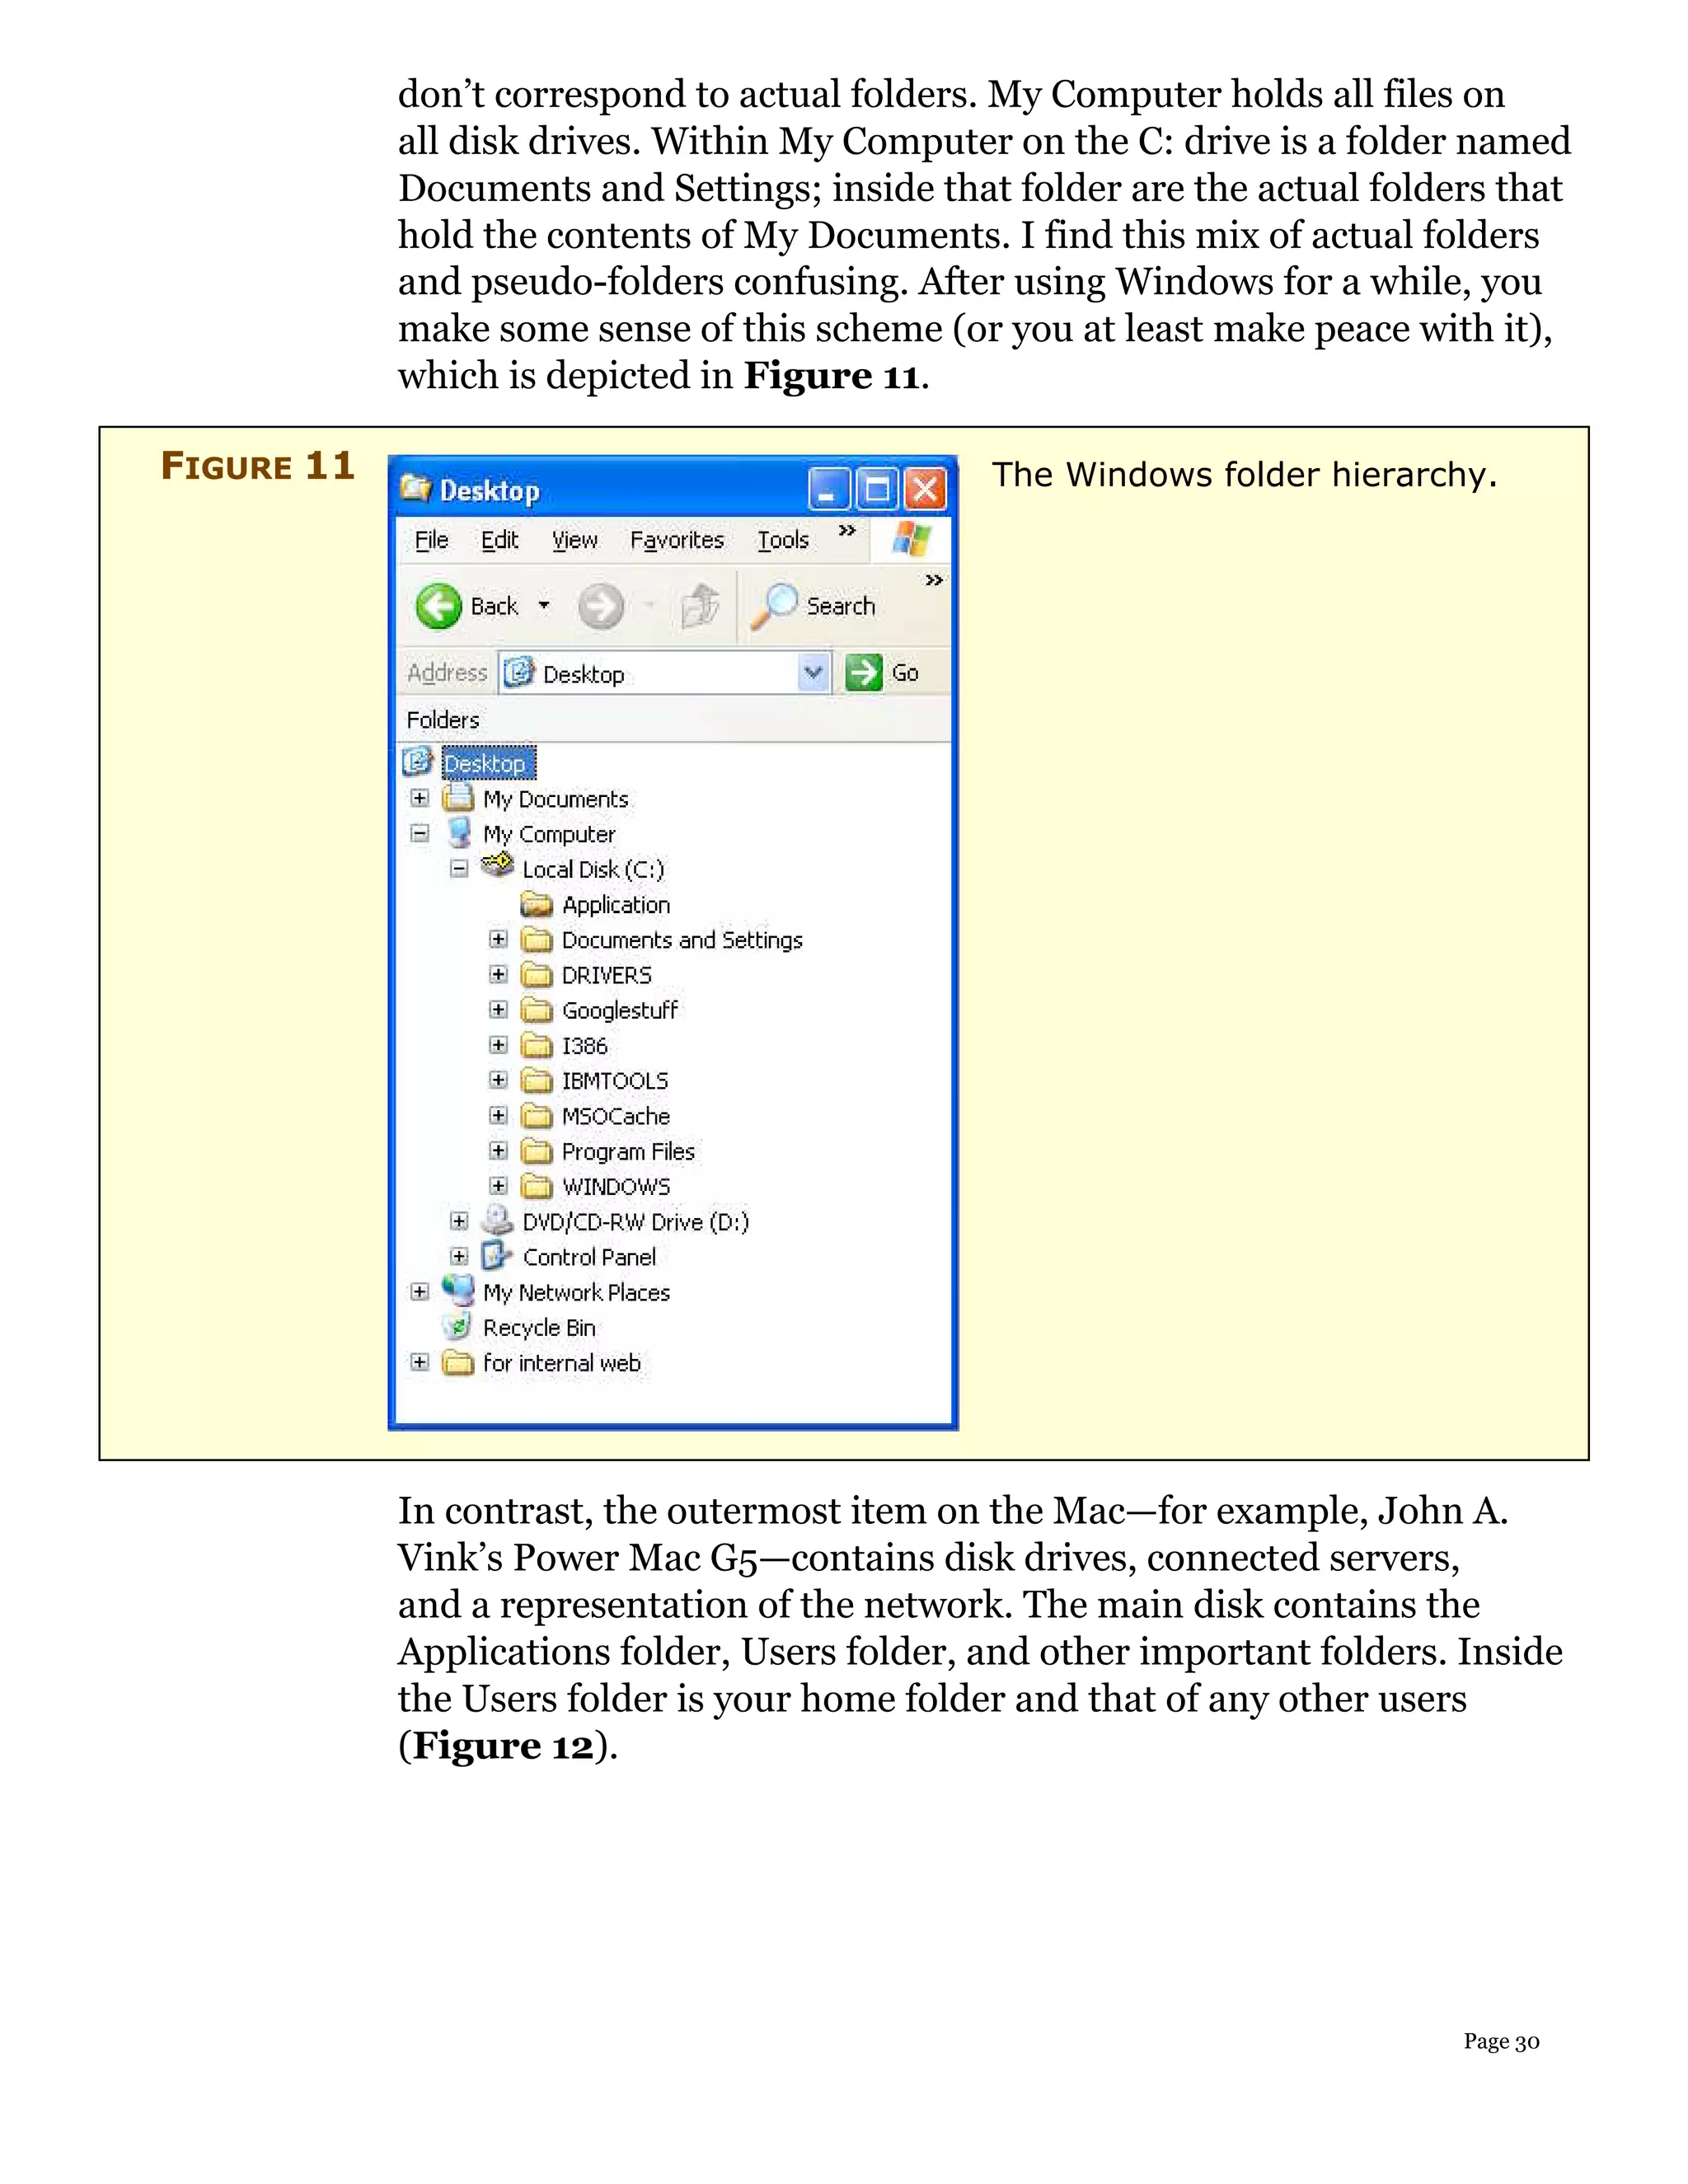
![FIGURE 4 The PowerBook is avail-
able in various screen
sizes: 12-, 15-, and 17-
inch. It includes nifty
features such as a backlit
keyboard and a trackpad
that can be used for
scrolling.
FIGURE 5 The iBook is the Power-
Book’s less expensive
cousin. It lacks a few of
the PowerBook’s features
and is available only in
12- and 14-inch screen
sizes, but it can cost
substantially less.
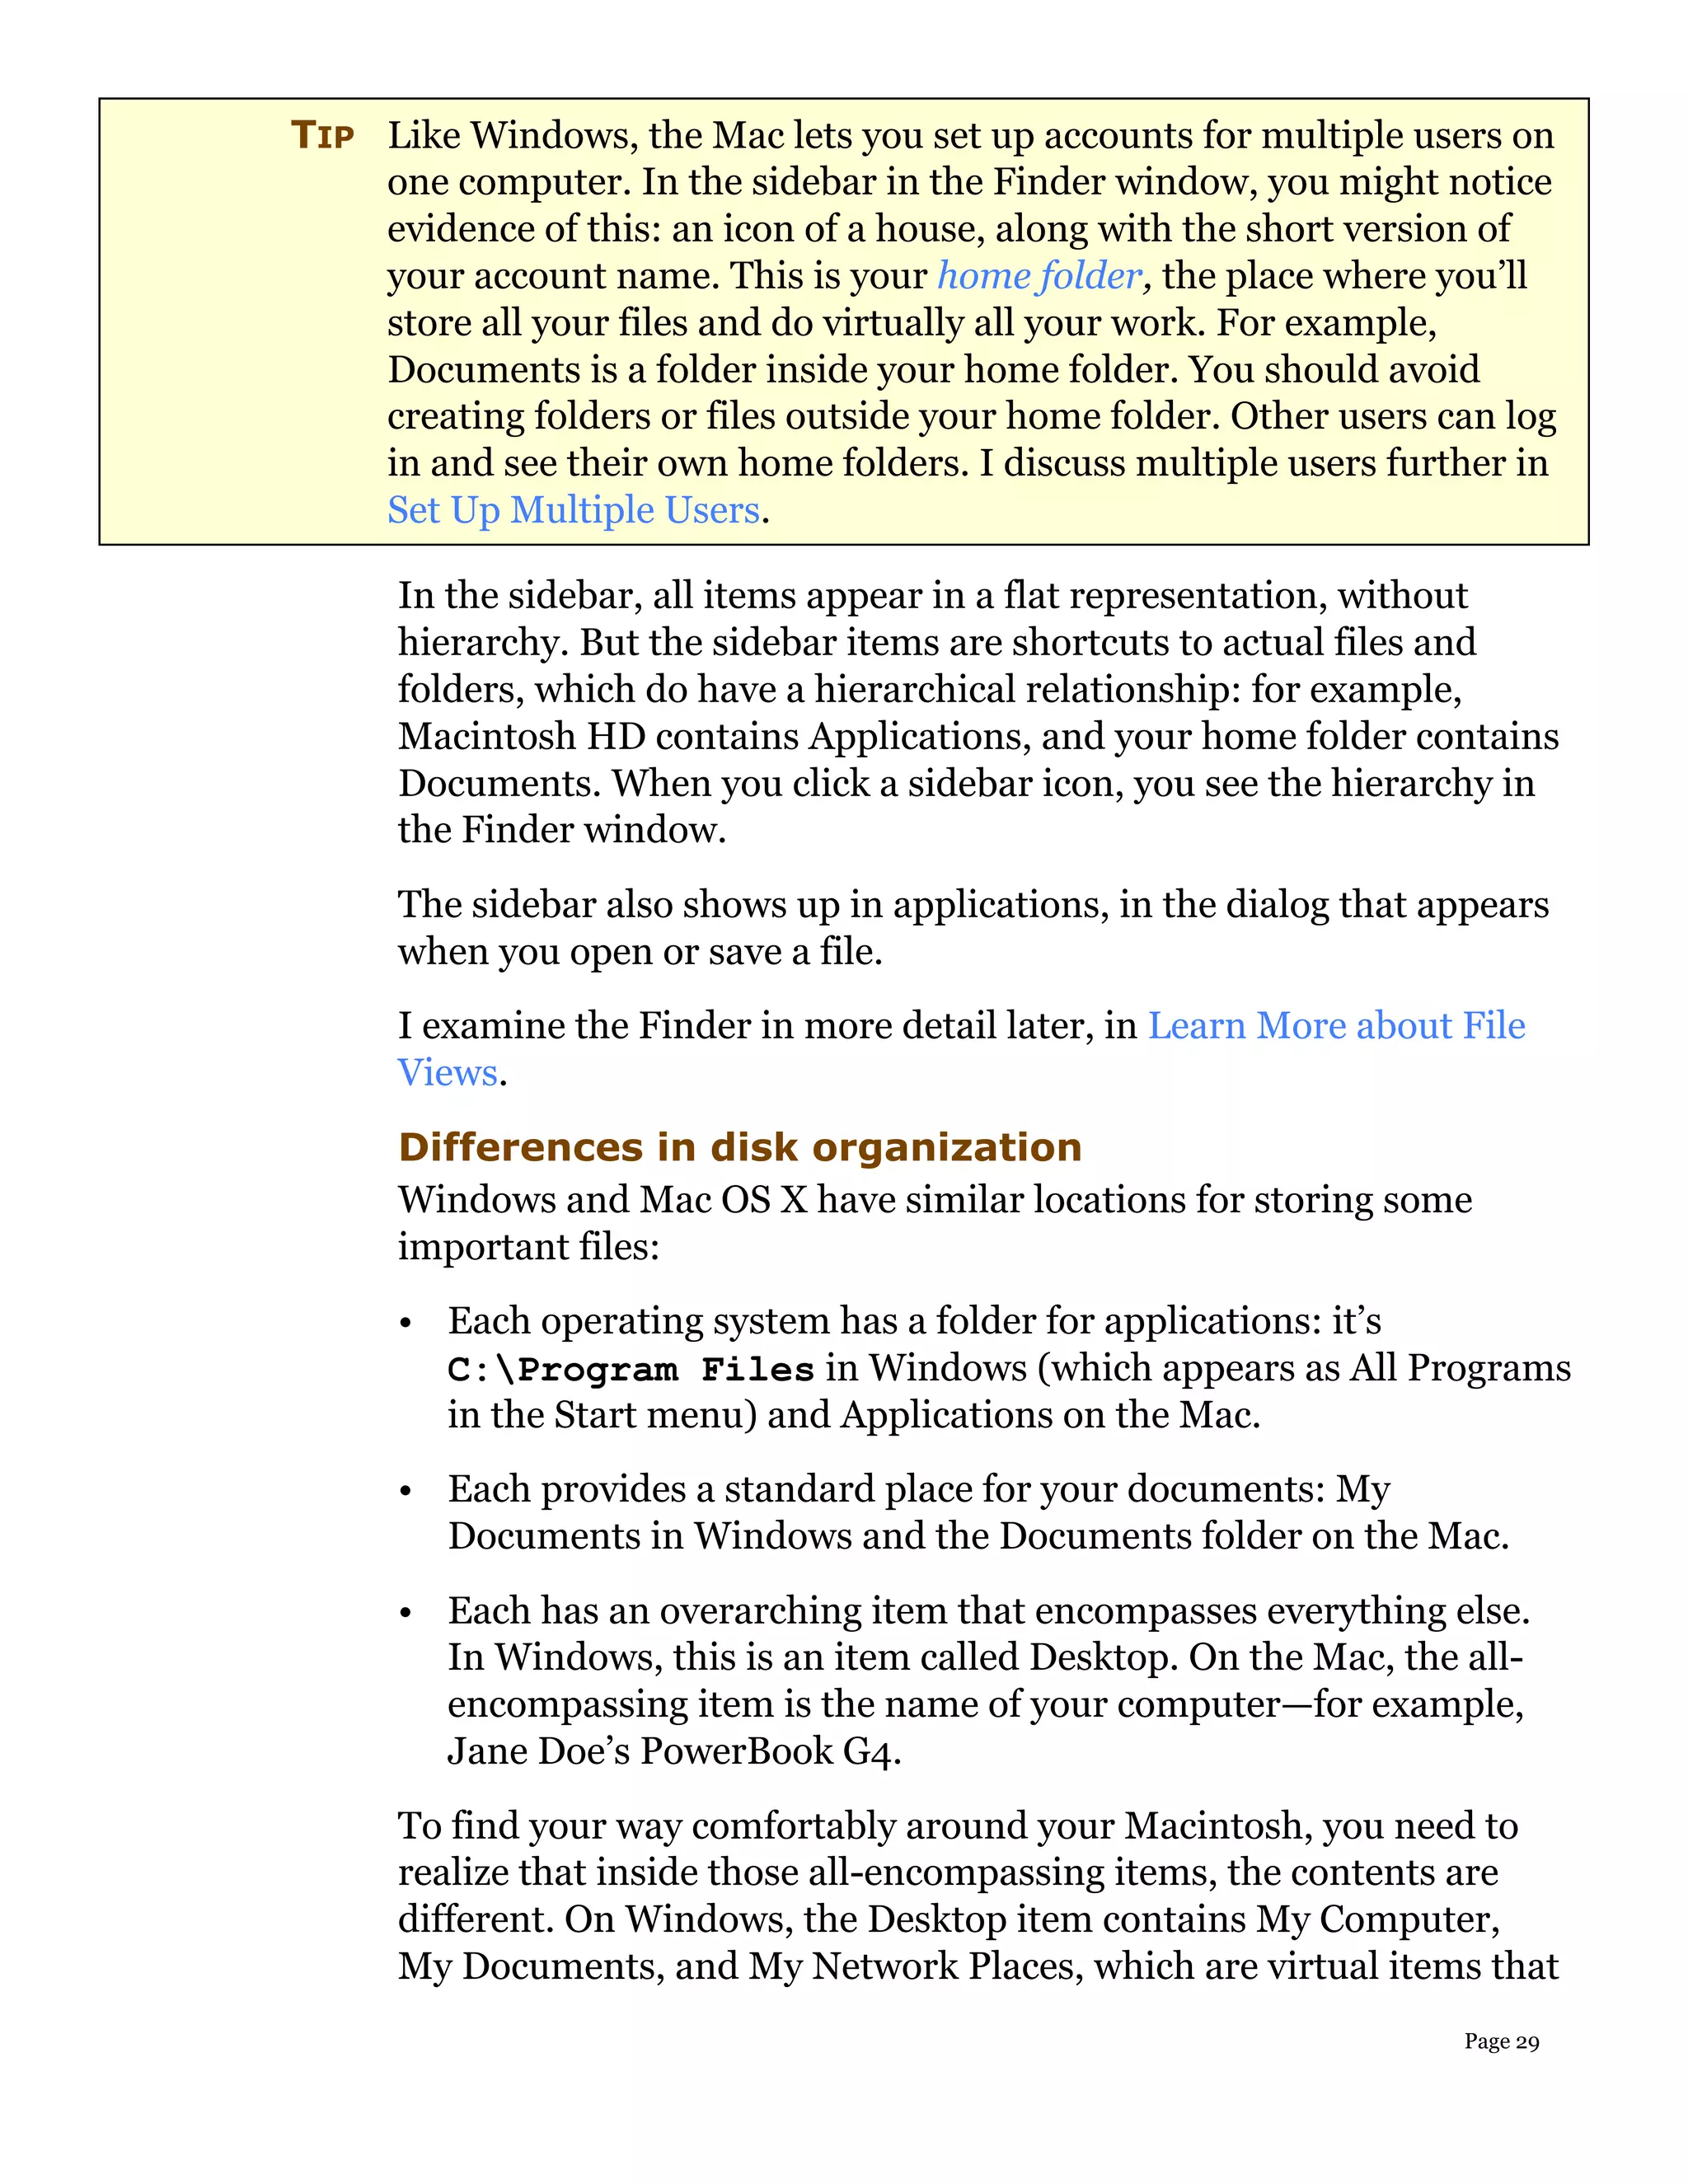
NOTE Although this general description of Apple’s Macintosh lines is
correct as of November 2005, Apple is always making new stuff, so
the product line is bound to change in the future. In particular, with
Apple’s transition to Intel processors just around the corner (see the
sidebar Switching to Intel), big changes might be afoot. (I don’t know
anything about Apple’s plans for new Macs, and [almost] nobody else
does either. Apple loves to surprise everyone and is notorious for its
secrecy. Of course, this vacuum of official information leads to a
flood of speculation and rumors about what Apple is up to. Rumor-
mongering is a popular pastime among Macintosh fans.)
For detailed information about selecting the right Mac for you,
I suggest that you read Take Control of Buying a Mac
(http://www.takecontrolbooks.com/buying-mac.html).
Page 14](https://image.slidesharecdn.com/takecontrolofswitchingtothemac1-0-100824141137-phpapp02/75/Take-control-of-switching-to-the-MAC-14-2048.jpg)