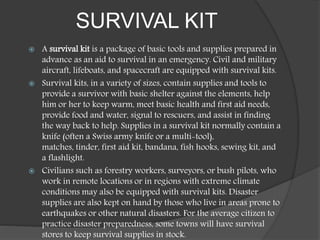
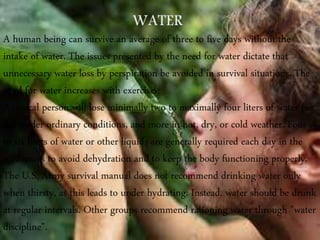
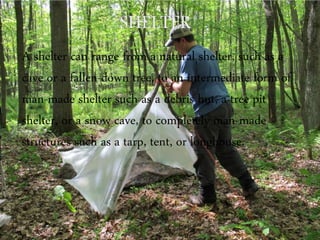
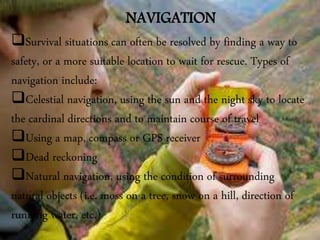
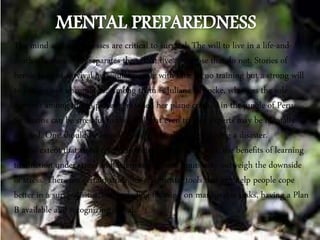
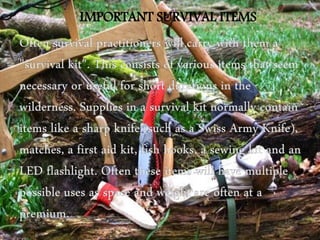
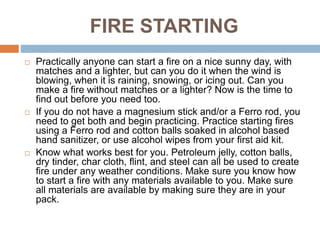
3. SURVIVAL KIT
A survival kit is a package of basic tools and supplies prepared in
advance as an aid to survival in an emergency. Civil and military
aircraft, lifeboats, and spacecraft are equipped with survival kits.
Survival kits, in a variety of sizes, contain supplies and tools to
provide a survivor with basic shelter against the elements, help
him or her to keep warm, meet basic health and first aid needs,
provide food and water, signal to rescuers, and assist in finding
the way back to help. Supplies in a survival kit normally contain a
knife (often a Swiss army knife or a multi-tool),
matches, tinder, first aid kit, bandana, fish hooks, sewing kit, and
a flashlight.
Civilians such as forestry workers, surveyors, or bush pilots, who
work in remote locations or in regions with extreme climate
conditions may also be equipped with survival kits. Disaster
supplies are also kept on hand by those who live in areas prone to
earthquakes or other natural disasters. For the average citizen to
practice disaster preparedness, some towns will have survival
stores to keep survival supplies in stock.
5. A human being can survive an average of three to five days without the
intake of water. The issues presented by the need for water dictate that
unnecessary water loss by perspiration be avoided in survival situations. The
need for water increases with exercise.
A typical person will lose minimally two to maximally four liters of water per
day under ordinary conditions, and more in hot, dry, or cold weather. Four
to six liters of water or other liquids are generally required each day in the
wilderness to avoid dehydration and to keep the body functioning properly.
The U.S. Army survival manual does not recommend drinking water only
when thirsty, as this leads to under hydrating. Instead, water should be drunk
at regular intervals. Other groups recommend rationing water through "water
discipline".
6. A shelter can range from a natural shelter, such as a
cave or a fallen-down tree, to an intermediate form of
man-made shelter such as a debris hut, a tree pit
shelter, or a snow cave, to completely man-made
structures such as a tarp, tent, or longhouse.
7.
8. NAVIGATION
Survival situations can often be resolved by finding a way to
safety, or a more suitable location to wait for rescue. Types of
navigation include:
Celestial navigation, using the sun and the night sky to locate
the cardinal directions and to maintain course of travel
Using a map, compass or GPS receiver
Dead reckoning
Natural navigation, using the condition of surrounding
natural objects (i.e. moss on a tree, snow on a hill, direction of
running water, etc.)
9. The mind and its processes are critical to survival. The will to live in a life-and-
death situation often separates those that live and those that do not. Stories of
heroic feats of survival by regular people with little or no training but a strong will
to live are not uncommon. Among them is Juliane Koepcke, who was the sole
survivor among the 93 passengers when her plane crashed in the jungle of Peru.
Situations can be stressful to the level that even trained experts may be mentally
affected. One should be mentally and physically tough during a disaster.
To the extent that stress results from testing human limits, the benefits of learning
to function under stress and determining those limits may outweigh the downside
of stress. There are certain strategies and mental tools that can help people cope
better in a survival situation, including focusing on manageable tasks, having a Plan
B available and recognizing denial.
13. SHELTER
Pull out your tarps, ponchos and even an old
parachute and start practicing. Look at various
ways of using your tarp or poncho as shelters.
You can even use a Mylar blanket as emergency
shelter along with certain plastic sheeting.
You can string a line and drape the material over
the line and stake down for a classic pup tent
style, or gather some saplings and construct a
teepee using the tarp, poncho, plastic or
parachute as cover for it. Know that you can
construct a shelter to cover you from rain, snow or
sun, before you find yourself lost or stranded.
14. ARCHERY/SLINGSHOT/SPEAR
SKILLS
Safety first, and this means no children or pets in the backyard, while
practicing and that you have sufficient backstop materials for the
projectiles. Firearms are not always available but you can make a longbow,
slingshot and spear from materials on you and from what you find in your
environment.
Obviously the way to ensure you have the means to hunt is to make sure
you never leave on an outdoor adventure without a longbow (folding ones
are available that can be carried in a pack), without a slingshot and the
means to cut a sapling and sharpen into a spear.
Can you hit your target with an arrow, or do you only think you can, so find
out if you can. Then make sure through practice that you can always bring
game down with a bow if needed and the same applies to the slingshot,
practice will make perfect.
Spears in most cases would be ideal for “spear fishing” or for self-defense
against animals or humans. Unless, the spear is well crafted and balanced
properly throwing a spear to kill game is not very productive, but it is one
more tool in your survival toolbox and you never will know until you do
practice.
15. FIRE STARTING
Practically anyone can start a fire on a nice sunny day, with
matches and a lighter, but can you do it when the wind is
blowing, when it is raining, snowing, or icing out. Can you
make a fire without matches or a lighter? Now is the time to
find out before you need too.
If you do not have a magnesium stick and/or a Ferro rod, you
need to get both and begin practicing. Practice starting fires
using a Ferro rod and cotton balls soaked in alcohol based
hand sanitizer, or use alcohol wipes from your first aid kit.
Know what works best for you. Petroleum jelly, cotton balls,
dry tinder, char cloth, flint, and steel can all be used to create
fire under any weather conditions. Make sure you know how
to start a fire with any materials available to you. Make sure
all materials are available by making sure they are in your
pack.
16. FORAGING FOR FOOD EDIBLES
IN YOUR BACKYARD
Unless you routinely spray herbicides to kill weeds
in your yard, you can find edibles weeds growing
at practically any time of the year. These same
weeds can be found in a wilderness environment
as well, and what better place to learn to identify
the edible ones than in your own backyard.
The following is just a sampling of what you may
find in your backyard. The list is common weeds
and even flowers that are edible and can be found
in your yard and in many wilderness
environments. Make sure you research carefully
before picking and eating any plant and have
reliable pictures for reference of all the plants.
17. SOME 10 OF THE FOOD
EDIBLES:
Dandelion
Plantain
Miners lettuce
Lamb’s-
quarters
Burdock
Stinging Nettles
Purslane
Cattails
Daylilies
Primrose
18. OUTDOOR COOKING
If lost or stranded, you will have to cook over open
flames so what better place to practice than over a
campfire in your own backyard. Food cannot just be
tossed into the coals or flames and then dragged out
when you think it may be done. Learn how to fashion
cooking grates using green saplings, or use flat
heated rocks as frying/cooking surface. You may think
you know how to cook, because the microwave is
handy, but it takes some knowledge and skill to cook
over an open flame in all kinds of weather.
The above list is just a few of the skills needed to
survive. With some imagination, you can come up with
other skills that maybe needed, and when you do,
start practicing them so you can master the art of
survival.
22. FIRST AID FOR ELECTROCUTION
Treatment for electrical shocks:
Before doing anything else, remember that your first priority is to ensure your own safety. Do
not touch the casualty if they are still in contact with the appliance that has caused the shock.
If they are still in contact with the electrical source, they will be 'live' and you risk
electrocution to yourself.
Turn off the source of the electricity, if possible, to break contact between the casualty and
the electrical supply. Switch off the supply at the mains or meter point if possible, otherwise
remove the plug or wrench the cable free.
Alternatively, you can move the source of the shock away from you and the casualty. Stand
on some dry, insulating material such as a wooden box, plastic mat or telephone directory.
Using a wooden pole or broom, push the casualty's limb away from the electrical source or
push the source away from them.
If it is not possible to break the contact using a wooden pole or broom, loop a length of rope
around the casualty's ankles or under their arms. Take great care not to touch them while
you are doing this. Once you have looped the rope around them, use this to pull them away
from the source of the electrical current.
Once you have broken the contact between the casualty and the source of the shock, conduct
the primary survey - response, airway, circulation, breathing - and treat any urgent
condition found. Call 999 / 112 for the emergency services.
24. FIRST AID FOR FRACTURES
If the person is unconscious and/or not breathing or moving, call 911 for
medical help and begin CPR.
Stop any bleeding. Apply pressure to the wound with a sterile bandage, a
clean cloth, or a clean piece of clothing.
While waiting for medical care, give first aid treatment for shock if the
victim has symptoms such as dizziness, weakness, pale and clammy skin,
shortness of breath, and increased heart rate. The person should lie quietly
with the feet elevated about 12 inches. Cover him or her with a blanket to
maintain body warmth.
Immobilize the injured area if you will be moving the victim. Do not move
them if there is a back or neck injury. Make a splint by folding a piece of
cardboard or newspaper or a magazine, then placing it gently under the
limb. Carefully tie the splint to the injured area with pieces of cloth.
Apply a cold compress or ice in a plastic bag to the injured area. Make sure
to place a cloth between the skin and the ice so you don’t damage the skin.
26. FIRST AID FOR BLEEDING WOUND
Help the person to remain calm. If the cut is large or bleeding heavily,
have them lie down. If the wound is on an arm or leg, raise the limb
above the heart to slow bleeding.
Remove obvious debris from the wound, such as sticks or grass. If the
object is embedded in the body, do NOT remove it.
If the cut is small, wash it out with soap and water. Do NOT clean a
large wound.
After putting on clean latex gloves, apply firm pressure to the wound
with a folded cloth or bandage for about 10 minutes. Do not remove the
bandage to look at the wound during this time, as it may begin
bleeding again. If blood soaks through, add another cloth or bandage
and continue holding pressure on the cut for an additional 10 minutes.
When bleeding has stopped, tape a clean bandage over the cut.
27. FIRST AID FOR DOG BITE
To care for a dog bite injury at home:
Place a clean towel over the injury to stop any
bleeding.
Try to keep the injured area elevated.
Wash the bite carefully with soap and water.
Apply a sterile bandage to the wound.
Apply antibiotic ointment to the injury every day
to prevent infection.