Download to read offline


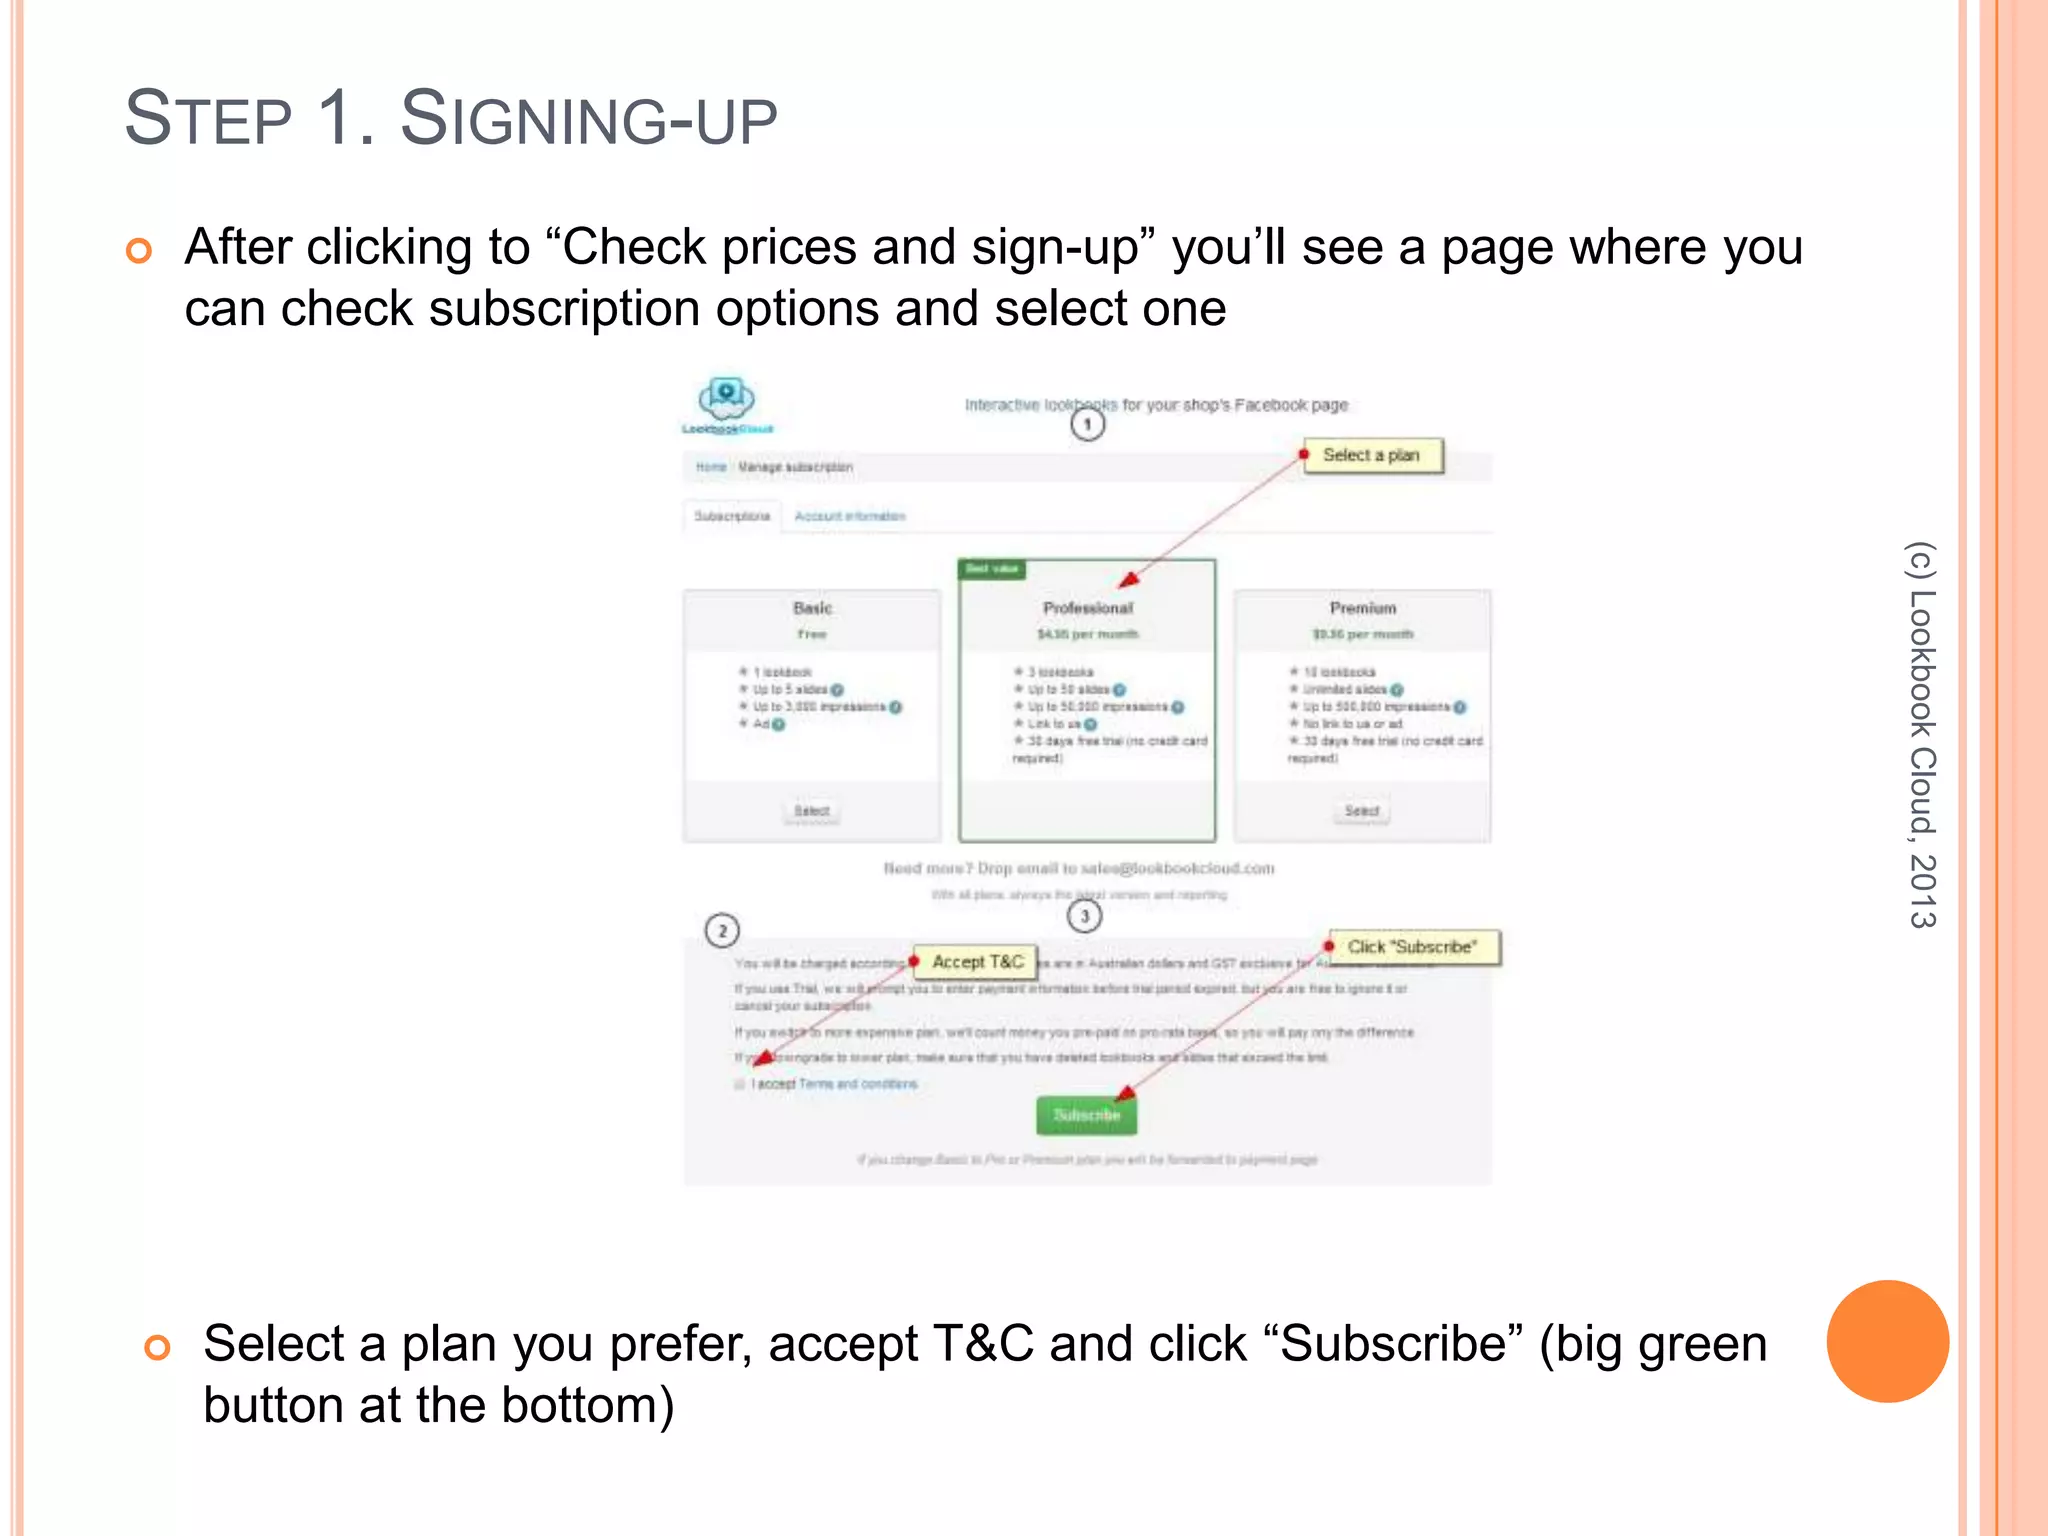
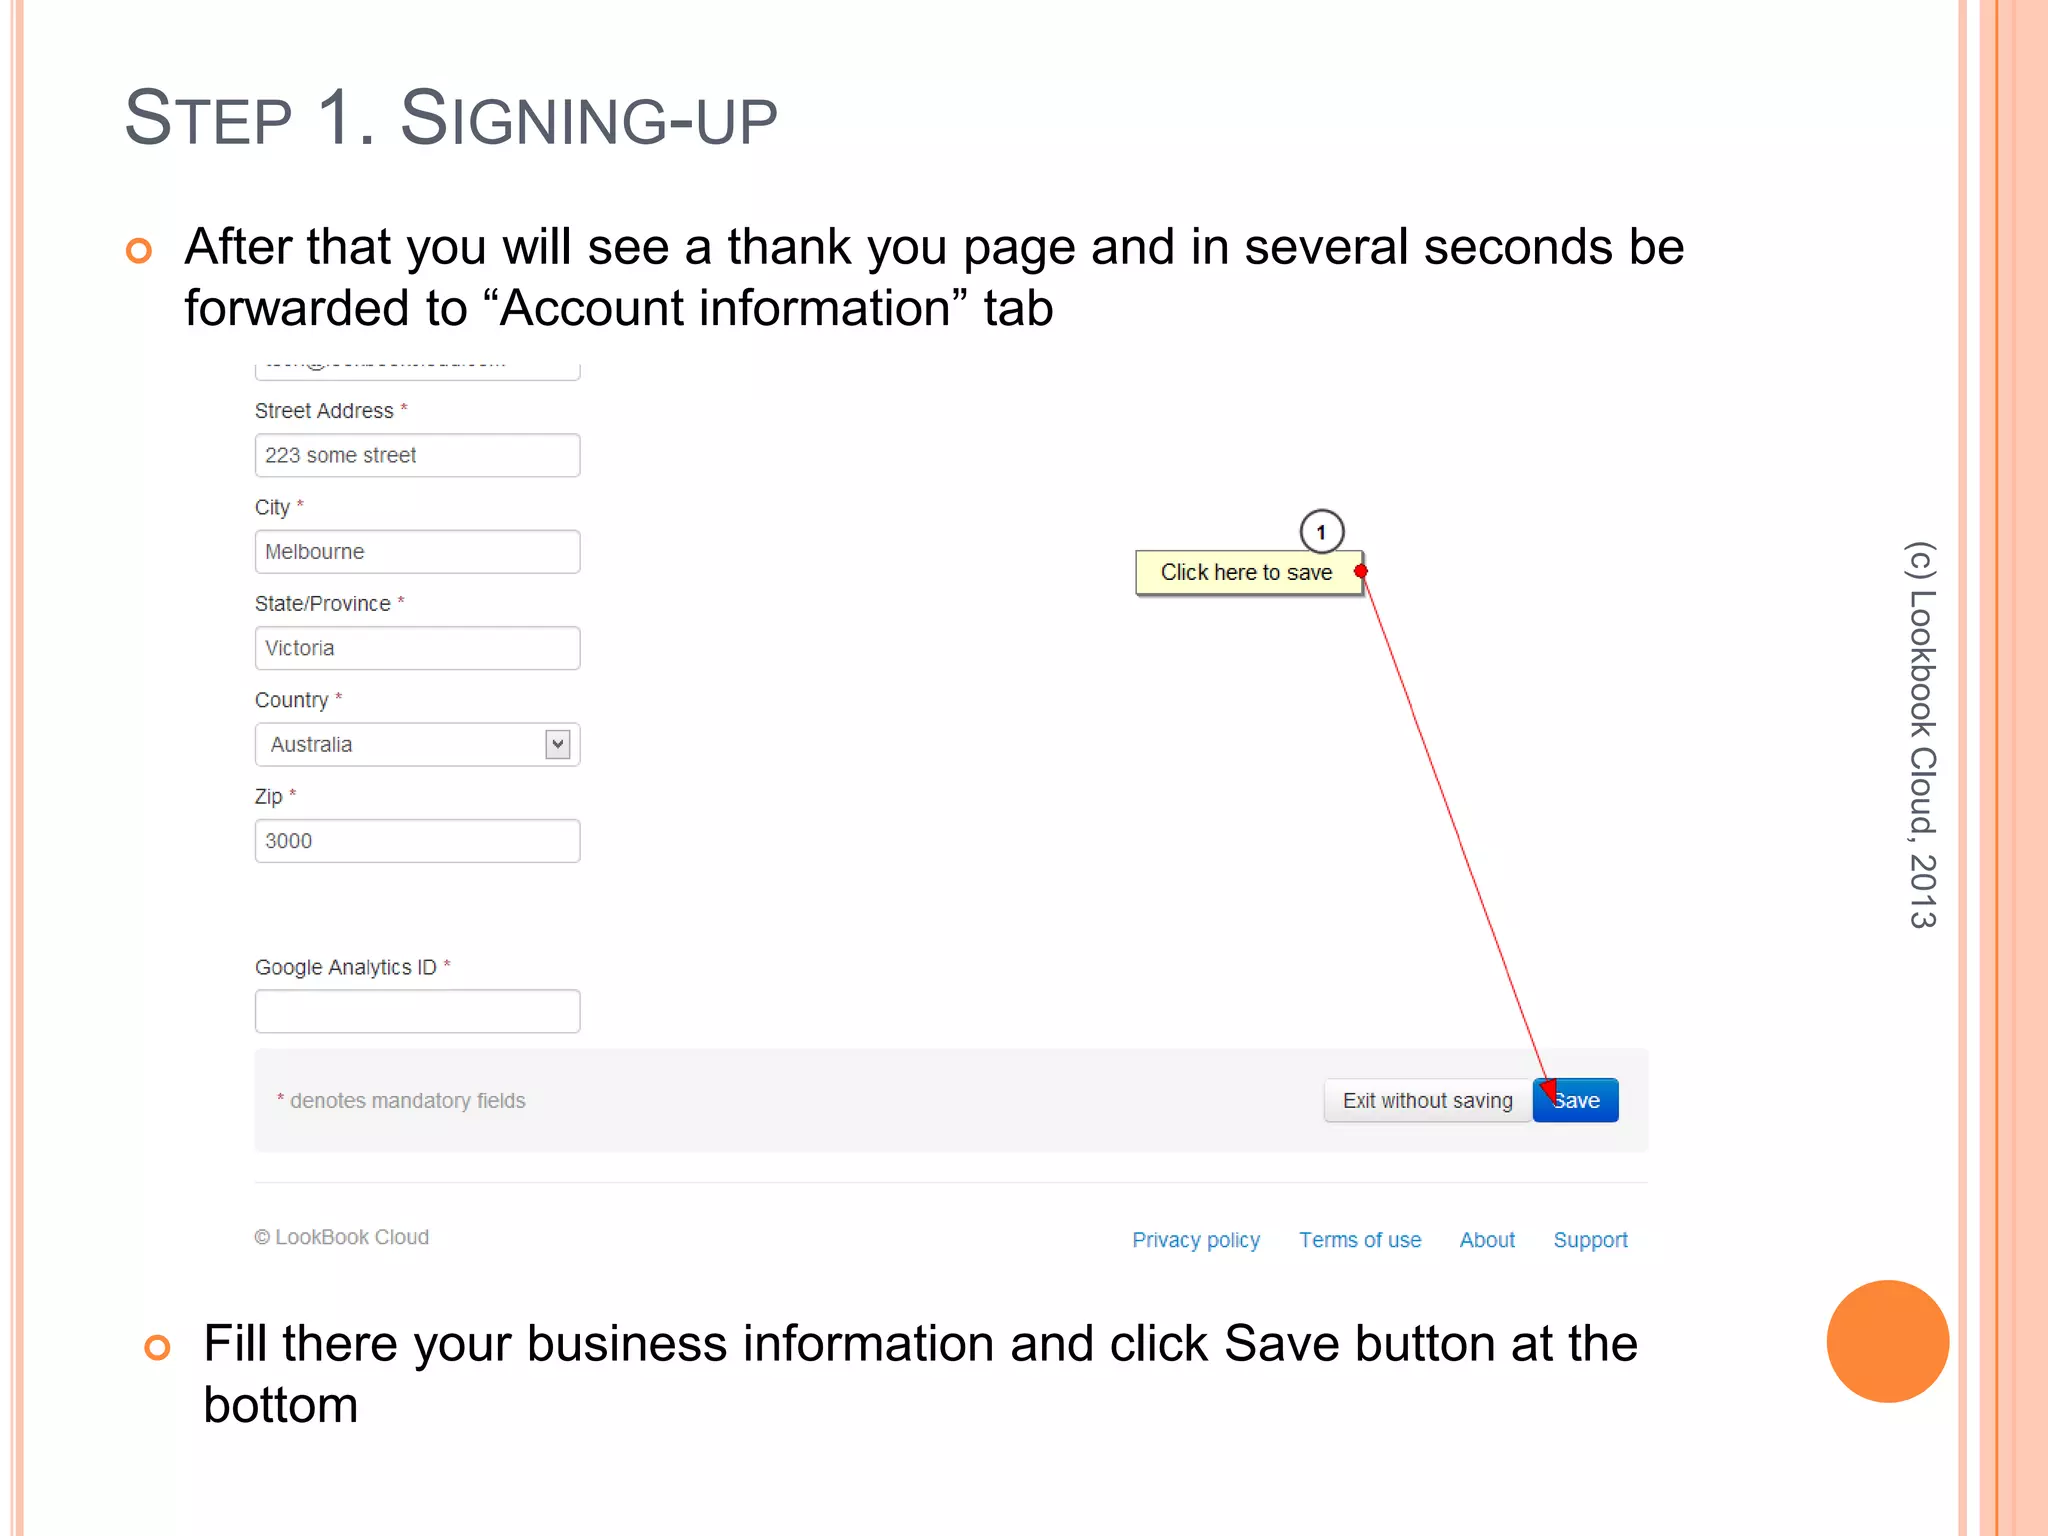
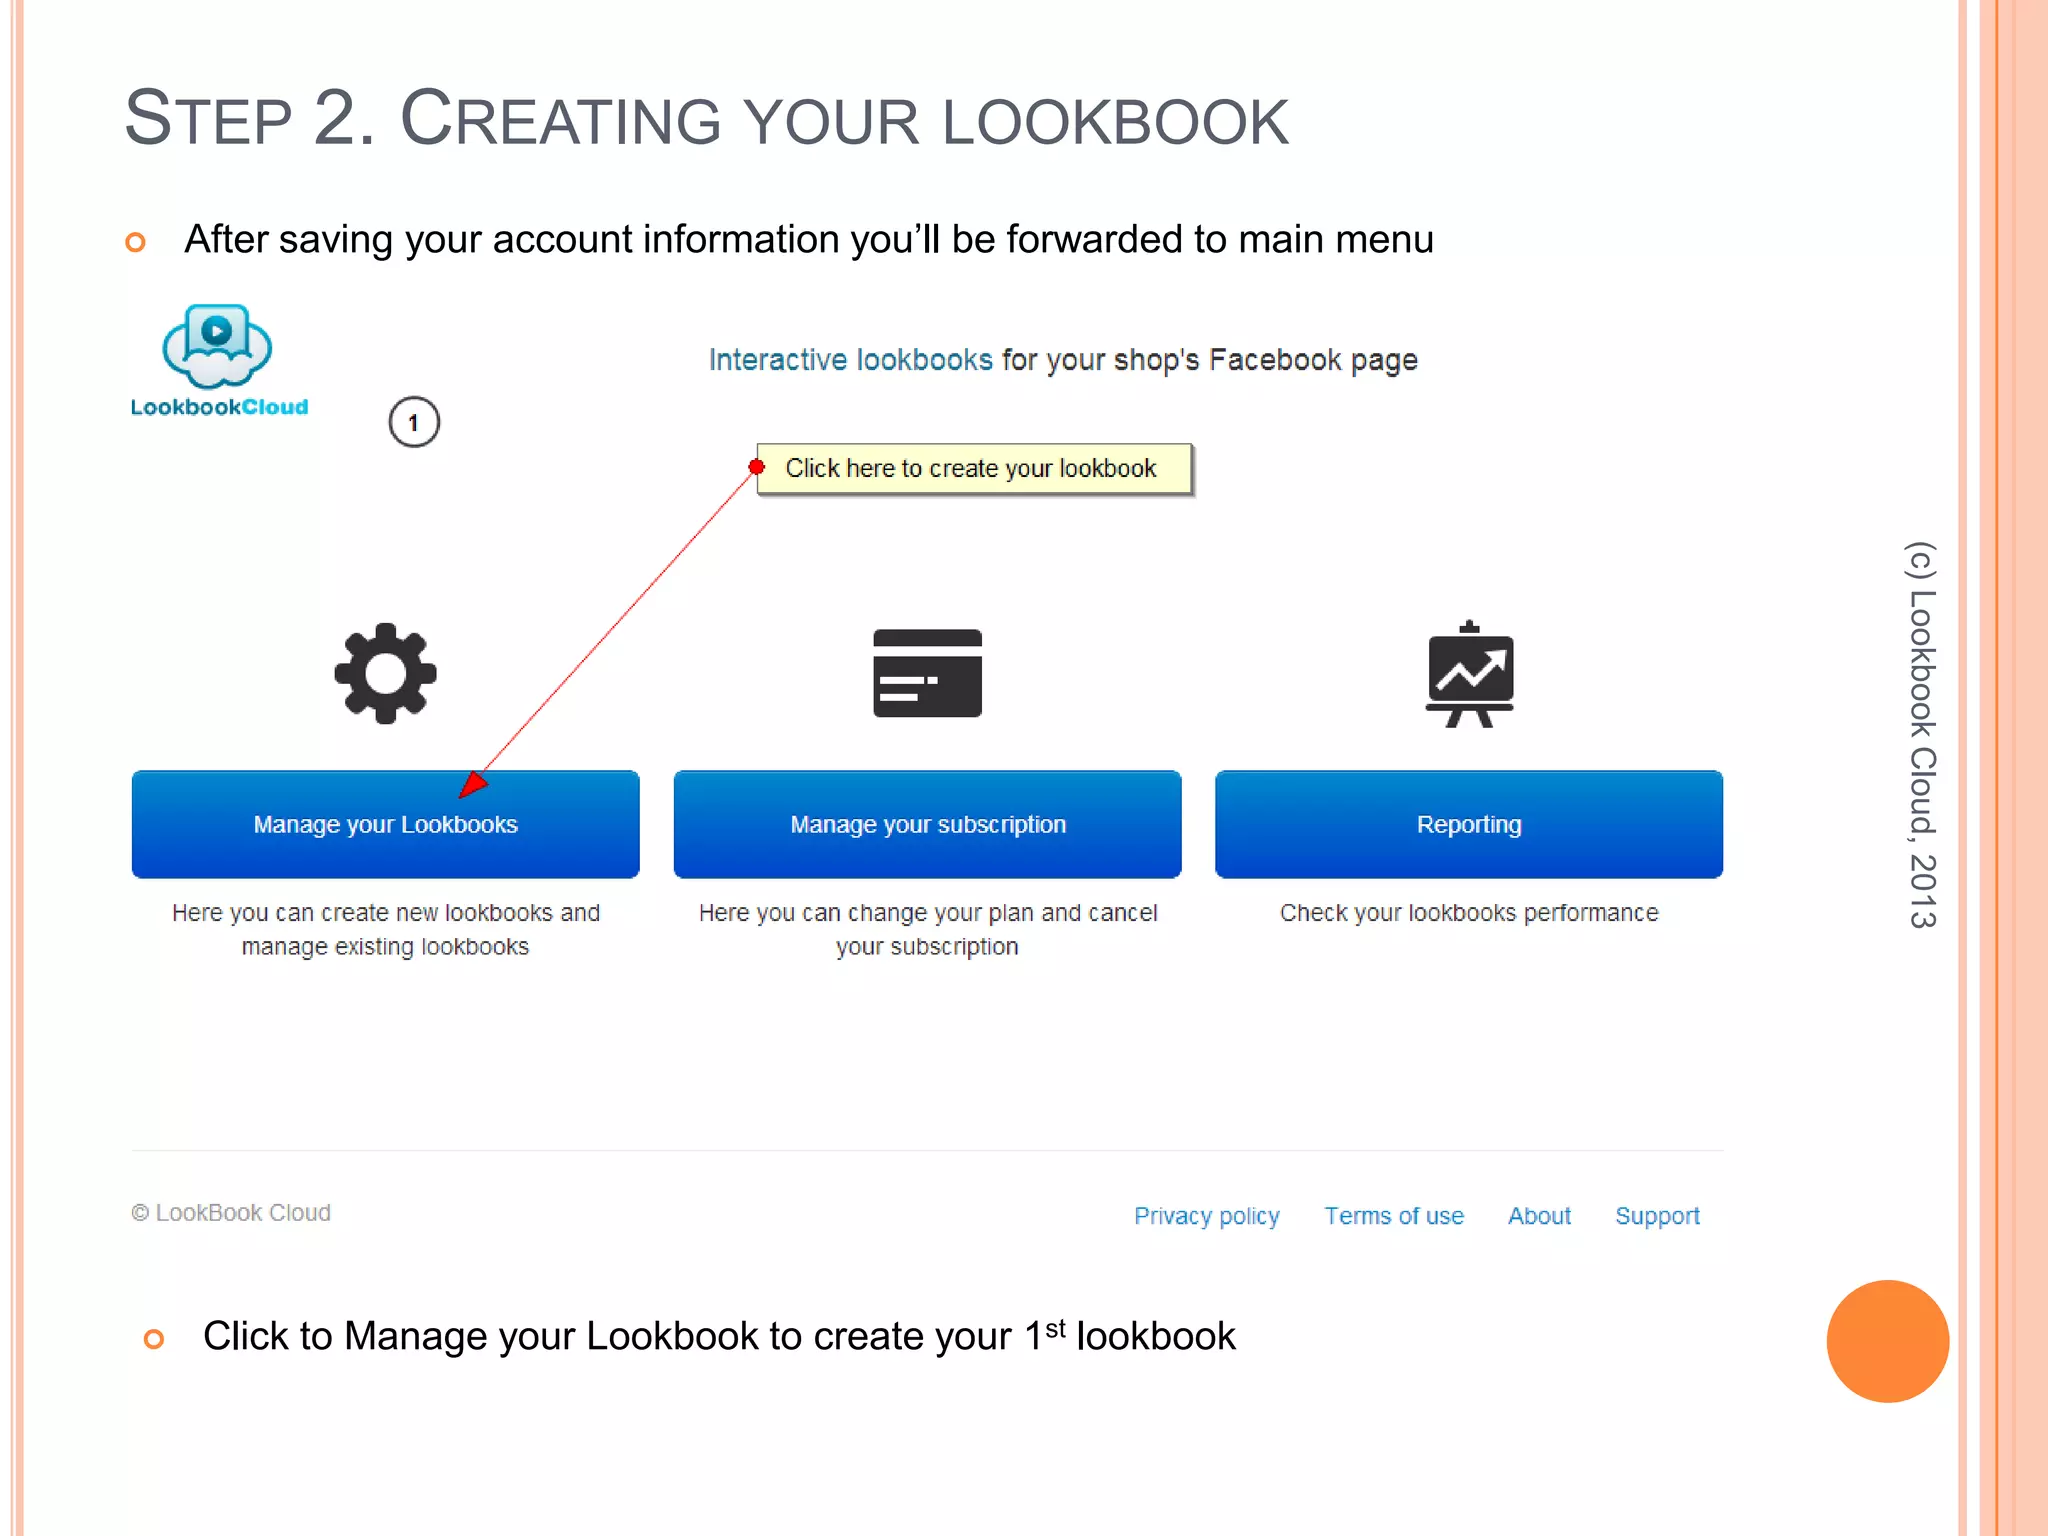
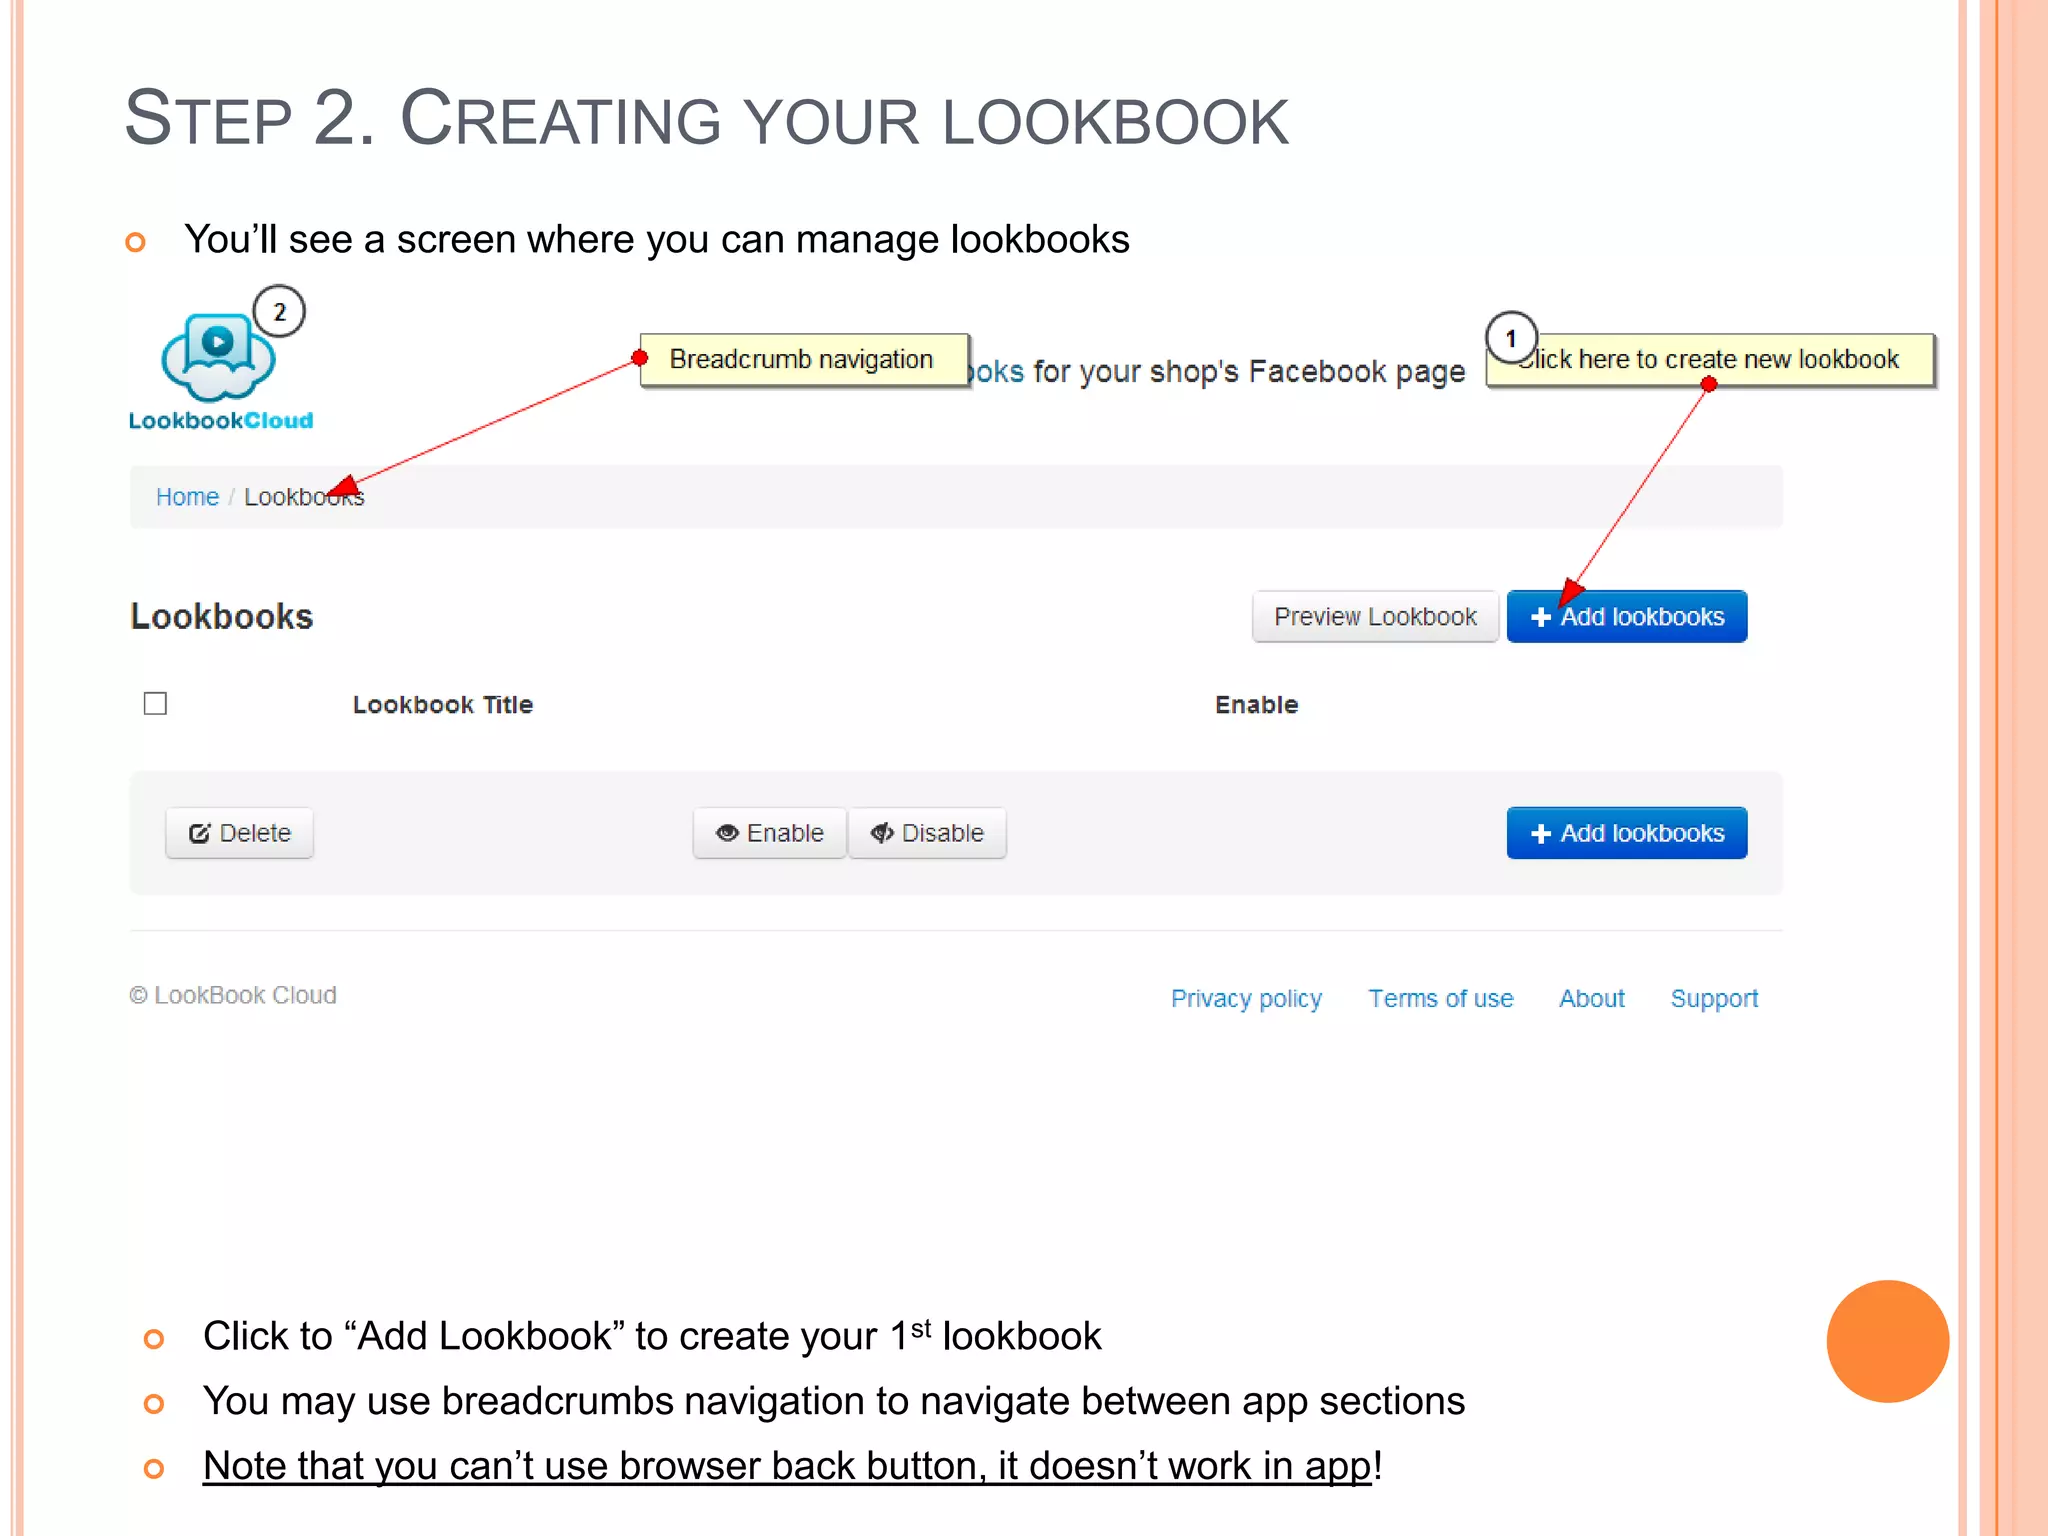
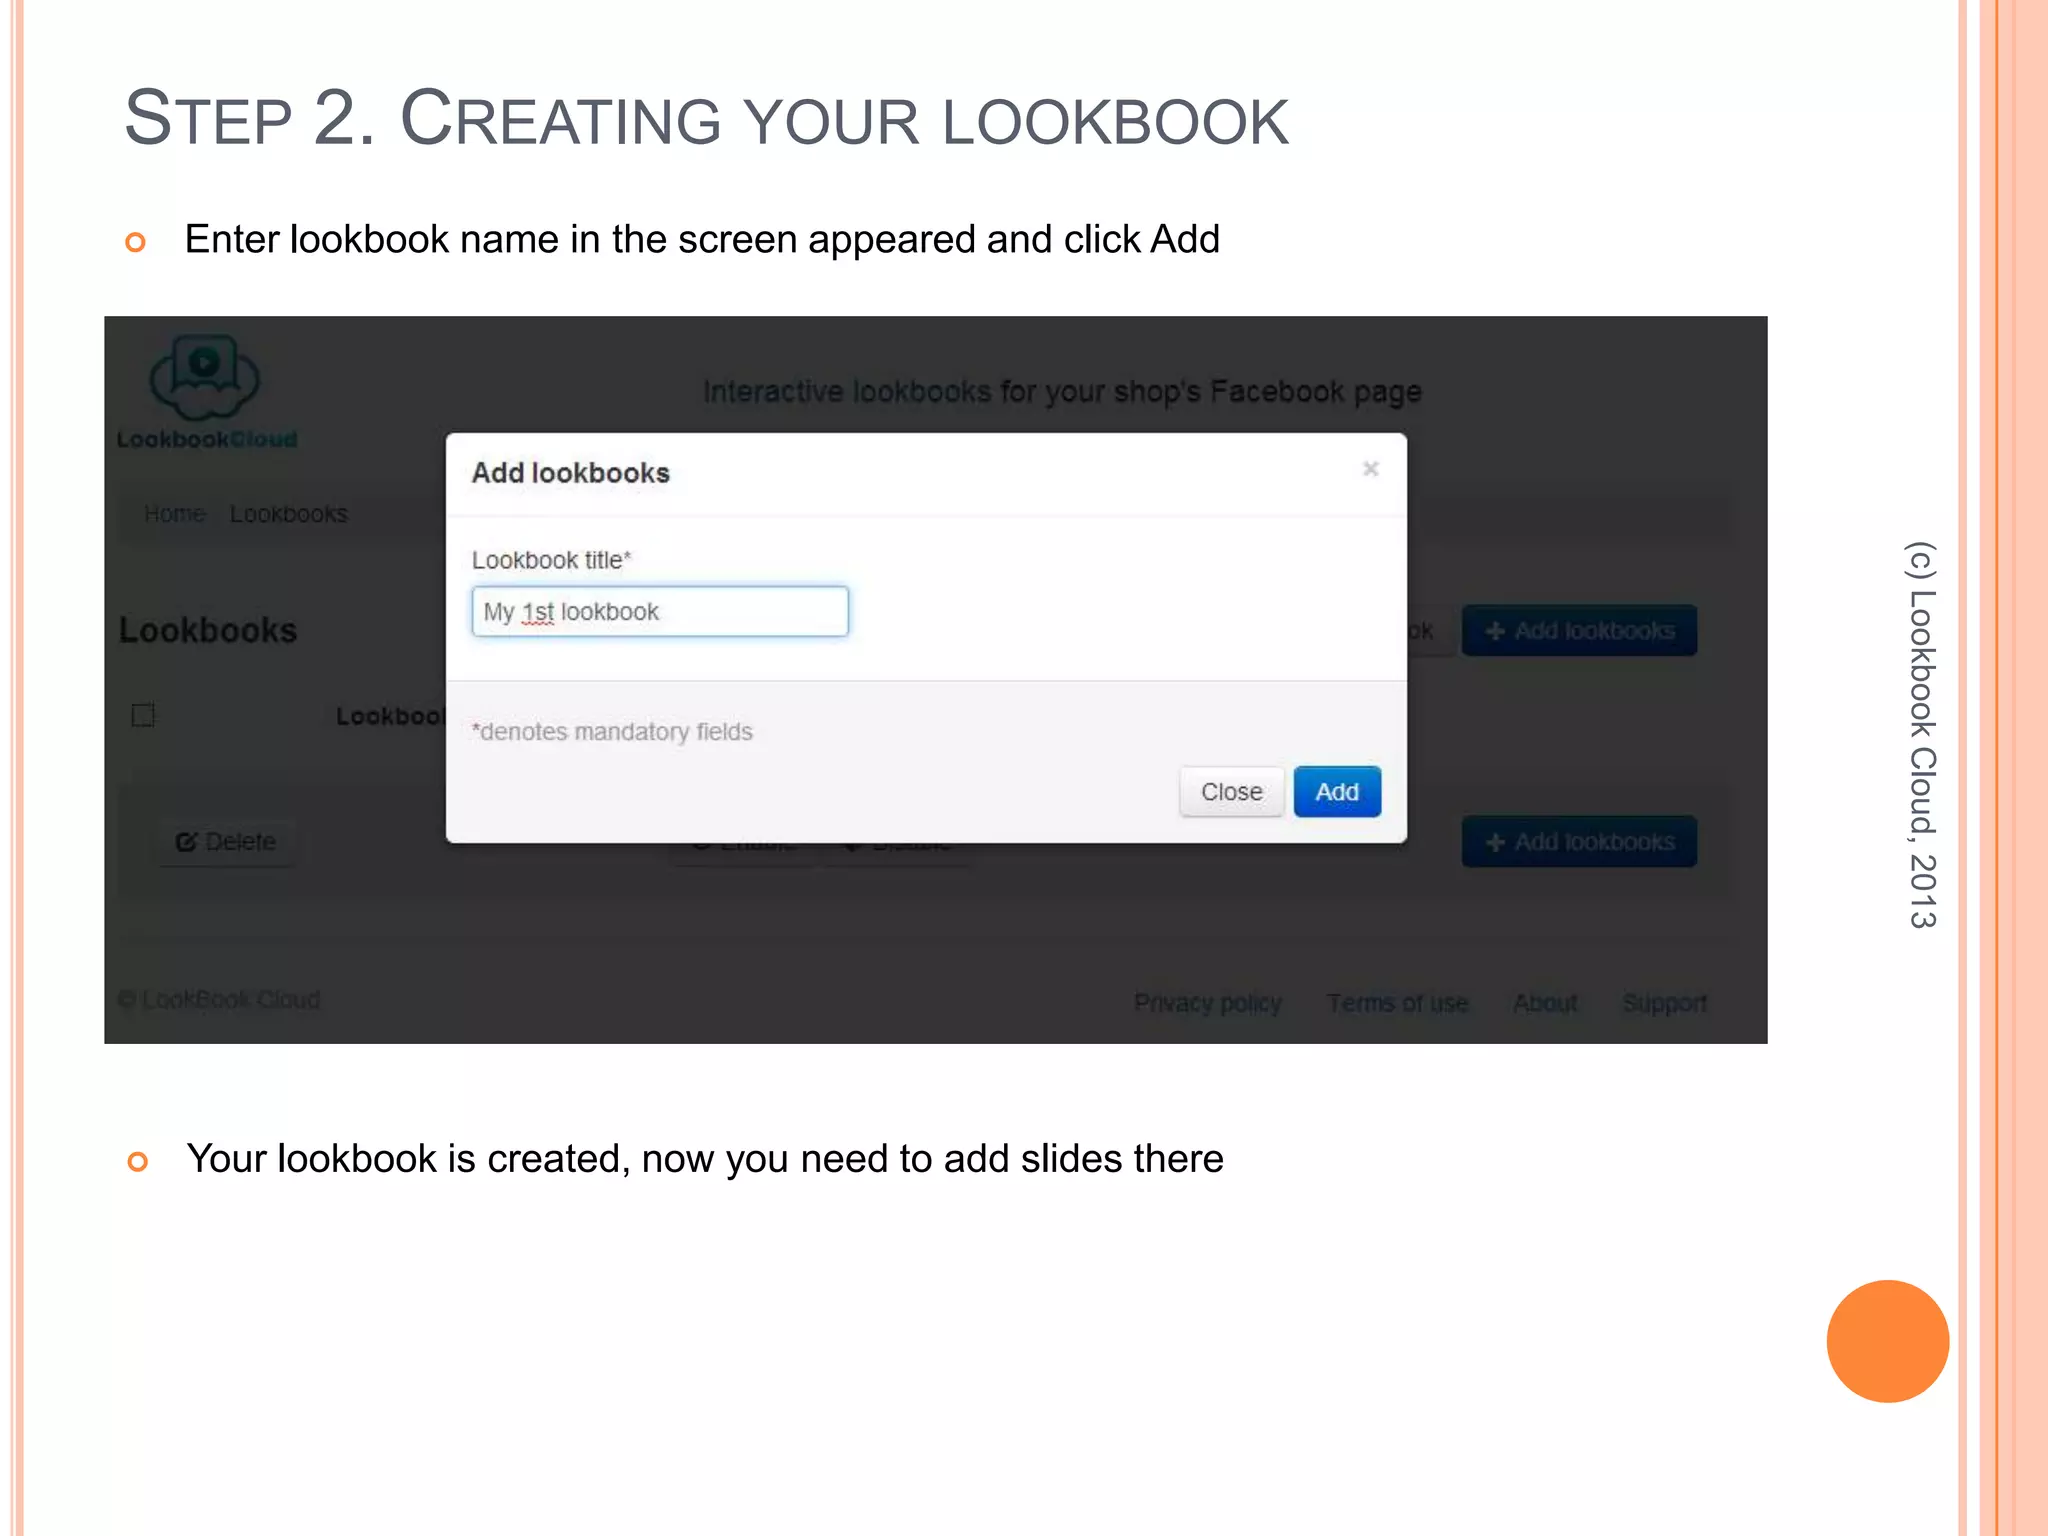
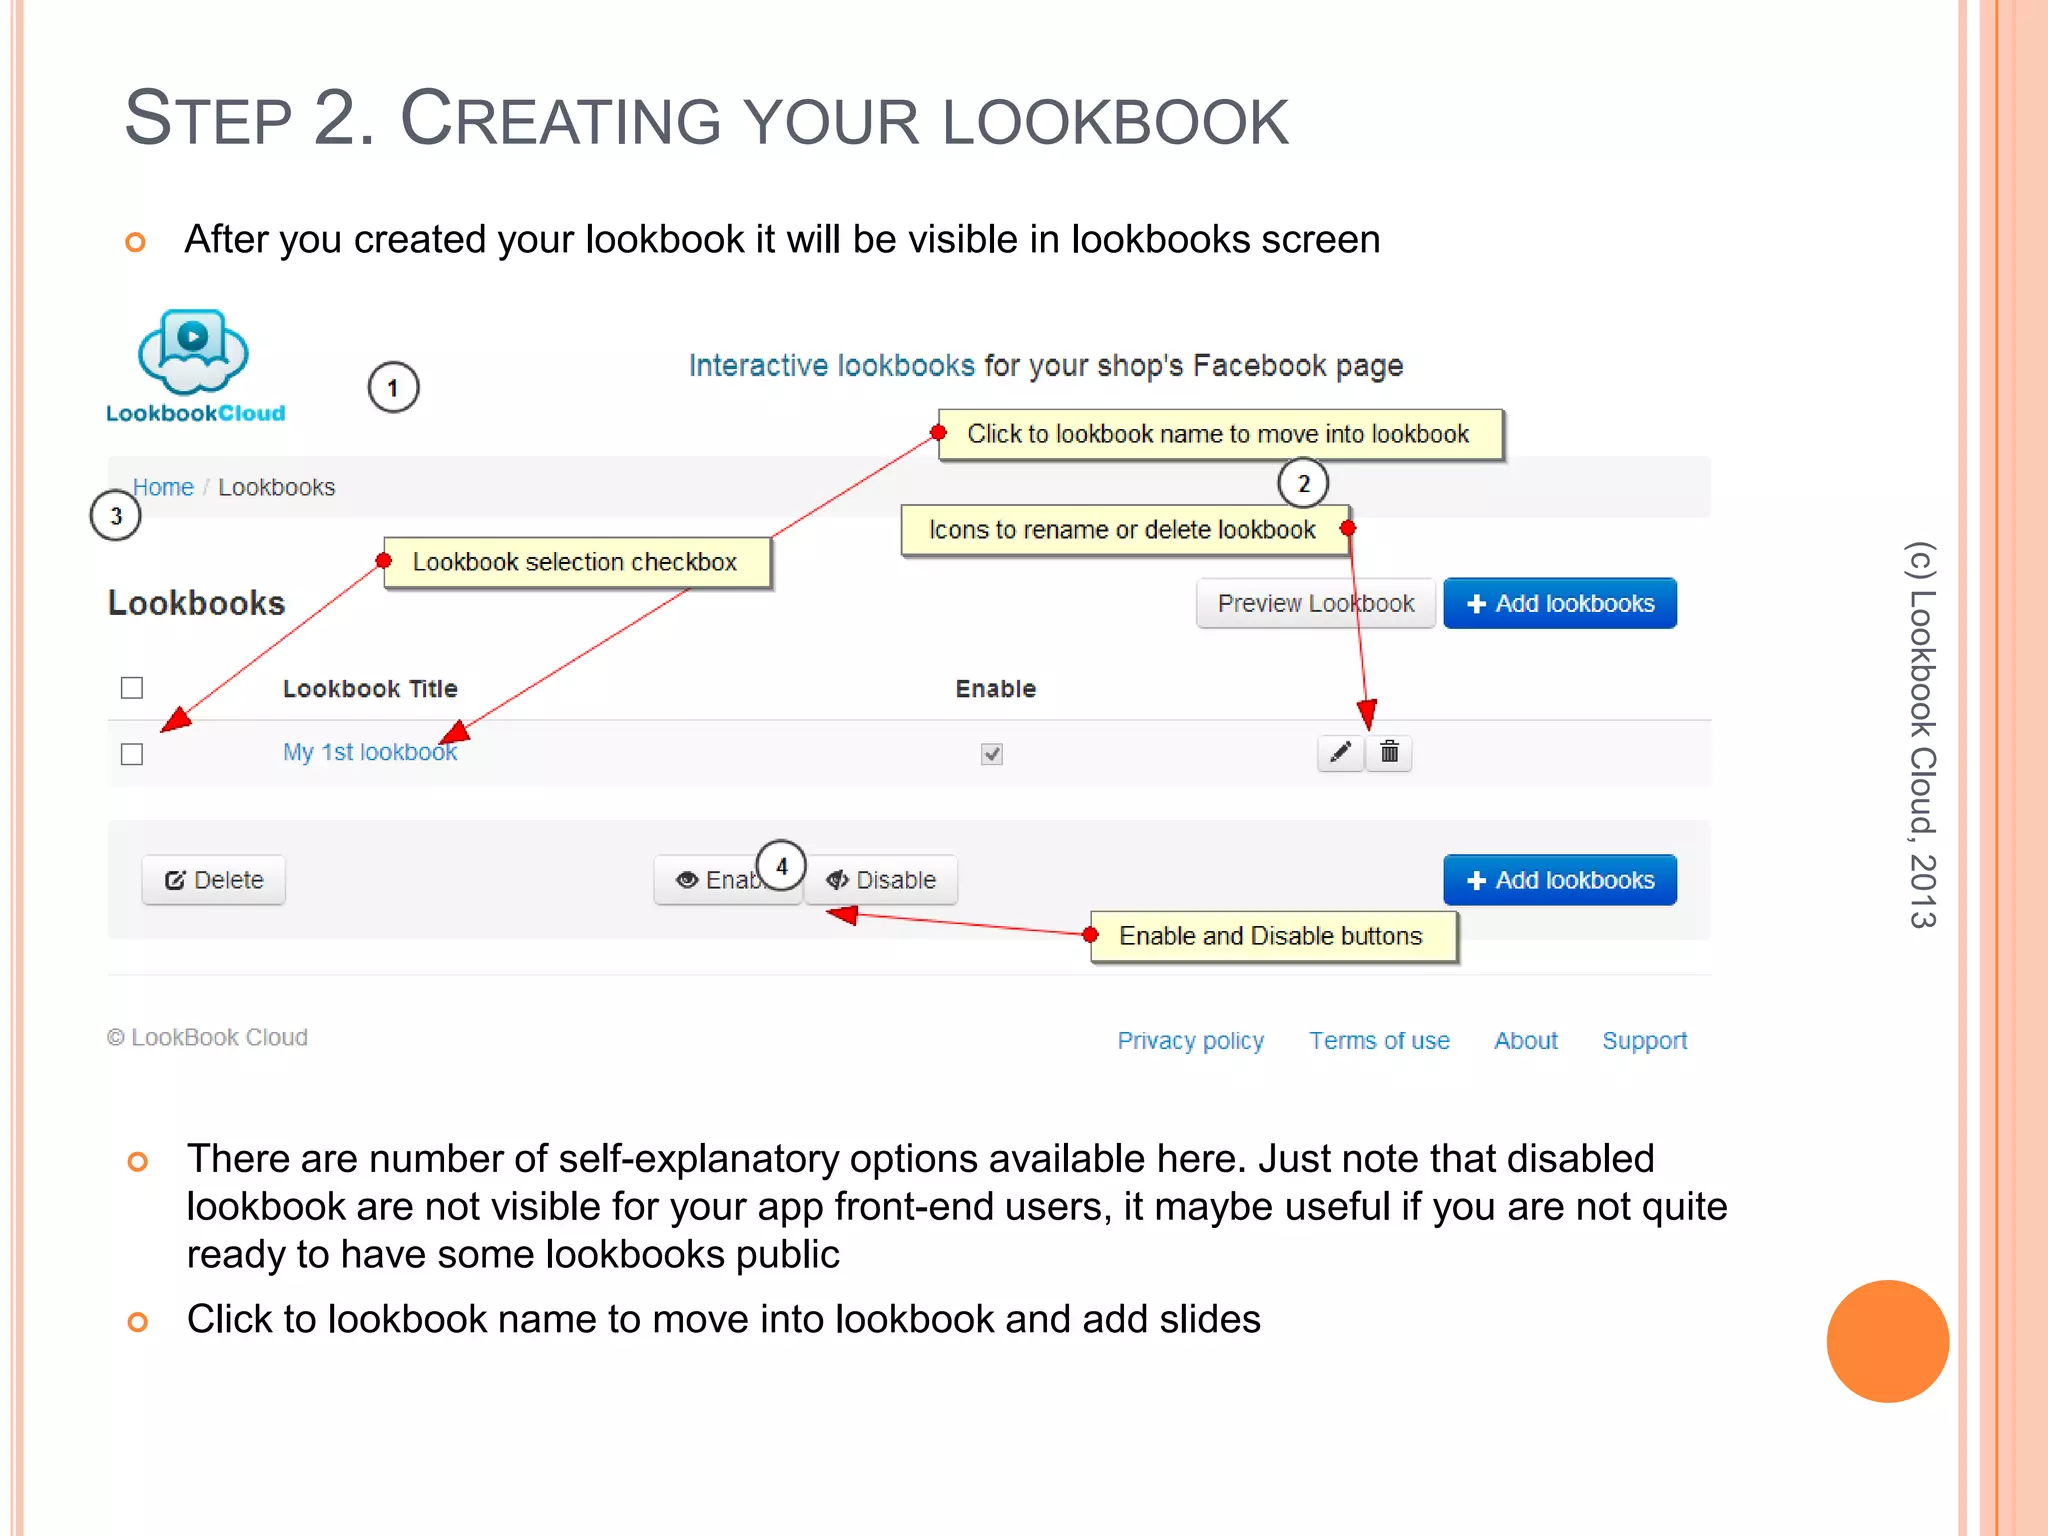
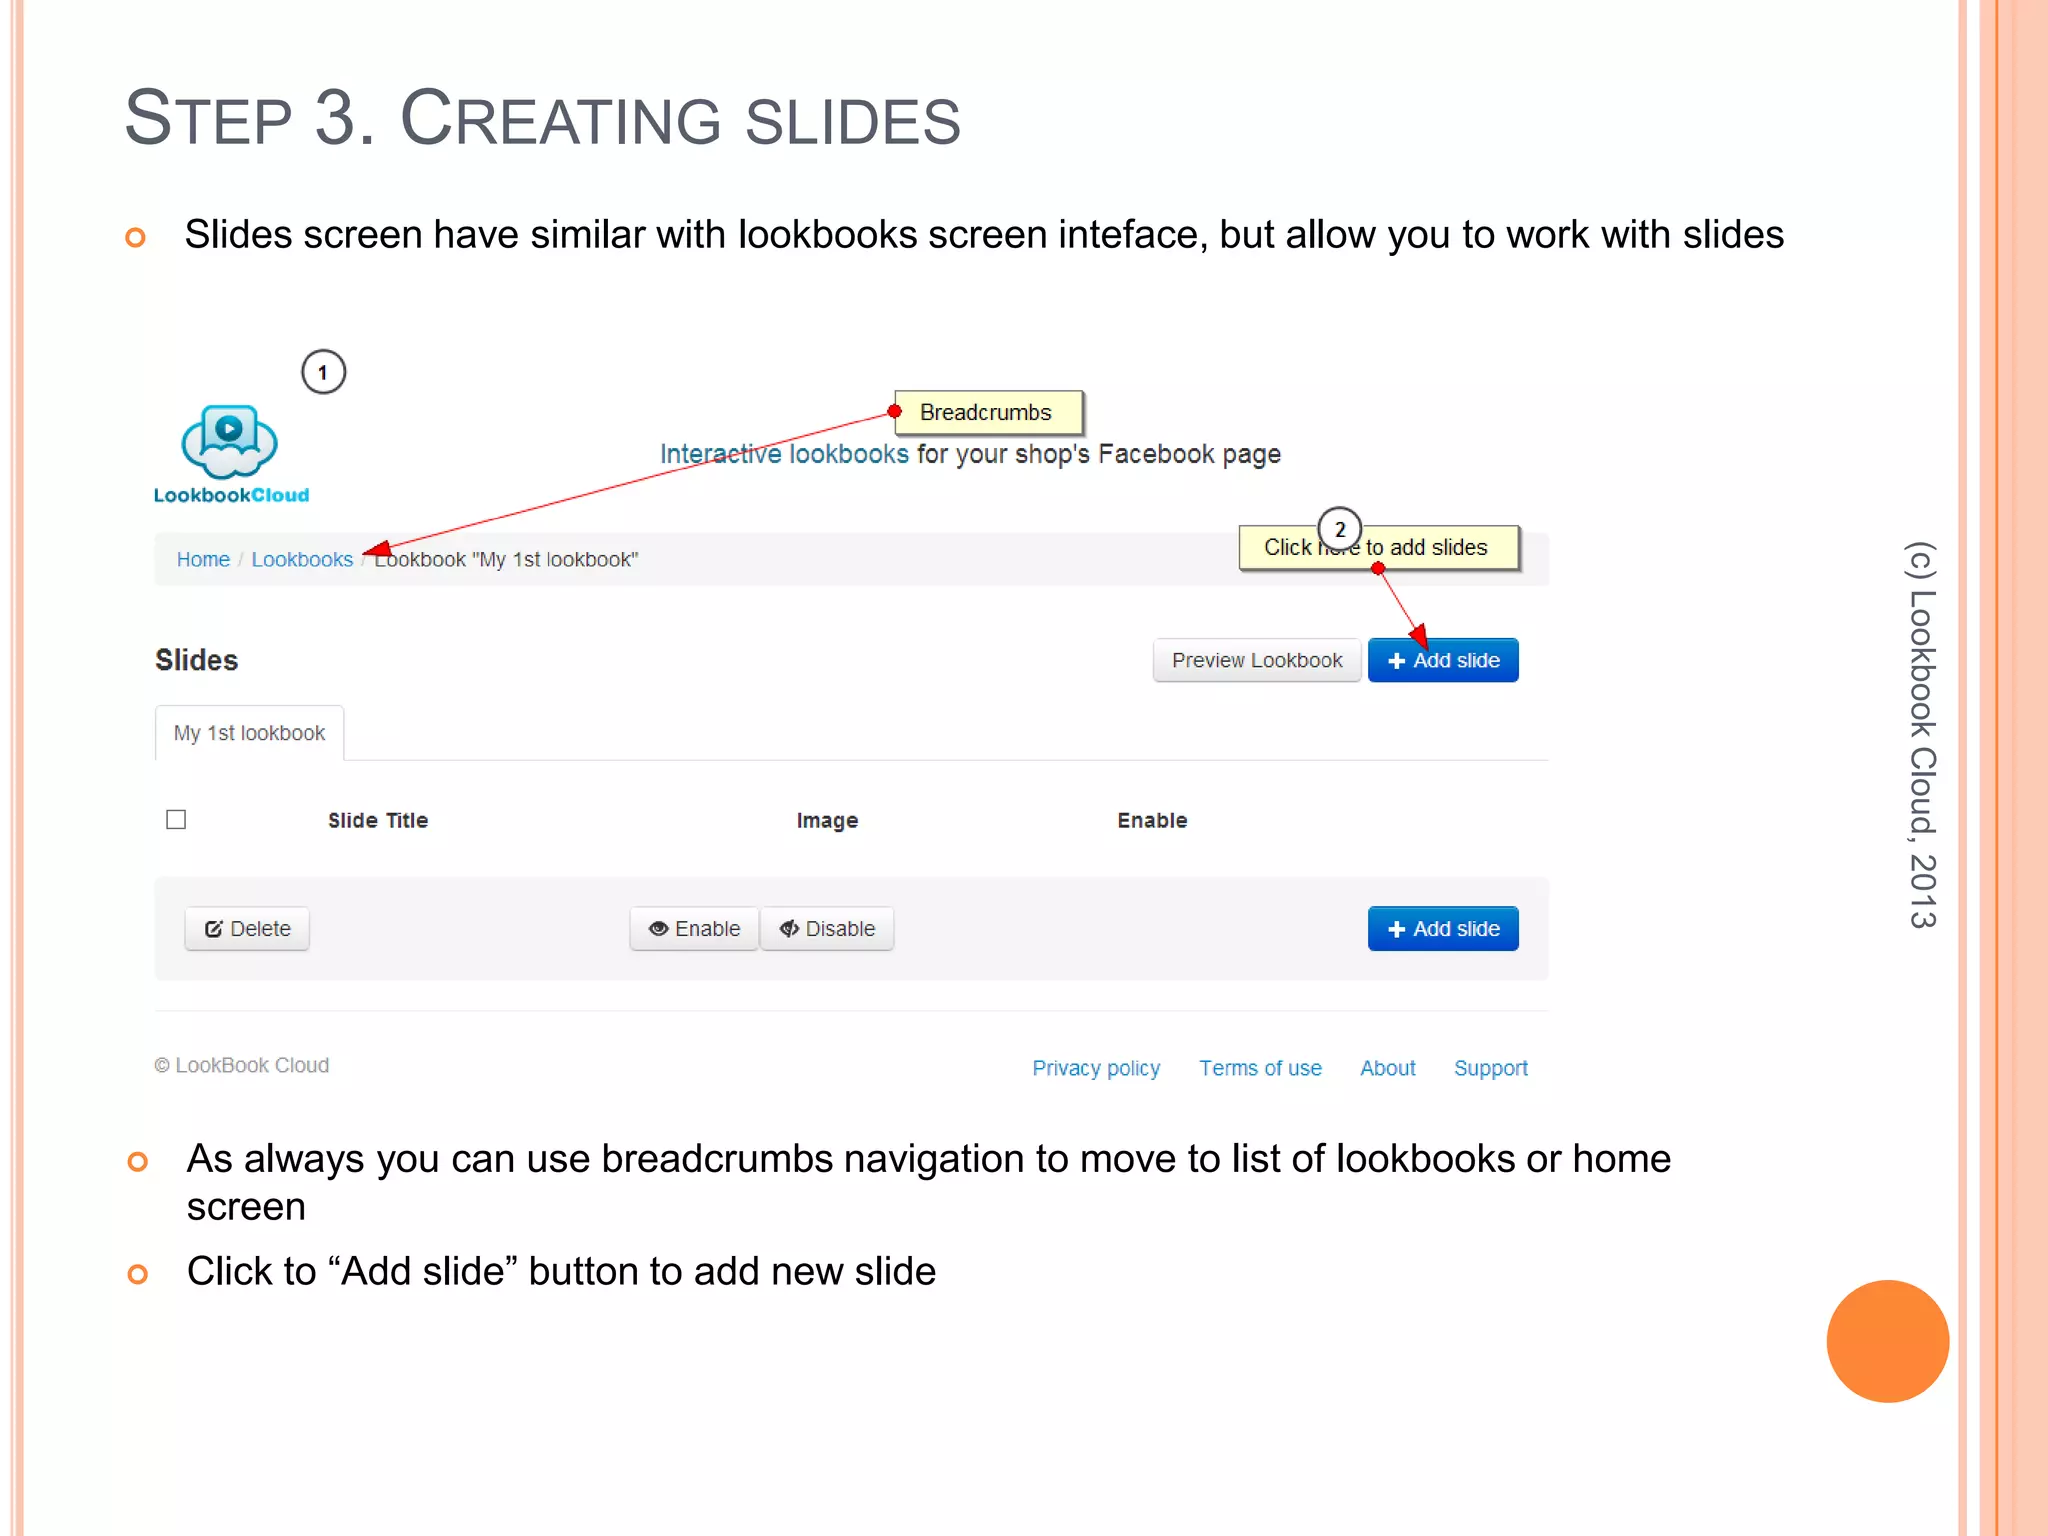

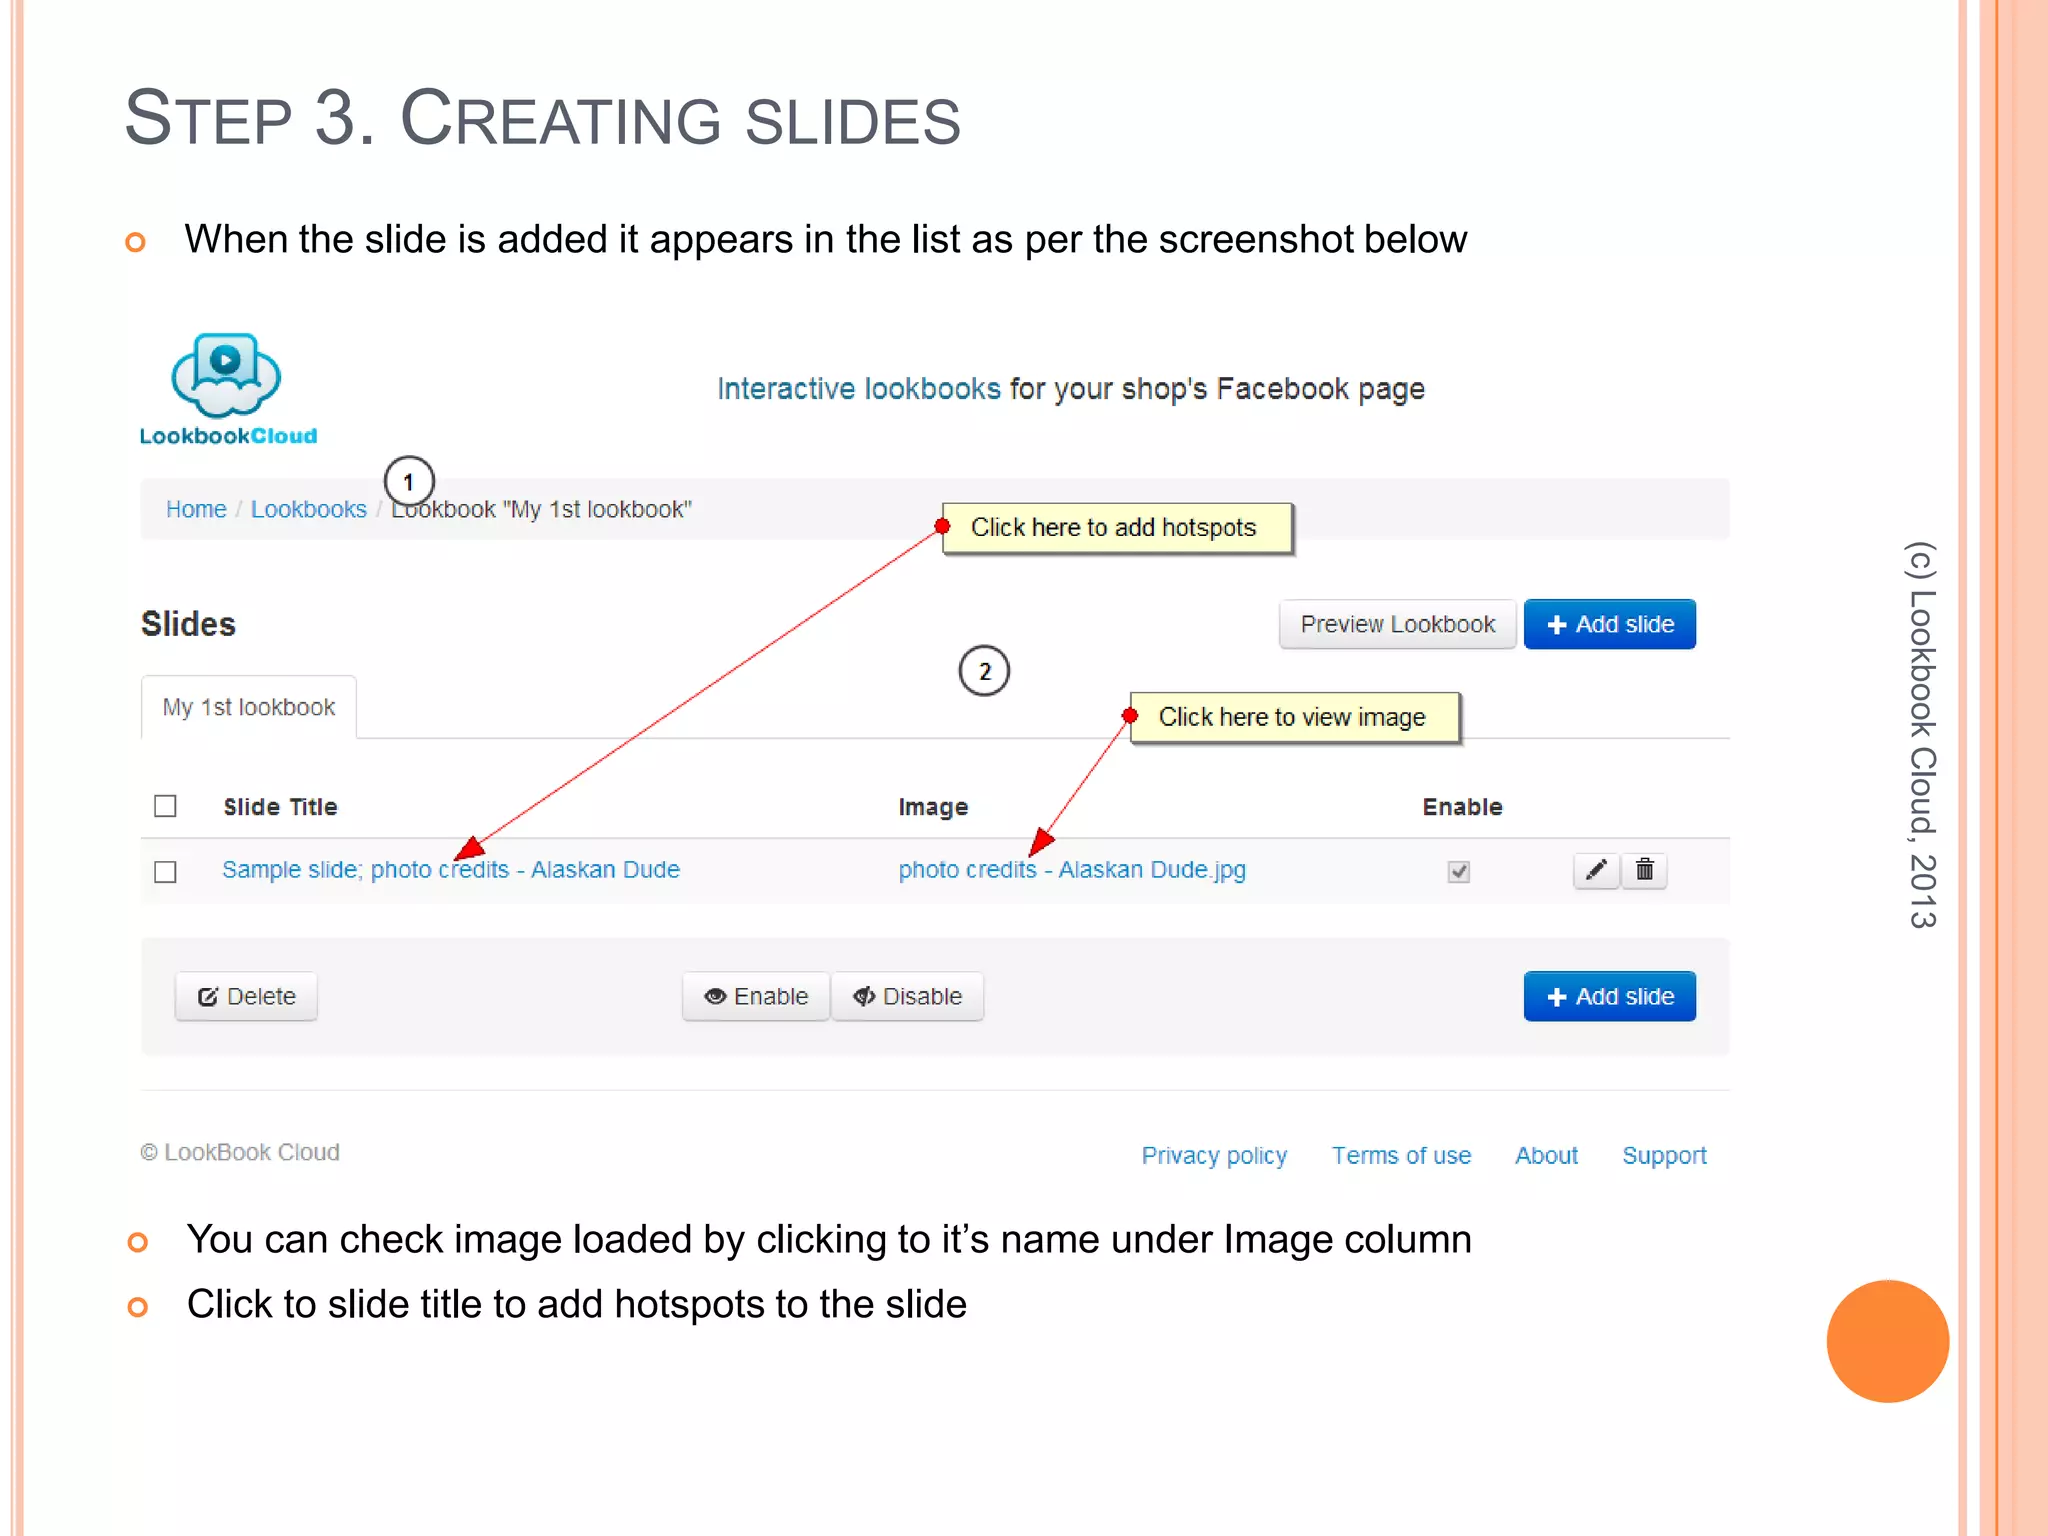
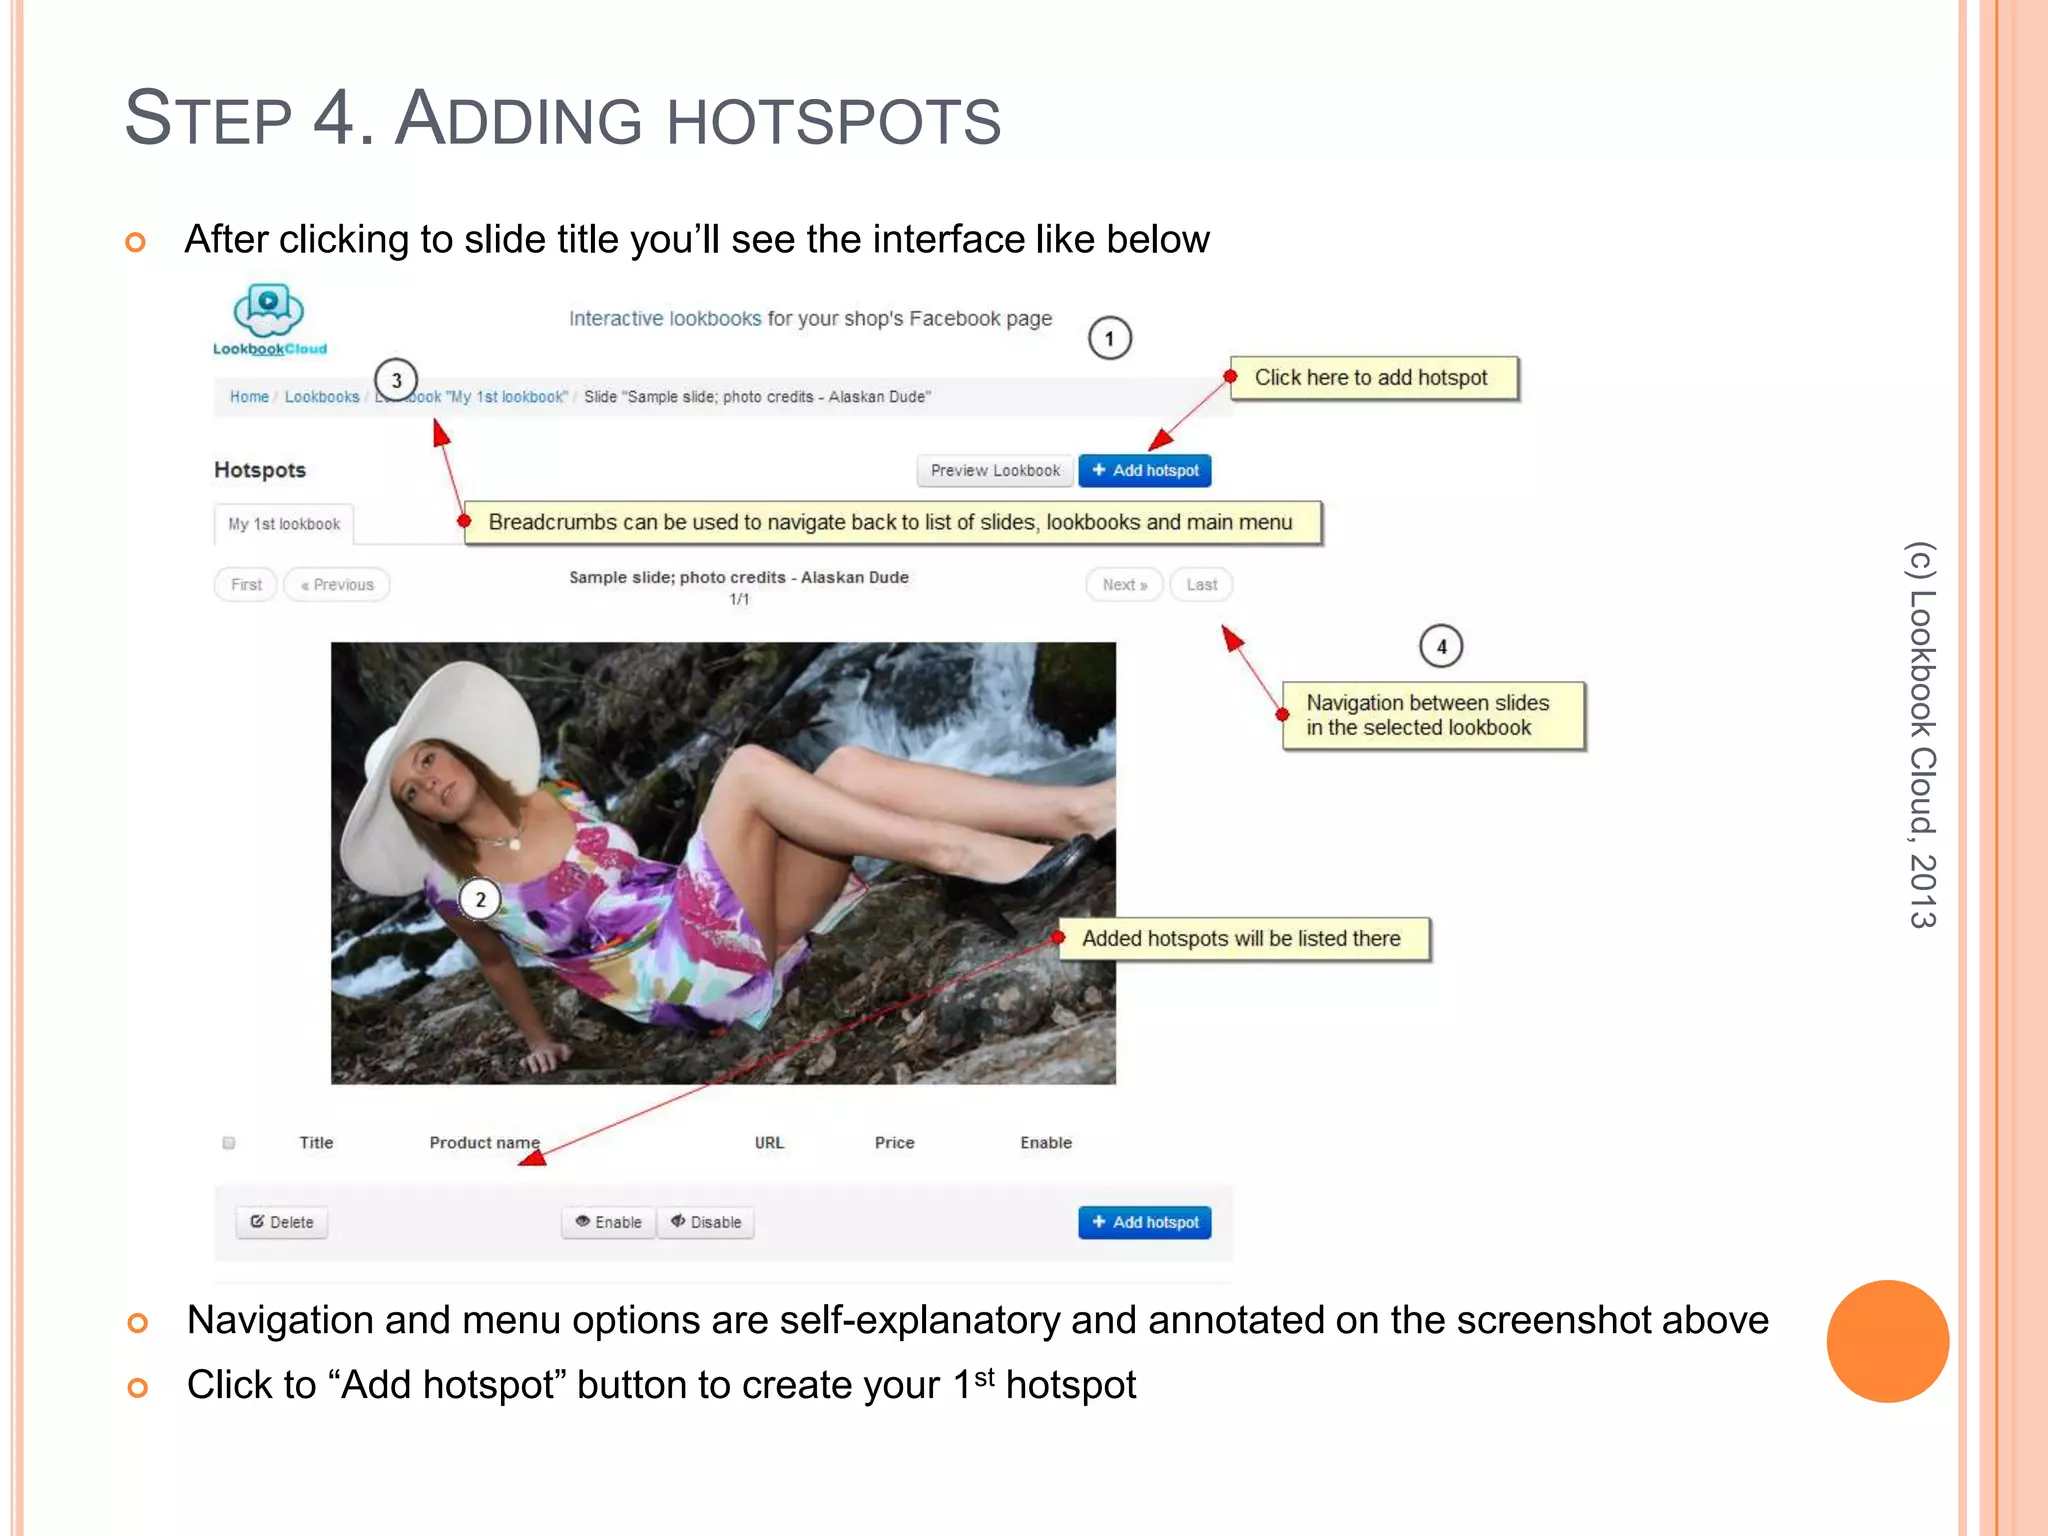
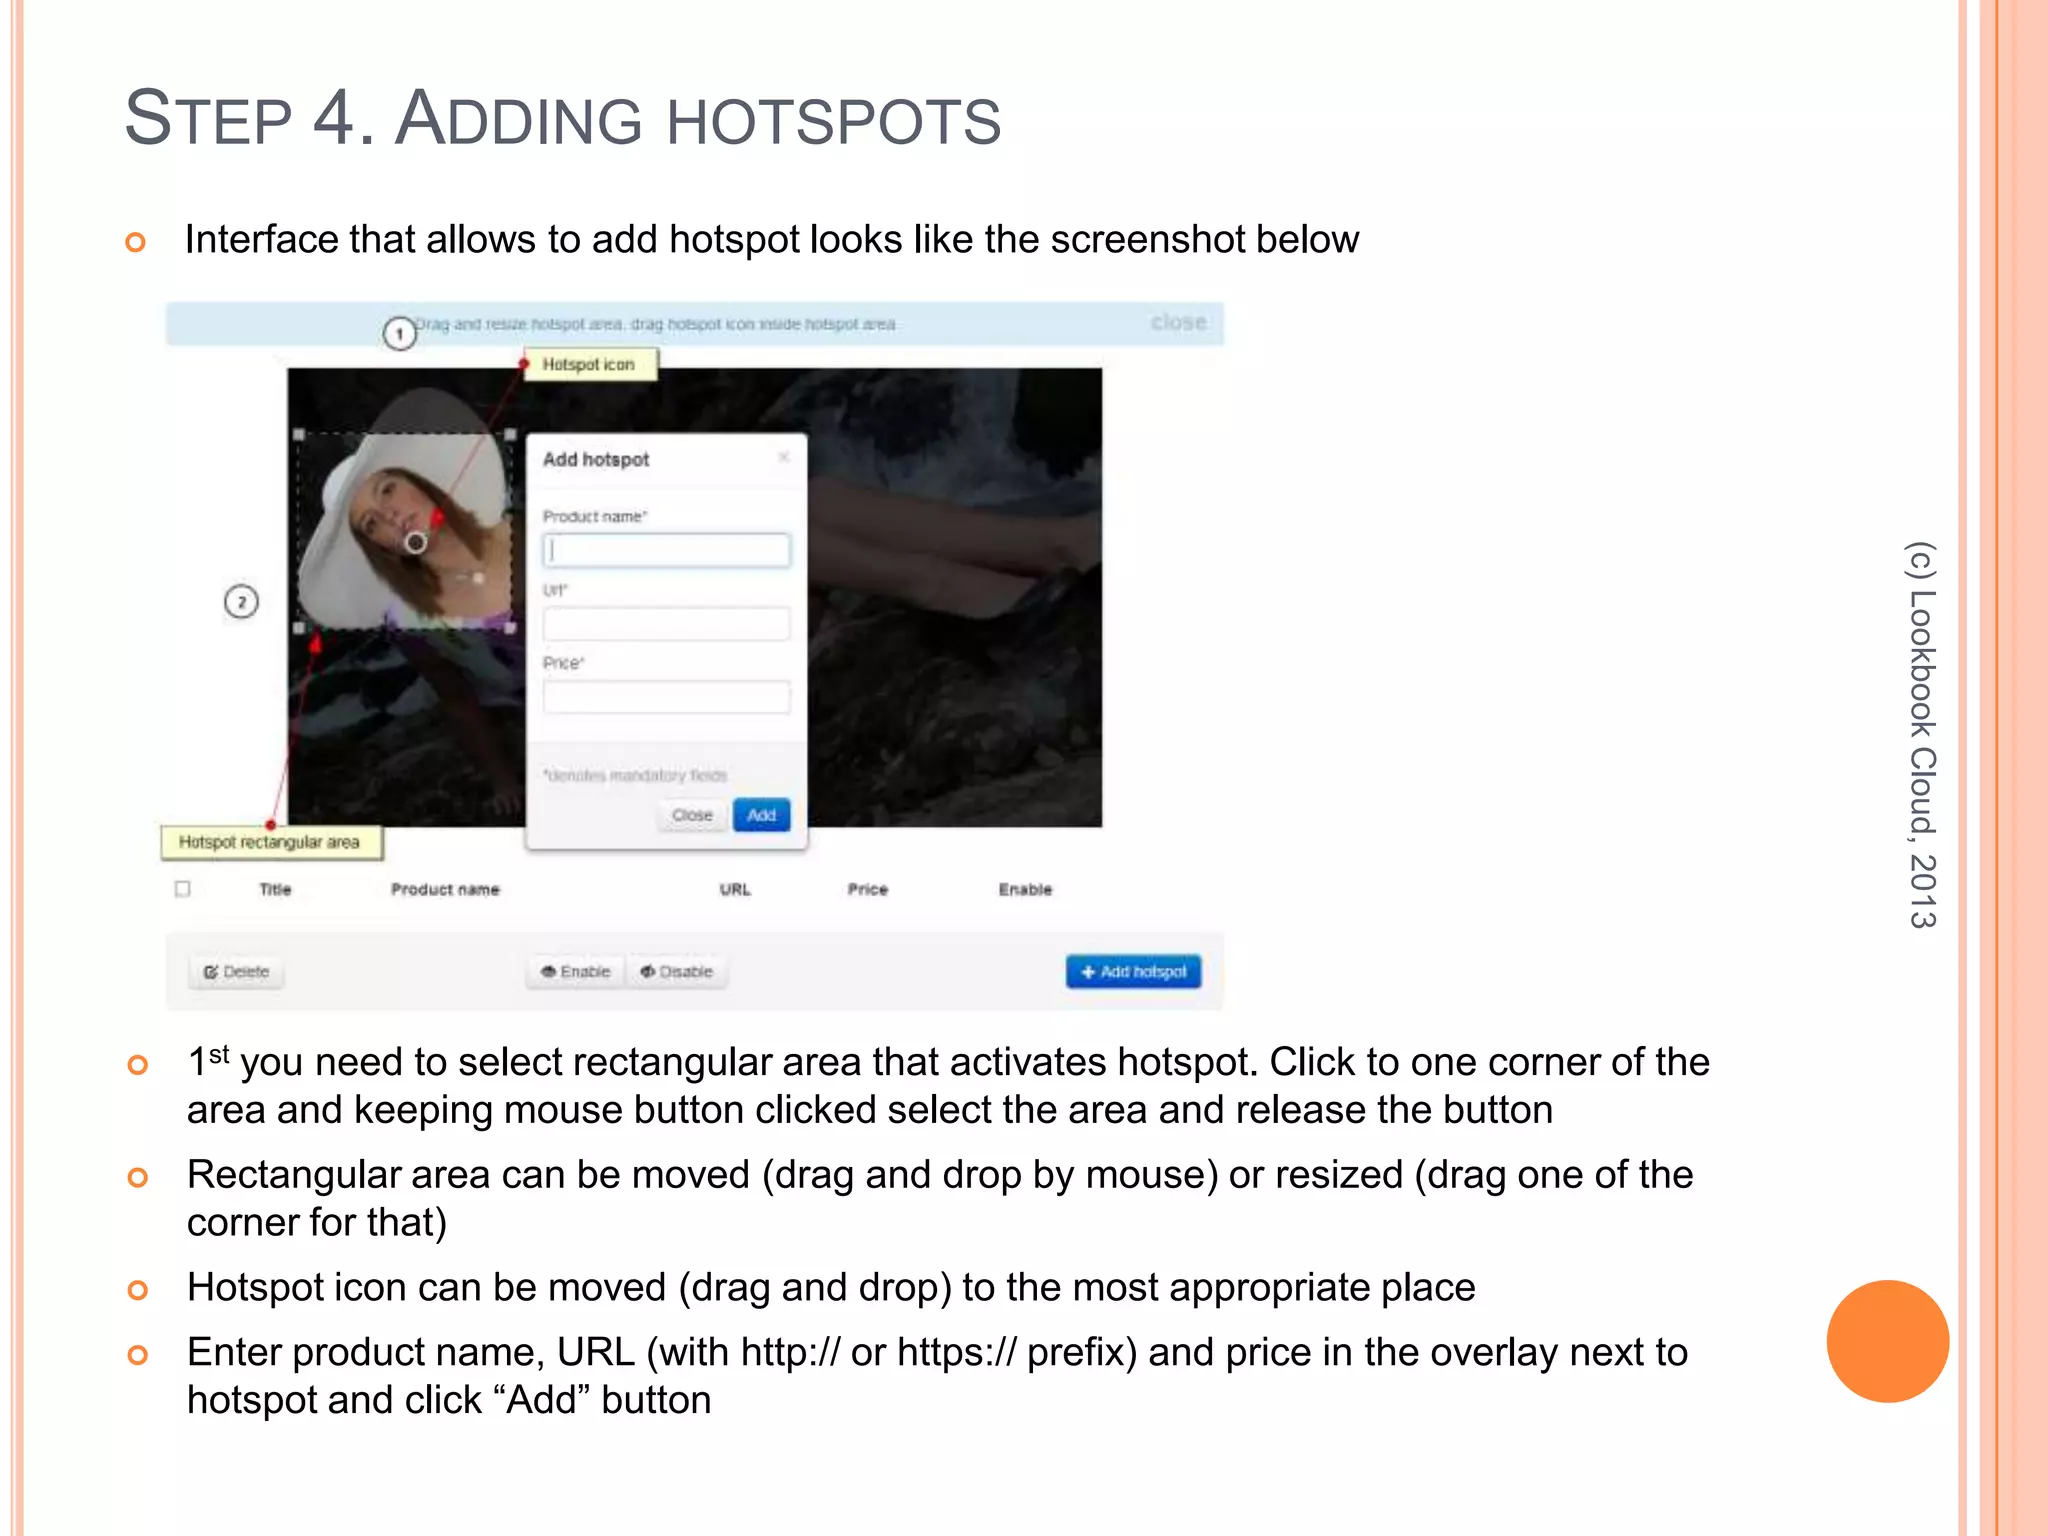
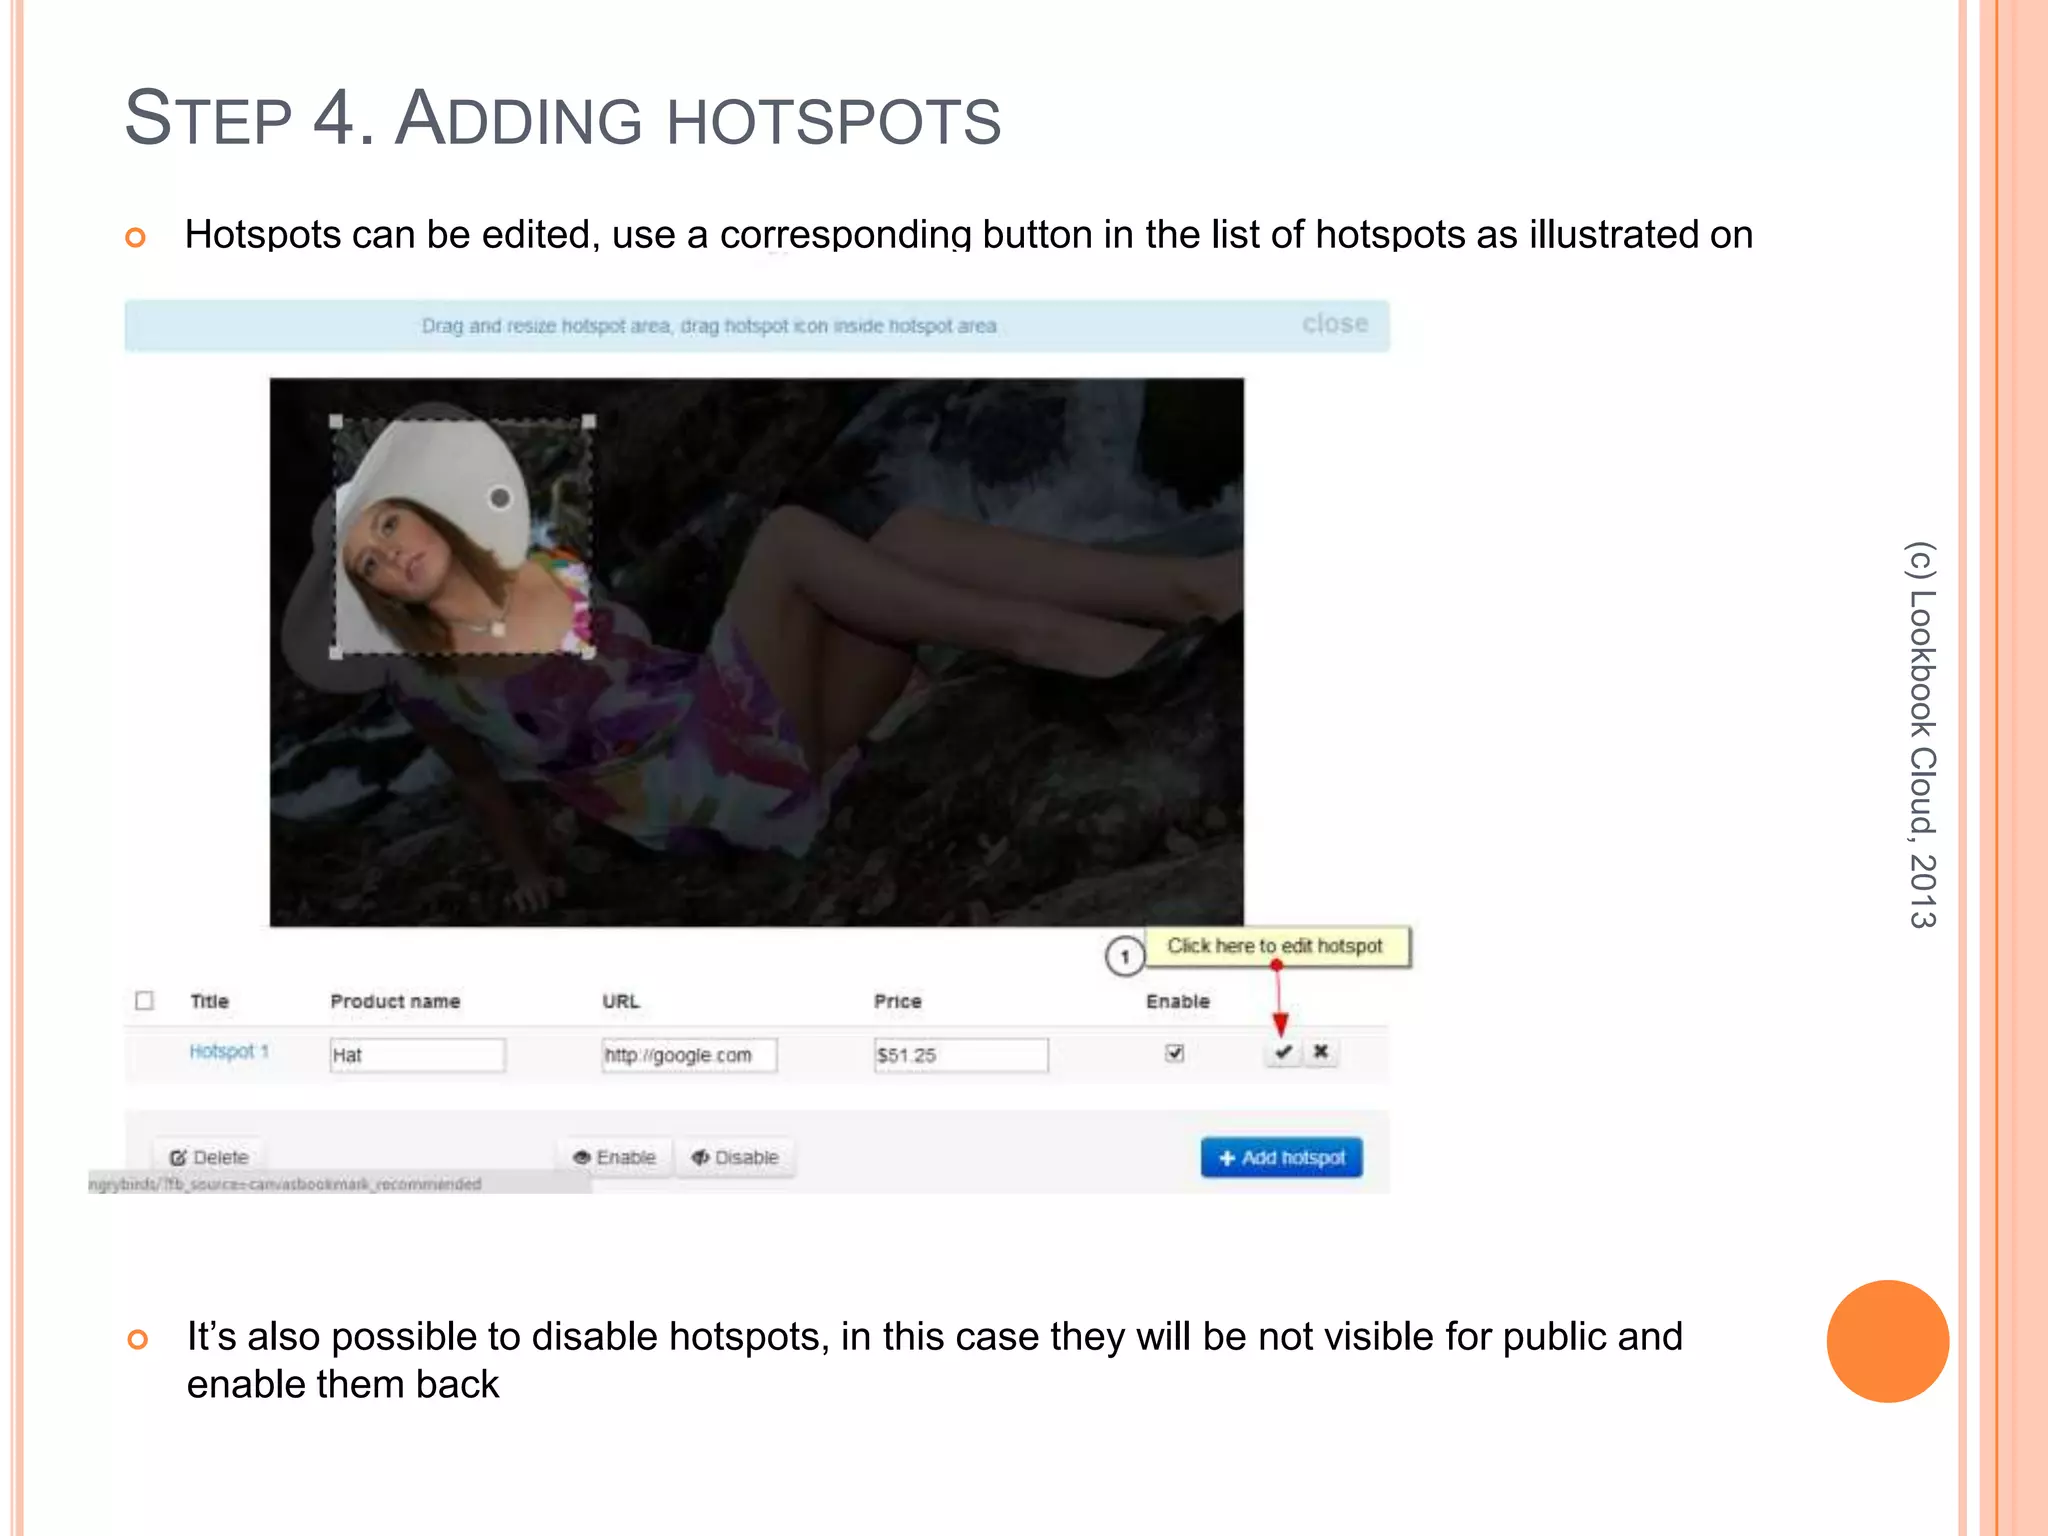
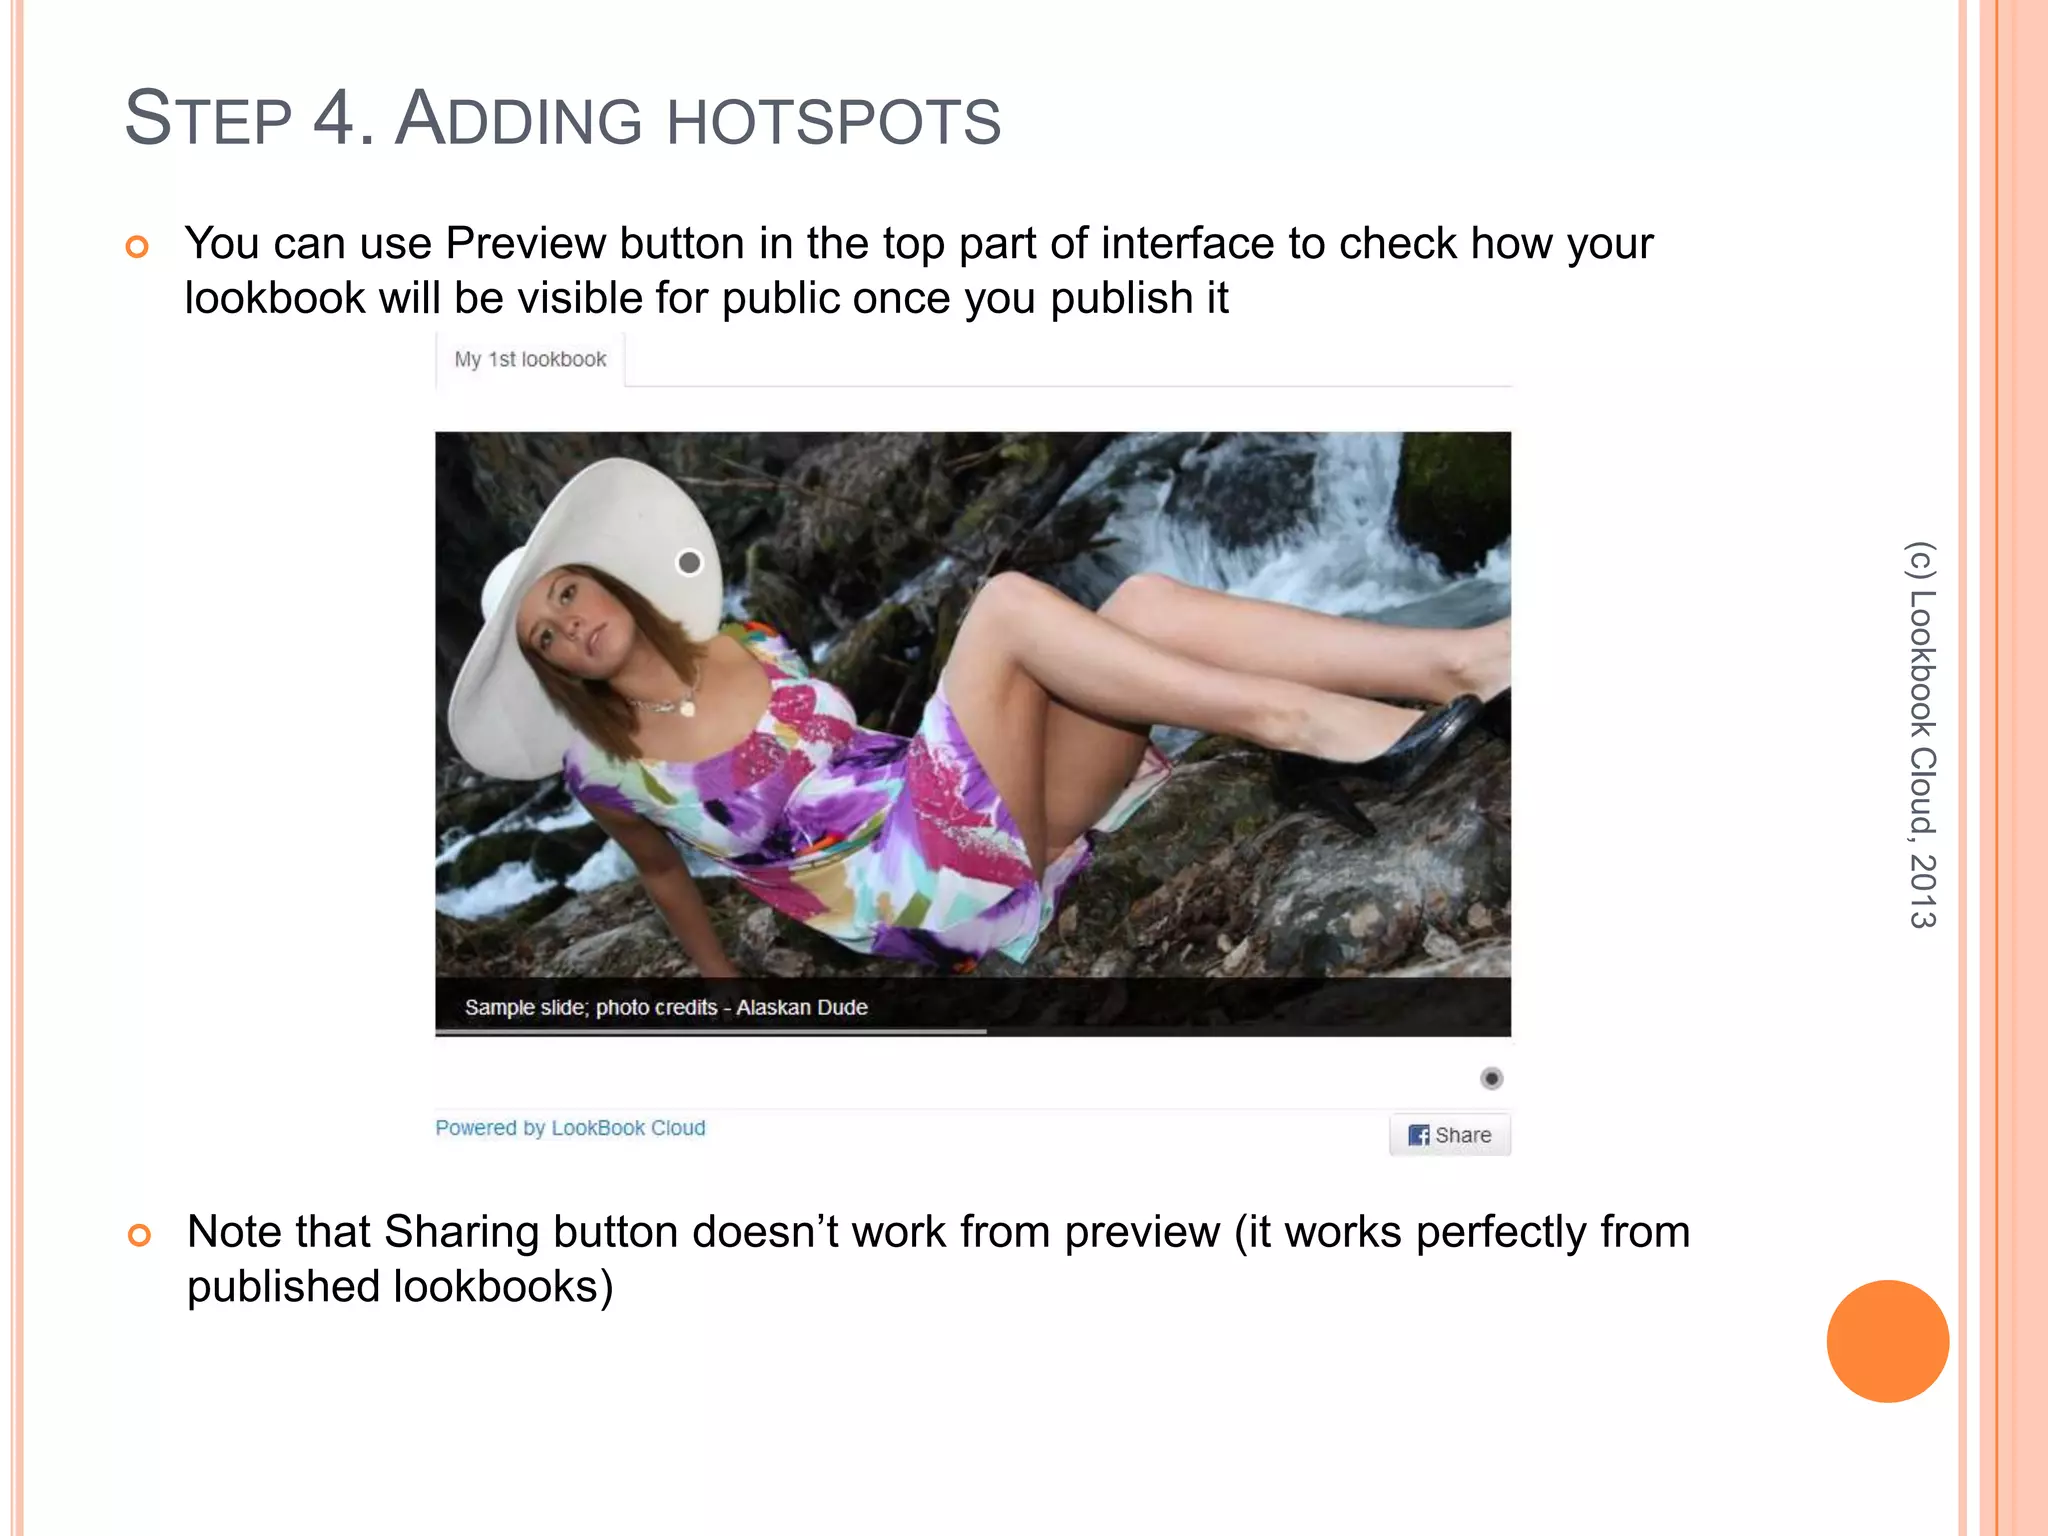

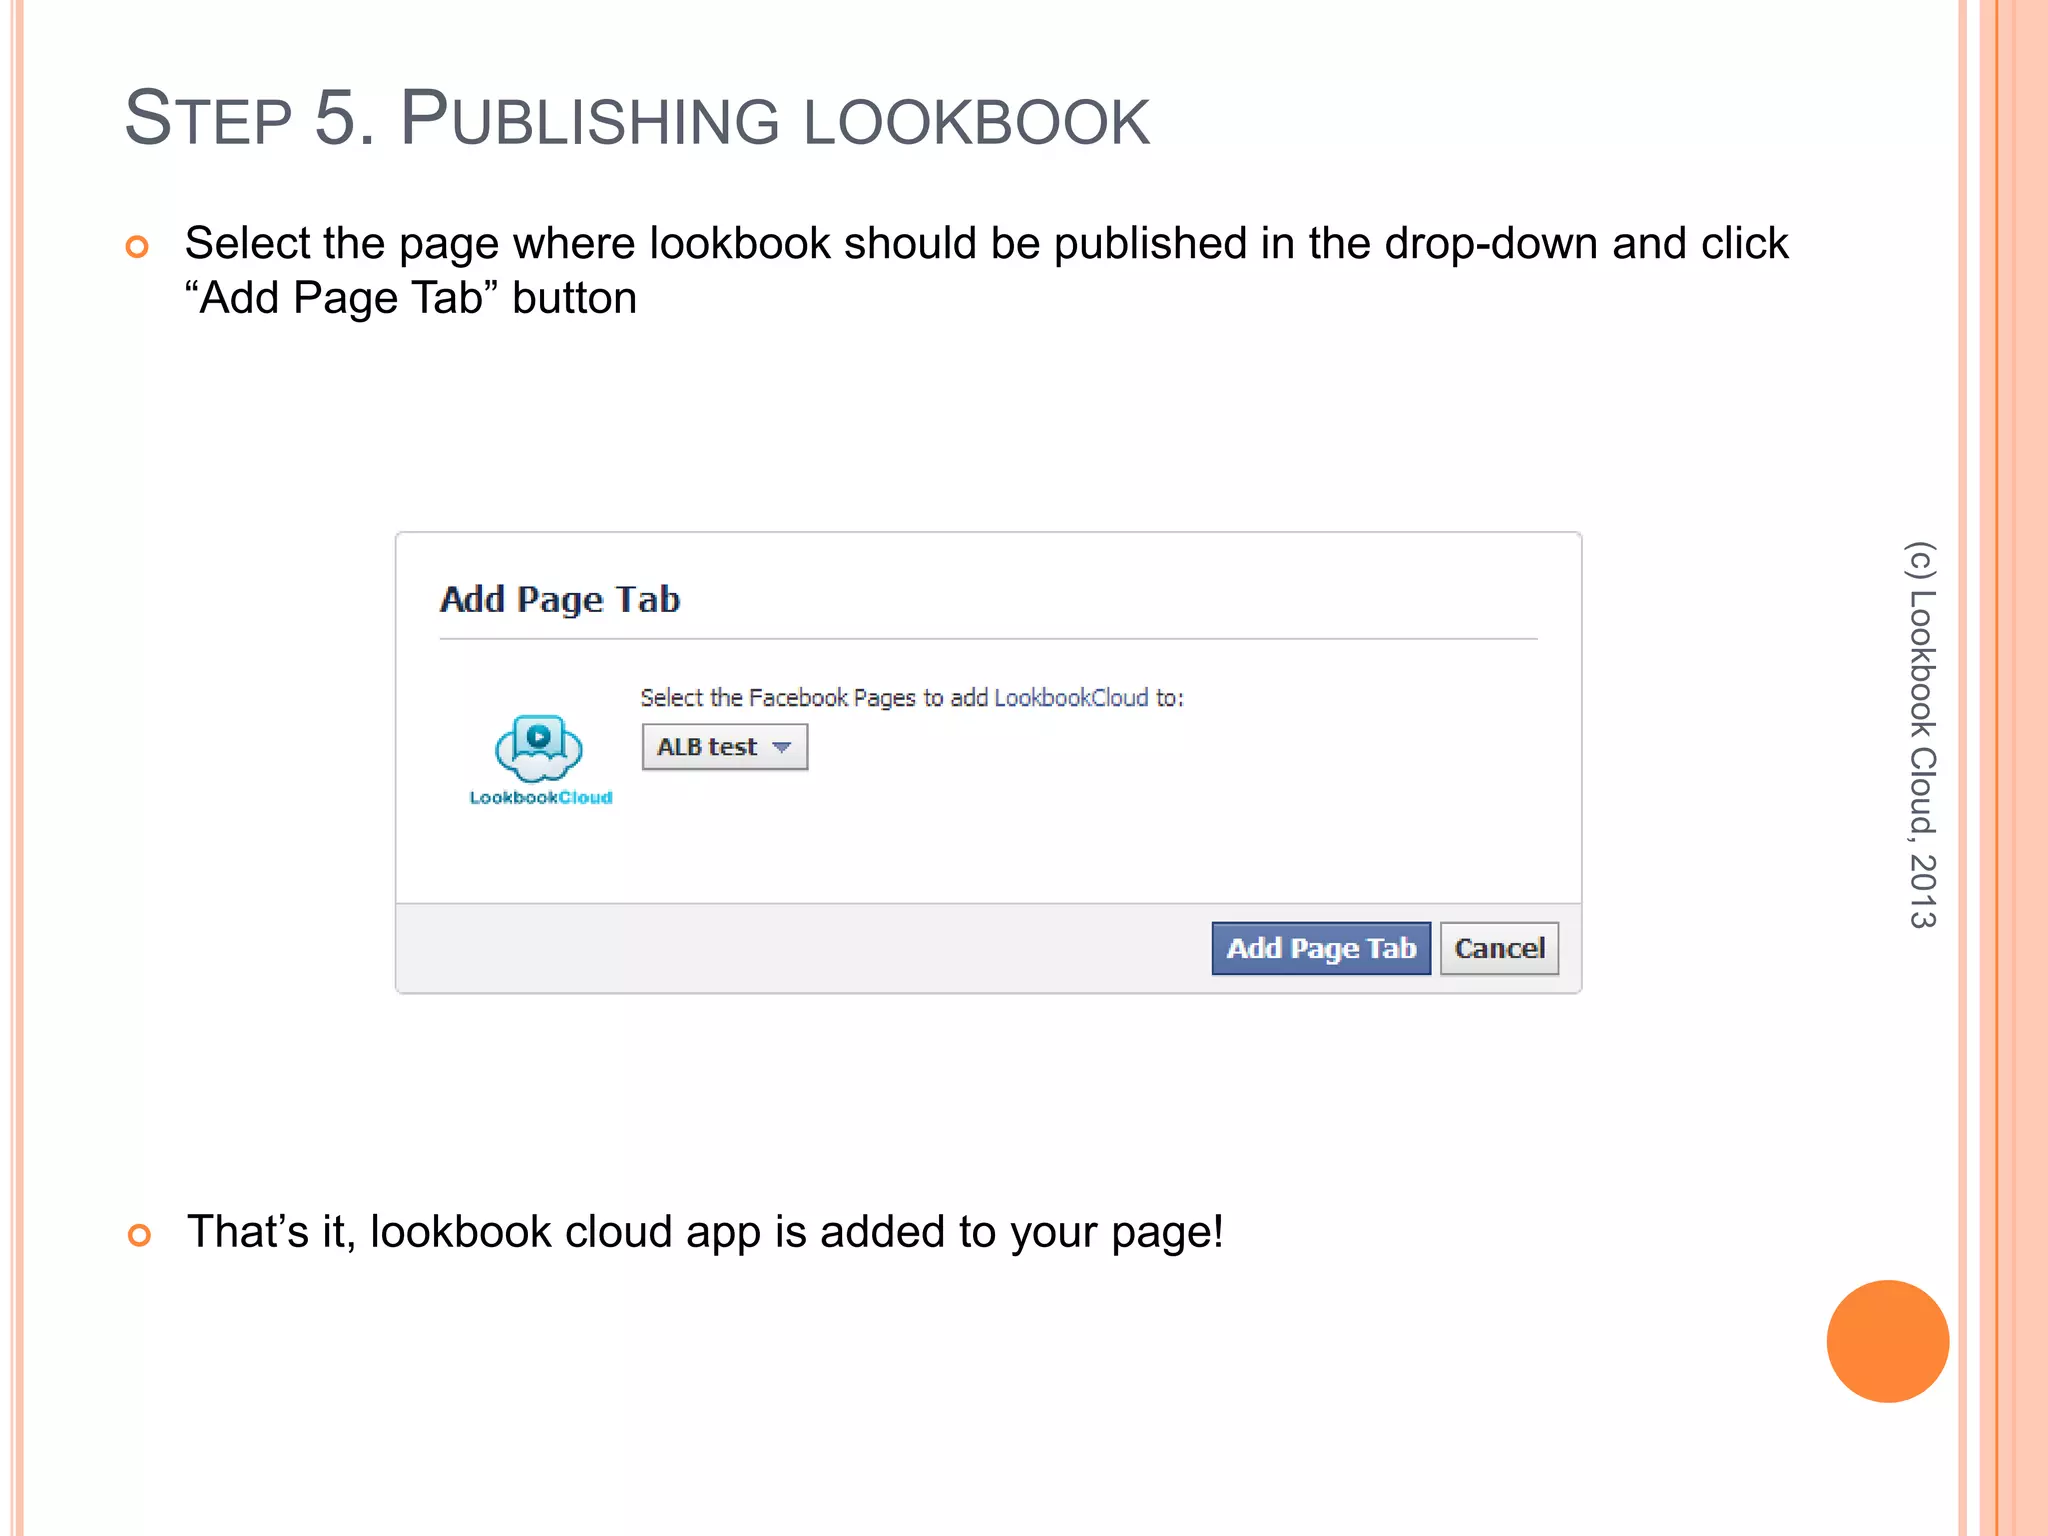
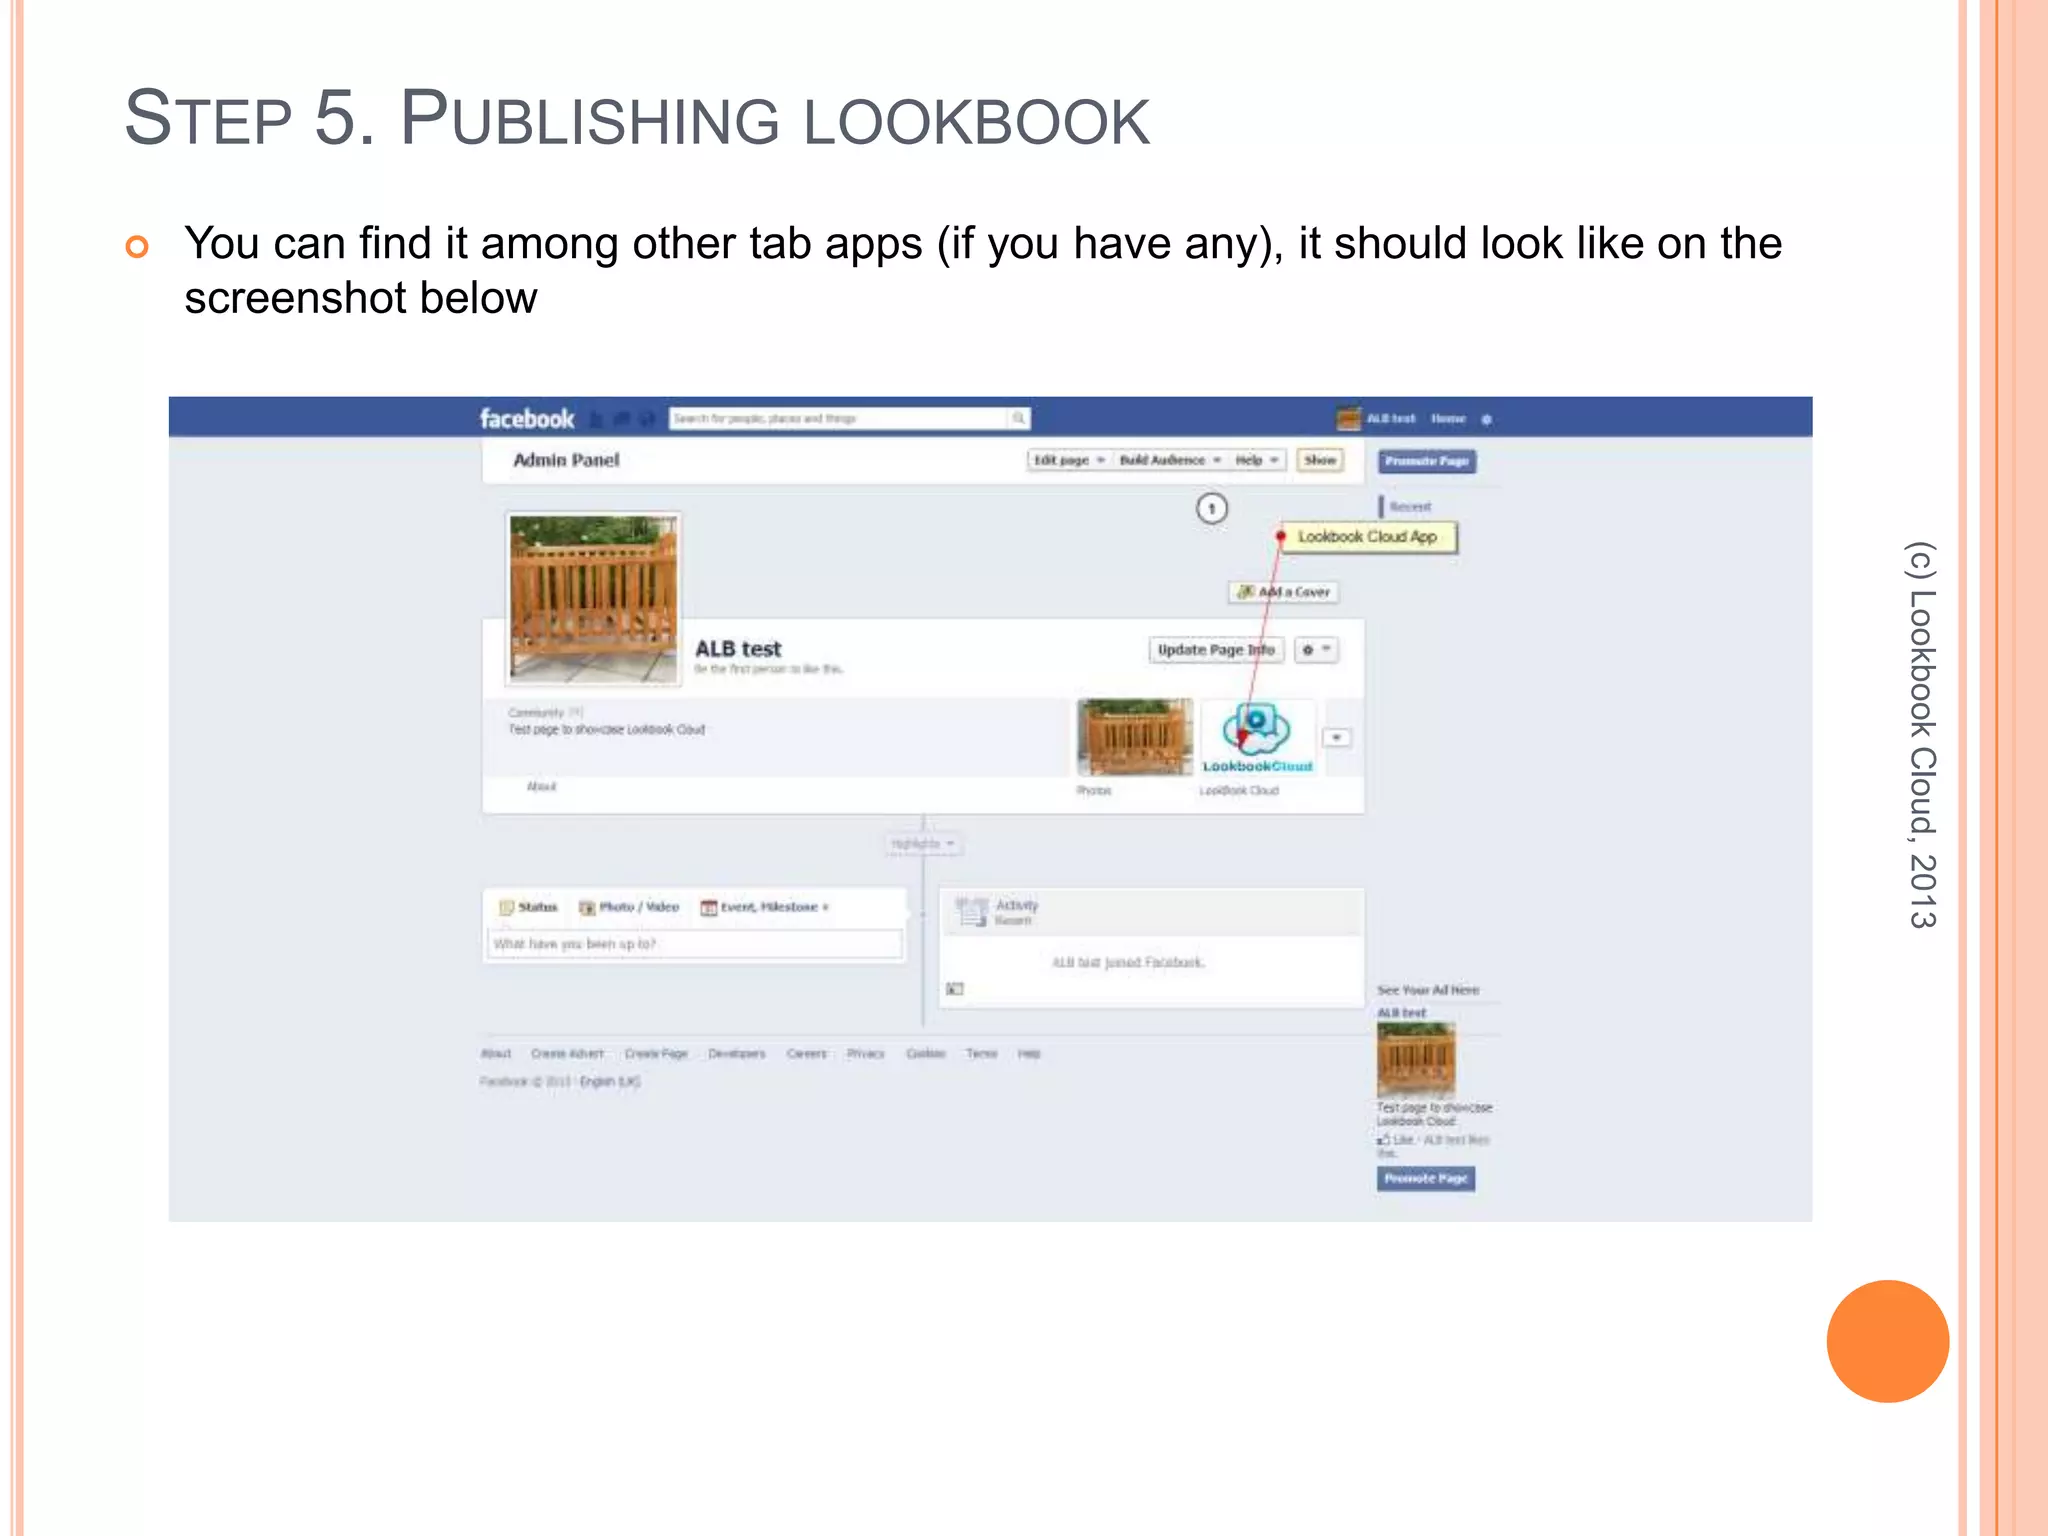
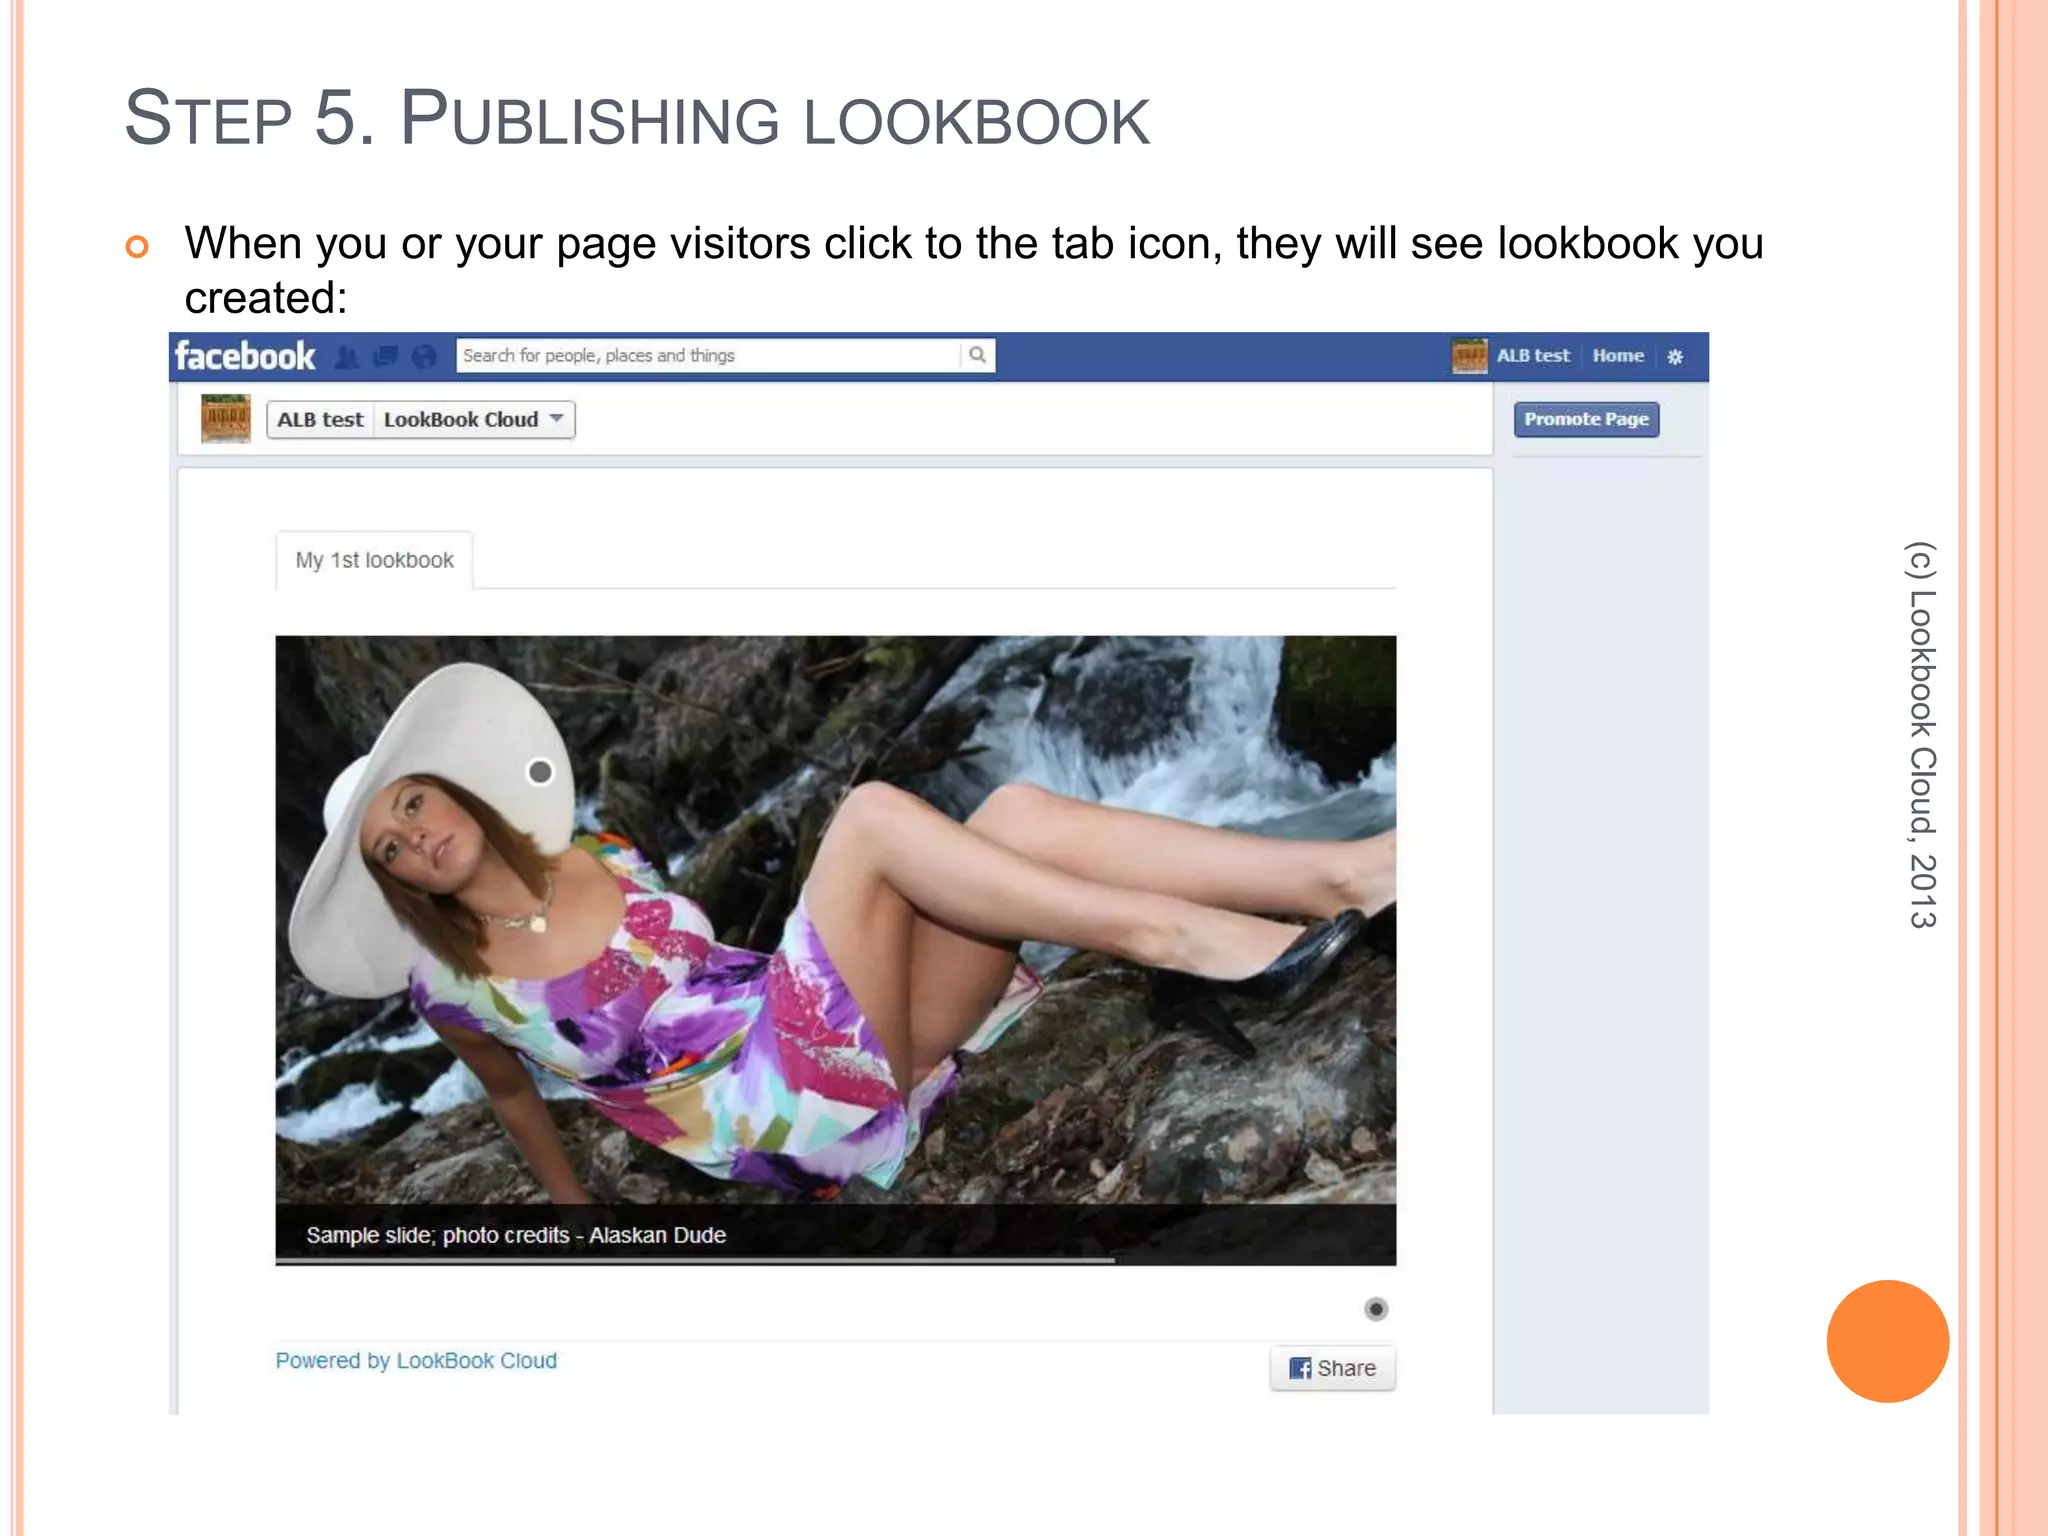

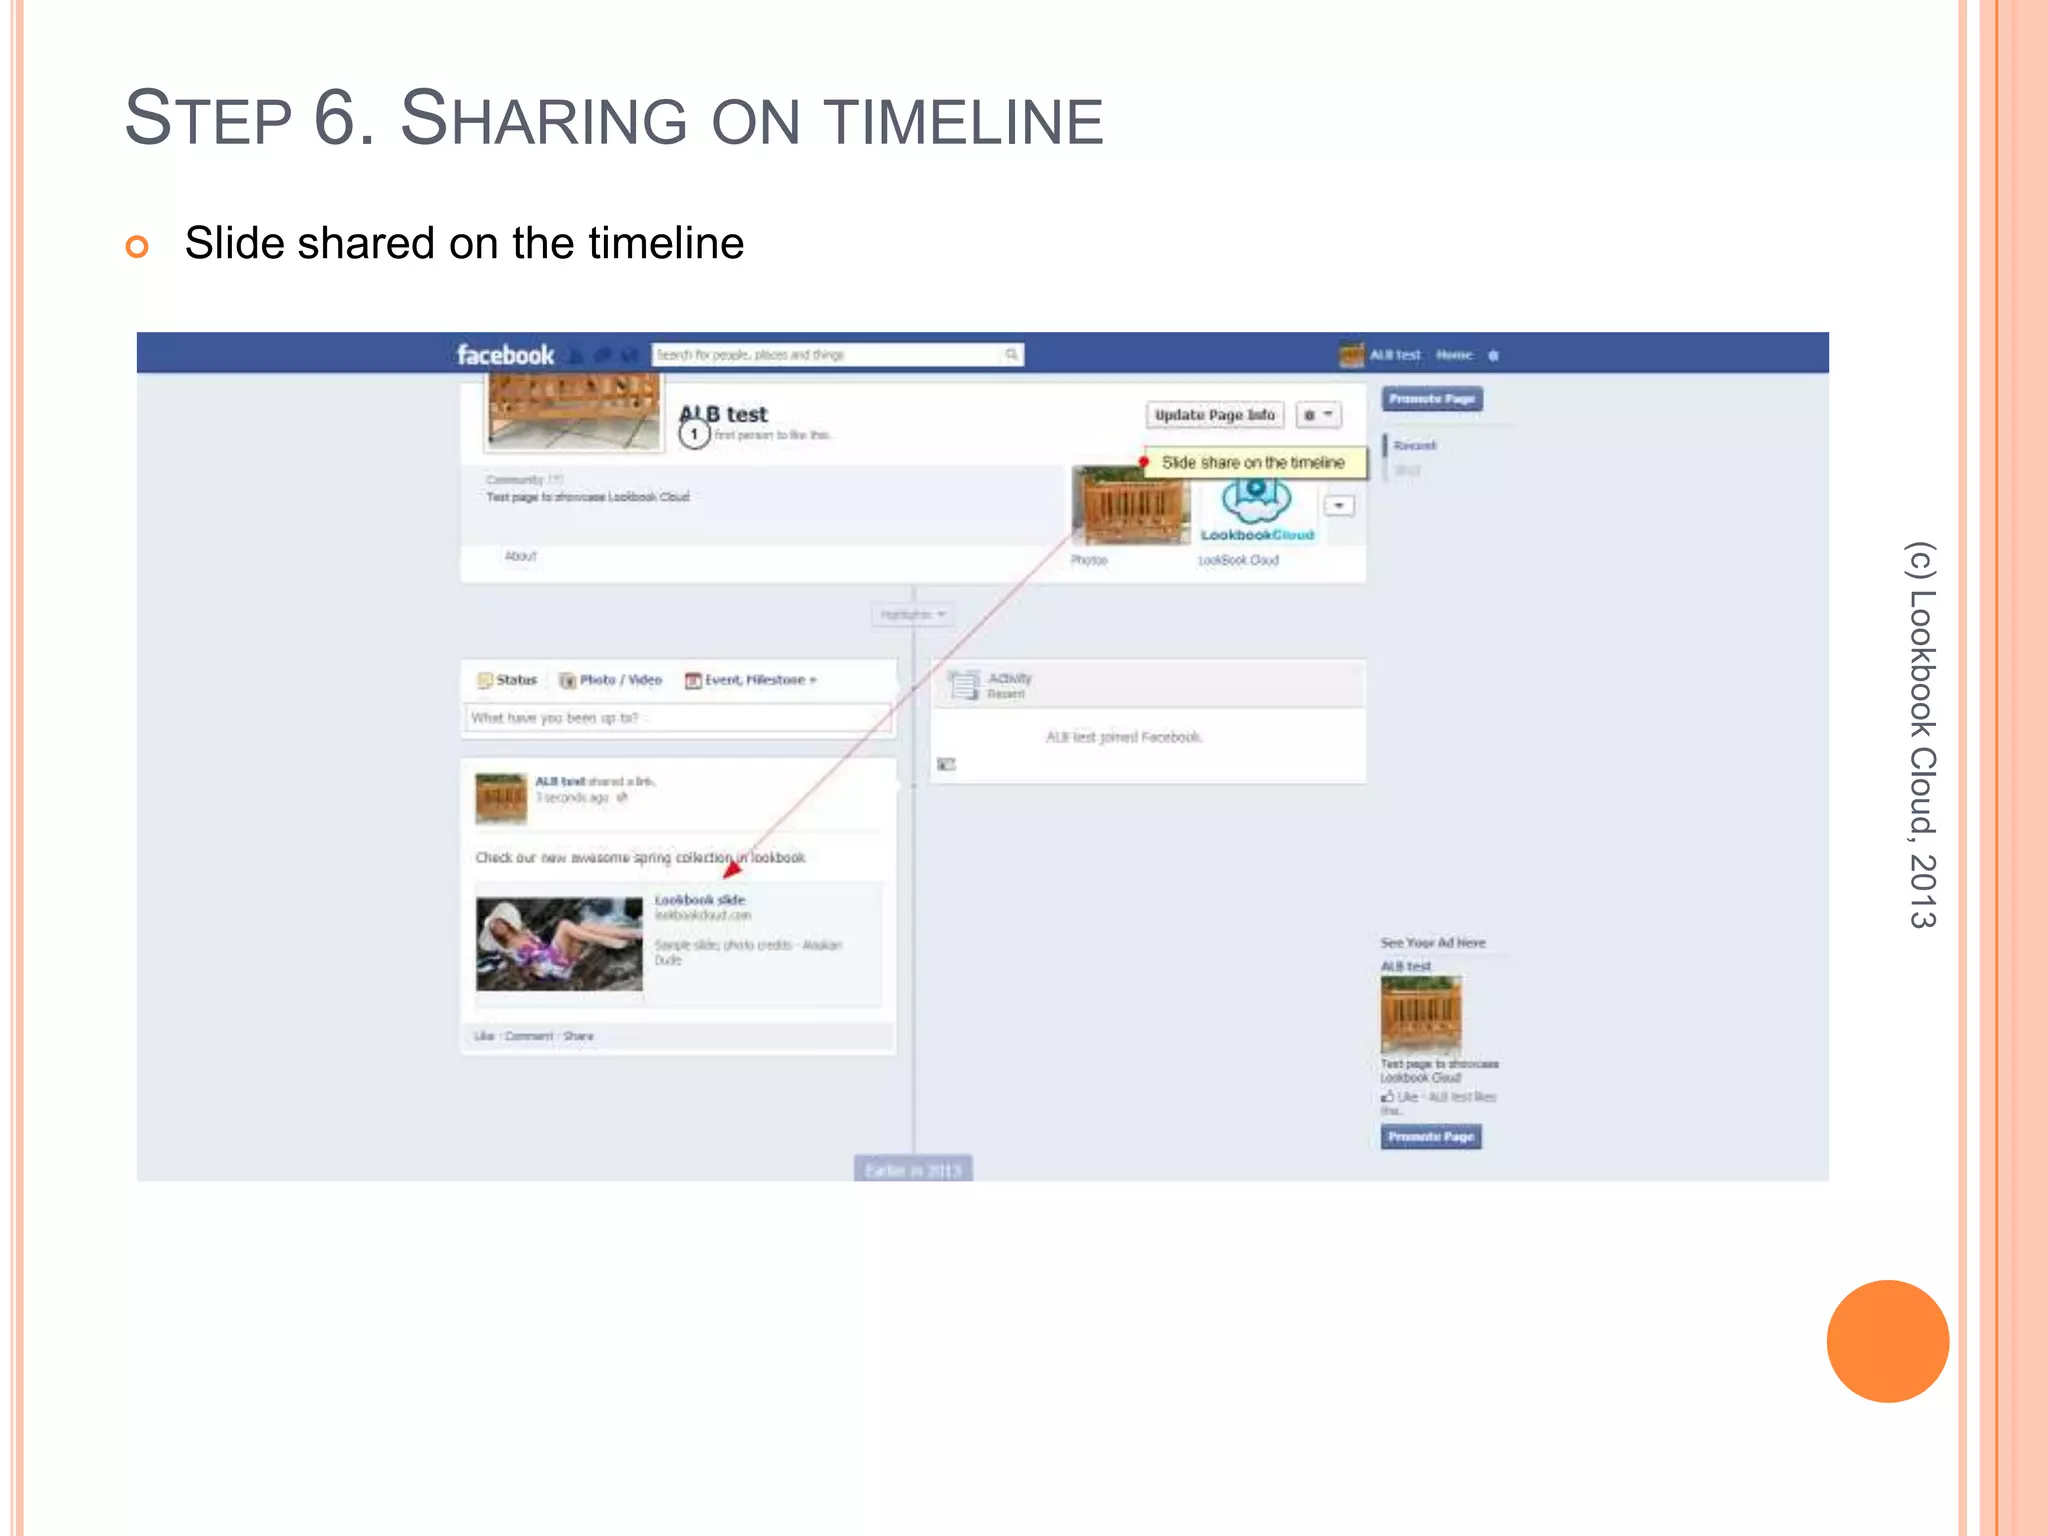
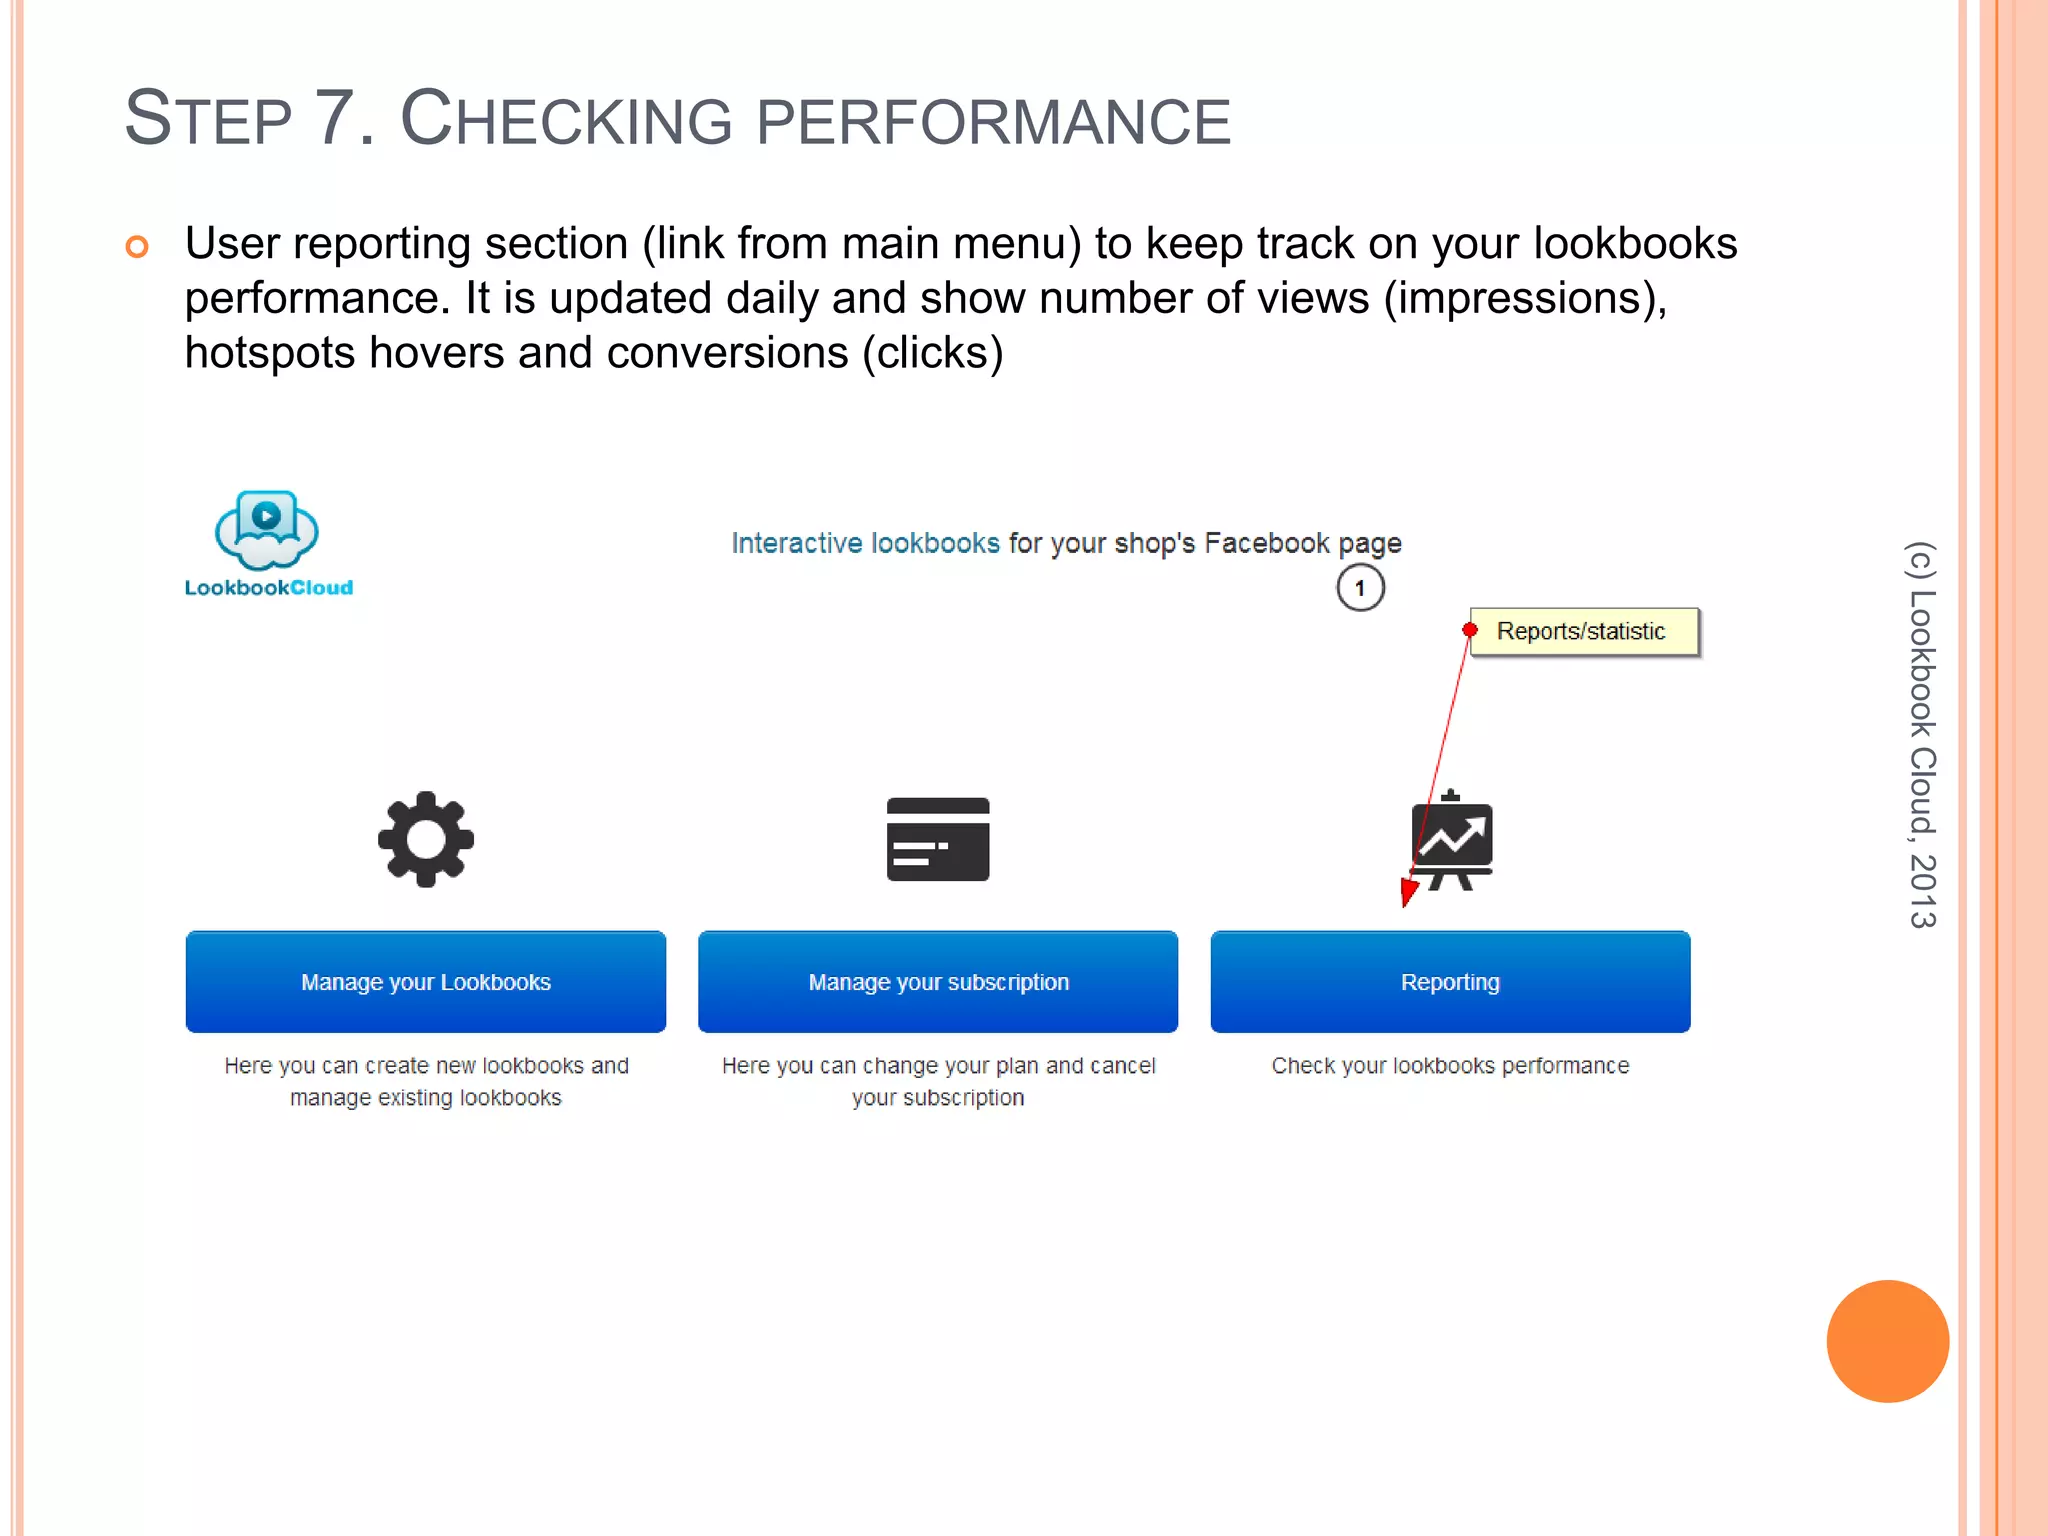
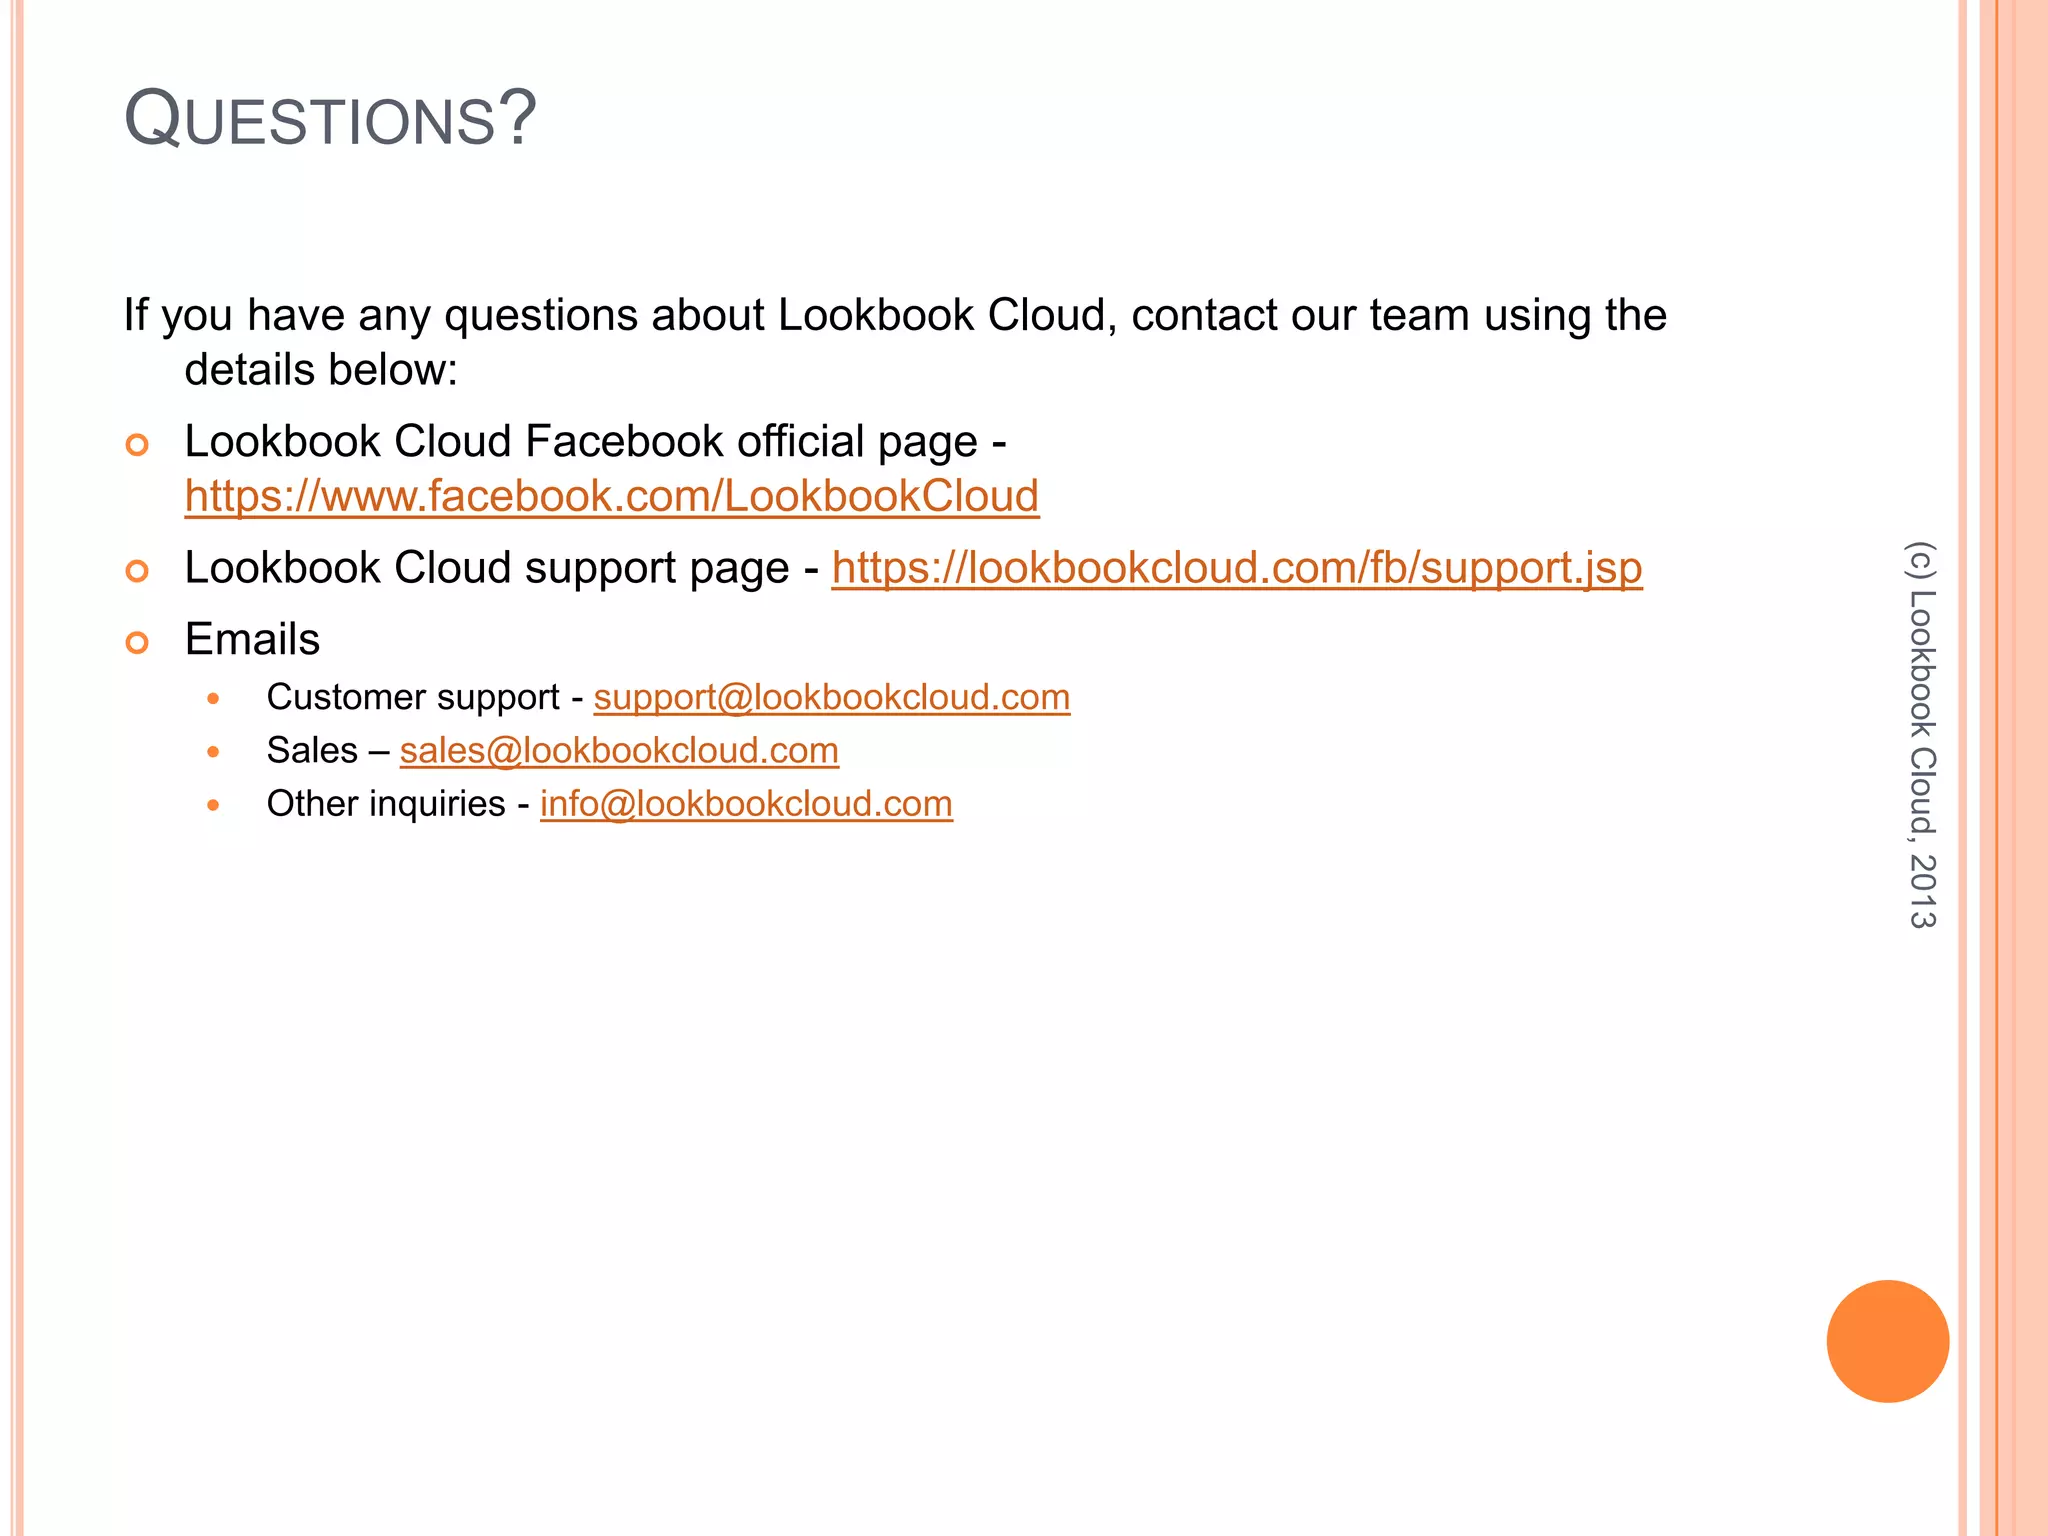

This document provides a 7 step guide for using the Lookbook Cloud app to create and publish online lookbooks. The steps include: 1) signing up for an account; 2) creating lookbooks and slides; 3) adding hotspots to slides; 4) publishing the lookbook as a Facebook page tab; 5) sharing slides on the page timeline; 6) checking performance metrics; and 7) contacting support.


![Vibe Coding vs. Spec-Driven Development [Free Meetup]](https://cdn.slidesharecdn.com/ss_thumbnails/vibecodingvsspecdrivendevelopment-251209105622-43f455e7-thumbnail.jpg?width=640&height=640&fit=bounds)


