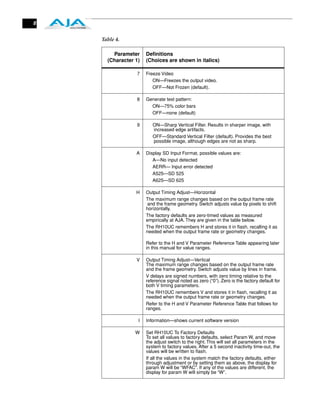
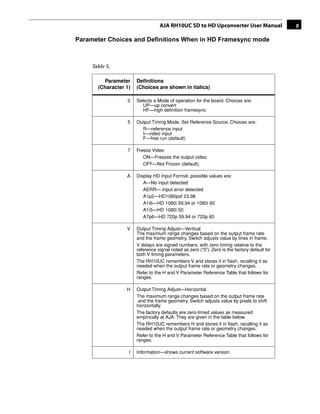
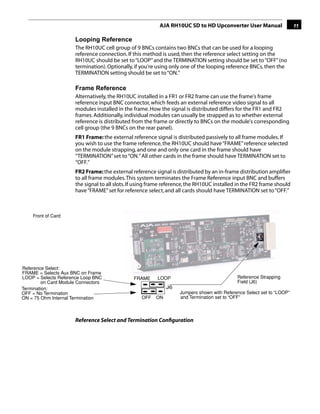
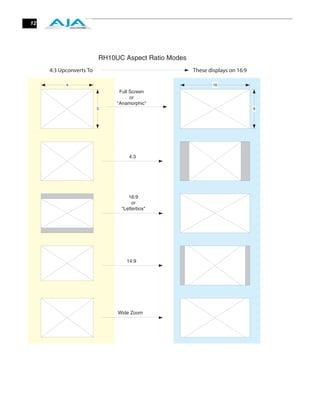
Download to read offline


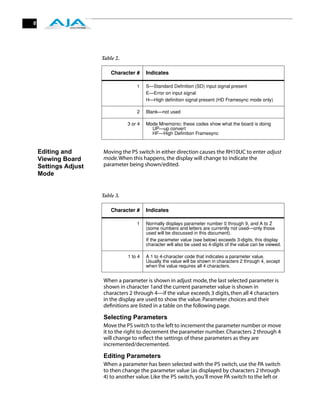


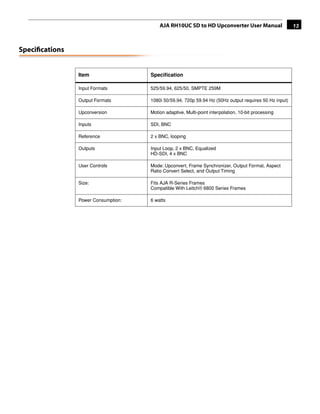


The document provides instructions for installing and operating the AJA RH10UC SD to HD upconverter card module. It can upconvert SD video to HD and also perform HD framesync functions. The card installs into the AJA FR1 or FR2 frame and provides SD and HD I/O through BNC connectors on the rear of the frame. It has a simple user interface using two toggle switches and a 4-character display to adjust parameters and view status information. Parameters control functions like output format, upconversion mode, timing adjustments and more depending on whether it is in upconvert or framesync mode.


