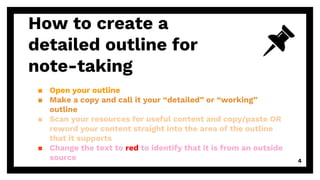
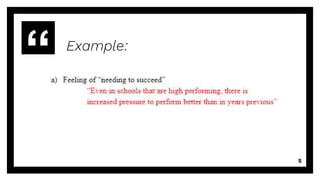
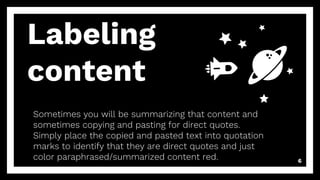
Note Taking
using a color-
coded detailed
outline
Why create a
detailed outline for
note-taking?
▪ It ensures that you follow your set order
▪ It ensures that you don’t accidentally insert new content without
changing the outline
▪ It ensures that you don’t accidentally forget to write about
something that you planned to address
▪ It helps you scan to make sure that you have included all proper
elements of writing
2
Following
your set order
As your outline follows the
order of your thesis statement,
your paper must follow the
order of your outline.
This helps to ensure that you
remember to follow the set
order in your written paper.
3
How to create a
detailed outline for
note-taking
▪ Open your outline
▪ Make a copy and call it your “detailed” or “working”
outline
▪ Scan your resources for useful content and copy/paste OR
reword your content straight into the area of the outline
that it supports
▪ Change the text to red to identify that it is from an outside
source 4
Example:
5
Labeling
content
Sometimes you will be summarizing that content and
sometimes copying and pasting for direct quotes.
Simply place the copied and pasted text into quotation
marks to identify that they are direct quotes and just
color paraphrased/summarized content red. 6
Further labeling
Every time that you use ideas or specific
words from outside sources, they must be
cited. It’s the best idea to do this now so that
you don’t accidentally plagiarize later.
If using MLA Style, place the author(s) last
name or the article title (in quotation marks)
or the italicized book title with page numbers
into parentheses as you would cite it
parenthetically. Color your citation blue.
Example:
8
Note: the parenthetical
citation continues on the next
line with the second author’s
last name
Checkpoint #1
At this stage, it is best to consult all
of your resources, extract useful
information from each, and properly
cite the information.
9
Maybe you ran across content that you
wanted to add and it didn’t match your
outline
If this happened, add an element to your
outline and remember to adjust your “non-
detailed” or “non-working” outline as well as
your thesis statement to reflect the addition.
Have you wanted
to add content
10
“It ensures that you don’t
accidentally insert new
content without changing
the outline.
After looking over your outline, are there
areas that you never filled out?
If this happened, search for new resources
that support the concept or adjust the outline
and thesis statement to remove the concept
if your content is not easily “researchable”
Do you have
enough content
11
“It ensures that you don’t
accidentally forget to write
about something that you
planned to address”
Maybe you only have one source to support
each idea
If this happened, look for additional sources
to further support that idea to allow you to
better synthesize expert information.
Is your content
diverse
12
Ensuring all
elements of
writing
In addition to “curating” all of
that supportive information that
you found by arranging it into
the proper areas you must
complete additional steps to
qualify as an effective writer.
13
Annotations
This is your paper! You created a unique thesis statement based upon
your interests. You get to lead your reader on a path that you set. The
way that you do this is by introducing or following expert information
with your own thinking. You “cushion” the research with your own
inferences or thoughts. You do this using formal writing techniques (no
personal pronouns, etc.) that possibly “break down the meaning” of
the information presented or “connect the human element” Be careful
that any of your own writing does not present new information and,
instead, analyzes the information gathered from experts. Color any
annotations green. 14
Example:
15
Transition and
Topic Sentences
Transition and topic sentences organize your writing to help your
reader follow your path seamlessly.
A good transition sentence addresses the topic or idea that was just
explored and introduces the upcoming topic or idea.
A strong topic sentence will help the reader with their “footing” as they
consider your next idea. Color any transition or topic sentences orange
16
Example:
17
Checkpoint #2
At this stage, check to ensure that
you have annotations and transition
and topic sentences.
18
Does green text “cushion” red and blue text throughout?
Your introduction and conclusion may be completely green
representing that they are entirely your own writing but you
may be able to strengthen those areas with a fabulous quote
(red text and cited in blue). The introduction may even
include a statistic or story (also red text cited with blue).
You do not want to scan your paper and see entire
paragraphs within the body green since this is a research
paper and must be heavy with research from expert sources.
Have you added
annotations
19
“It helps you
scan to make
sure that you
have included all
proper elements
of writing”
What to do now
assess edit transfer
20
Assess all sections one last
time. Is your source quality
top-notch? Have you included
all elements?
assess
21
Edit writing for further
sophistication and clear
communication of ideas and
edit as needed
edit
22
You’ve basically written your first rough
draft! Either copy your content to a new
document or delete the outline portion
on this document. Remember to switch
colors to black unless directed
otherwise.
transfer
23
Edit as often as
possible
You
Edit a few times with breaks
between sessions
A trusted friend or parent
Ask that they give feedback and
give them ample time.
A teacher or librarian
Ask if they have the time to edit
and would not mind. Give them
ample time if you want their
best quality work. Consider
asking two teachers.
24
You are done!
Great job!
I hope that you found this
process helpful!
25
Thanks!
Any questions?
You can find me at
▪ khornberger@palisadessd.org
26
Credits
Special thanks to all the people who made and
released these awesome resources for free:
▪ Presentation template by SlidesCarnival
▪ Photographs by Unsplash
27

Research Paper Note Taking with an Outline

  • 1.
    Note Taking using acolor- coded detailed outline
  • 2.
    Why create a detailedoutline for note-taking? ▪ It ensures that you follow your set order ▪ It ensures that you don’t accidentally insert new content without changing the outline ▪ It ensures that you don’t accidentally forget to write about something that you planned to address ▪ It helps you scan to make sure that you have included all proper elements of writing 2
  • 3.
    Following your set order Asyour outline follows the order of your thesis statement, your paper must follow the order of your outline. This helps to ensure that you remember to follow the set order in your written paper. 3
  • 4.
    How to createa detailed outline for note-taking ▪ Open your outline ▪ Make a copy and call it your “detailed” or “working” outline ▪ Scan your resources for useful content and copy/paste OR reword your content straight into the area of the outline that it supports ▪ Change the text to red to identify that it is from an outside source 4
  • 5.
  • 6.
    Labeling content Sometimes you willbe summarizing that content and sometimes copying and pasting for direct quotes. Simply place the copied and pasted text into quotation marks to identify that they are direct quotes and just color paraphrased/summarized content red. 6
  • 7.
    Further labeling Every timethat you use ideas or specific words from outside sources, they must be cited. It’s the best idea to do this now so that you don’t accidentally plagiarize later. If using MLA Style, place the author(s) last name or the article title (in quotation marks) or the italicized book title with page numbers into parentheses as you would cite it parenthetically. Color your citation blue.
  • 8.
    Example: 8 Note: the parenthetical citationcontinues on the next line with the second author’s last name
  • 9.
    Checkpoint #1 At thisstage, it is best to consult all of your resources, extract useful information from each, and properly cite the information. 9
  • 10.
    Maybe you ranacross content that you wanted to add and it didn’t match your outline If this happened, add an element to your outline and remember to adjust your “non- detailed” or “non-working” outline as well as your thesis statement to reflect the addition. Have you wanted to add content 10 “It ensures that you don’t accidentally insert new content without changing the outline.
  • 11.
    After looking overyour outline, are there areas that you never filled out? If this happened, search for new resources that support the concept or adjust the outline and thesis statement to remove the concept if your content is not easily “researchable” Do you have enough content 11 “It ensures that you don’t accidentally forget to write about something that you planned to address”
  • 12.
    Maybe you onlyhave one source to support each idea If this happened, look for additional sources to further support that idea to allow you to better synthesize expert information. Is your content diverse 12
  • 13.
    Ensuring all elements of writing Inaddition to “curating” all of that supportive information that you found by arranging it into the proper areas you must complete additional steps to qualify as an effective writer. 13
  • 14.
    Annotations This is yourpaper! You created a unique thesis statement based upon your interests. You get to lead your reader on a path that you set. The way that you do this is by introducing or following expert information with your own thinking. You “cushion” the research with your own inferences or thoughts. You do this using formal writing techniques (no personal pronouns, etc.) that possibly “break down the meaning” of the information presented or “connect the human element” Be careful that any of your own writing does not present new information and, instead, analyzes the information gathered from experts. Color any annotations green. 14
  • 15.
  • 16.
    Transition and Topic Sentences Transitionand topic sentences organize your writing to help your reader follow your path seamlessly. A good transition sentence addresses the topic or idea that was just explored and introduces the upcoming topic or idea. A strong topic sentence will help the reader with their “footing” as they consider your next idea. Color any transition or topic sentences orange 16
  • 17.
  • 18.
    Checkpoint #2 At thisstage, check to ensure that you have annotations and transition and topic sentences. 18
  • 19.
    Does green text“cushion” red and blue text throughout? Your introduction and conclusion may be completely green representing that they are entirely your own writing but you may be able to strengthen those areas with a fabulous quote (red text and cited in blue). The introduction may even include a statistic or story (also red text cited with blue). You do not want to scan your paper and see entire paragraphs within the body green since this is a research paper and must be heavy with research from expert sources. Have you added annotations 19 “It helps you scan to make sure that you have included all proper elements of writing”
  • 20.
    What to donow assess edit transfer 20
  • 21.
    Assess all sectionsone last time. Is your source quality top-notch? Have you included all elements? assess 21
  • 22.
    Edit writing forfurther sophistication and clear communication of ideas and edit as needed edit 22
  • 23.
    You’ve basically writtenyour first rough draft! Either copy your content to a new document or delete the outline portion on this document. Remember to switch colors to black unless directed otherwise. transfer 23
  • 24.
    Edit as oftenas possible You Edit a few times with breaks between sessions A trusted friend or parent Ask that they give feedback and give them ample time. A teacher or librarian Ask if they have the time to edit and would not mind. Give them ample time if you want their best quality work. Consider asking two teachers. 24
  • 25.
    You are done! Greatjob! I hope that you found this process helpful! 25
  • 26.
    Thanks! Any questions? You canfind me at ▪ khornberger@palisadessd.org 26
  • 27.
    Credits Special thanks toall the people who made and released these awesome resources for free: ▪ Presentation template by SlidesCarnival ▪ Photographs by Unsplash 27