Downloaded 115 times


![Prerequisite Cont..
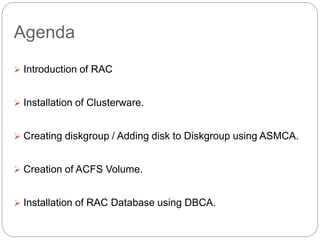
3. Need to upgrade selinux-policy rpm to make
SELINUX work current version of RPM Deliver with
RHEL 6.4
[root@STGW2 ~]# rpm -qa selinux-policy*
selinux-policy-3.7.19-195.el6.noarch
selinux-policy-targeted-3.7.19-195.el6.noarch
Need to upgrade with below mentioned package:-
[root@racnode1 ~]# rpm -qa selinux-policy*
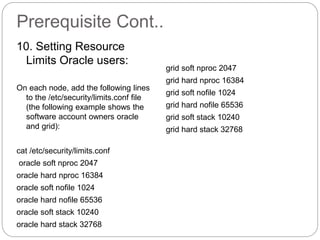
selinux-policy-3.7.19-231.el6.noarch
selinux-policy-targeted-3.7.19-231.el6.noarch](https://image.slidesharecdn.com/racinstallation11gr2-140605003701-phpapp01/85/RAC-Installing-your-First-Cluster-and-Database-9-320.jpg)

![Prerequisite Cont..
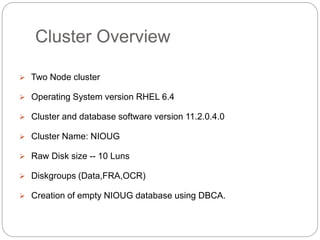
5. Put the below entry in /etc/hosts of both node
[root@racnode1 bin]# cat /etc/hosts
127.0.0.1 localhost localhost.localdomain localhost4 localhost4.localdomain4
::1 localhost localhost.localdomain localhost6 localhost6.localdomain6
192.168.7.71 racnode1
192.168.7.72 racnode2
192.168.71.40 racnode1-priv
192.168.71.41 racnode2-priv
192.168.7.41 racnode1-vip
192.168.7.42 racnode2-vip](https://image.slidesharecdn.com/racinstallation11gr2-140605003701-phpapp01/85/RAC-Installing-your-First-Cluster-and-Database-11-320.jpg)


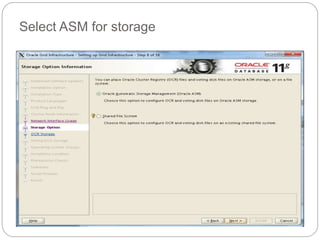
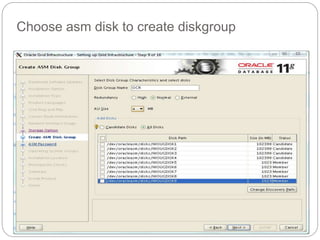


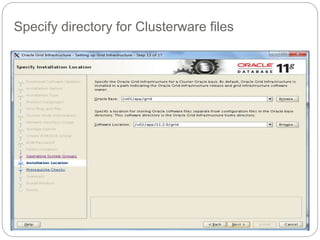


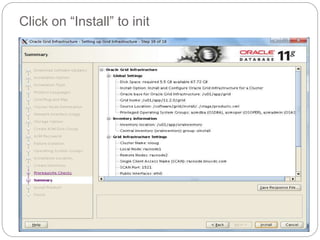


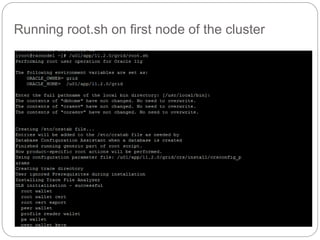


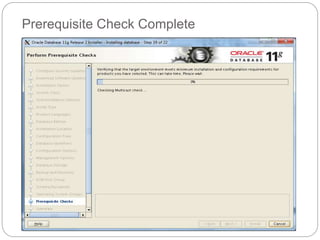

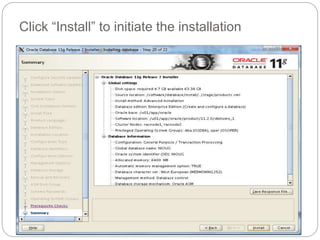
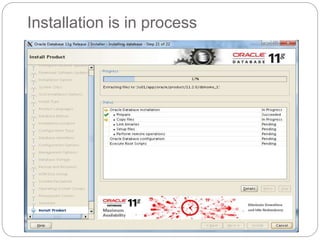

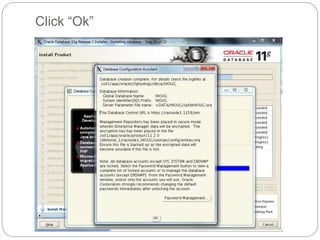

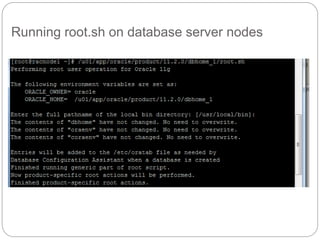


The document outlines the process for installing and configuring a Real Application Clusters (RAC) environment using Oracle's software. It includes detailed prerequisites for system and network configurations, and step-by-step instructions for setting up clusterware, creating disk groups, and establishing databases. Key topics covered include required kernel parameters, user and group setup, SELinux configurations, and the installation of ASM and database binaries.


![Oracle RAC 12c Best Practices Sanger OOW13 [CON8805]](https://cdn.slidesharecdn.com/ss_thumbnails/oraclerac12cbestpracticessangeroow13con8805-131001010408-phpapp02-thumbnail.jpg?width=640&height=640&fit=bounds)