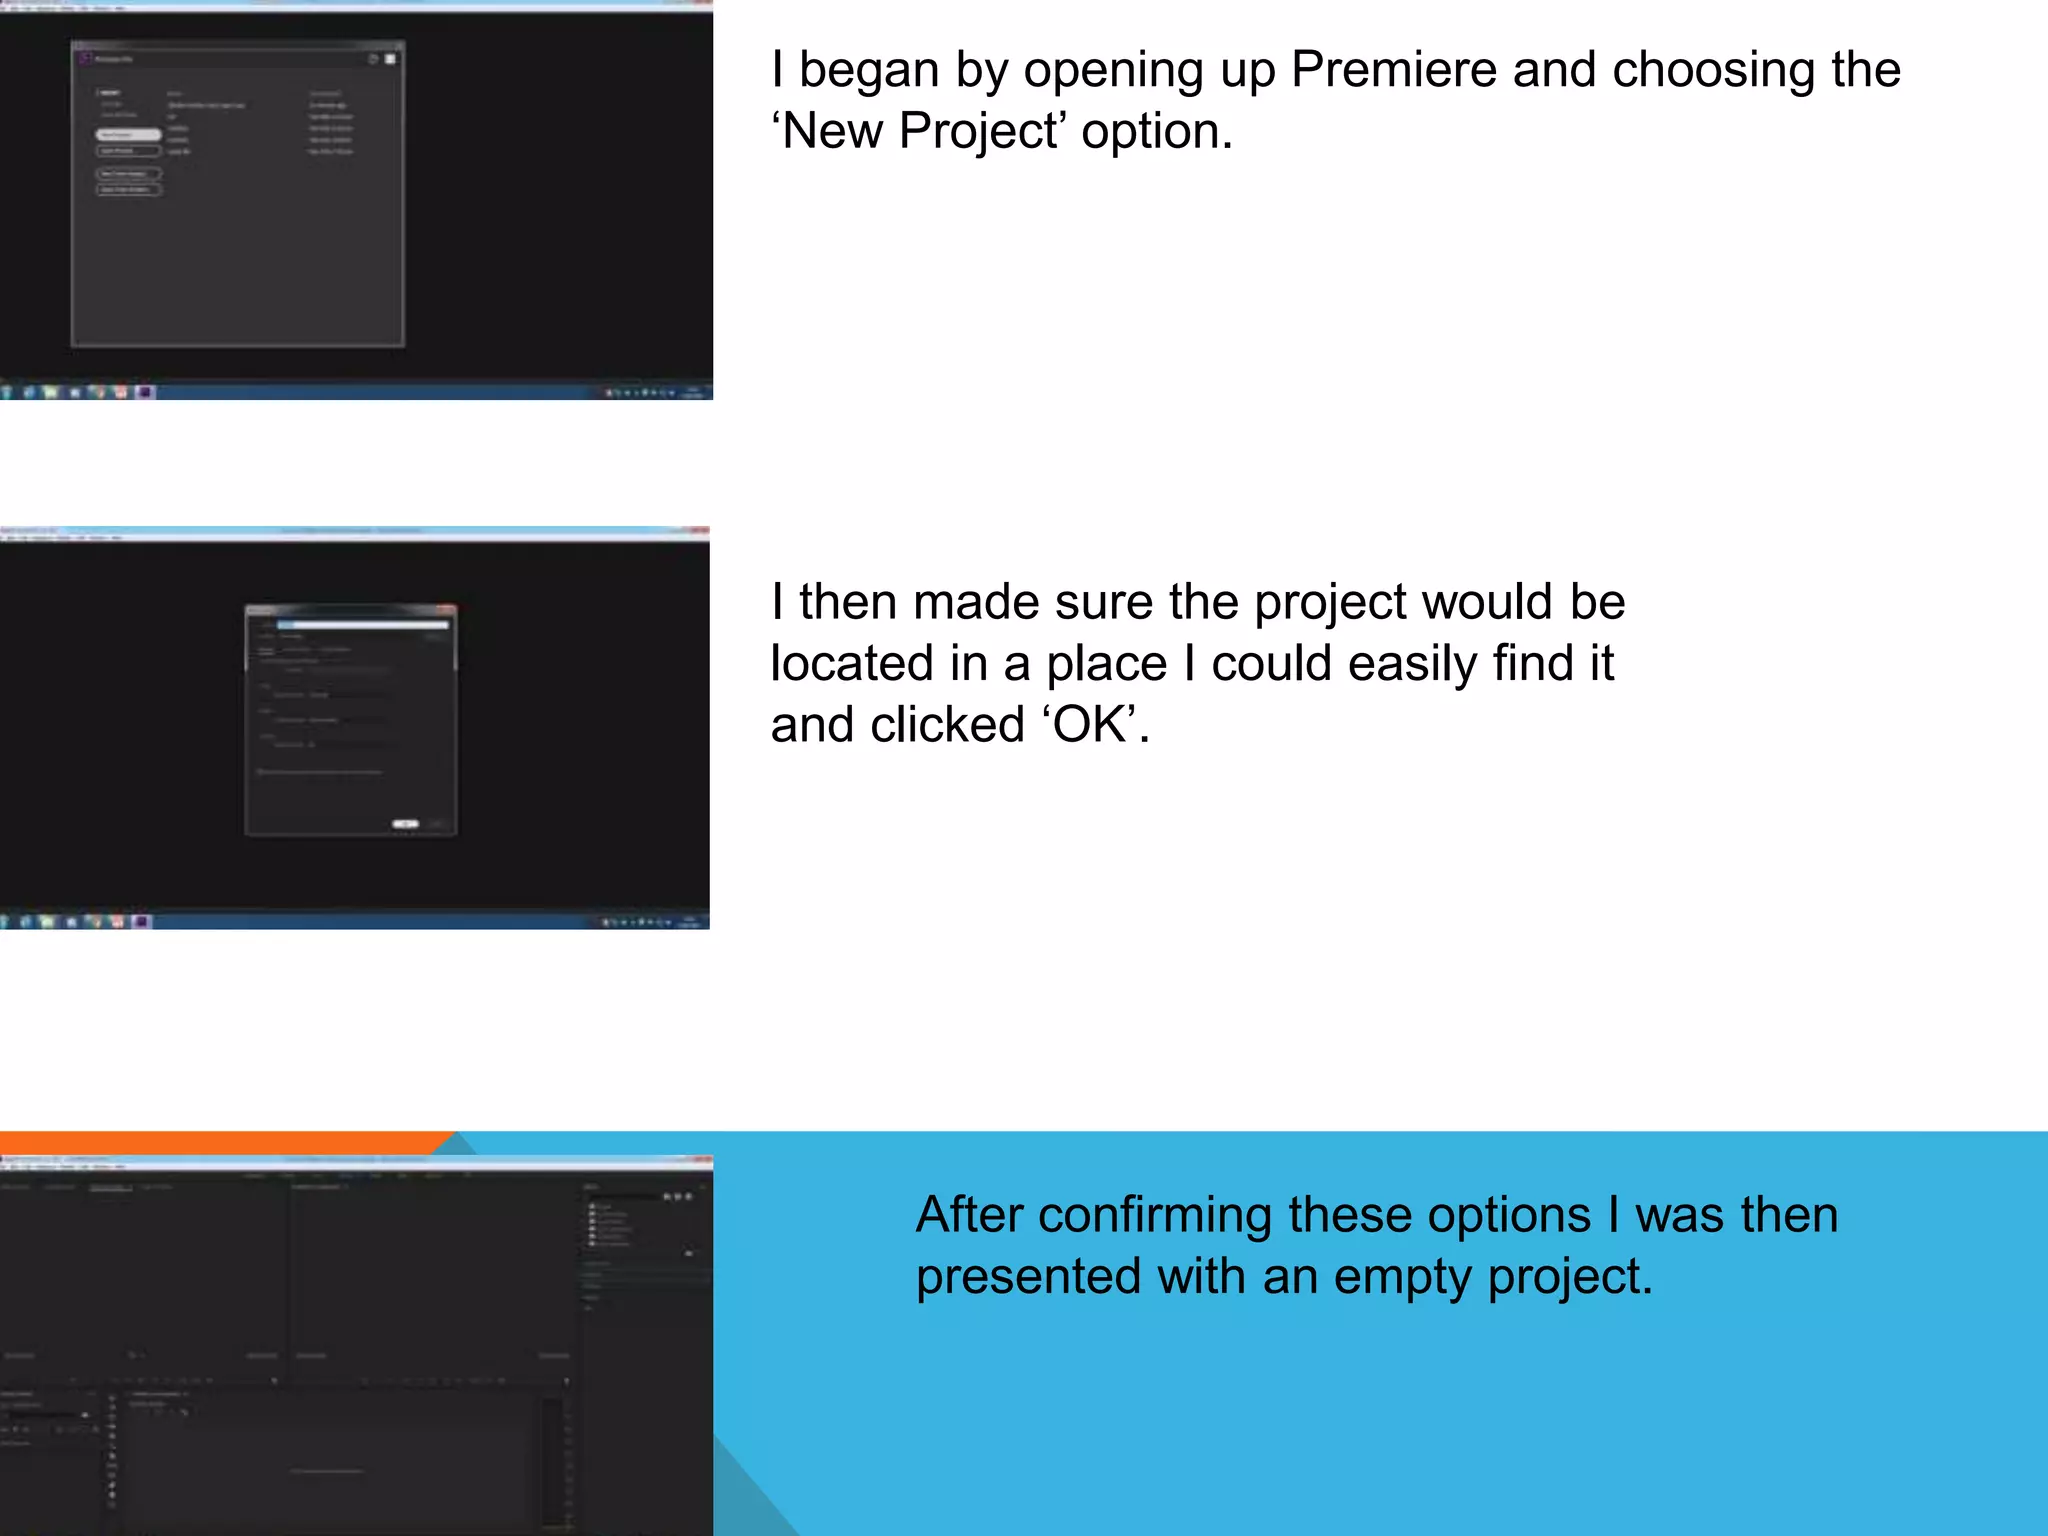
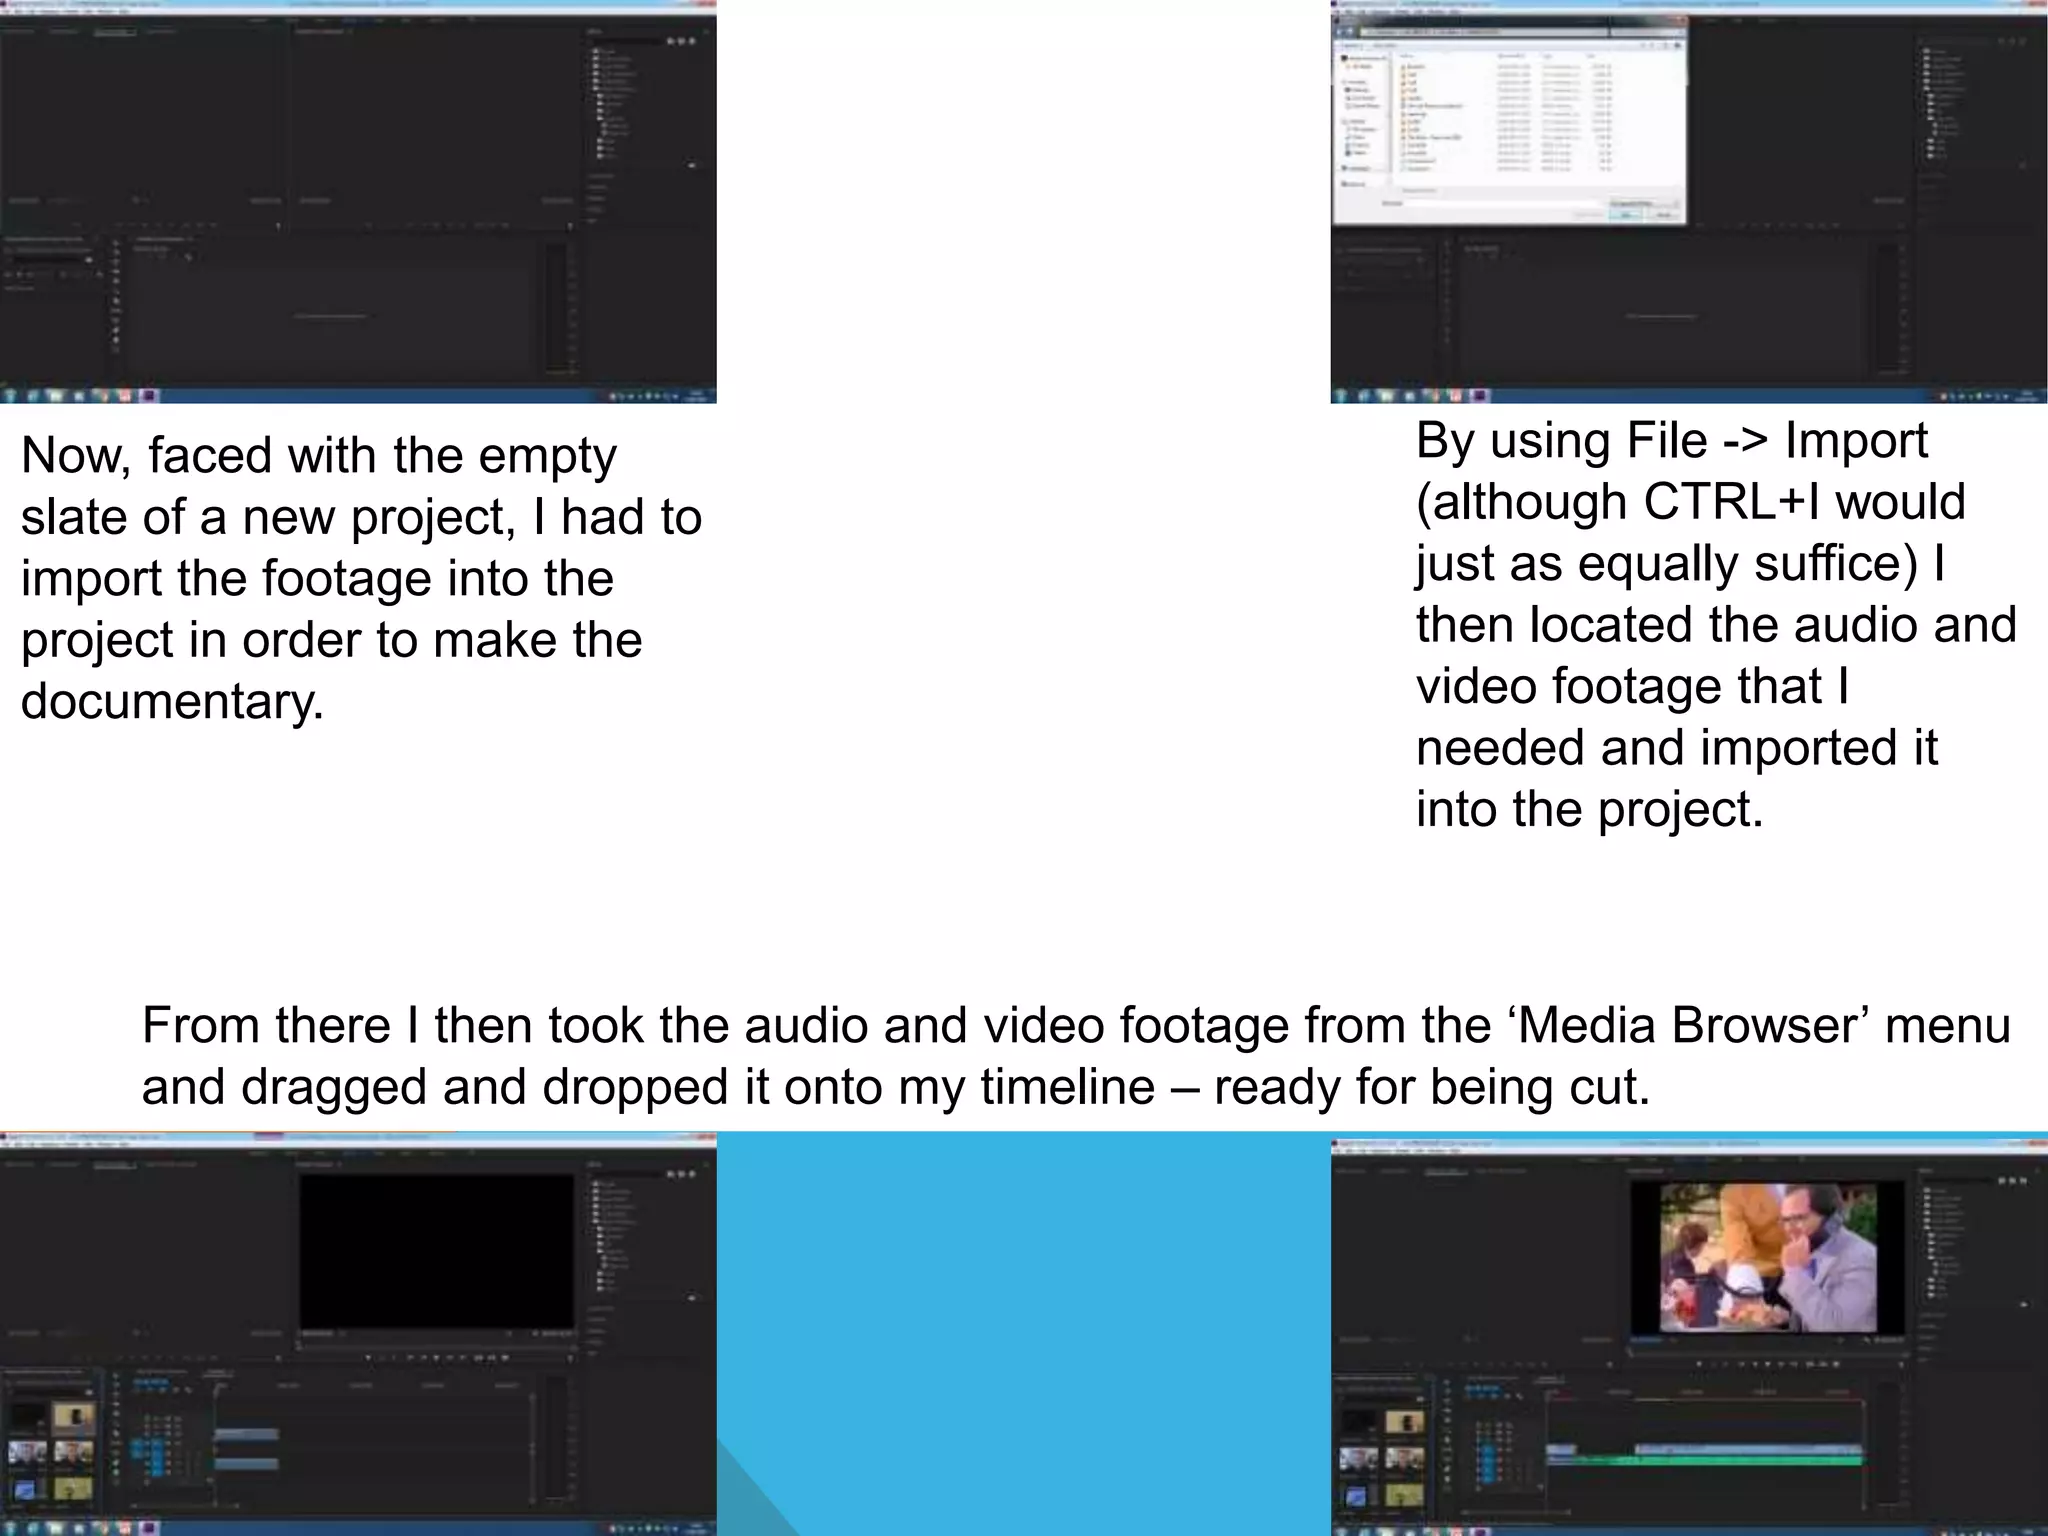
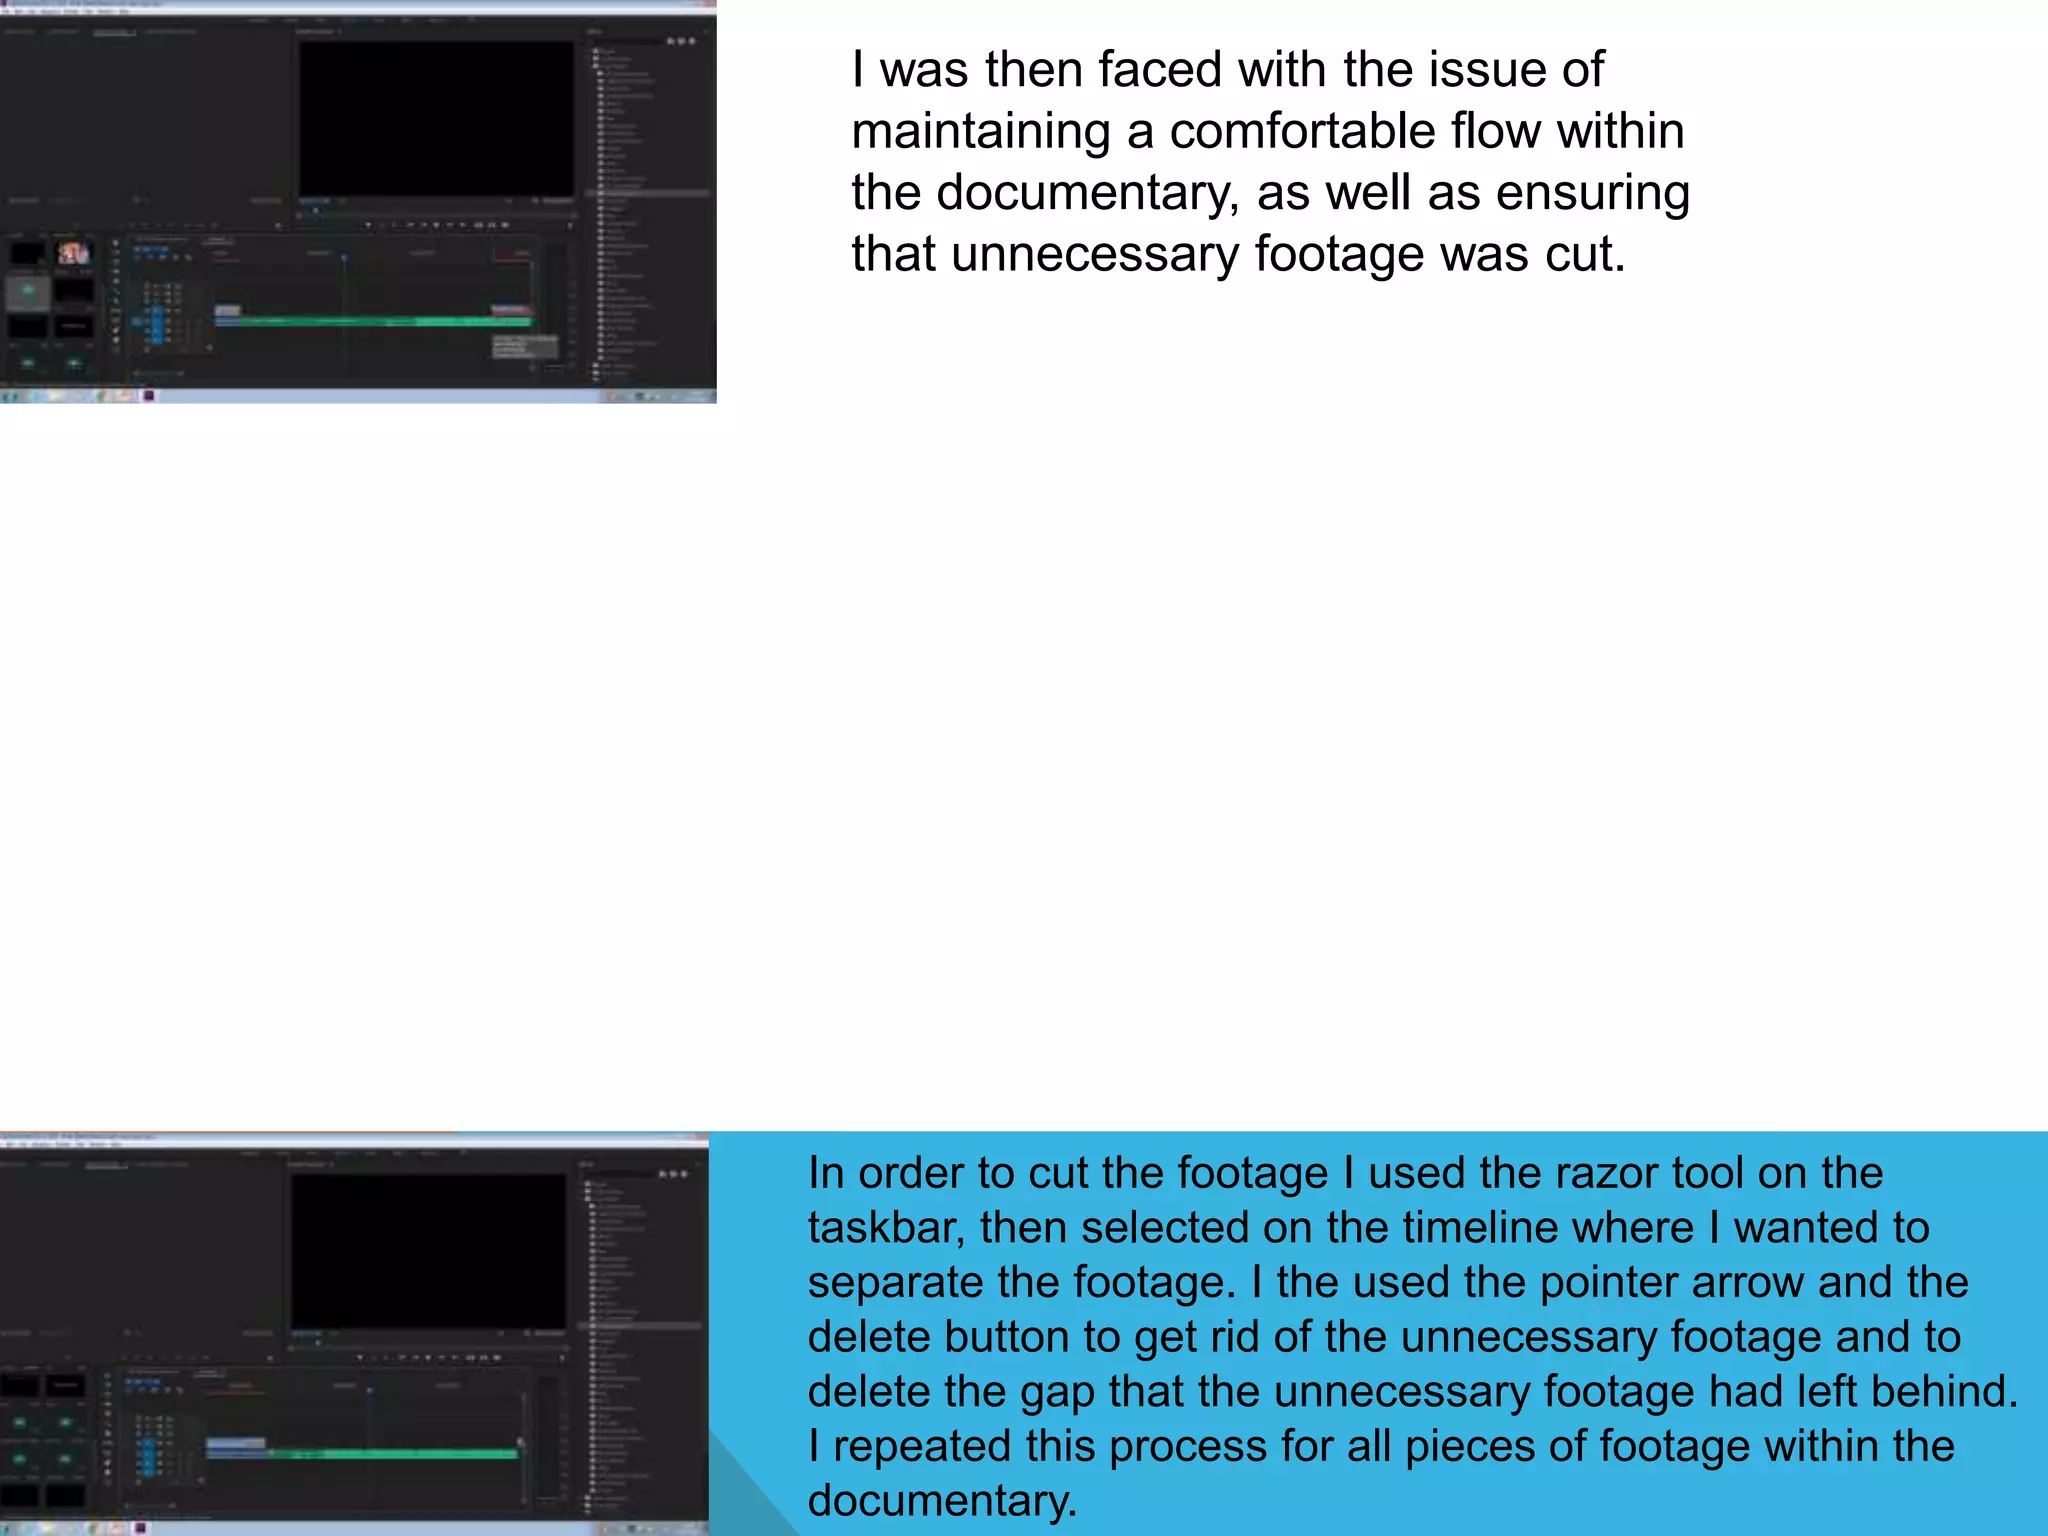
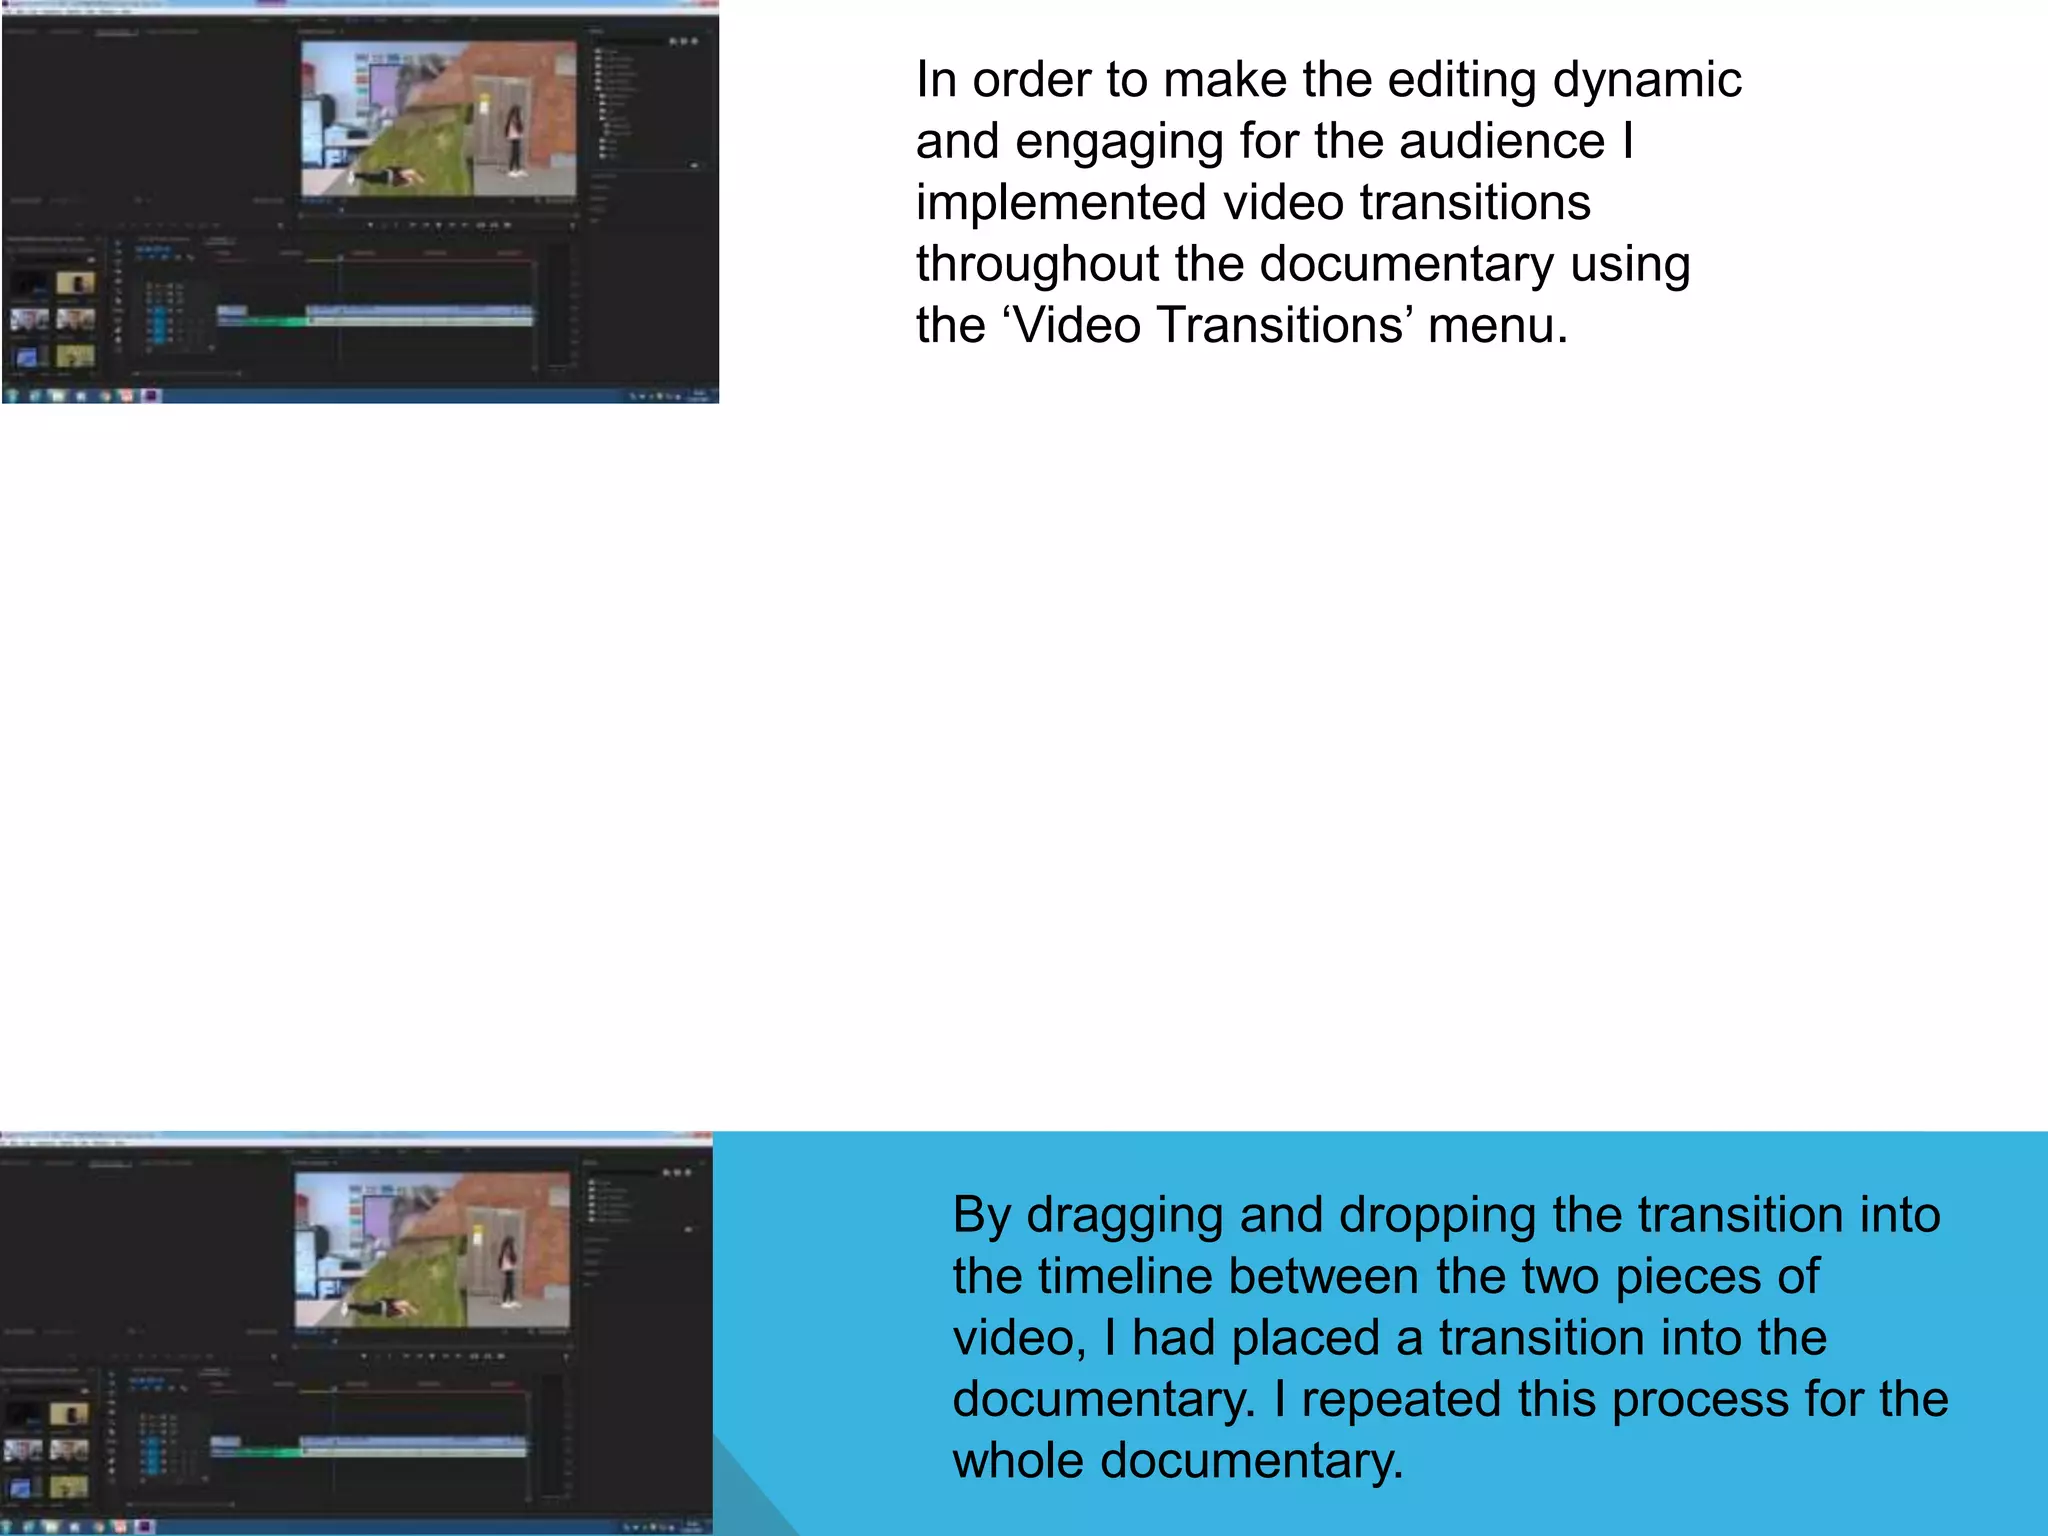
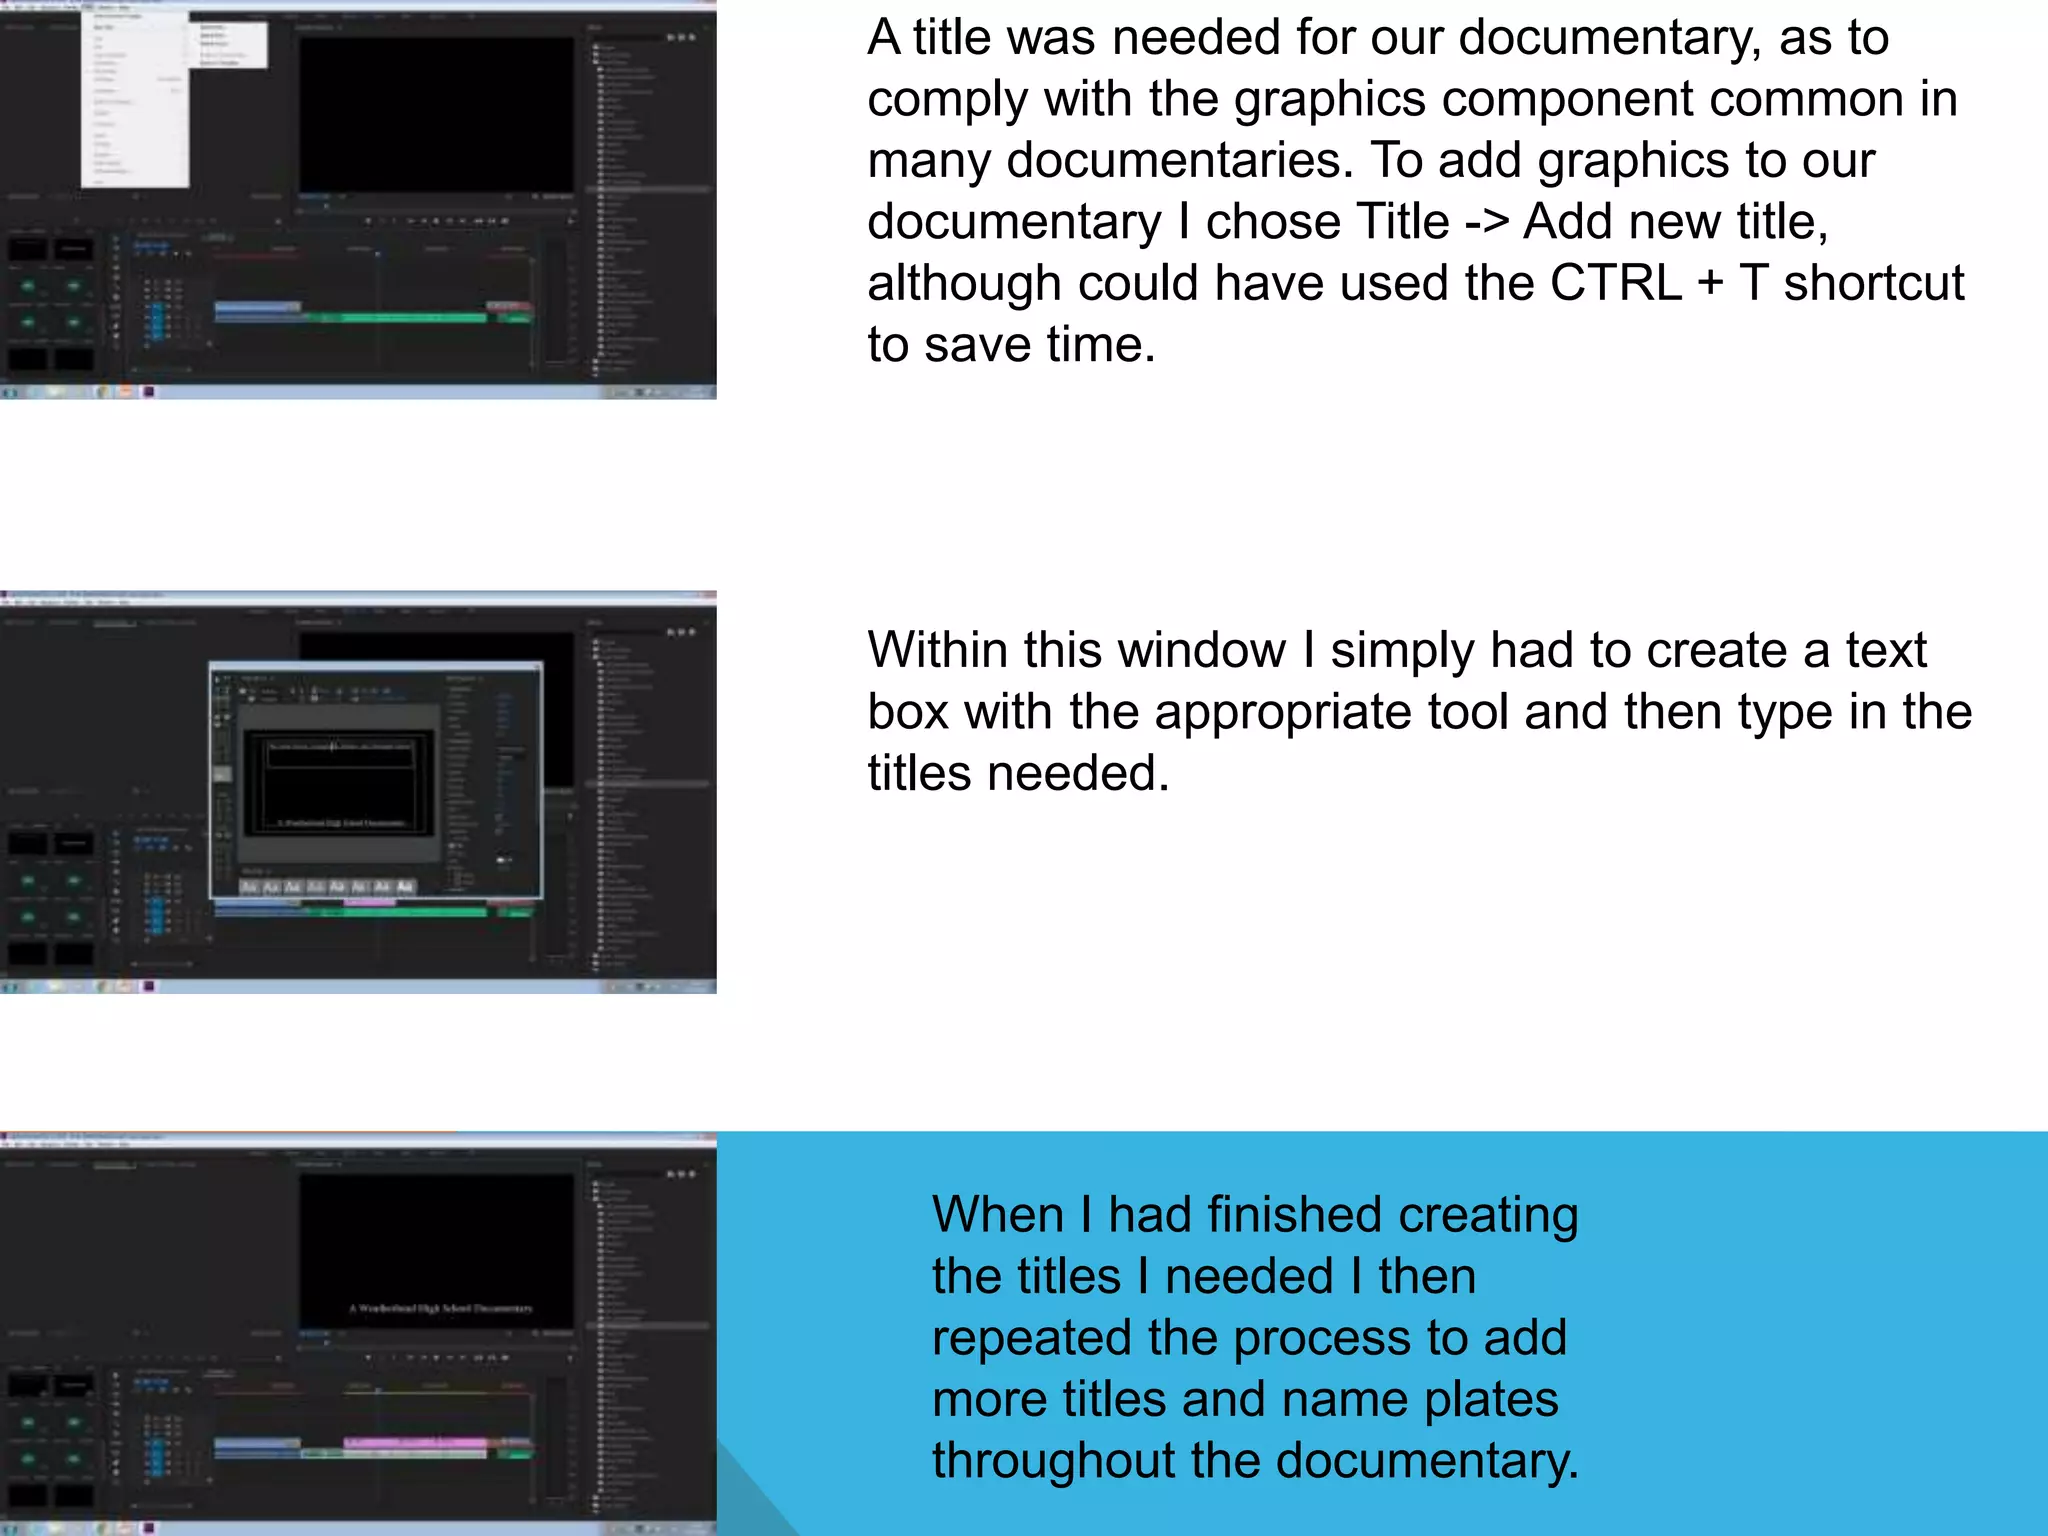
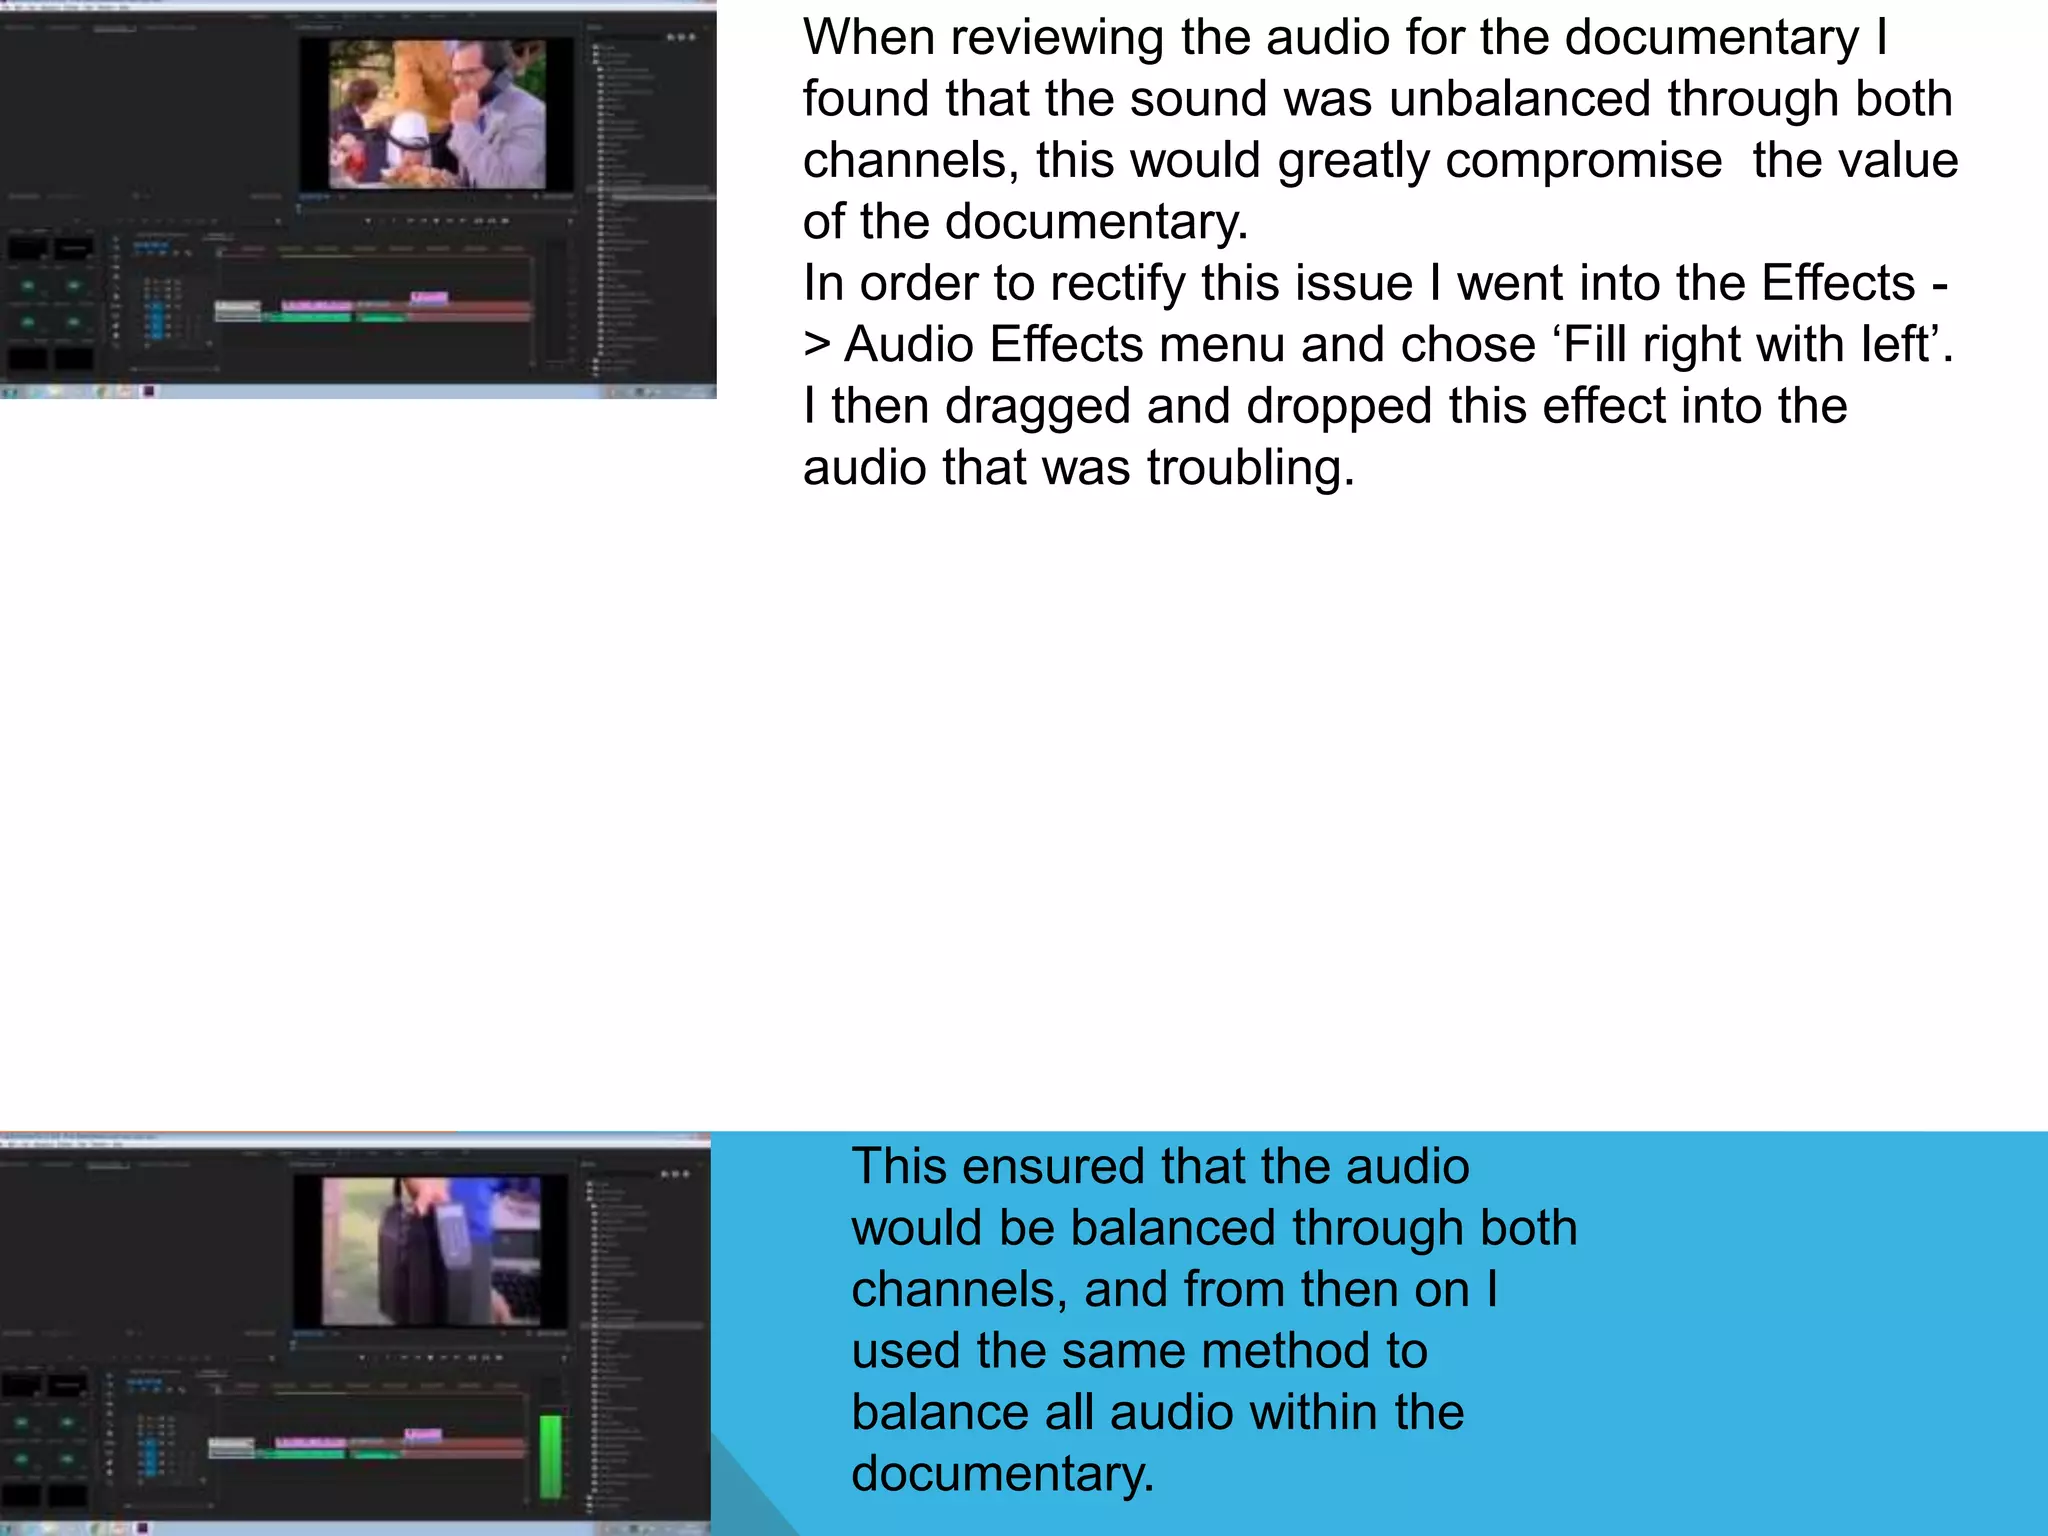
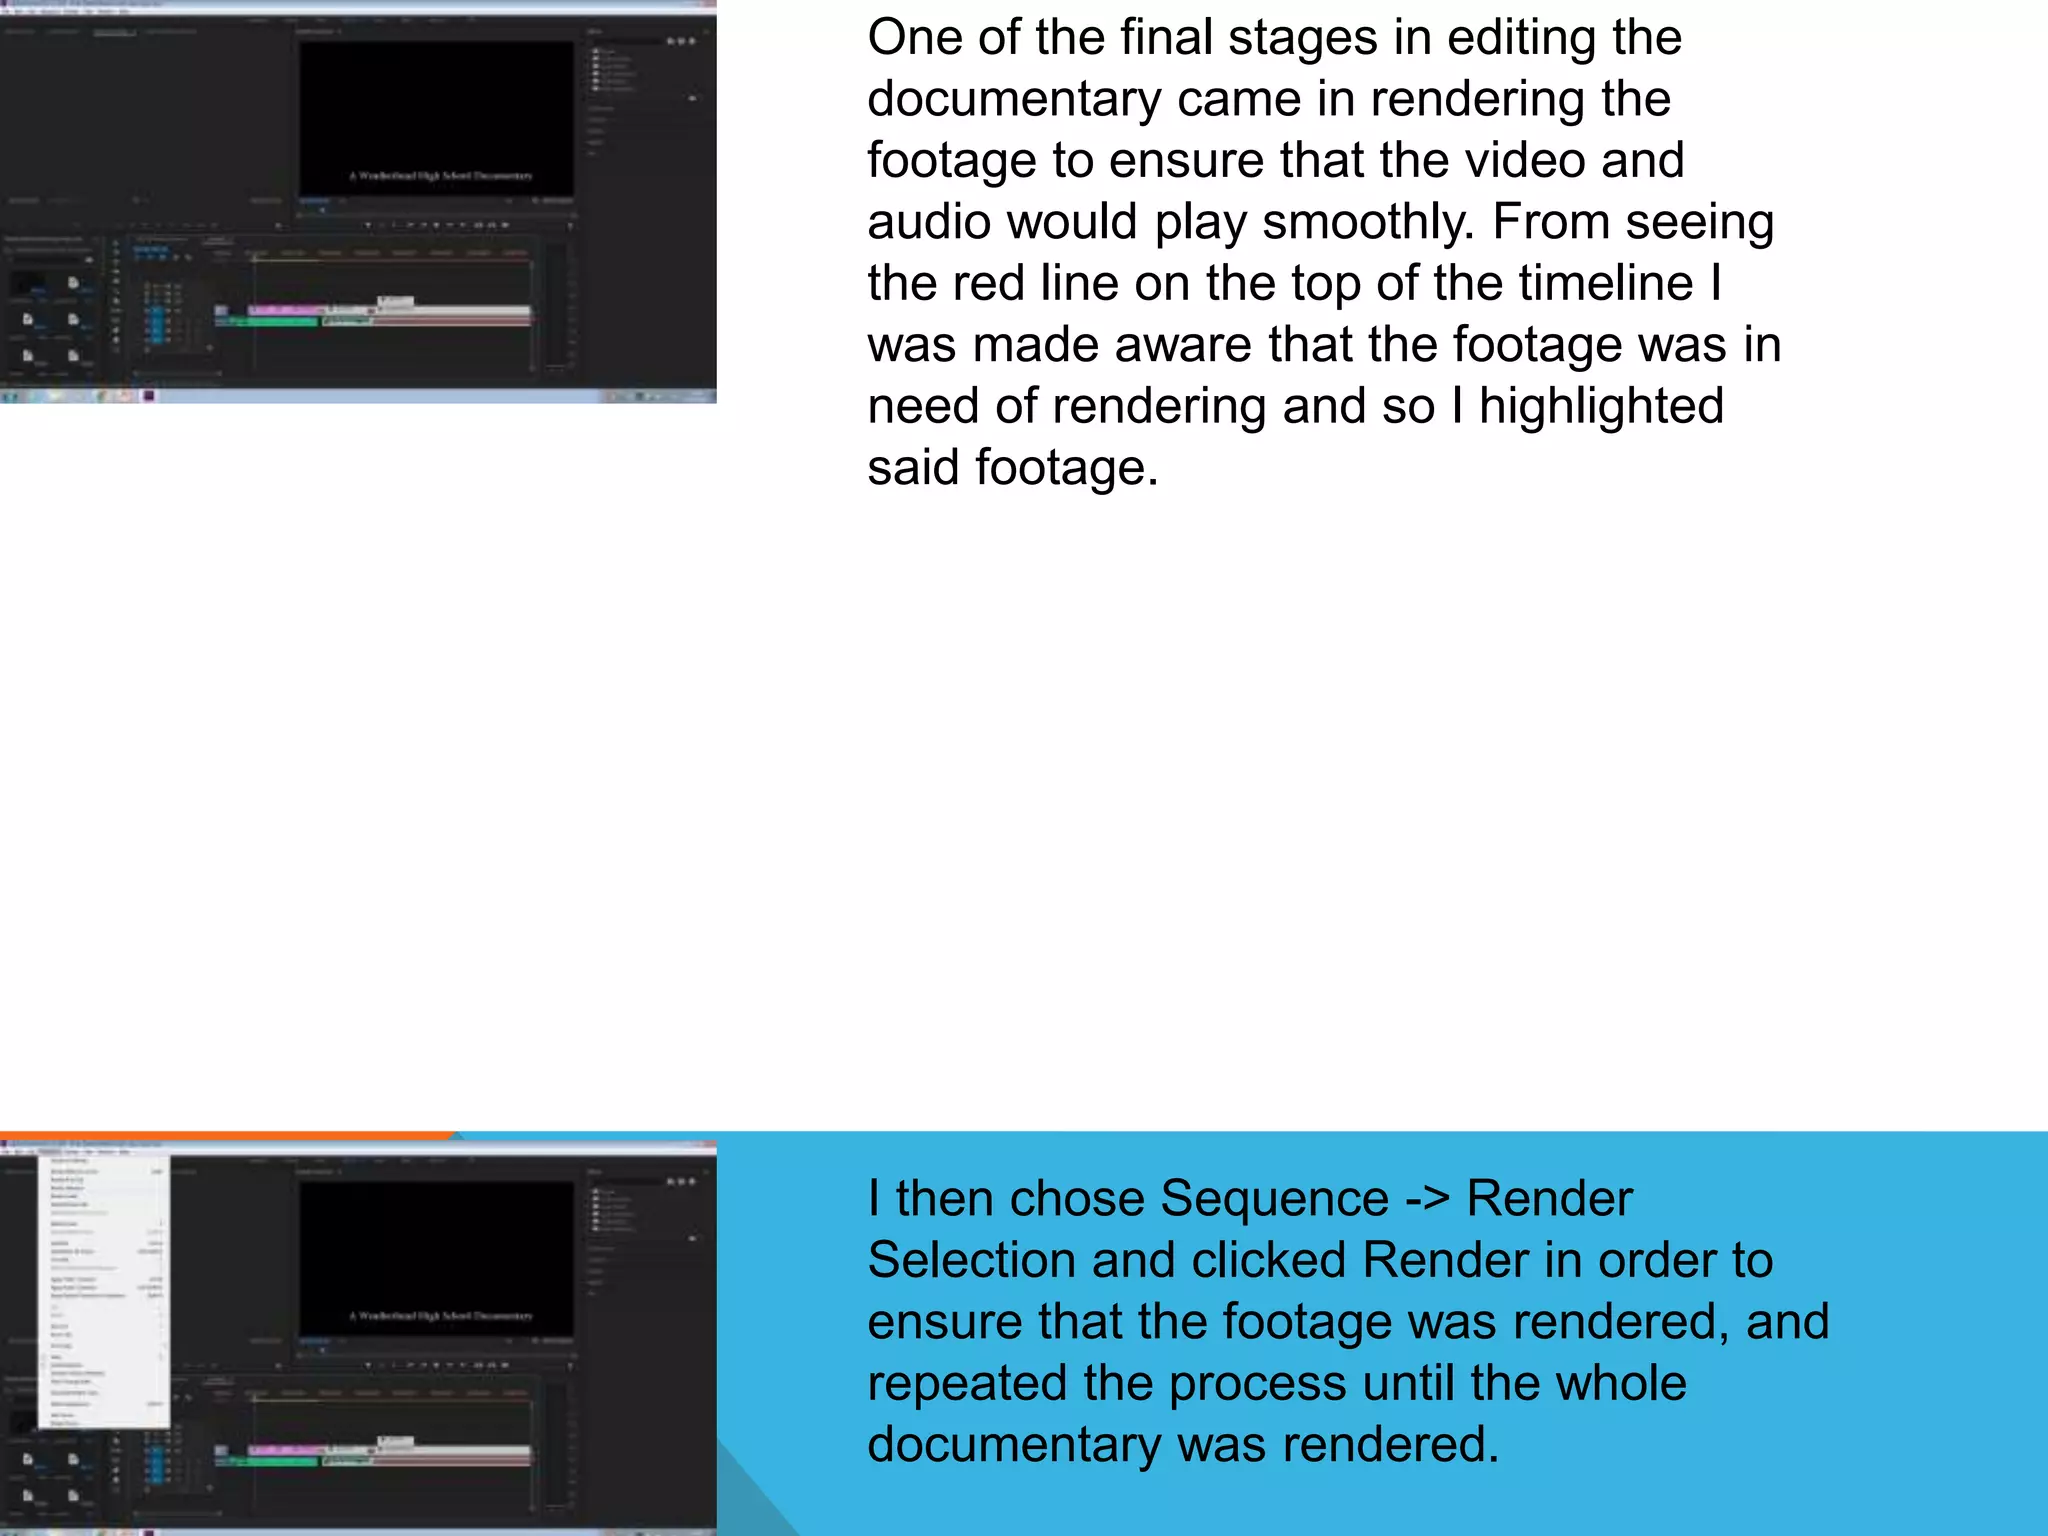
PROCESS OF MAKING A PRELIMINARY
DOCUMENTARY
S H O W N T H R O U G H A D O B E P R E M I E R E
S C R E E N S H O T S
I began by opening up Premiere and choosing the
‘New Project’ option.
I then made sure the project would be
located in a place I could easily find it
and clicked ‘OK’.
After confirming these options I was then
presented with an empty project.
Now, faced with the empty
slate of a new project, I had to
import the footage into the
project in order to make the
documentary.
By using File -> Import
(although CTRL+I would
just as equally suffice) I
then located the audio and
video footage that I
needed and imported it
into the project.
From there I then took the audio and video footage from the ‘Media Browser’ menu
and dragged and dropped it onto my timeline – ready for being cut.
I was then faced with the issue of
maintaining a comfortable flow within
the documentary, as well as ensuring
that unnecessary footage was cut.
In order to cut the footage I used the razor tool on the
taskbar, then selected on the timeline where I wanted to
separate the footage. I the used the pointer arrow and the
delete button to get rid of the unnecessary footage and to
delete the gap that the unnecessary footage had left behind.
I repeated this process for all pieces of footage within the
documentary.
In order to make the editing dynamic
and engaging for the audience I
implemented video transitions
throughout the documentary using
the ‘Video Transitions’ menu.
By dragging and dropping the transition into
the timeline between the two pieces of
video, I had placed a transition into the
documentary. I repeated this process for the
whole documentary.
A title was needed for our documentary, as to
comply with the graphics component common in
many documentaries. To add graphics to our
documentary I chose Title -> Add new title,
although could have used the CTRL + T shortcut
to save time.
Within this window I simply had to create a text
box with the appropriate tool and then type in the
titles needed.
When I had finished creating
the titles I needed I then
repeated the process to add
more titles and name plates
throughout the documentary.
When reviewing the audio for the documentary I
found that the sound was unbalanced through both
channels, this would greatly compromise the value
of the documentary.
In order to rectify this issue I went into the Effects -
> Audio Effects menu and chose ‘Fill right with left’.
I then dragged and dropped this effect into the
audio that was troubling.
This ensured that the audio
would be balanced through both
channels, and from then on I
used the same method to
balance all audio within the
documentary.
One of the final stages in editing the
documentary came in rendering the
footage to ensure that the video and
audio would play smoothly. From seeing
the red line on the top of the timeline I
was made aware that the footage was in
need of rendering and so I highlighted
said footage.
I then chose Sequence -> Render
Selection and clicked Render in order to
ensure that the footage was rendered, and
repeated the process until the whole
documentary was rendered.
When all of the video and audio footage had been
imported, cut and rendered, and the titles all put
into place, this was the finished timeline of the
documentary.
Upon finishing the documentary
timeline I then had to export it, I did so
by choosing File -> Export -> Media to
open up the export window.
Within the export window I then chose
Presets -> YouTube 1080P HD and
clicked ‘export’, as well as ensuring that
the documentary was saved under a
name and in a location that I could easily

Process of making a preliminary documentary

  • 1.
    PROCESS OF MAKINGA PRELIMINARY DOCUMENTARY S H O W N T H R O U G H A D O B E P R E M I E R E S C R E E N S H O T S
  • 2.
    I began byopening up Premiere and choosing the ‘New Project’ option. I then made sure the project would be located in a place I could easily find it and clicked ‘OK’. After confirming these options I was then presented with an empty project.
  • 3.
    Now, faced withthe empty slate of a new project, I had to import the footage into the project in order to make the documentary. By using File -> Import (although CTRL+I would just as equally suffice) I then located the audio and video footage that I needed and imported it into the project. From there I then took the audio and video footage from the ‘Media Browser’ menu and dragged and dropped it onto my timeline – ready for being cut.
  • 4.
    I was thenfaced with the issue of maintaining a comfortable flow within the documentary, as well as ensuring that unnecessary footage was cut. In order to cut the footage I used the razor tool on the taskbar, then selected on the timeline where I wanted to separate the footage. I the used the pointer arrow and the delete button to get rid of the unnecessary footage and to delete the gap that the unnecessary footage had left behind. I repeated this process for all pieces of footage within the documentary.
  • 5.
    In order tomake the editing dynamic and engaging for the audience I implemented video transitions throughout the documentary using the ‘Video Transitions’ menu. By dragging and dropping the transition into the timeline between the two pieces of video, I had placed a transition into the documentary. I repeated this process for the whole documentary.
  • 6.
    A title wasneeded for our documentary, as to comply with the graphics component common in many documentaries. To add graphics to our documentary I chose Title -> Add new title, although could have used the CTRL + T shortcut to save time. Within this window I simply had to create a text box with the appropriate tool and then type in the titles needed. When I had finished creating the titles I needed I then repeated the process to add more titles and name plates throughout the documentary.
  • 7.
    When reviewing theaudio for the documentary I found that the sound was unbalanced through both channels, this would greatly compromise the value of the documentary. In order to rectify this issue I went into the Effects - > Audio Effects menu and chose ‘Fill right with left’. I then dragged and dropped this effect into the audio that was troubling. This ensured that the audio would be balanced through both channels, and from then on I used the same method to balance all audio within the documentary.
  • 8.
    One of thefinal stages in editing the documentary came in rendering the footage to ensure that the video and audio would play smoothly. From seeing the red line on the top of the timeline I was made aware that the footage was in need of rendering and so I highlighted said footage. I then chose Sequence -> Render Selection and clicked Render in order to ensure that the footage was rendered, and repeated the process until the whole documentary was rendered.
  • 9.
    When all ofthe video and audio footage had been imported, cut and rendered, and the titles all put into place, this was the finished timeline of the documentary. Upon finishing the documentary timeline I then had to export it, I did so by choosing File -> Export -> Media to open up the export window. Within the export window I then chose Presets -> YouTube 1080P HD and clicked ‘export’, as well as ensuring that the documentary was saved under a name and in a location that I could easily